How to Solo Travel Europe: A Step-by-Step First-Timer's Plan
TrekGuider @trekguider
You have a dozen tabs open, a saved folder of dream destinations on Instagram, and that creeping sense of anxiety that it’s all just too complicated. The dream of wandering through Parisian streets or watching a sunset in Lisbon feels buried under an avalanche of questions about budgets, safety, and the fear of being utterly alone. You're stuck in analysis paralysis, and the excitement is slowly being replaced by dread.
You don't need another list of vague 'tips.' You need a plan.
This guide is that plan. This is your complete roadmap for solo travel in Europe. We will walk you through every single step, from your first budget spreadsheet to your first solo dinner abroad, turning your overwhelming 'what ifs' into a confident, resounding, 'I'm ready.'

From Jitters to Jet-Set: Your Four-Week Plan to Conquer Pre-Trip Anxiety
The single greatest weapon against travel anxiety is a competent, actionable plan. Every item you check off a list is a small victory, a piece of tangible proof that you are capable and in control. This guide will provide the specific, step-by-step strategy for your European adventure. But before we dive in, it's vital to build a strong foundation. For a complete overview of the core principles and mindset needed for any solo journey, is the perfect place to start.
Your 4-Week Countdown: A Week-by-Week Planning Checklist
Transform anxiety into action by breaking down the process into manageable weekly goals.
4 Weeks Out: Finalize your budget and book your round-trip flights. Purchase comprehensive travel insurance (this is non-negotiable). Ensure your passport is valid for at least six months beyond your planned return date.
3 Weeks Out: Book your accommodation for the first city on your itinerary. Begin booking major train routes between countries, as prices often increase closer to the date.
2 Weeks Out: Plan your packing list and purchase any necessary gear, like a universal adapter or packing cubes. Notify your bank and credit card companies of your travel dates.
1 Week Out: Download offline maps (Google Maps) and language packs (Google Translate). Confirm all bookings and share your detailed itinerary with a trusted contact back home. Pack your carry-on.
Identifying Your Travel Fears (and How to Systematically Crush Them)
Write down your top three fears. Are they about safety? Loneliness? Getting lost? Now, for each one, write down one concrete, actionable step you can take to mitigate it.
Fear of safety? Research and book a hotel in a neighborhood with a high GeoSure Women's Safety score.
Fear of loneliness? Pre-book a group walking tour for your first full day in a new city.
Fear of getting lost? Spend 30 minutes on Google Street View "walking" the route from your arrival airport/train station to your hotel. Familiarity breeds confidence.
How to Master Your Money in Europe
Financial stress can suffocate an otherwise amazing trip. A clear, realistic budget is an act of self-care that empowers you to enjoy your adventure without worry. Understanding the real costs of solo travel in Europe is the first step to financial freedom on the road.
How Much Does a Solo Trip to Europe Actually Cost?
Let's talk numbers. While your personal travel style is the biggest variable, here are some realistic daily budgets to anchor your planning (these exclude flights):
The Budget Backpacker: $50 - $75/day. This means staying in hostel dorms, cooking some of your own meals, focusing on free activities like walking tours, and using buses or pre-booked trains.
The Mid-Range Explorer: $100 - $175/day. This allows for private rooms in hostels or budget hotels, a mix of restaurant meals and street food, museum entries, and more comfortable train travel.
The Comfort Seeker: $200+/day. This budget accommodates boutique hotels, multi-course dinners, guided tours, and last-minute travel plans.

Destination Cost Tiers
Not all of Europe is priced equally. Stretch your budget further by focusing on these regions:
Budget-Friendly: Portugal, Spain, Czechia, Hungary, Poland, and the Balkan countries (Croatia, Albania, Bosnia and Herzegovina).
Mid-Range: Italy, Germany, France (outside of Paris), Ireland, Slovenia.
Splurge-Worthy: Switzerland, Iceland, Norway, Denmark, Sweden, and the United Kingdom (especially London).
Pro-Tip: The easiest way to save money on food is to make lunch your main meal. Many European restaurants offer a prix fixe lunch menu (menu of the day) which includes multiple courses for a fraction of the evening price.
Choosing Your Perfect First Solo Adventure
Your first destination should be a launching pad for success. Prioritize countries known for safety, excellent tourist infrastructure, and ease of navigation. This isn't about being unadventurous; it's about setting yourself up for a win.
For the Cautious Explorer: The 5 Safest & Easiest Countries for a First Trip
These countries consistently rank high on the Global Peace Index and are incredibly welcoming to solo travelers.
Portugal: Safe, affordable, fantastic public transport, and English is widely spoken in tourist areas. Lisbon is arguably the perfect first-time solo travel city.
Iceland: Staggeringly safe with otherworldly landscapes. Ideal for nature lovers. Easy to navigate with tours, though it is expensive.
Slovenia: A hidden gem. It has the beauty of Switzerland at a fraction of the cost, is incredibly safe, and is small enough to explore thoroughly.
Ireland: Famously friendly locals, easy to navigate, and a cozy pub culture that makes it easy to strike up a conversation.
Austria: Clean, efficient, and beautiful. Vienna is a solo traveler's dream with its cafe culture and walkable city center.

Understanding the Schengen Zone: How to Maximize Your 90 Days
For U.S. citizens, the Schengen Area is a collection of 27 European countries that have abolished internal border controls. You can travel freely between these countries for up to 90 days within any 180-day period without a visa. Be sure to track your days carefully if you're planning a longer trip. Countries like the UK and Ireland are not in the Schengen Zone and have their own entry rules.
Navigating Europe Like a Pro
Europe's transportation network is a marvel of efficiency. Mastering it is a core skill that transforms you from a tourist into a traveler.
Flights vs. Trains vs. Buses
Flights: Use budget airlines like Ryanair or EasyJet for long distances (e.g., Lisbon to Rome). Book well in advance and be ruthless about their baggage weight limits to avoid exorbitant fees.
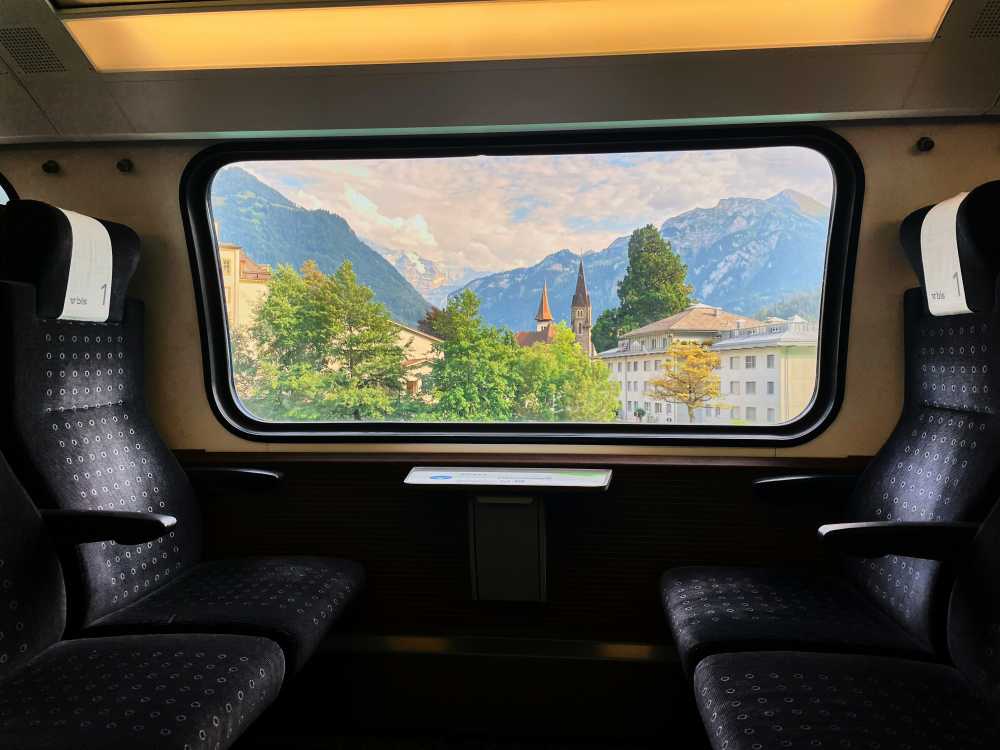
Trains: The best option for distances under 5 hours. It’s scenic, comfortable, and delivers you directly to the city center. A Eurail pass can be cost-effective if you plan on frequent, long-distance train travel, but always compare the pass price to buying individual tickets in advance.
Buses: The cheapest, but slowest, option. Companies like FlixBus and BlaBlaCar Bus are great for budget-conscious travelers and for routes not well-served by trains.
A Beginner's Guide to Navigating Europe's Train Systems
Booking trains can feel intimidating. The key is using the right tools. Apps like Trainline or Omio are great for comparing options, but they sometimes add a small service fee. For the best price, go directly to the website of the country's national rail service (e.g., Deutsche Bahn in Germany, Trenitalia in Italy).
Pro-Tip: In some countries (like Italy and France), you must validate your paper ticket in a small machine on the platform before boarding. Forgetting this step can result in a steep fine. When in doubt, watch what the locals do!
Finding Your Home Away From Home
Where you sleep is your sanctuary. It’s your base of operations, your charging station, and your place to feel secure.
Hostels vs. Hotels vs. Airbnbs for Solo Travelers
Hostels: The best choice for budget and social connection. Modern hostels offer private rooms, female-only dorms, and organized social events. They are the easiest place to meet fellow travelers.
Hotels: The right choice when you prioritize privacy, comfort, and security. A hotel gives you a guaranteed quiet space to decompress after a long day of exploring.
Airbnbs: Can offer great value and a local feel, but can also be isolating. For a first-timer, a "private room" in a host's apartment is a good middle ground, offering a local connection with more privacy than a hostel.
How to Pick a Safe and Social Hostel (Even If You're Not 21)
Read recent reviews like a detective, specifically filtering for "solo traveler" or "solo female traveler." Prioritize properties with:
24-hour reception
Secure individual lockers (bring your own padlock)
A well-lit, central location
Organized events like walking tours or group dinners

Your Guide to Staying Safe and Savvy on a Solo Travel in Europe
Let’s be clear: safety isn't about paranoia; it's about preparation. It's the quiet confidence that comes from being aware and intentional, which makes you a less appealing target from the start.
Blending In and Walking with Purpose
Dress to blend: Observe what local women are wearing. Ditching the tourist "uniform" of athletic wear can help you stand out less.
Walk with confidence: Even when lost, walk like you know where you're going. Duck into a cafe or shop to consult your map rather than stopping in the middle of the sidewalk.
Avoid "distracted" behaviors: Keep your phone away when walking through crowded areas. Being present and aware of your surroundings is your number one deterrent.
Proven Tactics to Beat Pickpockets
Major European cities are notorious for pickpockets who target distracted tourists.
Use a crossbody bag worn in front of your body, always with the zipper closed.
Never put your phone or wallet in your back pocket.
At restaurants, don't hang your bag on the back of your chair or place your phone on the table. Keep your belongings in your lap.
The Art of Solo Socializing
One of the biggest anxieties about a solo travel Europe trip is loneliness. The beauty of it is that you are in complete control of your social meter. You can dial it up or down at will.
How to Confidently Eat Alone (and Actually Enjoy It)
Reframe this act. It's not a sign of loneliness; it's a moment of luxurious self-indulgence.
Sit at the bar: It's more casual and invites conversation with the bartender or neighbors.
Bring a prop: A book signals "I'm content," while a journal signals "I'm an interesting person reflecting on my day."
Engage with the experience: Focus on the food. Take notes. Be present. You'll forget to feel self-conscious.
5 Easy Ways to Meet Other Travelers
Free Walking Tours: The #1 hack. Instant group for a few hours.
Cooking Classes: A shared activity is a natural icebreaker.
Hostel Common Areas: Simply being present in these spaces makes you approachable.
Meetup.com: Find events for locals and expats interested in everything from hiking to language exchange.
Small Group Day Trips: Use platforms like GetYourGuide or Viator to join tours to nearby attractions.
Your Solo Travel Europe Questions, Answered
What is the best European country to visit for the first time alone?
For its unbeatable combination of safety, affordability, friendly locals, and excellent tourist infrastructure, Portugal is widely considered the best choice for a first-time solo trip in Europe.
Is Europe safe for a young solo female traveler?
Yes, overwhelmingly so. By choosing safe destinations, practicing situational awareness, and following standard safety protocols like those outlined in this guide, Europe is an incredibly safe and rewarding place for solo female travelers.
How do I handle language barriers when traveling alone?
In most major tourist destinations, English will be sufficient. However, learning a few key phrases in the local language ("Hello," "Please," "Thank you," "Excuse me") shows respect and will be greatly appreciated. Use the Google Translate app's offline and camera features for menus and signs.
The journey of solo travel in Europe is one of the most empowering experiences a person can have. It will challenge you, thrill you, and teach you more about your own resilience and capability than you thought possible. You've read the plan, you have the tools, and you understand the strategies. The fear you feel now will be a distant memory the moment you navigate a new city's metro system by yourself for the first time. That feeling of profound competence and freedom is what awaits. The adventure is yours to claim.
Read the full guide: Anxious to Adventurous: The Ultimate Guide to Solo Travel Confidence
Don't Miss Out! Subscribe for Exclusive Content
Subscribe


Comments 0
No comments yet
Be the first to share your experience!
Dont Miss Out! Subscribe for Exclusive Content

Ultimate USA Holidays Guide: Top Picks

FTC Affiliate Disclosure Essentials: Stay Compliant as a Travel Creator

Essential Affiliate Tools: From Tracking to Full Optimization

Booking.com Affiliate Program Review: Pros, Cons, and Earnings Potential

Decoding Affiliate Commission Rates: Benchmarks for Travel Creators

Amazon Associates for Travel: Strategies to Maximize Commissions
How to Stay Safe While Hiking: A Hiker's Safety Guide
TrekGuider @trekguider
The call of the trail is a powerful one. It promises sweeping vistas, the quiet solitude of the forest, and the profound satisfaction of reaching a summit under your own power. But for all its beauty, the wilderness is impartial and unforgiving. The same trail that offers bliss on a sunny morning can present serious danger when the weather turns, a wrong turn is made, or an ankle is twisted. This is the problem every hiker faces: the gap between the adventure we dream of and the preparation it demands.
That gap is often filled with anxiety. A flicker of doubt about reading the map, a worry about the approaching clouds, or a sudden fear of what that noise was in the undergrowth can rob an incredible experience of its joy. Too often, hikers—both novice and experienced—find themselves in serious trouble simply by underestimating the trail and overestimating their preparedness. According to Search and Rescue (SAR) teams, most emergencies are the result of small, preventable mistakes. This guide is your definitive playbook for closing that gap for good. We’re providing the essential, expert-backed hiking safety tips you need to move through the backcountry with unwavering confidence. This isn't about fear; it's about empowerment. By mastering these skills, you’re ensuring every hike is a safe one, a core pillar of the responsible adventurer’s mindset we explore in our definitive The Ultimate Guide to Travel Safety: A 2026 Playbook. Let’s gear up, get smart, and get you ready to hit the trail.

This journey from novice to self-sufficient hiker begins not on the trail itself, but with a simple, powerful philosophy of preparedness that has been tested and refined by generations of mountaineers and wilderness experts. It all starts with your pack.
The Foundation of Safety: The 10 Essentials System
Long before your boots touch the dirt, your safety on the trail has already been decided by one thing: what’s inside your pack. Endorsed by the National Park Service and outdoor organizations like REI, the "10 Essentials" is not just a packing list; it's a systematic approach to preparedness. It ensures you have the tools to handle common problems and survive an unexpected night outdoors. Think of these not as ten individual items, but as ten crucial systems.
Navigation: Your primary system for knowing where you are and where you’re going. This must include a physical topographic map of the area and a compass. A GPS device or a smartphone with downloaded offline maps is a great tool, but electronics can fail. A map and compass are your foolproof backup.
Illumination: You need to be able to see in the dark, period. Carry a headlamp or flashlight with a full charge, and always pack extra batteries. A headlamp is superior as it keeps your hands free for other tasks.
Sun Protection: Sunburn and sunstroke can be serious dangers on the trail. This system includes sunglasses, broad-spectrum sunscreen (SPF 30+), and a wide-brimmed hat. Sun-protective clothing can also be a game-changer.
First-Aid Supplies: You must have the ability to treat common trail injuries. Your kit should be equipped to handle blisters, cuts, scrapes, and sprains. A basic kit is good; a custom-built one is better.
Repair Kit and Tools: Gear can break. A multi-tool or knife is invaluable, and a small roll of duct tape can repair everything from a torn jacket to a broken tent pole.
Fire: In an emergency, fire provides warmth, a way to purify water, and a powerful psychological boost. Carry waterproof matches, a reliable lighter, and a dedicated fire starter like dryer lint or a commercial fire-starting block.
Insulation: Weather can change in an instant, especially at elevation. You must carry an extra layer of clothing beyond what you start the hike in, regardless of the forecast. This should be a moisture-wicking layer, like a fleece jacket or thermal top—never cotton, which loses all insulating properties when wet.
Nutrition: Always pack more food than you think you’ll need. An extra day’s worth of non-perishable, high-energy food is the standard. Items like protein bars, nuts, and dried fruit are perfect.
Hydration: Carry more water than you expect to need and have a way to purify more. This means carrying a water filter or purification tablets to safely treat water from streams or lakes in an emergency.
Emergency Shelter: If you’re forced to spend an unplanned night out, protection from the elements is critical to preventing hypothermia. This doesn't mean a tent. A lightweight, packable emergency space blanket or bivy sack is all you need.

For expert-vetted gear lists and detailed trail guides from seasoned creators, the TrekGuider Marketplace is an invaluable resource for taking your preparation to the next level.
"Never Get Lost Again": Mastering Trail Navigation
Of all the potential hiking dangers, getting lost is one of the most common and terrifying. A recent study of SAR missions revealed that "error in judgment" was a leading cause of hikers needing rescue, and a huge part of that is poor navigation. Relying solely on your phone’s GPS is one of the biggest hiking safety tips to ignore—service is unreliable in the backcountry, and batteries die. True navigational confidence comes from time-tested skills.
How to Use a Map and Compass
This fundamental skill is easier than you think and is your most reliable tool.
Place the Compass on the Map: Lay your map flat. Identify your current location and your destination. Place your compass so the long edge of its baseplate creates a line connecting the two points, with the "Direction of Travel" arrow on the compass pointing toward your destination.
Set the Compass Bezel: Keeping the baseplate still, rotate the round bezel (the dial) until the orienting lines inside it are parallel with the map's north-south grid lines. Make sure the "N" on the bezel is pointing to North on the map. The number on the bezel aligned with the Direction of Travel arrow is now your bearing.
Follow the Bearing: Lift the compass off the map and hold it level in front of you. Turn your body until the red magnetic needle is "in the shed"—that is, perfectly inside the red orienting arrow on the bezel. The Direction of Travel arrow now points precisely to your destination. Pick a landmark in that direction, walk to it, and repeat the process.
Pro-Tip: The difference between "true north" (on your map) and "magnetic north" (where your compass points) is called declination. For precise navigation, you must adjust your compass for the local declination, which will be printed on your map.

Wildlife on the Trail: A Guide to Safe Encounters
Seeing wildlife is a thrilling part of hiking, but it’s crucial to remember that you are a visitor in their home. The core principles of every encounter are to maintain a safe distance, never feed wildlife, and know how to react to avoid escalating a situation.
Bear Encounters (Black vs. Grizzly)
Making noise while you hike (talking, clapping) is the best way to avoid surprising a bear. If you do encounter one, your reaction depends on the species.
If a Black Bear Approaches: Never run. Make yourself look as large as possible by raising your arms and opening your jacket. Yell, clap, and make loud noises. If it attacks, fight back aggressively. Target the bear's face and nose with anything you have—rocks, trekking poles, your fists. Do not play dead.
If a Grizzly Bear Approaches/Charges: Do not run and do not make direct eye contact. Speak in a calm, low voice to show you are not a threat. If it charges, stand your ground and use bear spray when it is within 30 feet. If it makes contact, play dead. Lie flat on your stomach, protect the back of your neck with your hands, and use your pack as a shield.
Mountain Lion (Cougar) Encounters
These predators are ambush hunters, so an encounter is rare. If you see one, it has likely been watching you.
Protocol: Do not run, as this triggers their chase instinct. Make direct eye contact. Make yourself appear larger by raising your arms and opening your jacket. Speak in a loud, firm voice. Slowly back away, giving the cat an escape route.
If Attacked: Fight back with everything you've got. Use rocks, sticks, or your hands to target the animal's eyes and face.
Venomous Snake Encounters
Snakes have no interest in humans and will only strike if they feel threatened.
Protocol: If you see a snake, freeze. Do not make any sudden movements. Once you've located the snake, slowly back away and give it a wide berth to move on. Be careful where you step and place your hands, especially when scrambling over rocks or logs.
If Bitten: The priority is to stay calm to slow the spread of venom. Limit physical activity and get to a hospital as quickly and safely as possible for evaluation and potential antivenom treatment.
Handling Trail Emergencies: What to Do When Things Go Wrong
Even with perfect preparation, accidents can happen. A twisted ankle, a sudden illness, or getting turned around can escalate quickly. Your ability to stay calm and make rational decisions is your most valuable asset. If you find yourself in trouble, remember the acronym S.T.O.P.
Stop: The moment you realize you are in trouble, stop moving. Sit down.
Think: Assess your situation calmly. What went wrong? What resources do you have?
Observe: Look around you. Where is the sun? Can you see any landmarks? Is there a source of water or shelter nearby?
Plan: Formulate a simple, logical plan. Don't make panicked decisions.
First Aid on the Trail
Your first-aid kit from the 10 Essentials is your go-to tool for injuries. Here's how to handle the most common trail ailments:
Blisters: The moment you feel a "hot spot" on your foot, stop and address it. Clean the area and apply moleskin or a blister-specific pad. Don't wait for it to become a full-blown blister.
Sprains: For a twisted ankle or knee, use an elastic wrap bandage from your kit to provide compression and support. Loosen it if you feel any numbness or tingling. Elevate the joint when you rest, and use a trekking pole or sturdy branch as a crutch if needed.
Cuts and Scrapes: Control any bleeding with direct pressure using a sterile gauze pad. Once it stops, clean the wound thoroughly with an antiseptic wipe and apply antibiotic ointment before covering it with a bandage.
A well-stocked daypack is crucial, but so is a plan for the whole trip. Before you head out to explore our incredible national parks, make sure your vehicle and supplies are just as prepared as your hiking gear.
Your Ultimate Adventure Blueprint
Ready to hit the road? Don't leave home without our expert-vetted National Park Road Trip Checklist. This free guide covers everything from vehicle prep and essential gear to can't-miss stops, ensuring your adventure is seamless from start to finish. Download it for free now!
Hiking Safety FAQs
A prepared mind anticipates questions. Here are expert answers to common concerns.
1. What's the right way to signal for help?
If you determine you cannot get yourself out of a situation safely, you need to signal for help. The universal distress signal is three of anything: three whistle blasts, three flashes of a headlamp, or three piles of rocks. A whistle is a must-have item that uses far less energy and carries further than shouting. For serious backcountry travel, consider investing in a personal locator beacon (PLB) or satellite messenger, which can send an SOS signal with your exact location to emergency services.
2. Is it safe to hike alone?
Solo hiking can be an incredibly rewarding experience, but it requires a higher level of preparation and self-sufficiency. All the rules in this guide become even more critical. It is absolutely essential that you leave a detailed itinerary with a trusted friend or family member. Include your planned route, your start and end times, and a "panic time"—the specific time they should call for help if they haven't heard from you.
3. What do I do if the weather turns bad unexpectedly?
Your first priority is to get below the treeline if you're in an exposed area to reduce the risk of lightning strikes. Put on your extra insulating layer and your rain gear before you get wet and cold. Assess your map and your situation. It is often safer to turn back, even if you're close to your destination, than to push on into deteriorating conditions.
Pro-Tip: Always tell someone your plan. Before every hike, leave a detailed itinerary with a trusted friend or family member. This is the single most important safety net you have.

Your Adventure, Empowered by Preparation
The goal of these hiking safety tips is not to fill you with fear, but to arm you with confidence. Every piece of gear you pack and every skill you learn is a key that unlocks a new level of freedom on the trail. Preparation allows you to push your boundaries, explore wilder places, and immerse yourself in the beauty of nature without the nagging whisper of anxiety. By respecting the wilderness and committing to self-sufficiency, you transform from a simple visitor into a capable, confident adventurer.
Now that you have the skills for a safe hike, you can integrate that adventure into a larger, perfectly planned journey. For a complete master plan covering everything from budgeting and logistics to finding the best trails and tours, our all-encompassing Travel Guide is the only resource you'll ever need.
Don't Miss Out! Subscribe for Exclusive Content
SubscribeComments 0
No comments yet
Be the first to share your experience!
Dont Miss Out! Subscribe for Exclusive Content

How to Avoid Travel Scams: A Global Guide

Is Public WiFi Safe? How to Protect Your Data Abroad

A Woman's Guide to Safe Travel: 10 Critical Tips

7 Hotel Safety & Security Tips for Peace of Mind

9 Beach Safety Tips That Could Save Your Life

7 Travel Insurance Red Flags to Spot Before You Buy
Chinese New Year SF: Parade Essentials
TrekGuider @trekguider
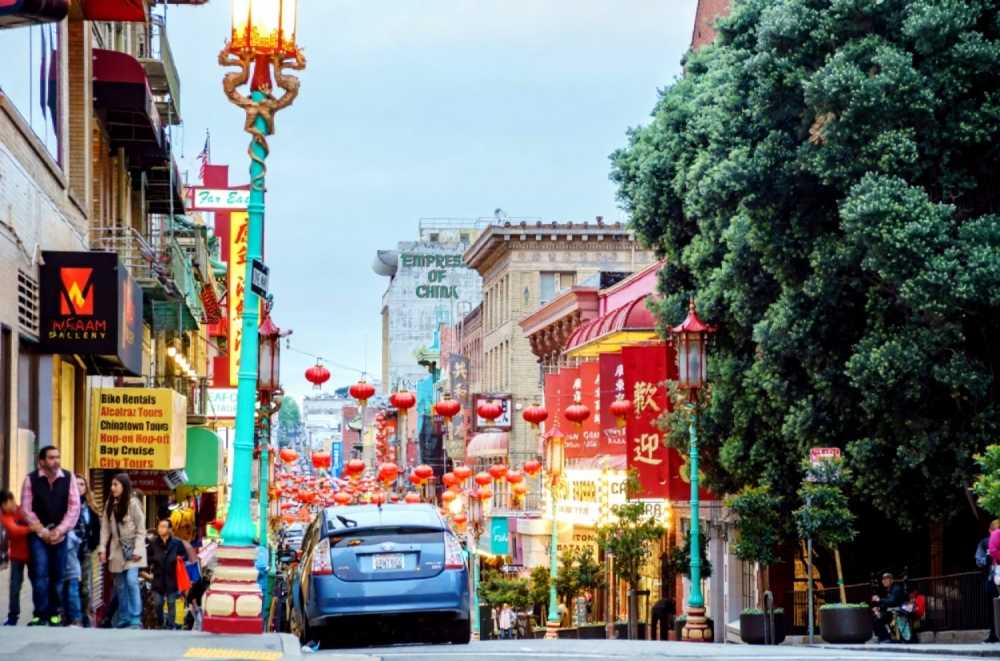
You can feel it before you see it. The low, resonant thump-thump-thump of the drums echoing off the buildings. The scent of roasted chestnuts and sizzling dumplings hanging in the cool February air. This is the magic of Chinese New Year in San Francisco, a tradition that has pulsed through the city’s veins since the Gold Rush. You’re here to witness the largest Lunar New Year celebration outside of Asia, but a thread of anxiety cuts through the excitement. How do you possibly navigate a crowd of half a million people? Where are the secret spots to actually see the famous 268-foot Golden Dragon?
The fear of missing out is real. You imagine being swallowed by the crowd, your view completely blocked, the vibrant floats and lion dancers reduced to a muffled soundtrack. A once-in-a-lifetime cultural immersion could easily devolve into a stressful, shoulder-to-shoulder shuffle. Without a game plan, you risk leaving with nothing but blurry photos and a sense of frustration.
This is your game plan. Forget the chaos and embrace the spectacle. This guide is your all-access pass, a step-by-step blueprint for conquering the parade like a seasoned local. We’ll give you the insider tips on securing the best viewing spots, a deep dive into the must-see moments, and the cultural context that brings it all to life. You’re about to experience the Chinese New Year San Francisco festival not as a tourist, but as an expert. This incredible event is at the heart of the city's cultural calendar, a vibrant highlight we proudly feature in our broader guide to San Francisco Holidays: Bay Area Buzz.

Understanding the Celebration: More Than Just a Parade
The Chinese New Year, also known as the Lunar New Year or Spring Festival, is the most important holiday in Chinese culture and for many other Asian communities worldwide. It marks the beginning of a new year on the traditional lunisolar calendar—a time for sweeping away the old, honoring ancestors, and gathering with family for lavish feasts.
Each year is associated with one of the twelve animals of the Chinese zodiac. The 2026 celebration, which officially begins on late January or February (the date follows the lunar calendar), will usher in the Year of the Snake—an animal symbolizing wisdom, intuition, and grace.
San Francisco’s celebration is steeped in history. First held in 1851, it has grown from a local community event into the oldest and largest festival of its kind outside of Asia, a powerful proof of the city’s deep-rooted Chinese-American heritage. While the parade is the dazzling finale, the festival is a multi-week affair with several key components you won't want to miss:
The Flower Market Fair: A bustling, fragrant market where families purchase fresh flowers and auspicious plants like orchids and peach blossoms to welcome good fortune into their homes.
The Community Street Fair: A vibrant, weekend-long street party that transforms Chinatown with traditional music, dance performances, artisan vendors, and an incredible array of festival foods.
The Grand Parade: The spectacular culmination of the festivities, featuring stunning floats, complex costumes, acrobatic lion dancers, and the legendary Golden Dragon.
The Main Event: Conquering the Chinese New Year San Francisco Parade
The Southwest Airlines Chinese New Year Parade is an unforgettable spectacle, renowned for being one of the few night-illuminated parades in North America. Its dazzling floats and vibrant performers don't just march; they light up the city streets, creating a truly magical atmosphere that has to be seen to be believed.
Mark Your Calendar: 2026 Parade Date and Time
To ensure you don’t miss a single moment of the magic, lock these details into your calendar now:
Date: Saturday, around mid-February (dates shift each year)
Start Time: 5:15 PM
The parade typically lasts for about two and a half hours, winding its way through the heart of the city as darkness falls, which allows the thousands of lights on the floats and costumes to shine their brightest.
The Parade Route: Where to Be and When
While the Chinese Chamber of Commerce confirms the final route closer to the date, it traditionally follows a path designed for maximum spectacle. The parade kicks off at the intersection of Second and Market Streets, proceeds up Market, turns onto Geary Street through Union Square, continues onto Powell Street, then Post Street, and finally enters Chinatown at Kearny Street before concluding near Columbus Avenue.
Choosing your spot is a strategic decision. Here’s the breakdown:
The Start (Market Street): This area is often slightly less congested than Union Square. It’s a great option if you want to see the performers and floats when they are fresh and full of energy.
The Middle (Union Square): This is the epicenter of the action, with massive crowds and an electric atmosphere. The wide streets provide good sightlines, but you must arrive exceptionally early to claim a spot.
The End (Chinatown & North Beach): As the parade passes through the iconic Dragon Gate on Grant Avenue (via Kearny), the energy is palpable. The narrower streets create an intimate, immersive experience, but this also makes it one of the most densely packed areas.
7 Essential Tips for Securing the Perfect Viewing Spot
Arrive Early. No, Earlier. This cannot be overstated. For a prime curbside spot along Geary or Powell, you need to be there hours in advance. Seasoned locals often lay down their blankets by 2:00 PM or even earlier.
Invest in Bleacher Seats. If you want a guaranteed, comfortable, and unobstructed view without a multi-hour wait, purchasing tickets for the bleacher seats is the smartest move you can make. Tickets are sold through the official parade website and are worth every penny for a stress-free experience, especially with family.
Scout the Corners. Intersections where the parade makes a turn—like from Geary onto Powell or Powell onto Post—are strategic goldmines. You get to see the floats approach from one direction and then watch them turn, effectively doubling your viewing time.
Pack for a Marathon, Not a Sprint. You’re in for the long haul. Bring a lightweight folding chair or a thick blanket. Pack snacks and water, but be courteous to your neighbors. This is a communal experience.
Think Vertically. Any slight elevation is an advantage. Look for spots on a small incline or the steps of a building. Some hotels and restaurants along the route host viewing parties, though these are premium, ticketed events.
The Post Street Gambit. The section along Post Street, between Powell and Kearny, is often slightly less chaotic than Union Square proper. It’s a solid choice for those arriving a little later but still hoping for a decent view before the parade plunges into the heart of Chinatown.
Public Transit is Your Only Friend. Do not even think about driving. Road closures begin in the afternoon, and parking is a nightmare of nonexistent spaces and astronomical fees. Use BART or MUNI to get downtown and walk the final blocks.
Pro-Tip: For a less overwhelming experience with kids, consider watching the parade formation near the starting point on Second Street. You'll see the floats and performers up close as they line up, offering a fascinating behind-the-scenes look before the main event's intensity kicks in.
What to Watch For: The Spectacle of the Night Parade
The parade is a rich mix of culture, artistry, and tradition. Knowing what to look for will transform your experience from passive viewing to active appreciation.
The Legendary Golden Dragon (Gum Lung)
The grand finale and undisputed star of the show is the Golden Dragon, or "Gum Lung." This is no ordinary parade float. It's a magnificent, 268-foot-long masterpiece that requires a team of over 100 puppeteers from the Leung's White Crane martial arts association to carry it through the streets. In Chinese culture, the dragon is a benevolent symbol of power, good luck, and prosperity. Watching it weave and dance, illuminated against the night sky, is a core San Francisco memory in the making.

Dazzling Floats and Acrobatic Lion Dancers
This is where the "night-illuminated" aspect truly shines. The floats are breathtaking works of art, depicting scenes from Chinese folklore, the year's zodiac animal, and cultural landmarks, all glowing with thousands of lights. Interspersed between them are the high-energy lion dance troupes. Accompanied by the powerful rhythm of drums, gongs, and cymbals, the lion dancers perform acrobatic feats to scare away evil spirits and usher in a year of good fortune.
A Modern Twist: The Drone Light Show
In a perfect blend of ancient tradition and modern innovation, the parade has incorporated a stunning drone light show. Hundreds of synchronized drones ascend into the night sky, forming complex, glowing patterns—from zodiac animals to Chinese characters—in a display that is uniquely San Franciscan.
Beyond the Parade: Immersing Yourself in the Festivities
To truly capture the spirit of the holiday, you must venture beyond the parade route. The real cultural immersion happens in the days leading up to the main event.
The Chinatown Flower Market Fair
Held on the weekend before the parade, the Flower Market Fair is a sensory explosion. The streets of Chinatown are closed to traffic and filled with vendors selling beautiful flowers, lucky plants, and traditional New Year decorations. It’s a cultural tradition to decorate the home with fresh blooms to symbolize rebirth and new growth. Look for these auspicious items:
Orchids: Symbolizing fertility and abundance.
Tangerines with leaves intact: Representing secure relationships and wealth.
Peach blossoms: Considered sacred and symbolizing romance and prosperity.
The Chinatown Community Street Fair
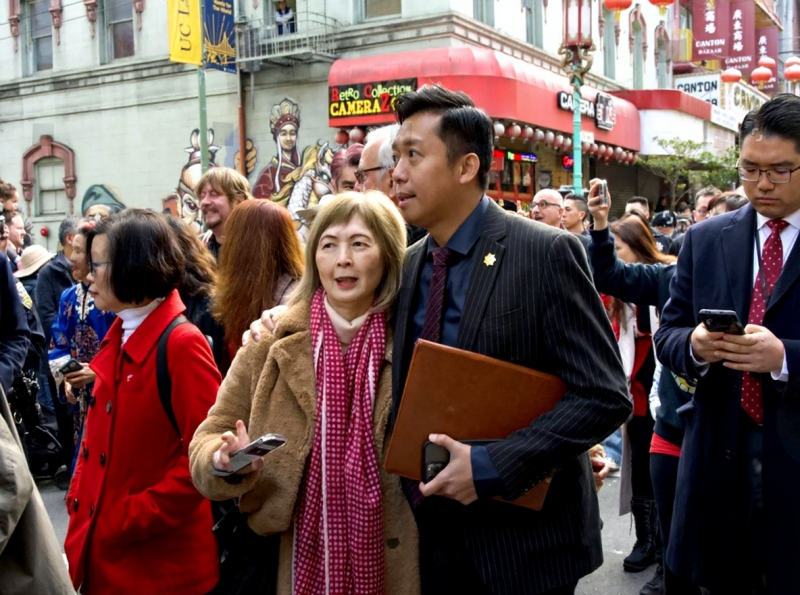
Taking place on parade weekend, the Community Street Fair is a massive block party that showcases the best of Chinese culture. You’ll find everything from traditional calligraphy and lantern-making demonstrations to folk dance performances and Chinese opera. It’s a fantastic opportunity to shop for unique souvenirs and, most importantly, to sample authentic festival food.
The Symbolism of the Food
Food is the heart of the Lunar New Year celebration, with many dishes carrying symbolic meanings for a prosperous year. As you explore the street fair or local bakeries, be sure to try:
Long Noodles (Chángshòu Miàn): Eaten uncut, these noodles represent a long and happy life.
Dumplings (Jiǎozi): Shaped like ancient Chinese gold ingots, they symbolize wealth.
Rice Cakes (Niángāo): The name is a homophone for "higher year," signifying progress and improvement in the coming year.
Oranges and Tangerines: Their round shape and golden color symbolize fullness and wealth.

Practical Logistics for a Flawless Experience
A little bit of planning will make all the difference between a stressful outing and a cherished memory.
Getting There: Transportation and Parking
Let's be clear: public transportation is your only sane option.
BART (Bay Area Rapid Transit): The Powell Street and Montgomery Street stations will deposit you right on the Market Street parade route.
MUNI Metro & Buses: Numerous lines serve the downtown area. Check the SFMTA website for parade-day reroutes and schedule changes, which are inevitable.
Rideshare (Uber/Lyft): Expect heavy surge pricing and significant delays due to road closures. A better strategy is to be dropped off several blocks away and enjoy the walk in.
What to Wear and What to Pack
San Francisco weather is notoriously unpredictable. A beautiful sunny afternoon can become a bone-chillingly cold night in an instant.
Dress in Layers: A t-shirt, a fleece or hoodie, and a windproof jacket are your best friends. You’ll be grateful for the options as the temperature drops after sunset.
Comfortable Shoes: This is non-negotiable. You will be standing for hours and walking far more than you expect.
Essential Pack List:
A full water bottle.
Snacks to keep your energy levels high.
A portable phone charger (your battery will drain faster than you think).
A small, secure backpack.
For those traveling from abroad to witness this incredible event, ensuring your documents and plans are in order is crucial. Our International Travel Checklist is an indispensable resource for organizing your packing, paperwork, and preparations for a major cultural festival like this.
Safety and Crowd Management
With hundreds of thousands of spectators, situational awareness is key.
Stay Alert: Keep your valuables, like your phone and wallet, in a secure front pocket or a zipped bag worn on your front.
Use the Buddy System: Stick with your group. It is incredibly easy to get separated in the dense crowds.
Establish a Meeting Point: Before the parade starts, agree on a specific, easy-to-find meeting spot away from the main route in case you get separated. Cell service can be spotty in such large crowds.
Your Ultimate Chinese New Year Experience Awaits
You are now armed with the insider knowledge to experience the magic of the Chinese New Year San Francisco celebration to its absolute fullest. From understanding the cultural significance of the Year of the Snake to securing the perfect spot to watch the 268-foot Golden Dragon dance through the illuminated streets, you are ready to move beyond being a mere spectator. You are prepared to become an active participant in one of the world’s most vibrant and historic cultural traditions. Embrace the energy, savor the flavors, and welcome a year of prosperity and good fortune.
This deep dive into a single, spectacular event is just a glimpse of the expert planning we offer. To master your entire U.S. trip, from San Francisco's iconic festivals to the majestic national parks and bustling cityscapes across the country, our comprehensive Travel Guide provides the ultimate roadmap for your adventure.
Meta Data Suggestions:
SEO Meta Title: Chinese New Year San Francisco: Parade Guide & Tips (2026)
URL Slug: chinese-new-year-san-francisco-parade
SEO Meta Description: Your ultimate guide to the 2026 Chinese New Year San Francisco parade. Get expert tips on viewing spots, times, traditions, and how to navigate the crowds.
Don't Miss Out! Subscribe for Exclusive Content
SubscribeComments 0
No comments yet
Be the first to share your experience!
Dont Miss Out! Subscribe for Exclusive Content

San Francisco Cherry Blossoms: A Local's Guide to the Blooms

Halloween SF: Haunts Without Horrors

SF Festivals: 7 Must-See Lineups

Christmas SF: Lights & Wharf Wonders

SF Pride: 6 Route & Party Hacks
