Is Solo Travel Safe? A Data-Driven Look at the Real Risks & How to Mitigate Them
TrekGuider @trekguider
You've pictured it a thousand times: a journey planned entirely for you, by you. The pure, unadulterated freedom of the open road. But then the doubt creeps in, fueled by worried questions and sensational headlines. Is it actually safe to venture out alone? That single question can be paralyzing, trapping you between a deep desire for adventure and a genuine concern for your well-being.
This constant drumbeat of fear can be deafening, causing you to second-guess your ambitions and question whether your dream of independent exploration is just a reckless fantasy.
This guide is your way through that noise. We believe that safe solo travel is not only possible but is one of the most profoundly empowering experiences a person can have. While we offer deep resources on all kinds of journeys, from group adventures detailed in our Family Travel Ideas: The 2026 Guide to Unforgettable Trips to individual quests, this article is dedicated to you, the solo explorer. It’s about replacing vague fears with a clear, data-driven assessment of the real risks and arming yourself with practical, proven strategies to manage them.

The Statistical Truth: Is Solo Travel Safe from a Data Perspective?
First, let's ground ourselves in reality, not headlines. The perception of danger, often amplified by a 24-hour news cycle, is frequently magnified far beyond the statistical truth. While any travel carries inherent risks, data shows that the world is not the uniformly dangerous place it's often made out to be.
Violent crime rates, for instance, have been on a global decline for decades. According to the United Nations Office on Drugs and Crime (UNODC), the global homicide rate has been steadily decreasing. Furthermore, areas popular with tourists are often more heavily policed and protected, simply because tourism is a vital economic engine for many countries.
The most common crimes affecting travelers are not violent assaults, but rather crimes of opportunity—preventable incidents that prey on distraction. These fall into three main categories:
Petty Theft: This is the undisputed champion of tourist troubles. It includes pickpocketing in crowded squares, snatching a phone left on a cafe table, and swiping an unattended bag. Data from cities like Barcelona and Rome consistently shows that this is, by a huge margin, the most reported crime against visitors.
Scams: From the aggressive "friendship bracelet" weavers in Paris to the notoriously creative taxi drivers in Bangkok, scams are designed to trick you out of your money through clever, non-violent deception.
Credit Card Fraud: Sophisticated skimming devices at ATMs or dishonest vendors can capture your card information, leading to fraudulent charges days or weeks later.
Understanding this allows for a critical mindset shift. The goal is not to build a fortress around yourself. It’s to develop smart, consistent habits that make you a "hard target" for these common, low-level threats. The answer to "is solo travel safe?" is overwhelmingly yes, provided you are prepared, aware, and informed.
Building Your Safety Foundation Before You Go
True travel safety isn't something you find; it's something you build. The foundation for a secure and confident solo trip is laid long before you ever start packing a bag. This pre-trip protocol is your blueprint for mitigating risk from the comfort of your own home.
1. Master Your Destination Before You Arrive

Every location has its own unique rhythm and set of unwritten rules. Conducting a deep analysis of your destination with safety as the primary lens is the first and most crucial step.
Consult Official Channels: Start with the U.S. Department of State's travel advisories. They provide detailed, country-specific information on everything from political unrest and health concerns to targeted advice for female or LGBTQ+ travelers. Pay attention to the overall country level, but also look for specific regional warnings.
Dig for Local Nuances: Go beyond official reports. Use travel blogs and forums to understand neighborhood dynamics. Instead of a generic search, use specific, targeted queries like "(City Name) solo female safety" or "scams to watch for in (Country)" on Reddit (r/solotravel) or Facebook groups. This uncovers the subtle, on-the-ground intelligence that guidebooks often miss.
Understand the Cultural Context: Research local customs, dress codes, and social norms. In some countries, what's considered a friendly gesture at home might be interpreted differently. Understanding and respecting the local culture not only enriches your experience but is also a powerful tool for blending in and avoiding unwanted attention.
2. Fortify Your Finances and Documents
The goal here is redundancy. You want to ensure that the loss of a single item—like your wallet or phone—is merely an inconvenience, not a trip-ending catastrophe.
Build a Digital Vault: Scan your passport, driver's license, visa, and the front and back of your credit cards. Save these as encrypted files in a secure cloud service (like Google Drive or Dropbox) and email a copy to yourself and a trusted contact. To ensure you don't miss any critical documents, our International Travel Checklist is an indispensable tool.
Distribute Your Itinerary: Leave a detailed copy of your itinerary—including flight numbers, accommodation names and addresses, and a general daily plan—with a family member or friend back home.
Diversify Your Money: Never depend on a single source of funds. Travel with at least two different credit cards and one debit card, and store them in separate locations. Keep one card in your wallet, one in a hidden pocket of your daypack, and perhaps a third in the safe back at your hotel.
Alert Your Banks: A simple but critical step. Inform your bank and credit card companies of your travel dates and destinations. This prevents their fraud detection systems from freezing your accounts when they see a transaction from a foreign country.
3. Travel Insurance
Think of travel insurance as your ultimate safety net. For a solo traveler, it's not a luxury; it's an absolute necessity. A comprehensive policy is your financial backstop for the unexpected. Look for coverage that includes:
Emergency medical and dental expenses
Emergency medical evacuation (this is critical and can cost tens of thousands of dollars without insurance)
Trip cancellation, delay, or interruption
Lost or stolen luggage and personal effects
A 24/7 emergency assistance hotline
Your On-the-Ground Toolkit for Staying Safe Solo
Once you arrive, your most powerful safety tool is situational awareness. This isn't about being paranoid; it's about being present, perceptive, and engaged with your surroundings.
Mastering the Art of Situational Awareness

This is the skill of observing your environment and making smart, proactive decisions based on what you see.
Walk with Purpose and Confidence: Even when you’re utterly lost, walk like you know exactly where you're going. Keep your head up, your shoulders back, and your pace steady. A confident posture is a natural deterrent.
Minimize Distractions, Maximize Perception: Avoid walking while staring down at your phone or wearing headphones in both ears. These actions scream "distracted tourist" and make you a prime target for pickpockets. Keep your phone in your pocket and one earbud out so you can hear your surroundings.
Blend In, Don't Stand Out: The goal is to look like a savvy local, not a bewildered tourist. Dress in a way that aligns with local styles—if locals don't wear shorts, maybe you shouldn't either. Avoid flashing expensive jewelry, wads of cash, or a high-end camera slung around your neck.
Trust Your Gut Instinct: Your intuition is a highly advanced, subconscious pattern-recognition machine. If a person, a dark alley, or a situation feels "off," it probably is. Don't hesitate or worry about being polite—remove yourself from the situation immediately.
Pro-Tip: Carry a "decoy" wallet. Get a cheap, old wallet and stock it with a small amount of local currency and some expired credit cards or old loyalty cards. Keep this in your pocket or an easily accessible part of your bag. In the unlikely event of a robbery, you can hand this over without losing your primary financial resources.
How to Guarantee Your Accommodation Is Safe for Solo Travel
Your hotel, hostel, or rental is your sanctuary. A few simple checks can ensure it stays that way.
Vet the Location: Before booking, use Google Street View to take a virtual walk around the block. Is it a deserted industrial area or a lively street with open cafes? Read recent reviews, specifically searching for keywords like "safe," "location," and "solo."
Secure Your Room: The moment you check in, test the locks on the door and windows. Always use the deadbolt and security chain when you're inside. For an incredibly effective and cheap extra layer of security, pack a simple rubber doorstop and wedge it under your door at night.
Use the Safe (That's What It's For): Don't leave your passport, extra cash, or spare credit cards lying around. Use the in-room safe. If you're in a hostel, choose one that offers secure individual lockers and bring your own padlock.
Digital Defense: Ensuring Your Solo Travel is Safe Online
In the 21st century, physical safety is only half the battle. Public Wi-Fi networks are notoriously insecure, making them prime hunting grounds for data thieves.
A VPN is Non-Negotiable: A Virtual Private Network (VPN) is an essential tool for any traveler. It encrypts your internet connection, creating a secure, private tunnel for your data that is unreadable to anyone snooping on the network.
Embrace Two-Factor Authentication (2FA): Activate 2FA on all your important accounts (email, banking, social media). This means that even if a thief manages to get your password, they can't access your accounts without a second, time-sensitive code sent to your device.
Be Wary of Public Computers: Avoid logging into sensitive accounts on public computers, like those in an internet cafe or hotel business center. If you absolutely must, use a private/incognito browsing window and be certain to log out of all accounts and clear the browser history before you leave.
Pro-Tip: Adapt the "Morning Photo" protocol for solo use. Each morning, send a quick photo of yourself (showing your outfit) and a brief text outlining your general plans for the day to a trusted contact back home. This creates a simple, timestamped visual record of your appearance and intended whereabouts.
A Crucial Guide for Solo Female Travelers

While the vast majority of safety advice is universal, it's a reality that women traveling alone can face a unique set of concerns and scrutiny. Adhering to the core principles of solo travel safety is therefore doubly important.
Confidence is Your Cloak: Your body language is your first line of defense. Walk tall, be assertive in your interactions, and don't be afraid to be firm or even loud if someone is making you uncomfortable. A simple, sharp "No" is a complete sentence in every language.
Be Mindful of Local Gender Dynamics: Research how men and women typically interact in your destination. In some conservative cultures, direct eye contact or an unsolicited smile from a woman can be misinterpreted as an invitation. Adapting your behavior isn't about submission; it's a sign of cultural respect and a smart safety tactic.
Strategically Handle Unwanted Attention: If you feel you are being followed or persistently harassed, walk directly into a busy shop, restaurant, or hotel lobby. Approach a staff member (especially another woman) and calmly explain the situation. A simple "that person is bothering me" is universally understood.
Use the "Ring" Trick: Many experienced solo female travelers wear a simple, plain band on their left ring finger, regardless of their actual marital status. It can be a simple, non-confrontational way to deter unwanted advances or questions about why you're alone.
Your Essential Toolkit for Confident Exploration
The advice in this section is just the beginning. For a deeper dive into female-specific safety strategies, real-world scenarios, and expert-level preparation, download our free Solo Female Travel Safety Guide. It's the definitive resource for every woman who's ready to see the world on her own terms.
Frequently Asked Questions
What is the most common crime against solo travelers?
The most common risks are crimes of opportunity, not violence. Petty theft, like pickpocketing and bag snatching in crowded tourist areas, is by far the most frequent issue. Being aware and keeping your valuables secure are your best defenses.
Is it safe for a woman to travel alone for the first time?
Absolutely. Thousands of women travel solo safely every day. The key is thorough preparation: choose a destination with a good safety record for solo women, research local customs, and follow the universal safety protocols outlined in this guide.
Should I carry my passport with me while I'm out exploring?
In most cases, it's safer to leave your passport secured in your hotel safe. Carry a photocopy or a digital image on your phone for identification purposes. Some countries legally require you to carry the original, so always verify the local law for your destination.
What is the single most important safety tip for a solo traveler?
Trust your intuition. More than any single gadget or tactic, your gut feeling is your best defense. If a situation or person feels wrong, remove yourself from it immediately without hesitation or apology.
Safety Is the Freedom to Explore
So, after all this, is solo travel safe? The answer is a resounding, confident yes. True safety on the road is not a matter of luck; it is the direct and empowering result of thoughtful preparation, heightened awareness, and a proactive mindset.

By shifting your perspective from a fear of the unknown to a healthy respect for the variables, you transform yourself from a potential target into a capable, worldly explorer. The strategies outlined here are not meant to make you fearful, but to make you free—free from the anxiety that holds you back, and free to embrace the incredible growth, perspective, and pure joy that only solo travel can provide. Armed with this knowledge and a commitment to smart travel practices, you can ensure your journey is not just memorable, but also profoundly safe.
Read the full guide: Family Travel Ideas: The 2026 Guide to Unforgettable Trips
Don't Miss Out! Subscribe for Exclusive Content
Subscribe


Comments 0
No comments yet
Be the first to share your experience!
Dont Miss Out! Subscribe for Exclusive Content

Ultimate USA Holidays Guide: Top Picks

FTC Affiliate Disclosure Essentials: Stay Compliant as a Travel Creator

Essential Affiliate Tools: From Tracking to Full Optimization

Booking.com Affiliate Program Review: Pros, Cons, and Earnings Potential

Decoding Affiliate Commission Rates: Benchmarks for Travel Creators

Amazon Associates for Travel: Strategies to Maximize Commissions
Decoding Affiliate Commission Rates: Benchmarks for Travel Creators
TrekGuider @trekguider
You’re a travel creator, and you’ve entered the world of affiliate marketing to turn your passion into a profession. But you’ve quickly run into a frustrating black box: the commission structure. You see a dizzying array of percentages, acronyms like CPA and EPC, and vague promises of earnings. You’re left wondering what good affiliate commission rates even look like. Are you earning your worth, or are you leaving a significant amount of money on the table?
This confusion isn't just academic; it's a direct threat to your bottom line. The reported average monthly income for affiliates in the travel niche is an impressive $13,847, a figure that proves this is a serious enterprise. But you can't build a sustainable business on guesswork. Partnering with a program offering a flashy 40% commission—only to discover it’s 40% of their tiny margin—is a rookie mistake that costs real money. This lack of clarity makes it impossible to forecast your income, negotiate better terms, or build a truly predictable business. You feel like you’re flying blind.
This guide is your decoder ring. We are pulling back the curtain to give you a comprehensive breakdown of how affiliate commissions actually work. We will deconstruct every major commission model, provide clear, data-backed industry benchmarks, and teach you how to analyze these rates like a seasoned professional. By the end of this deep dive, you will be able to spot high-value opportunities and architect a monetization strategy that truly rewards your influence. For a complete overview of the affiliate landscape, our definitive pillar page, Travel Affiliate Programs: The 2026 Ultimate Guide, is your essential command center.

The Anatomy of a Commission: Deconstructing the Core Models
Let's cut through the jargon. An affiliate commission is simply a reward for a job well done. A company—the merchant—pays you for successfully driving a specific, valuable action, which in the travel world almost always means a completed booking or sale.
But the way that reward is calculated can vary dramatically. Understanding the underlying structure of different affiliate commission rates is the first step toward becoming a high-earning creator.
1. Cost Per Sale (CPS) or Pay Per Sale (PPS): The Industry Workhorse
You'll encounter this model most often—it's the industry's workhorse for a reason. It’s simple and transparent: when a reader clicks your affiliate link and completes a purchase, you earn a percentage of the total sale value. If you recommend a $500 hotel stay and the program offers a 6% CPS commission, you earn $30. This model directly ties your earnings to the revenue you generate, making it the gold standard for most travel bookings and gear sales.
2. Cost Per Action (CPA): Rewarding a Specific Step
CPA is a broader model where you’re compensated for a specific action a user takes. While that action is often a sale (making it identical to CPS), it can also be something else. For example, a travel credit card company might pay you a CPA commission for every user who completes an application, regardless of whether they are approved.
3. Cost Per Lead (CPL): Paying for High-Value Inquiries
With a CPL model, you earn a fixed fee for each qualified lead you generate. This is common in high-ticket travel sectors where the sales cycle is long. A luxury tour operator, for instance, might pay you $50 for every user who fills out a detailed inquiry form for a bespoke African safari. You get paid for delivering a potential customer; their sales team takes it from there.
4. Tiered & Multi-Tier Structures: Incentivizing Growth
This is where commission models get more sophisticated and rewarding.
Tiered Structures: Rewarding Your Growth These are designed to reward high-performing affiliates. Your commission rate increases as you drive more sales. A program might offer a base rate of 6%, which jumps to 8% after you generate $5,000 in sales in a month, and 10% after $10,000.
Multi-Tier Structures: Building a Network These allow you to earn commissions not only on your own sales but also on the sales generated by other affiliates you recruit into the program. This effectively turns you into a partner who helps grow the program itself, creating a secondary, more passive income stream.
5. Cost Per Click (CPC): The Rare Exception
In this model, you are paid a small fee for every click your affiliate link receives, regardless of a sale. Due to its high vulnerability to fraud, the CPC model is now extremely rare in modern affiliate marketing and almost never seen in the travel space.

Industry Benchmarks: What Good Affiliate Commission Rates Look Like
So, what should you actually expect to earn? While rates vary, the travel industry has established clear benchmarks across its major categories. Here’s your cheat sheet.
Hotels & Accommodations: 2% - 7% of Booking Value This is the bread and butter for many creators, but the details are everything. A program like Expedia Group offers up to 6% of the total booking value with a 7-day cookie. In contrast, Booking.com advertises a much higher "25-40%", but this is a percentage of their commission, not the customer's total payment. This opaque structure often results in a much lower effective rate, closer to 2-4% of the final booking value.
Tours, Activities & Experiences: 6% - 8%+ This is a high-margin category with strong potential. Market leaders like Viator and GetYourGuide set the standard with base commissions of 7-8%. Adventure-focused operators like G Adventures offer 6%, which is incredibly powerful when applied to their high-ticket tours that can cost thousands of dollars.
Travel Insurance: 10% or More Insurance is a consistently high-paying vertical. Top programs like SafetyWing and World Nomads both offer a standard 10% commission. SafetyWing takes this a step further with a recurring model, meaning you continue to earn 10% every time your referred customer renews their policy.
Gear & Apparel: 3% - 8% For physical products, rates depend heavily on the retailer. Amazon Associates is the baseline, offering 3-4% for most travel categories. However, partnering with specialty retailers is far more lucrative. A brand like REI, for example, offers a 5-8% commission on high-quality (and often high-priced) outdoor gear.
Pro-Tip: Don't be blinded by the highest percentage. A 6% commission on a $3,000 G Adventures tour is $180. An 8% commission on a $50 city walking tour is $4. Always consider the average order value of the products you are promoting when evaluating affiliate commission rates.

The Metrics That Matter More Than the Rate Itself
An experienced affiliate marketer knows the commission rate is just a starting point. To truly understand a program's profitability, you need to analyze the metrics that measure real-world performance.
Earnings Per Click (EPC): Your True North This is arguably the single most important metric. It’s calculated by dividing your total commission earnings by the total number of clicks you sent. If you sent 100 clicks and earned $50, your EPC is $0.50. This number tells you the average value of every single click. A program with a lower commission but a higher EPC is often the more profitable partner for your specific audience.
Conversion Rate (CR): The Sign of a Healthy Partner This is the percentage of users who take the desired action after clicking your link. A high conversion rate is a sign of a trusted brand with a well-optimized checkout process. A program with a 10% commission that converts at 1% is less profitable than a program with a 5% commission that converts at 5%.
Cookie Duration: The Travel Creator's Safety Net This is critical in the travel space. A longer cookie duration (30, 60, or 90 days) gives your audience the time they need to research a high-consideration purchase while ensuring you still get credit. A short cookie window is a major red flag and a sign that the program may not be structured in your favor.
Pro-Tip: Dive into your affiliate dashboards. Most networks like CJ Affiliate and Travelpayouts provide detailed reports on your EPC and conversion rates for each program. Use this data to identify your true top performers—the results will often surprise you.

The Travel Creator's Toolkit
Feeling overwhelmed by the data? You don't have to be. To help you organize your strategy and implement everything you've learned, we've created the ultimate resource bundle. It includes checklists, templates, and tools designed to accelerate your journey from beginner to pro.
Download Your Free Bundle: The Travel Creator's Toolkit
The High-Margin Alternative: Referral & Revenue Share Models
While traditional commission models are powerful, the most forward-thinking creators are diversifying into referral and revenue-sharing programs. Instead of a one-time payment for a single sale, these models allow you to build long-term, passive income streams by becoming a true platform partner.
This is the philosophy behind the TrekGuider Seller Platform. We believe in empowering creators to build complex businesses. Our platform is designed for you to sell your own digital products—like itineraries and guides—but our referral program adds another powerful layer to your income strategy.
Instead of a simple CPS commission, our model functions like a sophisticated multi-tier system. When you refer other creators to become sellers on TrekGuider, you earn an ongoing share of the revenue they generate, with tiered commissions that start at 4% for referred sellers. You’re not just earning from a single transaction; you’re building a network and earning from its collective success. It's a strategic way to move beyond chasing individual sales and start building a more resilient, high-margin business.
Frequently Asked Questions (FAQ)
1. Is a higher commission rate always better? Not at all. A high commission rate can be misleading if the program has a low conversion rate, a short cookie duration, or a low average order value. Always look at your Earnings Per Click (EPC) to determine the true profitability of a program for your audience.
2. How can I find the EPC for an affiliate program? Most reputable affiliate networks (like CJ Affiliate, ShareASale, or Travelpayouts) provide EPC data. It's often listed as a network-wide average for each merchant, which gives you a good baseline. Once you start sending traffic, you can track your own personal EPC in your performance reports.
3. Can I negotiate my affiliate commission rates? Yes, absolutely. Once you become a proven partner and consistently drive a significant volume of high-quality sales, you have leverage. Many brands are willing to negotiate a higher, private commission rate for their top-performing affiliates. Always track your performance and don't be afraid to ask.

From Confusion to Command
You are no longer in the dark. The world of affiliate commission rates is no longer a confusing black box. You now have the knowledge to deconstruct any program's payment structure, the industry benchmarks to know your worth, and the key metrics to identify what truly drives profit.
This knowledge is power. It empowers you to audit your existing partnerships, confidently seek out new ones, and even negotiate better terms. By focusing on programs with fair commissions, long cookie durations, and high conversion rates, you can ensure your hard work is properly rewarded. Building a profitable travel content business requires a strategic approach, and a deep understanding of affiliate commission rates is a non-negotiable part of that strategy.
Read the full guide: The Travel Blogger's Playbook to Affiliate Marketing Mastery
Don't Miss Out! Subscribe for Exclusive Content
SubscribeComments 0
No comments yet
Be the first to share your experience!
Dont Miss Out! Subscribe for Exclusive Content
Ultimate USA Holidays Guide: Top Picks
FTC Affiliate Disclosure Essentials: Stay Compliant as a Travel Creator
Essential Affiliate Tools: From Tracking to Full Optimization

Avoid These 5 Affiliate Landing Page Mistakes for Better Conversions

Affiliate Keyword Research Mastery for Travel Blogs
Booking.com Affiliate Program Review: Pros, Cons, and Earnings Potential
The Ultimate Travel First Aid Kit Checklist (2026)
TrekGuider @trekguider
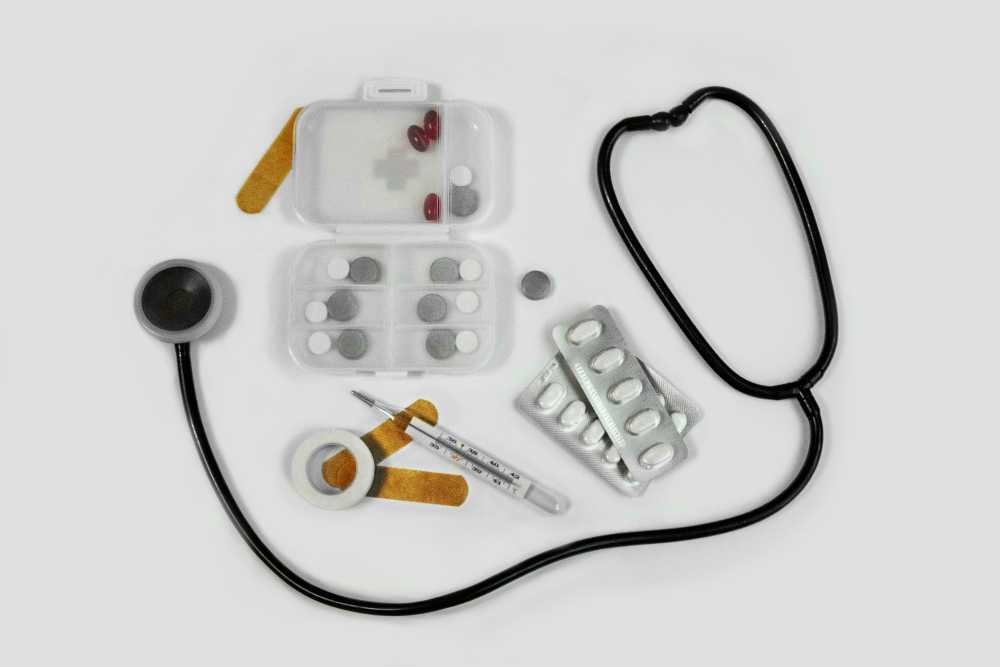
But it doesn’t have to be that way. The single most powerful tool for ensuring a healthy, stress-free journey is one you create before you even leave home: a comprehensive travel first aid kit. This isn’t just a box of bandages; it’s a personalized arsenal of preparedness that empowers you to handle common health issues with confidence and ease. Building your own kit is at the heart of the proactive mindset we cover in our comprehensive The Ultimate Guide to Travel Safety: A 2026 Playbook. Think of this guide less as a simple shopping list and more as a masterclass in preparedness, backed by pharmacist-approved advice to help you build the ultimate defense against travel’s minor medical curveballs.
DIY vs. Pre-Made: Which Travel First Aid Kit is Right for You?
Before we dive into the specific items, it’s worth considering whether to build your kit from scratch or buy a pre-made one.
Pre-Made Kits: These offer undeniable convenience. They come in a compact case and provide a decent baseline of supplies. However, they are often filled with low-quantity, generic items and may lack the specific medications you need for your trip.
DIY Kits: Building your own kit requires a bit more effort upfront but is superior in every other way. It allows you to choose high-quality brands, pack sufficient quantities, and tailor the contents specifically to your destination, your planned activities, and your personal health needs.
Our recommendation? Start with a high-quality pre-made kit as your base and then use this checklist to supercharge it, swapping out generic items and adding the crucial medications and tools it’s missing. This hybrid approach gives you the best of both worlds.
The Core Components of Your Ultimate Travel First Aid Kit
A truly effective travel first aid kit is organized like a mobile clinic, with specific supplies to treat the most common categories of travel-related ailments. Here is the definitive breakdown of what you need.
Wound & Burn Care: For Life's Little Scrapes
From a papercut to a scraped knee on a cobblestone street, any break in the skin is an open invitation for infection, especially in new environments. Here’s how you shut that door, fast.
Antiseptic Wipes (BZK or alcohol-based): For cleaning wounds, scrapes, and your hands before providing treatment. Individual packets are perfect for travel.
Antibiotic Ointment (e.g., bacitracin): A crucial step to prevent infection in minor cuts, scrapes, and burns after cleaning.
Assorted Adhesive Bandages: Pack a variety of sizes. Fabric bandages are generally more durable and flexible than plastic ones.
Butterfly Bandages / Wound-Closure Strips: Essential for taping the edges of a minor cut together to help it heal cleanly.
Sterile Gauze Pads and a Roll of Gauze: For dressing larger wounds or as a compress to control bleeding. Pack a few different sizes.
Medical Adhesive Tape: To secure gauze and bandages in place.
Moleskin or Blister Treatment Pads: An absolute lifesaver for any trip involving significant walking or hiking. Apply it as soon as you feel a "hot spot" to prevent a blister from forming.
Aloe Vera Gel: Provides soothing relief for minor sunburns.
Pain, Fever & Sprains: Managing Aches and Injuries
Long days of sightseeing, sleeping in unfamiliar beds, and carrying luggage can lead to aches and pains. Be prepared to manage them effectively so they don't slow you down.
Pain Relievers/Fever Reducers: Pack both an ibuprofen-based and an acetaminophen-based option. Pharmacists consistently recommend trusted brands like Advil/Motrin (Ibuprofen) for inflammation and pain, and Tylenol (Acetaminophen) for general pain and fever.
Aspirin: While not for general pain relief for everyone, a dose of aspirin can be life-saving for an adult experiencing symptoms of a heart attack.
Elastic Wrap Bandage: Invaluable for providing support and compression to a sprained ankle, wrist, or knee.
Instant Cold Packs: These single-use packs are activated by squeezing them and are excellent for reducing swelling from sprains, strains, and other minor injuries in the first 24-48 hours.
Pro-Tip: Decant pills into small, clearly labeled travel containers to save space, but take a photo of the original packaging first. This helps you remember dosages and provides information for pharmacists or doctors abroad if needed.

Digestive Issues: Your Defense Against Traveler's Diarrhea
Let’s be direct: traveler’s diarrhea is the single most common illness to strike travelers, affecting up to 80% of visitors in some destinations. Having a dedicated section in your kit to manage digestive distress is absolutely critical.
Anti-diarrhea Medication: To manage symptoms when you need to travel or get through a planned activity. The top pharmacist-recommended brand is Imodium (Loperamide).
Antacids: For relief from indigestion, heartburn, and general upset stomach. Pepto-Bismol is another pharmacist-favorite that can also help with mild diarrhea.
Oral Rehydration Salts: This is arguably the most important item in this section. Dehydration is the primary risk of diarrhea and vomiting. These pre-measured packets mix with safe, bottled water to replenish the essential fluids and electrolytes your body has lost.
Anti-nausea or Motion Sickness Medication: Essential if you’re prone to motion sickness on planes, boats, or winding bus rides.
Allergies, Bites & Skin: Soothing Irritations
New environments mean new pollens, unfamiliar insects, and different plants. Be ready to tackle itches, rashes, and allergic reactions before they become a major annoyance.
Antihistamine (e.g., diphenhydramine): For treating allergic reactions, hives, and severe itching. Note that some antihistamines can cause drowsiness.
Hydrocortisone Cream (1%): A topical steroid cream that provides fast relief from the irritation and itching of rashes and insect bites.
Insect Repellent: In any region with mosquito-borne illnesses like Dengue or Malaria, this is as important as your passport. Choose a repellent with an effective active ingredient like DEET or Picaridin.
Epinephrine Auto-Injector (e.g., EpiPen): This requires a prescription and is absolutely essential for travelers with a history of severe allergic reactions (anaphylaxis).
Ready to Pack Like a Pro?
Your travel first aid kit is a critical piece of your travel puzzle, but it's not the only one. To ensure you don't overlook a single essential item—from documents and finances to clothing and gear—you need a master list. Our comprehensive, free checklist has you covered.
Download Your Free International Travel Checklist Now!
Essential Tools & Personal Medications
The final layer of your kit includes the tools to use your supplies effectively and your own personal health necessities.
Fine-Point Tweezers: For removing splinters, ticks, or other foreign objects from the skin.
Small, Rounded-Tip Scissors: For cutting medical tape, gauze, or moleskin. (Ensure they meet TSA guidelines if packing in a carry-on).
Disposable Non-Latex Gloves: To protect your hands and prevent infection when treating a wound on yourself or someone else.
Digital Thermometer: For accurately checking for fever.
Personal Medications: This is the most critical category. Pack a sufficient supply for your entire trip, plus at least a few extra days' worth in case of delays. Always keep your personal medications in your carry-on luggage in their original, labeled containers.
Pro-Tip: Before you leave, ask your doctor for a letter describing your condition and the medications you take, including their generic names. Keep a digital copy of this and your prescriptions on your phone. This can be invaluable if your medication is lost or you need to see a doctor abroad.

Beyond the Basics: Customizing Your Kit
The ultimate travel first aid kit is not one-size-fits-all. Once you have the core components, elevate your preparedness by customizing it for your specific journey.
By Destination:
Tropical/Developing Countries: Add anti-fungal cream, more insect repellent, and potentially a prescription for a standby antibiotic for severe traveler's diarrhea (consult your doctor).
High-Altitude Destinations: Speak with your doctor about medication to prevent altitude sickness.
By Activity:
Hiking/Trekking: Double down on blister care (moleskin, gel pads), pack an elastic wrap for sprains, and add pain-relieving gel.
Beach Vacation: Add extra aloe vera gel, sting-relief spray, and waterproof bandages.
By Traveler:
With Children: Include children’s formulations and dosages of pain/fever reducers, kid-friendly bandages, and any specific allergy medications they need.
Travel First Aid Kit FAQs
A great kit anticipates problems. Here are answers to common questions that take your preparedness to the next level.
1. What’s the first thing I should do if I get traveler’s diarrhea?
According to the CDC and travel medicine doctors, the first and most important step is oral rehydration. Dehydration is the biggest risk. Start sipping an Oral Rehydration Solution (ORS), sports drinks, or clear broths immediately. For mild to moderate cases that don't have a high fever or blood, an antimotility drug like Loperamide (Imodium) can help manage the symptoms. If symptoms are severe, incapacitating, or include a high fever or blood, it's time to consider a prescribed standby antibiotic and seek medical advice.
2. Should I pack a standby antibiotic in my kit?
This is a question for your doctor or a travel medicine clinic. For travelers heading to high-risk destinations where severe traveler's diarrhea is common, many doctors will provide a prescription for a standby antibiotic like Azithromycin. It’s not for mild cases but can significantly shorten the duration of a severe bout of illness. Discuss your itinerary with your doctor to see if this is right for you.
3. Is it okay to pack medications outside their original bottles to save space?
While it's tempting, it's safest to keep prescription medications in their original, clearly labeled containers. This avoids any confusion or legal issues with customs officials. For over-the-counter pills, you have more flexibility. If you use a travel pill organizer, consider taking a photo of the original packaging so you have the dosage information and ingredients handy.

Pack Confidence for Every Journey
A carefully assembled travel first aid kit does more than just prepare you for minor medical issues; it provides profound peace of mind. It transforms you from a worried passenger into a self-sufficient, empowered traveler, ready to handle the small bumps in the road so you can stay focused on the incredible experiences ahead. By following this checklist, you’re not just packing supplies—you’re packing the confidence to explore the world freely and fully.
Now that your health and safety are covered, you can focus on the other details that make a trip unforgettable. For a complete, deep-dive into every facet of trip planning, from health and safety to budgeting and logistics, our comprehensive Travel Guide is the only resource you'll ever need.
Meta Data Suggestions:
SEO Meta Title (55 characters): The Ultimate Travel First Aid Kit Checklist (2026)
URL Slug: travel-first-aid-kit-checklist
SEO Meta Description (154 characters): Build the perfect travel first aid kit. Our 2026 checklist, with pharmacist-approved tips, covers everything from wound care to stomach issues. Be prepared.
Don't Miss Out! Subscribe for Exclusive Content
SubscribeComments 0
No comments yet
Be the first to share your experience!
Dont Miss Out! Subscribe for Exclusive Content
Ultimate USA Holidays Guide: Top Picks
FTC Affiliate Disclosure Essentials: Stay Compliant as a Travel Creator
Essential Affiliate Tools: From Tracking to Full Optimization
Booking.com Affiliate Program Review: Pros, Cons, and Earnings Potential
Decoding Affiliate Commission Rates: Benchmarks for Travel Creators