7 Best Travel Photography Blogs for Tips
TrekGuider @trekguider
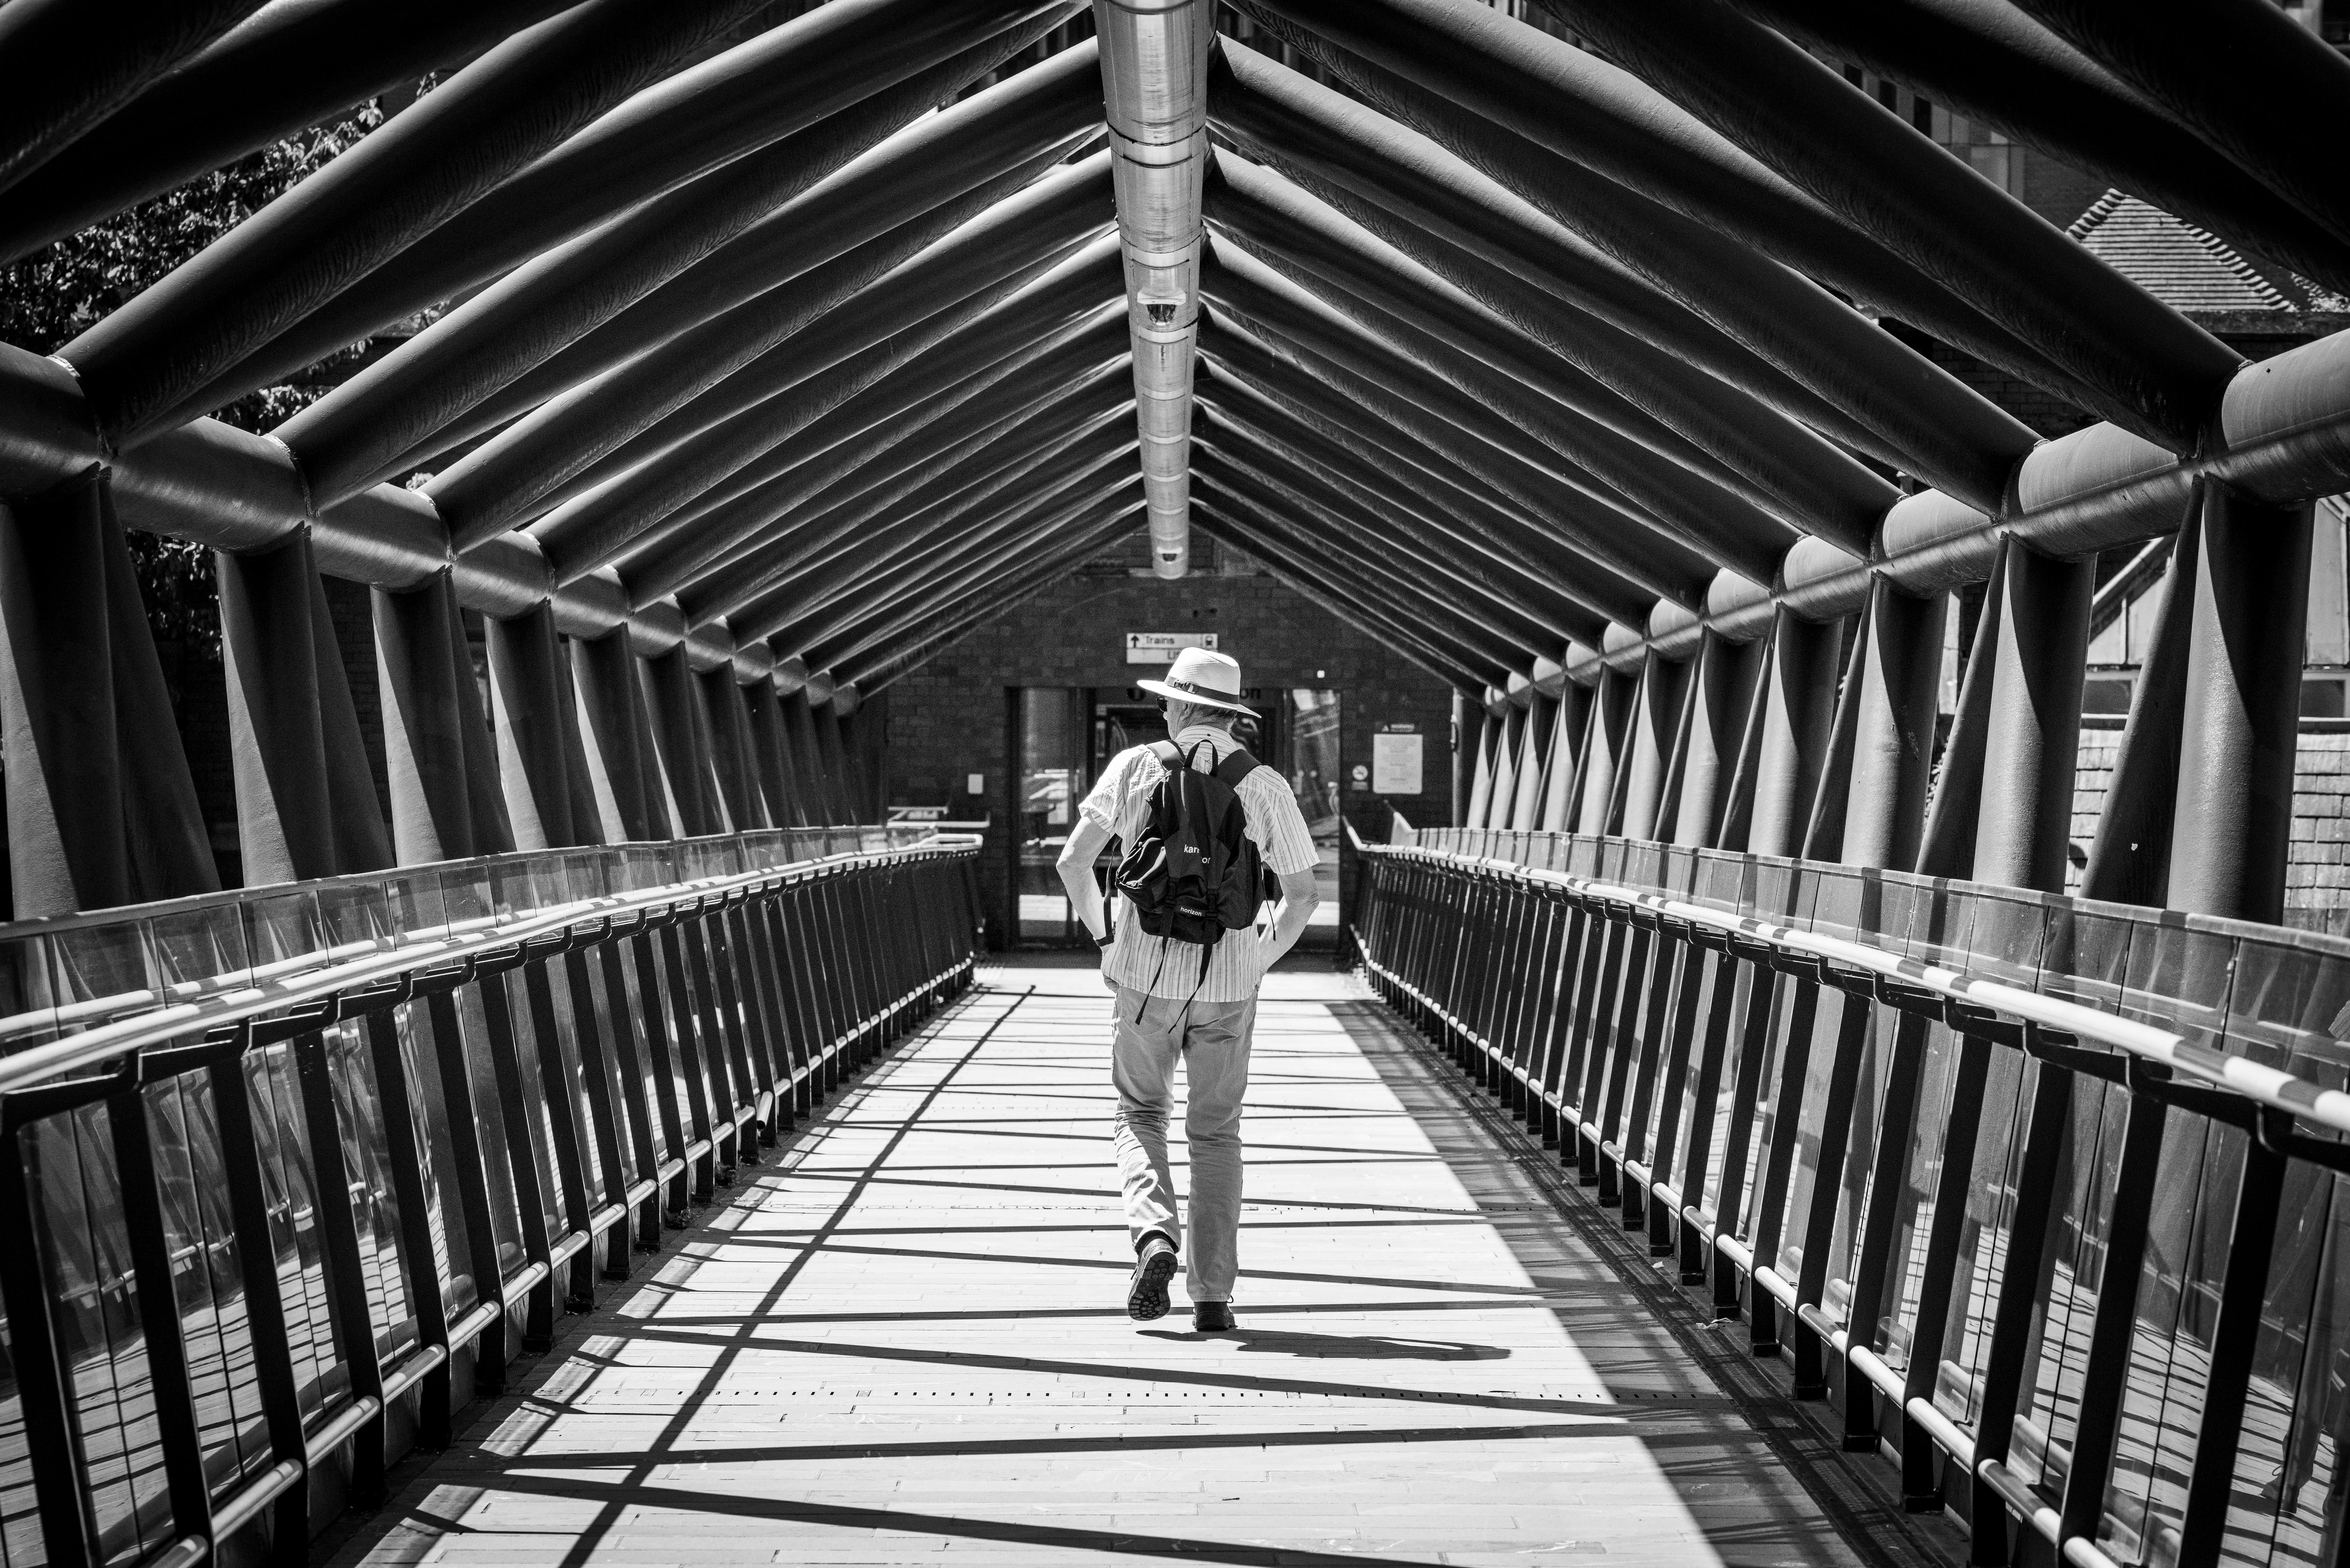
You know the feeling. You’re standing before a truly breathtaking scene—a fiery sunset melting into the ocean, a frenetic city street alive with energy, a mountain range so vast it stills your breath. You raise your camera, convinced you can bottle that magic. But when you get home, the photos on your screen are a pale imitation. The colors look washed out, the epic scale feels diminished, and the raw emotion of the moment is gone. It's the most common frustration in photography.
The gap between the photos you take and the professional shots you admire isn't about money or a more expensive camera. It's about knowledge. It's about seeing the world through a trained eye and understanding the techniques that transform a simple snapshot into a powerful story. The secret is learning from those who have already walked the path and mastered the craft. In a world saturated with social media portfolios, however, finding true educators can feel impossible.
That’s why we’ve sifted through the noise for you. We’ve identified the creators who are dedicated to teaching—the ones who provide the actionable advice, in-depth tutorials, and honest gear reviews that will actually make you a better photographer. If you’re ready to finally start creating travel photos that do your memories justice, you’re in the right place. These are the best travel photography blogs for real, practical tips. And for panoramic view of the top creators ac across every niche, our definitive guide to The Best Travel Blogs to Follow in 2026 is your essential starting point.
What Separates a Portfolio from a Powerhouse Educational Blog?
Before we dive in, let’s clarify our criteria. A gallery of beautiful photos is inspiring, but it won’t teach you how to improve. The blogs on this list were handpicked because they are exceptional educational platforms that empower their audience.
According to our 2026-2026 market analysis, the most authoritative blogs share key traits that set them apart. First is niche specificity and expertise; they establish themselves as deep experts in a specific domain, whether it’s adventure photography or post-processing. Second is the quality of writing and originality, allowing them to deconstruct complex topics—like the exposure triangle or advanced composition—into language anyone can understand. They are teachers, not just tastemakers.
The Top 7 Travel Photography Blogs for Actionable Advice
These seven blogs deliver on the promise of education. Each offers a unique perspective and a wealth of knowledge to help you improve your craft, whether you’re starting out or looking to refine your professional skills.
1. Expert Vagabond (Matthew Karsten)
For the photographer who thrives in the wild, there’s no better mentor than Matthew Karsten of Expert Vagabond. With over a decade of professional experience shooting in some of the world's most remote corners, Karsten doesn’t just show you the shot; he shows you the grit behind it. His gear guides are legendary for their depth, explaining not just what he uses, but why a particular piece of equipment is e essential for a specific environment. This is the ultimate resource for learning to create stunning images under rugged, challenging conditions.
2. Along Dusty Roads (Andrew & Emily)
Andrew and Emily are masters of mood. Their work has a distinct, cinematic quality, and their blog is an incredible resource for learning how to evoke emotion through imagery. While they offer detailed guides on photography techniques, their true genius lies in post-processing. Their Lightroom tutorials are models of clarity, focused on teaching you how to use editing to enhance the story of your image, not just apply a generic filter. They prove that the art happens just as much in the digital darkroom as it does in the camera.
3. BucketListly Blog (Pete R.)
If you love the tech behind the art, BucketListly Blog is your paradise. Pete’s gear reviews are exhaustive, moving far beyond spec sheets to deliver careful real-world performance analysis. He covers everything from the latest flagship mirrorless cameras to the best travel drones and action cameras. What makes his blog essential is its dual focus on both photography and videography, making it a one-stop shop for the modern hybrid creator who needs to produce elite content in multiple formats.
4. I Hit The Button (Andy Feliciotti)
The name says it all. This blog is laser-focused on the science and art of photography. Andy Feliciotti dives deep into the technical craft, offering detailed explorations of topics like long exposure, astrophotography, and advanced composition. This is where you go when you’re ready to move beyond beginner tips and truly understand the why behind a great photo. It’s the perfect resource for the photographer who loves to geek out on the details and push their creative boundaries.

5. The Blonde Abroad (Kiersten Rich)
Kiersten Rich is a powerhouse in the travel industry, and her photography is a masterclass in creating a vibrant, aspirational brand. Her blog is an excellent resource for anyone looking to master lifestyle and portrait travel photography. She offers fantastic, practical tips on everything from styling and wardrobe choices to using presets to achieve a cohesive, professional aesthetic. Her content is especially helpful for solo travelers who want to learn how to take incredible photos of themselves.
6. The Planet D (Dave & Deb)
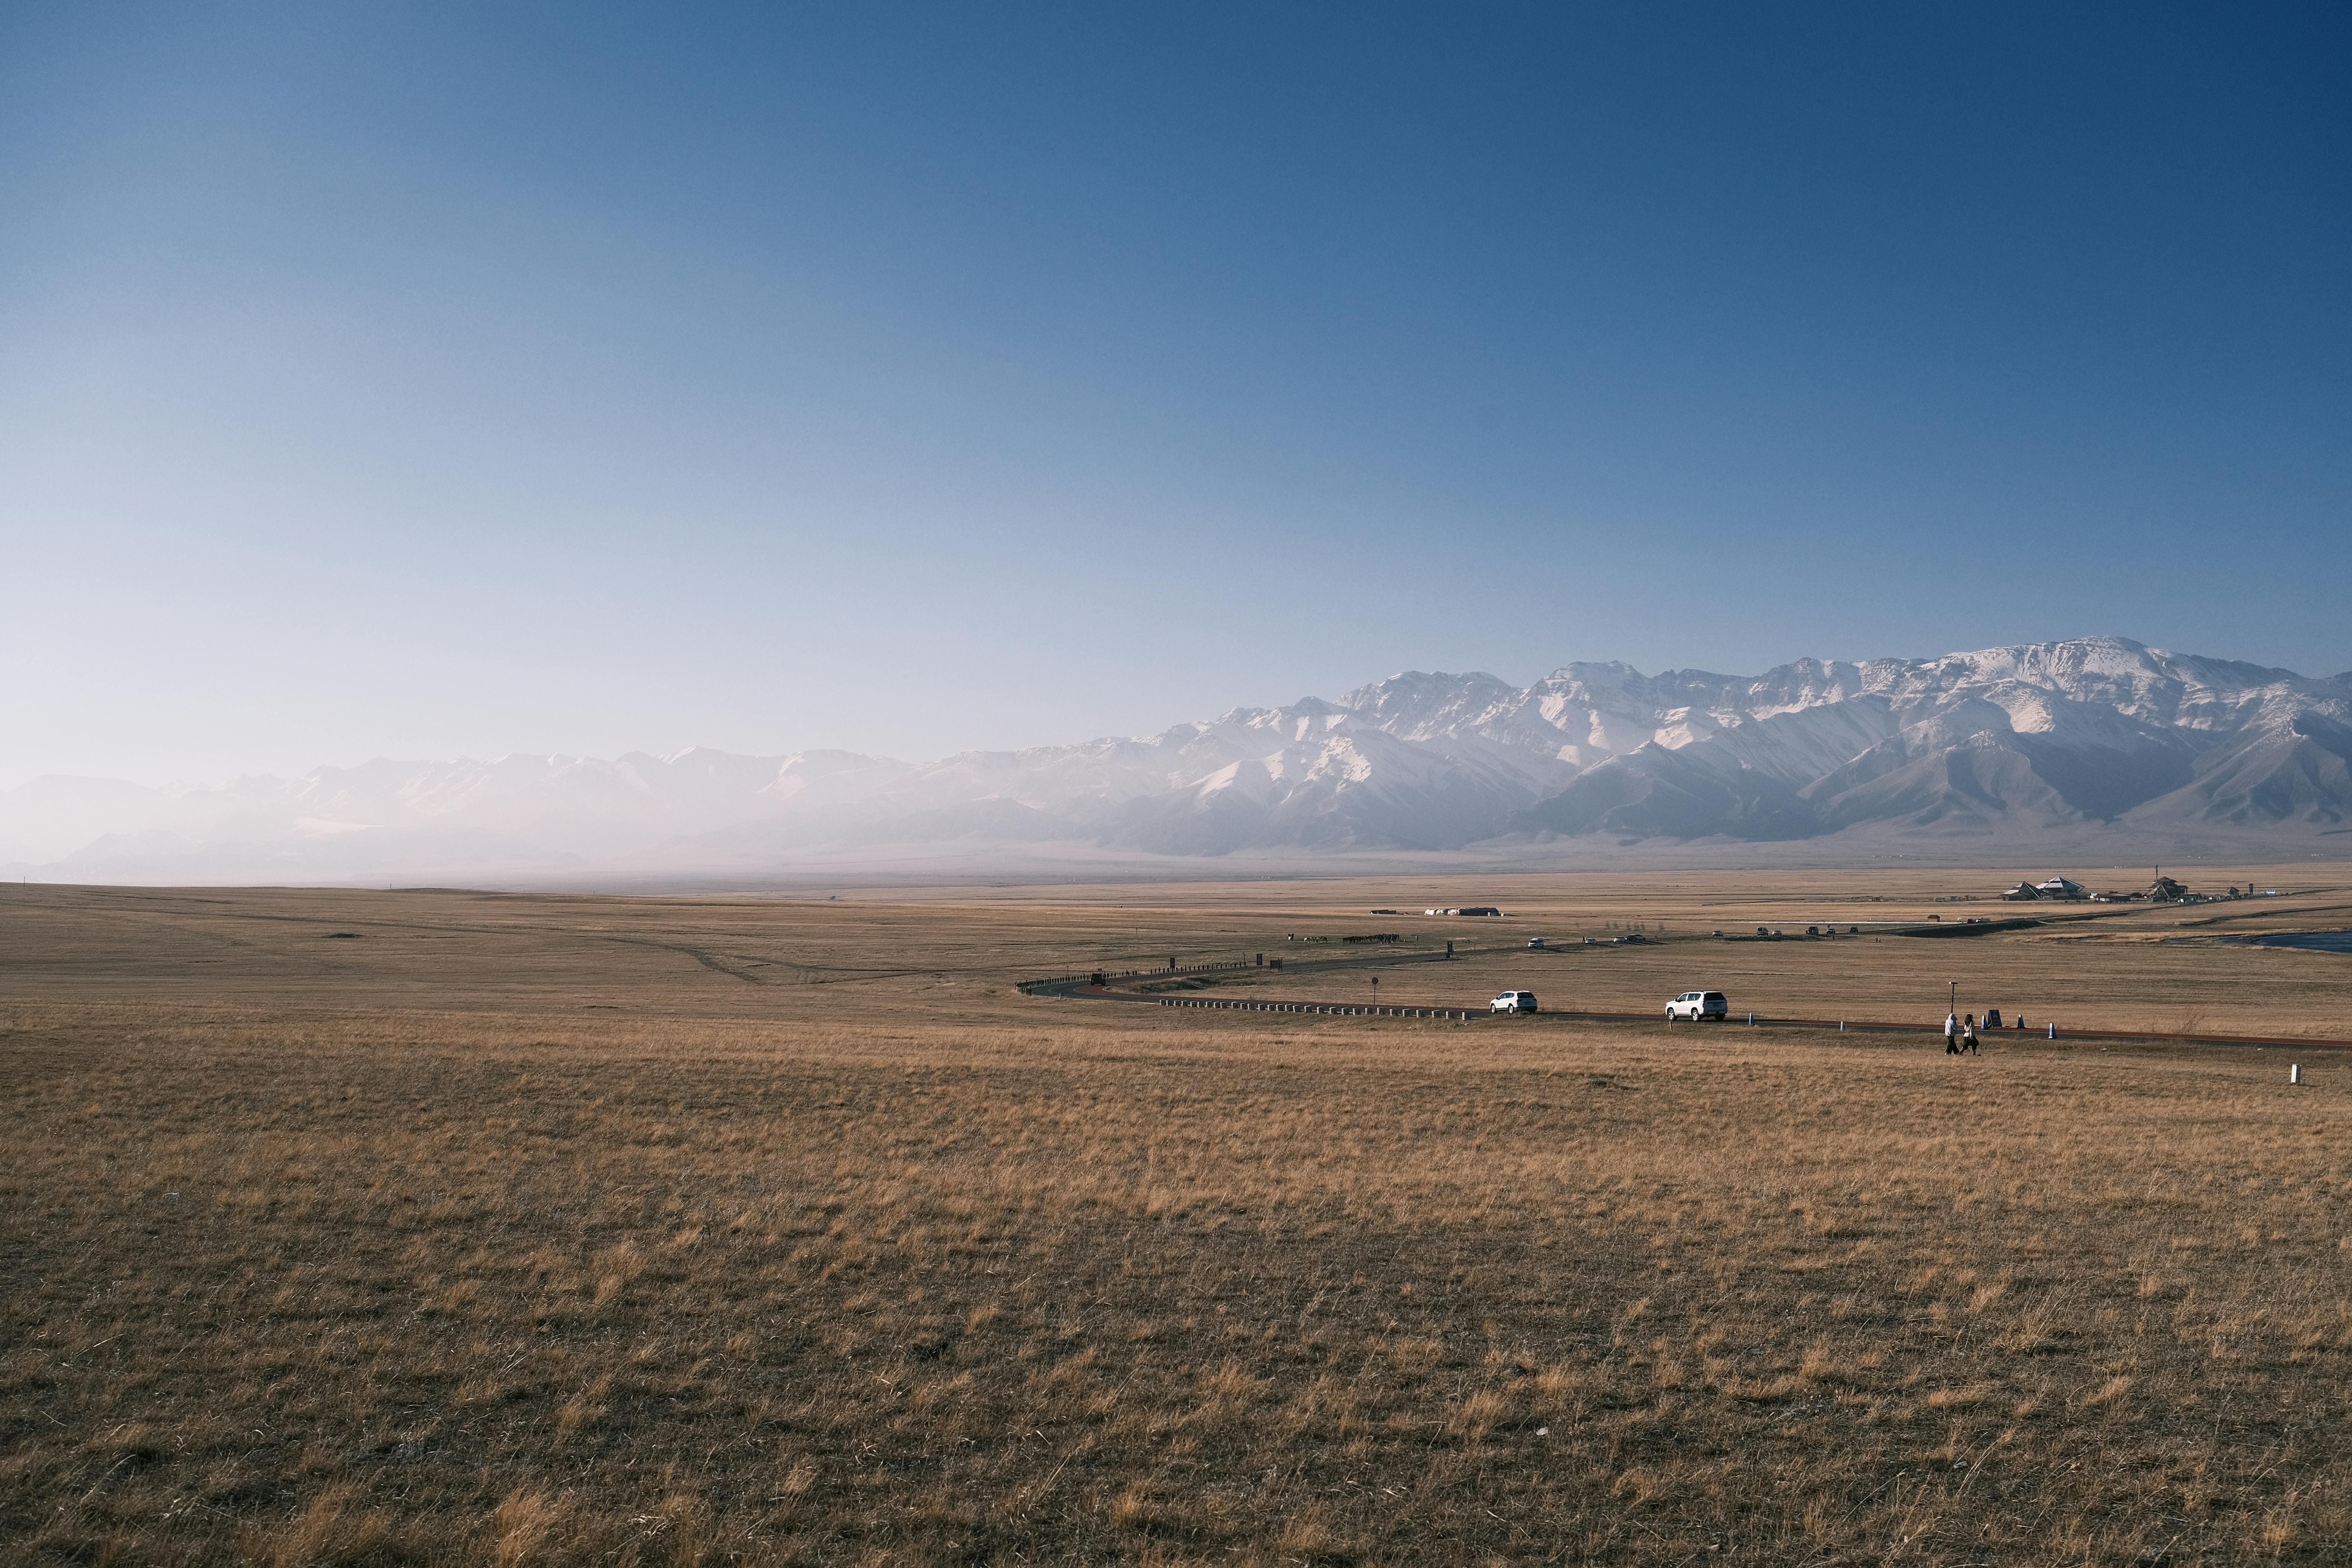
Dave and Deb have been exploring the world for over a decade, and their photography captures the sheer scale and grandeur of our planet's most epic landscapes. Their blog is a fantastic learning tool for anyone looking to improve their landscape and wildlife photography. They provide practical, field-tested advice on what lenses to use for sweeping vistas, how to shoot in harsh weather conditions (like Antarctica!), and how to tell a story of adventure through a series of powerful images.
7. The Lovers Passport (Stephen & Giselle)
Focused on couple’s travel, The Lovers Passport is an invaluable resource for anyone wanting to learn how to weave human elements into their photography. They excel at breaking down how to plan and execute an epic shot, from location scouting with Google Earth to posing subjects to create a compelling narrative. Their guides are packed with practical advice on making a destination feel both grand in scale and deeply intimate at the same time.
Decoding the Masters: Key Lessons from the Pros
Studying the work of these top-tier photographers reveals a set of shared principles. Their incredible images are not the result of magic, but a consistent application of three core pillars: strategic gear selection, timeless composition, and masterful post-processing.

It Starts with the Right Gear (But Not How You Think)
A unanimous philosophy among these pros is that the best camera for travel is the one you’re willing to carry. A bulky, heavy kit is a liability, not an asset. The market trend is toward smaller, lighter, yet incredibly powerful mirrorless systems.
Beyond the camera, your core kit should include a few essentials: a versatile "walk-around" lens (like a 24-70mm), extra batteries, and a solid camera bag.
Pro-Tip: A lightweight carbon fiber tripod is the single best investment for elevating your landscape photography. It allows you to shoot at "golden hour" with a low ISO for clean images and enables creative long exposures that are impossible handheld.
Mastering the Fundamentals of Composition
Gear is just a tool. The real art lies in arranging the elements within your frame. The best photographers use these timeless principles to tell a story.
Rule of Thirds: Mentally divide your frame into a 3x3 grid. By placing your subject along a line or at an intersection, you create a more balanced and visually engaging image than a simple centered shot.
Leading Lines: Use a road, river, or fence to create a line that guides the viewer's eye through the scene toward your main subject. This technique is a powerful way to create a sense of depth.

Shooting at Golden Hour: The hour after sunrise and before sunset offers soft, warm, directional light. This is far more flattering and dramatic than the harsh, flat light of midday.
Framing: Use foreground elements like an archway, a window, or tree branches to create a natural frame around your subject. This adds context and draws the viewer's focus.
Changing Perspective: Don't shoot everything from eye level. Get low to the ground to emphasize a foreground or find a high vantage point for a unique, sweeping overview. This simple shift can make a scene extraordinary.
Ready to Practice Your Composition Skills? Download the free Best NYC Photo Spots Map and start capturing incredible cityscapes today!
The Digital Darkroom: Post-Processing is Half the Battle
Every single professional photo you admire has been post-processed. Editing is not about "fixing" a bad photo; it's about enhancing a good one to fully realize your creative vision. The blogs we've highlighted consistently teach three key areas of editing in software like Adobe Lightroom.
Using Lightroom Presets: Presets are one-click settings that create a consistent aesthetic. They are excellent learning tools for understanding how different settings interact to create a professional look.
Editing Sunset Photos: This is a classic challenge that requires balancing the extreme dynamic range between the bright sky and the dark landscape. Tutorials will teach you how to use tools like graduated filters and the shadow/highlight sliders to balance the exposure and bring out the rich, vibrant colors.
Basic Color Grading: This is the art of adjusting the colors in your image to create a specific mood. Mastering the HSL (Hue, Saturation, Luminance) panel allows you to take full control, making the blues in the ocean deeper, the greens in a forest richer, or giving your entire photo a warm, autumnal feel. Destinations with distinct color palettes, like the neon-lit streets of Tokyo or the serene temples of Kyoto, are perfect places to practice these skills. If you're planning a trip, our Japan Travel Guide can help you find the most visually stunning locations.
Pro-Tip: When starting with post-processing, focus on mastering one tool at a time. The HSL panel in Lightroom is a great place to begin. Learning how to selectively adjust the hue, saturation, and luminance of individual colors can have a bigger impact on your photos than trying to learn every single tool at once.
Your Path to Better Travel Photos
Improving your travel photography is a journey, not a destination. It doesn't happen overnight. But by following the right guides, you can accelerate your progress and avoid common pitfalls. The path is simple: learn from the best travel photography blogs, focus on mastering the fundamental techniques of composition and light, and practice every chance you get. Pick one blog from this list to follow this week. Choose one composition technique to practice on your next outing, even if it's just in your own backyard. The more you shoot with intention, the faster you will begin to create images that truly capture the magic of your travels.
Meta Data Suggestions:
SEO Meta Title (56 characters): 7 Best Travel Photography Blogs for Tips (2026 Update)
URL Slug: best-travel-photography-blogs-tips
SEO Meta Description (154 characters): Want to take better travel photos? Discover the 7 best travel photography blogs that offer actionable tips on gear, composition, and editing from the pros.
Don't Miss Out! Subscribe for Exclusive Content
Subscribe


Comments 0
No comments yet
Be the first to share your experience!
Dont Miss Out! Subscribe for Exclusive Content

Ultimate USA Holidays Guide: Top Picks

FTC Affiliate Disclosure Essentials: Stay Compliant as a Travel Creator

Essential Affiliate Tools: From Tracking to Full Optimization

Avoid These 5 Affiliate Landing Page Mistakes for Better Conversions

Affiliate Keyword Research Mastery for Travel Blogs

Booking.com Affiliate Program Review: Pros, Cons, and Earnings Potential
Chicago Festivals: 8 Hidden Gems
TrekGuider @trekguider
You’ve seen the postcard shots: a sea of faces roaring at Lollapalooza, a river glowing an impossible, surreal green. Chicago is a city of grand gestures and epic celebrations, and its world-famous events deservedly draw millions. But you’re not here for the postcard. You’re digging for the city’s authentic pulse, the local rituals and hard-won secrets that exist just beyond the main stage and the barricaded parade routes. You want to experience the real Chicago.
The problem? Most travel guides are stuck on a loop, recycling the same five headliners. This leaves you with a generic itinerary that thousands of others are clutching, leading you straight into the jaws of the crowd. You risk a trip that’s memorable for all the wrong reasons—the endless lines, the sardine-packed trains, the nagging feeling that you only saw the spectacle, not the soul.
This guide is the antidote. We’re pulling back the curtain on eight hidden gems within the city’s vibrant festival scene. These aren’t obscure events; they are the insider angles, the local traditions, and the pro-level hacks that transform a popular celebration into a deeply personal, unforgettable memory. Forget just seeing the sights; we’re here to help you feel the stories behind them. This is your key to unlocking the authentic spirit of Chicago’s festivals, ensuring you go home with stories no one else has. For a panoramic view of the city's year-round celebrations before you dive into these secrets, our definitive guide to Chicago Holidays: Windy City Thrills is the perfect place to start your planning.
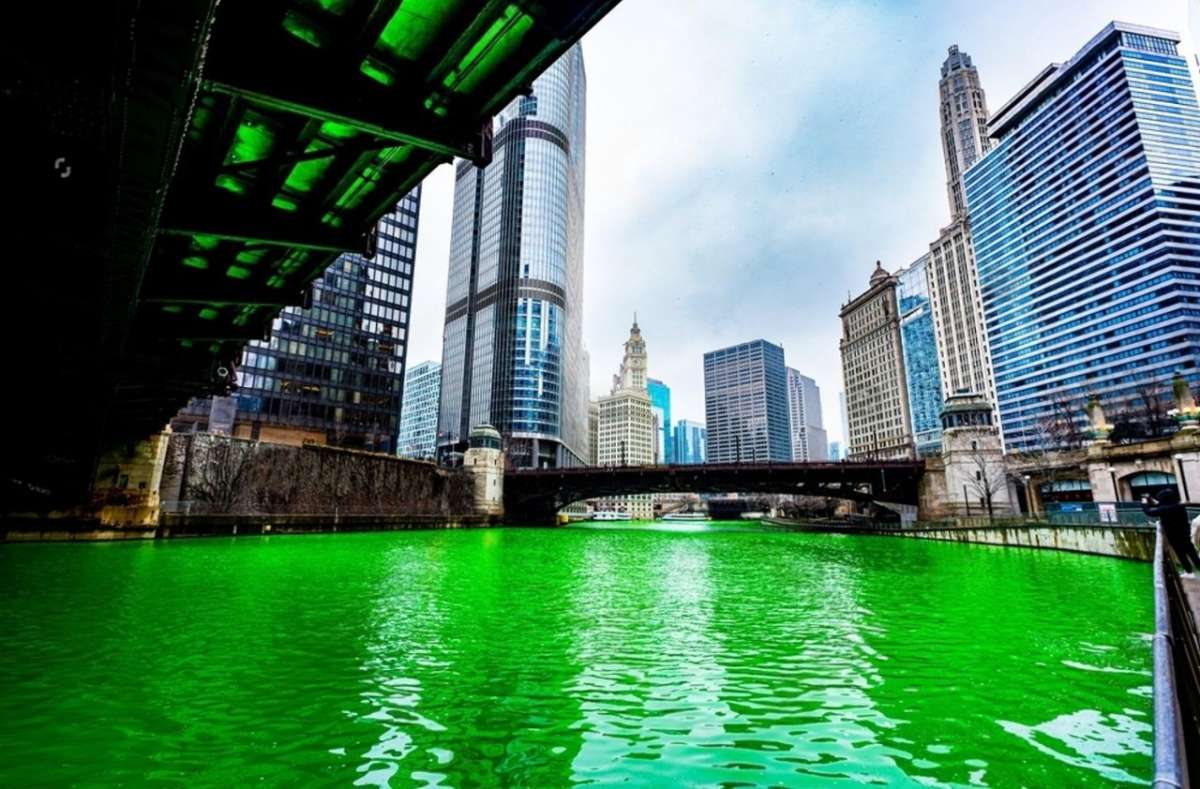
1. The Secret Science Behind the St. Patrick’s Day River Dye
Every March, the world watches as the Chicago River sheds its murky complexion for a shimmering, emerald green. While millions line the banks to witness the spectacle, the true hidden gem is understanding the fascinating history and precise science behind it. This isn't some century-old ritual; it was born in 1962 out of pure, blue-collar ingenuity. Local plumbers, using a dye to trace leaks, noticed it turned the water a brilliant green. An idea sparked, and today, that 'well-oiled machine' is a cherished tradition, still run by the Journeymen Plumbers Local Union 130.
Here’s the insider secret that makes it all happen: the substance is a vegetable-based, eco-friendly orange powder. The magic is in the chemistry. On the Saturday before St. Patrick's Day (the Saturday before St. Patrick's Day), a lead boat dumps 40 to 60 pounds of this powder, which streaks the surface in a vibrant orange. A smaller chase boat then zips behind, churning the water to catalyze the reaction, transforming the entire river into a shocking shade of green. The color is fleeting, lasting only about five to six hours, making the viewing a truly special, time-sensitive event.

How to Experience It Like a Local:
Time It Perfectly: The dyeing starts promptly at 10:00 AM. The most iconic viewing spots are the east side of the Michigan Avenue bridge or the west side of the Columbus Drive bridge. Get there by 9:00 AM to claim your space.
Get a Higher Perspective: For a less chaotic but equally stunning view, find a spot on an upper floor of a building overlooking the river. The contrast of the green water against the city’s iconic architecture is a photographer’s dream.
Follow the Action: The boats begin their work at Columbus Drive and head west toward the Wrigley Building. Position yourself near the start to witness the transformation from the very first moment.
2. Beyond the Headliners: A Pro’s Guide to Lollapalooza
Lollapalooza is a global music behemoth, drawing hundreds of thousands to Grant Park for a four-day sonic feast. Set for July 31 - the final day of the festival, the festival is a marathon of music. While the 2026 lineup is stacked with global megastars—think Olivia Rodrigo, Tyler the Creator, Sabrina Carpenter, Rüfüs du Sol, and even legends like Korn—the real hidden gem isn’t a secret band; it’s the art of navigating the festival with the calm confidence of a seasoned pro.
The average festival-goer shows up late, gets lost between stages, wilts from dehydration, and misses half the acts on their list. The pro, however, treats it like a strategic mission. The key is leveraging the tools at your disposal.

Your Pro-Level Survival Guide:
The App is Your Bible: The official Lollapalooza app is your single most important tool. Before you leave your hotel, download it, study the map, and build your custom schedule. It’s your source for real-time updates, surprise guest alerts, and life-saving emergency notifications.
Hydration is a Religion: Chicago in August is no joke. Lollapalooza provides free water stations throughout the park. The pro move is to bring your own empty hydration pack and make refilling it a constant ritual. Dehydration is the number one fun-killer.
Explore the Undercard: While the masses swarm the main stages, some of the most electric and memorable performances unfold on the smaller, more intimate side stages. Use your app to explore genres outside your usual rotation. This is where you’ll discover your next favorite artist before they blow up.
Master Your Exit Strategy: The festival wraps around 10 PM daily, and the ensuing stampede for the CTA trains is legendary. Either duck out 15 minutes before the final encore to beat the surge or linger in the park for a half-hour after the music stops to let the human tide recede.
Pro-Tip: Pack a poncho. Even if the forecast is clear, a sudden summer shower can roll in off Lake Michigan. A cheap poncho takes up no space and can be the difference between a minor inconvenience and a soggy, miserable evening.
3. The Authentic German Soul of Christkindlmarket
When winter’s chill settles over Chicago, Daley Plaza transforms into a magical, open-air European village. The Christkindlmarket is a beloved holiday tradition, but too many visitors treat it as a mere photo op. The hidden gem is immersing yourself in its authentic German heritage, a tradition modeled directly after the 16th-century Christkindlesmarkt in Nuremberg, Germany.
This isn’t just a holiday-themed market; it’s a slice of living history. The wooden stalls, the traditional food, and the artisan crafts are all part of a rich cultural mix.

How to Find the Authenticity:
Drink from the Boot: Skip the standard hot chocolate and go straight for the Glühwein, a traditional hot spiced wine served in a collectible boot-shaped mug. It’s the official taste of the market. For a non-alcoholic version, the Kinderglühwein is just as festive.
Eat Beyond the Pretzel: The giant pretzels are tempting, but your mission is to find more traditional fare. Seek out vendors selling sizzling Bratwurst, savory Leberkäse (a German meatloaf), tangy Sauerkraut, and crispy Kartoffelpuffer (potato pancakes).
Shop for Heirlooms, Not Souvenirs: Many vendors fly in directly from Germany and Austria. Look for hand-blown glass ornaments, complex wooden nutcrackers, and authentic cuckoo clocks. These are artisanal heirlooms. Ask the vendors about their craft—their stories are part of the purchase.
Pro-Tip: Visit the Christkindlmarket on a weekday afternoon. The crowds are significantly thinner, giving you the space to browse the stalls, chat with the artisans, and soak in the atmosphere without feeling rushed.
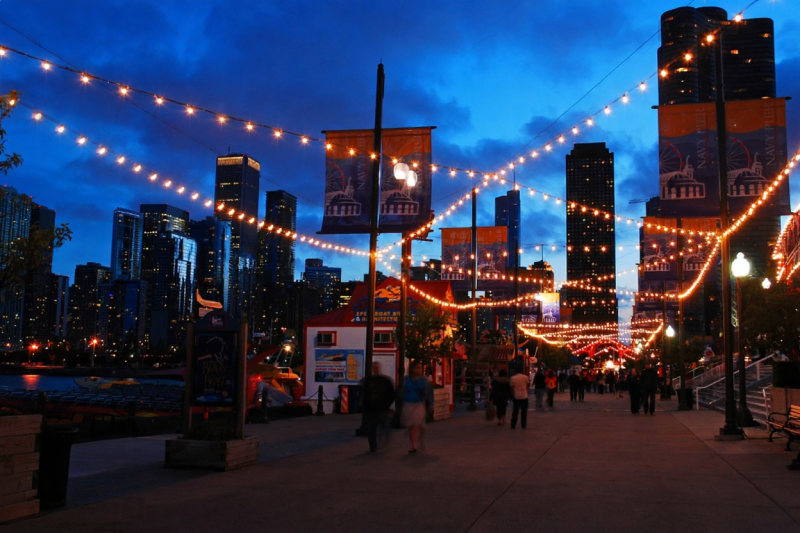
4. Rooftop Revelry: The Local’s View of July 4th Fireworks
On Independence Day, a massive human tide flows toward Navy Pier for its spectacular fireworks display. Fighting for a patch of concrete on the pier itself is a stressful, hours-long commitment. The true hidden gem, and the preferred method for savvy Chicagoans, is to watch the show from above. The city’s skyline is brimming with rooftop bars that offer a far more civilized and breathtaking vantage point.
Watching the fireworks explode over Lake Michigan with the glittering city as your backdrop is an experience the crowds on the ground simply can’t replicate. You trade the crush of humanity for a comfortable chair, a craft cocktail, and an unparalleled view.

How to Secure Your Spot in the Sky:
Book Yesterday: Rooftop bars with a view of Navy Pier are the hottest tickets in town on July 4th. Many require reservations or sell tickets for viewing parties weeks, if not months, in advance. Start your search in May, not July.
Expand Your Radius: While rooftops in Streeterville are closest, consider bars in Lincoln Park or the South Loop. They offer a slightly more distant but equally stunning panoramic view, often with a more relaxed vibe.
The Ultimate Private Party: If you’re visiting, booking a hotel room with a direct lake view can be your own private skybox for the show.
Just as capturing the perfect firework photo requires the right angle, so does capturing the essence of any great city. For travelers whose journey continues east, our Best NYC Photo Spots Map offers similar insider secrets for iconic shots.
5. Neighborhood Suds: Exploring Chicago’s Hyper-Local Beer Festivals
Chicago boasts a world-class craft beer scene, and the city hosts numerous beer festivals year-round. While the larger events are fun, the hidden gem is found in the smaller, neighborhood-focused fests that celebrate local breweries. These offer a more intimate and authentic taste of Chicago’s brewing culture.
Instead of a massive, impersonal convention hall, these fests feel like a community block party. You’ll chat with the brewers themselves, learn about their passion projects, and sample unique, experimental batches you won’t find anywhere else. They often feature local food trucks and bands, creating a holistic celebration of neighborhood pride.
How to Find the Best Local Brews:
Follow the Source: The best way to discover these smaller festivals is to follow your favorite Chicago breweries on social media. They’ll always promote the local events they’re pouring at.
Explore Malt Row: Keep an eye on neighborhood associations in areas like Ravenswood (home to the famous "Malt Row"), Logan Square, and the West Loop, as they often host their own craft beer showcases.
Seek a Theme: Go beyond the generic "beer fest" and look for events with a specific focus, like a Stout Fest in the winter or a Fresh Hop Festival in the fall, to taste the best of the season.
6. The Community Heartbeat of a Cinco de Mayo Parade
Across the U.S., Cinco de Mayo is often misunderstood and reduced to a marketing gimmick. The hidden gem of Chicago’s celebration is found in the vibrant, culturally rich parade in the Little Village neighborhood. Here, the holiday is observed as it was intended: a powerful celebration of Mexican-American heritage and a commemoration of the Mexican Army's unlikely victory at the Battle of Puebla in 1862.
The Little Village parade is a dazzling display of community pride. You’ll see folkloric dancers in brilliant traditional dress, hear the powerful sounds of mariachi bands, and watch as floats decorated by local families and businesses roll by. It’s a deeply authentic experience that showcases the soul of Chicago’s Mexican-American community.

How to Experience It Respectfully:
Go to 26th Street: The main parade route is along 26th Street in the heart of Little Village. Arrive early to find a good spot and soak in the infectious, family-friendly atmosphere.
Support Local: After the parade, explore the neighborhood. Grab a fantastic meal at a family-owned restaurant or browse the local shops. This is the best way to thank the community that puts on this incredible event.
Listen to the Story: The parade often includes speakers who discuss the holiday's historical significance. Take a moment to listen and gain a deeper appreciation for the culture you’re celebrating.
7. A Day of Service: The True Meaning of MLK Day in Chicago
Martin Luther King Jr. Day is a federal holiday, but in Chicago, it holds a profound significance. The city was instrumental in the civil rights movement, and a 1973 state bill championed by Harold Washington helped pave the way for the national holiday. The hidden gem of this day is to move beyond passive observance and engage with its intended spirit: community action. In 1994, it was designated a National Day of Service, a "day on, not a day off."
Thousands of Chicagoans honor Dr. King’s legacy by participating in volunteer projects, marches, and educational events.

How to Participate:
Find a Service Project: Organizations across the city host volunteer events, from packing meals at the Greater Chicago Food Depository to neighborhood clean-ups.
Visit the DuSable: The DuSable Museum of African American History hosts special exhibitions, speeches, and family activities that provide powerful context on the civil rights movement.
Join the Conversation: Attend a community-led march or rally. These events are not just commemorative; they are active continuations of the push for social justice and equality.
8. The Pre-Parade Rituals of St. Patrick’s Day
We’ve covered the river, but the St. Patrick’s Day parade that follows is an institution dating back to 1843. Kicking off at 12:15 PM, it marches down Columbus Drive through Grant Park. The hidden gem here isn’t the parade itself, but the electric, city-wide buzz and local rituals in the hours leading up to it.
For many Chicagoans, the day starts early. The energy in the Loop is palpable as a river of green-clad people converges downtown.

How to Capture the Pre-Parade Vibe:
Start at the Start: The parade begins at Columbus and Balbo Drive. Position yourself near the starting line to see the performers—from the solemn bagpipe bands to the energetic Irish dancers—when their excitement is at its absolute peak.
Follow the Music: Long before the parade steps off, you’ll hear the haunting sound of bagpipes warming up. Follow the sound to find different pipe and drum corps practicing in nearby parks, offering an impromptu, intimate performance.
Witness a Family Tradition: The parade is a multi-generational affair for thousands. Take a moment to notice the families gathered together, sharing a piece of their heritage. It’s a heartwarming display of community that is the true soul of the celebration.
Your Adventure into Authentic Chicago Awaits
Chicago’s festival scene is a rich mix woven with threads far more complex than its famous headliners. The city’s true spirit lives in the details: the science behind a green river, the taste of a German pastry in a bustling market, the pride in a neighborhood parade, and the quiet awe of watching fireworks from a rooftop high above the fray. By seeking out these hidden gems, you transform from a tourist into an active participant in the city’s vibrant culture. This is how you truly experience the best festivals in Chicago.

Now that you have the insider’s playbook, you’re ready to plan a trip that goes deeper. To build out the rest of your itinerary with expert advice on where to stay, what to eat, and what to see, our comprehensive Travel Guide is packed with everything you need to explore Chicago and beyond like a pro.
Meta Data Suggestions:
SEO Meta Title: Chicago Festivals: 8 Hidden Gems You Can't Miss
URL Slug: /chicago-festivals-hidden-gems
SEO Meta Description: Skip the crowds and discover the real Chicago. Our guide reveals 8 hidden gems and insider secrets for experiencing the best festivals in Chicago like a local.
Don't Miss Out! Subscribe for Exclusive Content
SubscribeComments 0
No comments yet
Be the first to share your experience!
Dont Miss Out! Subscribe for Exclusive Content

San Francisco Cherry Blossoms: A Local's Guide to the Blooms

Halloween SF: Haunts Without Horrors

SF Festivals: 7 Must-See Lineups

Christmas SF: Lights & Wharf Wonders

SF Pride: 6 Route & Party Hacks

Chinese New Year SF: Parade Essentials
9 Beach Safety Tips That Could Save Your Life
TrekGuider @trekguider
There’s a moment on every beach trip that feels like pure magic. It’s the feeling of warm sand between your toes, the hypnotic sound of waves crashing, and the endless blue horizon stretching out before you. It’s a picture of perfect relaxation. But beneath that tranquil surface, the ocean holds immense and impartial power. A beautiful day can turn dangerous in an instant from a hidden current, underestimated waves, or the relentless sun, transforming a dream vacation into a terrifying emergency. Every year, countless beachgoers find themselves in preventable peril simply because they misread the water or weren't prepared for the environment.
This isn't a guide to make you fear the ocean; it's a playbook to empower you to respect it. We’re here to give you the essential, expert-backed beach safety tips that can mean the difference between a blissful day and a life-altering one. These strategies, drawn from lifeguarding associations and national weather experts, are a critical component of the situational awareness we cover in our comprehensive guide, The Ultimate Guide to Travel Safety: A 2026 Playbook. By learning to see the beach not just as a playground, but as a dynamic natural environment, you can ensure your only takeaways are seashells and incredible memories. Let’s dive in.

Master the Water: Essential Ocean Safety Tips
The vast majority of beach-related dangers originate in the water itself. From powerful currents to unpredictable surf, understanding the ocean's behavior is the most critical skill any beachgoer can possess. These are the foundational beach safety tips for staying safe in the surf.
1. Become an Expert at Spotting Rip Currents
Rip currents are the number one danger at most surf beaches, responsible for the majority of ocean rescues performed by lifeguards. They are not undertows that pull you under the water; they are powerful, narrow channels of water that flow away from the shore at high speed. According to NOAA and the United States Lifesaving Association (USLA), knowing how to visually identify one from the shore is your first and best line of defense.
Here’s what to look for, especially from an elevated position like the dunes or a lifeguard tower:
A Channel of Churning, Choppy Water: Look for a specific area where the water seems agitated or rough, moving in a different direction than the surrounding waves.
A Break in the Incoming Wave Pattern: This is often the easiest sign to spot. You'll see a gap in the line of breaking waves—an area that looks deceptively calm. This flat spot is the rip current pulling water back out to sea, disrupting the incoming waves.
A Difference in Water Color: Because the current is carrying sand and sediment offshore, the water within a rip current often appears darker, murky, or sandy brown compared to the clearer, greener water on either side.
A Line of Foam or Debris Moving Seaward: This is a dead giveaway. If you see a line of foam, seaweed, or other floating debris moving steadily away from the beach, perpendicular to the shore, you are looking directly at a rip current.
Pro-Tip: Before you even set up your umbrella, take five minutes to stand back and observe the water. Actively look for these signs. Identifying potential rip currents before you get in the water is the single most important safety action you can take.
2. Know the "Flip, Float, Follow" Rule for Rip Current Survival
If you do get caught in a rip current, your instinctive reaction—to panic and swim directly against it back to shore—is the most dangerous thing you can do. Fighting a rip current will exhaust you to the point of drowning. The correct response is simple and could save your life.
Flip: Flip onto your back to stay afloat and conserve energy.
Float: The current will not pull you under; it will only pull you away from shore. Stay calm and float with it.
Follow: Once you are out of the main pull of the current, begin swimming parallel to the shoreline. Do not swim toward the beach. Once you have swum out of the current, you can then turn and swim back to shore, ideally at an angle away from where you were caught.
If you are unable to swim out of it, continue to float and wave your arms and yell for help to attract the attention of a lifeguard or other swimmers.

3. Understand and Obey the Beach Warning Flag System
While knowing how to escape an invisible current is a vital reactive skill, your most powerful proactive tool is the one flapping in the breeze. Beach warning flags are a simple, universal language used by lifeguards to communicate the current water conditions. This system, adopted by the International Lifesaving Federation, provides a quick, visual assessment of the hazard level. Ignoring these flags is a gamble you should never take.
Green Flag: Low Hazard. Conditions are calm, but you should still exercise caution.
Yellow Flag: Medium Hazard. Moderate surf and/or currents are present. Weak swimmers should stay out of the water, and everyone else should use extra care.
Red Flag: High Hazard. The surf is high, and/or strong currents make conditions dangerous. It is recommended that no one enters the water.
Double Red Flag: Water Closed to Public. Conditions are extremely dangerous. The water is closed to all swimming, and entering it is prohibited.
Purple Flag: Dangerous Marine Life. This flag indicates that potentially hazardous marine life, like jellyfish or sharks, has been spotted. It is always flown with another color flag that indicates the surf conditions.
Pro-Tip: The absence of flags does not automatically mean the water is safe. If there is no flag, it likely means there is no lifeguard on duty. In that case, you are swimming entirely at your own risk. Always try to swim at a beach protected by lifeguards.
Master the Environment: Sun and Shoreline Safety Tips
While the ocean poses the most immediate threats, the beach environment itself has its own set of risks. The sun, sand, and heat can cause serious health issues if not managed properly. These beach safety tips will keep you safe on the shore.
4. Know the Signs of Heat Exhaustion vs. Heatstroke
That perfect, sun-drenched beach day holds a hidden danger. When the temperature climbs, the line between bliss and a medical emergency can blur with alarming speed. According to the Red Cross, it's crucial to know the difference between heat exhaustion and the more severe, life-threatening heatstroke (sunstroke).
Heat Exhaustion Symptoms:
Headache, dizziness, and confusion
Excessive sweating with cool, moist, or pale skin
Nausea and muscle cramps
A rapid, weak pulse
First-Aid for Heat Exhaustion:
Move to a Cool Place: Immediately get the person out of the direct sun and into shade or air conditioning.
Cool Them Down: Loosen their clothing and apply cool, wet cloths or spray them with cool water.
Rehydrate: If they are conscious and able to swallow, have them sip small amounts of a sports drink or water.
If their condition doesn't improve or they start vomiting, call for emergency help immediately, as it can progress to heatstroke.
5. Recognize the Emergency of Heatstroke (Sunstroke)
Heatstroke is a full-blown medical emergency where the body's internal cooling system completely fails.
Heatstroke Symptoms:
Changes in mental status (confusion, agitation, loss of consciousness)
Hot, flushed, and often dry skin (sweating may have stopped)
A dangerously high body temperature (often above 104°F / 40°C)
A rapid, strong pulse, which may become weak later
First-Aid for Heatstroke:
Call 911 Immediately: This is a life-threatening emergency that requires professional medical intervention.
Begin Rapid Cooling: While waiting for help, do everything you can to cool the person's body. Immerse them in cool water if possible, or douse them with water and apply ice packs to the neck, groin, and armpits.

6. Practice Proactive Sun Protection
The best way to deal with a heat-related illness is to never let it start. Sun protection is a continuous strategy, not a one-time action.
Hydrate Constantly: Drink plenty of water throughout the day, even before you feel thirsty.
Use Broad-Spectrum Sunscreen: Apply a sunscreen with at least SPF 30 and reapply it every two hours, and always immediately after swimming or excessive sweating.
Seek Shade: Use an umbrella and take breaks from the sun, especially during the peak intensity hours of 10 a.m. to 4 p.m.
Wear Protective Clothing: A wide-brimmed hat and UV-blocking sunglasses are non-negotiable.
7. The "Stingray Shuffle" Rule
In many coastal areas, stingrays bury themselves in the sand in shallow water. Stepping directly on one can result in an excruciatingly painful sting from the barb on their tail. To avoid this, never walk normally through the shallows. Instead, shuffle your feet along the sand. The vibrations from the shuffle will alert any nearby stingrays to your presence, giving them a chance to swim away peacefully.
Master Your Preparation: Final Beach Safety Tips
A safe and relaxing beach day begins before you even leave home. Smart planning and having the right gear can make all the difference, especially when traveling with family.
8. Pack a Dedicated Beach First-Aid Kit
While your main travel medical kit should be comprehensive, your beach bag needs a few specific items to handle common coastal issues:
Waterproof Bandages: For minor cuts and scrapes from shells or rocks.
Aloe Vera Gel: For immediate relief from minor sunburn.
Antihistamine Cream: To soothe the itch from insect bites.
Tweezers: For removing splinters or shell fragments.
Vinegar: A small bottle of white vinegar is a secret weapon; it can help neutralize the sting from some types of jellyfish.
9. Always Designate a "Water Watcher"
When you're at the beach with a group, especially with children, it's easy to fall into the trap of "diffusion of responsibility," where everyone assumes someone else is watching the kids in the water. The solution is to formally designate one adult as the "Water Watcher" for a set period (e.g., 15-20 minutes). During their shift, that person's only job is to watch the water without distraction—no phones, no books, no conversations. Then, you switch. This simple system ensures there are always eyes on the swimmers.
Your Ultimate Guide to Family Beach Travel
Keeping kids safe and entertained at the beach is a unique challenge. From packing the right gear to navigating meltdowns and keeping them safe in the sun and surf, a little extra preparation goes a long way. Our specialized guide takes the stress out of the equation.
Download our free Stress-Free Flying with Kids Guide for expert tips on making every part of your family vacation, from the airport to the beach, a breeze!
Beach Safety FAQs
A prepared mind is a safe mind. Here are quick answers to other common beach safety questions.
1. What’s the right way to treat a jellyfish sting?
First, get out of the water. Rinse the affected area with vinegar (if available) for about 30 seconds to deactivate the stingers. Do not use fresh water, as it can make it worse. Carefully pluck out any visible tentacles with tweezers. Soaking the skin in hot water (as hot as can be tolerated without burning) for 20-45 minutes can also help relieve the pain.
2. Is it safe to dig deep holes in the sand?
Digging in the sand is a classic beach activity, but deep holes can be incredibly dangerous. They can collapse unexpectedly, burying a person in seconds. Never dig a hole deeper than the knees of the smallest person in your group, and always fill in any holes you dig before you leave the beach.
3. What should I do if I see someone in trouble in the water?
Do not attempt a swimming rescue yourself unless you are trained in water rescue. An untrained rescuer can quickly become a second victim. The best course of action is to call for help immediately. Yell to alert a lifeguard and call 911. If you can, throw the person something that floats, like a cooler or a boogie board.
By embracing these nine essential beach safety tips, you shift from being a passive visitor to an active, aware, and prepared participant in one of nature’s most magnificent environments. The goal isn't to diminish the fun but to ensure it. A healthy respect for the ocean and a solid plan for your day are the keys to unlocking a truly carefree and unforgettable experience by the sea.

Now that you've mastered the art of staying safe on the coast, you can focus on the rest of your adventure. For a complete, deep-dive into every facet of trip planning, from health and safety to budgeting and logistics, our comprehensive Travel Guide is the only resource you'll ever need.
Don't Miss Out! Subscribe for Exclusive Content
SubscribeComments 0
No comments yet
Be the first to share your experience!
Dont Miss Out! Subscribe for Exclusive Content
Ultimate USA Holidays Guide: Top Picks
FTC Affiliate Disclosure Essentials: Stay Compliant as a Travel Creator
Essential Affiliate Tools: From Tracking to Full Optimization
Booking.com Affiliate Program Review: Pros, Cons, and Earnings Potential

Decoding Affiliate Commission Rates: Benchmarks for Travel Creators
