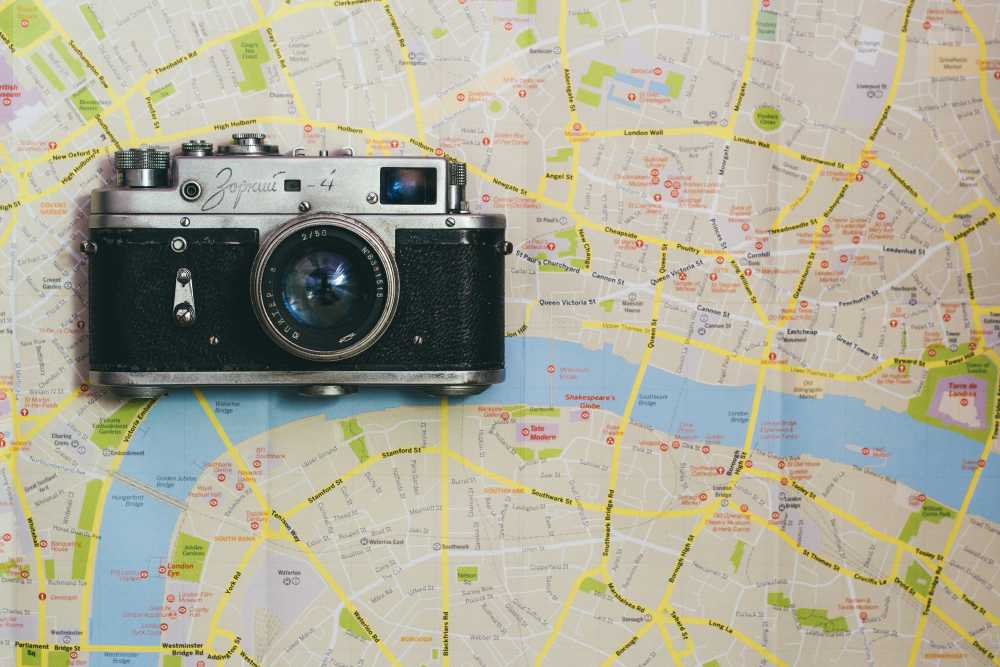
Decoding Affiliate Commission Rates: Benchmarks for Travel Creators
TrekGuider @trekguider
You’re a travel creator, and you’ve entered the world of affiliate marketing to turn your passion into a profession. But you’ve quickly run into a frustrating black box: the commission structure. You see a dizzying array of percentages, acronyms like CPA and EPC, and vague promises of earnings. You’re left wondering what good affiliate commission rates even look like. Are you earning your worth, or are you leaving a significant amount of money on the table?
This confusion isn't just academic; it's a direct threat to your bottom line. The reported average monthly income for affiliates in the travel niche is an impressive $13,847, a figure that proves this is a serious enterprise. But you can't build a sustainable business on guesswork. Partnering with a program offering a flashy 40% commission—only to discover it’s 40% of their tiny margin—is a rookie mistake that costs real money. This lack of clarity makes it impossible to forecast your income, negotiate better terms, or build a truly predictable business. You feel like you’re flying blind.
This guide is your decoder ring. We are pulling back the curtain to give you a comprehensive breakdown of how affiliate commissions actually work. We will deconstruct every major commission model, provide clear, data-backed industry benchmarks, and teach you how to analyze these rates like a seasoned professional. By the end of this deep dive, you will be able to spot high-value opportunities and architect a monetization strategy that truly rewards your influence. For a complete overview of the affiliate landscape, our definitive pillar page, Travel Affiliate Programs: The 2026 Ultimate Guide, is your essential command center.

The Anatomy of a Commission: Deconstructing the Core Models
Let's cut through the jargon. An affiliate commission is simply a reward for a job well done. A company—the merchant—pays you for successfully driving a specific, valuable action, which in the travel world almost always means a completed booking or sale.
But the way that reward is calculated can vary dramatically. Understanding the underlying structure of different affiliate commission rates is the first step toward becoming a high-earning creator.
1. Cost Per Sale (CPS) or Pay Per Sale (PPS): The Industry Workhorse
You'll encounter this model most often—it's the industry's workhorse for a reason. It’s simple and transparent: when a reader clicks your affiliate link and completes a purchase, you earn a percentage of the total sale value. If you recommend a $500 hotel stay and the program offers a 6% CPS commission, you earn $30. This model directly ties your earnings to the revenue you generate, making it the gold standard for most travel bookings and gear sales.
2. Cost Per Action (CPA): Rewarding a Specific Step
Recommended: The Solo Female Travel Safety Guide
Recommended: International Travel Checklist (Printable PDF)
CPA is a broader model where you’re compensated for a specific action a user takes. While that action is often a sale (making it identical to CPS), it can also be something else. For example, a travel credit card company might pay you a CPA commission for every user who completes an application, regardless of whether they are approved.
3. Cost Per Lead (CPL): Paying for High-Value Inquiries
With a CPL model, you earn a fixed fee for each qualified lead you generate. This is common in high-ticket travel sectors where the sales cycle is long. A luxury tour operator, for instance, might pay you $50 for every user who fills out a detailed inquiry form for a bespoke African safari. You get paid for delivering a potential customer; their sales team takes it from there.
4. Tiered & Multi-Tier Structures: Incentivizing Growth
This is where commission models get more sophisticated and rewarding.
Tiered Structures: Rewarding Your Growth These are designed to reward high-performing affiliates. Your commission rate increases as you drive more sales. A program might offer a base rate of 6%, which jumps to 8% after you generate $5,000 in sales in a month, and 10% after $10,000.
Multi-Tier Structures: Building a Network These allow you to earn commissions not only on your own sales but also on the sales generated by other affiliates you recruit into the program. This effectively turns you into a partner who helps grow the program itself, creating a secondary, more passive income stream.
5. Cost Per Click (CPC): The Rare Exception
In this model, you are paid a small fee for every click your affiliate link receives, regardless of a sale. Due to its high vulnerability to fraud, the CPC model is now extremely rare in modern affiliate marketing and almost never seen in the travel space.

Industry Benchmarks: What Good Affiliate Commission Rates Look Like
So, what should you actually expect to earn? While rates vary, the travel industry has established clear benchmarks across its major categories. Here’s your cheat sheet.
Hotels & Accommodations: 2% - 7% of Booking Value This is the bread and butter for many creators, but the details are everything. A program like Expedia Group offers up to 6% of the total booking value with a 7-day cookie. In contrast, Booking.com advertises a much higher "25-40%", but this is a percentage of their commission, not the customer's total payment. This opaque structure often results in a much lower effective rate, closer to 2-4% of the final booking value.
Tours, Activities & Experiences: 6% - 8%+ This is a high-margin category with strong potential. Market leaders like Viator and GetYourGuide set the standard with base commissions of 7-8%. Adventure-focused operators like G Adventures offer 6%, which is incredibly powerful when applied to their high-ticket tours that can cost thousands of dollars.
Travel Insurance: 10% or More Insurance is a consistently high-paying vertical. Top programs like SafetyWing and World Nomads both offer a standard 10% commission. SafetyWing takes this a step further with a recurring model, meaning you continue to earn 10% every time your referred customer renews their policy.
Gear & Apparel: 3% - 8% For physical products, rates depend heavily on the retailer. Amazon Associates is the baseline, offering 3-4% for most travel categories. However, partnering with specialty retailers is far more lucrative. A brand like REI, for example, offers a 5-8% commission on high-quality (and often high-priced) outdoor gear.
Pro-Tip: Don't be blinded by the highest percentage. A 6% commission on a $3,000 G Adventures tour is $180. An 8% commission on a $50 city walking tour is $4. Always consider the average order value of the products you are promoting when evaluating affiliate commission rates.

The Metrics That Matter More Than the Rate Itself
An experienced affiliate marketer knows the commission rate is just a starting point. To truly understand a program's profitability, you need to analyze the metrics that measure real-world performance.
Earnings Per Click (EPC): Your True North This is arguably the single most important metric. It’s calculated by dividing your total commission earnings by the total number of clicks you sent. If you sent 100 clicks and earned $50, your EPC is $0.50. This number tells you the average value of every single click. A program with a lower commission but a higher EPC is often the more profitable partner for your specific audience.
Conversion Rate (CR): The Sign of a Healthy Partner This is the percentage of users who take the desired action after clicking your link. A high conversion rate is a sign of a trusted brand with a well-optimized checkout process. A program with a 10% commission that converts at 1% is less profitable than a program with a 5% commission that converts at 5%.
Cookie Duration: The Travel Creator's Safety Net This is critical in the travel space. A longer cookie duration (30, 60, or 90 days) gives your audience the time they need to research a high-consideration purchase while ensuring you still get credit. A short cookie window is a major red flag and a sign that the program may not be structured in your favor.
Pro-Tip: Dive into your affiliate dashboards. Most networks like CJ Affiliate and Travelpayouts provide detailed reports on your EPC and conversion rates for each program. Use this data to identify your true top performers—the results will often surprise you.

The Travel Creator's Toolkit
Feeling overwhelmed by the data? You don't have to be. To help you organize your strategy and implement everything you've learned, we've created the ultimate resource bundle. It includes checklists, templates, and tools designed to accelerate your journey from beginner to pro.
Download Your Free Bundle: The Travel Creator's Toolkit
The High-Margin Alternative: Referral & Revenue Share Models
While traditional commission models are powerful, the most forward-thinking creators are diversifying into referral and revenue-sharing programs. Instead of a one-time payment for a single sale, these models allow you to build long-term, passive income streams by becoming a true platform partner.
This is the philosophy behind the TrekGuider Seller Platform. We believe in empowering creators to build complex businesses. Our platform is designed for you to sell your own digital products—like itineraries and guides—but our referral program adds another powerful layer to your income strategy.
Instead of a simple CPS commission, our model functions like a sophisticated multi-tier system. When you refer other creators to become sellers on TrekGuider, you earn an ongoing share of the revenue they generate, with tiered commissions that start at 4% for referred sellers. You’re not just earning from a single transaction; you’re building a network and earning from its collective success. It's a strategic way to move beyond chasing individual sales and start building a more resilient, high-margin business.
Frequently Asked Questions (FAQ)
1. Is a higher commission rate always better? Not at all. A high commission rate can be misleading if the program has a low conversion rate, a short cookie duration, or a low average order value. Always look at your Earnings Per Click (EPC) to determine the true profitability of a program for your audience.
2. How can I find the EPC for an affiliate program? Most reputable affiliate networks (like CJ Affiliate, ShareASale, or Travelpayouts) provide EPC data. It's often listed as a network-wide average for each merchant, which gives you a good baseline. Once you start sending traffic, you can track your own personal EPC in your performance reports.
3. Can I negotiate my affiliate commission rates? Yes, absolutely. Once you become a proven partner and consistently drive a significant volume of high-quality sales, you have leverage. Many brands are willing to negotiate a higher, private commission rate for their top-performing affiliates. Always track your performance and don't be afraid to ask.

From Confusion to Command
You are no longer in the dark. The world of affiliate commission rates is no longer a confusing black box. You now have the knowledge to deconstruct any program's payment structure, the industry benchmarks to know your worth, and the key metrics to identify what truly drives profit.
This knowledge is power. It empowers you to audit your existing partnerships, confidently seek out new ones, and even negotiate better terms. By focusing on programs with fair commissions, long cookie durations, and high conversion rates, you can ensure your hard work is properly rewarded. Building a profitable travel content business requires a strategic approach, and a deep understanding of affiliate commission rates is a non-negotiable part of that strategy.
Read the full guide: The Travel Blogger's Playbook to Affiliate Marketing Mastery
Don't Miss Out! Subscribe for Exclusive Content
Subscribe


Comments 0
No comments yet
Be the first to share your experience!
Dont Miss Out! Subscribe for Exclusive Content

Ultimate USA Holidays Guide: Top Picks

FTC Affiliate Disclosure: Stay Compliant as a Travel Creator

Essential Affiliate Tools: From Tracking to Full Optimization

Avoid These 5 Affiliate Landing Page Mistakes for Better Conversions

Affiliate Keyword Research Mastery for Travel Blogs

Booking.com Affiliate Review: Pros, Cons & Earnings
St. Patrick's: River Dyeing Secrets
TrekGuider @trekguider
You’ve seen the photos, and they look impossible: a major American river, flowing through a canyon of skyscrapers, glowing with the emerald-green hue of a shamrock. It’s a spectacle so surreal it feels like a clever digital edit. But it’s real, and the biggest problem for any traveler is that witnessing this world-famous tradition feels like a logistical nightmare. Where are the best spots? What time do you really need to arrive to beat the hundreds of thousands of spectators? And how do they even accomplish this magical feat without creating an environmental disaster?
Without a rock-solid plan, you risk being swallowed by a sea of green, craning your neck for a sliver of water between a thousand heads, only to miss the fleeting moment of transformation. You could spend hours shivering in the Windy City's notorious March air and leave with nothing but a blurry photo and the bitter taste of disappointment. This iconic event is the dazzling centerpiece of the city's festive calendar, a unique urban ritual that we place in the broader context of the city's year-round celebrations in our complete guide to Chicago Holidays: Windy City Thrills. Don't let poor planning rob you of the magic.
This is your definitive insider’s guide. Forget the guesswork. We are pulling back the curtain on the river dyeing secrets, from the history and science behind the tradition to a minute-by-minute game plan for a perfect day. You will learn the absolute best viewing locations, the parade navigation hacks locals swear by, and how to transform a potentially chaotic day into an unforgettable urban adventure.

The Legend of the Green River: An Accidental Tradition
While Chicago’s St. Patrick's Day Parade is one of the nation's oldest, with roots stretching back to 1843, the tradition that truly puts it on the global map is much younger. The practice of dyeing the Chicago River green was born in 1962 from a moment of pure, serendipitous observation. Stephen Bailey, then the business manager of the Chicago Journeymen Plumbers Local Union, noticed that a dye plumbers used to detect leaks and pollution sources in the river had stained a worker's white overalls a perfect, brilliant shade of Irish green.
A lightbulb went off. If that small amount of dye could stain fabric so vividly, what could a larger quantity do to the entire Chicago River? The Plumbers Union, a key sponsor of the parade, decided to find out. For the inaugural dyeing, they released 100 pounds of the chemical into the river, which, to their astonishment, kept the waterway a radiant green for nearly a week. The spectacle was an instant sensation, captivating the city and cementing a new, indelible tradition. Over the decades, the process has been perfected and the formula made environmentally safe, but the magic—and the stewardship of the event—remains firmly in the hands of the Plumbers Union, proof of a quirky idea that became a beloved civic institution.
The Science of the Spectacle: How Orange Powder Turns a River Green
The most closely guarded secret in Chicago isn't a political backroom deal; it's the precise formula for the dye that transforms the river. What we do know is that it’s a vegetable-based powder, making it completely safe for the river's ecosystem. The real visual trickery, however, lies in its color. When you see the crew on the boats scooping the substance from its container, you’ll notice it’s a bright, fiery orange.
The magic happens the moment the powder hits the water. Through an immediate chemical reaction, the orange powder blossoms into a brilliant emerald green. The process is a well-oiled machine. Two to three motorboats from the Plumbers Union perform the honors. One larger boat dumps between 40 and 60 pounds of the powder into the river just east of the DuSable Bridge (Michigan Avenue), creating a thick, concentrated streak of color. Smaller boats then zip back and forth through the dyed water, acting like giant egg beaters to churn the color and ensure it spreads evenly from bank to bank.
The initial streak of green is intense and almost fluorescent before it mellows into a rich, opaque emerald. The vibrant color holds for about five to six hours, allowing plenty of time for photos and for parade-goers to marvel at the sight before it naturally dissipates into Lake Michigan.
Pro-Tip: Many first-time visitors worry about the environmental impact. Rest assured, the original oil-based fluorescein dye was replaced with the current eco-friendly, vegetable-based powder decades ago. The Plumbers Union takes immense pride in the tradition being a safe spectacle that harms no wildlife.

Your Ultimate Viewing Guide for the St. Patrick's Day Chicago River Dyeing
Securing a good spot to watch the river dyeing is the single most important part of your plan. The event officially begins at 10:00 AM, but the crowds start forming hours earlier. Here are the best places to stake your claim, broken down by experience.
For the Iconic Postcard Shot: The Bridges
The East Side of the DuSable Bridge (Michigan Avenue): This is ground zero, the quintessential, postcard-perfect view. You get the iconic architecture, the Wrigley Building, the river, and the boats all in one frame. However, it is the most crowded spot on the planet for that hour. You must arrive by 7:00 AM, at the latest, to get a front-row spot against the railing.
The West Side of the Columbus Drive Bridge: Offering another fantastic, elevated vantage point, this bridge is slightly less famous than Michigan Avenue, so it can be marginally less packed. It’s also very close to the parade’s starting point, making for an easy transition.
For an Immersive, Water-Level View: The Riverwalk
The Chicago Riverwalk (Upper and Lower Levels): The stretch of the Riverwalk between Michigan Avenue and Columbus Drive puts you right at water level. It offers a unique and dramatic perspective as the green tide flows past. It’s fantastic for close-up photography and feeling completely immersed in the action. The lower level fills up extremely fast, and police will restrict access once it hits capacity, so get there early and be prepared to stay put.
For a More Relaxed, Crowd-Averse Experience
West of Michigan Avenue (Wabash, State, or Dearborn Street Bridges): The further west you go from the main dyeing area, the thinner the crowds become. You can still see the beautifully green river from these bridges without the intense crush of people. This is an excellent option for families with small children or anyone who prefers a bit more breathing room. You won't see the boats actively dumping the dye, but you'll see the stunning final product.
The St. Patrick's Day Chicago Game Plan: A Minute-by-Minute Timeline
To truly master the day, you need a strategy. Here is a timeline for Saturday, the Saturday before St. Patrick's Day, to ensure you see everything without the stress.
It’s a crucial distinction for planning: St. Patrick’s Day itself falls on Monday, March 17, 2026, but the city holds its main celebrations—the dyeing and the parade—on the preceding Saturday, March 15th. This allows for the largest possible turnout and a full day of festivities.
7:00 AM - 7:30 AM: The Early Bird Gets the View This is not an exaggeration. If you want a prime spot on the Michigan or Columbus bridges, you need to be there now. Grab a coffee and a pastry, dress in more warm layers than you think you need (the wind off the river is biting), and claim your territory. The city is still quiet, and the energy is just starting to build.
8:00 AM - 9:30 AM: The Green Tide Rises The crowds will begin to pour in. The bridges and the Riverwalk will fill up rapidly. This is the time to hold your ground and soak in the atmosphere. It’s a fantastic people-watching opportunity as the city transforms into a sea of green attire, from shamrock glasses to full-blown leprechaun suits.
10:00 AM: The Magic Moment The Plumbers Union boats will make their appearance. Watch as the crew begins dispersing the secret orange powder. You’ll see the first vibrant streaks of green appear in the boat’s wake, quickly spreading across the river’s surface as the crowd erupts in a collective cheer. This is the moment you came for.
10:30 AM - 11:30 AM: Soak It In and Reposition The river is now a stunning sheet of emerald. Take your photos and enjoy the incredible sight. Once the dyeing is complete, the crowds will begin to shift as people start moving toward the parade route. This is your window to either grab a quick bite or start making your way south to Columbus Drive.
Feeling inspired to document this incredible day? Capture every vibrant moment with our free The Travel Creator's Toolkit, packed with guides for stunning photography and videography to make your memories last a lifetime.
Navigating the Parade: From Columbus Drive to Victory
With the river successfully turned green, the city’s attention shifts to the grand St. Patrick's Day Parade. This is a massive celebration of Irish heritage featuring hundreds of groups, including traditional bagpipers, Irish dancers, elaborate floats, and local dignitaries.
Parade Start Time: 12:15 PM
Parade Route: The parade proceeds north along Columbus Drive, starting at Balbo Drive and ending at Monroe Drive. The main viewing stand is located in front of Buckingham Fountain.

Tips for a Great Parade Experience:
Best Viewing Spot: The area around Buckingham Fountain is the heart of the action, but it’s also the most crowded. For a more relaxed experience, find a spot further north along Columbus Drive toward Monroe.
Arrive with a Plan: The parade route is long. Pick a spot and stick to it. Trying to move through the dense crowds once the parade starts is nearly impossible.
Facilities: Portable restrooms are available along the route, but expect long lines. Plan accordingly. Food and drink vendors are also present, but it’s wise to bring your own water and snacks to avoid the high prices.
Pro-Tip: Public transportation is your best friend. The CTA 'L' trains will be packed, but they are far more efficient than trying to drive and park anywhere near Grant Park. Street closures are extensive. Exit at a stop in the Loop and walk the final few blocks to the river or parade route.
Beyond the River: Celebrating Like a Chicagoan
The river dyeing and parade are the main events, but the celebration extends throughout the city. To truly experience the day like a local, consider adding one of these activities to your itinerary.
Visit an Authentic Irish Pub: Chicago has a rich Irish heritage and the pubs to prove it. Head to neighborhoods like River North or Lincoln Park to find establishments like The Kerryman or Fado Irish Pub for a pint of Guinness, some traditional corned beef and cabbage, and live music.
Explore the Irish American Heritage Center: Located on the city's northwest side, this center often hosts a full-day festival with music, dance, food, and cultural exhibitions, offering a deeper connection to the holiday’s roots away from the downtown crowds.
Enjoy a Themed Cruise: Several boat tour companies offer special St. Patrick's Day cruises on the green river. This is a fantastic way to get an unparalleled view away from the crowded bridges, though tickets are pricey and must be booked months in advance.
Planning a bigger trip around this event? Our comprehensive Travel Guide has everything you need to explore Chicago's neighborhoods, find the best eats, and build the perfect itinerary for a multi-day adventure in the Windy City.
Your Mission, Should You Choose to Accept It
You are now armed with the secrets of the green river, a strategic timeline, and insider tips to navigate the festivities. You have the knowledge to bypass the chaos and witness one of the world's most unique and joyful celebrations like a seasoned pro. The magic of St Patrick's day Chicago is not just in the spectacle itself, but in the shared energy of a city coming together to create something beautiful and fleeting. So, dress in your finest green, brave the March chill, and go make memories that will last far longer than the color in the river.
Don't Miss Out! Subscribe for Exclusive Content
SubscribeComments 0
No comments yet
Be the first to share your experience!
Dont Miss Out! Subscribe for Exclusive Content

San Francisco Cherry Blossoms: A Local's Guide to the Blooms

Halloween SF: Haunts Without Horrors

SF Festivals: 7 Must-See Lineups

Christmas SF: Lights & Wharf Wonders

SF Pride: 6 Route & Party Hacks

Chinese New Year SF: Parade Essentials
July 4th NYC: Best Fireworks Views
TrekGuider @trekguider
Trying to see the Macy's 4th of July fireworks in New York City can feel like plotting a military campaign. You know it’s one of the most spectacular patriotic displays on the planet, a dazzling barrage of color and sound against the world’s most famous skyline. But the thought of navigating the colossal crowds, deciphering the cryptic official viewing spots, and battling for a sliver of sidewalk with a view of a brick wall is enough to trigger a full-blown anxiety attack.
You’re haunted by visions of being pinned for hours in a human gridlock, craning your neck to see absolutely nothing, with no access to a restroom or a bottle of water. What if you spend all day planning, only to find your chosen spot has been unceremoniously cordoned off by the NYPD? The dream of a magical Independence Day quickly sours into a logistical nightmare, leaving you sweating on a crowded street corner wondering why you didn't just stay home and watch it on TV.
Forget the chaos. This is your definitive battle plan for conquering the crowds and securing a breathtaking view. We’ve distilled the official intel and insider secrets into a foolproof strategy. Whether you want a free patch of grass with a picnic or a more civilized vantage point, this guide will equip you for an unforgettable Fourth of July in New York.

Understanding the Main Event: The Macy's Fireworks Spectacular
Let’s be clear about the sheer scale of this operation. The Macy's 4th of July Fireworks isn't just a show; it's the nation's largest pyrotechnic spectacle, a city-shaking tradition that paints the skyline with thousands of carefully choreographed shells launched from barges on the water. For Friday, July 4, 2026, the show continues its reign on the East River, meaning the most coveted views will be found along the waterfronts of Brooklyn, Queens, and Manhattan.
This isn't a casual affair where you can wander up a few minutes before showtime. It's a massive, city-wide celebration that demands a solid game plan. While the fireworks are an undisputed summer highlight, they're just one piece of the city's vibrant celebratory calendar, which we cover in our definitive guide to New York Holidays: 10 Must-Do Events. Thinking about your trip through this lens—as one epic event among many—is the key to unlocking a truly memorable visit.
The Best Free Viewing Spots for the Fourth of July in New York
Securing a great free spot is the holy grail for most spectators. It requires a healthy dose of patience and impeccable timing, but the reward is a front-row seat to history without spending a dime. The secret is knowing precisely where to go and, just as critically, which tourist traps to avoid.
Brooklyn's Cinematic Waterfront Views
For years, the Brooklyn waterfront has offered the most cinematic views of the fireworks, framing the pyrotechnics against the iconic Manhattan skyline. This is where you go for the postcard shot.
Transmitter Park (Greenpoint): Consistently hailed as a top-tier viewing location, this park offers a direct, jaw-droppingly clear sightline across the East River. Its open, grassy layout is a godsend, providing more room to spread out a blanket than the narrow promenades elsewhere. But its reputation precedes it. To claim a decent piece of turf, you must arrive by 6 PM at the absolute latest.
Domino Park (Williamsburg): With its clever multi-level design, reclaimed factory artifacts, and ample seating, Domino Park is a phenomenal—and popular—option. The elevated walkway provides a unique perspective, and the park's modern amenities (hello, clean restrooms!) make the long wait far more civilized.
East River State Park (Williamsburg): Just a short walk from Domino Park, this location offers a more traditional park experience with a sprawling grassy lawn. It’s a magnet for families and larger groups looking to set up a proper picnic and make a full day of it.
Manhattan's Official Front Lines (and What to Expect)
Manhattan offers official, NYPD-managed viewing points that get you incredibly close to the action. However, this proximity comes at the cost of the highest crowd density and the tightest security.
Official Access Points: The city announces these designated entry points a few days before the event, typically along the FDR Drive in the East Village, Murray Hill, and Midtown East. Check the official Macy's or NYC websites on the day of the event for the exact cross-streets.
The No-Go Zones: Heed the official warnings. The city explicitly advises spectators to avoid FDR Drive in Midtown, Battery Park, and the Brooklyn Heights Promenade. These areas will either be completely closed to the public or offer severely obstructed views. Don't be the tourist who wastes hours trekking to a dead end.
Queens: The Savvy Spectator's Choice
Often overlooked by the masses flocking to Brooklyn, the Queens waterfront in Long Island City provides views that are every bit as stunning, but often with slightly more breathing room.
Gantry Plaza State Park: This park is a true gem, famous for its iconic Pepsi-Cola sign and beautifully restored waterfront gantries. It offers a sweeping panorama of the Midtown skyline, which serves as the ultimate canvas for the fireworks display.
Hunter's Point South Park: Located just south of Gantry Plaza, this park boasts a vast, open green space perfect for laying down a blanket. It’s an excellent alternative for those looking to escape the most intense choke points in Manhattan and Brooklyn.

Pro-Level Strategy: Navigating Security and Human Gridlock
Experiencing the Fourth of July in New York is as much about logistical prowess as it is about patriotic fervor. This is not a casual security checkpoint. The NYPD's presence is comprehensive, involving everything from drones providing aerial surveillance and metal detectors at entry points to NYPD scuba divers patrolling the river itself. This isn't to intimidate, but to ensure a safe event for millions.
Your Arrival and Entry Checklist
Embrace the Early Bird Ethos: We cannot overstate this. For prime real estate like Transmitter Park, a 6 PM arrival is the bare minimum. For the official Manhattan zones, dedicated viewers begin lining up in the early afternoon. The later you arrive, the more likely you are to be watching the back of someone's head.
Pack Like a Pro: You will be on your feet or sitting on the ground for hours. Comfort matters most, but you also need to breeze through security. Large backpacks, coolers, alcohol, and lawn chairs are almost always prohibited. Knowing what to bring—and what to leave behind—is crucial. Our How to Pack Light Guide offers brilliant strategies for carrying just the essentials, a skill that's just as valuable for a day in the city as it is for a week-long trip.
Trust but Verify (Your Sources): On July 4th, follow the NYPD and Macy's on social media or refresh their websites. Viewing points can and do change or close without notice based on crowd capacity. A quick check before you head out can save you from a massive, frustrating detour.
The Buddy System is Non-Negotiable: In crowds of this magnitude, getting separated is incredibly easy. Establish a clear, unambiguous meeting point in advance (e.g., "the corner of X and Y," not "by the hot dog stand"). Keep your phones fully charged, and consider sharing your location with your group via a mapping app.
Pro-Tip: Public transportation is your only sane option. Do not even entertain the idea of driving. Street closures begin in the early afternoon, and parking is a fantasy. The subway is the most efficient way to get close to the action, but expect platforms and train cars to be packed to capacity. Plan your route, buy your MetroCard in advance, and budget at least double the normal travel time.

Beyond the Fireworks: Mastering the All-American Picnic
The fireworks are the grand finale, but Independence Day is an all-day affair. A classic American picnic is the perfect way to spend the afternoon, soaking in the city's festive energy in a more relaxed setting before diving into the waterfront fray.
Prime Picnic Parks (Well Away from the Fireworks Chaos)
Central Park: It’s the quintessential NYC experience for a reason. Head to the vast Sheep Meadow or the Great Lawn, find a spot under a tree, and enjoy the people-watching. You won't see the main fireworks from here, but it’s the perfect stage for your pre-show festivities.
Prospect Park, Brooklyn: Often called Brooklyn's answer to Central Park, the Long Meadow in Prospect Park offers a similarly idyllic and expansive setting. It’s a favorite among locals and provides a more laid-back, community-focused vibe.
Governors Island: A quick and scenic ferry ride away, Governors Island is a true urban oasis. With its sprawling lawns, hammocks, and unparalleled views of the Statue of Liberty, it’s an ideal place to decompress for the day before heading back for the evening's main event.
Your Picnic Pack-Out List
The Spread: Stick to classics that travel well: gourmet sandwiches, cold fried chicken, pasta salads, and fresh fruit. Most importantly, bring more water than you think you'll need. Remember that alcohol is prohibited in public parks.
The Comfort Kit: A large, durable blanket is your foundation. Sunscreen, hats, and sunglasses are absolutely essential for a long day outdoors.
The Clean-Up Crew: Pack a dedicated trash bag and commit to the golden rule of picnicking: leave your spot cleaner than you found it.
Paid Options for a Crowd-Free Fourth of July in New York
If the idea of battling the masses for a patch of grass makes you want to run for the hills, several paid alternatives offer a more comfortable and exclusive experience. These options require booking far in advance and come at a premium, but for many, the guaranteed view and amenities are worth every penny.
Rooftop Bars and Viewing Parties
Many hotels and restaurants with prime real estate in Midtown East, Williamsburg, and Long Island City host ticketed fireworks viewing parties. These events typically include an open bar, food, and live music, all with an elevated, unobstructed view high above the street-level chaos. Expect tickets to start in the low hundreds and sell out weeks, if not months, ahead of time.
Fireworks Cruises on the East River
For a truly cinematic experience, watch the fireworks from the water itself. Numerous companies offer July 4th dinner cruises that place you directly on the East River, offering an unparalleled, up-close perspective of the show.
The Perks: You get a completely unobstructed view, dinner and drinks are often included, and you have access to clean, private restrooms—a luxury that cannot be overstated.
The Price: This is the most expensive option, with prices frequently ranging from $150 to over $500 per person. They are incredibly popular and must be booked months in advance.
Pro-Tip: When booking any ticketed event, do your due diligence. Scrutinize the venue's location on a map to confirm its viewing position relative to the fireworks barges. Search for reviews and photos from previous years' events to ensure the view is as spectacular as advertised. Not all "river views" are created equal.

Your Mission: An Unforgettable Independence Day
You are now armed with the strategy and insider intelligence to make your Fourth of July in New York a resounding success. The key is to decide on your desired experience—a free-for-all on the grass, a civilized seat at a rooftop bar, or a luxurious view from the water—and plan with precision. Arrive early, pack smart, and stay informed.
This is about more than just watching fireworks; it's about taking part in a quintessential American tradition in the most dynamic city on Earth. You're no longer a tourist hoping for a lucky break; you're an insider with a plan. Go forth, claim your spot, and create some dazzling memories. And when you're ready to plan your next great urban adventure, our comprehensive Travel Guide is packed with the expert resources you need to make every trip a masterpiece.
Don't Miss Out! Subscribe for Exclusive Content
SubscribeComments 0
No comments yet
Be the first to share your experience!
Dont Miss Out! Subscribe for Exclusive Content
San Francisco Cherry Blossoms: A Local's Guide to the Blooms
Halloween SF: Haunts Without Horrors
SF Festivals: 7 Must-See Lineups
Christmas SF: Lights & Wharf Wonders
SF Pride: 6 Route & Party Hacks
Chinese New Year SF: Parade Essentials
Solo Travel Packing: Pack for Freedom, Not Fear
TrekGuider @trekguider
Forget every checklist you’ve ever downloaded. The internet is littered with lists of what to pack, but they all miss the fundamental point. For a solo traveler, the contents of your bag are secondary. What truly matters is the system behind it. Mainstream packing advice is a trap, designed for travelers who can lean on a partner. But for you, every ounce and every decision is a direct reflection of your independence.
The secret the pros know is this: packing isn’t a chore you endure before a trip. It is the first, most critical act of the adventure itself. It’s a declaration of self-reliance. Getting it wrong leads to the classic traveler mistakes: wrestling an overstuffed bag on a crowded train, becoming an obvious target, or having a minor inconvenience like a dead phone escalate into a genuine crisis in an unfamiliar city.
This is not another packing list. This is a manifesto on the philosophy of smart travel. We’re going to dismantle the conventional wisdom and replace it with a set of battle-tested systems. These are the solo travel packing hacks that go beyond gear, transforming your bag from a burdensome anchor into a strategic asset for a safer, more mobile, and profoundly more liberating journey. Of course, packing is just one piece of the puzzle. For the complete playbook on traveling alone, be sure to consult our master resource on Anxious to Adventurous: Solo Travel Tips for Confidence.

The Mindset Shift: Why Your Bag is Your Most Important Travel Companion
For a solo traveler, your pack is your superpower. It’s your home, your toolkit, and your shield. Embracing this mindset is the key. A masterful packing strategy isn’t about what you leave behind; it’s about what you gain—freedom from the tyranny of heavy luggage, the anxiety of unpreparedness, and the vulnerability that comes with looking like a lost tourist.
This philosophy is built on three core pillars:
Radical Self-Reliance: You are your entire support system. Every item must be a tool that empowers your independence, from a simple roll of duct tape for on-the-fly repairs to a power bank that ensures you are never without your digital lifeline.
Calculated Efficiency: Your time and energy are your most precious resources. An intelligently organized bag means less time spent rummaging for a charging cable and more time savoring a sunset. It means navigating cobblestone streets and endless train station stairs with ease, not exhaustion.
Proactive Security: A smart packer moves with confidence, and confidence is a powerful deterrent. This isn't about paranoia; it's about preparation. It’s choosing and organizing your gear in a way that makes you a "hard target," so you can focus on the joy of discovery.
System 1: The Capsule Wardrobe - A Masterclass in Infinite Style, Minimal Space
The Philosophy: More Options from Fewer Items
Recommended: The Solo Female Travel Safety Guide
Recommended: How to Pack Light: The Carry-On Guide
The capsule wardrobe isn't just a space-saving technique; it's a strategic weapon against decision fatigue. The goal is to create a small, curated collection of versatile, interchangeable clothing. This ensures you feel confident and appropriate in any situation, from a morning market stroll to an impromptu dinner invitation, without ever having to waste mental energy on what to wear.
The Method in Action
This system works by making smart, upfront choices. For example, a common framework for a one-week trip is the 5-4-3-2-1 guideline: 5 sets of socks/underwear, 4 tops, 3 bottoms, 2 pairs of shoes, and 1 layering piece. But the real magic is in the details.
Invest in high-performance fabrics. Merino wool is the undisputed champion for solo travelers; it’s temperature-regulating, moisture-wicking, and naturally odor-resistant, meaning you can wear it multiple times without washing. One merino wool shirt does the work of three cotton ones.
Build on a neutral palette. Sticking to a base of colors that all work together (black, grey, navy, tan) creates dozens of potential outfits. You can then add personality with a lightweight, colorful scarf or a unique accessory—items that provide maximum visual impact for minimal packing space.
System 2: Modular Organization - The Secret to Effortless Efficiency & Discretion
The Philosophy: A Place for Everything, and Everything in Its Place
How you organize your bag is a strategic choice. A chaotic bag bleeds time and energy. Worse, it forces you to expose your entire inventory just to find one item, a critical vulnerability in a shared hostel dorm. The goal is to create a modular system that allows you to access exactly what you need, when you need it, without disrupting anything else.
The Method in Action
The key element of modular organization is compartmentalization.
Packing cubes are the gold standard. They aren’t just for compression; they turn your backpack into a tidy chest of drawers. By using different colored cubes for different categories (e.g., blue for tops, red for bottoms, grey for electronics), you can retrieve an item in seconds, discreetly and efficiently.
The rolling method is foundational. Tightly rolling your clothes is superior to folding. It minimizes wrinkles and allows you to see every piece of clothing at a glance within your packing cube, eliminating the need to dig.
System 3: The Fortress of Self-Reliance - Your Security & Problem-Solving Toolkit
The Philosophy: Prepare for the Worst, Enjoy the Best
True freedom on the road doesn't come from hoping problems won't arise. It comes from the quiet confidence that you can handle them when they do. This system is about building a portable fortress of security and a toolkit for self-reliance, so you can explore with an unshakeable peace of mind.
The Three Layers of Your Fortress
Layer 1: Proactive Gear Security
The goal here is to make yourself a less appealing target. Opportunistic thieves look for easy wins.
Carry a decoy wallet with a small amount of local currency and some expired cards. If confronted, you can hand it over without losing your essential documents.
Use a simple carabiner to clip the zippers of your daypack together. It’s not a high-security lock, but it’s an effective deterrent against a pickpocket trying to subtly slide your bag open in a crowd.
Layer 2: Personal & Digital Safety
Your well-being matters most. These items are non-negotiable.
A rubber door stop is one of the most effective, low-cost security tools you can carry. Shoved under your hotel or Airbnb door, it provides a powerful physical barrier against unwanted entry.
Your phone is your lifeline. A dead phone is a safety crisis. Always carry a fully charged power bank (at least 10,000mAh).
Public Wi-Fi is a hunting ground for data thieves. Using a VPN on your phone and laptop is essential to protect your banking information and passwords.
Layer 3: The "MacGyver" Multi-Tools
When you’re alone, small problems can become major headaches. The MacGyver mindset is about packing a few multi-purpose items that can solve countless issues.
Wrap a few feet of duct tape around a water bottle or pen. It can repair a broken sandal, patch a backpack, or serve as a makeshift bandage.
A bandana or sarong is the ultimate multi-tool. It can be a towel, a sun shield, a dust mask, a makeshift bag, or a privacy screen.
Beyond the Gear: Packing for the Solo Experience
Expert packing goes beyond the purely practical. It’s also about packing for your emotional well-being and enhancing the unique moments that solo travel offers.
Pack a sensory comfort item. Loneliness can strike unexpectedly. Something small that connects you to home—a few of your favorite tea bags, a familiar scent, a silk pillowcase—can be an incredible comfort.
Bring a social icebreaker. A simple deck of playing cards placed on a table in a hostel common room is a universal invitation to connect with other travelers, breaking down language and cultural barriers instantly.
Empower your inner photographer. Don't let being solo stop you from getting great photos. A small, flexible mini tripod allows you to use your phone's self-timer for stunning shots that aren't just selfies. The "video screenshot hack" is another pro move: record a short video of yourself moving through a scene, then scrub through it later to pull out perfect, candid-looking still images.
Conclusion: Stop Packing, Start Preparing
You now possess the framework. The difference between an amateur and an expert traveler isn't what they pack, but how they think. It’s the understanding that a capsule wardrobe is about mental clarity, modular organization is about efficiency, and a fortress of self-reliance is about absolute freedom.
This guide was the "why." You have the philosophy.
Now it's time for the "what." To put these systems into practice, you need the right tools. We've compiled everything—every piece of gear, every item of clothing, every essential document—into one definitive resource.
Your next step is clear. Take these principles and build your ultimate kit with our . It’s the tactical playbook that will bring this strategy to life.
Read the full guide: Anxious to Adventurous: The Ultimate Guide to Solo Travel Confidence
Don't Miss Out! Subscribe for Exclusive Content
SubscribeComments 0
No comments yet
Be the first to share your experience!
Dont Miss Out! Subscribe for Exclusive Content
Ultimate USA Holidays Guide: Top Picks
FTC Affiliate Disclosure: Stay Compliant as a Travel Creator
Essential Affiliate Tools: From Tracking to Full Optimization
Booking.com Affiliate Review: Pros, Cons & Earnings

Decoding Affiliate Commission Rates: Benchmarks for Travel Creators
