TrekGuider @trekguider
Decoding Affiliate Commission Rates: Benchmarks for Travel Creators

You’re a travel creator, and you’ve entered the world of affiliate marketing to turn your passion into a profession. But you’ve quickly run into a frustrating black box: the commission structure. You see a dizzying array of percentages, acronyms like CPA and EPC, and vague promises of earnings. You’re left wondering what good affiliate commission rates even look like. Are you earning your worth, or are you leaving a significant amount of money on the table?
This confusion isn't just academic; it's a direct threat to your bottom line. The reported average monthly income for affiliates in the travel niche is an impressive $13,847, a figure that proves this is a serious enterprise. But you can't build a sustainable business on guesswork. Partnering with a program offering a flashy 40% commission—only to discover it’s 40% of their tiny margin—is a rookie mistake that costs real money. This lack of clarity makes it impossible to forecast your income, negotiate better terms, or build a truly predictable business. You feel like you’re flying blind.
This guide is your decoder ring. We are pulling back the curtain to give you a comprehensive breakdown of how affiliate commissions actually work. We will deconstruct every major commission model, provide clear, data-backed industry benchmarks, and teach you how to analyze these rates like a seasoned professional. By the end of this deep dive, you will be able to spot high-value opportunities and architect a monetization strategy that truly rewards your influence. For a complete overview of the affiliate landscape, our definitive pillar page, Travel Affiliate Programs: The 2026 Ultimate Guide, is your essential command center.
The Anatomy of a Commission: Deconstructing the Core Models
Let's cut through the jargon. An affiliate commission is simply a reward for a job well done. A company—the merchant—pays you for successfully driving a specific, valuable action, which in the travel world almost always means a completed booking or sale.
But the way that reward is calculated can vary dramatically. Understanding the underlying structure of different affiliate commission rates is the first step toward becoming a high-earning creator.
1. Cost Per Sale (CPS) or Pay Per Sale (PPS): The Industry Workhorse
You'll encounter this model most often—it's the industry's workhorse for a reason. It’s simple and transparent: when a reader clicks your affiliate link and completes a purchase, you earn a percentage of the total sale value. If you recommend a $500 hotel stay and the program offers a 6% CPS commission, you earn $30. This model directly ties your earnings to the revenue you generate, making it the gold standard for most travel bookings and gear sales.
2. Cost Per Action (CPA): Rewarding a Specific Step
Recommended: The Solo Female Travel Safety Guide
Recommended: International Travel Checklist (Printable PDF)
CPA is a broader model where you’re compensated for a specific action a user takes. While that action is often a sale (making it identical to CPS), it can also be something else. For example, a travel credit card company might pay you a CPA commission for every user who completes an application, regardless of whether they are approved.
3. Cost Per Lead (CPL): Paying for High-Value Inquiries
With a CPL model, you earn a fixed fee for each qualified lead you generate. This is common in high-ticket travel sectors where the sales cycle is long. A luxury tour operator, for instance, might pay you $50 for every user who fills out a detailed inquiry form for a bespoke African safari. You get paid for delivering a potential customer; their sales team takes it from there.
4. Tiered & Multi-Tier Structures: Incentivizing Growth
This is where commission models get more sophisticated and rewarding.
Tiered Structures: Rewarding Your Growth These are designed to reward high-performing affiliates. Your commission rate increases as you drive more sales. A program might offer a base rate of 6%, which jumps to 8% after you generate $5,000 in sales in a month, and 10% after $10,000.
Multi-Tier Structures: Building a Network These allow you to earn commissions not only on your own sales but also on the sales generated by other affiliates you recruit into the program. This effectively turns you into a partner who helps grow the program itself, creating a secondary, more passive income stream.
5. Cost Per Click (CPC): The Rare Exception
In this model, you are paid a small fee for every click your affiliate link receives, regardless of a sale. Due to its high vulnerability to fraud, the CPC model is now extremely rare in modern affiliate marketing and almost never seen in the travel space.

Industry Benchmarks: What Good Affiliate Commission Rates Look Like
So, what should you actually expect to earn? While rates vary, the travel industry has established clear benchmarks across its major categories. Here’s your cheat sheet.
Hotels & Accommodations: 2% - 7% of Booking Value This is the bread and butter for many creators, but the details are everything. A program like Expedia Group offers up to 6% of the total booking value with a 7-day cookie. In contrast, Booking.com advertises a much higher "25-40%", but this is a percentage of their commission, not the customer's total payment. This opaque structure often results in a much lower effective rate, closer to 2-4% of the final booking value.
Tours, Activities & Experiences: 6% - 8%+ This is a high-margin category with strong potential. Market leaders like Viator and GetYourGuide set the standard with base commissions of 7-8%. Adventure-focused operators like G Adventures offer 6%, which is incredibly powerful when applied to their high-ticket tours that can cost thousands of dollars.
Travel Insurance: 10% or More Insurance is a consistently high-paying vertical. Top programs like SafetyWing and World Nomads both offer a standard 10% commission. SafetyWing takes this a step further with a recurring model, meaning you continue to earn 10% every time your referred customer renews their policy.
Gear & Apparel: 3% - 8% For physical products, rates depend heavily on the retailer. Amazon Associates is the baseline, offering 3-4% for most travel categories. However, partnering with specialty retailers is far more lucrative. A brand like REI, for example, offers a 5-8% commission on high-quality (and often high-priced) outdoor gear.
Pro-Tip: Don't be blinded by the highest percentage. A 6% commission on a $3,000 G Adventures tour is $180. An 8% commission on a $50 city walking tour is $4. Always consider the average order value of the products you are promoting when evaluating affiliate commission rates.

The Metrics That Matter More Than the Rate Itself
An experienced affiliate marketer knows the commission rate is just a starting point. To truly understand a program's profitability, you need to analyze the metrics that measure real-world performance.
Earnings Per Click (EPC): Your True North This is arguably the single most important metric. It’s calculated by dividing your total commission earnings by the total number of clicks you sent. If you sent 100 clicks and earned $50, your EPC is $0.50. This number tells you the average value of every single click. A program with a lower commission but a higher EPC is often the more profitable partner for your specific audience.
Conversion Rate (CR): The Sign of a Healthy Partner This is the percentage of users who take the desired action after clicking your link. A high conversion rate is a sign of a trusted brand with a well-optimized checkout process. A program with a 10% commission that converts at 1% is less profitable than a program with a 5% commission that converts at 5%.
Cookie Duration: The Travel Creator's Safety Net This is critical in the travel space. A longer cookie duration (30, 60, or 90 days) gives your audience the time they need to research a high-consideration purchase while ensuring you still get credit. A short cookie window is a major red flag and a sign that the program may not be structured in your favor.
Pro-Tip: Dive into your affiliate dashboards. Most networks like CJ Affiliate and Travelpayouts provide detailed reports on your EPC and conversion rates for each program. Use this data to identify your true top performers—the results will often surprise you.

The Travel Creator's Toolkit
Feeling overwhelmed by the data? You don't have to be. To help you organize your strategy and implement everything you've learned, we've created the ultimate resource bundle. It includes checklists, templates, and tools designed to accelerate your journey from beginner to pro.
Download Your Free Bundle: The Travel Creator's Toolkit
The High-Margin Alternative: Referral & Revenue Share Models
While traditional commission models are powerful, the most forward-thinking creators are diversifying into referral and revenue-sharing programs. Instead of a one-time payment for a single sale, these models allow you to build long-term, passive income streams by becoming a true platform partner.
This is the philosophy behind the TrekGuider Seller Platform. We believe in empowering creators to build complex businesses. Our platform is designed for you to sell your own digital products—like itineraries and guides—but our referral program adds another powerful layer to your income strategy.
Instead of a simple CPS commission, our model functions like a sophisticated multi-tier system. When you refer other creators to become sellers on TrekGuider, you earn an ongoing share of the revenue they generate, with tiered commissions that start at 4% for referred sellers. You’re not just earning from a single transaction; you’re building a network and earning from its collective success. It's a strategic way to move beyond chasing individual sales and start building a more resilient, high-margin business.
Frequently Asked Questions (FAQ)
1. Is a higher commission rate always better? Not at all. A high commission rate can be misleading if the program has a low conversion rate, a short cookie duration, or a low average order value. Always look at your Earnings Per Click (EPC) to determine the true profitability of a program for your audience.
2. How can I find the EPC for an affiliate program? Most reputable affiliate networks (like CJ Affiliate, ShareASale, or Travelpayouts) provide EPC data. It's often listed as a network-wide average for each merchant, which gives you a good baseline. Once you start sending traffic, you can track your own personal EPC in your performance reports.
3. Can I negotiate my affiliate commission rates? Yes, absolutely. Once you become a proven partner and consistently drive a significant volume of high-quality sales, you have leverage. Many brands are willing to negotiate a higher, private commission rate for their top-performing affiliates. Always track your performance and don't be afraid to ask.

From Confusion to Command
You are no longer in the dark. The world of affiliate commission rates is no longer a confusing black box. You now have the knowledge to deconstruct any program's payment structure, the industry benchmarks to know your worth, and the key metrics to identify what truly drives profit.
This knowledge is power. It empowers you to audit your existing partnerships, confidently seek out new ones, and even negotiate better terms. By focusing on programs with fair commissions, long cookie durations, and high conversion rates, you can ensure your hard work is properly rewarded. Building a profitable travel content business requires a strategic approach, and a deep understanding of affiliate commission rates is a non-negotiable part of that strategy.
Read the full guide: The Travel Blogger's Playbook to Affiliate Marketing Mastery
Travel News


Comments 0
No comments yet
Be the first to share your experience!
You May Also Like

Ultimate USA Holidays Guide: Top Picks

FTC Affiliate Disclosure: Stay Compliant as a Travel Creator

Essential Affiliate Tools: From Tracking to Full Optimization

Avoid These 5 Affiliate Landing Page Mistakes for Better Conversions

Affiliate Keyword Research Mastery for Travel Blogs

Booking.com Affiliate Review: Pros, Cons & Earnings
TrekGuider @trekguider
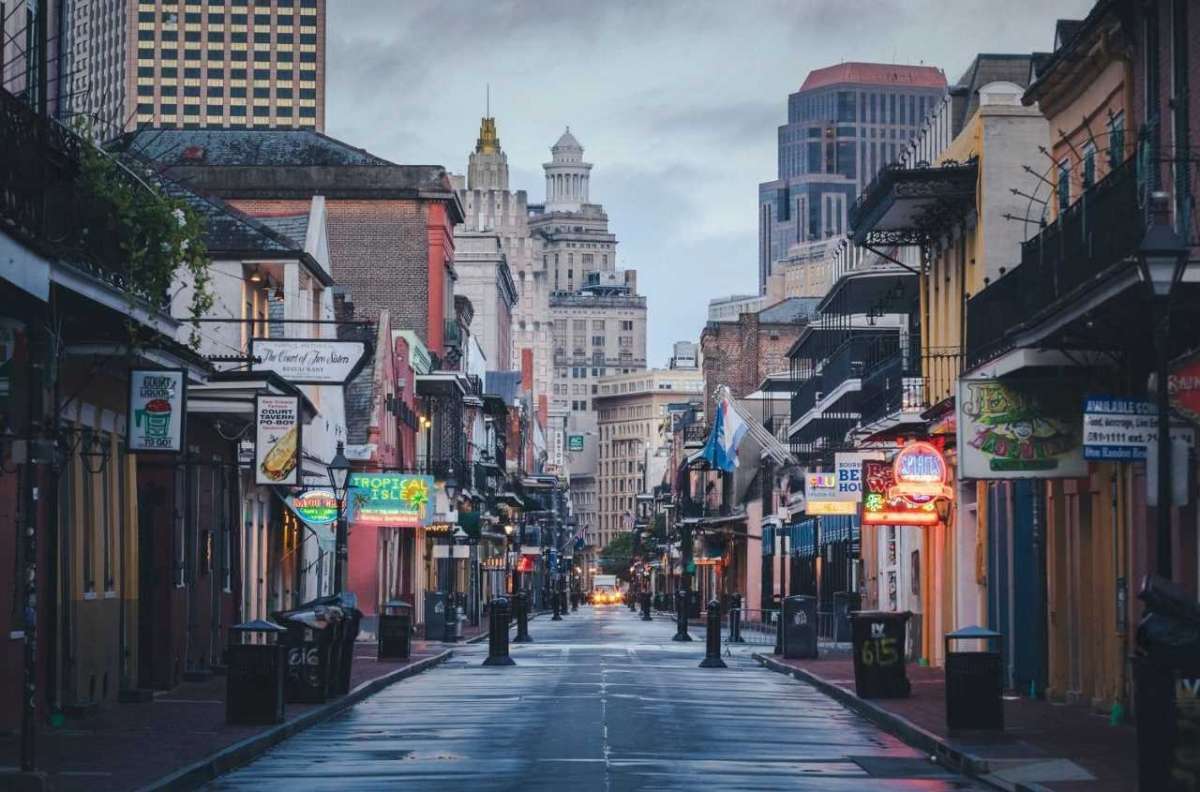
Mardi Gras: 6 Parade Survival Tips

You’ve seen the photos—a blizzard of purple, green, and gold beads flying through the air. You’ve heard the stories of jazz music spilling onto streets packed with revelers. The dream of Mardi Gras in New Orleans is a powerful one, a siren call to the world’s greatest free party. It’s a bucket-list spectacle of dazzling floats, complex costumes, and pure, unadulterated joy. But let’s be honest: the reality behind that dream can be intimidating. The sheer scale of the crowds, the labyrinthine parade schedules, and the logistical hurdles can turn a fantasy trip into a frantic mess.
Without a battle plan, you risk becoming just another overwhelmed tourist. Imagine traveling all that way only to be stuck ten rows deep, craning your neck for a fleeting glimpse of a float. Picture the rising panic of losing your friends in a sea of humanity with zero cell service, or the bone-deep exhaustion that sets in after hours on your feet, unprepared. The magic of Carnival can fade fast when you’re fighting the chaos instead of embracing it.
This is where you stop worrying. Consider this your official playbook for not just surviving, but thriving at the parades. We’re going to arm you with the insider knowledge to navigate the festivities like a seasoned pro. These six essential survival tips will transform your Mardi Gras New Orleans experience from stressful to unforgettable. This is just one of the incredible cultural celebrations we explore in our complete guide to New Orleans Holidays: Cultural Feasts, but for now, let’s master the art of the parade.
Tip 1: Decode the Schedule & Choose Your Krewes Like a Local
First, let’s clear up a common misconception: Mardi Gras isn't just one day. It's an entire season, a cultural crescendo that officially begins on January 6th and leads to the city-wide blowout of "Fat Tuesday." The parades, organized by social clubs known as "krewes," are the lifeblood of the celebration, and they hit a fever pitch in the final two weeks. Knowing which parades to see—and when—is the first step to crafting your perfect experience.
The final weekend before Fat Tuesday is when the legendary "super-krewes" roll, drawing the biggest crowds and delivering the most spectacular shows. For 2026, these are the dates to circle in red on your calendar:
Saturday, the weekend before Mardi Gras: A marathon day featuring the massive Krewe of Endymion, an evening parade so spectacular it feels like a rolling blockbuster.
Sunday, the days leading up to Fat Tuesday: The Krewe of Bacchus, another titan of Carnival, hits the streets at 5:15 PM with its own celebrity monarch and jaw-dropping floats.
Monday, the Monday before Mardi Gras (Lundi Gras): Witness history with the Krewes of Proteus and Orpheus, two stunning nighttime parades that light up the city.
Tuesday, late February (dates shift each year—check nola.com for the exact schedule) (Fat Tuesday): The grand finale. The day kicks off with the Krewe of Zulu at 8:00 AM, famous for its coveted hand-painted coconut throws, followed by the regal Krewe of Rex at 10:30 AM, whose leader is the official "King of Carnival."
Not all krewes offer the same experience. Daytime parades often have a more relaxed, family-centric vibe. Nighttime parades are a different animal entirely—lit by historic gaslight torches called "flambeaux," they are dazzling, high-energy spectacles that draw a more party-oriented crowd. Do a little research on each krewe's theme and history to find the ones that match your style.
Pro-Tip: Before you even leave your hotel, download a real-time parade tracker app from a local New Orleans news station. These GPS-powered apps show you the exact location of the parade's lead float, giving you the intel to know if you have time for a bathroom break or a food run before the action reaches you.

Tip 2: Location is Everything: How to Claim Your Parade Turf
Your viewing spot will define your entire parade experience. The primary routes snake through the stately Uptown/St. Charles Avenue corridor and along the edge of the French Quarter. For a more traditional, family-friendly atmosphere, plant yourself along St. Charles Avenue. Under the canopy of ancient oak trees, you’ll find generations of families who have claimed the same spot for decades. For a more intense, high-octane experience, the sections of the route closer to Canal Street are where the crowds roar loudest.
Let’s be clear: the golden rule of securing a good spot is to arrive obscenely early. For a super-krewe on that final weekend, we’re not talking 30 minutes ahead—we’re talking hours. This is a marathon of patience. You’ll see locals set up their full camp—chairs, coolers, and ladders—long before the first siren wails. About those ladders: you’ll see many custom-built ladder seats designed to give kids a safe, elevated view. It’s a brilliant tradition, but if you use one, follow the local etiquette: place it at least six feet back from the curb to avoid obstructing the view of those in front and to stay clear of the massive floats.
Remember, the major parades do not go through the narrow, historic streets of the French Quarter. While Bourbon Street is its own unique Mardi Gras spectacle, it is not the place to watch the krewes roll.

Tip 3: Master the Art of the "Throw" for Your Mardi Gras New Orleans Haul
The quintessential Mardi Gras New Orleans experience is reaching up and catching a string of colorful beads. These items, tossed from the floats by krewe members, are called "throws," and they are the currency of Carnival. But it’s so much more than just beads. Each krewe has its own signature throws, from decorated plastic cups and doubloon coins to light-up toys and stuffed animals. Some are true collector's items, like the exquisitely hand-decorated shoes from the all-female Krewe of Muses or the legendary painted coconuts from Zulu.
Catching the best stuff is a skill. Here’s how to improve your odds:
Engage and Make Eye Contact: Float riders are scanning the crowd for energy. Wave your arms, smile, and yell the classic line: "Throw me something, mister!" They are more likely to toss something special to someone who is clearly having a great time.
Practice Good Karma: Be aware of the people around you, especially children. If a coveted throw lands near a kid, let them have it. The spirit of Mardi Gras is communal joy, not competition.
Bring a Designated Bag: You will catch far more than you can wear or carry. A simple tote bag or small backpack is essential for stashing your loot.
Above all, be safe. The number one rule is never, ever run into the street or chase a float for a throw. These floats are enormous, pulled by tractors with limited visibility. Wait for the throws to come to you and never reach under a float. No plastic necklace is worth the risk.
Tip 4: Pack Your Ultimate Parade Survival Kit
A day on the parade route is an urban endurance event. You’ll be on your feet for hours, exposed to the elements, and a long way from your home base. A well-packed day bag is non-negotiable. Being prepared for any great American adventure requires the right checklist, and just as you’d use our National Park Road Trip Checklist to prepare for the wild, this kit will ensure you conquer the urban jungle of Carnival.
These are the absolute essentials for your Mardi Gras survival kit:
Hydration: Pack more water than you think you need. Staying hydrated is critical.
Fuel: High-energy, easy-to-carry snacks like protein bars, trail mix, and pretzels will keep your energy levels up.
Sun & Rain Gear: New Orleans weather is fickle. Pack sunscreen, a hat, and sunglasses for daytime parades, but also throw in a cheap poncho. A sudden downpour can’t ruin your day if you’re prepared for it.
Layers: A sunny 70-degree afternoon can plummet to a chilly 50 degrees after sunset. Wear layers you can easily shed or add.
Portable Power Bank: Between taking photos, coordinating with friends, and running a parade tracker, your phone battery will vanish. A portable charger is a modern-day necessity.
Sanitation Supplies: Public restrooms are of the port-a-potty variety and see heavy use. A travel-sized pack of tissues and a bottle of hand sanitizer will feel like pure luxury.
A Throw Bag: A lightweight, foldable tote is perfect for your haul.

Tip 5: Navigate the Crowds & Stay Safe Like a Pro
The sheer scale of the crowds can be staggering—this is, after all, an event that generated an $891 million economic impact in 2024. Navigating this joyful mass of humanity requires a proactive approach to safety.
First, the buddy system is not optional. Stick with your group. Before you even head out, establish a non-obvious, hyper-specific meeting point. "Under the clock at the hotel" is good. "The corner of Canal and St. Charles" is a recipe for disaster. Cell service will be spotty at best, so you cannot rely on your phone to reunite.
When it comes to getting around, forget driving. Street closures and traffic make it a nightmare. Parking, if you can find it, will be exorbitant—reserve a spot in a garage well in advance if you must bring a car. Your best bets are walking, using public transit, or grabbing a rideshare, but be prepared for surge pricing and long waits after a parade.
Pro-Tip: To move through a thick crowd, don't try to bull your way through the middle. The pro move is to retreat one block off the parade route, walk parallel to it in the direction you want to go, and then cut back in. It’s a slightly longer walk that will save you immense time and frustration.
Tip 6: Embrace the Spirit of "Laissez les Bons Temps Rouler"
Finally, the most crucial tip of all: embrace the official motto of Mardi Gras, Laissez les bons temps rouler—Let the good times roll. This isn't just a slogan; it's the city's philosophy. This celebration is a profound expression of New Orleans' unique Creole heritage, a season defined by king cake feasts, brass bands, and an unbreakable sense of community. Don't get so wrapped up in logistics that you forget to be present.
Strike up a conversation with the family next to you. Compliment a stranger's incredible costume. Share your snacks. New Orleanians are famously hospitable and love sharing their traditions. Participate in the culture, don't just observe it. To truly understand the soul of this festival and others like it, our comprehensive Travel Guide offers a deep dive into the cultural fabric of America's most fascinating cities, providing the context that turns a great trip into a meaningful one.
Your Mission: Go Forth and Conquer Carnival
You are now officially prepared. Armed with these insider strategies, you can confidently tackle your Mardi Gras New Orleans adventure. You have the knowledge to decode the schedule, claim the best spots, pack for success, and stay safe in the joyous chaos. You are no longer just a tourist hoping for the best; you are an informed participant, ready to dive into the heart of one of the world's greatest cultural spectacles.
So book the ticket, pack your most festive attire, and get ready to let the good times roll. The magic of Mardi Gras is waiting for you.
Travel News
Comments 0
No comments yet
Be the first to share your experience!
You May Also Like

San Francisco Cherry Blossoms: A Local's Guide to the Blooms

Halloween SF: Haunts Without Horrors

SF Festivals: 7 Must-See Lineups

Christmas SF: Lights & Wharf Wonders

SF Pride: 6 Route & Party Hacks

Chinese New Year SF: Parade Essentials
TrekGuider @trekguider
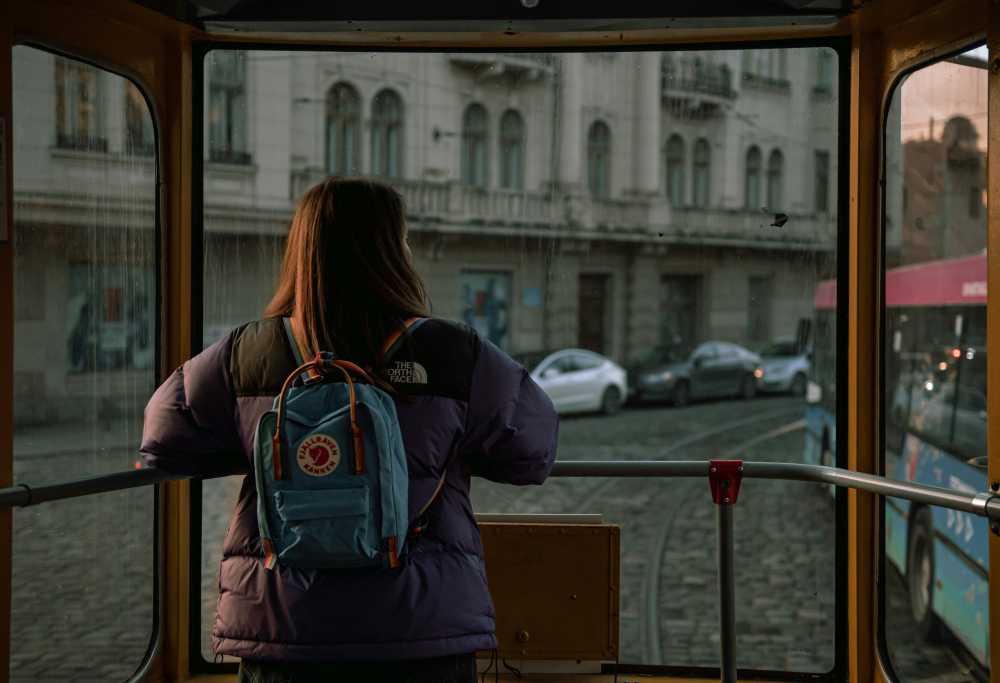
Solo Travel Europe Without Going Broke: A Realist's Guide

Does the dream of a solo trip through Europe—wandering Rome’s ancient streets, finding the perfect café in Lisbon, or watching the sunset over the Danube in Budapest—feel just out of reach because of one major hurdle? The cost. For years, the myth has persisted that a European adventure requires a massive savings account. You've seen the glamorous photos, but you’re agitated by the nagging fear that traveling alone means paying double for everything and draining your bank account.
Let's put that fear to rest. The fantastic news is that this financial barrier is crumbling. The travel industry is finally waking up to the power of the solo traveler, and a smarter, more affordable way to explore the continent has emerged. This guide is your complete playbook for an incredible solo travel Europe adventure on a budget. We'll show you how to leverage Europe’s incredible network of hostels and trains, not as a sacrifice, but as a real advantage for a richer journey. These are the essential that transform financial anxiety into confident exploration.
The First, Most Important Decision: Mastering Europe's Budget Map
The single most powerful decision you will make for your budget happens before you book a single hostel or train ticket: choosing where to go. The secret to affordable solo travel Europe is understanding that the continent has two distinct economic personalities. Your first strategic move is to divide your map into two zones: the pricier West and North, and the wonderfully affordable East and South.

This isn’t about sacrificing iconic experiences; it’s about being smart. A daily backpacker budget in Western Europe (think France, the UK, Switzerland) can easily run you $75-$125. That same travel style in Eastern Europe (Hungary, Poland, Czech Republic) will cost closer to $40-$70. To put it bluntly: a single dinner in Zurich can cost more than your entire day’s budget in Krakow.
Your Budget-Friendly Hubs (East & South): These regions are your financial superpower. They offer world-class history and vibrant culture at a fraction of the cost. Prioritize cities like:
Budapest, Hungary: Famous for its stunning architecture and thermal baths.
Krakow, Poland: A historical gem with a lively, youthful energy.
Prague, Czech Republic: A fairytale city of spires and bridges.
Lisbon, Portugal: Coastal charm, fantastic food, and a laid-back vibe.
Seville, Spain: The heart of Andalusia, with passionate culture and sunny plazas.
Athens, Greece: The cradle of Western civilization, with ancient wonders at every turn.
The Splurge-Worthy Destinations (West & North): This doesn't mean you have to skip London, Paris, or Amsterdam. It just means you visit them strategically.
Pro-Tip: Embrace the "Hybrid Trip" Strategy. Don't think in terms of "either/or." Plan to spend the bulk of your trip—say, two weeks—exploring the more affordable regions. This allows you to "bank" significant savings, which you can then deploy for a shorter, more focused four or five-day splurge in a bucket-list city like Paris without breaking the bank.
Forging Your Financial Compass
A budget isn’t a restriction; it’s a tool of empowerment. It’s what allows you to travel without financial stress. Instead of a single magic number, let's break down the costs so you can build a personalized plan.
Deconstructing the Daily Costs: Where Does the Money Go?
Recommended: The Solo Female Travel Safety Guide
Recommended: How to Pack Light: The Carry-On Guide
Forget generic advice. Your daily budget is a deeply personal number that hinges on your travel style. To give you a real-world compass, we’ve broken down the three most common approaches we see on the road:
The Bare-Bones Backpacker: $45-$65 per day. This is for the traveler who stays exclusively in hostel dorms, cooks most meals in the hostel kitchen, and focuses on free activities like walking tours and exploring neighborhoods on foot.
The Savvy Mid-Ranger: $75-$130 per day. This is the sweet spot for most. It allows for a mix of hostel dorms with the occasional private room, eating one meal out per day at a casual spot, visiting paid attractions, and enjoying the local nightlife.
The Comfort-Conscious Budgeter: $135+ per day. This budget allows for private rooms in hostels or budget hotels, dining out more frequently, and participating in unique paid experiences or guided tours.
Pre-Trip Savings vs. On-the-Ground Spending
Remember that a significant chunk of your budget will be spent before you even leave home. Factor in these major upfront costs:
International Flights: Use tools like Google Flights and Skyscanner with flexible date searches to find the best deals.
Travel Insurance: This is non-negotiable. It’s your ultimate safety net for medical emergencies or trip cancellations.
Essential Gear: A quality, comfortable backpack and two pairs of versatile shoes are your most important investments.
For your money on the ground, be a financial ninja. Get a credit or debit card with no foreign transaction fees (like the Chase Sapphire Preferred or Capital One Venture). These 2-3% charges on every purchase add up shockingly fast. Crucially, always avoid the bright blue and yellow Euronet ATMs. They are predatory, charging outrageous conversion rates and hidden fees. Stick to official bank ATMs—look for the logos of major national banks like Deutsche Bank, BNP Paribas, or Santander. Your wallet will thank you.
Sleep Smart, Save Big
For solo travelers, where you sleep is more than just a bed—it’s your social hub, your sanctuary, and your savings engine.
Hostels: Your Social Hub and Savings Engine
Hostels are the undisputed key element of budget travel in Europe. A dorm bed will typically cost between $25 and $45, a massive saving compared to a hotel. But their true value lies beyond the price tag.
Built-in Community: Hostels are designed for social interaction. The common areas, shared kitchens, and organized events (like free walking tours or pub crawls) make it incredibly easy to meet other travelers if you choose to.
Safety & Security: Modern hostels are safer than ever. Look for properties with 24-hour reception, secure individual lockers for your valuables (always bring your own padlock), and female-only dorms if that makes you more comfortable.
Amenities that Save: The communal kitchen is a budget game-changer. Cooking just a few meals a week can save you hundreds over a long trip.
When booking on sites like Hostelworld, read recent reviews like a detective. Pay close attention to comments on cleanliness, location, security, and the overall "vibe" to find the perfect fit for you.
Beyond the Dorm: Other Budget-Friendly Options
While hostels are king, they aren't your only choice. The rise of "lifestyle" hotel brands like Moxy offers smaller, stylish single rooms that can be a great value. Renting a private room on Airbnb is another option, though often pricier than a hostel. A key piece of good news: the dreaded "single supplement" fee is slowly dying. The industry has recognized the solo travel boom, and more companies are offering true single-person pricing. Once you've locked in your home base, the next piece of the puzzle is mastering the art of getting from A to B without draining your travel fund.
Mastering the Rails & Roads
Europe’s transport network is a marvel, but choosing the cheapest option requires a strategic trade-off between cost, time, and convenience. This is a critical component of your plan for solo travel Europe on a budget.
Eurail Pass vs. Point-to-Point Tickets
Is a Eurail Pass worth it for a solo traveler? The answer is: it depends.
Get a Eurail Pass if: You crave ultimate flexibility and plan to travel extensively through expensive countries like Germany, Switzerland, and Austria, where last-minute train tickets are costly.
Buy Point-to-Point Tickets if: You have a relatively fixed itinerary and are focusing on Southern or Eastern Europe. Booking individual bus or train tickets in advance on platforms like Omio or Trainline is almost always cheaper.
Pro-Tip: Before you buy a pass, map out your ideal route and price out each individual leg of the journey. Compare that total to the cost of the pass. This simple exercise can save you hundreds of dollars.
Eating Like Royalty on a Pauper's Budget
Forget surviving on instant noodles. Eating affordably in Europe can be one of the most delicious and authentic parts of your journey.
The Holy Trinity of Budget Eating
Supermarkets & Picnics: This is your #1 money-saving tactic. Visit a local grocery store or an outdoor market. Buy a fresh baguette, some regional cheese, local cured meats, fruit, and a bottle of wine for a few euros. Enjoying this feast in a Parisian park or along a Venetian canal is a 5-star experience at a 1-star price.
Hostel Kitchens: Cooking dinner with new friends in the hostel kitchen is a quintessential backpacking experience. It’s social, fun, and incredibly cheap.
Street Food & Local Markets: From gyros in Greece to pierogi in Poland, covered food halls and street food stalls are where you’ll find authentic, delicious local food for just a few dollars.

Smart Restaurant Hacks
When you do dine out, eat smart. Embrace the lunch special. Across Europe, especially the menu del día in Spain (which typically includes a starter, main, dessert, and a drink for a set price), restaurants offer multi-course lunch menus for a fraction of their dinner prices. And always use the Five Block Rule: walk at least five blocks away from any major tourist attraction before choosing a restaurant. You’ll almost always find better food at a lower price.
Two Field-Tested Budget Itineraries
Let's make this real. Here are two sample itineraries showing these principles in action.
The 3-Week Eastern Europe Classic (€50/day)
Route: Prague → Krakow → Budapest → Belgrade
The Vibe: This is the ultimate budget-friendly route through the heart of Central and Eastern Europe. You’ll experience stunning history, incredible nightlife, and delicious food and beer, all while your daily costs stay incredibly low. Transportation between these cities is fast, cheap, and easy via bus or train.
The 3-Week "Best of Both" Hybrid (€85/day)
Route: Lisbon → Seville → (Fly to) Rome → Florence → (Overnight bus to) Ljubljana
The Vibe: This itinerary demonstrates the Hybrid Strategy. You start in affordable and beautiful Portugal and Spain, then take a strategic budget flight to tackle your Italian bucket list. You finish in charming, budget-friendly Slovenia, using an overnight bus from Italy to save on both transport and a night's accommodation.
Your Top Budget Questions, Answered
How much money do I need for 1 month of solo travel in Europe?
A solo traveler can expect to spend between $1,500 (frugal backpacker in the East) and $4,500 (mid-range traveler including the West) for a one-month trip. Your destination choices and travel style are the biggest factors.
Is Europe safe for a first-time solo female traveler?
Absolutely. Europe is generally very safe for solo female travelers. Countries like Iceland, Portugal, and Slovenia are consistently ranked among the safest in the world. Standard precautions—being aware of your surroundings, securing your belongings, and trusting your gut—are key.
What is the absolute cheapest way to travel between countries in Europe?
The bus is almost always the cheapest option. Companies like Flixbus have an extensive network with fares as low as $5, making them a backpacker's best friend.
Should I travel in the summer or the off-season?
For budget travel, the shoulder seasons (April-May, September-October) are perfect. You’ll get pleasant weather with far fewer crowds and significantly lower prices for flights and accommodation compared to the peak summer months.
You now have the framework for an affordable and unforgettable European adventure. The key to a successful solo travel Europe journey on a budget isn't about restriction; it's about smart, strategic planning. By choosing your destinations wisely, embracing the social and economic power of hostels, and mastering the continent's incredible public transport, you transform a dream into an achievable, actionable plan. The freedom of the open road—and the railway—is yours for the taking.
Read the full guide: Anxious to Adventurous: The Ultimate Guide to Solo Travel Confidence
Travel News
Comments 0
No comments yet
Be the first to share your experience!
You May Also Like

Top 11 High-Paying Affiliate Programs for Travel Bloggers

High-Paying Affiliate Opportunities for Individual Travel Affiliates

Amazon Associates for Travel: Strategies to Maximize Commissions

How to Avoid Travel Scams: A Global Guide

A Woman's Guide to Safe Travel: 10 Critical Tips

7 Hotel Safety & Security Tips for Peace of Mind
TrekGuider @trekguider
The Sanity-Saving System for Your Next Family Road Trip

Staring down a long family road trip and picturing more chaos than cherished memories? You're not alone. The line between an 'epic family adventure' and a 'mobile hostage situation' can be perilously thin, often hinging on a single forgotten charging cable or a rogue juice box.
The internet offers an avalanche of checklists, but this overload often creates more anxiety than it solves. What you really need isn't another random list—it's a bulletproof system designed to transform potential chaos into predictable calm.
This is that system. Forget frantic, last-minute packing. We're moving beyond what to pack and showing you how to orchestrate a seamless journey, from pre-trip vehicle checks to a sanity-saving in-car entertainment strategy.
While this guide focuses on the mechanics of a successful road trip, it’s a critical component of a larger travel philosophy. For a broader look at destinations and trip styles, be sure to explore our comprehensive guide to Family Travel Ideas: The 2026 Guide to Unforgettable Trips to find your next perfect adventure.
Your Pre-Launch Sequence: Mastering the 2-Week Countdown
A smooth trip begins long before you pull out of the driveway. This phase is about laying a foundation of safety and organization, giving you unshakable peace of mind before the wheels even start rolling.
The Essential Vehicle Safety Audit: Your First Step
Two weeks before your departure date, it’s time to give your vehicle a thorough check-up. While entrusting this to a certified mechanic is the gold standard, you can perform a solid initial inspection yourself.
Tires: Check the pressure on all four tires (and the spare!) to ensure it matches the recommended PSI on the driver’s side doorjamb. Inspect the tread for wear; a simple way to do this is with a penny. If you can see all of Lincoln's head, it’s time for new tires.
Fluids: Check and top off all essential fluids, including engine oil, coolant, brake fluid, and windshield washer fluid.
Brakes: Listen for any squeaking or grinding noises. If you notice any changes in performance or feel a vibration when braking, have them inspected by a professional immediately.
Lights & Wipers: Test all exterior and interior lights. Check your wiper blades for signs of cracking or wear and replace them if necessary. A sudden downpour is a terrible time to discover your wipers are shot.
Child Car Seat Safety
Vehicle safety extends to your most precious cargo. An improperly installed car seat can be a critical point of failure in an accident. Take these steps:
Check for Recalls: Visit the National Highway Traffic Safety Administration (NHTSA) website to ensure your car seat model has not been recalled.
Verify Fit: Ensure your child meets the height and weight requirements for their current seat.
Confirm Installation: A properly installed car seat should not move more than one inch in any direction at the belt path. Many local fire departments have certified technicians who will inspect your installation for free.
Assembling Your Complete Roadside Emergency Kit
Your vehicle should be equipped with more than just a jack and spare tire. A well-stocked roadside emergency kit is a non-negotiable part of your travel gear.
Jumper cables
Tire pressure gauge and portable air compressor
A well-stocked first-aid kit
Roadside flares or reflective triangles
A multi-tool and a small set of wrenches
Duct tape (because it fixes everything)
Flashlight with extra batteries
Portable phone charger or power bank
High-energy, non-perishable snacks and bottled water
Documentation & Digital Organization
Ensure your car's registration and insurance information are current and easily accessible. It's also wise to have digital copies saved to your phone. Use an app to plan your route, but to keep everything in one place—from reservations to daily plans—a dedicated Travel Itinerary Template is invaluable.
Your Ultimate Road Trip Blueprint
Planning a trip through America's greatest landscapes? Don't leave anything to chance. Our free, printable National Park Road Trip Checklist covers everything from vehicle prep to the one snack you can't forget. Download it now and guarantee a smoother adventure.
A System for Your Family Road Trip Essentials
Effective packing is about organization and accessibility, not just volume. This system ensures that everything you need is exactly where you need it, preventing roadside archaeology in your trunk.

The "Car Command Center": Organizing Your In-Reach Essentials
The front passenger seat area is your mission control. Use a seat-back organizer or a small bin to keep critical items within arm’s reach.
Phone mounts and charging cables
A roll of paper towels and a pack of wet wipes
Hand sanitizer
A small trash bag or designated car trash can
Lip balm, pain relievers, and personal medications
Sunglasses for the driver and co-pilot
The Comfort Kit: Blankets, Pillows, and Personal Items
A comfortable child is a happy child. For each kid, pack a small bag containing their comfort items like a travel pillow, a soft blanket, noise-canceling headphones, and a reusable water bottle.
The Kids' "Go-Bags": Empowering Young Travelers
Give each child a small backpack that is their responsibility. This fosters independence and dramatically reduces "Can you get my...?" requests. Let them help pack it with small toys, a coloring book, a reading book, and their tablet (if applicable).
The Overnight Bag: The Hotel Stop Lifesaver
If your trip includes an overnight hotel stay, this single tactic will save your sanity. Pack one duffel bag with everything the entire family needs for a single night: a change of clothes for everyone, pajamas, toiletries, medications, and charging cables. This prevents you from lugging every suitcase into the hotel.
Your In-Car Entertainment Playbook
Boredom is the mortal enemy of a peaceful road trip. Don’t leave entertainment to chance; deploy a structured strategy to keep spirits high and sibling squabbles low.
Your Secret Weapon Against Boredom
Instead of giving kids all their new activities at once, wrap a few small, inexpensive items and present one every hour or two. The anticipation and novelty work wonders to break up the monotony.
Pro-Tip: Use a hanging shoe organizer on the back of the front seat. Each pocket can hold a new activity, snack, or surprise. This visual countdown gives kids a clear answer to "how much longer?"
The Screen-Free Activity Arsenal
Engage their minds and prevent the glazed-over look of too much screen time with these proven winners:
Audiobooks: A captivating story can make hours fly by. Borrow digital audiobooks for free from your local library using the Libby app.
Podcasts for Kids: Shows like "Wow in the World" or "Story Pirates" are both entertaining and educational.
The License Plate Game: A classic for a reason. Find a printable checklist online to track which states you’ve found.
Travel Journals: Give each older child a blank notebook and encourage them to document the trip.
Travel Bingo: Create or print bingo cards with things to spot on the road (a red truck, a cow, a bridge, etc.).
Using Technology as a Tool, Not a Crutch
Screen time isn't the enemy, but mindless screen time can lead to crankiness. Use it strategically.
Download Everything: Do not rely on cellular service. Download movies, shows, and games onto tablets before you leave.
Set Clear Boundaries: Establish rules for screen time before you start the car.
Invest in Headphone Splitters: This cheap device allows two kids to watch the same movie on one device, preventing arguments.
Mastering Snacks and Drinks for the Road
Constant stops for overpriced gas station food can derail your budget and schedule. A well-planned mobile kitchen keeps everyone fed, hydrated, and happy.

How to Pack a Cooler for Freshness
Pre-chill: Bring your cooler inside the night before and pre-chill it with a "sacrificial" bag of ice.
Ice on the Bottom: Use solid blocks of ice or frozen water bottles on the bottom, as they melt slower than cubed ice.
Layer Strategically: Place drinks at the bottom and more delicate items like sandwiches on top.
Fill the Gaps: Air is the enemy of cold. Fill any empty space with extra ice cubes.
The "Low-Mess" Snack Box
Keep a separate, easily accessible box with snacks that don't require refrigeration and minimize mess. Think protein-packed (string cheese, nuts), clean fruits & veggies (grapes, baby carrots), and crunchy classics (pretzels, goldfish).
Pro-Tip: Use a craft organizer or a tackle box with small compartments to create a "snackle box." This turns snack time into a fun, self-serve activity.
Setting the Tone for a Great Trip
The final piece of your strategy involves managing expectations and the rhythm of the journey itself.
The 2-Hour Rule: Making Pit Stops Part of the Adventure
Plan to stop every two to three hours, even if nobody needs a bathroom break. Use your map app to find interesting parks, quirky roadside attractions, or local ice cream shops. Some of the 4 Unforgettable National Park Family Travel Ideas make for incredible, itinerary-worthy stops.
Embracing Spontaneity
No matter how well you plan, things will go wrong. You’ll hit traffic, or a child will have a meltdown. The most important thing you can pack is a flexible mindset. A relaxed attitude from the parents is contagious and sets the tone for the entire trip.
Frequently Asked Questions
How do you survive a 12-hour car ride with kids?
The key is breaking the trip into manageable chunks. Use the "Slow Reveal" method for new toys and activities, and plan to stop every 2-3 hours. Have one longer stop at a park or playground midday to burn off significant energy.
What are the best mess-free snacks for toddlers in the car?
Focus on dry, bite-sized items that won't cause a sticky disaster. Puffs, small crackers (like goldfish), dry cereal, and raisins are all excellent choices. Avoid anything juicy or crumbly like peaches or flaky pastries.
What should I check on my car before a long road trip?
Recommended: Stress-Free Flying with Kids: Airport, TSA, and In-Flight Guide
Recommended: Travel Guide: Trip Planning, Flights, and Avoiding Tourist Traps
At a minimum, you must check your tire pressure (including the spare), oil and other fluid levels, brakes, lights, and windshield wipers. For maximum peace of mind on a major trip, have a trusted mechanic perform a full inspection.
Your System for a Memorable Journey
You now have more than just a packing list; you have a complete, systems-based playbook for executing a smooth and memorable road trip. By investing time in this preparation, you’re not eliminating challenges—you're building the confidence and structure to handle them with grace.
You are transforming the drive from a stressful chore into a core part of the family adventure. Pack your bags, load up the car, and get ready to create memories that will last a lifetime.
Read the full guide: Family Travel Ideas: The 2026 Guide to Unforgettable Trips
Travel News
Comments 0
No comments yet
Be the first to share your experience!
You May Also Like
Ultimate USA Holidays Guide: Top Picks
FTC Affiliate Disclosure: Stay Compliant as a Travel Creator
Essential Affiliate Tools: From Tracking to Full Optimization
Booking.com Affiliate Review: Pros, Cons & Earnings
Amazon Associates for Travel: Strategies to Maximize Commissions
