Decoding Affiliate Commission Rates: Benchmarks for Travel Creators
TrekGuider @trekguider
You’re a travel creator, and you’ve entered the world of affiliate marketing to turn your passion into a profession. But you’ve quickly run into a frustrating black box: the commission structure. You see a dizzying array of percentages, acronyms like CPA and EPC, and vague promises of earnings. You’re left wondering what good affiliate commission rates even look like. Are you earning your worth, or are you leaving a significant amount of money on the table?
This confusion isn't just academic; it's a direct threat to your bottom line. The reported average monthly income for affiliates in the travel niche is an impressive $13,847, a figure that proves this is a serious enterprise. But you can't build a sustainable business on guesswork. Partnering with a program offering a flashy 40% commission—only to discover it’s 40% of their tiny margin—is a rookie mistake that costs real money. This lack of clarity makes it impossible to forecast your income, negotiate better terms, or build a truly predictable business. You feel like you’re flying blind.
This guide is your decoder ring. We are pulling back the curtain to give you a comprehensive breakdown of how affiliate commissions actually work. We will deconstruct every major commission model, provide clear, data-backed industry benchmarks, and teach you how to analyze these rates like a seasoned professional. By the end of this deep dive, you will be able to spot high-value opportunities and architect a monetization strategy that truly rewards your influence. For a complete overview of the affiliate landscape, our definitive pillar page, Travel Affiliate Programs: The 2026 Ultimate Guide, is your essential command center.

The Anatomy of a Commission: Deconstructing the Core Models
Let's cut through the jargon. An affiliate commission is simply a reward for a job well done. A company—the merchant—pays you for successfully driving a specific, valuable action, which in the travel world almost always means a completed booking or sale.
But the way that reward is calculated can vary dramatically. Understanding the underlying structure of different affiliate commission rates is the first step toward becoming a high-earning creator.
1. Cost Per Sale (CPS) or Pay Per Sale (PPS): The Industry Workhorse
You'll encounter this model most often—it's the industry's workhorse for a reason. It’s simple and transparent: when a reader clicks your affiliate link and completes a purchase, you earn a percentage of the total sale value. If you recommend a $500 hotel stay and the program offers a 6% CPS commission, you earn $30. This model directly ties your earnings to the revenue you generate, making it the gold standard for most travel bookings and gear sales.
2. Cost Per Action (CPA): Rewarding a Specific Step
CPA is a broader model where you’re compensated for a specific action a user takes. While that action is often a sale (making it identical to CPS), it can also be something else. For example, a travel credit card company might pay you a CPA commission for every user who completes an application, regardless of whether they are approved.
3. Cost Per Lead (CPL): Paying for High-Value Inquiries
With a CPL model, you earn a fixed fee for each qualified lead you generate. This is common in high-ticket travel sectors where the sales cycle is long. A luxury tour operator, for instance, might pay you $50 for every user who fills out a detailed inquiry form for a bespoke African safari. You get paid for delivering a potential customer; their sales team takes it from there.
4. Tiered & Multi-Tier Structures: Incentivizing Growth
This is where commission models get more sophisticated and rewarding.
Tiered Structures: Rewarding Your Growth These are designed to reward high-performing affiliates. Your commission rate increases as you drive more sales. A program might offer a base rate of 6%, which jumps to 8% after you generate $5,000 in sales in a month, and 10% after $10,000.
Multi-Tier Structures: Building a Network These allow you to earn commissions not only on your own sales but also on the sales generated by other affiliates you recruit into the program. This effectively turns you into a partner who helps grow the program itself, creating a secondary, more passive income stream.
5. Cost Per Click (CPC): The Rare Exception
In this model, you are paid a small fee for every click your affiliate link receives, regardless of a sale. Due to its high vulnerability to fraud, the CPC model is now extremely rare in modern affiliate marketing and almost never seen in the travel space.

Industry Benchmarks: What Good Affiliate Commission Rates Look Like
So, what should you actually expect to earn? While rates vary, the travel industry has established clear benchmarks across its major categories. Here’s your cheat sheet.
Hotels & Accommodations: 2% - 7% of Booking Value This is the bread and butter for many creators, but the details are everything. A program like Expedia Group offers up to 6% of the total booking value with a 7-day cookie. In contrast, Booking.com advertises a much higher "25-40%", but this is a percentage of their commission, not the customer's total payment. This opaque structure often results in a much lower effective rate, closer to 2-4% of the final booking value.
Tours, Activities & Experiences: 6% - 8%+ This is a high-margin category with strong potential. Market leaders like Viator and GetYourGuide set the standard with base commissions of 7-8%. Adventure-focused operators like G Adventures offer 6%, which is incredibly powerful when applied to their high-ticket tours that can cost thousands of dollars.
Travel Insurance: 10% or More Insurance is a consistently high-paying vertical. Top programs like SafetyWing and World Nomads both offer a standard 10% commission. SafetyWing takes this a step further with a recurring model, meaning you continue to earn 10% every time your referred customer renews their policy.
Gear & Apparel: 3% - 8% For physical products, rates depend heavily on the retailer. Amazon Associates is the baseline, offering 3-4% for most travel categories. However, partnering with specialty retailers is far more lucrative. A brand like REI, for example, offers a 5-8% commission on high-quality (and often high-priced) outdoor gear.
Pro-Tip: Don't be blinded by the highest percentage. A 6% commission on a $3,000 G Adventures tour is $180. An 8% commission on a $50 city walking tour is $4. Always consider the average order value of the products you are promoting when evaluating affiliate commission rates.

The Metrics That Matter More Than the Rate Itself
An experienced affiliate marketer knows the commission rate is just a starting point. To truly understand a program's profitability, you need to analyze the metrics that measure real-world performance.
Earnings Per Click (EPC): Your True North This is arguably the single most important metric. It’s calculated by dividing your total commission earnings by the total number of clicks you sent. If you sent 100 clicks and earned $50, your EPC is $0.50. This number tells you the average value of every single click. A program with a lower commission but a higher EPC is often the more profitable partner for your specific audience.
Conversion Rate (CR): The Sign of a Healthy Partner This is the percentage of users who take the desired action after clicking your link. A high conversion rate is a sign of a trusted brand with a well-optimized checkout process. A program with a 10% commission that converts at 1% is less profitable than a program with a 5% commission that converts at 5%.
Cookie Duration: The Travel Creator's Safety Net This is critical in the travel space. A longer cookie duration (30, 60, or 90 days) gives your audience the time they need to research a high-consideration purchase while ensuring you still get credit. A short cookie window is a major red flag and a sign that the program may not be structured in your favor.
Pro-Tip: Dive into your affiliate dashboards. Most networks like CJ Affiliate and Travelpayouts provide detailed reports on your EPC and conversion rates for each program. Use this data to identify your true top performers—the results will often surprise you.

The Travel Creator's Toolkit
Feeling overwhelmed by the data? You don't have to be. To help you organize your strategy and implement everything you've learned, we've created the ultimate resource bundle. It includes checklists, templates, and tools designed to accelerate your journey from beginner to pro.
Download Your Free Bundle: The Travel Creator's Toolkit
The High-Margin Alternative: Referral & Revenue Share Models
While traditional commission models are powerful, the most forward-thinking creators are diversifying into referral and revenue-sharing programs. Instead of a one-time payment for a single sale, these models allow you to build long-term, passive income streams by becoming a true platform partner.
This is the philosophy behind the TrekGuider Seller Platform. We believe in empowering creators to build complex businesses. Our platform is designed for you to sell your own digital products—like itineraries and guides—but our referral program adds another powerful layer to your income strategy.
Instead of a simple CPS commission, our model functions like a sophisticated multi-tier system. When you refer other creators to become sellers on TrekGuider, you earn an ongoing share of the revenue they generate, with tiered commissions that start at 4% for referred sellers. You’re not just earning from a single transaction; you’re building a network and earning from its collective success. It's a strategic way to move beyond chasing individual sales and start building a more resilient, high-margin business.
Frequently Asked Questions (FAQ)
1. Is a higher commission rate always better? Not at all. A high commission rate can be misleading if the program has a low conversion rate, a short cookie duration, or a low average order value. Always look at your Earnings Per Click (EPC) to determine the true profitability of a program for your audience.
2. How can I find the EPC for an affiliate program? Most reputable affiliate networks (like CJ Affiliate, ShareASale, or Travelpayouts) provide EPC data. It's often listed as a network-wide average for each merchant, which gives you a good baseline. Once you start sending traffic, you can track your own personal EPC in your performance reports.
3. Can I negotiate my affiliate commission rates? Yes, absolutely. Once you become a proven partner and consistently drive a significant volume of high-quality sales, you have leverage. Many brands are willing to negotiate a higher, private commission rate for their top-performing affiliates. Always track your performance and don't be afraid to ask.

From Confusion to Command
You are no longer in the dark. The world of affiliate commission rates is no longer a confusing black box. You now have the knowledge to deconstruct any program's payment structure, the industry benchmarks to know your worth, and the key metrics to identify what truly drives profit.
This knowledge is power. It empowers you to audit your existing partnerships, confidently seek out new ones, and even negotiate better terms. By focusing on programs with fair commissions, long cookie durations, and high conversion rates, you can ensure your hard work is properly rewarded. Building a profitable travel content business requires a strategic approach, and a deep understanding of affiliate commission rates is a non-negotiable part of that strategy.
Read the full guide: The Travel Blogger's Playbook to Affiliate Marketing Mastery
Don't Miss Out! Subscribe for Exclusive Content
Subscribe


Comments 0
No comments yet
Be the first to share your experience!
Dont Miss Out! Subscribe for Exclusive Content

Ultimate USA Holidays Guide: Top Picks

FTC Affiliate Disclosure Essentials: Stay Compliant as a Travel Creator

Essential Affiliate Tools: From Tracking to Full Optimization

Avoid These 5 Affiliate Landing Page Mistakes for Better Conversions

Affiliate Keyword Research Mastery for Travel Blogs

Booking.com Affiliate Program Review: Pros, Cons, and Earnings Potential
Lollapalooza: 7 Stage-Hopping Tips
TrekGuider @trekguider
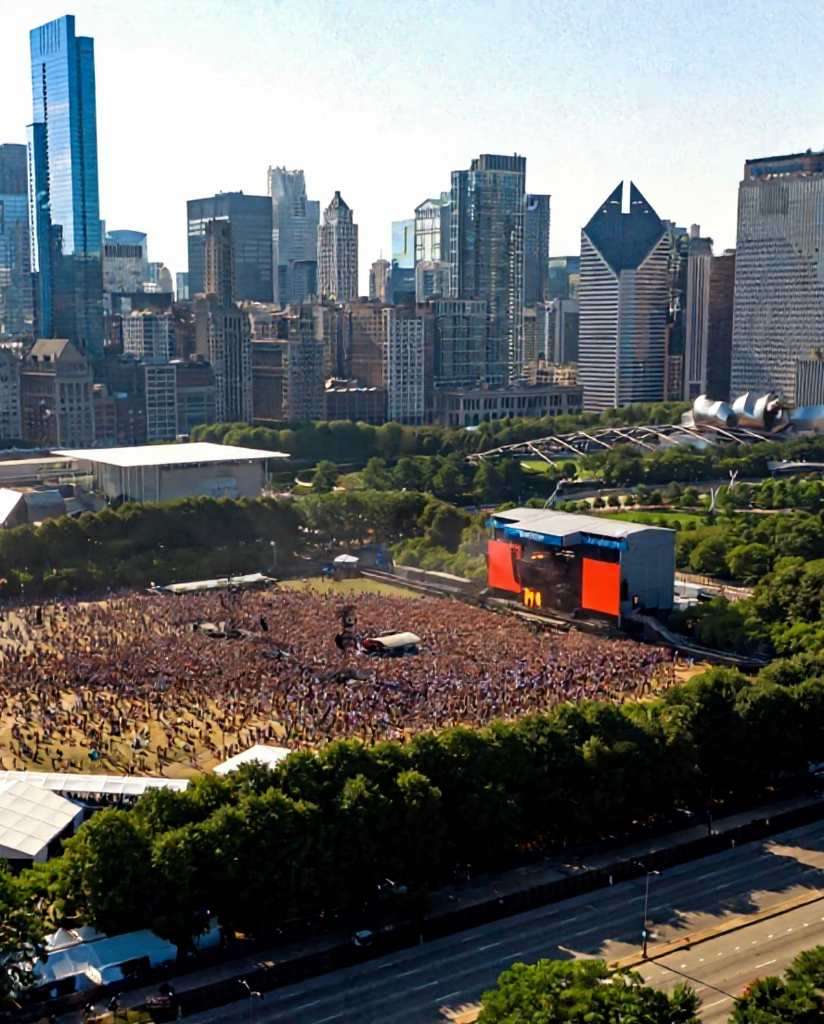
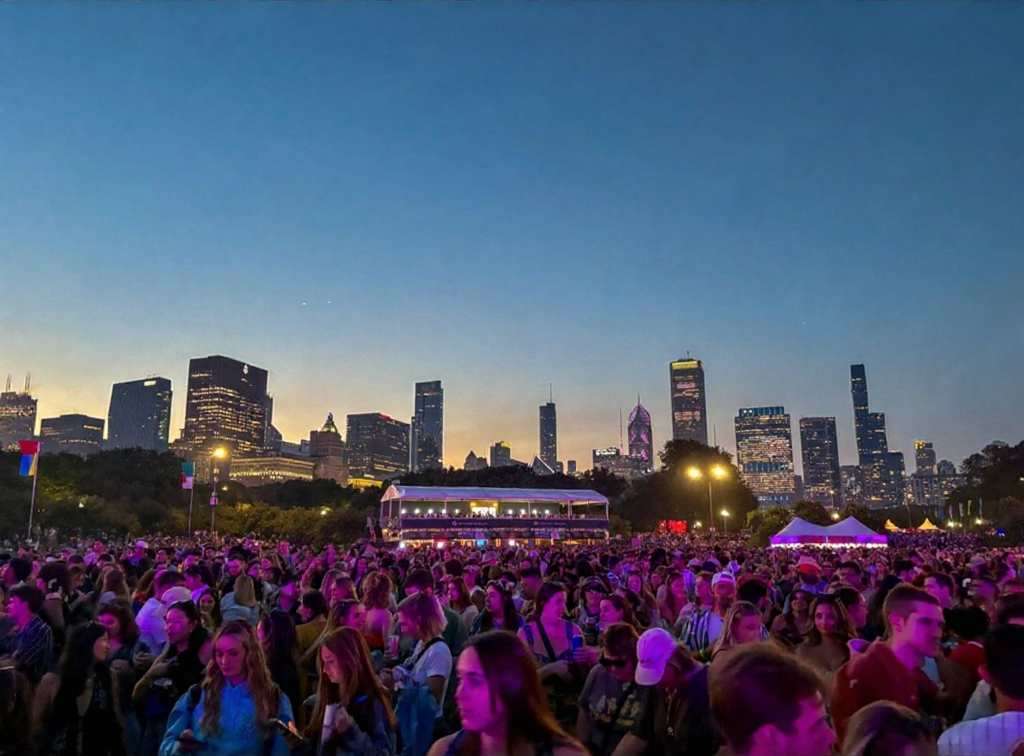
You’ve done it. You scored the golden ticket to Lollapalooza, the four-day musical marathon that transforms Chicago’s Grant Park into the center of the universe. But now, staring at a schedule that looks more like a complex circuit board than a concert lineup, the reality sets in. Dozens of artists you’re dying to see are scattered across a dozen stages, their set times overlapping in a cruel twist of fate. The sheer scale of the festival, with its massive crowds and sprawling grounds, suddenly feels less like a dream and more like a daunting logistical nightmare.
The anxiety begins to bubble. You picture yourself spending half the day trudging from the T-Mobile stage at the south end to the Bud Light stage at the north, only to arrive sweaty, exhausted, and just in time to hear the final chords of your favorite song. The fear of missing out becomes a palpable threat, turning the promise of unforgettable musical moments into a frantic race against the clock. Without a rock-solid plan, your festival experience could be defined by endless walks, missed opportunities, and the nagging feeling of being perpetually in the wrong place. This isn't just about seeing bands; it's about conquering one of the keystone events in a city known for its epic celebrations, a true highlight among the many experiences we cover in our definitive guide to Chicago Holidays: Windy City Thrills.
Forget the stress. This guide is your strategic playbook for navigating the glorious chaos of Lollapalooza Chicago. We’re breaking down the art of stage-hopping into seven actionable, pro-level tips that will transform you from a frantic fan into a festival veteran. From mastering the map before you even step foot in Grant Park to planning a seamless exit, these strategies will ensure you maximize your time, conserve your energy, and catch every single performance on your must-see list.
1. Become a Pre-Festival Master of the Map & Schedule
The biggest mistake a Lollapalooza rookie can make is showing up and trying to figure it all out on the fly. Grant Park is a massive urban oasis, and when it’s filled with stages, vendors, and hundreds of thousands of people, it becomes a complex, pulsating labyrinth. Your success begins long before you scan your wristband.
Download the Official App Immediately
Long before you even think about packing, your first move is to download the official Lollapalooza app. Consider it your digital command center for the entire weekend, running from July 31 to the final day of the festival. The app provides the most up-to-date schedule, a detailed festival map, and, most importantly, real-time push notifications. If a set time changes, a stage is delayed, or a surprise guest appears, the app will be the first to tell you. It also sends out crucial emergency alerts, making it an indispensable tool for staying safe and informed.
Create Your Artist Tiers
Once the full schedule drops, it’s time for strategy. Open the lineup—featuring titans like Olivia Rodrigo, Tyler the Creator, Sabrina Carpenter, and A$AP Rocky for the 2026 festival—and categorize every artist into two simple lists:
Tier 1 (Must-See): These are your non-negotiables. The artists you bought the ticket for. You will be at their set, no matter what.
Tier 2 (Nice-to-See): These are the artists you’d love to catch if the timing and location work out. They are your flexible options, the happy bonuses.
This simple act of prioritization is the bedrock of your stage-hopping plan. It allows you to build your day around your top-tier artists and fill the gaps with others, preventing the decision paralysis that comes from having too many choices.
Internalize the Grant Park Layout
Study the festival map like you’re planning a heist. The two main stages are typically located at the far north and south ends of Grant Park, a walk that can easily take 20-30 minutes through a thick crowd. Identify the locations of your Tier 1 artists and mentally map the routes between them. Note the locations of smaller stages, food courts (Chow Town), and, critically, the free water stations. Understanding the physical distances involved will help you make realistic calls about which back-to-back sets are doable and which are pure fantasy.

2. Master the "Perimeter Path" to Navigate Crowds
The center of any festival crowd is a slow-moving, densely packed sea of humanity. Trying to cut directly through the middle to get from one stage to another is a rookie move that wastes time and energy. The secret to swift movement is to think like a river, flowing where the resistance is lowest.
Stick to the Arteries
The most effective way to navigate Lollapalooza Chicago is by using the perimeter paths. Instead of plunging into the heart of the crowd, stick to the designated walkways along the sides. These paths, often lining the edges of the park or separating vendor areas, are the festival's arteries. While they may look like the longer route on a map, they are almost always faster than trying to push through a stationary audience. Make a mental note of these pathways when you first arrive.
Live by the 15-Minute Rule
If your next Tier 1 artist is on a stage across the park, you need to be ruthless with your timing. Implement the 15-Minute Rule: leave the current set 15 minutes before it ends. This gives you a critical head start, allowing you to exit the immediate crowd before the mass exodus begins when the music stops. It might sting to walk away from the end of a great performance, but that small sacrifice ensures you’re in a good position for the next one, rather than hearing it faintly from a quarter-mile away.
3. Hydrate and Fuel Like a Seasoned Athlete
Stage-hopping is a sport. You’ll be on your feet for 10 hours a day, walking several miles under the summer sun. You’re not just attending a concert; you’re entering a temporary city that generates a staggering economic impact—estimated at over $440 million. That scale demands respect and a bit of preparation.
Make Water Your First Priority
Lollapalooza provides free water refill stations throughout the grounds. When you first enter Grant Park, make it your mission to locate the station nearest the entrance and the stages you’ll be frequenting. Dehydration is the number one enemy of the festival-goer; it saps your energy, causes headaches, and can ruin your entire weekend. Make it a personal rule to refill your water bottle every single time you pass a station.
Pro-Tip: Bring a collapsible water bottle or an empty hydration pack. It's light, complies with security rules, and allows you to carry more water than a standard bottle. This means fewer trips to the refill station and more time enjoying the music.

4. Dress for a Four-Day Marathon, Not a Fashion Sprint
While Lollapalooza is a prime spot for people-watching and showing off your style, practicality should be your guiding principle. Your fashion choices can make or break your physical ability to enjoy the festival.
Your Shoes Are Your Most Important Gear
You will be walking and standing on concrete, grass, and uneven ground for hours on end. This is not the time for brand-new boots that need breaking in, flimsy sandals, or anything with a heel. Your number one priority should be comfortable, supportive, and already broken-in sneakers or walking shoes. Your feet are your foundation for the entire weekend; treat them well.
Prepare for All Four Chicago Seasons in One Day
Chicago weather is famously unpredictable. A day that starts hot and sunny can quickly turn cool and rainy. The key is to dress in layers. Start with a lightweight, breathable base layer and bring a flannel, hoodie, or light jacket that you can tie around your waist during the day and put on after the sun goes down. Most importantly, pack a poncho. It’s small, light, and will be an absolute lifesaver if a sudden downpour occurs.
5. Establish a "Home Base" for Your Crew
Navigating Lollapalooza Chicago with friends is a core part of the experience, but it’s incredibly easy to get separated. Cell service is notoriously unreliable when tens of thousands of people are trying to use it at once, so you can’t count on a text message or call to find your group.
Why a Meeting Point is Non-Negotiable
Before you even think about splitting up to see different artists, establish a clear, specific, and easy-to-find meeting point. This is your group’s "home base." If anyone gets lost, their phone dies, or you just need to regroup, everyone knows exactly where to go.
How to Choose a Good Spot
Don’t pick a generic spot like "the fountain" or "the food court." Choose a unique and unmistakable landmark. A good meeting point is something like, "the giant silver sculpture near the Buckingham Fountain" or "the corner of the 'Deep Dish' pizza stand in Chow Town." Pick a spot that is slightly away from the main walkways to avoid being constantly jostled. Check in at your home base at pre-determined times to ensure everyone is safe and accounted for.

6. Embrace the Journey Between the Stages
Stage-hopping isn’t just a commute; it’s an opportunity. The journey from one performance to another is part of the festival experience itself. Instead of seeing it as a chore, reframe it as a chance for discovery and inspiration.
Discover Your Next Favorite Band
As you walk the perimeter paths, you’ll pass smaller stages where artists you’ve never heard of are playing. Pause for a few minutes and listen. This is how you stumble upon incredible new music. Some of the most memorable Lollapalooza moments happen not at the massive headliner stages, but in the intimate settings of the BMI or Grove stages. Let your ears guide you.
Explore the Full Festival Experience
Lollapalooza is more than just a concert. It’s a massive cultural event filled with creativity. On your way from one stage to the next, take a detour through the art installations, check out the merch tents, or see what activations the sponsors have set up. This spirit of creative discovery is what fuels the best entrepreneurs. If you're feeling inspired by the artistry around you, channel that energy into your own project with our free Digital Product Ideas Guide. By exploring, you break up the monotony of walking and get a richer, more complete festival experience.

7. Plan Your Grand Escape in Advance
How you leave the festival is just as important as how you navigate it. At 10 PM, when the final headliner finishes, a massive wave of people will pour out of the Grant Park exits, creating a human traffic jam that can be overwhelming and slow.
Beat the Final Rush
Just as with the 15-Minute Rule for stage-hopping, consider leaving a few minutes before the absolute end of the night. Slipping out during the last song or just before the encore can save you up to an hour of being stuck in a slow-moving crowd. You’ll get to public transit or your rideshare pickup spot ahead of the main surge, which is a priceless advantage after a long day.
Know Your Public Transit Route Cold
The best way to get to and from Lollapalooza Chicago is by using the CTA rail system. Multiple downtown street closures make driving or using rideshares near the park a nightmare. Before the festival, identify the closest CTA station to your accommodation and memorize the route to and from the park exits. Having this plan locked in will prevent you from wandering aimlessly with a dead phone at the end of a long day.
Pro-Tip: If you must use a rideshare, set your pickup location several blocks away from the Grant Park exits. Walk away from the chaos and toward your pin. You'll escape the immediate surge pricing, and your driver will be able to find you much more easily than in the gridlock traffic near the festival grounds.
Your Blueprint for Lollapalooza Domination
The overwhelming scale of Lollapalooza can intimidate even the most enthusiastic music fan, but it doesn’t have to. With a strategic approach, the festival transforms from a logistical puzzle into the ultimate musical playground. By preparing in advance, navigating smartly, and taking care of your body, you shift from being a passive attendee to the master of your own experience. With these stage-hopping tips, you're now fully equipped with the knowledge of a seasoned pro, ready to conquer Lollapalooza Chicago and create a weekend of flawless, unforgettable memories.

Your Lollapalooza adventure is just one part of an incredible trip. To make the most of your time in the Windy City and beyond, check out our comprehensive Travel Guide. It’s packed with insider tips for exploring the best destinations across the USA.
Don't Miss Out! Subscribe for Exclusive Content
SubscribeComments 0
No comments yet
Be the first to share your experience!
Dont Miss Out! Subscribe for Exclusive Content

San Francisco Cherry Blossoms: A Local's Guide to the Blooms

Halloween SF: Haunts Without Horrors

SF Festivals: 7 Must-See Lineups

Christmas SF: Lights & Wharf Wonders

SF Pride: 6 Route & Party Hacks

Chinese New Year SF: Parade Essentials
Solo Travel Seniors Tips: Comfortable Adventures After 50
TrekGuider @trekguider
Are you dreaming of exploring the cobblestone streets of Rome or the vibrant markets of Thailand, but a nagging voice in your head keeps asking, "Is it too late? Is it safe for me to go alone?" You are not alone in feeling this way. For many seniors, the freedom of retirement brings a powerful urge to travel, followed closely by a wave of practical concerns about safety, health, and loneliness. This flood of generic advice online, often aimed at 20-something backpackers, can feel more discouraging than helpful. This guide is here to silence that voice of doubt. We're not just giving you a list of solo travel seniors tips; we're giving you a complete, step-by-step blueprint for transforming apprehension into adventure. This is your practical roadmap to becoming a safe, confident, and empowered senior solo traveler.

Building the Confidence to Go It Alone
Before you book a flight or pack a bag, the most important journey is the one that happens in your mind. Acknowledging your fears is the first step toward conquering them. For many mature travelers, the concerns are not just about logistics but about a deeper sense of vulnerability. Let's dismantle these worries with a new perspective, framing them not as stop signs, but as guideposts for smart preparation.
The Fear of Loneliness
The image of a lonely dinner for one is a powerful deterrent. However, the reality of modern solo travel is far from isolating. The key is to reframe your thinking. You are not "alone"; you are "independent." This is a journey you have gifted yourself, where every decision—from the museum you visit to the time you wake up—is entirely your own. This freedom is a luxury. Remember, solitude can be a profound source of peace and self-discovery, and when you do crave connection, you'll find countless opportunities to engage on your own terms.
The Fear of Safety
It's wise to be cautious, but it's counterproductive to be paralyzed by fear. The 24-hour news cycle can paint the world as a terrifying place, but billions of people live safe, ordinary lives every day. Your strategy is not to build a fortress of fear but to develop a toolkit of awareness. By learning to recognize and avoid common scams, securing your belongings intelligently, and trusting your intuition, you transform yourself from a potential "soft target" into a savvy, confident traveler who is in control of their environment. Many of the safest places for senior solo travel, like Portugal and Japan, have remarkably low crime rates.
The Fear of "Am I Fit Enough?"
Forget the notion that travel must be a whirlwind of non-stop activity. The greatest advantage of traveling solo after 50 is that you set the pace. There is no one to keep up with and no one to impress. If you want to spend an entire afternoon reading at a Parisian café, you can. If you need a mid-day nap to recharge, your schedule allows it. Embracing your own natural rhythm is not a limitation; it's a smarter, more sustainable way to travel that prevents burnout and allows you to truly savor every moment.
A Pre-Trip Checklist for Total Peace of Mind
Confidence is born from competence. There is no greater antidote to pre-travel anxiety than a rock-solid plan that systematically turns "what-ifs" into "I've-got-this." This checklist covers the essential solo travel seniors tips for building an unshakeable foundation for your adventure.

Choosing Your Destination: Prioritize Safety, Accessibility, and Passion
Your first solo trip should be an unequivocal success. Set yourself up for it by choosing a destination that aligns with your needs.
Safety & Infrastructure: Start with countries renowned for safety and excellent tourist infrastructure. Destinations like Iceland, New Zealand, Costa Rica, and much of Scandinavia are popular for a reason. Use resources like the U.S. Department of State's travel advisories to check for any current issues.
Accessibility: Consider the physical demands. Research your target city's topography—are there lots of steep hills? Look into its public transit system. A city known for its walkability and excellent, accessible subway, like Lisbon or Copenhagen, can be far more enjoyable.
Your Passion: This is your trip. Choose a place that genuinely excites you, whether it's the art museums of Florence, the gardens of Kyoto, or the historical sites of Quebec City.
Booking Logistics
The physical and mental stress of travel often peaks during transit. Minimize it with a few key decisions.
Flights: Whenever possible, book direct flights. Avoiding the rush and potential confusion of a tight connection is worth a modest premium. Pay the extra fee to check your luggage; navigating an airport unencumbered is a simple but significant luxury.
Arrival: Pre-book your airport transfer. Knowing a reputable car service or shuttle will be waiting for you eliminates the uncertainty of haggling for a taxi or navigating public transport after a long flight.
Accommodations
Where you stay is your sanctuary. For senior solo travelers, location and comfort matter most.
Location is Everything: Choose a hotel or apartment in a central, well-lit, and safe neighborhood. Use the map view during your search to ensure you're close to public transport and amenities.
Read the Reviews: Look for recent reviews from other solo travelers. Pay attention to comments about the safety of the area at night, noise levels, and the helpfulness of the staff.
Amenities that Matter: An elevator, 24-hour reception, and an in-room safe are non-negotiable for peace of mind.
Your Itinerary and the STEP Program
Sharing your plans is a critical safety measure. Provide a detailed copy of your itinerary—including flight numbers, hotel addresses, and contact numbers—to a trusted friend or family member. For U.S. citizens, enrolling in the free Smart Traveler Enrollment Program (STEP) is a wise move. This registers your trip with the nearest U.S. Embassy or Consulate, who can then contact you in an emergency. Enrolling also makes it easier for family to get in touch with you through the embassy in a true crisis.
With these age-specific details handled, you can broaden your preparation by exploring our ultimate guide, which is packed with dozens of universal applicable to adventurers of all ages.
Your Well-Being on the Road
Managing your health on the road is at the heart of a successful trip. This isn't just about packing pills; it's about a complete approach that ensures you can enjoy every day to the fullest. This is one of the most crucial areas for solo travel seniors tips.

The Pre-Travel Doctor's Visit & Smart Medication Management
Schedule a visit with your doctor 4-6 weeks before your departure.
Discuss your itinerary and any necessary vaccinations or preventative medications.
Obtain a letter from your doctor detailing any prescription medications you carry.
Pro-Tip: When getting a doctor's note for your prescriptions, also ask for the generic names of your medications. Brand names can vary dramatically between countries, and knowing the generic name can be a lifesaver if you need a refill abroad.
Always pack your medications in your carry-on bag in their original containers. Bring more than you need to cover any potential travel delays.
Acknowledging Your Limits
The "fear of missing out" can lead to over-scheduled days and total exhaustion.
The One Big Thing Rule: Plan just one major activity per day (e.g., a museum visit, a walking tour). Anything else you do is a bonus.
Schedule Downtime: Intentionally block out time in your itinerary for rest. An afternoon nap or a quiet hour with a book can make all the difference for your evening energy levels.
Listen to Your Body: If you wake up feeling tired, give yourself permission to have a slow morning. Flexibility is a solo travel superpower.
Leveraging Accessibility Services Everywhere
Asking for assistance is a sign of a smart, prepared traveler, not a weakness.
Airports: Don't hesitate to request wheelchair assistance when booking your flight. It can make navigating long terminals and security lines infinitely less stressful.
Attractions: Most major museums and tourist sites offer accessibility services, such as elevators, ramps, and sometimes even free admission for a companion. Check their websites in advance to know what's available.
A Practical Guide to Situational Awareness
Your best safety tool is your brain. Being aware and projecting confidence makes you a far less appealing target for opportunistic thieves and scammers.

Securing Your Valuables: A Three-Tiered System
The Crossbody Bag: A secure crossbody bag, worn in front of your body with a locking zipper, is your best friend for daily essentials. It keeps your hands free and your belongings in your line of sight.
The Money Belt (for transit days): On days you're moving between cities, a money belt worn under your clothes is the most secure place for your passport, extra credit cards, and the bulk of your cash.
The Hotel Safe: Upon arrival at your hotel, immediately lock your passport, extra cash, and any valuable electronics you don't need for the day in the room safe.
How to Avoid Looking Like an Easy Target
Walk with Purpose: Even when you're just exploring, walk as if you know where you're going. If you need to check a map, step into a shop or café rather than stopping in the middle of a busy sidewalk.
Dress Modestly: Research local customs and aim to dress like the locals. Avoid flashy jewelry or expensive-looking accessories that draw unnecessary attention.
Limit Phone Distraction: Keep your phone tucked away in crowded areas like subways or markets. Being engrossed in your screen makes you oblivious to your surroundings.
Your Oldest and Best Security System
Your intuition is a powerful, time-honed survival mechanism. If a person or a situation feels "off," it is. You don't need to justify it or worry about being rude. Remove yourself from the situation immediately. This is the most important of all safety-related solo travel seniors tips.
Pro-Tip: Learn a few key phrases in the local language, such as "Hello," "Thank you," and most importantly, "No, thank you." A firm "No, thank you" in their own language, delivered with direct eye contact, is a powerful and universally understood deterrent.
Four Low-Pressure Ways to Connect on the Road
Traveling solo doesn't have to mean traveling lonely. The beauty is choosing when and how you connect with others. Here are four easy strategies to meet people.

The Power of a Shared Interest
This is the ultimate hack for effortless socializing. Joining a small-group walking tour, a cooking class, or a wine tasting event instantly connects you with like-minded travelers. The shared activity provides a natural icebreaker, and conversations flow easily. You might just meet a dinner companion for the evening.
The Art of Dining Solo
Eating alone can be a joy, not a fear.
Sit at the Bar: The bar or chef's counter is a more casual setting and perfect for solo diners. You can often strike up a pleasant conversation with the bartender or your neighbors.
Bring a Prop: A book or a journal can be a comfortable companion. It signals you're content but still approachable.
Look for Communal Tables: Many modern restaurants and food halls feature large communal tables, which are an open invitation for conversation.
The "Bold Title Book" Technique
This clever tip comes from veteran solo travelers. Carry a book with an intriguing or bold title. When you're sitting in a park or café, it can be a fantastic conversation starter as curious people inquire about what you're reading.
The "Solo-Friendly" Group Tour
If you want the freedom of a solo trip with the security and social structure of a group, consider companies that specialize in small-group tours for mature travelers. Companies like Road Scholar or Overseas Adventure Travel offer fantastic itineraries that handle all the logistics and provide a built-in community of fellow travelers, often with options to avoid the dreaded single supplement fee.
Your Questions Answered
What is the best travel insurance for seniors?
Look for a comprehensive policy that has high limits for emergency medical coverage and, crucially, a waiver for pre-existing conditions. Companies like Allianz Travel Insurance, Travel Guard, and World Nomads are highly regarded, but always read the policy details carefully to ensure it meets your specific health needs. The best travel insurance for over 65 is one that provides total peace of mind.
How can I avoid the single supplement fee?
The single supplement is an extra charge for a solo traveler to compensate a hotel or tour operator for the loss of a second person's revenue. To avoid it, look for tour companies that either waive the fee or offer to match you with a roommate. Booking accommodations in guesthouses or apartments rather than traditional hotels can also eliminate this cost.
What are the best smartphone apps for a senior solo traveler?
Google Maps: Essential for navigation. Download offline maps of your destination before you leave.
Google Translate: Use the camera and conversation features to overcome language barriers.
WhatsApp: A free and easy way to stay in touch with family and friends back home using Wi-Fi.
TripIt: Organizes all your travel confirmations (flights, hotels, rental cars) into one master itinerary.
You’ve earned the wisdom and the time to see the world on your own terms. Now, with this guide, you also have the playbook for doing it with confidence. Armed with these solo travel seniors tips, you can move forward with the assurance that you are not just capable, but perfectly equipped for the adventure of a lifetime. The world is not just for the young; it's for the curious, the brave, and the young at heart. Go and claim your corner of it.
Read the full guide: Anxious to Adventurous: The Ultimate Guide to Solo Travel Confidence
Don't Miss Out! Subscribe for Exclusive Content
SubscribeComments 0
No comments yet
Be the first to share your experience!
Dont Miss Out! Subscribe for Exclusive Content
Ultimate USA Holidays Guide: Top Picks
FTC Affiliate Disclosure Essentials: Stay Compliant as a Travel Creator
Essential Affiliate Tools: From Tracking to Full Optimization
Booking.com Affiliate Program Review: Pros, Cons, and Earnings Potential

Decoding Affiliate Commission Rates: Benchmarks for Travel Creators

Amazon Associates for Travel: Strategies to Maximize Commissions
10 Best International Destinations for Digital Nomads
TrekGuider @trekguider
The dream of working from anywhere is powerful, but the reality of choosing where to plant your laptop is a daunting, high-stakes decision. You’ve seen the polished photos, but behind that image lies a complex web of visa regulations, tax laws, and the non-negotiable need for blazing-fast internet. The web is flooded with generic listicles that tout beautiful scenery but gloss over the critical details that can make or break your experience. Choosing wrong means legal headaches, financial strain, and a level of frustration that will have you booking a ticket straight back home.
Forget the superficial listicles. This is your definitive, data-driven playbook for the 10 best international destinations for digital nomads in 2026, built for the savvy American remote worker who demands more than just pretty pictures. We cut through the noise to focus on the pillars that truly matter, empowering you to make a strategic, confident decision about your next chapter. After all, succeeding as a nomad isn't just about picking a spot on the map; it requires a foundation of confidence, and our guide on essential is the perfect place to start building it.

The Four Pillars of a Perfect Nomad Base
Before we jet off, let's establish the framework. A world-class nomad destination is a careful balance of four key factors.
Cost of Living: This isn't about surviving; it's about thriving. We analyze the monthly budget for a comfortable lifestyle, including a modern apartment, a mix of dining out and cooking, and co-working space access.
Digital Infrastructure: High-speed, reliable internet is your lifeline. We look at average broadband speeds and the general stability of the connection in key cities.
Visa Accessibility: This is often the biggest hurdle. We assess the ease of securing legal long-term residency through official digital nomad visas, weighing income requirements against long-term benefits.
Quality of Life: This is the magic ingredient. It’s a measure of community, safety, culture, and the overall vibe that makes a place feel like home.
The Gold Standard: 5 Destinations That Get Everything Right
These locations represent the top tier, offering a world-class balance of all four pillars. They boast mature infrastructure, welcoming communities, and clear legal pathways for American remote workers.
1. Lisbon, Portugal: Europe’s Magnetic West Coast Hub

Lisbon has cemented its status as the quintessential European hub for digital nomads. It's a magical blend of old-world charm, with its rattling trams and historic Alfama district, and a buzzing modern tech scene. Its coastal location, incredible food, and established international community make it an almost perfect entry point for living and working in Europe.
The Data Breakdown:
Cost of Living: Expect a monthly budget of $2,500 - $3,900 for a comfortable lifestyle. While it’s one of the more affordable Western European capitals, its popularity has driven up prices.
Internet Speed: Excellent. With widespread fiber-optic coverage, you can expect reliable average speeds of 150 Mbps.
Visa Situation: Portugal offers the D8 Digital Nomad Visa, requiring a monthly income of around $3,480. Critically, this visa provides a clear pathway to permanent residency after five years—a massive long-term benefit.
Quality of Life: Superb. Lisbon is safe, walkable, and packed with world-class restaurants and cafes. The large, active nomad community means you’ll never struggle to find your tribe.
On-the-Ground Intel: Popular neighborhoods include the historic Alfama and the trendy, central Chiado. Co-working spaces like Second Home and LACS are central hubs for networking and deep work.
2. Mexico City, Mexico: The North American Nearshore Favorite
For Americans, Mexico City is an unbeatable combination of affordability, cultural richness, and logistical ease. Its position in a North American time zone is a massive advantage for collaborating with US-based teams. It's a sprawling, dynamic metropolis with a world-class culinary scene and a cost of living that feels like a dream.
The Data Breakdown:
Cost of Living: A fantastic value. A comfortable monthly budget falls between $1,500 - $2,100.
Internet Speed: Good, but diligence is required. Average speeds are around 60 Mbps, which is sufficient for most work, but can be inconsistent. Always confirm the internet speed with your Airbnb host or landlord before committing.
Visa Situation: This is evolving. The reliable, long-term solution is the Temporary Residence Visa, which requires proving financial solvency and should be obtained from a Mexican consulate before you go.
Quality of Life: Exceptional. The energy of CDMX is infectious. The neighborhoods of Condesa and Roma are nomad epicenters, filled with beautiful parks, Art Deco architecture, and some of the best cafes on the planet.
On-the-Ground Intel: Base yourself in Condesa or Roma for the quintessential nomad experience. Public transportation is extensive, and Uber is cheap and reliable for getting around this massive city.
3. Chiang Mai, Thailand: The Original Budget-Friendly Haven

Chiang Mai is the legendary cradle of the digital nomad movement. It continues to offer an almost impossibly low cost of living without sacrificing quality of life. Surrounded by lush mountains, filled with ancient temples, and home to an incredible food culture, it provides a relaxed base with one of the most established nomad communities on the planet.
The Data Breakdown:
Cost of Living: Astonishingly low. You can live a very comfortable life for $1,000 - $1,300 per month.
Internet Speed: Surprisingly fast. Fiber-optic is common, delivering average speeds of 100 Mbps.
Visa Situation: Thailand has recently introduced the Destination Thailand Visa (DTV), a 5-year visa for remote workers that is a game-changer, replacing the old, precarious system of "visa runs."
Quality of Life: Excellent. The pace of life is slower, the people are famously friendly, and the food alone is worth the trip.
On-the-Ground Intel: The Nimman neighborhood is the modern heart of the nomad scene, packed with trendy cafes and co-working spaces like Punspace. Renting a scooter is the most common and enjoyable way to get around.
Pro-Tip: When looking for monthly accommodation, book a hotel or Airbnb for your first 1-2 weeks. Use that time to explore neighborhoods in person and connect with local Facebook groups for digital nomads. The best and most affordable deals are almost always found on the ground, not online.
4. Tbilisi, Georgia: The Undiscovered Gem with an Unbeatable Visa
For those seeking an off-the-beaten-path destination with a stunningly simple visa policy, Tbilisi is a revelation. The capital of Georgia is a city of dramatic contrasts, where ancient churches sit next to futuristic architecture. It's incredibly affordable, with a unique culture and cuisine that will captivate adventurous nomads.
The Data Breakdown:
Cost of Living: Very affordable, ranging from $1,000 - $2,200 a month.
Internet Speed: The main drawback. Speeds average a slower 15 Mbps. It's workable, but not ideal for data-heavy professions.
Visa Situation: Unbeatable. Georgia offers a 1-year visa-free policy for Americans on arrival, making it the easiest place in the world to set up a long-term base with zero bureaucracy.
Quality of Life: High for the price. Tbilisi is a city with deep history, a burgeoning wine scene, and a dramatic landscape. The community is smaller but growing and tight-knit.
On-the-Ground Intel: The Vake and Vera neighborhoods are popular with expats for their green spaces and modern amenities. The city is compact and walkable, and Georgian hospitality is legendary.
5. Budapest, Hungary: Old-World Grandeur, New-World Speeds
Budapest offers the quintessential grand European capital experience at a fraction of the price. Straddling the Danube River, the "Pearl of the Danube" is famous for its stunning architecture, historic thermal baths, and eclectic ruin bars. For nomads, its biggest selling point is world-class internet in a beautiful, central European setting.
The Data Breakdown:
Cost of Living: Very reasonable for a major European city, at $1,100 - $1,300 per month.
Internet Speed: Blazing fast. With average speeds of 220 Mbps, it's one of the most reliable cities on this list.
Visa Situation: Hungary offers a digital nomad visa (called the "White Card") with an income requirement of around €2,000 per month.
Quality of Life: Fantastic. It's a city with endless things to do, from exploring castles to relaxing in centuries-old spas. It’s a great base for exploring the rest of Central Europe.
On-the-Ground Intel: Most nomads live on the bustling Pest side, particularly in the lively Jewish Quarter (District VII), which is the heart of the city's nightlife and creative scene.
5 More World-Class Contenders for Your Shortlist
These locations are fantastic options that excel in specific areas, making them perfect for nomads with particular priorities.
Medellín, Colombia: Known as the "City of Eternal Spring" for its perfect climate, Medellín has become a thriving, innovative hub for nomads.
Bali, Indonesia: The ultimate destination for wellness, surfing, and spirituality. The town of Canggu is the epicenter of a massive and vibrant community.
Buenos Aires, Argentina: Crave a European feel with a Latin American passion? This city of grand boulevards, tango, and incredible steak is for you, though economic instability can be a challenge.
Valencia, Spain: A fantastic quality of life with beautiful beaches, a stunning park, and a more relaxed vibe than Madrid or Barcelona. Its new digital nomad visa is very popular.
Kuala Lumpur, Malaysia: A modern, multicultural Asian metropolis that serves as a fantastic and affordable hub for exploring Southeast Asia with top-notch infrastructure.
The Visa Game: Your Guide to Staying Legal Long-Term

Understanding the legal landscape matters most. The world is shifting away from the gray area of tourist visas towards official international destinations for digital nomads visas.
Tourist Visas: The "old way" involved "visa runs" (leaving and re-entering to reset the clock). This strategy is risky, increasingly unreliable, and provides no legal right to work.
Digital Nomad Visas (DNVs): These are official residency permits designed for remote workers. They provide a legal, long-term basis to live and work in a country, but come with bureaucracy and high minimum income requirements (typically $2,500-$3,500+ per month).
Pro-Tip: Taxes are the most complex part of nomad life. As a US citizen, you are taxed on worldwide income regardless of where you live. Rules like the Foreign Earned Income Exclusion can help, but this is not a DIY situation. Always consult a tax professional specializing in US expat taxes before you leave.
The Nomad Reality Check: Answering Your Toughest Questions

How do you build community and avoid loneliness?
Be proactive. Choose a destination with an established community. Join co-working spaces. Use apps like Meetup.com. Prioritize "slow travel"—staying in one place for 3-6 months to build deeper connections.
What are the essential items to pack?
Less than you think. Aim for carry-on only. Pack versatile clothing (merino wool is king), a solid power bank, a universal travel adapter, and noise-canceling headphones. Almost anything you forget can be bought abroad.
Is the digital nomad lifestyle a permanent vacation?
Absolutely not. This is a common and dangerous myth. A sustainable nomad lifestyle is about living your normal life—with work deadlines, budgets, and chores—in a different location. It requires immense self-discipline.
Choosing from the many amazing international destinations for digital nomads is a deeply personal decision. The "best" place isn't a rank on a list; it's the location where the delicate balance of cost, connectivity, community, and culture aligns perfectly with your personal and professional needs. This guide has given you the data-driven framework and on-the-ground intelligence to make that strategic choice. You have the tools to move beyond the dream and build a real, sustainable life of freedom and adventure abroad. The world is waiting.
Read the full guide: Anxious to Adventurous: The Ultimate Guide to Solo Travel Confidence
Don't Miss Out! Subscribe for Exclusive Content
SubscribeComments 0
No comments yet
Be the first to share your experience!
Dont Miss Out! Subscribe for Exclusive Content

Is Public WiFi Safe? How to Protect Your Data Abroad

A Woman's Guide to Safe Travel: 10 Critical Tips

7 Hotel Safety & Security Tips for Peace of Mind

11 Essential Solo Travel Safety Tips You Need to Know

The Ultimate Guide to Travel Safety: A 2026 Playbook
