Decoding Affiliate Commission Rates: Benchmarks for Travel Creators
TrekGuider @trekguider
You’re a travel creator, and you’ve entered the world of affiliate marketing to turn your passion into a profession. But you’ve quickly run into a frustrating black box: the commission structure. You see a dizzying array of percentages, acronyms like CPA and EPC, and vague promises of earnings. You’re left wondering what good affiliate commission rates even look like. Are you earning your worth, or are you leaving a significant amount of money on the table?
This confusion isn't just academic; it's a direct threat to your bottom line. The reported average monthly income for affiliates in the travel niche is an impressive $13,847, a figure that proves this is a serious enterprise. But you can't build a sustainable business on guesswork. Partnering with a program offering a flashy 40% commission—only to discover it’s 40% of their tiny margin—is a rookie mistake that costs real money. This lack of clarity makes it impossible to forecast your income, negotiate better terms, or build a truly predictable business. You feel like you’re flying blind.
This guide is your decoder ring. We are pulling back the curtain to give you a comprehensive breakdown of how affiliate commissions actually work. We will deconstruct every major commission model, provide clear, data-backed industry benchmarks, and teach you how to analyze these rates like a seasoned professional. By the end of this deep dive, you will be able to spot high-value opportunities and architect a monetization strategy that truly rewards your influence. For a complete overview of the affiliate landscape, our definitive pillar page, Travel Affiliate Programs: The 2026 Ultimate Guide, is your essential command center.

The Anatomy of a Commission: Deconstructing the Core Models
Let's cut through the jargon. An affiliate commission is simply a reward for a job well done. A company—the merchant—pays you for successfully driving a specific, valuable action, which in the travel world almost always means a completed booking or sale.
But the way that reward is calculated can vary dramatically. Understanding the underlying structure of different affiliate commission rates is the first step toward becoming a high-earning creator.
1. Cost Per Sale (CPS) or Pay Per Sale (PPS): The Industry Workhorse
You'll encounter this model most often—it's the industry's workhorse for a reason. It’s simple and transparent: when a reader clicks your affiliate link and completes a purchase, you earn a percentage of the total sale value. If you recommend a $500 hotel stay and the program offers a 6% CPS commission, you earn $30. This model directly ties your earnings to the revenue you generate, making it the gold standard for most travel bookings and gear sales.
2. Cost Per Action (CPA): Rewarding a Specific Step
CPA is a broader model where you’re compensated for a specific action a user takes. While that action is often a sale (making it identical to CPS), it can also be something else. For example, a travel credit card company might pay you a CPA commission for every user who completes an application, regardless of whether they are approved.
3. Cost Per Lead (CPL): Paying for High-Value Inquiries
With a CPL model, you earn a fixed fee for each qualified lead you generate. This is common in high-ticket travel sectors where the sales cycle is long. A luxury tour operator, for instance, might pay you $50 for every user who fills out a detailed inquiry form for a bespoke African safari. You get paid for delivering a potential customer; their sales team takes it from there.
4. Tiered & Multi-Tier Structures: Incentivizing Growth
This is where commission models get more sophisticated and rewarding.
Tiered Structures: Rewarding Your Growth These are designed to reward high-performing affiliates. Your commission rate increases as you drive more sales. A program might offer a base rate of 6%, which jumps to 8% after you generate $5,000 in sales in a month, and 10% after $10,000.
Multi-Tier Structures: Building a Network These allow you to earn commissions not only on your own sales but also on the sales generated by other affiliates you recruit into the program. This effectively turns you into a partner who helps grow the program itself, creating a secondary, more passive income stream.
5. Cost Per Click (CPC): The Rare Exception
In this model, you are paid a small fee for every click your affiliate link receives, regardless of a sale. Due to its high vulnerability to fraud, the CPC model is now extremely rare in modern affiliate marketing and almost never seen in the travel space.

Industry Benchmarks: What Good Affiliate Commission Rates Look Like
So, what should you actually expect to earn? While rates vary, the travel industry has established clear benchmarks across its major categories. Here’s your cheat sheet.
Hotels & Accommodations: 2% - 7% of Booking Value This is the bread and butter for many creators, but the details are everything. A program like Expedia Group offers up to 6% of the total booking value with a 7-day cookie. In contrast, Booking.com advertises a much higher "25-40%", but this is a percentage of their commission, not the customer's total payment. This opaque structure often results in a much lower effective rate, closer to 2-4% of the final booking value.
Tours, Activities & Experiences: 6% - 8%+ This is a high-margin category with strong potential. Market leaders like Viator and GetYourGuide set the standard with base commissions of 7-8%. Adventure-focused operators like G Adventures offer 6%, which is incredibly powerful when applied to their high-ticket tours that can cost thousands of dollars.
Travel Insurance: 10% or More Insurance is a consistently high-paying vertical. Top programs like SafetyWing and World Nomads both offer a standard 10% commission. SafetyWing takes this a step further with a recurring model, meaning you continue to earn 10% every time your referred customer renews their policy.
Gear & Apparel: 3% - 8% For physical products, rates depend heavily on the retailer. Amazon Associates is the baseline, offering 3-4% for most travel categories. However, partnering with specialty retailers is far more lucrative. A brand like REI, for example, offers a 5-8% commission on high-quality (and often high-priced) outdoor gear.
Pro-Tip: Don't be blinded by the highest percentage. A 6% commission on a $3,000 G Adventures tour is $180. An 8% commission on a $50 city walking tour is $4. Always consider the average order value of the products you are promoting when evaluating affiliate commission rates.

The Metrics That Matter More Than the Rate Itself
An experienced affiliate marketer knows the commission rate is just a starting point. To truly understand a program's profitability, you need to analyze the metrics that measure real-world performance.
Earnings Per Click (EPC): Your True North This is arguably the single most important metric. It’s calculated by dividing your total commission earnings by the total number of clicks you sent. If you sent 100 clicks and earned $50, your EPC is $0.50. This number tells you the average value of every single click. A program with a lower commission but a higher EPC is often the more profitable partner for your specific audience.
Conversion Rate (CR): The Sign of a Healthy Partner This is the percentage of users who take the desired action after clicking your link. A high conversion rate is a sign of a trusted brand with a well-optimized checkout process. A program with a 10% commission that converts at 1% is less profitable than a program with a 5% commission that converts at 5%.
Cookie Duration: The Travel Creator's Safety Net This is critical in the travel space. A longer cookie duration (30, 60, or 90 days) gives your audience the time they need to research a high-consideration purchase while ensuring you still get credit. A short cookie window is a major red flag and a sign that the program may not be structured in your favor.
Pro-Tip: Dive into your affiliate dashboards. Most networks like CJ Affiliate and Travelpayouts provide detailed reports on your EPC and conversion rates for each program. Use this data to identify your true top performers—the results will often surprise you.

The Travel Creator's Toolkit
Feeling overwhelmed by the data? You don't have to be. To help you organize your strategy and implement everything you've learned, we've created the ultimate resource bundle. It includes checklists, templates, and tools designed to accelerate your journey from beginner to pro.
Download Your Free Bundle: The Travel Creator's Toolkit
The High-Margin Alternative: Referral & Revenue Share Models
While traditional commission models are powerful, the most forward-thinking creators are diversifying into referral and revenue-sharing programs. Instead of a one-time payment for a single sale, these models allow you to build long-term, passive income streams by becoming a true platform partner.
This is the philosophy behind the TrekGuider Seller Platform. We believe in empowering creators to build complex businesses. Our platform is designed for you to sell your own digital products—like itineraries and guides—but our referral program adds another powerful layer to your income strategy.
Instead of a simple CPS commission, our model functions like a sophisticated multi-tier system. When you refer other creators to become sellers on TrekGuider, you earn an ongoing share of the revenue they generate, with tiered commissions that start at 4% for referred sellers. You’re not just earning from a single transaction; you’re building a network and earning from its collective success. It's a strategic way to move beyond chasing individual sales and start building a more resilient, high-margin business.
Frequently Asked Questions (FAQ)
1. Is a higher commission rate always better? Not at all. A high commission rate can be misleading if the program has a low conversion rate, a short cookie duration, or a low average order value. Always look at your Earnings Per Click (EPC) to determine the true profitability of a program for your audience.
2. How can I find the EPC for an affiliate program? Most reputable affiliate networks (like CJ Affiliate, ShareASale, or Travelpayouts) provide EPC data. It's often listed as a network-wide average for each merchant, which gives you a good baseline. Once you start sending traffic, you can track your own personal EPC in your performance reports.
3. Can I negotiate my affiliate commission rates? Yes, absolutely. Once you become a proven partner and consistently drive a significant volume of high-quality sales, you have leverage. Many brands are willing to negotiate a higher, private commission rate for their top-performing affiliates. Always track your performance and don't be afraid to ask.

From Confusion to Command
You are no longer in the dark. The world of affiliate commission rates is no longer a confusing black box. You now have the knowledge to deconstruct any program's payment structure, the industry benchmarks to know your worth, and the key metrics to identify what truly drives profit.
This knowledge is power. It empowers you to audit your existing partnerships, confidently seek out new ones, and even negotiate better terms. By focusing on programs with fair commissions, long cookie durations, and high conversion rates, you can ensure your hard work is properly rewarded. Building a profitable travel content business requires a strategic approach, and a deep understanding of affiliate commission rates is a non-negotiable part of that strategy.
Read the full guide: The Travel Blogger's Playbook to Affiliate Marketing Mastery
Don't Miss Out! Subscribe for Exclusive Content
Subscribe


Comments 0
No comments yet
Be the first to share your experience!
Dont Miss Out! Subscribe for Exclusive Content

Ultimate USA Holidays Guide: Top Picks

FTC Affiliate Disclosure Essentials: Stay Compliant as a Travel Creator

Essential Affiliate Tools: From Tracking to Full Optimization

Avoid These 5 Affiliate Landing Page Mistakes for Better Conversions

Affiliate Keyword Research Mastery for Travel Blogs

Booking.com Affiliate Program Review: Pros, Cons, and Earnings Potential
How to Make Family Travel Planning Actually Easy
TrekGuider @trekguider
Staring down the logistics of a family vacation can feel less like an adventure and more like a high-stakes, unpaid second job. The dream of relaxing on a sun-drenched beach is often buried under an avalanche of budgets, schedules, and the wildly different demands of a toddler and a teen. If you’re feeling the pressure to create a perfect, frictionless experience, you’re not alone—the mental load is immense.

This constant juggling act leaves you feeling stressed before you’ve even packed a bag. But what if the planning process itself could be a seamless and satisfying part of the journey? You don't need a business degree to succeed—you just need the right playbook. This is that playbook. We’ve created a comprehensive guide that transforms a daunting task into a manageable process, clearing the path to the best Family Travel Ideas: The 2026 Guide to Unforgettable Trips.
The Strategic Blueprint (6+ Months Before Your Trip)
A truly relaxing vacation is built long before you ever pack a bag. The decisions you make in this early stage form a rock-solid foundation that prevents costly mistakes and eliminates last-minute panic. This is where you align expectations, define your financial reality, and get the core logistics in order.
Define Your Family's Travel Style
The most common mistake is choosing a trip that’s fundamentally mismatched with your family’s personality. A rustic camping trip will be a disaster for a family that craves resort amenities. Before you do anything else, take a moment for an honest assessment.
Ask yourselves:
Are we Relaxation-Oriented or Adventure-Seekers? Do we want to spend our days lounging by a pool, or are we happiest when hiking, biking, or exploring?
Do we prefer Structure or Spontaneity? Does a detailed itinerary make us feel secure, or does it feel restrictive?
Are we City Explorers or Nature Lovers? Do we draw energy from bustling streets and museums, or from quiet trails and scenic vistas?
What is our "Pace-Maturity"? Can our kids handle long days of sightseeing, or do we need to build in significant downtime and nap schedules?
Answering these questions creates a filter that immediately narrows down your options. It stops you from planning a trip you think you should want, and helps you focus on the one your family will actually enjoy. For more help with this crucial first step, see our guide on Best Family Vacations: How to Finally Pick the Right One.
Host a "Family Dream Session" to Get Everyone on Board
Getting buy-in from the entire crew early on is the secret to a harmonious trip. This turns "your" trip into "our" trip and builds collective excitement.
For younger kids: Frame choices in simple terms. "Would you rather build sandcastles at the beach or see really big animals at a national park?"
For older kids and teens: Give them genuine responsibility. Task them with researching and pitching two or three activity options for the trip.
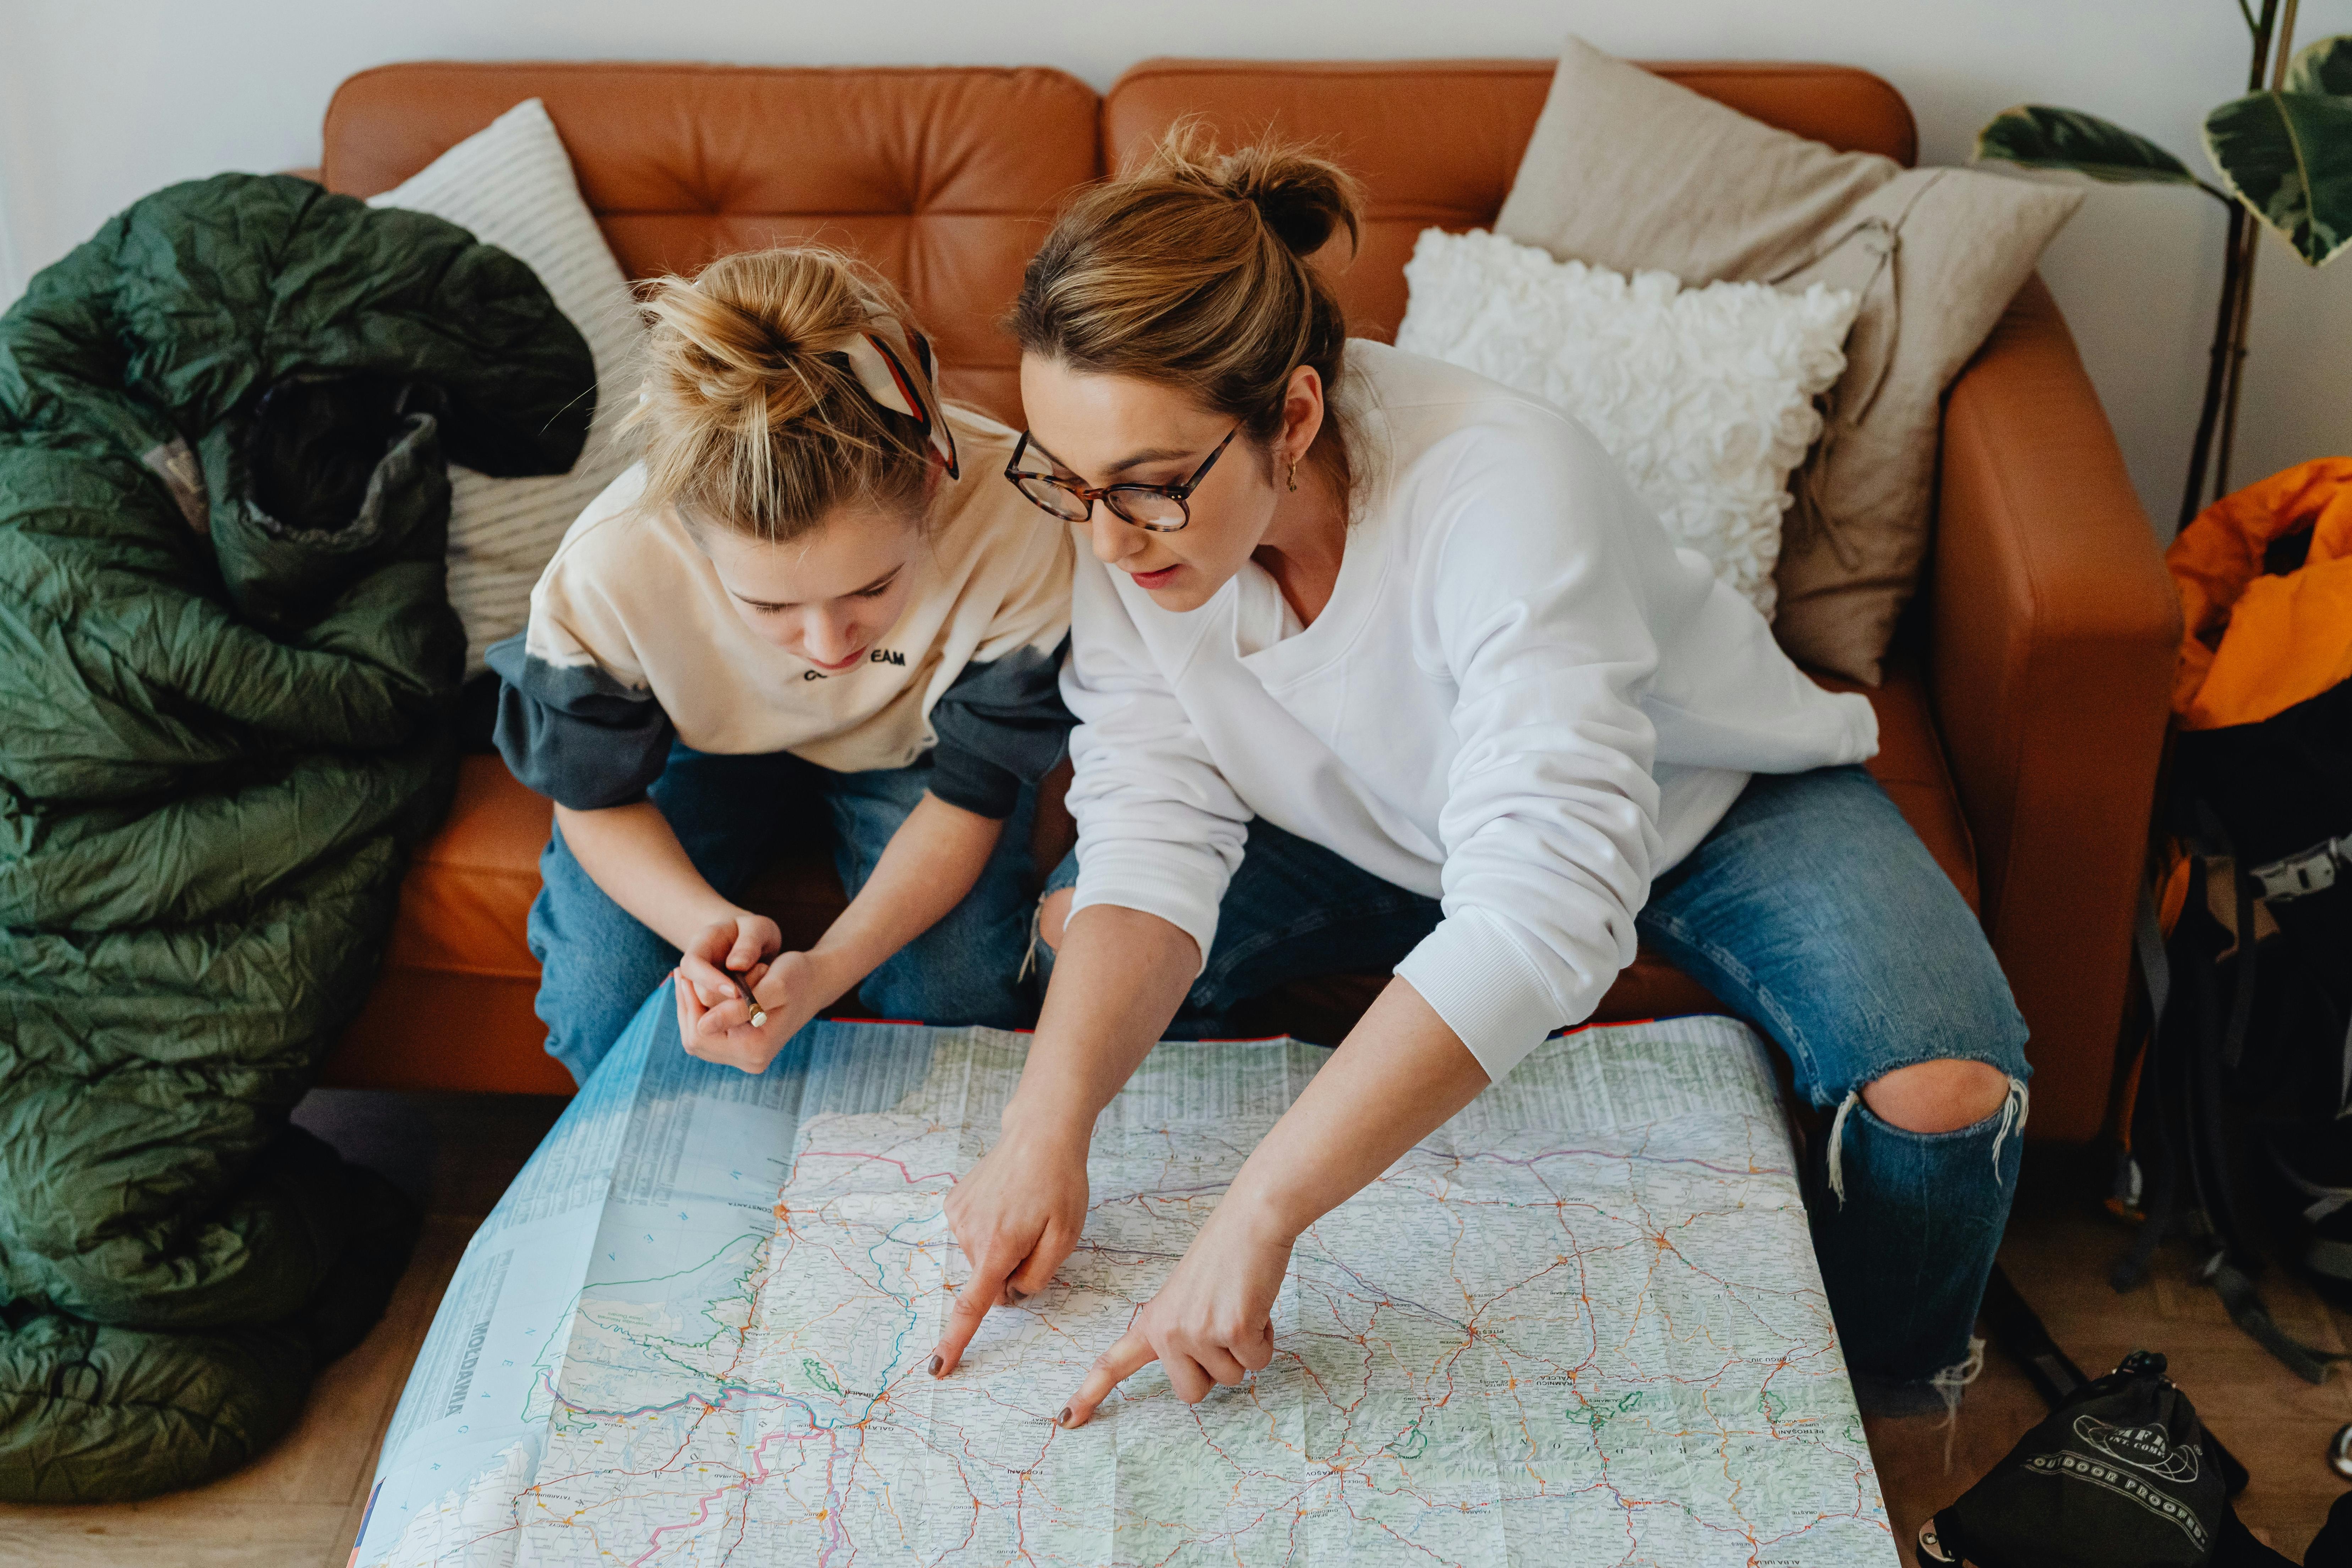
Make it fun: Host a "dream session" over pizza with a map spread out on the table. Create a shared vision board on Pinterest where everyone can add images of what they'd like to see, do, and eat.
Craft a Realistic Vacation Budget That Works
Nothing kills the vacation buzz faster than money stress. A clear budget isn’t a restriction; it’s a powerful tool that makes decisions easier and eliminates worry.
Determine a Total Trip Number: Decide on a realistic, all-in amount you are comfortable spending. Work backward from this number.
Use the 50/30/20 Rule: Allocate your funds to provide structure.
50% for Core Costs: This covers the non-negotiables: flights/fuel and accommodations.
30% for Experiences: This is your budget for activities, tours, park tickets, and dining out.
20% for Contingency & Extras: This covers souvenirs and, crucially, a 10-15% buffer for the unexpected. This emergency fund is your key to a stress-free mindset.
Account for Hidden Costs: Don't forget easily overlooked expenses like airport parking, baggage fees, hotel resort fees, and travel insurance.
Automate Your Savings: Create a dedicated high-yield savings account for your trip (e.g., "Hawaii 2026") and set up automatic transfers. This makes the goal feel tangible and motivating.
Track Everything: Use a simple spreadsheet or a budgeting app to monitor your spending and ensure you stay on track.

Conduct a Critical Document Audit
This is the most time-sensitive task in this entire phase. Do not procrastinate.
Passports: Physically locate every passport and check the expiration date. Many countries require your passport to be valid for at least six months after your planned return date. If anyone’s is expiring within a year, start the renewal process now.
Visas: Do a quick search for visa requirements for your top destination choices.
Digital Backups: Take a photo of each passport's information page and save it to a secure cloud service like Google Drive or Dropbox. This can be a lifesaver.
For a comprehensive list of everything you might need for a trip abroad, our International Travel Checklist is an essential resource.
Locking in the Logistics (3-5 Months Before Your Trip)
With your destination direction clear and documents verified, it’s time to commit. This phase is about securing the key elements of your trip at the best possible prices. This is a key part of successful family travel planning.
Choose the Perfect Destination & Accommodations
Where you stay is more than just a place to sleep; it’s your command center.
Hotels vs. Vacation Rentals: Hotels offer amenities like pools and housekeeping. Vacation rentals (like Airbnb or Vrbo) provide invaluable assets like a full kitchen (critical for picky eaters), separate bedrooms (a lifesaver for different bedtimes), and a washing machine.
The Amenity Checklist: When booking, look for game-changing features like a kitchen, on-site laundry, and a pool or nearby playground for easy entertainment.
Pro-Tip: When traveling with infants, call the hotel directly to confirm the availability and condition of amenities like cribs. Don't rely solely on an online icon.
Secure Your Flights, Lodging, and Rental Car
The best family-friendly options get snatched up quickly, especially during school breaks.
Become a Flight Hawk: Use tools like Google Flights to set price alerts for your route. For international travel, the 2-3 month window is often the sweet spot.
Book Your Home Base: Lock in your preferred hotel or vacation rental now for the best selection.
Reserve Your Wheels: If you need a rental car—especially a larger SUV or van—book it early. Waiting is a recipe for sky-high prices or no availability at all.
Invest in Peace of Mind with Travel Insurance
Think of travel insurance not as an expense, but as an essential piece of safety equipment. It’s the safety net that protects your financial investment and ensures your family’s health is covered. A good policy must include strong coverage for trip cancellation, emergency medical expenses, and emergency medical evacuation. Use a comparison site like Squaremouth or InsureMyTrip to easily compare policies.
Fleshing Out the Details (1-2 Months Before Your Trip)
The skeleton of your trip is built. Now it’s time to add the muscle and personality by planning your daily adventures and handling key logistics back home.

Build a Flexible Itinerary (and Avoid the Over-scheduling Trap)
A great itinerary is a guide, not a straitjacket. The goal is to minimize on-the-ground stress, not to schedule every second.
The "One Big Thing" Rule: Anchor each day with only one primary activity (e.g., a museum visit, a specific hike). Everything else is a bonus.
Schedule Downtime: This is the golden rule of family travel. Intentionally block out "do nothing" time. Alternate busy days with relaxed ones to prevent meltdowns.
Delegate and Empower: Assign each child or teen a "planning day." Let them choose the main activity or where the family eats dinner from a pre-approved list.
Transform Your Itinerary from a To-Do List to a Done Deal
A well-structured plan is the secret to a low-stress vacation. Stop trying to organize everything in a messy document or a string of emails. Download our free Travel Itinerary Template to build a clear, flexible, and easy-to-follow plan that the whole family can use.
Pre-Book "Must-Do" Tickets and Reservations
For bucket-list attractions that are known to sell out or have long lines (like the Colosseum or a popular luau), booking your tickets online a month in advance is a game-changer. This simple step can save you hours of waiting.
Arrange Home, Pet, and Plant Care
Pet Sitter/Kennel: Confirm dates and details with your pet care provider.
House Sitter: Finalize plans and do a walkthrough of your home’s quirks.
Inform a Neighbor: Give a trusted neighbor your itinerary and contact info, and ask them to keep an eye on your place.
The Final Countdown (The Week Before Departure)
The excitement is building! This week is all about tying up loose ends, starting the physical packing process, and prepping your home for departure.
Pack Smart, Not Heavy: A Strategy for Families
Overpacking is a travel sin. It creates heavy luggage and decision fatigue. For a deeper dive into minimalism, grab our popular How to Pack Light Guide.

Create a "Staging Area": Designate a guest bed or a corner as your packing zone. As you think of items throughout the week, put them there to prevent last-minute scrambling.
Use Packing Cubes: These are non-negotiable. Assign each family member a color to keep clothes organized and make finding items a 10-second job.
Pack by Outfit: Lay out complete outfits for each day, including socks and accessories. This prevents overpacking "just in case" items.
Pro-Tip: Snap a picture of each child's daily outfit on your phone. This visual checklist makes it easy for them to get dressed and ensures you don't forget anything.
The 1-Week Rule: For trips longer than seven days, pack for one week and plan to do laundry.
Prepare Your Carry-On Command Center: Your carry-on is your lifeline. It must contain a complete change of clothes for everyone, all essential medications, a "boredom-busting" kit, and portable power banks with charging cables.
Handle Last-Minute Finances and Confirmations
Triple-Check Reservations: Quickly reconfirm flight times, hotel bookings, and car rental details.
Notify Your Banks: Call your credit card companies to set a travel notice to prevent your cards from being frozen for suspected fraud.
Get Local Currency: If traveling internationally, get a small amount of local currency to cover immediate expenses like a taxi or snacks upon arrival.
Prep Your Tech for Travel
The Great Charge-Up: Charge every single electronic device to 100%—phones, tablets, and power banks.
The Great Download: Download everything you might need: movies, playlists, podcasts, and offline Google Maps for your destination. Never rely on spotty airport Wi-Fi.
An Age-by-Age Guide to a Smoother Journey
Tailoring your strategy to your kids' developmental stages is the secret to travel harmony. Generic advice falls flat. Here’s how to adapt your approach.

Traveling with Infants & Toddlers (Ages 0-4)
Packing: Create a "Blowout Bag" for your carry-on with two full changes of clothes, extra diapers, and wipes. Consider using a gear rental service like BabyQuip at your destination for bulky items.
Transit: Gate-check your stroller to have it immediately upon deplaning. Pack a small bag of new, quiet toys (stickers, gel window clings) to reveal during the flight. For more pro tips, check out our Stress-Free Flying with Kids Guide.
On-the-Ground: Try to maintain your child's nap and sleep schedule as much as possible. A well-rested child is a happy traveler.
Traveling with Young Children (Ages 5-10)
On-the-Ground: Balance "adult" activities with kid-focused fun. For every museum, plan a trip to a playground. Give them a simple camera and assign them the role of "Official Trip Documentarian."
Pro-Tip: Before visiting a historical site, find a short, engaging, kid-friendly YouTube video about it. Five minutes of prep provides context and can prevent an hour of whining.
Souvenir Hack: Give them their own vacation spending money. This empowers them, teaches budgeting, and instantly ends the "Can I have this?" negotiations.
Traveling with Tweens & Teens (Ages 11-17)
Transit: Respect their need for space. A long travel day is a great time for them to listen to music or watch their own movies. Don't force family games.
On-the-Ground: The key is autonomy.
Grant them planning power: Make them responsible for planning one full day of the trip.
Schedule solo time: Allow for supervised periods of independence, like exploring a shopping district while you visit a nearby coffee shop.
Wi-Fi is a utility: Acknowledge that connecting with friends is important to them. Ensure your accommodation has reliable Wi-Fi and treat it like you would hot water.
The Ultimate Departure Day Checklist
The day is here! The goal is a calm, orderly exit. Run through this final checklist before you head out the door.
Last-Minute Grab List
Toiletries used this morning (toothbrushes, hairbrush)
Phone chargers that were used overnight
Daily medications
Each child's essential comfort item ("lovey")
Final Home Security Check
Adjust thermostat (up in summer, down in winter)
Empty all trash cans and run the dishwasher
Unplug non-essential small appliances
Check that all windows and doors are locked
The Final Sweep
Do one last walkthrough, grab your cooler of snacks, take a deep breath, and lock the door. You did it. Let the adventure begin.
Frequently Asked Questions
What is the biggest mistake in family travel planning?
The most common mistake is choosing a vacation that doesn't match your family's true travel style. Planning an intense, adventure-packed trip for a family that prefers to relax by the pool is a recipe for stress. An honest assessment of your family's preferences is the most important first step.
How much should I budget for a family vacation?
A great starting point is the 50/30/20 rule. Allocate 50% of your total budget to core costs like flights and lodging, 30% to experiences like activities and dining, and reserve 20% for extras and a crucial contingency fund for unexpected costs.
What is the "One Big Thing" rule for family itineraries?
The "One Big Thing" rule is a simple way to avoid over-scheduling. Instead of packing your day with activities, anchor each day with just one primary event, like a museum visit or a specific hike. This creates a flexible structure and leaves room for spontaneous fun and much-needed downtime.
Your Plan is Your Passport to Presence
The goal of careful family travel planning is not to eliminate every possible hiccup, but to build a resilient, flexible framework that allows your family to navigate challenges together. By following this guide, you’ve transformed a daunting task into a manageable process. You are the architect of your family's most precious memories.
The shared discovery and laughter are the ultimate return on your investment. Now, go and enjoy the incredible experience you've worked so hard to create by exploring all the Family Travel Ideas: The 2026 Guide to Unforgettable Trips that await.
Read the full guide: Family Travel Ideas: The 2026 Guide to Unforgettable Trips
Don't Miss Out! Subscribe for Exclusive Content
SubscribeComments 0
No comments yet
Be the first to share your experience!
Dont Miss Out! Subscribe for Exclusive Content
Ultimate USA Holidays Guide: Top Picks
FTC Affiliate Disclosure Essentials: Stay Compliant as a Travel Creator
Essential Affiliate Tools: From Tracking to Full Optimization
Booking.com Affiliate Program Review: Pros, Cons, and Earnings Potential

Decoding Affiliate Commission Rates: Benchmarks for Travel Creators

Top 11 High-Paying Affiliate Programs for Travel Bloggers
Solo Travel for Men: An Honest Guide to the Road Less Traveled
TrekGuider @trekguider
You feel that pull, don't you? It's the spark you get from a photo of a rugged coastline or a bustling foreign market—the call to adventure, to test your limits, and see the world on your own terms. But then the "what ifs" rush in. Are the logistics too complicated? Will it be lonely? Is it weird to travel by yourself? This guide is here to tell you those fears are normal, but they shouldn't be the reason you stay home. This is your definitive playbook for planning and executing your first incredible solo trip.
This hesitation is the silent thief of profound, life-altering experiences. It keeps you anchored in the familiar while a world of opportunity for growth, resilience, and radical self-discovery passes you by. Every year you put it off is a year you don't learn what you're truly made of when no one else is around to rely on. The comfort zone, once a safe harbor, slowly becomes a cage.
While the ultimate goal for many is creating unforgettable memories with loved ones, a journey of self-discovery through solo travel can be the most profound preparation. It builds the confidence and worldview that enriches every future trip, including those you'll find in Family Travel Ideas: The 2026 Guide to Unforgettable Trips.
Let's cut through the noise. This isn't another blog post filled with vague platitudes. This is an operational playbook, a mission briefing for one of the most rewarding journeys you'll ever undertake. We will dismantle every one of your concerns and equip you with the tools, tactics, and confidence to take that first monumental step. By the end of this guide, the idea of traveling alone won't be an intimidating fantasy; it will be your next actionable, exciting mission.

Why Going It Alone is a Modern Rite of Passage
In our day-to-day lives, men are often slotted into specific roles: the provider, the leader, the planner, the rock. These roles, while important, can also be limiting. Solo travel is a powerful antidote, a hard reset that strips away these external expectations and forces you to confront a more fundamental question: Who are you when no one is watching? The benefits aren't just about cool stories; they are tangible upgrades to your character.
Radical Self-Reliance: When you're alone in a new country and you miss the last train, there's no one to turn to for a solution. You have to figure it out. This isn't a hypothetical exercise; it's a real-time test of your problem-solving skills. You learn to trust your own judgment, navigate ambiguity, and find solutions under pressure. This builds a deep, unshakable confidence that permeates every other area of your life.
The Power of Decisive Action: At home, decisions can be made by committee. On the road, you are the committee. Where to eat, what to see, when to splurge, when to save—every choice is yours. This constant cycle of decision and consequence sharpens your instincts and teaches you to be decisive, cutting through the paralysis of overthinking.
A Hard Reset for the Mind: Routine is the enemy of growth. Solo travel is the ultimate pattern interrupt. It forces you out of your physical, mental, and social comfort zones, exposing you to new perspectives, cultures, and ways of thinking. This novelty stimulates your brain, fostering a level of creativity and open-mindedness that's difficult to achieve when you're stuck in a rut.
Forging Genuine Human Connection: Traveling with a partner or group can create a social bubble. When you travel alone, you are more approachable and more motivated to connect with others. These interactions—with fellow travelers in a hostel common room, a local shopkeeper, or a guide—are often more authentic and memorable. You learn to listen more and connect with people from vastly different backgrounds, building empathy and social skills.
A Step-by-Step Playbook for Launching Your Solo Journey
The biggest hurdle isn't the cost or the time off; it's inertia. Faced with a world of options, it's easy to get stuck in the planning phase forever. This playbook is designed to break that inertia and propel you from your couch to the boarding gate.
Step 1: Define Your Mission. What Kind of Solo Trip Are You After?
Before you look at a map, look in the mirror. Why are you doing this? Your motivation should define your destination.
The Recharge: Is the goal to decompress and escape the daily grind? You're looking for low-stress, high-comfort environments. Think a quiet coastal town in Portugal, a laid-back island in Thailand, or a cabin in a national park. The mission is relaxation, not a logistical marathon.
The Skill Acquisition: Do you want to learn something new? Pick a place that's a hub for that skill. Head to Costa Rica to learn to surf, to Chiang Mai for a Thai cooking course, or to the Alps for an introductory mountaineering class. This gives your trip a clear purpose and a built-in social structure.
The Frontier Test: Is this about pushing your limits and seeing what you're made of? This calls for a more adventurous destination. Consider trekking in Patagonia, motorbiking through Vietnam, or exploring the cultural depths of Colombia. These trips build maximum resilience.
Step 2: Choose Your Destination
Your first solo trip should be a win. It's about building confidence, not testing your absolute limits. Here are three archetypes for a successful first mission:
The Easy-Win (English-Speaking & High-Infrastructure): These are destinations where the learning curve is gentle. Think Ireland, Scotland, Australia, or New Zealand. The lack of a language barrier removes a major layer of stress, and the well-trodden tourist paths mean logistics are straightforward. You can focus on the experience of being alone without battling constant communication challenges.
The Adventure Hub (Activity-Focused): If your goal is to be active, choose a place known for it. The national parks of the Western USA for hiking, the mountains of British Columbia for biking, or Queenstown, New Zealand for adrenaline sports. These places are full of other active, often solo, travelers, making it easy to meet like-minded people.
The Backpacker's Trail (Social & Budget-Friendly): Southeast Asia (Thailand, Vietnam) or parts of South America (Peru, Colombia) are legendary for a reason. They offer an incredible value for money and a built-in social infrastructure of hostels, tours, and transportation that caters specifically to independent travelers. It's almost impossible not to meet people.
Step 3: The Budget
Your budget dictates your trip's style and duration. Be realistic and thorough. A well-structured plan, perhaps organized with a Travel Itinerary Template, is your best friend here.
Big Ticket Items: Start with the non-negotiables: flights and accommodation. Use tools like Google Flights and Skyscanner to track prices. For lodging, hostels are the most budget-friendly and social option, while private rooms on Airbnb or budget hotels offer more solitude.
Daily Expenses: Research the average daily cost in your chosen destination using sites like Numbeo. This includes food, local transport, and activities. A good rule of thumb is to estimate this and then add a 20% buffer.
Contingency Fund: This is non-negotiable. Have access to an extra $500-$1000 for emergencies—a missed flight, a medical issue, or a lost phone. This isn't for souvenirs; it's your get-out-of-jail-free card.
Pro-Tip: Always carry a portable power bank. A dead phone in an unfamiliar city isn't just an inconvenience; it's a safety risk. It’s your map, translator, and lifeline. Charge it religiously every night.
Step 4: Packing
Overpacking is a rookie mistake. Every item you bring is something you have to carry. The goal is to be prepared, not to bring your entire apartment.

The Right Bag: A travel backpack (40-50L) is far more versatile than a rolling suitcase. It forces you to be disciplined and can handle cobblestone streets, crowded trains, and hostel staircases with ease.
The Clothing Trinity: Pack items that are versatile, quick-drying, and layerable. Merino wool is the gold standard for travel clothing; it's temperature-regulating, odor-resistant, and comfortable. Aim for a week's worth of clothes and plan to do laundry.
3-4 merino wool t-shirts/henleys
1-2 pairs of versatile travel pants (not jeans)
1 pair of shorts (if climate appropriate)
1 packable rain jacket
1 mid-layer fleece or hoodie
4-5 pairs of wool socks and underwear
Essential Gear:
Packing cubes to organize everything.
A quick-dry travel towel.
A universal power adapter.
A basic first-aid kit with pain relievers, blister care, and any personal medications.
A padlock for hostel lockers.
Your Free Toolkit for Smarter Packing
Packing light is a skill. Our free How to Pack Light Guide is a masterclass in efficiency, showing you exactly how to fit everything you need into a single carry-on. Download it now and transform the way you prepare for any trip.
Tactics for Mastering the Solo Experience
Planning is only half the battle. Thriving on the road requires a specific mindset and a set of practical skills. This is where the real growth happens.
Neutralizing the "Big Three" Anxieties of Solo Travel for Men
Let’s address the elephants in the room head-on. These are the primary concerns that hold men back, and each one has a practical solution.
The Fear of Loneliness: This is the most common fear, but it's often misplaced. Being alone is not the same as being lonely.
Stay in Social Environments: Choose hostels with good common areas and organized events (like pub crawls or walking tours). This is the single easiest way to meet other travelers.
Embrace Day Tours: Joining a food tour, a hiking group, or a historical walking tour provides structured, low-pressure social interaction.
Learn a Few Key Phrases: Simply learning "Hello," "Please," and "Thank you" in the local language can break down barriers and make you seem more approachable.
Concerns About Safety: The world is generally safer than the news suggests, but being smart is non-negotiable.
Master Situational Awareness: This is your primary weapon. Constantly run a mental checklist: Where are the exits? Who seems out of place? Walk with purpose and confidence. Avoid flashing expensive electronics or large amounts of cash.
Secure Your Valuables: Keep your passport, extra cash, and credit cards locked in your accommodation. Carry only what you need for the day in a front pocket or a secure bag. Never put your wallet in your back pocket.
Inform Someone: Share your itinerary with a friend or family member back home and check in regularly.
Trust Your Gut: If a situation or a person feels off, it probably is. Remove yourself from the situation immediately. Don't worry about being polite; your safety is your only priority.
The Social Stigma (Is it "Weird"?): Let's be blunt: No one cares. The idea that it's strange for a man to travel alone is a self-imposed mental barrier. In the travel world, it's completely normal. You will see hundreds of other people doing the exact same thing.
How to Meet People Without Being Awkward
The Common Room is Your Stage: In a hostel, the common area is designed for interaction. Don't just sit in a corner on your phone. Sit at a communal table. A simple "Hey, where are you from?" is the universal icebreaker.
Ask for Advice: People love to be helpful. Asking another traveler for a restaurant recommendation is a low-stakes way to start a conversation that can easily lead to "Hey, I was about to head there now, want to join?"
Mastering the Art of Dining Alone: For many, this is surprisingly intimidating.
Sit at the Bar: It's more social and less formal than a table for one. You can chat with the bartender or the people next to you.
Bring a Prop: A book or a journal can make you feel less self-conscious, but try not to hide behind it. Make eye contact and be open to conversation.
Choose Casual Spots: Street food stalls, food halls, and casual eateries are much more comfortable for solo diners than formal restaurants.

Pro-Tip: The "Leading Question" technique is your best conversational tool. Instead of asking a closed question like "Are you having a good trip?" ask an open-ended one like, "What's been the most unexpected thing you've done in this city?" This invites a story, not a one-word answer.
Frequently Asked Questions
What's the best type of accommodation for a first-time solo male traveler?
For maximizing social opportunities and minimizing cost, hostels are unbeatable. Look for ones with highly-rated common areas and organized social events. If you need more privacy and have a larger budget, a private room in an Airbnb or a centrally-located hotel are also great options.
How do I handle eating alone in restaurants without feeling awkward?
Confidence is key. Sit at the bar whenever possible, as it's a more social and casual setting. Choosing less formal spots like food halls or bustling cafes can also feel more comfortable than a quiet, formal restaurant.
Is solo travel for men expensive?
It doesn't have to be. Your biggest expenses will be flights and accommodation. By choosing budget-friendly destinations (like Southeast Asia or Eastern Europe), staying in hostels, and eating like a local, you can travel for a fraction of what a typical resort vacation would cost.
What are some of the safest destinations for a first solo trip?
Countries with a strong tourism infrastructure and low crime rates are excellent starting points. Consider places like Portugal, Ireland, New Zealand, Japan, and South Korea. These destinations offer a great balance of adventure and security.
The Only Thing Left Is to Go
The journey of solo travel for men is far more than a simple vacation. It's a deliberate act of self-investment. It's an opportunity to strip away the noise of daily life, challenge your own preconceived limits, and build a more resilient, resourceful, and worldly version of yourself. The skills you learn are not just travel skills; they are life skills. You will return home not just with photos, but with a quiet confidence that can only be forged in the fires of experience.
The path is laid out. The excuses have been dismantled. The only thing left is to take the first step. Start the research, check the flights, and request the time off. Your adventure is waiting, but it demands that you go out and claim it.

Read the full guide: Family Travel Ideas: The 2026 Guide to Unforgettable Trips
Don't Miss Out! Subscribe for Exclusive Content
SubscribeComments 0
No comments yet
Be the first to share your experience!
Dont Miss Out! Subscribe for Exclusive Content
Ultimate USA Holidays Guide: Top Picks
FTC Affiliate Disclosure Essentials: Stay Compliant as a Travel Creator
Essential Affiliate Tools: From Tracking to Full Optimization
Booking.com Affiliate Program Review: Pros, Cons, and Earnings Potential
Decoding Affiliate Commission Rates: Benchmarks for Travel Creators

Amazon Associates for Travel: Strategies to Maximize Commissions
How to Stay Safe While Hiking: A Hiker's Safety Guide
TrekGuider @trekguider
The call of the trail is a powerful one. It promises sweeping vistas, the quiet solitude of the forest, and the profound satisfaction of reaching a summit under your own power. But for all its beauty, the wilderness is impartial and unforgiving. The same trail that offers bliss on a sunny morning can present serious danger when the weather turns, a wrong turn is made, or an ankle is twisted. This is the problem every hiker faces: the gap between the adventure we dream of and the preparation it demands.
That gap is often filled with anxiety. A flicker of doubt about reading the map, a worry about the approaching clouds, or a sudden fear of what that noise was in the undergrowth can rob an incredible experience of its joy. Too often, hikers—both novice and experienced—find themselves in serious trouble simply by underestimating the trail and overestimating their preparedness. According to Search and Rescue (SAR) teams, most emergencies are the result of small, preventable mistakes. This guide is your definitive playbook for closing that gap for good. We’re providing the essential, expert-backed hiking safety tips you need to move through the backcountry with unwavering confidence. This isn't about fear; it's about empowerment. By mastering these skills, you’re ensuring every hike is a safe one, a core pillar of the responsible adventurer’s mindset we explore in our definitive The Ultimate Guide to Travel Safety: A 2026 Playbook. Let’s gear up, get smart, and get you ready to hit the trail.

This journey from novice to self-sufficient hiker begins not on the trail itself, but with a simple, powerful philosophy of preparedness that has been tested and refined by generations of mountaineers and wilderness experts. It all starts with your pack.
The Foundation of Safety: The 10 Essentials System
Long before your boots touch the dirt, your safety on the trail has already been decided by one thing: what’s inside your pack. Endorsed by the National Park Service and outdoor organizations like REI, the "10 Essentials" is not just a packing list; it's a systematic approach to preparedness. It ensures you have the tools to handle common problems and survive an unexpected night outdoors. Think of these not as ten individual items, but as ten crucial systems.
Navigation: Your primary system for knowing where you are and where you’re going. This must include a physical topographic map of the area and a compass. A GPS device or a smartphone with downloaded offline maps is a great tool, but electronics can fail. A map and compass are your foolproof backup.
Illumination: You need to be able to see in the dark, period. Carry a headlamp or flashlight with a full charge, and always pack extra batteries. A headlamp is superior as it keeps your hands free for other tasks.
Sun Protection: Sunburn and sunstroke can be serious dangers on the trail. This system includes sunglasses, broad-spectrum sunscreen (SPF 30+), and a wide-brimmed hat. Sun-protective clothing can also be a game-changer.
First-Aid Supplies: You must have the ability to treat common trail injuries. Your kit should be equipped to handle blisters, cuts, scrapes, and sprains. A basic kit is good; a custom-built one is better.
Repair Kit and Tools: Gear can break. A multi-tool or knife is invaluable, and a small roll of duct tape can repair everything from a torn jacket to a broken tent pole.
Fire: In an emergency, fire provides warmth, a way to purify water, and a powerful psychological boost. Carry waterproof matches, a reliable lighter, and a dedicated fire starter like dryer lint or a commercial fire-starting block.
Insulation: Weather can change in an instant, especially at elevation. You must carry an extra layer of clothing beyond what you start the hike in, regardless of the forecast. This should be a moisture-wicking layer, like a fleece jacket or thermal top—never cotton, which loses all insulating properties when wet.
Nutrition: Always pack more food than you think you’ll need. An extra day’s worth of non-perishable, high-energy food is the standard. Items like protein bars, nuts, and dried fruit are perfect.
Hydration: Carry more water than you expect to need and have a way to purify more. This means carrying a water filter or purification tablets to safely treat water from streams or lakes in an emergency.
Emergency Shelter: If you’re forced to spend an unplanned night out, protection from the elements is critical to preventing hypothermia. This doesn't mean a tent. A lightweight, packable emergency space blanket or bivy sack is all you need.

For expert-vetted gear lists and detailed trail guides from seasoned creators, the TrekGuider Marketplace is an invaluable resource for taking your preparation to the next level.
"Never Get Lost Again": Mastering Trail Navigation
Of all the potential hiking dangers, getting lost is one of the most common and terrifying. A recent study of SAR missions revealed that "error in judgment" was a leading cause of hikers needing rescue, and a huge part of that is poor navigation. Relying solely on your phone’s GPS is one of the biggest hiking safety tips to ignore—service is unreliable in the backcountry, and batteries die. True navigational confidence comes from time-tested skills.
How to Use a Map and Compass
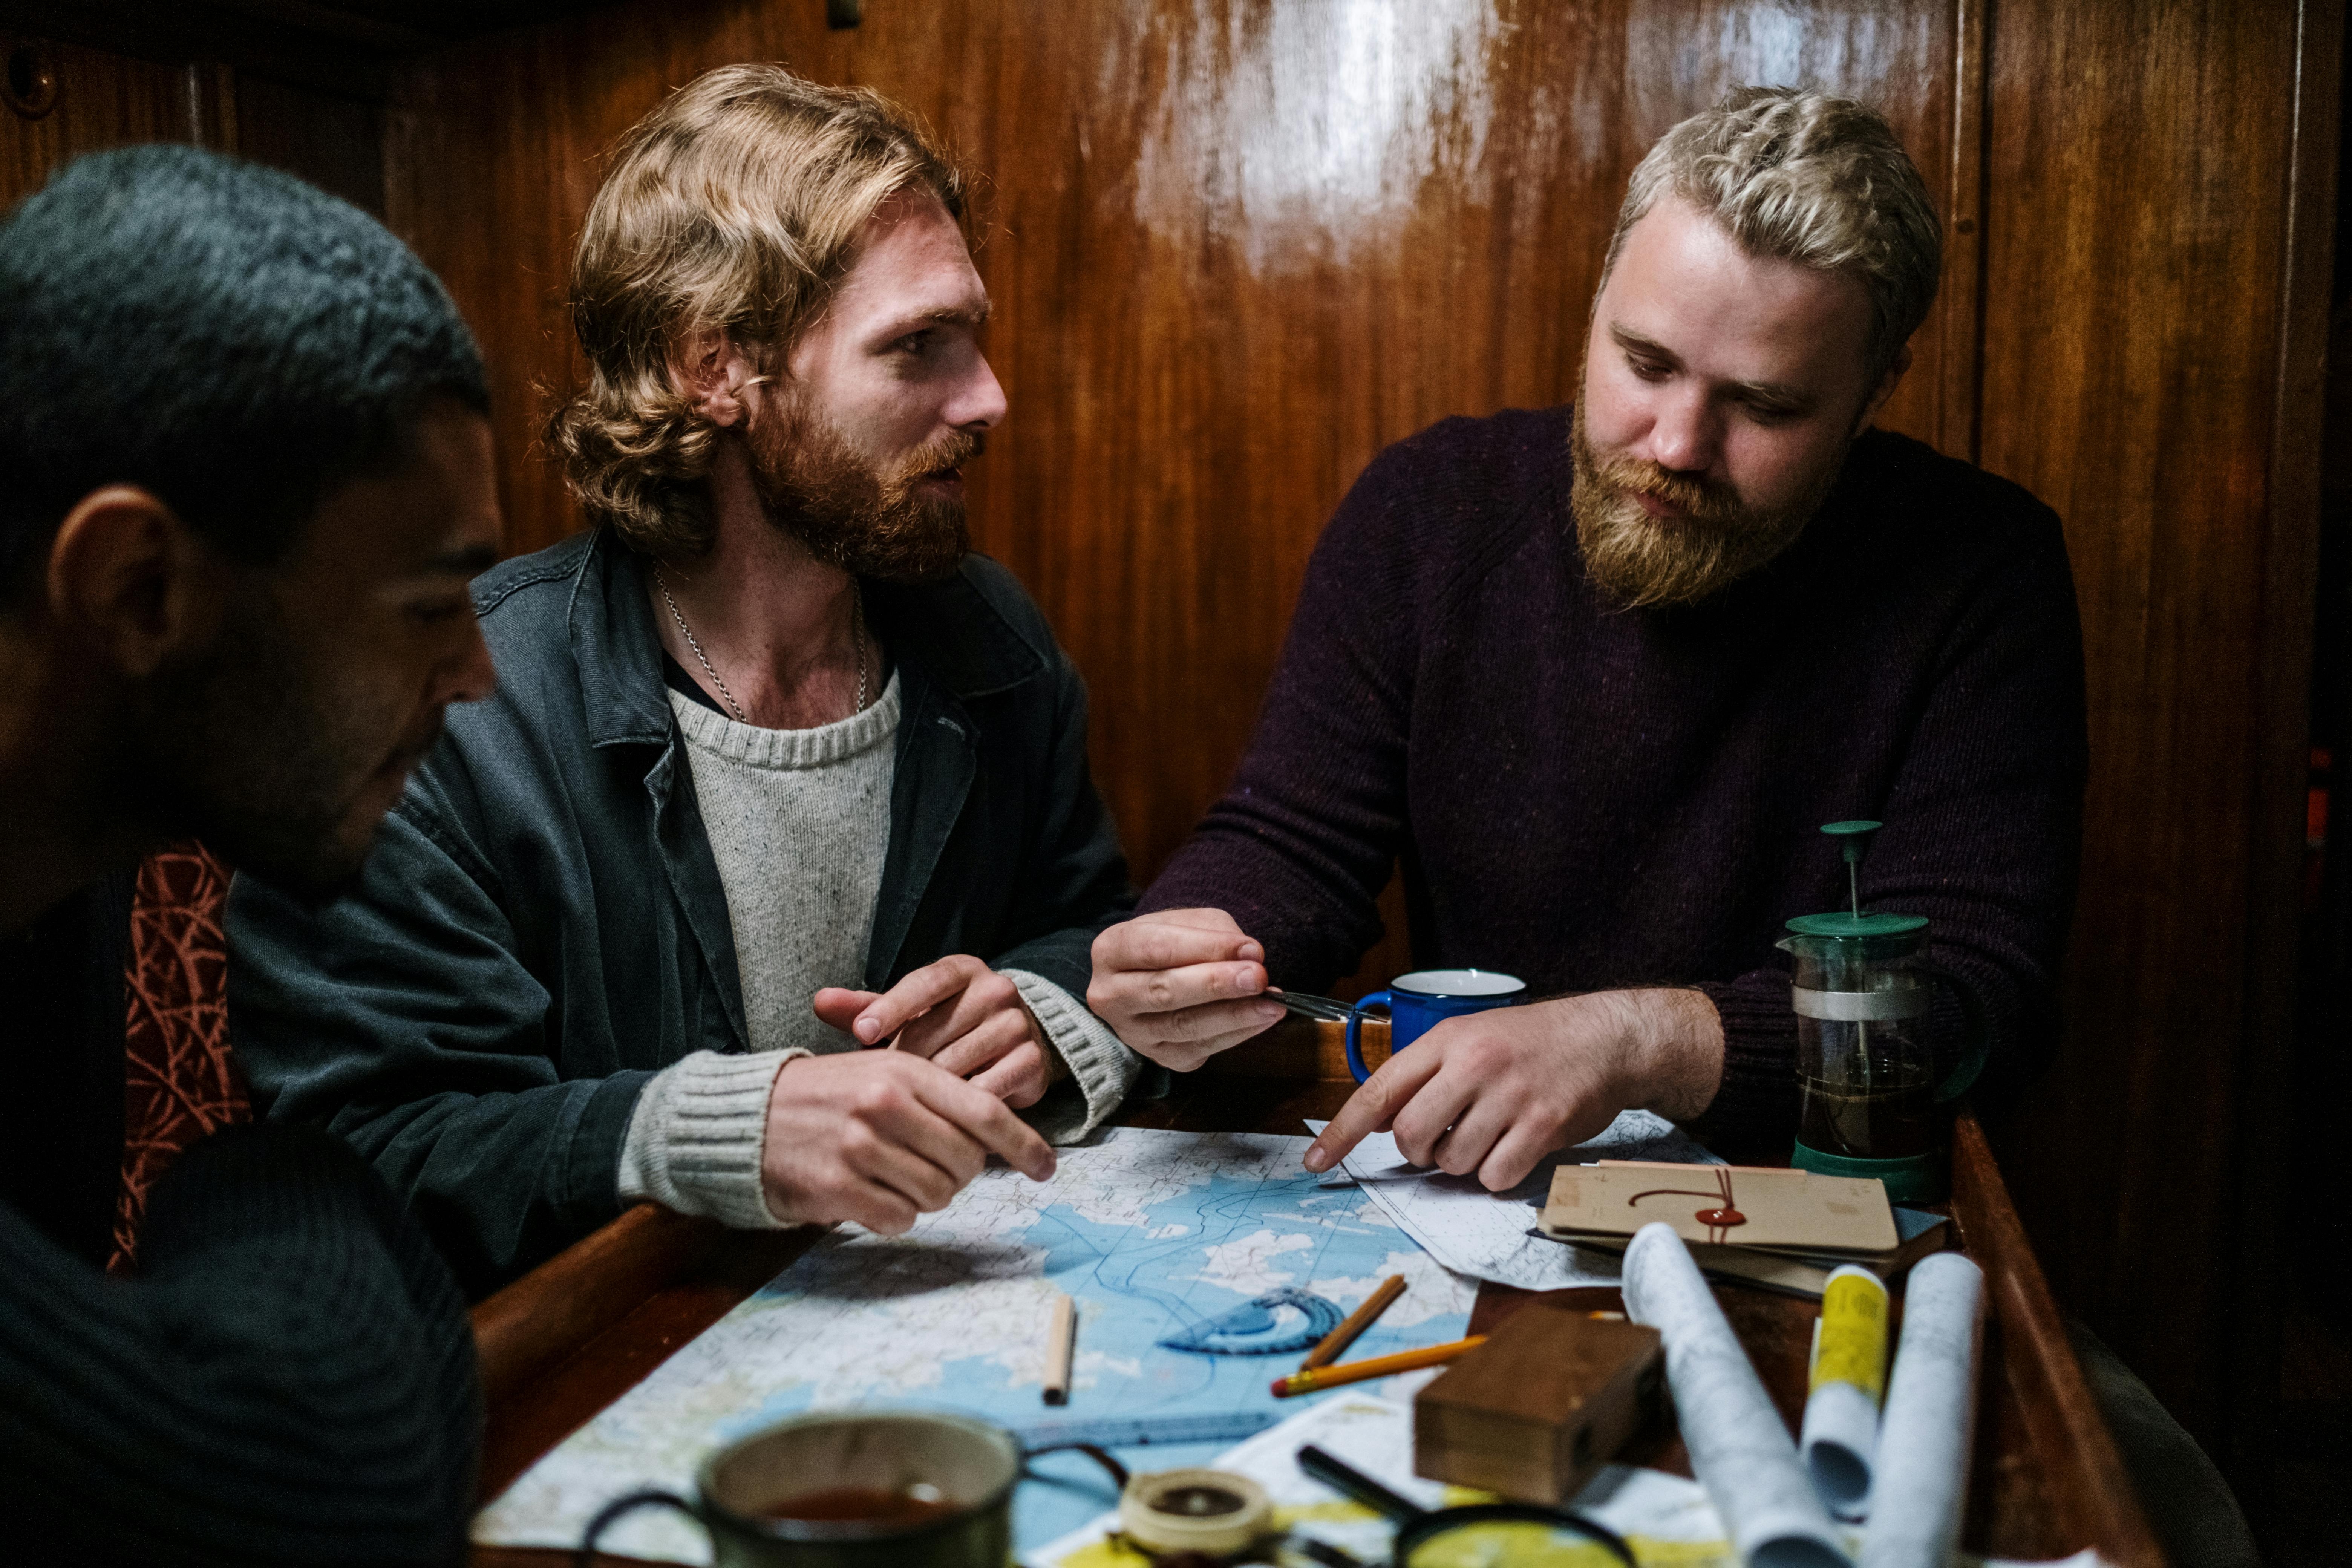
This fundamental skill is easier than you think and is your most reliable tool.
Place the Compass on the Map: Lay your map flat. Identify your current location and your destination. Place your compass so the long edge of its baseplate creates a line connecting the two points, with the "Direction of Travel" arrow on the compass pointing toward your destination.
Set the Compass Bezel: Keeping the baseplate still, rotate the round bezel (the dial) until the orienting lines inside it are parallel with the map's north-south grid lines. Make sure the "N" on the bezel is pointing to North on the map. The number on the bezel aligned with the Direction of Travel arrow is now your bearing.
Follow the Bearing: Lift the compass off the map and hold it level in front of you. Turn your body until the red magnetic needle is "in the shed"—that is, perfectly inside the red orienting arrow on the bezel. The Direction of Travel arrow now points precisely to your destination. Pick a landmark in that direction, walk to it, and repeat the process.
Pro-Tip: The difference between "true north" (on your map) and "magnetic north" (where your compass points) is called declination. For precise navigation, you must adjust your compass for the local declination, which will be printed on your map.

Wildlife on the Trail: A Guide to Safe Encounters
Seeing wildlife is a thrilling part of hiking, but it’s crucial to remember that you are a visitor in their home. The core principles of every encounter are to maintain a safe distance, never feed wildlife, and know how to react to avoid escalating a situation.
Bear Encounters (Black vs. Grizzly)
Making noise while you hike (talking, clapping) is the best way to avoid surprising a bear. If you do encounter one, your reaction depends on the species.
If a Black Bear Approaches: Never run. Make yourself look as large as possible by raising your arms and opening your jacket. Yell, clap, and make loud noises. If it attacks, fight back aggressively. Target the bear's face and nose with anything you have—rocks, trekking poles, your fists. Do not play dead.
If a Grizzly Bear Approaches/Charges: Do not run and do not make direct eye contact. Speak in a calm, low voice to show you are not a threat. If it charges, stand your ground and use bear spray when it is within 30 feet. If it makes contact, play dead. Lie flat on your stomach, protect the back of your neck with your hands, and use your pack as a shield.
Mountain Lion (Cougar) Encounters
These predators are ambush hunters, so an encounter is rare. If you see one, it has likely been watching you.
Protocol: Do not run, as this triggers their chase instinct. Make direct eye contact. Make yourself appear larger by raising your arms and opening your jacket. Speak in a loud, firm voice. Slowly back away, giving the cat an escape route.
If Attacked: Fight back with everything you've got. Use rocks, sticks, or your hands to target the animal's eyes and face.
Venomous Snake Encounters
Snakes have no interest in humans and will only strike if they feel threatened.
Protocol: If you see a snake, freeze. Do not make any sudden movements. Once you've located the snake, slowly back away and give it a wide berth to move on. Be careful where you step and place your hands, especially when scrambling over rocks or logs.
If Bitten: The priority is to stay calm to slow the spread of venom. Limit physical activity and get to a hospital as quickly and safely as possible for evaluation and potential antivenom treatment.
Handling Trail Emergencies: What to Do When Things Go Wrong
Even with perfect preparation, accidents can happen. A twisted ankle, a sudden illness, or getting turned around can escalate quickly. Your ability to stay calm and make rational decisions is your most valuable asset. If you find yourself in trouble, remember the acronym S.T.O.P.
Stop: The moment you realize you are in trouble, stop moving. Sit down.
Think: Assess your situation calmly. What went wrong? What resources do you have?
Observe: Look around you. Where is the sun? Can you see any landmarks? Is there a source of water or shelter nearby?
Plan: Formulate a simple, logical plan. Don't make panicked decisions.
First Aid on the Trail
Your first-aid kit from the 10 Essentials is your go-to tool for injuries. Here's how to handle the most common trail ailments:
Blisters: The moment you feel a "hot spot" on your foot, stop and address it. Clean the area and apply moleskin or a blister-specific pad. Don't wait for it to become a full-blown blister.
Sprains: For a twisted ankle or knee, use an elastic wrap bandage from your kit to provide compression and support. Loosen it if you feel any numbness or tingling. Elevate the joint when you rest, and use a trekking pole or sturdy branch as a crutch if needed.
Cuts and Scrapes: Control any bleeding with direct pressure using a sterile gauze pad. Once it stops, clean the wound thoroughly with an antiseptic wipe and apply antibiotic ointment before covering it with a bandage.
A well-stocked daypack is crucial, but so is a plan for the whole trip. Before you head out to explore our incredible national parks, make sure your vehicle and supplies are just as prepared as your hiking gear.
Your Ultimate Adventure Blueprint
Ready to hit the road? Don't leave home without our expert-vetted National Park Road Trip Checklist. This free guide covers everything from vehicle prep and essential gear to can't-miss stops, ensuring your adventure is seamless from start to finish. Download it for free now!
Hiking Safety FAQs
A prepared mind anticipates questions. Here are expert answers to common concerns.
1. What's the right way to signal for help?
If you determine you cannot get yourself out of a situation safely, you need to signal for help. The universal distress signal is three of anything: three whistle blasts, three flashes of a headlamp, or three piles of rocks. A whistle is a must-have item that uses far less energy and carries further than shouting. For serious backcountry travel, consider investing in a personal locator beacon (PLB) or satellite messenger, which can send an SOS signal with your exact location to emergency services.
2. Is it safe to hike alone?
Solo hiking can be an incredibly rewarding experience, but it requires a higher level of preparation and self-sufficiency. All the rules in this guide become even more critical. It is absolutely essential that you leave a detailed itinerary with a trusted friend or family member. Include your planned route, your start and end times, and a "panic time"—the specific time they should call for help if they haven't heard from you.
3. What do I do if the weather turns bad unexpectedly?
Your first priority is to get below the treeline if you're in an exposed area to reduce the risk of lightning strikes. Put on your extra insulating layer and your rain gear before you get wet and cold. Assess your map and your situation. It is often safer to turn back, even if you're close to your destination, than to push on into deteriorating conditions.
Pro-Tip: Always tell someone your plan. Before every hike, leave a detailed itinerary with a trusted friend or family member. This is the single most important safety net you have.

Your Adventure, Empowered by Preparation
The goal of these hiking safety tips is not to fill you with fear, but to arm you with confidence. Every piece of gear you pack and every skill you learn is a key that unlocks a new level of freedom on the trail. Preparation allows you to push your boundaries, explore wilder places, and immerse yourself in the beauty of nature without the nagging whisper of anxiety. By respecting the wilderness and committing to self-sufficiency, you transform from a simple visitor into a capable, confident adventurer.
Now that you have the skills for a safe hike, you can integrate that adventure into a larger, perfectly planned journey. For a complete master plan covering everything from budgeting and logistics to finding the best trails and tours, our all-encompassing Travel Guide is the only resource you'll ever need.
Don't Miss Out! Subscribe for Exclusive Content
SubscribeComments 0
No comments yet
Be the first to share your experience!
Dont Miss Out! Subscribe for Exclusive Content

How to Avoid Travel Scams: A Global Guide

Is Public WiFi Safe? How to Protect Your Data Abroad

A Woman's Guide to Safe Travel: 10 Critical Tips

7 Hotel Safety & Security Tips for Peace of Mind

9 Beach Safety Tips That Could Save Your Life
