Decoding Affiliate Commission Rates: Benchmarks for Travel Creators
TrekGuider @trekguider
You’re a travel creator, and you’ve entered the world of affiliate marketing to turn your passion into a profession. But you’ve quickly run into a frustrating black box: the commission structure. You see a dizzying array of percentages, acronyms like CPA and EPC, and vague promises of earnings. You’re left wondering what good affiliate commission rates even look like. Are you earning your worth, or are you leaving a significant amount of money on the table?
This confusion isn't just academic; it's a direct threat to your bottom line. The reported average monthly income for affiliates in the travel niche is an impressive $13,847, a figure that proves this is a serious enterprise. But you can't build a sustainable business on guesswork. Partnering with a program offering a flashy 40% commission—only to discover it’s 40% of their tiny margin—is a rookie mistake that costs real money. This lack of clarity makes it impossible to forecast your income, negotiate better terms, or build a truly predictable business. You feel like you’re flying blind.
This guide is your decoder ring. We are pulling back the curtain to give you a comprehensive breakdown of how affiliate commissions actually work. We will deconstruct every major commission model, provide clear, data-backed industry benchmarks, and teach you how to analyze these rates like a seasoned professional. By the end of this deep dive, you will be able to spot high-value opportunities and architect a monetization strategy that truly rewards your influence. For a complete overview of the affiliate landscape, our definitive pillar page, Travel Affiliate Programs: The 2026 Ultimate Guide, is your essential command center.

The Anatomy of a Commission: Deconstructing the Core Models
Let's cut through the jargon. An affiliate commission is simply a reward for a job well done. A company—the merchant—pays you for successfully driving a specific, valuable action, which in the travel world almost always means a completed booking or sale.
But the way that reward is calculated can vary dramatically. Understanding the underlying structure of different affiliate commission rates is the first step toward becoming a high-earning creator.
1. Cost Per Sale (CPS) or Pay Per Sale (PPS): The Industry Workhorse
You'll encounter this model most often—it's the industry's workhorse for a reason. It’s simple and transparent: when a reader clicks your affiliate link and completes a purchase, you earn a percentage of the total sale value. If you recommend a $500 hotel stay and the program offers a 6% CPS commission, you earn $30. This model directly ties your earnings to the revenue you generate, making it the gold standard for most travel bookings and gear sales.
2. Cost Per Action (CPA): Rewarding a Specific Step
CPA is a broader model where you’re compensated for a specific action a user takes. While that action is often a sale (making it identical to CPS), it can also be something else. For example, a travel credit card company might pay you a CPA commission for every user who completes an application, regardless of whether they are approved.
3. Cost Per Lead (CPL): Paying for High-Value Inquiries
With a CPL model, you earn a fixed fee for each qualified lead you generate. This is common in high-ticket travel sectors where the sales cycle is long. A luxury tour operator, for instance, might pay you $50 for every user who fills out a detailed inquiry form for a bespoke African safari. You get paid for delivering a potential customer; their sales team takes it from there.
4. Tiered & Multi-Tier Structures: Incentivizing Growth
This is where commission models get more sophisticated and rewarding.
Tiered Structures: Rewarding Your Growth These are designed to reward high-performing affiliates. Your commission rate increases as you drive more sales. A program might offer a base rate of 6%, which jumps to 8% after you generate $5,000 in sales in a month, and 10% after $10,000.
Multi-Tier Structures: Building a Network These allow you to earn commissions not only on your own sales but also on the sales generated by other affiliates you recruit into the program. This effectively turns you into a partner who helps grow the program itself, creating a secondary, more passive income stream.
5. Cost Per Click (CPC): The Rare Exception
In this model, you are paid a small fee for every click your affiliate link receives, regardless of a sale. Due to its high vulnerability to fraud, the CPC model is now extremely rare in modern affiliate marketing and almost never seen in the travel space.

Industry Benchmarks: What Good Affiliate Commission Rates Look Like
So, what should you actually expect to earn? While rates vary, the travel industry has established clear benchmarks across its major categories. Here’s your cheat sheet.
Hotels & Accommodations: 2% - 7% of Booking Value This is the bread and butter for many creators, but the details are everything. A program like Expedia Group offers up to 6% of the total booking value with a 7-day cookie. In contrast, Booking.com advertises a much higher "25-40%", but this is a percentage of their commission, not the customer's total payment. This opaque structure often results in a much lower effective rate, closer to 2-4% of the final booking value.
Tours, Activities & Experiences: 6% - 8%+ This is a high-margin category with strong potential. Market leaders like Viator and GetYourGuide set the standard with base commissions of 7-8%. Adventure-focused operators like G Adventures offer 6%, which is incredibly powerful when applied to their high-ticket tours that can cost thousands of dollars.
Travel Insurance: 10% or More Insurance is a consistently high-paying vertical. Top programs like SafetyWing and World Nomads both offer a standard 10% commission. SafetyWing takes this a step further with a recurring model, meaning you continue to earn 10% every time your referred customer renews their policy.
Gear & Apparel: 3% - 8% For physical products, rates depend heavily on the retailer. Amazon Associates is the baseline, offering 3-4% for most travel categories. However, partnering with specialty retailers is far more lucrative. A brand like REI, for example, offers a 5-8% commission on high-quality (and often high-priced) outdoor gear.
Pro-Tip: Don't be blinded by the highest percentage. A 6% commission on a $3,000 G Adventures tour is $180. An 8% commission on a $50 city walking tour is $4. Always consider the average order value of the products you are promoting when evaluating affiliate commission rates.

The Metrics That Matter More Than the Rate Itself
An experienced affiliate marketer knows the commission rate is just a starting point. To truly understand a program's profitability, you need to analyze the metrics that measure real-world performance.
Earnings Per Click (EPC): Your True North This is arguably the single most important metric. It’s calculated by dividing your total commission earnings by the total number of clicks you sent. If you sent 100 clicks and earned $50, your EPC is $0.50. This number tells you the average value of every single click. A program with a lower commission but a higher EPC is often the more profitable partner for your specific audience.
Conversion Rate (CR): The Sign of a Healthy Partner This is the percentage of users who take the desired action after clicking your link. A high conversion rate is a sign of a trusted brand with a well-optimized checkout process. A program with a 10% commission that converts at 1% is less profitable than a program with a 5% commission that converts at 5%.
Cookie Duration: The Travel Creator's Safety Net This is critical in the travel space. A longer cookie duration (30, 60, or 90 days) gives your audience the time they need to research a high-consideration purchase while ensuring you still get credit. A short cookie window is a major red flag and a sign that the program may not be structured in your favor.
Pro-Tip: Dive into your affiliate dashboards. Most networks like CJ Affiliate and Travelpayouts provide detailed reports on your EPC and conversion rates for each program. Use this data to identify your true top performers—the results will often surprise you.

The Travel Creator's Toolkit
Feeling overwhelmed by the data? You don't have to be. To help you organize your strategy and implement everything you've learned, we've created the ultimate resource bundle. It includes checklists, templates, and tools designed to accelerate your journey from beginner to pro.
Download Your Free Bundle: The Travel Creator's Toolkit
The High-Margin Alternative: Referral & Revenue Share Models
While traditional commission models are powerful, the most forward-thinking creators are diversifying into referral and revenue-sharing programs. Instead of a one-time payment for a single sale, these models allow you to build long-term, passive income streams by becoming a true platform partner.
This is the philosophy behind the TrekGuider Seller Platform. We believe in empowering creators to build complex businesses. Our platform is designed for you to sell your own digital products—like itineraries and guides—but our referral program adds another powerful layer to your income strategy.
Instead of a simple CPS commission, our model functions like a sophisticated multi-tier system. When you refer other creators to become sellers on TrekGuider, you earn an ongoing share of the revenue they generate, with tiered commissions that start at 4% for referred sellers. You’re not just earning from a single transaction; you’re building a network and earning from its collective success. It's a strategic way to move beyond chasing individual sales and start building a more resilient, high-margin business.
Frequently Asked Questions (FAQ)
1. Is a higher commission rate always better? Not at all. A high commission rate can be misleading if the program has a low conversion rate, a short cookie duration, or a low average order value. Always look at your Earnings Per Click (EPC) to determine the true profitability of a program for your audience.
2. How can I find the EPC for an affiliate program? Most reputable affiliate networks (like CJ Affiliate, ShareASale, or Travelpayouts) provide EPC data. It's often listed as a network-wide average for each merchant, which gives you a good baseline. Once you start sending traffic, you can track your own personal EPC in your performance reports.
3. Can I negotiate my affiliate commission rates? Yes, absolutely. Once you become a proven partner and consistently drive a significant volume of high-quality sales, you have leverage. Many brands are willing to negotiate a higher, private commission rate for their top-performing affiliates. Always track your performance and don't be afraid to ask.

From Confusion to Command
You are no longer in the dark. The world of affiliate commission rates is no longer a confusing black box. You now have the knowledge to deconstruct any program's payment structure, the industry benchmarks to know your worth, and the key metrics to identify what truly drives profit.
This knowledge is power. It empowers you to audit your existing partnerships, confidently seek out new ones, and even negotiate better terms. By focusing on programs with fair commissions, long cookie durations, and high conversion rates, you can ensure your hard work is properly rewarded. Building a profitable travel content business requires a strategic approach, and a deep understanding of affiliate commission rates is a non-negotiable part of that strategy.
Read the full guide: The Travel Blogger's Playbook to Affiliate Marketing Mastery
Don't Miss Out! Subscribe for Exclusive Content
Subscribe


Comments 0
No comments yet
Be the first to share your experience!
Dont Miss Out! Subscribe for Exclusive Content

Ultimate USA Holidays Guide: Top Picks

FTC Affiliate Disclosure Essentials: Stay Compliant as a Travel Creator

Essential Affiliate Tools: From Tracking to Full Optimization

Avoid These 5 Affiliate Landing Page Mistakes for Better Conversions

Affiliate Keyword Research Mastery for Travel Blogs

Booking.com Affiliate Program Review: Pros, Cons, and Earnings Potential
Solo Travel Europe Without Going Broke: A Realist's Guide
TrekGuider @trekguider
Does the dream of a solo trip through Europe—wandering Rome’s ancient streets, finding the perfect café in Lisbon, or watching the sunset over the Danube in Budapest—feel just out of reach because of one major hurdle? The cost. For years, the myth has persisted that a European adventure requires a massive savings account. You've seen the glamorous photos, but you’re agitated by the nagging fear that traveling alone means paying double for everything and draining your bank account.

Let's put that fear to rest. The fantastic news is that this financial barrier is crumbling. The travel industry is finally waking up to the power of the solo traveler, and a smarter, more affordable way to explore the continent has emerged. This guide is your complete playbook for an incredible solo travel Europe adventure on a budget. We'll show you how to leverage Europe’s incredible network of hostels and trains, not as a sacrifice, but as a real advantage for a richer journey. These are the essential that transform financial anxiety into confident exploration.
The First, Most Important Decision: Mastering Europe's Budget Map
The single most powerful decision you will make for your budget happens before you book a single hostel or train ticket: choosing where to go. The secret to affordable solo travel Europe is understanding that the continent has two distinct economic personalities. Your first strategic move is to divide your map into two zones: the pricier West and North, and the wonderfully affordable East and South.
This isn’t about sacrificing iconic experiences; it’s about being smart. A daily backpacker budget in Western Europe (think France, the UK, Switzerland) can easily run you $75-$125. That same travel style in Eastern Europe (Hungary, Poland, Czech Republic) will cost closer to $40-$70. To put it bluntly: a single dinner in Zurich can cost more than your entire day’s budget in Krakow.
Your Budget-Friendly Hubs (East & South): These regions are your financial superpower. They offer world-class history and vibrant culture at a fraction of the cost. Prioritize cities like:
Budapest, Hungary: Famous for its stunning architecture and thermal baths.
Krakow, Poland: A historical gem with a lively, youthful energy.
Prague, Czech Republic: A fairytale city of spires and bridges.
Lisbon, Portugal: Coastal charm, fantastic food, and a laid-back vibe.
Seville, Spain: The heart of Andalusia, with passionate culture and sunny plazas.
Athens, Greece: The cradle of Western civilization, with ancient wonders at every turn.
The Splurge-Worthy Destinations (West & North): This doesn't mean you have to skip London, Paris, or Amsterdam. It just means you visit them strategically.
Pro-Tip: Embrace the "Hybrid Trip" Strategy. Don't think in terms of "either/or." Plan to spend the bulk of your trip—say, two weeks—exploring the more affordable regions. This allows you to "bank" significant savings, which you can then deploy for a shorter, more focused four or five-day splurge in a bucket-list city like Paris without breaking the bank.
Forging Your Financial Compass
A budget isn’t a restriction; it’s a tool of empowerment. It’s what allows you to travel without financial stress. Instead of a single magic number, let's break down the costs so you can build a personalized plan.
Deconstructing the Daily Costs: Where Does the Money Go?
Forget generic advice. Your daily budget is a deeply personal number that hinges on your travel style. To give you a real-world compass, we’ve broken down the three most common approaches we see on the road:
The Bare-Bones Backpacker: $45-$65 per day. This is for the traveler who stays exclusively in hostel dorms, cooks most meals in the hostel kitchen, and focuses on free activities like walking tours and exploring neighborhoods on foot.
The Savvy Mid-Ranger: $75-$130 per day. This is the sweet spot for most. It allows for a mix of hostel dorms with the occasional private room, eating one meal out per day at a casual spot, visiting paid attractions, and enjoying the local nightlife.
The Comfort-Conscious Budgeter: $135+ per day. This budget allows for private rooms in hostels or budget hotels, dining out more frequently, and participating in unique paid experiences or guided tours.
Pre-Trip Savings vs. On-the-Ground Spending
Remember that a significant chunk of your budget will be spent before you even leave home. Factor in these major upfront costs:
International Flights: Use tools like Google Flights and Skyscanner with flexible date searches to find the best deals.
Travel Insurance: This is non-negotiable. It’s your ultimate safety net for medical emergencies or trip cancellations.
Essential Gear: A quality, comfortable backpack and two pairs of versatile shoes are your most important investments.
For your money on the ground, be a financial ninja. Get a credit or debit card with no foreign transaction fees (like the Chase Sapphire Preferred or Capital One Venture). These 2-3% charges on every purchase add up shockingly fast. Crucially, always avoid the bright blue and yellow Euronet ATMs. They are predatory, charging outrageous conversion rates and hidden fees. Stick to official bank ATMs—look for the logos of major national banks like Deutsche Bank, BNP Paribas, or Santander. Your wallet will thank you.
Sleep Smart, Save Big
For solo travelers, where you sleep is more than just a bed—it’s your social hub, your sanctuary, and your savings engine.
Hostels: Your Social Hub and Savings Engine
Hostels are the undisputed key element of budget travel in Europe. A dorm bed will typically cost between $25 and $45, a massive saving compared to a hotel. But their true value lies beyond the price tag.
Built-in Community: Hostels are designed for social interaction. The common areas, shared kitchens, and organized events (like free walking tours or pub crawls) make it incredibly easy to meet other travelers if you choose to.
Safety & Security: Modern hostels are safer than ever. Look for properties with 24-hour reception, secure individual lockers for your valuables (always bring your own padlock), and female-only dorms if that makes you more comfortable.
Amenities that Save: The communal kitchen is a budget game-changer. Cooking just a few meals a week can save you hundreds over a long trip.
When booking on sites like Hostelworld, read recent reviews like a detective. Pay close attention to comments on cleanliness, location, security, and the overall "vibe" to find the perfect fit for you.
Beyond the Dorm: Other Budget-Friendly Options
While hostels are king, they aren't your only choice. The rise of "lifestyle" hotel brands like Moxy offers smaller, stylish single rooms that can be a great value. Renting a private room on Airbnb is another option, though often pricier than a hostel. A key piece of good news: the dreaded "single supplement" fee is slowly dying. The industry has recognized the solo travel boom, and more companies are offering true single-person pricing. Once you've locked in your home base, the next piece of the puzzle is mastering the art of getting from A to B without draining your travel fund.
Mastering the Rails & Roads
Europe’s transport network is a marvel, but choosing the cheapest option requires a strategic trade-off between cost, time, and convenience. This is a critical component of your plan for solo travel Europe on a budget.
Eurail Pass vs. Point-to-Point Tickets
Is a Eurail Pass worth it for a solo traveler? The answer is: it depends.
Get a Eurail Pass if: You crave ultimate flexibility and plan to travel extensively through expensive countries like Germany, Switzerland, and Austria, where last-minute train tickets are costly.
Buy Point-to-Point Tickets if: You have a relatively fixed itinerary and are focusing on Southern or Eastern Europe. Booking individual bus or train tickets in advance on platforms like Omio or Trainline is almost always cheaper.
Pro-Tip: Before you buy a pass, map out your ideal route and price out each individual leg of the journey. Compare that total to the cost of the pass. This simple exercise can save you hundreds of dollars.
Eating Like Royalty on a Pauper's Budget
Forget surviving on instant noodles. Eating affordably in Europe can be one of the most delicious and authentic parts of your journey.
The Holy Trinity of Budget Eating
Supermarkets & Picnics: This is your #1 money-saving tactic. Visit a local grocery store or an outdoor market. Buy a fresh baguette, some regional cheese, local cured meats, fruit, and a bottle of wine for a few euros. Enjoying this feast in a Parisian park or along a Venetian canal is a 5-star experience at a 1-star price.
Hostel Kitchens: Cooking dinner with new friends in the hostel kitchen is a quintessential backpacking experience. It’s social, fun, and incredibly cheap.
Street Food & Local Markets: From gyros in Greece to pierogi in Poland, covered food halls and street food stalls are where you’ll find authentic, delicious local food for just a few dollars.

Smart Restaurant Hacks
When you do dine out, eat smart. Embrace the lunch special. Across Europe, especially the menu del día in Spain (which typically includes a starter, main, dessert, and a drink for a set price), restaurants offer multi-course lunch menus for a fraction of their dinner prices. And always use the Five Block Rule: walk at least five blocks away from any major tourist attraction before choosing a restaurant. You’ll almost always find better food at a lower price.
Two Field-Tested Budget Itineraries
Let's make this real. Here are two sample itineraries showing these principles in action.
The 3-Week Eastern Europe Classic (€50/day)
Route: Prague → Krakow → Budapest → Belgrade
The Vibe: This is the ultimate budget-friendly route through the heart of Central and Eastern Europe. You’ll experience stunning history, incredible nightlife, and delicious food and beer, all while your daily costs stay incredibly low. Transportation between these cities is fast, cheap, and easy via bus or train.
The 3-Week "Best of Both" Hybrid (€85/day)
Route: Lisbon → Seville → (Fly to) Rome → Florence → (Overnight bus to) Ljubljana
The Vibe: This itinerary demonstrates the Hybrid Strategy. You start in affordable and beautiful Portugal and Spain, then take a strategic budget flight to tackle your Italian bucket list. You finish in charming, budget-friendly Slovenia, using an overnight bus from Italy to save on both transport and a night's accommodation.
Your Top Budget Questions, Answered
How much money do I need for 1 month of solo travel in Europe?
A solo traveler can expect to spend between $1,500 (frugal backpacker in the East) and $4,500 (mid-range traveler including the West) for a one-month trip. Your destination choices and travel style are the biggest factors.
Is Europe safe for a first-time solo female traveler?
Absolutely. Europe is generally very safe for solo female travelers. Countries like Iceland, Portugal, and Slovenia are consistently ranked among the safest in the world. Standard precautions—being aware of your surroundings, securing your belongings, and trusting your gut—are key.
What is the absolute cheapest way to travel between countries in Europe?
The bus is almost always the cheapest option. Companies like Flixbus have an extensive network with fares as low as $5, making them a backpacker's best friend.
Should I travel in the summer or the off-season?
For budget travel, the shoulder seasons (April-May, September-October) are perfect. You’ll get pleasant weather with far fewer crowds and significantly lower prices for flights and accommodation compared to the peak summer months.
You now have the framework for an affordable and unforgettable European adventure. The key to a successful solo travel Europe journey on a budget isn't about restriction; it's about smart, strategic planning. By choosing your destinations wisely, embracing the social and economic power of hostels, and mastering the continent's incredible public transport, you transform a dream into an achievable, actionable plan. The freedom of the open road—and the railway—is yours for the taking.
Read the full guide: Anxious to Adventurous: The Ultimate Guide to Solo Travel Confidence
Don't Miss Out! Subscribe for Exclusive Content
SubscribeComments 0
No comments yet
Be the first to share your experience!
Dont Miss Out! Subscribe for Exclusive Content

Top 11 High-Paying Affiliate Programs for Travel Bloggers

High-Paying Affiliate Opportunities for Individual Travel Affiliates

Amazon Associates for Travel: Strategies to Maximize Commissions

How to Avoid Travel Scams: A Global Guide

A Woman's Guide to Safe Travel: 10 Critical Tips

7 Hotel Safety & Security Tips for Peace of Mind
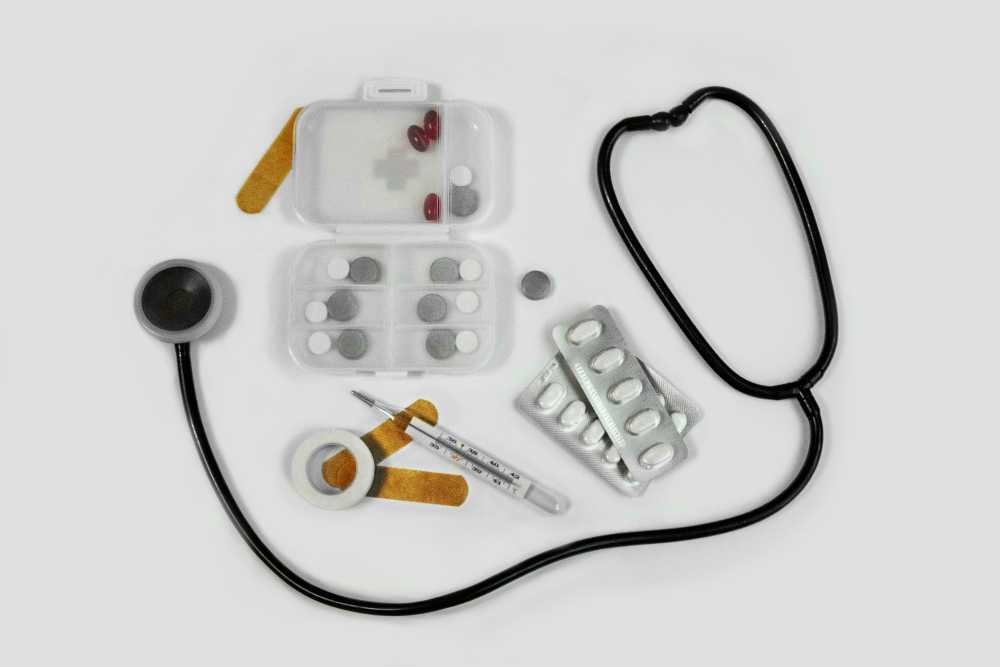
The Ultimate Travel First Aid Kit Checklist (2026)
TrekGuider @trekguider
But it doesn’t have to be that way. The single most powerful tool for ensuring a healthy, stress-free journey is one you create before you even leave home: a comprehensive travel first aid kit. This isn’t just a box of bandages; it’s a personalized arsenal of preparedness that empowers you to handle common health issues with confidence and ease. Building your own kit is at the heart of the proactive mindset we cover in our comprehensive The Ultimate Guide to Travel Safety: A 2026 Playbook. Think of this guide less as a simple shopping list and more as a masterclass in preparedness, backed by pharmacist-approved advice to help you build the ultimate defense against travel’s minor medical curveballs.
DIY vs. Pre-Made: Which Travel First Aid Kit is Right for You?
Before we dive into the specific items, it’s worth considering whether to build your kit from scratch or buy a pre-made one.
Pre-Made Kits: These offer undeniable convenience. They come in a compact case and provide a decent baseline of supplies. However, they are often filled with low-quantity, generic items and may lack the specific medications you need for your trip.
DIY Kits: Building your own kit requires a bit more effort upfront but is superior in every other way. It allows you to choose high-quality brands, pack sufficient quantities, and tailor the contents specifically to your destination, your planned activities, and your personal health needs.
Our recommendation? Start with a high-quality pre-made kit as your base and then use this checklist to supercharge it, swapping out generic items and adding the crucial medications and tools it’s missing. This hybrid approach gives you the best of both worlds.
The Core Components of Your Ultimate Travel First Aid Kit
A truly effective travel first aid kit is organized like a mobile clinic, with specific supplies to treat the most common categories of travel-related ailments. Here is the definitive breakdown of what you need.
Wound & Burn Care: For Life's Little Scrapes
From a papercut to a scraped knee on a cobblestone street, any break in the skin is an open invitation for infection, especially in new environments. Here’s how you shut that door, fast.
Antiseptic Wipes (BZK or alcohol-based): For cleaning wounds, scrapes, and your hands before providing treatment. Individual packets are perfect for travel.
Antibiotic Ointment (e.g., bacitracin): A crucial step to prevent infection in minor cuts, scrapes, and burns after cleaning.
Assorted Adhesive Bandages: Pack a variety of sizes. Fabric bandages are generally more durable and flexible than plastic ones.
Butterfly Bandages / Wound-Closure Strips: Essential for taping the edges of a minor cut together to help it heal cleanly.
Sterile Gauze Pads and a Roll of Gauze: For dressing larger wounds or as a compress to control bleeding. Pack a few different sizes.
Medical Adhesive Tape: To secure gauze and bandages in place.
Moleskin or Blister Treatment Pads: An absolute lifesaver for any trip involving significant walking or hiking. Apply it as soon as you feel a "hot spot" to prevent a blister from forming.
Aloe Vera Gel: Provides soothing relief for minor sunburns.
Pain, Fever & Sprains: Managing Aches and Injuries
Long days of sightseeing, sleeping in unfamiliar beds, and carrying luggage can lead to aches and pains. Be prepared to manage them effectively so they don't slow you down.
Pain Relievers/Fever Reducers: Pack both an ibuprofen-based and an acetaminophen-based option. Pharmacists consistently recommend trusted brands like Advil/Motrin (Ibuprofen) for inflammation and pain, and Tylenol (Acetaminophen) for general pain and fever.
Aspirin: While not for general pain relief for everyone, a dose of aspirin can be life-saving for an adult experiencing symptoms of a heart attack.
Elastic Wrap Bandage: Invaluable for providing support and compression to a sprained ankle, wrist, or knee.
Instant Cold Packs: These single-use packs are activated by squeezing them and are excellent for reducing swelling from sprains, strains, and other minor injuries in the first 24-48 hours.
Pro-Tip: Decant pills into small, clearly labeled travel containers to save space, but take a photo of the original packaging first. This helps you remember dosages and provides information for pharmacists or doctors abroad if needed.

Digestive Issues: Your Defense Against Traveler's Diarrhea
Let’s be direct: traveler’s diarrhea is the single most common illness to strike travelers, affecting up to 80% of visitors in some destinations. Having a dedicated section in your kit to manage digestive distress is absolutely critical.
Anti-diarrhea Medication: To manage symptoms when you need to travel or get through a planned activity. The top pharmacist-recommended brand is Imodium (Loperamide).
Antacids: For relief from indigestion, heartburn, and general upset stomach. Pepto-Bismol is another pharmacist-favorite that can also help with mild diarrhea.
Oral Rehydration Salts: This is arguably the most important item in this section. Dehydration is the primary risk of diarrhea and vomiting. These pre-measured packets mix with safe, bottled water to replenish the essential fluids and electrolytes your body has lost.
Anti-nausea or Motion Sickness Medication: Essential if you’re prone to motion sickness on planes, boats, or winding bus rides.
Allergies, Bites & Skin: Soothing Irritations
New environments mean new pollens, unfamiliar insects, and different plants. Be ready to tackle itches, rashes, and allergic reactions before they become a major annoyance.
Antihistamine (e.g., diphenhydramine): For treating allergic reactions, hives, and severe itching. Note that some antihistamines can cause drowsiness.
Hydrocortisone Cream (1%): A topical steroid cream that provides fast relief from the irritation and itching of rashes and insect bites.
Insect Repellent: In any region with mosquito-borne illnesses like Dengue or Malaria, this is as important as your passport. Choose a repellent with an effective active ingredient like DEET or Picaridin.
Epinephrine Auto-Injector (e.g., EpiPen): This requires a prescription and is absolutely essential for travelers with a history of severe allergic reactions (anaphylaxis).
Ready to Pack Like a Pro?
Your travel first aid kit is a critical piece of your travel puzzle, but it's not the only one. To ensure you don't overlook a single essential item—from documents and finances to clothing and gear—you need a master list. Our comprehensive, free checklist has you covered.
Download Your Free International Travel Checklist Now!
Essential Tools & Personal Medications
The final layer of your kit includes the tools to use your supplies effectively and your own personal health necessities.
Fine-Point Tweezers: For removing splinters, ticks, or other foreign objects from the skin.
Small, Rounded-Tip Scissors: For cutting medical tape, gauze, or moleskin. (Ensure they meet TSA guidelines if packing in a carry-on).
Disposable Non-Latex Gloves: To protect your hands and prevent infection when treating a wound on yourself or someone else.
Digital Thermometer: For accurately checking for fever.
Personal Medications: This is the most critical category. Pack a sufficient supply for your entire trip, plus at least a few extra days' worth in case of delays. Always keep your personal medications in your carry-on luggage in their original, labeled containers.
Pro-Tip: Before you leave, ask your doctor for a letter describing your condition and the medications you take, including their generic names. Keep a digital copy of this and your prescriptions on your phone. This can be invaluable if your medication is lost or you need to see a doctor abroad.

Beyond the Basics: Customizing Your Kit
The ultimate travel first aid kit is not one-size-fits-all. Once you have the core components, elevate your preparedness by customizing it for your specific journey.
By Destination:
Tropical/Developing Countries: Add anti-fungal cream, more insect repellent, and potentially a prescription for a standby antibiotic for severe traveler's diarrhea (consult your doctor).
High-Altitude Destinations: Speak with your doctor about medication to prevent altitude sickness.
By Activity:
Hiking/Trekking: Double down on blister care (moleskin, gel pads), pack an elastic wrap for sprains, and add pain-relieving gel.
Beach Vacation: Add extra aloe vera gel, sting-relief spray, and waterproof bandages.
By Traveler:
With Children: Include children’s formulations and dosages of pain/fever reducers, kid-friendly bandages, and any specific allergy medications they need.
Travel First Aid Kit FAQs
A great kit anticipates problems. Here are answers to common questions that take your preparedness to the next level.
1. What’s the first thing I should do if I get traveler’s diarrhea?
According to the CDC and travel medicine doctors, the first and most important step is oral rehydration. Dehydration is the biggest risk. Start sipping an Oral Rehydration Solution (ORS), sports drinks, or clear broths immediately. For mild to moderate cases that don't have a high fever or blood, an antimotility drug like Loperamide (Imodium) can help manage the symptoms. If symptoms are severe, incapacitating, or include a high fever or blood, it's time to consider a prescribed standby antibiotic and seek medical advice.
2. Should I pack a standby antibiotic in my kit?
This is a question for your doctor or a travel medicine clinic. For travelers heading to high-risk destinations where severe traveler's diarrhea is common, many doctors will provide a prescription for a standby antibiotic like Azithromycin. It’s not for mild cases but can significantly shorten the duration of a severe bout of illness. Discuss your itinerary with your doctor to see if this is right for you.
3. Is it okay to pack medications outside their original bottles to save space?
While it's tempting, it's safest to keep prescription medications in their original, clearly labeled containers. This avoids any confusion or legal issues with customs officials. For over-the-counter pills, you have more flexibility. If you use a travel pill organizer, consider taking a photo of the original packaging so you have the dosage information and ingredients handy.

Pack Confidence for Every Journey
A carefully assembled travel first aid kit does more than just prepare you for minor medical issues; it provides profound peace of mind. It transforms you from a worried passenger into a self-sufficient, empowered traveler, ready to handle the small bumps in the road so you can stay focused on the incredible experiences ahead. By following this checklist, you’re not just packing supplies—you’re packing the confidence to explore the world freely and fully.
Now that your health and safety are covered, you can focus on the other details that make a trip unforgettable. For a complete, deep-dive into every facet of trip planning, from health and safety to budgeting and logistics, our comprehensive Travel Guide is the only resource you'll ever need.
Meta Data Suggestions:
SEO Meta Title (55 characters): The Ultimate Travel First Aid Kit Checklist (2026)
URL Slug: travel-first-aid-kit-checklist
SEO Meta Description (154 characters): Build the perfect travel first aid kit. Our 2026 checklist, with pharmacist-approved tips, covers everything from wound care to stomach issues. Be prepared.
Don't Miss Out! Subscribe for Exclusive Content
SubscribeComments 0
No comments yet
Be the first to share your experience!
Dont Miss Out! Subscribe for Exclusive Content
Ultimate USA Holidays Guide: Top Picks
FTC Affiliate Disclosure Essentials: Stay Compliant as a Travel Creator
Essential Affiliate Tools: From Tracking to Full Optimization
Booking.com Affiliate Program Review: Pros, Cons, and Earnings Potential

Decoding Affiliate Commission Rates: Benchmarks for Travel Creators
Amazon Associates for Travel: Strategies to Maximize Commissions
Chicago Beer Fests: Top 6 Tastings
TrekGuider @trekguider
Chicago. The Windy City. A metropolis of staggering architecture, legendary deep-dish pizza, and a cultural pulse that's impossible to ignore. But for the discerning traveler, another current runs deep through its streets: a world-class, boundary-pushing craft beer scene. The problem? If you're searching for the best beer festivals Chicago has to offer, you're likely drowning in a generic sea of event listings and outdated guides. It’s a frustrating quest that can leave you wondering where the truly exceptional tasting experiences are hiding.
The agitation is real. You don't want to waste your precious travel time or money on a crowded, soulless festival with endless lines and a tap list dominated by macro-brews. You're hunting for something more—an authentic experience that pairs the city's vibrant energy with the innovative spirit of its local brewers. You risk missing out on that perfect pint, that unique seasonal ale enjoyed in a memorable setting, the very reason you sought out Chicago's beer culture. You want a curated path to the city's best pours, not just another tent in a park.
So, let's cut through the noise. I've personally vetted the city's event calendar to bring you a curated guide to the six most exceptional beer tasting experiences—moments that are woven directly into the fabric of Chicago's most iconic celebrations. This isn't just a list; it's your strategic plan for exploring the sudsy side of the city. We'll show you how to find craft beer havens at massive music festivals, what to sip while a river runs green, and where to find festive German lagers in the heart of downtown. These are the can't-miss moments that elevate a simple drink into a core Chicago memory, and they represent just one facet of the year-round excitement we detail in our complete guide to Chicago Holidays: Windy City Thrills.

1. Lollapalooza: An Unlikely Star Among Beer Festivals in Chicago
When you picture Lollapalooza, you see massive stages, roaring crowds, and a lineup of global music superstars. But tucked within this four-day musical marathon is one of the most unique settings for a craft beer experience in the city. Lollapalooza, taking over Grant Park from July 31 - the final day of the festival, is a city within a city, and its beverage program has evolved to satisfy the sophisticated palates of modern festival-goers.
Forget the days of limited options. The festival now boasts a dedicated "Craft Beer Oasis," a shaded haven where you can escape the pulsating crowds and explore a curated selection of Chicago's finest local breweries. Here, you can find everything from crisp, refreshing pilsners perfect for a sunny afternoon watching artists like Olivia Rodrigo or Sabrina Carpenter, to bold, hoppy IPAs that provide the perfect fuel for a night with headliners like Tyler the Creator, A$AP Rocky, and Korn.
Your Tasting Strategy:
Plan Your Pours: With gates open from 11 AM to 10 PM daily, pacing is key. Start your day with a lighter option, like a session ale or a kolsch, to stay hydrated. As the sun sets and the energy builds, transition to something with more character—perhaps a hazy IPA from a local favorite or a rich porter to savor during the final set.
Navigate Like a Pro: Before you even arrive, download the official Lollapalooza app. It’s your key to locating the craft beer tents, viewing digital menus, and identifying which vendors have the shortest lines. This simple step can save you precious time that is better spent enjoying the music.
Pairing is Everything: Think of your beer choice as part of the sensory experience. The bright, citrusy notes of a pale ale can perfectly complement the upbeat energy of a pop performance by an artist like TWICE, while the complex, dark notes of a stout might be the ideal companion for an intense rock set.
Pro-Tip: Lollapalooza is a "rain or shine" event. Pack a poncho. A sudden downpour can send crowds running for cover, creating the perfect five-minute window for you to walk right up to a beer tent with no line and discover your new favorite Chicago brew.

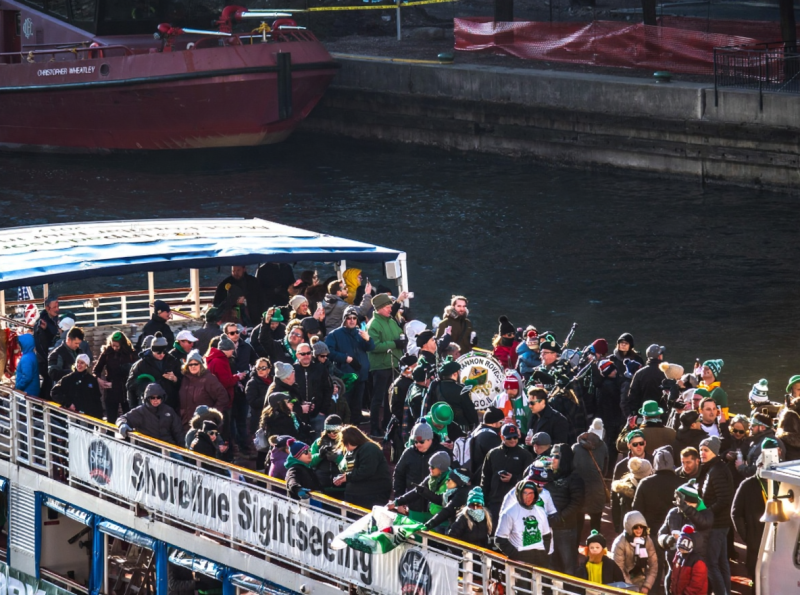
2. The St. Patrick's Day Green River Pour: A Uniquely Chicago Tradition
On Saturday, the Saturday before St. Patrick's Day, Chicago performs a miracle of civic engineering and festive spirit: it dyes its river a brilliant, shimmering emerald green. This spectacle, a tradition dating back to 1962, is the centerpiece of the city's St. Patrick's Day celebration and creates an unparalleled backdrop for a truly unique beer experience. While not a formal festival, the entire riverfront transforms into a massive, open-air party where the beer flows as freely as the green water.
The day kicks off as crews release 40 to 60 pounds of a secret, vegetable-based powder into the water, turning it a vibrant green for about five to six hours. This is followed by the grand parade—a tradition since 1843—which starts at 12:15 PM and marches down Columbus Drive. For a beer lover, the mission is clear: secure a spot with a view and a pint in hand.
Your Tasting Strategy:
Embrace the Theme: This is the one day of the year when ordering a green-dyed light lager is not just acceptable, but practically mandatory. It’s a novelty, a photo op, and a rite of passage for anyone celebrating in the city.
Seek Out Authenticity: Beyond the green beer, riverfront pubs and pop-up vendors will be pouring classic Irish styles. Look for a rich, creamy nitrogen-poured stout or a malty Irish red ale. These traditional brews offer a delicious, authentic contrast to the playful absurdity of the green river.
Location, Location, Location: The best views are from the bridges crossing the river or along the Riverwalk. Arrive early (by 9 AM) to claim your territory. Many local bars and restaurants with river views offer ticketed events that include drinks, providing a more comfortable (and less crowded) way to enjoy the spectacle.
This celebration is a photographer's dream. To make your photos of the emerald river and city skyline truly pop, consider using our collection of Free Travel Lightroom Presets, designed to enhance travel shots and make your memories look as vivid as the day itself.
3. The Christkindlmarket Chalice: German Biers and Festive Cheer
As winter descends upon Chicago, Daley Plaza transforms into a magical, twinkling European village. This is the Christkindlmarket, a traditional German-style Christmas market that is at the heart of the city's holiday season. While families flock here for handcrafted ornaments and festive snacks, beer aficionados know it as the premier destination for authentic German winter brews.
The experience is famously centered around "Glühwein" (hot spiced wine), but the beer selection is equally impressive and essential to the market's charm. You won't find a sprawling list of experimental IPAs here. Instead, the focus is on classic, impeccably crafted German styles that are perfect for sipping in the chilly air.
Your Tasting Strategy:
Drink from the Boot: The most iconic part of the experience is drinking from the commemorative ceramic boot-shaped mug, or "Stiefel." Each year features a new design, making it a collectible souvenir. It’s the perfect vessel for a crisp German pilsner, a malty Märzen, or a dark, roasty Dunkel.
Explore Winter Styles: Look for seasonal specialties like a Doppelbock or a Winter Warmer. These beers are typically higher in alcohol and feature rich, malty flavors of caramel, toffee, and dark fruit, making them the perfect antidote to a cold Chicago evening.
Pair with German Fare: The beer is only half the story. Enhance your tasting by pairing your brew with traditional market food. A crisp pilsner cuts through the richness of a bratwurst, while the sweet maltiness of a bock beer beautifully complements a warm, soft pretzel or a bag of candied nuts.
Pro-Tip: The Christkindlmarket can get extremely crowded, especially on weekends. For a more relaxed tasting experience, visit on a weekday afternoon. You'll have more space to wander, shorter lines for beer and food, and a better chance to chat with the vendors about their offerings.

4. The July 4th Fireworks Flight: Patriotic Pints at Navy Pier
Independence Day in Chicago is a spectacular affair, culminating in a massive fireworks display over Lake Michigan, launched from the iconic Navy Pier. While thousands crowd the pier itself, the savvy beer lover knows the best experience is found away from the main throng, combining the stunning visuals with a curated taste of American craft brewing. This is your chance to create your own micro beer tasting against a patriotic backdrop.
The strategy is to find a rooftop bar or a comfortable perch with a clear view of the fireworks. Many establishments in the Streeterville and River North neighborhoods offer exactly this. The goal is to arrive by 7 PM, settle in, and order a "flight" of local craft beers to enjoy as the sky lights up.
Your Tasting Strategy:
Curate an All-American Flight: Work with your server to build a tasting flight that celebrates American brewing history and innovation. A perfect flight might include:
A Classic American Lager: A clean, crisp, and refreshing starting point.
An American Pale Ale (APA): The style that arguably launched the craft beer revolution, known for its balance of malt and citrusy hops.
A West Coast IPA: A bold, hop-forward brew that showcases the piney, bitter notes characteristic of the style.
A Midwest Stout: A rich, dark beer from a local Chicago or regional brewery, perhaps with notes of coffee or chocolate.
The Rooftop Advantage: Choosing a rooftop bar not only gives you a superior, less crowded view of the fireworks but also provides access to a full menu, comfortable seating, and proper glassware—all elements that elevate the beer tasting experience.
Timing is Key: Order your flight about 30-45 minutes before the fireworks are scheduled to begin. This gives you ample time to savor and compare each beer as the anticipation builds, culminating in the grand finale both in the sky and in your glass.

5. Neighborhood Street Fairs: The True Heart of Beer Festivals in Chicago
While the major events offer fantastic beer experiences, the heart and soul of the city's craft scene is found at its countless neighborhood street festivals. These weekend events, which pop up across Chicago's diverse communities from late spring to early fall, are the authentic gatherings that locals cherish. This is where you move beyond the big names and discover the hyper-local, experimental breweries that are pushing the boundaries of craft beer.
Exploring these festivals requires a spirit of adventure. One weekend you might be at a food-focused fest in the West Loop, the next at an art fair in Lincoln Park. The key is that nearly every one of them features a strong showing from local breweries, often pouring special, festival-only releases.
Your Tasting Strategy:
Follow the Breweries: Instead of searching for festivals, follow your favorite Chicago breweries on social media. They will always announce which neighborhood events they'll be pouring at, leading you directly to the best and most interesting beer selections.
Talk to the Brewers: At these smaller events, you often have the chance to speak directly with the brewers or brewery staff. Ask them what's new, what they're excited about, and what you should try. This insider access is invaluable for any true beer fan.
Go Beyond the Loop: Don't be afraid to hop on the 'L' train and explore festivals in neighborhoods like Logan Square, Pilsen, or Andersonville. This is where you'll find the city's most exciting and innovative breweries, far from the downtown crowds.
Discovering these hidden gems is the ultimate reward for any traveler. To plan your journey through the city's neighborhoods and uncover these and other off-the-beaten-path experiences, our comprehensive Travel Guide is the essential resource, packed with local insights and detailed maps.

6. The Cinco de Mayo Cerveza Celebration: Pints and Parades
On May 5th, Chicago's vibrant Mexican-American communities, particularly in the Little Village neighborhood, burst into celebration for Cinco de Mayo. The holiday, which commemorates the Mexican Army's 1862 victory at the Battle of Puebla, is marked by lively parades, incredible food, and, of course, fantastic beer. This is a cultural immersion that offers a unique and flavorful tasting experience far removed from a standard beer fest.
The centerpiece is the parade, a colorful procession of floats, dancers, and musicians. The surrounding streets become a festival in their own right, with vendors selling authentic Mexican cuisine and local bars and restaurants pouring a variety of Mexican and Mexican-inspired beers.
Your Tasting Strategy:
Start with the Classics: Begin with a classic Mexican-style lager. It’s light, crisp, and incredibly refreshing—the perfect beer for sipping in the sun while you watch the parade. Ask for it with a lime wedge for the full, traditional experience.
Explore Craft Interpretations: Many Chicago craft breweries create special releases for Cinco de Mayo. Look for creative interpretations like a lime-infused gose, a spicy habanero-laced stout, or a refreshing pale ale brewed with agave nectar.
The Ultimate Food Pairing: The real magic happens when you pair your beer with the food. The crispness of a lager perfectly cuts through the richness of tacos al pastor, while the subtle sweetness of an amber ale beautifully complements the smoky flavor of elotes (grilled street corn).
Your Ultimate Chicago Beer Adventure Awaits
Chicago's beer scene is as dynamic and diverse as the city itself. It isn't confined to traditional taprooms or designated festival grounds; it's woven into the very fabric of the city's greatest celebrations. By looking beyond the obvious, you can craft a tasting journey that is unique, memorable, and deeply connected to the local culture. From sipping German lagers at a Christmas market to enjoying an All-American flight during the July 4th fireworks, you now have the ultimate insider's guide to the best beer festivals Chicago has to offer—even the ones you didn't know existed. So go forth, raise a glass, and toast to the incredible spirit of the Windy City.
Don't Miss Out! Subscribe for Exclusive Content
SubscribeComments 0
No comments yet
Be the first to share your experience!
Dont Miss Out! Subscribe for Exclusive Content

San Francisco Cherry Blossoms: A Local's Guide to the Blooms

Halloween SF: Haunts Without Horrors

SF Festivals: 7 Must-See Lineups

Christmas SF: Lights & Wharf Wonders

SF Pride: 6 Route & Party Hacks
