Decoding Affiliate Commission Rates: Benchmarks for Travel Creators
TrekGuider @trekguider
You’re a travel creator, and you’ve entered the world of affiliate marketing to turn your passion into a profession. But you’ve quickly run into a frustrating black box: the commission structure. You see a dizzying array of percentages, acronyms like CPA and EPC, and vague promises of earnings. You’re left wondering what good affiliate commission rates even look like. Are you earning your worth, or are you leaving a significant amount of money on the table?
This confusion isn't just academic; it's a direct threat to your bottom line. The reported average monthly income for affiliates in the travel niche is an impressive $13,847, a figure that proves this is a serious enterprise. But you can't build a sustainable business on guesswork. Partnering with a program offering a flashy 40% commission—only to discover it’s 40% of their tiny margin—is a rookie mistake that costs real money. This lack of clarity makes it impossible to forecast your income, negotiate better terms, or build a truly predictable business. You feel like you’re flying blind.
This guide is your decoder ring. We are pulling back the curtain to give you a comprehensive breakdown of how affiliate commissions actually work. We will deconstruct every major commission model, provide clear, data-backed industry benchmarks, and teach you how to analyze these rates like a seasoned professional. By the end of this deep dive, you will be able to spot high-value opportunities and architect a monetization strategy that truly rewards your influence. For a complete overview of the affiliate landscape, our definitive pillar page, Travel Affiliate Programs: The 2026 Ultimate Guide, is your essential command center.

The Anatomy of a Commission: Deconstructing the Core Models
Let's cut through the jargon. An affiliate commission is simply a reward for a job well done. A company—the merchant—pays you for successfully driving a specific, valuable action, which in the travel world almost always means a completed booking or sale.
But the way that reward is calculated can vary dramatically. Understanding the underlying structure of different affiliate commission rates is the first step toward becoming a high-earning creator.
1. Cost Per Sale (CPS) or Pay Per Sale (PPS): The Industry Workhorse
You'll encounter this model most often—it's the industry's workhorse for a reason. It’s simple and transparent: when a reader clicks your affiliate link and completes a purchase, you earn a percentage of the total sale value. If you recommend a $500 hotel stay and the program offers a 6% CPS commission, you earn $30. This model directly ties your earnings to the revenue you generate, making it the gold standard for most travel bookings and gear sales.
2. Cost Per Action (CPA): Rewarding a Specific Step
CPA is a broader model where you’re compensated for a specific action a user takes. While that action is often a sale (making it identical to CPS), it can also be something else. For example, a travel credit card company might pay you a CPA commission for every user who completes an application, regardless of whether they are approved.
3. Cost Per Lead (CPL): Paying for High-Value Inquiries
With a CPL model, you earn a fixed fee for each qualified lead you generate. This is common in high-ticket travel sectors where the sales cycle is long. A luxury tour operator, for instance, might pay you $50 for every user who fills out a detailed inquiry form for a bespoke African safari. You get paid for delivering a potential customer; their sales team takes it from there.
4. Tiered & Multi-Tier Structures: Incentivizing Growth
This is where commission models get more sophisticated and rewarding.
Tiered Structures: Rewarding Your Growth These are designed to reward high-performing affiliates. Your commission rate increases as you drive more sales. A program might offer a base rate of 6%, which jumps to 8% after you generate $5,000 in sales in a month, and 10% after $10,000.
Multi-Tier Structures: Building a Network These allow you to earn commissions not only on your own sales but also on the sales generated by other affiliates you recruit into the program. This effectively turns you into a partner who helps grow the program itself, creating a secondary, more passive income stream.
5. Cost Per Click (CPC): The Rare Exception
In this model, you are paid a small fee for every click your affiliate link receives, regardless of a sale. Due to its high vulnerability to fraud, the CPC model is now extremely rare in modern affiliate marketing and almost never seen in the travel space.

Industry Benchmarks: What Good Affiliate Commission Rates Look Like
So, what should you actually expect to earn? While rates vary, the travel industry has established clear benchmarks across its major categories. Here’s your cheat sheet.
Hotels & Accommodations: 2% - 7% of Booking Value This is the bread and butter for many creators, but the details are everything. A program like Expedia Group offers up to 6% of the total booking value with a 7-day cookie. In contrast, Booking.com advertises a much higher "25-40%", but this is a percentage of their commission, not the customer's total payment. This opaque structure often results in a much lower effective rate, closer to 2-4% of the final booking value.
Tours, Activities & Experiences: 6% - 8%+ This is a high-margin category with strong potential. Market leaders like Viator and GetYourGuide set the standard with base commissions of 7-8%. Adventure-focused operators like G Adventures offer 6%, which is incredibly powerful when applied to their high-ticket tours that can cost thousands of dollars.
Travel Insurance: 10% or More Insurance is a consistently high-paying vertical. Top programs like SafetyWing and World Nomads both offer a standard 10% commission. SafetyWing takes this a step further with a recurring model, meaning you continue to earn 10% every time your referred customer renews their policy.
Gear & Apparel: 3% - 8% For physical products, rates depend heavily on the retailer. Amazon Associates is the baseline, offering 3-4% for most travel categories. However, partnering with specialty retailers is far more lucrative. A brand like REI, for example, offers a 5-8% commission on high-quality (and often high-priced) outdoor gear.
Pro-Tip: Don't be blinded by the highest percentage. A 6% commission on a $3,000 G Adventures tour is $180. An 8% commission on a $50 city walking tour is $4. Always consider the average order value of the products you are promoting when evaluating affiliate commission rates.

The Metrics That Matter More Than the Rate Itself
An experienced affiliate marketer knows the commission rate is just a starting point. To truly understand a program's profitability, you need to analyze the metrics that measure real-world performance.
Earnings Per Click (EPC): Your True North This is arguably the single most important metric. It’s calculated by dividing your total commission earnings by the total number of clicks you sent. If you sent 100 clicks and earned $50, your EPC is $0.50. This number tells you the average value of every single click. A program with a lower commission but a higher EPC is often the more profitable partner for your specific audience.
Conversion Rate (CR): The Sign of a Healthy Partner This is the percentage of users who take the desired action after clicking your link. A high conversion rate is a sign of a trusted brand with a well-optimized checkout process. A program with a 10% commission that converts at 1% is less profitable than a program with a 5% commission that converts at 5%.
Cookie Duration: The Travel Creator's Safety Net This is critical in the travel space. A longer cookie duration (30, 60, or 90 days) gives your audience the time they need to research a high-consideration purchase while ensuring you still get credit. A short cookie window is a major red flag and a sign that the program may not be structured in your favor.
Pro-Tip: Dive into your affiliate dashboards. Most networks like CJ Affiliate and Travelpayouts provide detailed reports on your EPC and conversion rates for each program. Use this data to identify your true top performers—the results will often surprise you.

The Travel Creator's Toolkit
Feeling overwhelmed by the data? You don't have to be. To help you organize your strategy and implement everything you've learned, we've created the ultimate resource bundle. It includes checklists, templates, and tools designed to accelerate your journey from beginner to pro.
Download Your Free Bundle: The Travel Creator's Toolkit
The High-Margin Alternative: Referral & Revenue Share Models
While traditional commission models are powerful, the most forward-thinking creators are diversifying into referral and revenue-sharing programs. Instead of a one-time payment for a single sale, these models allow you to build long-term, passive income streams by becoming a true platform partner.
This is the philosophy behind the TrekGuider Seller Platform. We believe in empowering creators to build complex businesses. Our platform is designed for you to sell your own digital products—like itineraries and guides—but our referral program adds another powerful layer to your income strategy.
Instead of a simple CPS commission, our model functions like a sophisticated multi-tier system. When you refer other creators to become sellers on TrekGuider, you earn an ongoing share of the revenue they generate, with tiered commissions that start at 4% for referred sellers. You’re not just earning from a single transaction; you’re building a network and earning from its collective success. It's a strategic way to move beyond chasing individual sales and start building a more resilient, high-margin business.
Frequently Asked Questions (FAQ)
1. Is a higher commission rate always better? Not at all. A high commission rate can be misleading if the program has a low conversion rate, a short cookie duration, or a low average order value. Always look at your Earnings Per Click (EPC) to determine the true profitability of a program for your audience.
2. How can I find the EPC for an affiliate program? Most reputable affiliate networks (like CJ Affiliate, ShareASale, or Travelpayouts) provide EPC data. It's often listed as a network-wide average for each merchant, which gives you a good baseline. Once you start sending traffic, you can track your own personal EPC in your performance reports.
3. Can I negotiate my affiliate commission rates? Yes, absolutely. Once you become a proven partner and consistently drive a significant volume of high-quality sales, you have leverage. Many brands are willing to negotiate a higher, private commission rate for their top-performing affiliates. Always track your performance and don't be afraid to ask.

From Confusion to Command
You are no longer in the dark. The world of affiliate commission rates is no longer a confusing black box. You now have the knowledge to deconstruct any program's payment structure, the industry benchmarks to know your worth, and the key metrics to identify what truly drives profit.
This knowledge is power. It empowers you to audit your existing partnerships, confidently seek out new ones, and even negotiate better terms. By focusing on programs with fair commissions, long cookie durations, and high conversion rates, you can ensure your hard work is properly rewarded. Building a profitable travel content business requires a strategic approach, and a deep understanding of affiliate commission rates is a non-negotiable part of that strategy.
Read the full guide: The Travel Blogger's Playbook to Affiliate Marketing Mastery
Don't Miss Out! Subscribe for Exclusive Content
Subscribe


Comments 0
No comments yet
Be the first to share your experience!
Dont Miss Out! Subscribe for Exclusive Content

Ultimate USA Holidays Guide: Top Picks

FTC Affiliate Disclosure Essentials: Stay Compliant as a Travel Creator

Essential Affiliate Tools: From Tracking to Full Optimization

Avoid These 5 Affiliate Landing Page Mistakes for Better Conversions

Affiliate Keyword Research Mastery for Travel Blogs

Booking.com Affiliate Program Review: Pros, Cons, and Earnings Potential
Affiliate Keyword Research Mastery for Travel Blogs
TrekGuider @trekguider
You’re doing everything right. Your destination guides are insightful, your photos are stunning, and your packing lists are careful. You’ve joined the affiliate programs, placed the links, and then... crickets. It’s the silent frustration that burns out thousands of talented travel creators.
You see the industry reports, like the one stating the average monthly income for travel affiliates is a staggering $13,847, and it feels like it’s happening in another universe. The chasm between the effort you pour into your work and the revenue trickling into your bank account isn't a reflection of your talent—it's a reflection of your strategy.
The solution is to stop writing into the void and start targeting your content with the precision of a sniper. The secret, the absolute bedrock of every successful affiliate business, is mastering affiliate keyword research. This isn't about SEO wizardry or gaming the system; it's about deeply understanding the language of your audience at the exact moment they are ready to buy. This guide is your definitive, step-by-step masterclass in finding the profitable keywords that will transform your travel blog from a passion project into a revenue-generating powerhouse. For a complete command of the entire affiliate landscape, our definitive pillar page, Travel Affiliate Programs: The 2026 Ultimate Guide, is your essential command center.

The Mindset Shift: From "What to Write" to "What to Target"
The most common mistake in content creation is brainstorming ideas in a vacuum. A creator thinks, "I'll write a post about my amazing trip to Rome." They produce a beautiful, engaging travelogue, sprinkle in a few links to hotels and tours, and then wonder why it doesn't make a dime.
But the highest-earning creators? They flip this model on its head. Their entire content strategy starts not with an idea, but with a question: "What are people who are ready to spend money on a trip to Rome searching for on Google?"
This is the critical difference between informational intent and commercial investigation intent.
Informational Intent: The user is in learning mode. They're searching for things like "what to do in Rome," "history of the Colosseum," or "how to pack a carry-on." This content is fantastic for building an audience, but it rarely leads directly to a sale.
Commercial Investigation Intent: The user has their wallet out. They are actively researching a purchase, comparing options, and looking for an expert to validate their final decision. This is where the money is.
Mastering affiliate keyword research is the disciplined process of finding these "commercial investigation" keywords and building your content around them. When you do this, you stop hoping for random sales and start attracting a steady stream of visitors who arrive on your blog primed to convert.
The Anatomy of a Money-Making Keyword
To find these golden-nugget keywords, you first need to know what they look like. Commercial investigation keywords typically fall into three high-value categories. If you build your content calendar around these formats, you are building a business designed for profit.
1. "Best Of" Keywords
This is the quintessential affiliate keyword. The user is overwhelmed with options and is looking for a trusted expert (you) to curate a list of the top choices.
Travel Examples:
"best carry-on luggage for international travel"
"best travel insurance for digital nomads"
"best hiking boots for rocky trails"
"best all-inclusive resorts in Mexico for families"
2. Comparison & "Vs" Keywords
These keywords are pure gold. The user has already done their initial research and has narrowed their options down to two or three contenders. They are at the final stage of their decision-making process.
Travel Examples:
"Viator vs GetYourGuide"
"SafetyWing vs World Nomads"
"Osprey Farpoint vs Porter"
"Booking.com vs Expedia"
3. Review Keywords
Here, the user is looking for a detailed, real-world verdict on a single product, tour, or service. They are one step away from clicking "buy" and are seeking that final piece of social proof and expert validation.
Travel Examples:
"G Adventures Peru tour review"
"Away Bigger Carry-On review"
"Nomatic travel pack review"
"SafetyWing insurance review"

The Affiliate Keyword Research Workflow: A Step-by-Step Tutorial
Theory is great, but execution is everything. Here is a simple, repeatable process for finding high-value affiliate keywords using a standard SEO tool like Ahrefs or Semrush.
Step 1: Brainstorm Your "Seed" Keywords
Begin by listing the broad topics, products, and services that are central to your niche. Don't filter yourself. If your niche is "luxury eco-tourism in Costa Rica," your seed keywords might include:
eco-lodge
Costa Rica tours
sustainable travel
adventure travel
bird watching gear
waterproof backpack
These terms are too broad to target on their own, but they are the seeds from which your entire profitable content strategy will grow.
Step 2: Use Commercial Modifiers to Find Gold
Now, take your seed keywords and plug them into your SEO tool's "Keywords Explorer." This is where you transform broad topics into specific, monetizable content ideas. Use the tool's filters to find phrases that contain your seed keyword plus a commercial modifier.
Commercial modifiers are the words that signal buying intent. Your core list should include:
best
review
vs
alternative
top
cheap
affordable
comparison
For example, using the seed keyword "eco-lodge," your research might uncover:
"best eco-lodges in Costa Rica"
"Pacuare Lodge Costa Rica review"
"Lapa Rios Lodge vs Pacuare Lodge"
"alternatives to luxury resorts in Costa Rica"
This single step will generate a treasure map of content ideas, each one pointing directly to a user with commercial intent.
Step 3: Analyze the SERP (Search Engine Results Page)
A keyword can look perfect in your SEO tool, but the real test is analyzing the live competition on Google. Before you commit to writing a single word, search for your target keyword and scrutinize the top 10 results.
Confirm the Intent: Are the top-ranking pages other blog posts, reviews, and listicles? That's a green light. If the page is dominated by the homepages of major brands or e-commerce category pages, it's a signal that Google doesn't think a blog post is the right answer, and it will be much harder to rank.
Scope Out the Competition: Are the top spots held by media behemoths like Forbes or Condé Nast Traveler? Or do you see other independent travel blogs like yours? If other creators are ranking, it's definitive proof that you can, too.
Find the "10x Content" Opportunity: Look for weaknesses in the current top-ranking articles. Are they outdated? Thin on detail? Lacking personal experience or high-quality photos? Your mission is to create a piece of content that is so much more thorough, helpful, and engaging that it's undeniably the best result for that search.
Step 4: Balance Keyword Difficulty (KD) and Search Volume
Your SEO tool will give you two final, crucial metrics:
Search Volume: An estimate of how many times a month people search for this term.
Keyword Difficulty (KD): A score (usually from 0-100) that estimates how hard it will be to rank on the first page of Google.
For a newer blog, the sweet spot is a keyword with a KD score under 30. Don't be put off by lower search volumes (e.g., 50-250 searches/month). These keywords are often far less competitive, and the traffic they bring is hyper-targeted and converts at a much higher rate.
Pro-Tip: Don't ignore long-tail keywords. These are longer, highly specific phrases like "best waterproof travel backpack for Southeast Asia monsoon season." They have low search volume, but the user searching for this knows exactly what they need. Ranking for these terms can be incredibly profitable.

Beyond Products: Keyword Research for Next-Level Opportunities
A truly sophisticated affiliate strategy evolves. Once you've mastered promoting products, you can apply the same affiliate keyword research principles to higher-margin opportunities like referral programs. This means shifting your focus from targeting consumers to targeting your peers: other creators.
The goal is to find what other creators are searching for when they're trying to grow their own businesses.
For example, the TrekGuider Seller Platform is built for travel creators to sell their own digital products—itineraries, guides, presets, and more. To attract other creators to the platform using your unique referral link, you would target keywords they are searching for:
"how to sell travel itineraries online"
"best platform for travel creators"
"make money as a travel blogger 2026"
"digital product ideas for travel creators"
"alternatives to Gumroad for travel guides"
By creating genuinely helpful content that solves these business-level problems, you can introduce your peers to a valuable tool and, through a referral program, earn a recurring revenue share from their success. This adds a powerful, diversified income stream that isn't dependent on one-off product sales.
Pro-Tip: The rise of video means your keyword research shouldn't be confined to your blog. According to industry projections, video will account for 55% of all affiliate traffic by 2026. The same keywords you find for your blog posts—"Away Bigger Carry-On review," "Best Hostels in Bangkok"—are the exact titles you should be using for your YouTube videos and TikToks to capture high-intent search traffic on those platforms as well.
The Travel Creator's Toolkit
Feeling ready to build your keyword strategy? Mastering affiliate keyword research is the first step. To help you organize your findings and build a complete, professional affiliate marketing system, we've created the ultimate resource bundle. It includes checklists, content templates, and keyword tracking sheets designed to accelerate your journey from beginner to pro.
Download Your Free Bundle: The Travel Creator's Toolkit

Frequently Asked Questions (FAQ)
1. What if two of my articles start ranking for the same keyword? Is that bad? This is called "keyword cannibalization," and yes, it can be a problem. It confuses Google about which page is the most important, potentially hurting the rankings of both. The best way to avoid this is to assign one primary target keyword to each article and ensure your content is distinct.
2. Should I ignore keywords with very low search volume (e.g., under 50 searches/month)? Absolutely not! These low-volume, long-tail keywords are often a goldmine. The competition is usually non-existent, and the user searching for such a specific phrase is often highly motivated and ready to buy. A page that gets only 20 visits a month but converts at 25% is a huge asset.
3. How long does it take to rank for a new keyword? For a newer blog, it can take 6-12 months for Google to fully trust your site and grant you authoritative rankings for competitive keywords. This is why consistency is key. The work you do on affiliate keyword research today is building a business asset that will pay you dividends for years to come.
Your Blueprint for a Profitable Content Strategy
You now possess the single most valuable skill for building a profitable travel blog. Affiliate keyword research is the foundation upon which every successful affiliate business is built. It elevates your content strategy from a game of chance into a predictable system for generating revenue.
By shifting your focus from simply "creating content" to "targeting commercial intent," you align your hard work directly with an audience that is actively looking for your expert guidance. You are no longer just a travel writer; you are a strategic business owner. You have the knowledge and the step-by-step process to find the keywords that will attract high-value traffic and drive consistent affiliate sales.
The path is clear. Stop writing into the void. Start targeting with precision. Your journey to becoming a top-earning travel creator begins with the very next keyword you choose.
Meta Data Suggestions:
SEO Meta Title (59 characters): Affiliate Keyword Research: A Masterclass for Travel Blogs
URL Slug: /affiliate-keyword-research-travel-blogs
SEO Meta Description (154 characters): Learn how to find profitable keywords with our step-by-step affiliate keyword research tutorial. Drive more sales and grow your travel blog's income today.
Read the full guide: The Travel Blogger's Playbook to Affiliate Marketing Mastery
Don't Miss Out! Subscribe for Exclusive Content
SubscribeComments 0
No comments yet
Be the first to share your experience!
Dont Miss Out! Subscribe for Exclusive Content
FTC Affiliate Disclosure Essentials: Stay Compliant as a Travel Creator
Essential Affiliate Tools: From Tracking to Full Optimization
Avoid These 5 Affiliate Landing Page Mistakes for Better Conversions
Booking.com Affiliate Program Review: Pros, Cons, and Earnings Potential

Decoding Affiliate Commission Rates: Benchmarks for Travel Creators

7 Proven Affiliate Marketing Tips to Skyrocket Travel Income
How to Stay Safe While Hiking: A Hiker's Safety Guide
TrekGuider @trekguider
The call of the trail is a powerful one. It promises sweeping vistas, the quiet solitude of the forest, and the profound satisfaction of reaching a summit under your own power. But for all its beauty, the wilderness is impartial and unforgiving. The same trail that offers bliss on a sunny morning can present serious danger when the weather turns, a wrong turn is made, or an ankle is twisted. This is the problem every hiker faces: the gap between the adventure we dream of and the preparation it demands.
That gap is often filled with anxiety. A flicker of doubt about reading the map, a worry about the approaching clouds, or a sudden fear of what that noise was in the undergrowth can rob an incredible experience of its joy. Too often, hikers—both novice and experienced—find themselves in serious trouble simply by underestimating the trail and overestimating their preparedness. According to Search and Rescue (SAR) teams, most emergencies are the result of small, preventable mistakes. This guide is your definitive playbook for closing that gap for good. We’re providing the essential, expert-backed hiking safety tips you need to move through the backcountry with unwavering confidence. This isn't about fear; it's about empowerment. By mastering these skills, you’re ensuring every hike is a safe one, a core pillar of the responsible adventurer’s mindset we explore in our definitive The Ultimate Guide to Travel Safety: A 2026 Playbook. Let’s gear up, get smart, and get you ready to hit the trail.

This journey from novice to self-sufficient hiker begins not on the trail itself, but with a simple, powerful philosophy of preparedness that has been tested and refined by generations of mountaineers and wilderness experts. It all starts with your pack.
The Foundation of Safety: The 10 Essentials System
Long before your boots touch the dirt, your safety on the trail has already been decided by one thing: what’s inside your pack. Endorsed by the National Park Service and outdoor organizations like REI, the "10 Essentials" is not just a packing list; it's a systematic approach to preparedness. It ensures you have the tools to handle common problems and survive an unexpected night outdoors. Think of these not as ten individual items, but as ten crucial systems.
Navigation: Your primary system for knowing where you are and where you’re going. This must include a physical topographic map of the area and a compass. A GPS device or a smartphone with downloaded offline maps is a great tool, but electronics can fail. A map and compass are your foolproof backup.
Illumination: You need to be able to see in the dark, period. Carry a headlamp or flashlight with a full charge, and always pack extra batteries. A headlamp is superior as it keeps your hands free for other tasks.
Sun Protection: Sunburn and sunstroke can be serious dangers on the trail. This system includes sunglasses, broad-spectrum sunscreen (SPF 30+), and a wide-brimmed hat. Sun-protective clothing can also be a game-changer.
First-Aid Supplies: You must have the ability to treat common trail injuries. Your kit should be equipped to handle blisters, cuts, scrapes, and sprains. A basic kit is good; a custom-built one is better.
Repair Kit and Tools: Gear can break. A multi-tool or knife is invaluable, and a small roll of duct tape can repair everything from a torn jacket to a broken tent pole.
Fire: In an emergency, fire provides warmth, a way to purify water, and a powerful psychological boost. Carry waterproof matches, a reliable lighter, and a dedicated fire starter like dryer lint or a commercial fire-starting block.
Insulation: Weather can change in an instant, especially at elevation. You must carry an extra layer of clothing beyond what you start the hike in, regardless of the forecast. This should be a moisture-wicking layer, like a fleece jacket or thermal top—never cotton, which loses all insulating properties when wet.
Nutrition: Always pack more food than you think you’ll need. An extra day’s worth of non-perishable, high-energy food is the standard. Items like protein bars, nuts, and dried fruit are perfect.
Hydration: Carry more water than you expect to need and have a way to purify more. This means carrying a water filter or purification tablets to safely treat water from streams or lakes in an emergency.
Emergency Shelter: If you’re forced to spend an unplanned night out, protection from the elements is critical to preventing hypothermia. This doesn't mean a tent. A lightweight, packable emergency space blanket or bivy sack is all you need.

For expert-vetted gear lists and detailed trail guides from seasoned creators, the TrekGuider Marketplace is an invaluable resource for taking your preparation to the next level.
"Never Get Lost Again": Mastering Trail Navigation
Of all the potential hiking dangers, getting lost is one of the most common and terrifying. A recent study of SAR missions revealed that "error in judgment" was a leading cause of hikers needing rescue, and a huge part of that is poor navigation. Relying solely on your phone’s GPS is one of the biggest hiking safety tips to ignore—service is unreliable in the backcountry, and batteries die. True navigational confidence comes from time-tested skills.
How to Use a Map and Compass
This fundamental skill is easier than you think and is your most reliable tool.
Place the Compass on the Map: Lay your map flat. Identify your current location and your destination. Place your compass so the long edge of its baseplate creates a line connecting the two points, with the "Direction of Travel" arrow on the compass pointing toward your destination.
Set the Compass Bezel: Keeping the baseplate still, rotate the round bezel (the dial) until the orienting lines inside it are parallel with the map's north-south grid lines. Make sure the "N" on the bezel is pointing to North on the map. The number on the bezel aligned with the Direction of Travel arrow is now your bearing.
Follow the Bearing: Lift the compass off the map and hold it level in front of you. Turn your body until the red magnetic needle is "in the shed"—that is, perfectly inside the red orienting arrow on the bezel. The Direction of Travel arrow now points precisely to your destination. Pick a landmark in that direction, walk to it, and repeat the process.
Pro-Tip: The difference between "true north" (on your map) and "magnetic north" (where your compass points) is called declination. For precise navigation, you must adjust your compass for the local declination, which will be printed on your map.

Wildlife on the Trail: A Guide to Safe Encounters
Seeing wildlife is a thrilling part of hiking, but it’s crucial to remember that you are a visitor in their home. The core principles of every encounter are to maintain a safe distance, never feed wildlife, and know how to react to avoid escalating a situation.
Bear Encounters (Black vs. Grizzly)
Making noise while you hike (talking, clapping) is the best way to avoid surprising a bear. If you do encounter one, your reaction depends on the species.
If a Black Bear Approaches: Never run. Make yourself look as large as possible by raising your arms and opening your jacket. Yell, clap, and make loud noises. If it attacks, fight back aggressively. Target the bear's face and nose with anything you have—rocks, trekking poles, your fists. Do not play dead.
If a Grizzly Bear Approaches/Charges: Do not run and do not make direct eye contact. Speak in a calm, low voice to show you are not a threat. If it charges, stand your ground and use bear spray when it is within 30 feet. If it makes contact, play dead. Lie flat on your stomach, protect the back of your neck with your hands, and use your pack as a shield.
Mountain Lion (Cougar) Encounters
These predators are ambush hunters, so an encounter is rare. If you see one, it has likely been watching you.
Protocol: Do not run, as this triggers their chase instinct. Make direct eye contact. Make yourself appear larger by raising your arms and opening your jacket. Speak in a loud, firm voice. Slowly back away, giving the cat an escape route.
If Attacked: Fight back with everything you've got. Use rocks, sticks, or your hands to target the animal's eyes and face.
Venomous Snake Encounters
Snakes have no interest in humans and will only strike if they feel threatened.
Protocol: If you see a snake, freeze. Do not make any sudden movements. Once you've located the snake, slowly back away and give it a wide berth to move on. Be careful where you step and place your hands, especially when scrambling over rocks or logs.
If Bitten: The priority is to stay calm to slow the spread of venom. Limit physical activity and get to a hospital as quickly and safely as possible for evaluation and potential antivenom treatment.
Handling Trail Emergencies: What to Do When Things Go Wrong
Even with perfect preparation, accidents can happen. A twisted ankle, a sudden illness, or getting turned around can escalate quickly. Your ability to stay calm and make rational decisions is your most valuable asset. If you find yourself in trouble, remember the acronym S.T.O.P.
Stop: The moment you realize you are in trouble, stop moving. Sit down.
Think: Assess your situation calmly. What went wrong? What resources do you have?
Observe: Look around you. Where is the sun? Can you see any landmarks? Is there a source of water or shelter nearby?
Plan: Formulate a simple, logical plan. Don't make panicked decisions.
First Aid on the Trail
Your first-aid kit from the 10 Essentials is your go-to tool for injuries. Here's how to handle the most common trail ailments:
Blisters: The moment you feel a "hot spot" on your foot, stop and address it. Clean the area and apply moleskin or a blister-specific pad. Don't wait for it to become a full-blown blister.
Sprains: For a twisted ankle or knee, use an elastic wrap bandage from your kit to provide compression and support. Loosen it if you feel any numbness or tingling. Elevate the joint when you rest, and use a trekking pole or sturdy branch as a crutch if needed.
Cuts and Scrapes: Control any bleeding with direct pressure using a sterile gauze pad. Once it stops, clean the wound thoroughly with an antiseptic wipe and apply antibiotic ointment before covering it with a bandage.
A well-stocked daypack is crucial, but so is a plan for the whole trip. Before you head out to explore our incredible national parks, make sure your vehicle and supplies are just as prepared as your hiking gear.
Your Ultimate Adventure Blueprint
Ready to hit the road? Don't leave home without our expert-vetted National Park Road Trip Checklist. This free guide covers everything from vehicle prep and essential gear to can't-miss stops, ensuring your adventure is seamless from start to finish. Download it for free now!
Hiking Safety FAQs
A prepared mind anticipates questions. Here are expert answers to common concerns.
1. What's the right way to signal for help?
If you determine you cannot get yourself out of a situation safely, you need to signal for help. The universal distress signal is three of anything: three whistle blasts, three flashes of a headlamp, or three piles of rocks. A whistle is a must-have item that uses far less energy and carries further than shouting. For serious backcountry travel, consider investing in a personal locator beacon (PLB) or satellite messenger, which can send an SOS signal with your exact location to emergency services.
2. Is it safe to hike alone?
Solo hiking can be an incredibly rewarding experience, but it requires a higher level of preparation and self-sufficiency. All the rules in this guide become even more critical. It is absolutely essential that you leave a detailed itinerary with a trusted friend or family member. Include your planned route, your start and end times, and a "panic time"—the specific time they should call for help if they haven't heard from you.
3. What do I do if the weather turns bad unexpectedly?
Your first priority is to get below the treeline if you're in an exposed area to reduce the risk of lightning strikes. Put on your extra insulating layer and your rain gear before you get wet and cold. Assess your map and your situation. It is often safer to turn back, even if you're close to your destination, than to push on into deteriorating conditions.
Pro-Tip: Always tell someone your plan. Before every hike, leave a detailed itinerary with a trusted friend or family member. This is the single most important safety net you have.

Your Adventure, Empowered by Preparation
The goal of these hiking safety tips is not to fill you with fear, but to arm you with confidence. Every piece of gear you pack and every skill you learn is a key that unlocks a new level of freedom on the trail. Preparation allows you to push your boundaries, explore wilder places, and immerse yourself in the beauty of nature without the nagging whisper of anxiety. By respecting the wilderness and committing to self-sufficiency, you transform from a simple visitor into a capable, confident adventurer.
Now that you have the skills for a safe hike, you can integrate that adventure into a larger, perfectly planned journey. For a complete master plan covering everything from budgeting and logistics to finding the best trails and tours, our all-encompassing Travel Guide is the only resource you'll ever need.
Don't Miss Out! Subscribe for Exclusive Content
SubscribeComments 0
No comments yet
Be the first to share your experience!
Dont Miss Out! Subscribe for Exclusive Content

How to Avoid Travel Scams: A Global Guide

Is Public WiFi Safe? How to Protect Your Data Abroad

A Woman's Guide to Safe Travel: 10 Critical Tips

7 Hotel Safety & Security Tips for Peace of Mind

9 Beach Safety Tips That Could Save Your Life

7 Travel Insurance Red Flags to Spot Before You Buy
Food & Water Safety Abroad: How to Avoid Getting Sick
TrekGuider @trekguider
There’s a moment on every trip where the true magic happens: the first bite of a dish you can’t pronounce from a street cart buzzing with locals, the refreshing sip of a regional drink, the discovery of a flavor that will forever define a place in your memory. Food is culture, connection, and the fastest way to the heart of a destination. And that’s the traveler’s paradox, isn’t it? The very experiences that promise the most profound connection also carry a potent, gut-wrenching risk.
One bad meal or a single sip of contaminated water can derail your entire adventure, swapping days of discovery for days spent locked in a hotel room. This fear is agitated by horror stories from fellow travelers and the sheer unpredictability of an unfamiliar environment. It's a valid concern—traveler's diarrhea is unequivocally the most common travel-related illness, affecting up to 80% of international travelers depending on the destination. The fear of getting sick can make you timid, causing you to stick to bland, "safe" foods and miss out on the rich mix of flavors your destination has to offer. It can rob you of the very experiences you traveled so far to find.

But it doesn't have to be this way. This guide is your solution, a definitive and practical playbook for mastering food and water safety abroad. We’ve synthesized actionable advice from the world’s leading health organizations, including the Centers for Disease Control and Prevention (CDC) and the World Health Organization (WHO), to empower you to eat boldly and drink safely. This isn’t a list of things to fear; it’s a set of simple, memorable rules for prevention, identification, and, if necessary, management. This is a critical deep-dive into a core pillar of preparedness we cover in The Ultimate Guide to Travel Safety: A 2026 Playbook, designed to give you the confidence to dive fork-first into the heart of a culture.
The Golden Rule of Food and Water Safety: "Boil It, Cook It, Peel It, or Forget It"
If you remember only one thing from this guide, make it this simple, five-word mantra. Promoted by the CDC and other global health bodies, this single rule is a powerful and easy-to-use filter for nearly every culinary decision you'll make on the road. It’s the foundation of your entire food and water safety strategy.
Boil It: Your Safest Bet for Liquids
Pathogens like bacteria, viruses, and parasites are killed by heat. This makes boiling the most effective method for purifying liquids.
Examples: Drinking water that has been brought to a vigorous, rolling boil for at least one full minute. Hot beverages like tea or coffee that are served steaming hot are also generally safe. Any milk products you consume should be confirmed to be pasteurized or have been boiled.
Cook It: The Power of Heat
Thoroughly cooking food kills the harmful microorganisms that cause illness. The key is to ensure it is cooked all the way through and served hot.
Examples: Meat, poultry, or seafood that is well-cooked (not rare or raw) and served steaming hot to the touch. This is especially crucial for street food; dishes that are cooked fresh to order in front of you are a much safer bet than those that have been sitting out.
Peel It: Nature’s Own Packaging
For raw fruits and vegetables, the contamination is almost always on the outside surface. By peeling it yourself with clean hands, you remove the risk.
Examples: Fruits with a thick, peelable skin like bananas, oranges, mangoes, and avocados are your safest and best friends for a healthy snack. Similarly, vegetables you can peel, such as cucumbers, are also a great option.
Forget It: When in Doubt, Go Without
This is the most critical and sometimes most difficult part of the rule to follow. It requires discipline, but it’s your ultimate defense. If an item of food or drink doesn't meet one of the three criteria above, you must skip it.
Examples: Tap water and ice cubes made from tap water are the biggest culprits. Salads and raw leafy greens like lettuce are high-risk because they are difficult to clean thoroughly and may have been washed in contaminated water. You should also avoid fruits that cannot be peeled, such as grapes and berries, and any unpasteurized dairy products like milk or cheese. Finally, be very wary of any food served at room temperature, such as from a buffet.
Navigating the Streets: A Visual Guide to Spotting Unsafe Food
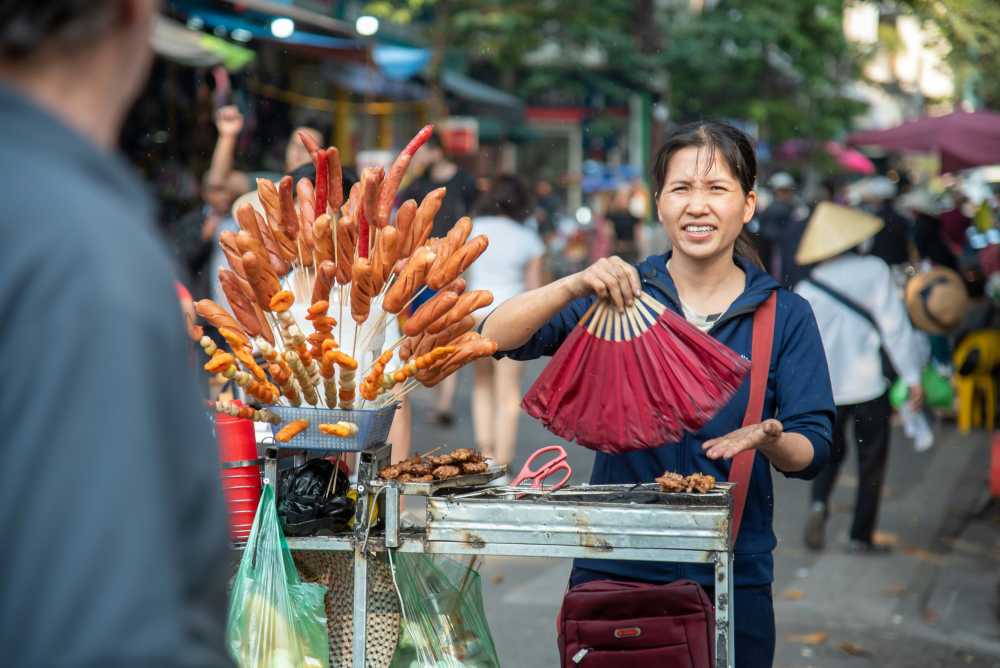
Street food is often the soul of a city's cuisine, but not all vendors are created equal. Your eyes are your best tool for vetting a stall. Before you order, take thirty seconds to perform a quick visual inspection. Look for these five clear signs of a safe or unsafe operation.
Poor General Cleanliness: This is the most obvious indicator. Red flags include dirty workstations with unwiped spills, visible food waste, rubbish on the ground, and the presence of pests like flies or wasps. The vendor themselves should also appear clean, with tidy clothes and hands.
Improper Food Temperatures: Food left in the "danger zone" (room temperature) is a breeding ground for bacteria. Avoid stalls where cooked food, especially meat, is sitting out in large trays. The safest option is always food that is cooked fresh to order, right in front of you. Hot food should be visibly steaming.
Obvious Cross-Contamination: Watch how the vendor handles ingredients. A major red flag is using the same cutting board, knife, or unwashed hands to handle raw meat and then touch ready-to-eat items like bread, salad, or cooked food.
Use of Contaminated Water: Look at the vendor’s water source. Rinsing dishes, utensils, or vegetables in a single bucket of murky, stagnant water is a sign of a high-risk operation. Likewise, avoid ice in your drinks unless you can confirm it was made from purified water (commercially bagged ice is usually a safe sign).
Lack of a Crowd (Especially Locals): A busy stall with a long line, particularly of local residents, is one of the best indicators of a trusted and safe food source. High customer turnover means the food is fresh and hasn't been sitting out for long. An empty stall is often empty for a reason.
Pro-Tip: Make "follow the locals" your street food mantra. A long line of residents is a walking, talking five-star review of a vendor's quality and safety. It's the most reliable seal of approval you can find.
Securing Your Water Supply: A Deep Dive into Hydration and Purification
Staying hydrated is non-negotiable for your health and energy while traveling, but assuming tap water is safe is one of the most common and dangerous mistakes a traveler can make. Here’s how to ensure every sip you take is safe.
Identifying Safe and Unsafe Drinking Water Sources
The CDC and WHO have clear guidelines. Unless you are in a country with a known, highly-developed sanitation system, you should assume all tap water is unsafe.
Safest Sources: Commercially bottled water in a factory-sealed, tamper-proof container is your most reliable option. Carbonated water is even safer, as a broken seal is immediately obvious. The second safest source is water that you have personally brought to a rolling boil for at least one minute.
Unsafe Sources to Avoid: Tap water, well water, ice made from tap water, fountain drinks mixed with tap water, and even water from clear mountain streams (which can contain germs) should all be avoided unless they have been purified.
Your Purification Playbook: The Top 3 Methods
When bottled or boiled water isn't available, you need a backup plan. Here are the top three recommended purification methods.
Boiling (The Gold Standard): This is consistently ranked by the CDC and WHO as the single most effective method. It kills all known disease-causing microorganisms, including viruses, bacteria, and parasites. Simply bring clear water to a rolling boil for 1 minute (or 3 minutes at elevations above 6,500 feet / 2,000 meters).
Filtration: A high-quality portable water filter is highly effective at removing bacteria and protozoan parasites like Giardia and Cryptosporidium. Look for a filter with an absolute pore size of 1 micron or smaller. The main limitation is that most portable filters do not remove viruses, so in high-risk areas, the CDC recommends following filtration with chemical disinfection.
Chemical Disinfection: Chlorine, iodine, or chlorine dioxide tablets/drops are a lightweight and easy way to kill viruses and bacteria. However, they are not consistently effective against the parasite Cryptosporidium and require a contact time of at least 30 minutes.
For in-depth planning on what gear to pack for every type of trip, from water filters to first-aid supplies, our all-encompassing Travel Guide is the only resource you'll ever need.
Damage Control: How to Manage Traveler's Diarrhea
But let’s be realistic: even the most diligent traveler can have a bad day. When that happens, knowing exactly what to do—and what not to do—can be the difference between a 24-hour nuisance and a trip-ruining ordeal. This is the damage control phase of your food and water safety plan.
The First and Most Critical Step: Oral Rehydration
According to travel medicine doctors, dehydration is the single most likely and dangerous complication of traveler's diarrhea. Replacing lost fluids and electrolytes is your absolute first priority.
Method: The best way to rehydrate is with a dedicated Oral Rehydration Solution (ORS), which comes in packets of salts and sugars that you mix with boiled or bottled water. In a pinch, sports drinks or clear soups can also be used.
Symptomatic Treatment for Mild to Moderate Cases
If the diarrhea is tolerable and not accompanied by a high fever or blood, over-the-counter medications can provide relief and help you get through a travel day.
Medications: An antimotility agent like Loperamide (the active ingredient in Imodium, a top pharmacist-recommended brand) can reduce the frequency of bowel movements. Bismuth Subsalicylate (found in Pepto-Bismol, another pharmacist favorite) can also help decrease the frequency and shorten the duration of the illness.
When to Use Standby Antibiotics (For Severe Cases)
If diarrhea is distressing, incapacitating, or contains blood or mucus, a prescribed antibiotic may be necessary.
Method: Before you travel, speak with your doctor or a travel medicine clinic. For travelers heading to high-risk destinations, they may provide a prescription for a standby antibiotic, such as Azithromycin, to carry with you. A single dose is often highly effective at treating severe cases.
Pro-Tip: Within your main travel first-aid kit, create a dedicated "Digestive Distress" module. Keep it in a separate, clearly-labeled zip-top bag containing a few packets of Oral Rehydration Salts, a strip of Loperamide, and a few antacids. This way, when you need it, you won't have to rummage through your entire kit.

Ready to Pack Like a Pro?
A smart food and water safety strategy is just one piece of your pre-trip preparation. To ensure you don't overlook a single essential item—from documents and finances to clothing and medical supplies—a master checklist is your most powerful tool. Our comprehensive, free checklist has you covered for every stage of your journey.
Download Your Free International Travel Checklist Now!
Food and Water Safety FAQs
A prepared mind is a safe mind. Here are expert answers to common questions that take your preparedness to the next level.
1. Besides traveler's diarrhea, what are the most common travel illnesses?
While traveler's diarrhea is number one, the CDC reports that other common issues include acute respiratory infections (like influenza or COVID-19, often acquired in transit), vector-borne fevers like Dengue and Malaria in tropical regions, and other food-borne illnesses like Hepatitis A and Typhoid Fever. Skin conditions from insect bites are also extremely common.
2. Is it safe to eat at a restaurant if I'm worried about street food?
Generally, restaurants can be safer, but the same principles apply. A busy restaurant full of locals is a great sign. Be cautious with the same high-risk items: salads, unpeeled fruits, and tap water or ice. If you want to find trusted, local-approved gems, explore the TrekGuider platform, where travel creators often share their own curated guides to safe and authentic eats.
3. Should I carry a standby antibiotic in my first-aid kit?
This is a question for your doctor or a travel medicine clinic. For travelers heading to high-risk destinations where severe traveler's diarrhea is common, many doctors will provide a prescription for a standby antibiotic like Azithromycin. It’s not for mild cases but can significantly shorten the duration of a severe bout of illness. Discuss your itinerary with your doctor to see if this is right for you.
Eat Boldly, Travel Well
The world of food is a world of incredible diversity and connection, and it deserves to be explored with an open mind and a curious palate. The goal of mastering food and water safety is not to build a wall of fear that separates you from authentic experiences. It is about building a foundation of knowledge that gives you the freedom to be adventurous. By internalizing the golden rule of "Boil it, cook it, peel it, or forget it," learning to trust your own visual assessment of a food stall, and knowing exactly what to do if you get sick, you replace anxiety with empowerment. You are now equipped with the skills to navigate the world's most exciting cuisines with confidence, ensuring your focus remains on the flavor, connection, and joy that every journey promises. Go explore, eat boldly, and travel well.

Meta Data Suggestions:
SEO Meta Title (Under 60 characters): Food & Water Safety Abroad: How to Avoid Getting Sick
URL Slug: food-water-safety-abroad
SEO Meta Description (Under 155 characters): Avoid traveler's diarrhea with our expert guide to food and water safety abroad. Learn the golden rules for eating street food, purifying water, and staying healthy.
Don't Miss Out! Subscribe for Exclusive Content
SubscribeComments 0
No comments yet
Be the first to share your experience!
Dont Miss Out! Subscribe for Exclusive Content

Chicago Beer Fests: Top 6 Tastings
Ultimate USA Holidays Guide: Top Picks
FTC Affiliate Disclosure Essentials: Stay Compliant as a Travel Creator
Essential Affiliate Tools: From Tracking to Full Optimization
Booking.com Affiliate Program Review: Pros, Cons, and Earnings Potential