Decoding Affiliate Commission Rates: Benchmarks for Travel Creators
TrekGuider @trekguider
You’re a travel creator, and you’ve entered the world of affiliate marketing to turn your passion into a profession. But you’ve quickly run into a frustrating black box: the commission structure. You see a dizzying array of percentages, acronyms like CPA and EPC, and vague promises of earnings. You’re left wondering what good affiliate commission rates even look like. Are you earning your worth, or are you leaving a significant amount of money on the table?
This confusion isn't just academic; it's a direct threat to your bottom line. The reported average monthly income for affiliates in the travel niche is an impressive $13,847, a figure that proves this is a serious enterprise. But you can't build a sustainable business on guesswork. Partnering with a program offering a flashy 40% commission—only to discover it’s 40% of their tiny margin—is a rookie mistake that costs real money. This lack of clarity makes it impossible to forecast your income, negotiate better terms, or build a truly predictable business. You feel like you’re flying blind.
This guide is your decoder ring. We are pulling back the curtain to give you a comprehensive breakdown of how affiliate commissions actually work. We will deconstruct every major commission model, provide clear, data-backed industry benchmarks, and teach you how to analyze these rates like a seasoned professional. By the end of this deep dive, you will be able to spot high-value opportunities and architect a monetization strategy that truly rewards your influence. For a complete overview of the affiliate landscape, our definitive pillar page, Travel Affiliate Programs: The 2026 Ultimate Guide, is your essential command center.

The Anatomy of a Commission: Deconstructing the Core Models
Let's cut through the jargon. An affiliate commission is simply a reward for a job well done. A company—the merchant—pays you for successfully driving a specific, valuable action, which in the travel world almost always means a completed booking or sale.
But the way that reward is calculated can vary dramatically. Understanding the underlying structure of different affiliate commission rates is the first step toward becoming a high-earning creator.
1. Cost Per Sale (CPS) or Pay Per Sale (PPS): The Industry Workhorse
You'll encounter this model most often—it's the industry's workhorse for a reason. It’s simple and transparent: when a reader clicks your affiliate link and completes a purchase, you earn a percentage of the total sale value. If you recommend a $500 hotel stay and the program offers a 6% CPS commission, you earn $30. This model directly ties your earnings to the revenue you generate, making it the gold standard for most travel bookings and gear sales.
2. Cost Per Action (CPA): Rewarding a Specific Step
Recommended: The Solo Female Travel Safety Guide
Recommended: International Travel Checklist (Printable PDF)
CPA is a broader model where you’re compensated for a specific action a user takes. While that action is often a sale (making it identical to CPS), it can also be something else. For example, a travel credit card company might pay you a CPA commission for every user who completes an application, regardless of whether they are approved.
3. Cost Per Lead (CPL): Paying for High-Value Inquiries
With a CPL model, you earn a fixed fee for each qualified lead you generate. This is common in high-ticket travel sectors where the sales cycle is long. A luxury tour operator, for instance, might pay you $50 for every user who fills out a detailed inquiry form for a bespoke African safari. You get paid for delivering a potential customer; their sales team takes it from there.
4. Tiered & Multi-Tier Structures: Incentivizing Growth
This is where commission models get more sophisticated and rewarding.
Tiered Structures: Rewarding Your Growth These are designed to reward high-performing affiliates. Your commission rate increases as you drive more sales. A program might offer a base rate of 6%, which jumps to 8% after you generate $5,000 in sales in a month, and 10% after $10,000.
Multi-Tier Structures: Building a Network These allow you to earn commissions not only on your own sales but also on the sales generated by other affiliates you recruit into the program. This effectively turns you into a partner who helps grow the program itself, creating a secondary, more passive income stream.
5. Cost Per Click (CPC): The Rare Exception
In this model, you are paid a small fee for every click your affiliate link receives, regardless of a sale. Due to its high vulnerability to fraud, the CPC model is now extremely rare in modern affiliate marketing and almost never seen in the travel space.

Industry Benchmarks: What Good Affiliate Commission Rates Look Like
So, what should you actually expect to earn? While rates vary, the travel industry has established clear benchmarks across its major categories. Here’s your cheat sheet.
Hotels & Accommodations: 2% - 7% of Booking Value This is the bread and butter for many creators, but the details are everything. A program like Expedia Group offers up to 6% of the total booking value with a 7-day cookie. In contrast, Booking.com advertises a much higher "25-40%", but this is a percentage of their commission, not the customer's total payment. This opaque structure often results in a much lower effective rate, closer to 2-4% of the final booking value.
Tours, Activities & Experiences: 6% - 8%+ This is a high-margin category with strong potential. Market leaders like Viator and GetYourGuide set the standard with base commissions of 7-8%. Adventure-focused operators like G Adventures offer 6%, which is incredibly powerful when applied to their high-ticket tours that can cost thousands of dollars.
Travel Insurance: 10% or More Insurance is a consistently high-paying vertical. Top programs like SafetyWing and World Nomads both offer a standard 10% commission. SafetyWing takes this a step further with a recurring model, meaning you continue to earn 10% every time your referred customer renews their policy.
Gear & Apparel: 3% - 8% For physical products, rates depend heavily on the retailer. Amazon Associates is the baseline, offering 3-4% for most travel categories. However, partnering with specialty retailers is far more lucrative. A brand like REI, for example, offers a 5-8% commission on high-quality (and often high-priced) outdoor gear.
Pro-Tip: Don't be blinded by the highest percentage. A 6% commission on a $3,000 G Adventures tour is $180. An 8% commission on a $50 city walking tour is $4. Always consider the average order value of the products you are promoting when evaluating affiliate commission rates.

The Metrics That Matter More Than the Rate Itself
An experienced affiliate marketer knows the commission rate is just a starting point. To truly understand a program's profitability, you need to analyze the metrics that measure real-world performance.
Earnings Per Click (EPC): Your True North This is arguably the single most important metric. It’s calculated by dividing your total commission earnings by the total number of clicks you sent. If you sent 100 clicks and earned $50, your EPC is $0.50. This number tells you the average value of every single click. A program with a lower commission but a higher EPC is often the more profitable partner for your specific audience.
Conversion Rate (CR): The Sign of a Healthy Partner This is the percentage of users who take the desired action after clicking your link. A high conversion rate is a sign of a trusted brand with a well-optimized checkout process. A program with a 10% commission that converts at 1% is less profitable than a program with a 5% commission that converts at 5%.
Cookie Duration: The Travel Creator's Safety Net This is critical in the travel space. A longer cookie duration (30, 60, or 90 days) gives your audience the time they need to research a high-consideration purchase while ensuring you still get credit. A short cookie window is a major red flag and a sign that the program may not be structured in your favor.
Pro-Tip: Dive into your affiliate dashboards. Most networks like CJ Affiliate and Travelpayouts provide detailed reports on your EPC and conversion rates for each program. Use this data to identify your true top performers—the results will often surprise you.

The Travel Creator's Toolkit
Feeling overwhelmed by the data? You don't have to be. To help you organize your strategy and implement everything you've learned, we've created the ultimate resource bundle. It includes checklists, templates, and tools designed to accelerate your journey from beginner to pro.
Download Your Free Bundle: The Travel Creator's Toolkit
The High-Margin Alternative: Referral & Revenue Share Models
While traditional commission models are powerful, the most forward-thinking creators are diversifying into referral and revenue-sharing programs. Instead of a one-time payment for a single sale, these models allow you to build long-term, passive income streams by becoming a true platform partner.
This is the philosophy behind the TrekGuider Seller Platform. We believe in empowering creators to build complex businesses. Our platform is designed for you to sell your own digital products—like itineraries and guides—but our referral program adds another powerful layer to your income strategy.
Instead of a simple CPS commission, our model functions like a sophisticated multi-tier system. When you refer other creators to become sellers on TrekGuider, you earn an ongoing share of the revenue they generate, with tiered commissions that start at 4% for referred sellers. You’re not just earning from a single transaction; you’re building a network and earning from its collective success. It's a strategic way to move beyond chasing individual sales and start building a more resilient, high-margin business.
Frequently Asked Questions (FAQ)
1. Is a higher commission rate always better? Not at all. A high commission rate can be misleading if the program has a low conversion rate, a short cookie duration, or a low average order value. Always look at your Earnings Per Click (EPC) to determine the true profitability of a program for your audience.
2. How can I find the EPC for an affiliate program? Most reputable affiliate networks (like CJ Affiliate, ShareASale, or Travelpayouts) provide EPC data. It's often listed as a network-wide average for each merchant, which gives you a good baseline. Once you start sending traffic, you can track your own personal EPC in your performance reports.
3. Can I negotiate my affiliate commission rates? Yes, absolutely. Once you become a proven partner and consistently drive a significant volume of high-quality sales, you have leverage. Many brands are willing to negotiate a higher, private commission rate for their top-performing affiliates. Always track your performance and don't be afraid to ask.

From Confusion to Command
You are no longer in the dark. The world of affiliate commission rates is no longer a confusing black box. You now have the knowledge to deconstruct any program's payment structure, the industry benchmarks to know your worth, and the key metrics to identify what truly drives profit.
This knowledge is power. It empowers you to audit your existing partnerships, confidently seek out new ones, and even negotiate better terms. By focusing on programs with fair commissions, long cookie durations, and high conversion rates, you can ensure your hard work is properly rewarded. Building a profitable travel content business requires a strategic approach, and a deep understanding of affiliate commission rates is a non-negotiable part of that strategy.
Read the full guide: The Travel Blogger's Playbook to Affiliate Marketing Mastery
Don't Miss Out! Subscribe for Exclusive Content
Subscribe


Comments 0
No comments yet
Be the first to share your experience!
Dont Miss Out! Subscribe for Exclusive Content

Ultimate USA Holidays Guide: Top Picks

FTC Affiliate Disclosure: Stay Compliant as a Travel Creator

Essential Affiliate Tools: From Tracking to Full Optimization

Avoid These 5 Affiliate Landing Page Mistakes for Better Conversions

Affiliate Keyword Research Mastery for Travel Blogs

Booking.com Affiliate Review: Pros, Cons & Earnings
The Ultimate Guide to Travel Safety: A 2026 Playbook
TrekGuider @trekguider
Travel holds a mirror up to the world and shows us who we can be within it. It’s a force that pushes our boundaries, reshapes our perspectives, and fills the pages of our lives with stories we’ll tell for decades. Yet, for all the joy it promises, a shadow of uncertainty—the thought of what could go wrong—can temper the most thrilling plans. In a world defined by its unpredictability, feeling prepared is the currency that buys a truly carefree adventure. That’s why we’ve created this ultimate guide to travel safety. This isn’t a list of warnings to scare you; it's your definitive playbook for navigating the globe with unwavering confidence. We’ve synthesized advice from the world’s leading health organizations, security experts, and seasoned travelers to bring you the most essential travel safety tips for every stage of your journey.

Think of this as your central command. We will cover the full spectrum of travel safety—health and medical preparedness, personal and digital security, accommodation and transportation smarts, and even the specific risks tied to your favorite activities. For each topic, we provide a powerful, actionable overview right here. When you’re ready to master a specific area, we’ll point you directly to our deep-dive guides. Let’s get you prepared, so you can focus on what travel is truly about: the experience.
Health First: Your Foundation for a Safe Trip
Nothing can sideline a trip faster than an unexpected health issue. From a common stomach bug to a more serious injury, being medically unprepared can turn a dream vacation into a logistical and physical nightmare. The good news is that with smart preparation, you can preemptively solve the vast majority of health-related travel risks. It all boils down to two pillars: understanding the potential challenges of your destination and equipping yourself with the right tools to handle them.

This means more than just throwing a few bandages in your suitcase. It’s about proactive prevention—knowing what to eat, what to drink, and how to protect yourself from the elements. And it’s about reactive readiness—having a carefully stocked first-aid kit and a clear grasp of your health insurance. In this section, we'll lay the groundwork for a healthy journey, so you can spend less time worrying and more time exploring.
Food & Water Safety: The Golden Rules of Eating Well Abroad
One of travel’s greatest thrills is diving into the local cuisine. But new flavors can mean new microbes your body isn’t accustomed to. It’s no surprise that traveler’s diarrhea is, by a massive margin, the most common travel-related illness, affecting up to 80% of international travelers depending on the destination. As the Centers for Disease Control and Prevention (CDC) confirms, it's most often caused by consuming food or water contaminated with bacteria. Beyond that, more severe illnesses like Hepatitis A and Typhoid Fever remain significant risks in many regions.
The key to staying healthy is a simple, unforgettable mantra: “Boil it, cook it, peel it, or forget it.” This single rule can guide nearly all your culinary decisions.
Boil It: Applies to all water and liquids. The safest bet is always commercially bottled water with an intact seal. If that's unavailable, bringing water to a rolling boil for at least one full minute is the most effective purification method. Hot beverages like coffee and tea, made with boiled water, are also generally safe.
Cook It: Heat is your best friend. Only eat food that is cooked thoroughly and served steaming hot. This is especially crucial for street food; if you can watch it being cooked fresh to order, it’s a much safer choice than something that’s been sitting in a tray.
Peel It: Contaminants often reside on the skin of raw fruits and vegetables. If you can peel it yourself (with clean hands), it’s safe. This makes bananas, mangoes, oranges, and avocados your go-to snacks.
Forget It: This is the most critical part of the rule. If it doesn’t meet the criteria above, skip it. This means no tap water, no ice cubes, no salads or raw leafy greens, and no unpeeled fruits like grapes or berries.

When choosing where to eat, trust the locals. A busy stall with a long line of residents is a glowing review of its safety and quality. High turnover means fresh ingredients. Conversely, avoid stalls that look dirty, have visible pests, or where the vendor uses the same unwashed hands or utensils for both raw and cooked foods.
For a complete strategy on choosing safe food and purifying water, see our guide on Food & Water Safety Abroad: How to Avoid Getting Sick.
The Essential Travel First-Aid Kit
A well-stocked first-aid kit isn't just an accessory; it's a non-negotiable piece of gear. While you can buy pre-made versions, building your own allows you to tailor it perfectly to your trip. A truly comprehensive kit moves beyond basic bandages to address the most common travel ailments: minor wounds, pain, digestive issues, and skin irritations.
Wound & Burn Care: The foundation of your kit.
Antiseptic wipes to clean wounds and hands.
Antibiotic ointment to prevent infection.
Assorted adhesive bandages, larger gauze pads, and medical tape.
Blister treatment pads (like moleskin) are a must for any walking-heavy trip.
Aloe vera gel for minor sunburns.
Pain, Fever & Sprains:
Pain relievers like Ibuprofen (Advil/Motrin) and Acetaminophen (Tylenol).
An elastic wrap bandage for joint support.
Digestive Issues: Since traveler’s diarrhea is the #1 travel illness, this section is vital.
Anti-diarrhea medication like Loperamide. Imodium is a top pharmacist-recommended brand.
Antacids for indigestion.
Oral rehydration salts to replenish critical fluids and electrolytes.
Allergies, Bites & Skin:
Antihistamine for allergic reactions.
Hydrocortisone cream for insect bites and rashes.
Insect repellent with DEET or Picaridin is essential for destinations with mosquito-borne diseases.
Finally, add the tools: fine-point tweezers, small scissors, and a digital thermometer. Most importantly, pack a sufficient supply of any personal prescription medications in their original containers, plus extra for delays. Before you leave, make sure it's all organized and you've double-checked every item against our International Travel Checklist.
Get the full, pharmacist-approved list in The Ultimate Travel First Aid Kit Checklist (2026).
Personal Security: Navigating the World with Confidence
Beyond health, personal security is often the biggest source of travel anxiety. The thought of scams, theft, or cultural misunderstandings can be intimidating, especially for first-time or solo travelers. But personal safety isn’t about paranoia; it’s about presence. It’s a mindset built on situational awareness, confident decision-making, and an informed understanding of your environment.
By knowing the common challenges and arming yourself with simple, proven strategies, you shift from being a potential target to being a savvy, hard-to-fool traveler. This section will give you those tools, covering everything from outsmarting common tourist scams to specific, empowering advice for solo and female travelers.
How to Avoid the Top 10 Travel Scams
Travel scams persist for a simple reason: they exploit human nature. Scammers are masters of distraction, confusion, and a traveler's own politeness or desire for a deal. Your best defense is to know their script before the show starts. From the "broken taxi meter" to the "friendship bracelet" gambit, recognizing the setup is the key to sidestepping the con entirely. In most cases, a firm, polite "No, thank you" while confidently walking away is your most effective tool.
Learn to spot and disengage from every common con in our detailed breakdown: How to Avoid Travel Scams: A Global Guide.
Essential Tips for Solo Travelers
The currency of safe solo travel is confidence. It’s a mindset, a posture, and a projection that transforms you from a potential target into a savvy, self-assured traveler. This journey begins at home, by researching your destination’s culture and learning a few phrases in the local language. When you arrive, walk with purpose. If you need to check a map, step into a café to orient yourself discreetly. Above all, trust your intuition; that gut feeling is a powerful, primitive security system. If a person or situation feels wrong, it is. Don't hesitate to remove yourself immediately.
For gender-neutral advice on navigation, confidence-building, and socializing safely, read 11 Essential Solo Travel Safety Tips You Need to Know.
A Woman's Guide to Safe Travel
While many safety principles are universal, women often navigate an additional layer of gender-specific risks and cultural nuances. Safe and empowered travel as a woman is rooted in preparation. A critical aspect is respecting and understanding local dress codes. In many cultures, dressing modestly by covering shoulders and knees isn't just a sign of respect—it’s a powerful tool that helps you blend in and deter unwanted attention. It’s equally vital to research norms around social interaction. Beyond your own research, one of the best resources is other women who have been there before. On the TrekGuider platform, you can explore our Catalog of Authors to discover and follow trusted female travel creators, accessing their expert guides and articles all in one place.

For a deeper dive into empowerment, cultural respect, and navigating harassment, see A Woman's Guide to Safe Travel: 10 Critical Tips.
Safe Spaces: Accommodation & Transportation Security
Your safety isn't just about how you navigate crowded streets; it's also about ensuring your private spaces—your hotel room, your train cabin, your taxi—are secure sanctuaries. Every transition point on a journey, from checking into a hotel to hailing a ride, is a moment where a quick, deliberate safety check can provide immense peace of mind.

A few simple, repeatable habits can drastically reduce your vulnerability. These aren't complicated procedures; they are the smart, swift routines that become second nature to seasoned travelers.
Your Hotel Room Security Checklist
The moment you cross the threshold of a new hotel room, perform this 60-second security sweep. First, prop the door open with your luggage and do a quick visual clear of the room—behind curtains, under the bed, in the closet, and shower. Once clear, close the door and test every single lock: the deadbolt, the security chain, the latch. They should all feel solid and function smoothly.
Next, find the emergency evacuation map on the back of the door. Don't just glance at it. Identify the two nearest exits and physically count the doors between your room and the closest one. This knowledge is invaluable if you ever need to navigate a dark or smoke-filled hallway. Check that the room phone works, and ensure all windows and connecting doors lock securely. For your valuables, use the room safe. If one isn't available, avoid obvious hiding spots. Taping an envelope with cash to the underside of a heavy desk or the back of a drawer is far more secure than leaving it in your suitcase.
Find a complete, step-by-step process in our guide: 7 Hotel Safety & Security Tips for Peace of Mind.
Transportation Safety: Planes, Trains, and Automobiles
Getting from A to B safely is about protecting both yourself and your belongings while in transit. Each mode of transport has its own playbook.
In the Airport: The TSA recommends using TSA-recognized locks on checked baggage, which allows security to inspect a bag without destroying the lock. The golden rule: never pack valuables in your checked luggage. Electronics, medications, documents, and jewelry belong in your carry-on. Make your bag instantly identifiable with a colorful strap to prevent mix-ups at the carousel.
On Trains: On an overnight journey, secure your main bag to a fixed object like a luggage rack with a small cable lock. Keep your absolute essentials—passport, phone, wallet—on your person in a money belt or in a small bag you can use as a pillow. In a private or shared cabin, always lock the door from the inside at night.
In Taxis & Ride-Shares: Before getting in, verify. For a ride-share, match the license plate, car model, and driver's photo with your app. Ask the driver, “Who are you here for?” so they confirm your name. Don't volunteer it. Once moving, use the app’s “Share Trip” feature to send your live location to a trusted contact.

For a mode-by-mode breakdown of best practices, read our Transportation Safety: Staying Safe on Planes & Trains guide.
Digital Defenses: Protecting Your Data Abroad
In our hyper-connected world, travel safety extends far beyond the physical. Your digital identity is one of your most valuable assets, and it's never more vulnerable than when you're on the road, connecting to unfamiliar networks. Public WiFi, shared computers, and even public USB charging ports can be gateways for data thieves.
Hackers specifically target travelers, but you don’t need to be a cybersecurity expert to defend yourself. A few fundamental habits and one essential tool can build a powerful fortress around your digital life.
The Dangers of Public WiFi and How to Stay Safe
Public WiFi is a minefield. These networks are the primary hunting ground for "Man-in-the-Middle" attacks. A hacker simply sets up a fake WiFi network with a believable name, like "CoffeeShop Guest WiFi." The moment you connect, they become an invisible eavesdropper, capturing every password, credit card number, and private message you send.
Your single most effective defense is a Virtual Private Network (VPN). A VPN is a simple app that encrypts your internet connection, creating a secure, private tunnel that makes your data completely unreadable to anyone else on the network. Before you travel, subscribe to a reputable VPN service and install the app on your phone and laptop. Then, every time you use public WiFi, just open the app and tap “Connect.” It’s that simple. Also, practice good device hygiene: lock your devices with strong passphrases and avoid public USB charging ports, which can be used for "juice jacking" to install malware. Always use your own power adapter or a portable power bank.
Get our simple, step-by-step instructions in Is Public WiFi Safe? How to Protect Your Data Abroad.
Adventure-Ready: Activity-Specific Safety
Many of the best trips are built around specific adventures—trekking through mountains or relaxing on a perfect beach. While these experiences create lifelong memories, they carry unique risks that demand specific preparation. General safety knowledge is a great start, but understanding the particular challenges of your environment is what truly prepares you for a safe and successful adventure.

From packing the right gear for the wilderness to knowing how to spot a dangerous rip current, this specialized knowledge can make all the difference.
Hiking Safety: Be Prepared on the Trail
Heading into the great outdoors requires a commitment to self-sufficiency. The National Park Service promotes the "10 Essentials," a system of critical gear every hiker must carry. This includes Navigation (map, compass), Illumination (headlamp), Sun Protection, a First-Aid Kit, Tools, Fire starters, extra Insulation (clothing), extra Nutrition, extra Hydration, and an Emergency Shelter. If you're looking for expert-vetted packing lists or detailed trail guides for your next adventure, the TrekGuider Marketplace is an invaluable resource where seasoned hikers and outdoor creators share their knowledge. Beyond gear, wildlife safety is key. Never run from a bear. Instead, make noise and make yourself look large. For mountain lions, maintain eye contact and back away slowly.

For a full gear list and wildlife protocols, check out How to Stay Safe While Hiking: A Hiker's Safety Guide.
Beach Safety: Know Before You Go
A day at the beach can feel idyllic, but the ocean demands constant respect. The most critical skill is spotting a rip current. According to NOAA, look for a channel of choppy water, a break in the wave pattern, or a line of foam moving away from shore. If you're caught in one, don't fight it. Swim parallel to the shore until you're free of the current's pull. Also, always heed the beach warning flag system. A yellow flag signifies moderate surf/currents, while a red flag means high hazard, and swimming is discouraged. The absence of flags doesn't guarantee safety, so always be vigilant.

For more on rip currents, sun safety, and marine life, read our 9 Beach Safety Tips That Could Save Your Life.
Financial Protection: The Safety Net of Travel Insurance
Even the best-laid plans can be upended. A canceled flight, lost luggage, or a sudden medical emergency can be financially devastating in a foreign country. Travel insurance is your ultimate financial safety net. However, policies are filled with fine print that can confuse even savvy travelers.
Understanding what you’re buying is as important as buying it. Knowing the key terms and common red flags ensures your policy will be there for you when it matters most. Before finalizing any travel plans, make sure you're covered with both a good insurance policy and a solid plan using our International Travel Checklist.
Demystifying Travel Insurance
Choosing the right policy means looking for common red flags. The pre-existing medical conditions exclusion is a big one; many policies won't cover issues from a condition you had before purchase. Another is the exclusion for high-risk activities; if you plan to ski or scuba dive, you likely need an add-on.
It’s also crucial to understand key terms. The deductible is what you pay out-of-pocket before the insurer pays. Primary coverage is better than secondary coverage because it pays first, resulting in faster claims. For ultimate flexibility, a “Cancel for Any Reason” (CFAR) upgrade lets you cancel for any reason not covered in the base policy and still recoup 50-80% of your non-refundable costs. A small investment in the right policy—and our all-encompassing Travel Guide—can save you a fortune.
Learn to decode policy jargon and spot bad deals with our guide on 7 Travel Insurance Red Flags to Spot Before You Buy.
Travel with Confidence
The world is a magnificent, welcoming place, and the goal of travel is to experience it with an open heart. Being prepared isn't about building walls of fear; it's about building a foundation of knowledge that gives you the freedom to embrace the unexpected with confidence. By internalizing these travel safety tips, you invest in your own peace of mind, ensuring your focus remains on the beauty, connection, and growth that every journey offers. From packing a smart first-aid kit to recognizing a scam, each act of preparation contributes to a safer, more rewarding adventure. So go—plan the trip, book the ticket, and step out into the world. You’ve got this.

Are you a travel expert with hard-won knowledge to share? If this guide resonated with you, and you have your own expertise in a specific destination or travel style, consider becoming a creator on TrekGuider. Our Publishing Platform and Monetization Tools empower travel bloggers and experts like you to build authority, share your wisdom, and sell your own digital products to a community that values authentic, on-the-ground knowledge.
Don't Miss Out! Subscribe for Exclusive Content
SubscribeComments 0
No comments yet
Be the first to share your experience!
Dont Miss Out! Subscribe for Exclusive Content
Ultimate USA Holidays Guide: Top Picks
FTC Affiliate Disclosure: Stay Compliant as a Travel Creator
Essential Affiliate Tools: From Tracking to Full Optimization
Booking.com Affiliate Review: Pros, Cons & Earnings

Decoding Affiliate Commission Rates: Benchmarks for Travel Creators

Amazon Associates for Travel: Strategies to Maximize Commissions
How to Plan a Stress-Free Hawaii Family Trip
TrekGuider @trekguider
Planning a family trip to Hawaii should feel exciting, but the reality can be overwhelming. You're juggling how to pack for unpredictable weather, what activities will actually entertain everyone from toddlers to teens, and how to manage the logistics without losing your mind. The fear of getting it wrong—forgetting something crucial or planning a day that ends in meltdowns—can quickly overshadow the promise of paradise.

Imagine arriving on Maui only to realize you’ve forgotten the reef-safe sunscreen now required by law, forcing a frantic, expensive search. Picture the meltdowns—from kids and adults alike—when a carefully planned beach day is met with groans of boredom, or the crushing disappointment of discovering the lūʻau you dreamed of has been sold out for weeks. Without a strategic plan, the logistical details can overshadow the magic you’re seeking.
This guide is the antidote to that anxiety. It’s your strategic playbook, crafted from hard-won experience to eliminate the guesswork and transform your planning process into an exciting prelude to your adventure. While this article drills down into Hawaii-specifics, it's part of our complete library of Family Travel Ideas: The 2026 Guide to Unforgettable Trips. Consider this your roadmap to a seamless, stress-free, and truly magical Hawaiian escape.
What to Bring and What to Leave Behind
A successful packing strategy for Hawaii isn't about bringing everything; it's about bringing the right things. The islands’ unique environment—from intense equatorial sun to sudden tropical showers—demands a thoughtful approach. For a deep dive into the core principles, our How to Pack Light Guide is a great resource. This Hawaii-specific blueprint ensures you’re prepared for every possibility without hauling unnecessary weight across the Pacific.
Your In-Flight & First-Day Survival Kit
Think of your carry-on bag as your mission-critical command center. If your checked luggage gets delayed, this bag should contain everything you need to not just survive, but thrive for the first 24 hours.
A Complete Change of Clothes for Everyone: One full, lightweight outfit per person. Don't forget underwear and socks.
Swimsuits: This is non-negotiable. You can change in the lobby restroom and head straight to the pool, starting your vacation immediately.
Essential Medications: All prescription medications, plus a small first-aid kit with children’s pain relievers, allergy medicine, band-aids, and antibacterial ointment.
Documents & Valuables: IDs, credit cards, and digital or printed copies of your key reservations (hotel, rental car, first big tour).
The "Boredom Buster" Kit: Fully charge all electronics and pre-load them with movies and games. For younger kids, pack a small bag with a new coloring book or a few wrapped dollar-store toys to reveal mid-flight.
A Feast of Snacks: Pack more than you think you’ll need to combat travel delays and grumpy tummies.
Empty Reusable Water Bottles: Fill them up post-security to stay hydrated and save money.
Your Flight Plan for Happy Kids
The long flight to Hawaii is often the most dreaded part of the trip. To make it a breeze, download our free, sanity-saving checklist.
Stress-Free Flying with Kids Guide
It's packed with simple, actionable tips to keep kids of all ages happy and occupied from takeoff to landing.
The Checked Luggage
Chaos is the enemy of a relaxing vacation. To combat this, we rely on a modular system built around packing cubes. This simple technique transforms your luggage from a chaotic pit into a structured, mobile dresser where everything has its place.

The Clothing System (Lightweight & Layered): Hawaii’s climate is defined by humidity and trade winds. Pack lightweight, breathable fabrics like cotton and linen. Focus on mix-and-match pieces. For a week, plan on 5-6 tops and 3-4 bottoms per person. Everyone should have a light jacket or cardigan for breezy evenings and a packable rain jacket.
The Beach Gear System (Protect & Play): This is the core of your Hawaii packing.
Reef-Safe Sunscreen: An absolute must. Pack at least one large tube of mineral-based (zinc oxide or titanium dioxide) sunscreen lotion.
Total Sun Protection: Wide-brimmed sun hats, UV-protective sunglasses, and long-sleeved rash guards for every family member.
Minimalist Beach Toys: A collapsible bucket and a few small shovels are all you need.
Goggles: For kids who love to put their face in the water, a good pair of goggles is invaluable.
The Footwear System (The Rule of Three): You only need three pairs of shoes per person.
Water Shoes/Aqua Socks: Essential for exploring rocky tide pools or beaches with sharp lava rock.
Sandals/Flip-Flops: For the beach, pool, and casual strolls.
Closed-Toe Shoes: A comfortable pair of sneakers for travel days, hikes, or activities like ziplining.
What to Leave at Home (And Rent or Buy in Hawaii)
Beach Towels: Every hotel and condo complex will provide these.
Bulky Floaties and Pool Noodles: Buy them there and leave them for another family when you depart.
Full-Sized Snorkel Sets: Renting high-quality, sanitized equipment on the island is far more convenient.
Formal Wear: Hawaii is overwhelmingly casual. A sundress or a collared shirt with nice shorts is as dressed-up as you’ll need to get.
Pro-Tip: Assign each family member a specific color of packing cubes. This simple trick makes it incredibly easy to identify whose clothes are whose.
Crafting Your Perfect Itinerary for Family Beach Vacations in Hawaii
While building sandcastles is a rite of passage, the true magic of Hawaii lies in its diverse experiences. Tailoring activities to your children's developmental stage is the secret to a trip that engages everyone. And to keep it all organized, our Travel Itinerary Template is a game-changer.
For Families with Toddlers & Preschoolers (Ages 0-5)
At this age, the goals are safety, sensory engagement, and maintaining routines. Focus on manageable outings that spark wonder without causing overstimulation.
Master the Art of the Lagoon: The man-made lagoons of Ko Olina on Oahu are a toddler parent’s paradise. The water is virtually waveless, creating a giant, safe saltwater pool. On Kauai, Lydgate Beach Park offers similarly protected swimming.
Meet the Marine Life (Up Close): The Maui Ocean Center is a world-class aquarium with a walk-through tunnel and touch pools. The Waikiki Aquarium on Oahu is smaller but equally captivating.
Discover the Magic of Shave Ice: Don't underestimate the joy of this simple treat. Trying authentic Hawaiian shave ice is a core memory on a hot afternoon.

For School-Aged Kids (Ages 6-12)
This is the golden age of family travel. Kids are old enough for bigger activities and to truly learn from their experiences.
Become a Junior Snorkeler: This is the perfect age to introduce kids to the underwater world. Start at an ultra-calm spot like Kapalua Bay on Maui or Hanauma Bay on Oahu (reservations required!).
Experience a Family Lūʻau: A lūʻau is a quintessential Hawaiian experience. Opt for one known for being family-friendly, like the Smith Family Garden Lūʻau on Kauai.
Become a Volcano Voyager: On the Big Island, a visit to Hawaiʻi Volcanoes National Park is like a real-life science lesson. Pick up a Junior Ranger booklet to transform your kids into active explorers.

For Teenagers (Ages 13-18)
For teenagers, the key is balancing family time with a sense of independence and adventure. Involve them in the planning.
Learn to Surf: Book a group lesson from a reputable surf school in a beginner-friendly area like Waikiki on Oahu or Kihei on Maui.
Conquer an Epic Hike: Challenge your teens with an iconic hike like the summit of Diamond Head on Oahu, which offers panoramic vistas of Waikiki.
Zipline Through Paradise: Soaring through the rainforest canopy on a zipline is a pure adrenaline rush that provides a thrilling adventure for the whole family.

Pro-Tip: The most popular activities in Hawaii—especially lūʻaus, timed-entry parks like Hanauma Bay, and surf lessons—book up weeks, if not months, in advance. Make your reservations the moment you have your travel dates confirmed.
The Aloha Code: Essential Rules for a Safe and Respectful Trip
A little local knowledge goes a long way. These are the non-negotiable rules for any family visiting the islands.
Ocean Safety Comes First
The Pacific Ocean is powerful. The most important rule in Hawaii is "Never turn your back on the ocean." Rogue waves can appear on even the calmest-looking days.
Swim at Lifeguarded Beaches: Whenever possible, choose a beach with a lifeguard on duty.
Understand Shore Break: Many Hawaiian beaches have a powerful shore break, where waves crash directly onto the sand. This can be dangerous for young children.
Respect the Warnings: Pay attention to all posted warning signs regarding strong currents, high surf, or dangerous marine life.
Protecting the 'Āina (Land)
Hawaii's coral reefs are fragile, living ecosystems. Protecting them is not just a suggestion; it's the law.

Use Mineral-Based LOTION Only: By law, you must only use sunscreens with zinc oxide or titanium dioxide. Critically, avoid aerosol sprays. Even "reef-safe" sprays settle on the sand and wash into the ocean, harming the reef.
Apply Early and Often: Apply sunscreen 20 minutes before sun exposure and reapply every two hours, or immediately after swimming.
Respecting the Wildlife
Hawaii is home to the Hawaiian green sea turtle (honu) and the endangered Hawaiian monk seal.

Keep Your Distance—It's the Law: You must maintain a distance of at least 10 feet (3 meters) from sea turtles and 50 feet (15 meters) from monk seals. It is illegal to touch, chase, or harass them.
View Responsibly: Use a zoom lens for photos. If an animal approaches you, calmly and slowly move away.
Frequently Asked Questions
What is the single most important thing to pack for a Hawaii family trip?
The most crucial item is reef-safe, mineral-based sunscreen LOTION. Sunscreens containing oxybenzone and octinoxate are banned in Hawaii to protect the coral reefs, and aerosol sprays are highly discouraged as they pollute the sand and water.
Is Hawaii a safe destination for toddlers and young children?
Recommended: Stress-Free Flying with Kids: Airport, TSA, and In-Flight Guide
Recommended: Travel Guide: Trip Planning, Flights, and Avoiding Tourist Traps
Absolutely. Many beaches are perfect for little ones, especially the man-made lagoons at Ko Olina on Oahu or the protected rock ponds at Lydgate Beach Park on Kauai, which have calm, waveless water perfect for safe splashing.
Do I really need to book Hawaiian activities in advance?
Yes, it is critical. Popular activities like lūʻaus, boat tours, surf lessons, and timed-entry parks like Hanauma Bay on Oahu often sell out weeks or even months in advance. Booking ahead is essential to avoid disappointment.
What are the essential types of shoes to bring to Hawaii?
You only need three pairs per person: water shoes for rocky beaches and tide pools, comfortable sandals or flip-flops for the beach and pool, and a pair of closed-toe sneakers for travel days and hiking.
Conclusion
The key to crafting the perfect trip isn’t about finding a secret beach; it’s about making a series of smart, informed choices. By implementing a strategic packing system and thoughtfully selecting age-appropriate activities, you transform the stress of planning into the joy of anticipation. You now have the framework to pack with confidence and design an itinerary that weaves together relaxation, adventure, and connection. This is how you create the legendary Hawaiian family vacation that becomes a key part of your family's story. For even more in-depth strategies on planning unforgettable trips anywhere in the world, explore our comprehensive Travel Guide. Aloha.
Read the full guide: Family Travel Ideas: The 2026 Guide to Unforgettable Trips
Don't Miss Out! Subscribe for Exclusive Content
SubscribeComments 0
No comments yet
Be the first to share your experience!
Dont Miss Out! Subscribe for Exclusive Content
Ultimate USA Holidays Guide: Top Picks
FTC Affiliate Disclosure: Stay Compliant as a Travel Creator
Essential Affiliate Tools: From Tracking to Full Optimization
Booking.com Affiliate Review: Pros, Cons & Earnings
Decoding Affiliate Commission Rates: Benchmarks for Travel Creators
Amazon Associates for Travel: Strategies to Maximize Commissions
Thanksgiving Parade: 6 Prime Spots
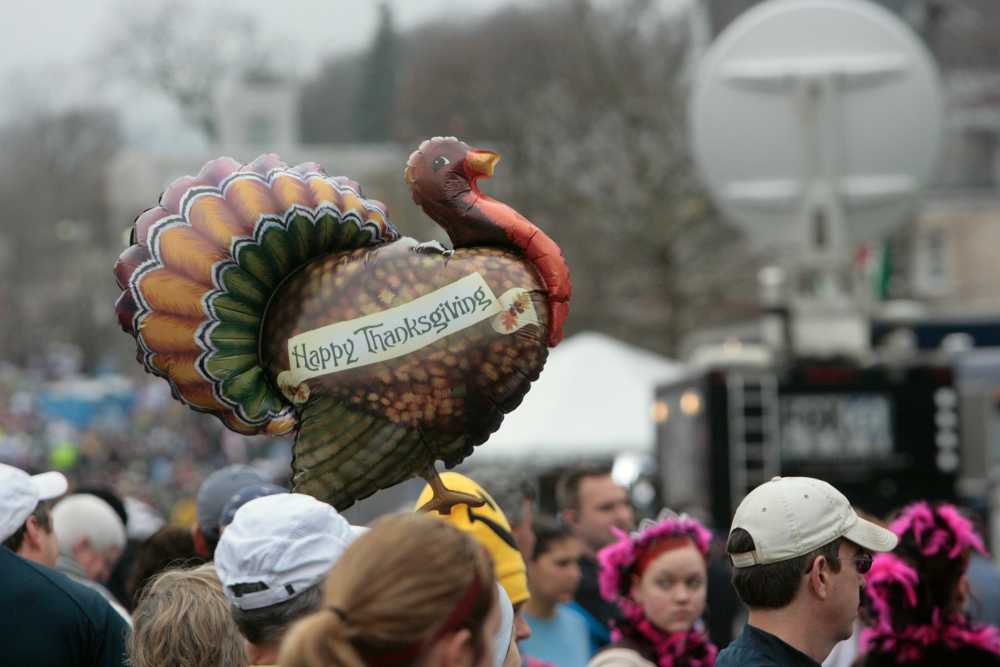
TrekGuider @trekguider
You’ve seen it on television your whole life: colossal cartoon characters floating between skyscrapers, world-class marching bands sending echoes through the avenues, and the final, festive arrival of Santa Claus himself. The Macy's Thanksgiving Day Parade is an American institution, the magical kick-off to the holiday season. But the dream of seeing it in person is often haunted by a logistical nightmare. You’re worried about battling millions for a tiny patch of sidewalk, only to have your view blocked, your kids get restless, and the entire enchanting experience devolve into a cold, stressful ordeal.
That anxiety is completely valid. Every year, over 3.5 million people descend on the route, and without a rock-solid plan, you’ll see more of the back of someone’s head than you will of the giant Snoopy balloon. You risk waking up before dawn only to find every good spot claimed, leaving your family disappointed and shivering. The magic you traveled for feels impossibly out of reach, lost in a sea of chaos. You deserve to experience the wonder, not the worry.
Forget the frustration. This is your strategic blueprint for success. We’re going to bypass the chaos and transform you into a parade-viewing expert. We’ll unveil the six prime spots to watch the spectacle, complete with insider strategies on timing, what to pack, and how to navigate the city like a local. This is your definitive plan for conquering the Thanksgiving parade in New York and creating memories that will last a lifetime. It’s one of the most iconic events in the city, a true highlight that we cover in our broader guide to New York Holidays: 10 Must-Do Events.

Understanding the Parade Route: Your Strategic Map
Before you can pick your spot, you need to understand the battlefield. The Macy's Thanksgiving Day Parade is a massive operation, and its route is the key to everything. Knowing the path, the timing, and—most importantly—the restricted zones will give you a powerful advantage.
The parade officially kicks off at 8:30 AM sharp on Thanksgiving morning, Thursday, the fourth Thursday of November. It begins on the Upper West Side and marches for 2.5 miles, concluding around noon.
Here’s the official step-by-step route:
Starts: 77th Street & Central Park West at 8:30 AM.
Travels South: Proceeds down Central Park West to Columbus Circle.
Turns: At Columbus Circle, it turns onto Broadway.
Continues South: It follows Broadway through the heart of Midtown.
Ends: The parade concludes around noon at the iconic Macy's Herald Square on 34th Street.
Our internal research confirms two critical areas to avoid at all costs: the start zone around 77th Street and the finish zone near Herald Square (from 34th to 38th Street). These areas have heavily restricted public viewing and are reserved for television broadcasting. Trying to watch from here is a rookie mistake that guarantees disappointment. Your strategy must focus on the long stretches in between.
The 6 Prime Viewing Spots for the Thanksgiving Parade in New York
Now for the main event. Choosing your location is the single most important decision you’ll make. Each of these six spots offers a unique advantage, whether it’s fewer crowds, better photo opportunities, or more family-friendly conditions.
1. The Upper West Side: The Classic Family Choice
Location: Along Central Park West, from 77th Street down to Columbus Circle (specifically the west side of the street).
Why It’s Prime: As the parade’s very first leg, this 16-block stretch is where the magic is freshest. The performers are electric with energy, the marching bands are at their most thunderous, and the balloon handlers are still wrangling their colossal characters into perfect formation. Because it's more residential, the crowds feel slightly more manageable and family-oriented than in the commercial chaos of Midtown. The backdrop of Central Park on one side and historic apartment buildings on the other makes for stunning photos.
Your Strategy:
Timing is Everything: You must arrive by 6:00 AM. The front-row spots are often claimed by locals before the sun is up. By 6:30 AM, the area will be packed several rows deep.
Positioning: Plant yourself on the west side of Central Park West. This gives you a direct, unobstructed view as the parade marches south.
What to Expect: It will be cold and dark when you arrive. This spot requires a commitment to waiting, but the payoff is a fantastic, high-energy viewing experience.
2. The Shops at Columbus Circle: The VIP Indoor View
Location: The second and third floors of The Shops at Columbus Circle, overlooking the parade’s turn from Central Park West onto Broadway.
Why It’s Prime: This is the ultimate parade hack for those who want to avoid the cold and the crowds. You get a warm, elevated, bird’s-eye view of the entire spectacle. Plus, you have immediate access to restrooms, coffee, and food—luxuries that are unthinkable for those on the street.
Your Strategy:
This Isn't Free: This is not a public viewing area. Access is typically granted to customers of the shops and restaurants within the mall.
Plan Months Ahead: Check with stores like Williams-Sonoma or restaurants with windows facing the circle. Many host private, ticketed viewing events that sell out far in advance.
Be Prepared to Spend: You will need to make a purchase or pay for a breakfast event to gain entry. Consider it the price of unparalleled comfort and convenience.

3. The Sixth Avenue Stretch: The Urban Canyon Experience
Location: Along Sixth Avenue (Avenue of the Americas) from 59th Street down to 38th Street.
Why It’s Prime: This is the longest and straightest portion of the route, offering dozens of blocks for potential viewing. Watching the giant balloons squeeze between the towering skyscrapers of Midtown is a uniquely New York experience. The sheer scale of the buildings creates a dramatic "urban canyon" effect that makes the parade feel even more grand.
Your Strategy:
Arrive Early: The secret is out on this spot. To get a decent view, be in position by 6:30 AM at the latest. The blocks closest to Central Park (59th to 50th) fill up the fastest.
Avoid Corners: Set up in the middle of a block. Corners are notoriously crowded and chaotic, with people constantly moving and blocking views.
Look for Scaffolding: Sometimes, construction scaffolding can be a blessing in disguise, creating a covered area that offers some protection from the elements and can deter massive crowds from forming in that exact spot.
Pro-Tip: The area between 70th and 75th streets on Central Park West offers a slightly wider sidewalk, giving you a little more breathing room. Pack a thermos of hot chocolate to stay warm while you wait—it’s a game-changer.
4. The "Quiet Zone" Near Radio City Music Hall
Location: The stretch of Sixth Avenue between 49th and 51st Streets.
Why It’s Prime: While no part of the route is truly "quiet," this section is designated as a no-marching-band-performance zone to accommodate the national television broadcast headquartered at Radio City. This means you get a brief respite from the loudest musical numbers—a great option for families with young children or those with sensory sensitivities.
Your Strategy:
Know the Trade-Off: You will see all the floats and balloons perfectly, but you will miss the live performances from the marching bands as they pass this specific area.
Use the Location: This spot is fantastic for its iconic backdrop. You can capture incredible photos of the balloons with the famous Radio City Music Hall marquee in the background.
Post-Parade Plans: You are perfectly positioned to see the Rockettes' Christmas Spectacular later in the day or head over to Rockefeller Center.

5. The South Side of 38th Street: The Late-Arrival Lifeline
Location: The blocks along Sixth Avenue from 40th Street down to 38th Street.
Why It’s Prime: Let's be realistic: not everyone can wake up at 4 AM. If you’re running late, this is your last best chance. As the parade nears its end at 34th Street, the area becomes a restricted broadcast zone. Therefore, the blocks just before this cutoff are the final public viewing areas.
Your Strategy:
Manage Expectations: You will not get a front-row view here. This is a spot for seeing the tops of the balloons and catching the general energy of the event.
Look Up: Your view will be mostly vertical. It’s less about seeing the performers on the street and more about witnessing the spectacle of the giant balloons against the sky.
Quick Exit: The advantage of being near the end of the route is that you can make a quick exit once the final float passes, beating some of the mass exodus heading for the subway.
6. The Virtual View: Your Hotel Room Perch
Location: Any hotel with rooms directly overlooking the parade route on Central Park West or Sixth Avenue.
Why It’s Prime: This is the most comfortable, stress-free, and luxurious way to experience the Thanksgiving parade in New York. You can watch the entire event from the warmth of your room, in your pajamas, with a cup of coffee in hand. You have your own bathroom, your own food, and an unbeatable, unobstructed view.
Your Strategy:
Book a Year in Advance: Rooms with parade views are often booked a year or more ahead and come at a significant premium.
Confirm the View: When booking, you must call the hotel directly to confirm that your specific room has a "parade view." An "avenue view" is not always sufficient.
Notable Hotels: Some hotels famous for their parade views include the JW Marriott Essex House, the Mandarin Oriental, New York, the Warwick New York, and the New York Hilton Midtown.
Pro-Level Survival Guide for Parade Day
Securing a great spot is only half the battle. You need a solid plan for the hours you’ll spend waiting. Follow these tips to ensure your experience is comfortable and memorable for all the right reasons.
The Ultimate Timing Strategy
The golden rule, confirmed by years of experience, is to arrive by 6:00 AM. This is non-negotiable for a front-row or second-row spot along Central Park West or the prime stretches of Sixth Avenue. By 6:30 AM, these areas are typically full. By 7:00 AM, you’ll be lucky to find a spot where you can see anything at all. Set your alarm, bundle up, and get there early. The early bird gets the best view of the parade.
What to Wear and Pack: The Family Checklist
New York in late November is cold. Standing still for hours makes it feel even colder.
Dress in Layers: Start with a thermal base layer, add a fleece or sweater, and top it off with a warm, wind-resistant winter coat. Don't forget a hat, gloves, and a scarf.
Comfortable Footwear: Wear warm, waterproof boots. Your feet will thank you.
The Essentials Bag: Pack a backpack with:
Snacks and Drinks: A thermos of hot chocolate or coffee is a must. Bring water and easy-to-eat snacks like granola bars and fruit.
Entertainment: A book, a deck of cards, or a fully charged phone with headphones can help pass the time.
Portable Phone Charger: Your battery will drain faster in the cold.
Small Folding Stools: If you have space, these can be a lifesaver for your back and legs.
For a comprehensive list of what to bring on any family adventure, our National Park Road Trip Checklist has you covered, with tips that apply just as well to an urban expedition.

Navigating the Crowds with Kids
The parade is a magical experience for children, but the crowds and waiting can be tough.
Avoid Strollers: In the most crowded areas, strollers are more of a liability than a help. They are difficult to maneuver and take up valuable space. A carrier is a much better option for very young children.
Establish a Meeting Point: As soon as you claim your spot, pick a clear, fixed landmark (e.g., a specific lamppost, a store entrance) as your family's meeting point in case you get separated.
Use a Buddy System: Ensure everyone has a partner.
Ladders: You will see people with small ladders for their kids to see over the crowd. If you bring one, be sure to place it a safe distance from the street and be courteous to those around you.
Pro-Tip: Skip the car. Public transportation is your best friend. The subway will be running on a holiday schedule, but expect crowded stations near the route. Plan your subway route in advance and buy your MetroCard the day before to avoid long lines at the machines on Thanksgiving morning.
Beyond the Parade: Making it a Full Thanksgiving Experience
Remember, the parade ends around noon, leaving you with a full day to enjoy the city. Many people head straight to a Thanksgiving dinner. If you plan to eat out, you must make reservations weeks, if not months, in advance. New York City is one of the world's culinary capitals, and a festive meal is the perfect way to cap off a magical morning.
Planning the perfect holiday trip, from the parade to the feast, requires expert knowledge. Our comprehensive Travel Guide provides detailed itineraries and booking advice for major US cities, ensuring your entire vacation is seamless and spectacular.

Your Mission, Should You Choose to Accept It
Watching the Macy's Thanksgiving Day Parade in person is a bucket-list dream, and with this guide, it’s a dream you can turn into a flawless reality. You now have the route, the prime locations, and the pro-level strategies to outsmart the crowds and secure a fantastic viewing experience. You’re no longer a tourist hoping for a glimpse; you’re a prepared strategist ready to claim your prime spot and soak in every moment of the magic. The Thanksgiving parade in New York is waiting for you.
Now go make those once-in-a-lifetime memories!
Meta Data Suggestions:
SEO Meta Title: 6 Prime Spots for the NYC Thanksgiving Day Parade (2026)
URL Slug: thanksgiving-parade-new-york-viewing-spots
SEO Meta Description: Don't just watch the Thanksgiving parade in New York, conquer it. Our guide reveals 6 prime viewing spots and insider tips for a stress-free family experience.
Don't Miss Out! Subscribe for Exclusive Content
SubscribeComments 0
No comments yet
Be the first to share your experience!
Dont Miss Out! Subscribe for Exclusive Content

San Francisco Cherry Blossoms: A Local's Guide to the Blooms

Halloween SF: Haunts Without Horrors

SF Festivals: 7 Must-See Lineups

Christmas SF: Lights & Wharf Wonders

SF Pride: 6 Route & Party Hacks
