Decoding Affiliate Commission Rates: Benchmarks for Travel Creators
TrekGuider @trekguider
You’re a travel creator, and you’ve entered the world of affiliate marketing to turn your passion into a profession. But you’ve quickly run into a frustrating black box: the commission structure. You see a dizzying array of percentages, acronyms like CPA and EPC, and vague promises of earnings. You’re left wondering what good affiliate commission rates even look like. Are you earning your worth, or are you leaving a significant amount of money on the table?
This confusion isn't just academic; it's a direct threat to your bottom line. The reported average monthly income for affiliates in the travel niche is an impressive $13,847, a figure that proves this is a serious enterprise. But you can't build a sustainable business on guesswork. Partnering with a program offering a flashy 40% commission—only to discover it’s 40% of their tiny margin—is a rookie mistake that costs real money. This lack of clarity makes it impossible to forecast your income, negotiate better terms, or build a truly predictable business. You feel like you’re flying blind.
This guide is your decoder ring. We are pulling back the curtain to give you a comprehensive breakdown of how affiliate commissions actually work. We will deconstruct every major commission model, provide clear, data-backed industry benchmarks, and teach you how to analyze these rates like a seasoned professional. By the end of this deep dive, you will be able to spot high-value opportunities and architect a monetization strategy that truly rewards your influence. For a complete overview of the affiliate landscape, our definitive pillar page, Travel Affiliate Programs: The 2026 Ultimate Guide, is your essential command center.

The Anatomy of a Commission: Deconstructing the Core Models
Let's cut through the jargon. An affiliate commission is simply a reward for a job well done. A company—the merchant—pays you for successfully driving a specific, valuable action, which in the travel world almost always means a completed booking or sale.
But the way that reward is calculated can vary dramatically. Understanding the underlying structure of different affiliate commission rates is the first step toward becoming a high-earning creator.
1. Cost Per Sale (CPS) or Pay Per Sale (PPS): The Industry Workhorse
You'll encounter this model most often—it's the industry's workhorse for a reason. It’s simple and transparent: when a reader clicks your affiliate link and completes a purchase, you earn a percentage of the total sale value. If you recommend a $500 hotel stay and the program offers a 6% CPS commission, you earn $30. This model directly ties your earnings to the revenue you generate, making it the gold standard for most travel bookings and gear sales.
2. Cost Per Action (CPA): Rewarding a Specific Step
CPA is a broader model where you’re compensated for a specific action a user takes. While that action is often a sale (making it identical to CPS), it can also be something else. For example, a travel credit card company might pay you a CPA commission for every user who completes an application, regardless of whether they are approved.
3. Cost Per Lead (CPL): Paying for High-Value Inquiries
With a CPL model, you earn a fixed fee for each qualified lead you generate. This is common in high-ticket travel sectors where the sales cycle is long. A luxury tour operator, for instance, might pay you $50 for every user who fills out a detailed inquiry form for a bespoke African safari. You get paid for delivering a potential customer; their sales team takes it from there.
4. Tiered & Multi-Tier Structures: Incentivizing Growth
This is where commission models get more sophisticated and rewarding.
Tiered Structures: Rewarding Your Growth These are designed to reward high-performing affiliates. Your commission rate increases as you drive more sales. A program might offer a base rate of 6%, which jumps to 8% after you generate $5,000 in sales in a month, and 10% after $10,000.
Multi-Tier Structures: Building a Network These allow you to earn commissions not only on your own sales but also on the sales generated by other affiliates you recruit into the program. This effectively turns you into a partner who helps grow the program itself, creating a secondary, more passive income stream.
5. Cost Per Click (CPC): The Rare Exception
In this model, you are paid a small fee for every click your affiliate link receives, regardless of a sale. Due to its high vulnerability to fraud, the CPC model is now extremely rare in modern affiliate marketing and almost never seen in the travel space.

Industry Benchmarks: What Good Affiliate Commission Rates Look Like
So, what should you actually expect to earn? While rates vary, the travel industry has established clear benchmarks across its major categories. Here’s your cheat sheet.
Hotels & Accommodations: 2% - 7% of Booking Value This is the bread and butter for many creators, but the details are everything. A program like Expedia Group offers up to 6% of the total booking value with a 7-day cookie. In contrast, Booking.com advertises a much higher "25-40%", but this is a percentage of their commission, not the customer's total payment. This opaque structure often results in a much lower effective rate, closer to 2-4% of the final booking value.
Tours, Activities & Experiences: 6% - 8%+ This is a high-margin category with strong potential. Market leaders like Viator and GetYourGuide set the standard with base commissions of 7-8%. Adventure-focused operators like G Adventures offer 6%, which is incredibly powerful when applied to their high-ticket tours that can cost thousands of dollars.
Travel Insurance: 10% or More Insurance is a consistently high-paying vertical. Top programs like SafetyWing and World Nomads both offer a standard 10% commission. SafetyWing takes this a step further with a recurring model, meaning you continue to earn 10% every time your referred customer renews their policy.
Gear & Apparel: 3% - 8% For physical products, rates depend heavily on the retailer. Amazon Associates is the baseline, offering 3-4% for most travel categories. However, partnering with specialty retailers is far more lucrative. A brand like REI, for example, offers a 5-8% commission on high-quality (and often high-priced) outdoor gear.
Pro-Tip: Don't be blinded by the highest percentage. A 6% commission on a $3,000 G Adventures tour is $180. An 8% commission on a $50 city walking tour is $4. Always consider the average order value of the products you are promoting when evaluating affiliate commission rates.

The Metrics That Matter More Than the Rate Itself
An experienced affiliate marketer knows the commission rate is just a starting point. To truly understand a program's profitability, you need to analyze the metrics that measure real-world performance.
Earnings Per Click (EPC): Your True North This is arguably the single most important metric. It’s calculated by dividing your total commission earnings by the total number of clicks you sent. If you sent 100 clicks and earned $50, your EPC is $0.50. This number tells you the average value of every single click. A program with a lower commission but a higher EPC is often the more profitable partner for your specific audience.
Conversion Rate (CR): The Sign of a Healthy Partner This is the percentage of users who take the desired action after clicking your link. A high conversion rate is a sign of a trusted brand with a well-optimized checkout process. A program with a 10% commission that converts at 1% is less profitable than a program with a 5% commission that converts at 5%.
Cookie Duration: The Travel Creator's Safety Net This is critical in the travel space. A longer cookie duration (30, 60, or 90 days) gives your audience the time they need to research a high-consideration purchase while ensuring you still get credit. A short cookie window is a major red flag and a sign that the program may not be structured in your favor.
Pro-Tip: Dive into your affiliate dashboards. Most networks like CJ Affiliate and Travelpayouts provide detailed reports on your EPC and conversion rates for each program. Use this data to identify your true top performers—the results will often surprise you.

The Travel Creator's Toolkit
Feeling overwhelmed by the data? You don't have to be. To help you organize your strategy and implement everything you've learned, we've created the ultimate resource bundle. It includes checklists, templates, and tools designed to accelerate your journey from beginner to pro.
Download Your Free Bundle: The Travel Creator's Toolkit
The High-Margin Alternative: Referral & Revenue Share Models
While traditional commission models are powerful, the most forward-thinking creators are diversifying into referral and revenue-sharing programs. Instead of a one-time payment for a single sale, these models allow you to build long-term, passive income streams by becoming a true platform partner.
This is the philosophy behind the TrekGuider Seller Platform. We believe in empowering creators to build complex businesses. Our platform is designed for you to sell your own digital products—like itineraries and guides—but our referral program adds another powerful layer to your income strategy.
Instead of a simple CPS commission, our model functions like a sophisticated multi-tier system. When you refer other creators to become sellers on TrekGuider, you earn an ongoing share of the revenue they generate, with tiered commissions that start at 4% for referred sellers. You’re not just earning from a single transaction; you’re building a network and earning from its collective success. It's a strategic way to move beyond chasing individual sales and start building a more resilient, high-margin business.
Frequently Asked Questions (FAQ)
1. Is a higher commission rate always better? Not at all. A high commission rate can be misleading if the program has a low conversion rate, a short cookie duration, or a low average order value. Always look at your Earnings Per Click (EPC) to determine the true profitability of a program for your audience.
2. How can I find the EPC for an affiliate program? Most reputable affiliate networks (like CJ Affiliate, ShareASale, or Travelpayouts) provide EPC data. It's often listed as a network-wide average for each merchant, which gives you a good baseline. Once you start sending traffic, you can track your own personal EPC in your performance reports.
3. Can I negotiate my affiliate commission rates? Yes, absolutely. Once you become a proven partner and consistently drive a significant volume of high-quality sales, you have leverage. Many brands are willing to negotiate a higher, private commission rate for their top-performing affiliates. Always track your performance and don't be afraid to ask.

From Confusion to Command
You are no longer in the dark. The world of affiliate commission rates is no longer a confusing black box. You now have the knowledge to deconstruct any program's payment structure, the industry benchmarks to know your worth, and the key metrics to identify what truly drives profit.
This knowledge is power. It empowers you to audit your existing partnerships, confidently seek out new ones, and even negotiate better terms. By focusing on programs with fair commissions, long cookie durations, and high conversion rates, you can ensure your hard work is properly rewarded. Building a profitable travel content business requires a strategic approach, and a deep understanding of affiliate commission rates is a non-negotiable part of that strategy.
Read the full guide: The Travel Blogger's Playbook to Affiliate Marketing Mastery
Don't Miss Out! Subscribe for Exclusive Content
Subscribe


Comments 0
No comments yet
Be the first to share your experience!
Dont Miss Out! Subscribe for Exclusive Content

Ultimate USA Holidays Guide: Top Picks

FTC Affiliate Disclosure Essentials: Stay Compliant as a Travel Creator

Essential Affiliate Tools: From Tracking to Full Optimization

Avoid These 5 Affiliate Landing Page Mistakes for Better Conversions

Affiliate Keyword Research Mastery for Travel Blogs

Booking.com Affiliate Program Review: Pros, Cons, and Earnings Potential
7-Day Solo Travel Itinerary: A Perfect First-Trip Template
TrekGuider @trekguider
You're ready for an adventure that's entirely your own. No more compromising on destinations, no more syncing schedules. Just you, the open road, and the profound freedom of solo travel.

But a blank page can be intimidating. The excitement of the idea is quickly replaced by the paralysis of planning. Where do I start? How do I build a solo travel itinerary that's exciting but not overwhelming? How do I stay safe?
The good news is that you don't need to reinvent the wheel. You need a proven framework, a reliable playbook to guide you. This article provides the ultimate solution: a flexible 7-day solo travel itinerary that acts as the perfect template for your first independent adventure. It’s designed to eliminate guesswork, build confidence, and ensure an unforgettable experience.
While planning a trip for one has a very different set of challenges than coordinating group travel, as detailed in our guide to Family Travel Ideas: The 2026 Guide to Unforgettable Trips, the need for a solid plan remains universal. This guide is your key to unlocking that journey, transforming apprehension into pure excitement.
Your Pre-Flight Checklist: Engineering a Stress-Free Start
A smooth trip begins long before you pack your bags. Solid preparation is the antidote to travel anxiety, transforming "what ifs" into "I've got this."

1. Choose a Beginner-Friendly Destination
For your first solo trip, set yourself up for success by picking a location known for its strong tourist infrastructure and safety. You're looking for a "soft landing."
Top Contenders: Think cities like Lisbon (Portugal Travel Guide), Dublin, Kyoto (Japan Travel Guide), or Vancouver. These spots are celebrated for being affordable, walkable, friendly, and supremely safe.
The Litmus Test: Can you get around easily on public transport? Is it known for being safe, particularly for solo travelers? Is Wi-Fi widely available?
2. Select Your Home Base Wisely
Your accommodation is more than a place to sleep; it's your sanctuary and command center.
Boutique Hostels (with Private Rooms): The gold standard for many first-timers. You get the social energy of a common room and organized tours, plus the quiet retreat of your own space. It's the perfect balance of community and privacy.
Boutique Hotels or Guesthouses: A step up in privacy and comfort. Small, locally-owned spots often provide a warmer, more personal touch than soulless chains, and the staff can be a goldmine of local tips.
Centrally Located Airbnbs: Ideal if you crave a "live like a local" vibe and a kitchen. Stick exclusively to hosts with a "Superhost" designation and dozens of positive reviews that specifically mention safety, cleanliness, and an excellent location.
3. A Quick Word on Budgeting for Your First Solo Trip
A clear budget isn't a restriction; it's freedom. It frees you from money-related stress on the road. For a 7-day city trip, a simple framework is:
Fixed Costs: Pre-booked flights and accommodation.
Daily Average: Set a realistic daily budget for food, activities, and transport. Research costs in your chosen city (e.g., a meal in Lisbon is far cheaper than in Zurich). A good starting point for many European or North American cities is $75-$125 per day.
Contingency Fund: Always have an extra 20% of your total budget tucked away in a separate account for unexpected opportunities or emergencies.
4. A Pro's Approach to Solo Safety
Your confidence is directly linked to how safe you feel. Build a fortress of preparation. For a deeper dive, especially for female travelers, our Solo Female Travel Safety Guide is an essential resource.
Digital Security: Download offline maps of your city on Google Maps. Use a VPN on public Wi-Fi. Scan your passport and important documents and save them to a secure cloud service like Dropbox.
Situational Awareness: The "Morning Photo" protocol is a great habit for solo travelers. Snap a quick selfie each morning. In an emergency, it provides an exact, current visual reference.
Contingency Plan: Before you leave, share your detailed itinerary with someone at home. Establish a simple check-in cadence (e.g., a quick "all good" text each night).
Financial Safety: Carry a "decoy" wallet with a small amount of cash and an expired credit card. Keep your primary cards and the bulk of your cash in a secure money belt or a hidden internal pocket. Never keep all your money in one place.
Pro-Tip: Download the Noonlight app. It's a discreet safety button on your phone. If you're feeling uneasy, you can hold your thumb on the button. Release it and don't enter your PIN, and it will automatically alert local authorities with your exact location.
Your Ultimate Pre-Trip Tool
Feeling organized is feeling confident. Before you book a single flight, download our free International Travel Checklist. It’s a comprehensive resource that covers everything from passports and visas to packing and travel insurance, ensuring you don't miss a single crucial step.
The Perfect 7-Day Solo Travel Itinerary Blueprint
This is your playbook. The specific sights will change, but the strategic rhythm of this week is designed to maximize discovery while preventing burnout.

Day 1: Land Softly, Start Slow
Your only goal on day one is to land softly. Forget the pressure to do anything "touristy." The mission is simple: arrive, check-in, and breathe.
Afternoon (Arrival & Settle): Navigate from the airport to your lodging using a pre-vetted option—an official taxi stand, Uber/Lyft, or the city's express train. Avoid unsolicited ride offers. Once you drop your bags, take 30 minutes to actually unpack. This small act of nesting transforms a sterile room into your personal space.
Late Afternoon (The Reconnaissance Walk): Take a short, aimless walk with a purpose: to locate your vitals. Find the nearest ATM, pharmacy, small grocery store, and metro/bus stop. This simple recon mission builds a mental map and makes you feel instantly more capable.
Evening (The Easiest Dinner Ever): Your first meal should be low-stress. Find a casual, well-lit café or bistro within a few blocks of your accommodation. Ask for a table with a view of the street. This isn't just dinner; it's your first immersion.
Day 2: Find Your Anchor, Catch the Vibe
Today is about orientation. You'll anchor yourself with a major landmark and then plug into the city's authentic energy.
Morning (The Iconic Anchor): Head to the city's most famous landmark—the one on all the postcards. Book your ticket online, weeks in advance, to bypass the soul-crushing queues. Seeing this "anchor point" early gives your mental map a center of gravity.
Lunch (A Feast for the Senses): Skip the tourist-trap restaurants and head for a bustling local food market. It's a vibrant, low-pressure way to sample authentic cuisine. Graze from different stalls, trying whatever looks and smells incredible.
Afternoon (The Ultimate Solo Travel Hack): Join a "free" walking tour (they run on tips, so bring cash). A passionate local guide will give you a brilliant crash course in the city's history, secrets, and layout. It's also an effortless way to be around fellow travelers.
Evening (Culture or Comfort): If you're energized, catch a local performance—traditional music, a play, anything that gives you a taste of the culture. If you're tired, there is zero shame in a simple dinner and an early night. Listen to your body.
Day 3: Pursue Your Passion
This is your trip. Today is dedicated entirely to whatever makes you tick.

Morning (The Deep Dive):
Art Lover? Lose yourself in a world-class museum or hunt for street art in a bohemian neighborhood.
History Buff? Explore that niche museum or archaeological site that fascinates you.
Foodie? Take a local cooking class. It's one of the best ways to meet people, learn a skill, and eat an amazing meal.
Nature Enthusiast? Escape to the city's largest park or botanical garden for a few hours of green therapy.
Afternoon (The Art of Getting Lost): Pick a neighborhood that intrigued you and put your phone on airplane mode. Allow yourself to wander without a destination. Follow a charming alleyway, pop into a random shop, sit on a bench. This is where the magic happens.
Evening (A Table for One, with a View): Treat yourself. Find a restaurant or rooftop bar with a spectacular view. Order a great meal, and toast to your adventure. Worried about dining alone? Bring a journal and write about your day—it makes you look like a mysterious travel writer, not a lonely tourist.
Day 4: Gain Perspective with a Day Trip
Escaping the city for a day provides a vital change of scenery and proves your growing travel competence.
Full Day: Choose a destination one or two hours away by train or bus. Think a coastal village, a historic castle, or a national park. The journey itself is part of the adventure.
The Mission: This trip breaks the routine and shows you a completely different facet of the country. It also flexes your navigation skills and builds immense confidence. Successfully planning and executing a day trip on your own is a huge milestone.
Logistics: Research train/bus schedules the night before. Pack a small daypack with a water bottle, snacks, a portable charger, and a light jacket.
Day 5: Live Like You Belong Here
Today, your goal is to blend in. Shed the tourist skin and adopt the rhythms of a local.

Morning (The Café Ritual): Find a small, neighborhood café far from the tourist trail. Order a coffee, grab a pastry, and settle in with a book or journal for an hour. Watch the morning commute, listen to the chatter—just be.
Mid-Day (A Mundane Mission): Do a normal-person errand. Browse a local bookstore, buy fruit at a grocer, or find a post office to mail cards home. These simple tasks ground you in the reality of the place.
Afternoon (Scheduled Downtime): Hit the pause button. You are not a travel machine. Go back to your room for a nap. Read a book on a park bench. Do absolutely nothing. This is a vital part of sustainable travel.
Evening (The Local's Recommendation): Ask a local you've had a pleasant interaction with—your barista, a friendly shopkeeper—"Where's your favorite place to eat around here?" Their recommendation will almost always be more authentic and delicious than anything on a top-ten list.
Day 6: The Open Road and a Fond Farewell
Leave this day largely unplanned. It's a blank page for you to fill with whatever your heart desires.
Morning (Encore or Exploration): Is there a neighborhood you fell in love with? Go back. Did a fellow traveler tell you about a hidden gem you can't stop thinking about? Go find it. This is your flex day to chase your curiosity.
Afternoon (Meaningful Mementos): If you're buying souvenirs, seek out items that tell a story. Skip the generic trinkets and look for local crafts, specialty foods, a vintage poster, or a book from a local author.
Evening (The Last Supper): Make your final dinner a celebration of your journey. Return to a favorite spot or try that one special place you've been saving. As you eat, reflect on the week. Think about what you've learned, the challenges you've overcome, and the person you've become.
Day 7: Depart with Your Head Held High
The last day is for a smooth, grateful exit. No frantic rushing.
Morning: Enjoy one last coffee and pastry at your favorite café. Take a final, mindful walk down a beloved street, soaking in the sights and sounds.
Pack & Go: Head back to your room for a final pack-up. Leave ample time for your journey to the airport. Strolling calmly to your gate is a far better feeling than sprinting.
At the Airport: Once you're through security, pause. Take a deep breath. You did it. You took the dream of solo travel and forged it into reality. Acknowledge the magnitude of that achievement.
Frequently Asked Questions
What is the best way to handle feeling lonely on a solo trip?
It's completely normal to feel a pang of loneliness. The best strategy is to be proactive. Stay in social accommodations like a boutique hostel, join a walking tour or a cooking class on days you crave interaction, and find a cozy café to simply be around the comforting buzz of other people.
Is it awkward to eat at restaurants alone?
Not at all! It's a skill that gets easier with practice. Start with casual cafes, bring a book or journal to feel more comfortable, and try sitting at the bar where you can often chat with the bartender. Soon you'll find it's a peaceful and empowering experience.
How can I stay safe when going out at night by myself?
A: Prioritize well-lit, busy areas and research neighborhoods beforehand. Tell someone where you're going, use ride-sharing apps like Uber instead of walking in unfamiliar areas late at night, and always be mindful of your drink. Trust your intuition—if a place feels off, leave immediately.
What's the most common mistake first-time solo travelers make?
The most common mistake is over-scheduling. New solo travelers often try to fill every single minute to avoid being alone with their thoughts. The real magic happens in the unplanned moments, so be sure to build plenty of downtime and flexibility into your itinerary.
Welcome Home, Traveler: This Is Just the Beginning
Walk through that arrival gate on your way home, and you won't be the same person who left. A solo trip is a declaration—proof that you are more capable, resilient, and fiercely independent than you might have ever allowed yourself to believe.

This solo travel itinerary was never just about seeing a new place; it was about discovering a new version of yourself. Use this template, adapt it, and carry the confidence you've earned into planning your next adventure. When you're ready to go from template to a fully-realized plan, our comprehensive Travel Guide is the perfect next step to turning your dream trip into a reality. Because this isn't the end of one journey; it's the beginning of a lifetime of them.
Read the full guide: Family Travel Ideas: The 2026 Guide to Unforgettable Trips
Don't Miss Out! Subscribe for Exclusive Content
SubscribeComments 0
No comments yet
Be the first to share your experience!
Dont Miss Out! Subscribe for Exclusive Content
Ultimate USA Holidays Guide: Top Picks
FTC Affiliate Disclosure Essentials: Stay Compliant as a Travel Creator
Essential Affiliate Tools: From Tracking to Full Optimization
Booking.com Affiliate Program Review: Pros, Cons, and Earnings Potential

Decoding Affiliate Commission Rates: Benchmarks for Travel Creators

Amazon Associates for Travel: Strategies to Maximize Commissions
July 4th Chicago: Fireworks Hotspots
TrekGuider @trekguider
The first explosive boom echoes across Lake Michigan, a flash of crimson and gold illuminating an entire wall of skyscrapers. From below, a collective gasp of pure wonder rises from a crowd of thousands. This is the postcard moment, the magic of July 4th in Chicago. But let’s be honest—the path to that perfect moment is often paved with stress. You’re grappling with the classic problem: finding a spot with a clear view that isn’t shoulder-to-shoulder with a million other people, a location you can reach without getting trapped in a traffic apocalypse, and a vantage point that truly does justice to the nation’s birthday.

The agitation is a familiar feeling. You can already picture yourself craning your neck around a forest of selfie sticks, only to catch a sliver of the show. You envision the gridlocked streets, the jaw-dropping parking fees, and that sinking feeling that you’ve missed the best part of the celebration while hunting for a decent patch of grass. The pressure is real, especially when you’re trying to fit this iconic celebration into a larger itinerary of Chicago Holidays: Windy City Thrills, where every moment is precious.
But that's not how your Fourth of July is going to play out. This guide is your strategic blueprint for outsmarting the crowds and securing a front-row seat to one of the country's most spectacular fireworks displays. We’re going to dismantle the chaos by breaking down every option, from the epicenter of the action at Navy Pier to exclusive rooftop lounges and serene lakeside parks. This is your definitive plan for a seamless, memorable, and breathtaking Independence Day Chicago.
The Epicenter: Conquering Navy Pier for Independence Day Chicago
When it comes to July 4th fireworks in Chicago, Navy Pier isn't just an option; it's the option. As the official host of the city’s largest and most dazzling display, the pier offers an unparalleled, up-close-and-personal experience. The fireworks are launched from a barge on Lake Michigan directly in front of the pier, meaning you are at ground zero for the spectacle. The energy of the massive, joyful crowd is electric. However, this prime real estate comes with a significant challenge: everyone wants it. Success here isn’t about luck; it’s about strategy.

The Ultimate Navy Pier Game Plan: A Step-by-Step Timeline
Treating your trip to Navy Pier like a casual evening stroll is the fastest way to disappointment. A successful visit requires a military-like precision that begins hours before the first firework is launched.
1. Early Afternoon (2:00 PM - 4:00 PM): The Arrival & Reconnaissance Phase Do not wait until dusk. Arriving in the early afternoon is your secret weapon against the worst of the traffic and security lines. Use this time to your advantage. Grab a Chicago-style hot dog or a slice of deep-dish from a food vendor before the lines snake around the building. Take a ride on the 200-foot Centennial Wheel for a staggering daytime panorama of the city and lakefront. This is your chance to relax and absorb the festive atmosphere before the masses descend.
2. Late Afternoon (4:00 PM - 7:00 PM): The Encampment Phase This is when the pier transforms from a tourist attraction into a high-stakes real estate market. The official advice is to arrive by 7:00 PM, but by then, you’re looking at leftover spots with obstructed views. Your mission is to claim a prime piece of turf along the South Dock. The farther east you venture down the pier, the more central your view will be. Lay down your blankets, set up your chairs, and establish your base camp. This is the time to settle in for the long, rewarding wait.
3. Evening (7:00 PM - 9:00 PM): The Anticipation Phase As the sun dips below the skyline, the energy on the pier builds to a palpable buzz. This is the perfect time for people-watching, playing a deck of cards, or just enjoying the cool lake breeze. Keep your group together; a simple trip to the restroom can become a challenging expedition through a sea of people. Be patient and soak in the shared sense of excitement.
4. The Main Event (9:00 PM): The Spectacle Just before 9:00 PM, the lights dim, a hush falls over the crowd, and the first firework shrieks into the night sky. For the next 15-20 minutes, you are immersed in a world-class pyrotechnic display. Because you planned ahead, you have a comfortable, direct view, making the entire day’s effort completely worth it.
5. Post-Show (9:30 PM onwards): The Strategic Retreat The moment the grand finale fades, resist the primal urge to bolt. Tens of thousands of people will be flooding the exits at once. Instead, execute a strategic delay. Let the initial human tidal wave recede. Pack up your belongings at a leisurely pace, enjoy the glittering skyline, and plan to start your journey home 30-45 minutes after the show. Your future self will thank you.
The Sensory Experience: More Than Just a Light Show
This isn’t just a visual show; it’s a full sensory assault. The fireworks are perfectly synchronized to a soaring patriotic soundtrack broadcast across the pier, with each concussive boom vibrating through the wooden planks beneath your feet. You can smell the faint, celebratory scent of gunpowder and lake water on the breeze. It’s an immersive experience that a distant view simply cannot replicate.
Your Navy Pier Survival Kit
An hours-long stakeout for fireworks demands a little comfort. Packing smart is non-negotiable.
Seating: A thick blanket or low-profile foldable chairs are essential.
Sustenance: Pack sealed water bottles and plenty of snacks. While food is available, having your own stash saves you from long lines and high prices.
Sun & Wind Protection: The afternoon sun reflecting off the lake is brutal. Bring sunscreen, sunglasses, and a hat. After dark, the breeze off the lake can be surprisingly chilly, so a light jacket is a wise addition.
Power Bank: Between taking photos, coordinating with friends, and passing the time, your phone battery will drain. A portable charger is a lifesaver.
Entertainment: A deck of cards, a book, or downloaded podcasts can make the waiting hours fly by.
To avoid feeling like a pack mule, mastering the art of minimalism is crucial. For pro-level tips on carrying only what you need, our How to Pack Light Guide is an essential read.
Beyond the Pier: Chicago's Best Alternative Fireworks Views
If the thought of the Navy Pier crowds gives you hives, don't worry. Chicago is brimming with fantastic alternative spots that offer breathtaking views without the same level of intensity.
Rooftop Revelry: An Elevated Experience
For a more civilized and comfortable viewing experience, nothing beats a rooftop bar. You trade the massive crowds for a reserved seat, craft cocktails, and an unbeatable panoramic perspective.
Offshore Rooftop & Bar: Perched at the very end of Navy Pier, this is officially the world's largest rooftop bar. It offers the most direct, spectacular view imaginable, but tickets for their July 4th party are a hot commodity, selling out months in advance at a premium price.
Cindy's Rooftop: Sitting atop the historic Chicago Athletic Association hotel, Cindy's provides a stunning, albeit more distant, view across Millennium Park toward the lake. The reflection of the fireworks on the polished surface of "The Bean" is a uniquely Chicago sight.
Terrace 16: Located in the Trump International Hotel & Tower, this elegant terrace offers a direct, sweeping vista of the lakefront and Navy Pier. It’s a high-end option for those looking to celebrate in true luxury.

Pro-Tip: Book any rooftop bar reservation or fireworks cruise ticket the moment they become available. These premium experiences are in high demand and often sell out by early spring. Set a calendar reminder for February or March to start your search.
Lakeside Serenity: Parks and Beaches with a View
For a classic, family-friendly picnic vibe, Chicago’s sprawling lakefront parks and sandy beaches are ideal.
Millennium Park & Grant Park: These iconic parks offer vast lawns perfect for spreading out a blanket. While some views might be partially obstructed by buildings, the atmosphere is wonderfully festive. The key is to find a spot east of DuSable Lake Shore Drive for the clearest line of sight to Navy Pier.
Ohio Street Beach & North Avenue Beach: Just north of the pier, these beaches offer a fantastic, slightly angled view of the fireworks exploding over the water. You get the added bonus of feeling the sand between your toes as you watch. These are beloved local spots, so arrive early to claim your space.
Museum Campus: The grassy areas surrounding the Field Museum, Shedd Aquarium, and Adler Planetarium offer arguably the most iconic skyline view in the city. Watching the fireworks burst behind Chicago’s architectural titans is a photographer’s dream come true.

Set Sail for the Spectacle: Fireworks Cruises on Lake Michigan
To completely escape the land-based crowds and get a truly unique perspective, watch the show from the water. Numerous companies offer special July 4th cruises.
Dinner & Cocktail Cruises: Companies like Odyssey Lake Michigan and Spirit of Chicago offer elegant evenings with dining, dancing, and guaranteed front-row seats on the water for the main event.
Architectural Tours: Many of the city’s famed architectural boat tours offer special holiday cruises that conclude by positioning themselves perfectly on the lake for the fireworks display.
Tall Ship Cruises: For a truly memorable experience, watch the show from the deck of a majestic tall ship like the Windy, adding a touch of nautical history to your patriotic celebration.
A Pro's Guide to July 4th Logistics
A flawless holiday is built on smart planning. Beyond choosing your spot, mastering transportation and safety will ensure your day is stress-free.

Getting Around the City: Transportation Hacks
On Independence Day Chicago, public transit is not just an option; it's a necessity.
CTA 'L' Trains: The elevated and subway trains are the most efficient way to get downtown. The State/Lake (Brown, Green, Orange, Pink, Purple Lines) and Washington/Wabash stops are your best bets for accessing Grant Park and the southern approach to Navy Pier.
CTA Buses: Several bus routes drop off directly at or near Navy Pier, including the #29 State, #65 Grand, #66 Chicago, and the #124 Navy Pier express route. Be prepared for holiday schedules and potential reroutes due to street closures.
Rideshare & Taxis: Avoid them if you can. Surge pricing will be in full effect before and especially after the fireworks. If you must use a rideshare, walk several blocks west of Michigan Avenue to request your ride in a less congested zone.
Safety First: Navigating Crowds Like a Pro
Large crowds require situational awareness. Keep these tips in mind:
Use the Buddy System: Stick with your group. It’s easy to get separated in the post-fireworks shuffle.
Establish a Meeting Point: Before your phone batteries die, pick a clear, specific meeting spot away from the main exit paths in case you get separated. "The front of the Ferris wheel" is a bad idea; "the corner of the W Chicago - Lakeshore hotel" is much better.
Supervise Children Closely: The crowds can be overwhelming for kids. Keep them close, and consider writing your phone number on their arm or a wristband.
Expect Strong Security: At Navy Pier and other major gathering points, expect bag checks and a heavy police presence. Prohibited items typically include alcohol, coolers, grills, and drones. Check the official Navy Pier website for the most up-to-date list.
Your Blueprint for a Flawless Fourth
You are now armed with the ultimate insider’s guide to experiencing the magic of July 4th in Chicago. The anxiety of the unknown has been replaced with a clear, actionable strategy. Whether you brave the vibrant energy of Navy Pier, opt for the chic ambiance of a rooftop bar, or choose the laid-back vibe of a lakeside park, you have a plan to make it happen. You are ready to navigate the crowds, secure the perfect view, and create unforgettable memories against the backdrop of one of America’s greatest cities. This is how you master Independence Day Chicago.
Now that you've conquered the city's biggest patriotic celebration, why stop there? Unlock all the secrets of the Windy City's year-round festivities and hidden gems. For the most comprehensive insights into making the most of your trip, from iconic landmarks to local favorites, our Travel Guide is your ultimate resource for exploring Chicago and beyond.
Meta Data Suggestions:
SEO Meta Title: July 4th Chicago Fireworks: 5 Best Viewing Hotspots
URL Slug: july-4th-chicago-fireworks-hotspots
SEO Meta Description: Planning your Independence Day in Chicago? Discover the best spots to watch the Navy Pier fireworks, from the pier itself to secret rooftops and cruises.
Don't Miss Out! Subscribe for Exclusive Content
SubscribeComments 0
No comments yet
Be the first to share your experience!
Dont Miss Out! Subscribe for Exclusive Content

San Francisco Cherry Blossoms: A Local's Guide to the Blooms

Halloween SF: Haunts Without Horrors

SF Festivals: 7 Must-See Lineups

Christmas SF: Lights & Wharf Wonders

SF Pride: 6 Route & Party Hacks

Chinese New Year SF: Parade Essentials
The Minimalist Solo Travel Packing List: A Complete Guide
TrekGuider @trekguider
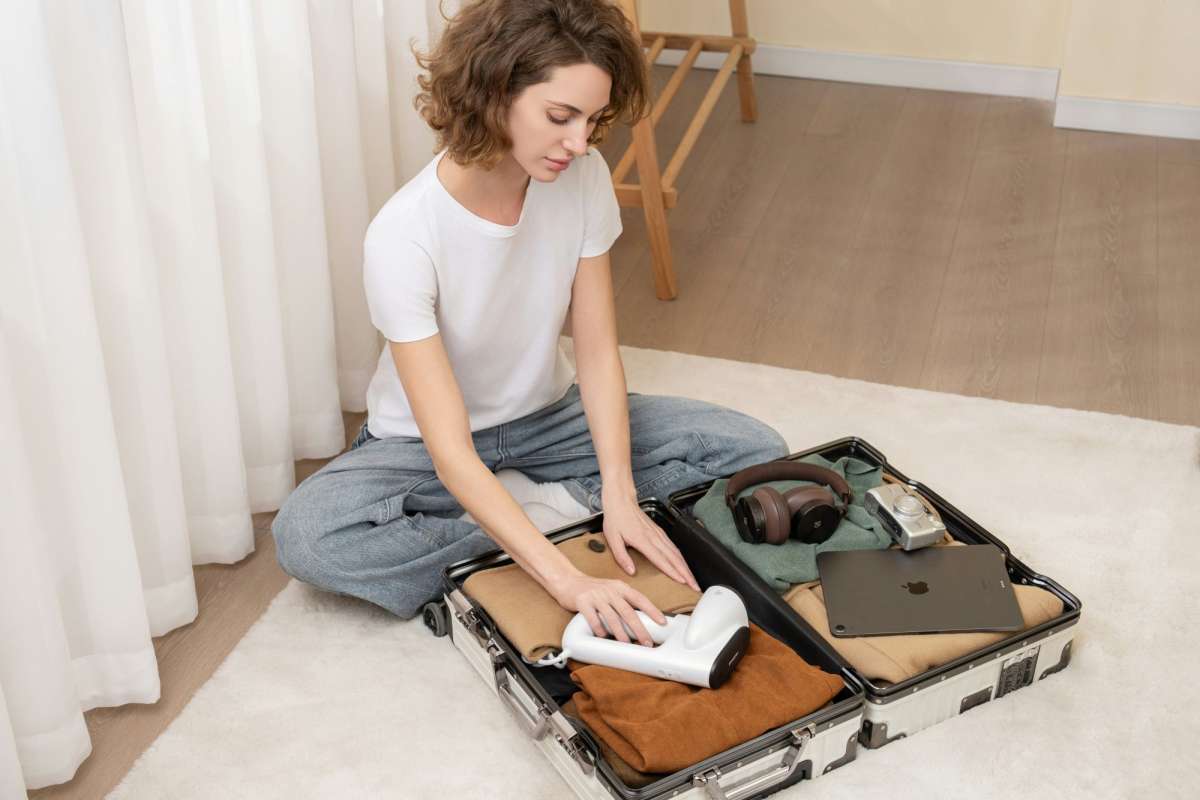
You’ve seen the photo a hundred times: a solo traveler, backpack slung casually over one shoulder, gazing out at a breathtaking vista with a look of pure, unburdened freedom. That’s the dream. But then you look at your own open, empty suitcase, and a wave of anxiety hits. The "what ifs" start piling up. What if it rains? What if I get invited to a fancy dinner? What if I need more options? Before you know it, you’re wrestling with a monstrously heavy bag, convinced you need to pack for every conceivable scenario. This isn't just an inconvenience; for a solo traveler who has no one to help them, an overpacked bag is a physical burden, a financial drain in baggage fees, and a security risk that screams "tourist." It is the very anchor that weighs down the freedom you seek.

This guide is your liberation. It’s the tactical blueprint for adopting a minimalist mindset and the definitive solo female travel packing list you need to execute it with absolute confidence. We will systematically replace the anxiety of "what if" with the certainty of "I have what I need." By packing smarter, not fuller, you’ll unlock the mobility, savings, and peace of mind that define a truly life-changing solo adventure. This isn't just about what to pack; it's about reclaiming the freedom you deserve. For a complete overview of every stage of your journey, be sure to start with our comprehensive pillar guide, The Ultimate Guide to Solo Female Travel (15 Essential Tips).
The Freedom Philosophy: Why Less is Radically More for Solo Travelers
Adopting a minimalist packing ethos isn’t about deprivation; it’s a strategic choice that unlocks four key freedoms essential to the solo travel experience.
Freedom of Mobility: Navigating a bustling train station in Tokyo, climbing the winding cobblestone streets of Lisbon, or hopping on a last-minute ferry to a Greek island becomes effortless with a single, lightweight bag. You are nimble, agile, and free to say "yes" to spontaneous adventures without being weighed down.
Freedom from Fees: In an era where budget airlines charge for everything, checking a bag can add hundreds of dollars to your trip cost. Traveling carry-on only eliminates these fees entirely, putting that money back where it belongs: into your experience fund for things like a cooking class in Florence or a guided hike in Patagonia.
Freedom in Security: A large, checked bag is out of your control for hours, vulnerable to loss, damage, or theft. A carry-on stays with you, dramatically reducing your risk profile. Furthermore, a traveler with a single, manageable bag is less conspicuous and presents a less appealing target than someone struggling with multiple, bulky pieces of luggage.
Freedom of Mind: The fewer items you have, the fewer you have to track, manage, and worry about. A minimalist wardrobe simplifies your daily decisions, reduces clutter in your hotel room, and frees up mental energy to focus on what truly matters: being present and soaking in your surroundings.
The Core of Your Minimalist Solo Female Travel Packing List
The secret to a successful minimalist wardrobe is not about having less; it’s about making sure every single item does more. This means building a small, curated collection of high-quality, versatile pieces that can be mixed, matched, and layered to create multiple outfits for different occasions and climates. This is the art of the capsule wardrobe.
Clothing: The Art of the 10-Day Carry-On Capsule
This checklist is designed to fit into a standard 40-liter carry-on bag for a 10-day trip to a destination with a temperate climate (think European cities in spring or autumn). The core principle is to pack for one week and plan to do laundry once.
Tops (5):
2 neutral-colored t-shirts (merino wool or a high-quality blend is ideal)
2 versatile tank tops or blouses that can be dressed up or down
1 long-sleeve shirt for layering or sun protection
Layers (2):
1 comfortable sweater or cardigan in a neutral color
1 light, weather-resistant jacket (a packable rain shell or a classic denim jacket)
Bottoms (3):
1 pair of dark, comfortable travel pants or jeans (wear these on the plane to save space)
1 pair of versatile trousers, a skirt, or shorts (depending on the destination)
1 pair of leggings (perfect for sleeping, layering under pants for warmth, or lounging)
One-Piece Outfit (1):
1 simple, wrinkle-resistant dress or jumpsuit that can be worn casually with sneakers or dressed up with a scarf and flats.
Undergarments & Sleepwear:
5-7 pairs of underwear (quick-drying fabric is a game-changer)
3 pairs of socks (at least one pair of wool socks for warmth and comfort)
2 bras (one regular, one sports bra or bralette)
1 set of pajamas or comfortable sleepwear
Footwear (Maximum 3 pairs):
Comfortable Walking Shoes: A pair of stylish but supportive sneakers. This is your most important item. Wear them on the plane.
Versatile Flats or Sandals: A pair that can be dressed up for a nice dinner but are still comfortable enough to walk in.
Utility Shoes: A pair of flip-flops (essential for hostels and beaches) or waterproof boots, depending on your itinerary.
Pro-Tip: The combination of rolling your clothes tightly and using packing cubes is the single most effective space-saving technique. Packing cubes not only compress your clothing but also keep your bag impeccably organized, so you're not tearing everything apart to find one pair of socks.
The Champions of Versatility: 5 Items You Can't Live Without
Within your capsule wardrobe, a few key items will do the heaviest lifting. Investing in these five pieces will form the indestructible core of your minimalist packing list.
A Merino Wool T-Shirt: This isn't just a t-shirt; it's a piece of high-performance gear. Merino wool is a natural fiber that is thermo-regulating (keeps you cool when it's hot, warm when it's cold), moisture-wicking, and, most importantly, antimicrobial. This means it resists odor and can be worn multiple times between washes, allowing you to pack far fewer tops.
A Large, High-Quality Scarf or Sarong: This is the Swiss Army knife of a travel wardrobe. It can be a stylish accessory, a wrap for a chilly airplane, a head covering for entering religious sites, a makeshift picnic blanket, or even a privacy curtain in a hostel dorm.
A Simple Black Dress (in a wrinkle-resistant fabric): Choose a dress in a fabric like jersey or tencel. It can be paired with sneakers for a day of sightseeing and then instantly transformed for a nice dinner with the addition of flats and your versatile scarf. It’s a complete outfit in one lightweight piece.
Dark, Comfortable, Multi-Purpose Pants: A single pair of well-fitting, dark-colored pants can anchor your entire travel wardrobe. Whether they are high-tech travel pants, comfortable dark-wash jeans, or polished black trousers, they should be able to transition seamlessly from a day of exploring to a casual evening out.
A Lightweight Button-Down Shirt: A classic button-down in a breathable fabric like linen or tencel offers countless styling options. Wear it buttoned up, wear it open as a light jacket over a tank top or your black dress, or tie it at the waist. It’s a layering hero.
Beyond the Wardrobe: Your Solo Female Travel Packing List for Safety & Tech
While clothing makes up the bulk of your bag, a few key non-clothing items are indispensable for a safe, smooth, and convenient solo trip.
Your Personal Security Toolkit
Your awareness is your primary safety tool, but these devices provide a crucial layer of physical security and peace of mind.

Personal Safety Alarm: A small device that attaches to your keychain and emits an ear-piercing siren and flashing strobe light when activated. It’s designed to startle a potential attacker and attract immediate attention, giving you a window to escape.
Portable Door Lock or Door Stop Alarm: These inexpensive, lightweight devices give you absolute control over the security of your hotel or Airbnb room, making it nearly impossible for someone to enter, even with a key.
Anti-Theft Bag: With a 2024 report noting that 29% of solo female travelers had experienced a theft or attempted scam, a specialized bag is a wise investment. Look for features like slash-proof fabric and lockable zippers. A crossbody style worn in front of your body is the most secure option.
Small Padlock: A simple combination lock is a must-have for securing your belongings in a hostel locker or for locking the zippers of your backpack together in crowded areas.
Essential Tech and Convenience Items
Universal Travel Adapter with USB Ports: A modern essential. Choose a model that includes multiple USB-A and USB-C ports, allowing you to charge your phone, power bank, and other devices simultaneously from a single outlet.
High-Capacity Portable Power Bank: For a solo traveler, a dead phone is a safety issue. A reliable power bank (at least 10,000 mAh) ensures your lifeline for navigation, communication, and emergency help stays operational all day.
Solid Toiletry Kit: This is a game-changer for carry-on travel. Shampoo bars, conditioner bars, solid soap, and solid perfume sticks eliminate the need to worry about the TSA's liquids rule, prevent disastrous leaks, and are more environmentally friendly.
Pro-Tip: Before you leave, use your phone to download offline maps of your destination via Google Maps. This allows your phone's GPS to function perfectly even without a cell signal or Wi-Fi, making it nearly impossible to get truly lost. This makes a fully charged power bank your most important piece of tech.
Ready to Master the Art of Packing Light?
This guide gives you the "what," but to truly perfect the "how"—from advanced folding techniques to brand recommendations—you need the complete toolkit. Our free guide is the ultimate resource for step-by-step strategies, visual guides, and our ultimate pre-trip checklist.
Download the How to Pack Light Guide for free!
The "Do Not Pack" List: 5 Things to Leave at Home
Effective packing is as much about what you leave behind as what you bring. Ditching these common items will save you space, weight, and stress.

Expensive or Sentimental Jewelry: Wearing flashy jewelry can make you a target for theft. More importantly, the risk of losing a cherished or irreplaceable item is simply too high.
Multiple "Just-in-Case" Outfits: Resist the urge to pack for imaginary, unlikely scenarios. Pack for the trip you know you're taking. If an unexpected need arises, you can almost always buy what you need locally.
A Hair Dryer: This bulky item is provided by nearly every hotel and even most modern hostels. Leave yours at home.
Full-Sized Toiletries: There is no reason to carry large bottles of shampoo. Decant your essential liquids into reusable, travel-sized (under 100ml/3.4oz) containers or, better yet, switch to solids.
A Money Belt: While once a travel staple, money belts are often impractical for daily access and can be conspicuous. A more modern and secure approach is to use an anti-theft crossbody bag for daily essentials, while keeping deep storage items (like a backup credit card and passport) locked in your accommodation.
Frequently Asked Questions About Minimalist Packing
Are packing cubes really worth it?
Absolutely. They are the single most effective organizing tool for a carry-on. Not only do they compress clothing to save space, but they also function like dresser drawers inside your backpack, allowing you to find what you need without destroying your perfectly packed bag.
How do I pack for a trip with multiple climates?
The key is layering. Your capsule wardrobe (merino wool base layers, a fleece or sweater, and a waterproof/windproof shell) is designed for this. A merino t-shirt that keeps you cool in Rome can be layered under a sweater and jacket to keep you warm on a chilly evening in the Swiss Alps. Focus on adding or removing these versatile layers rather than packing entirely separate outfits.
What if I forget something important?
Unless it’s your passport or essential medication, you can almost certainly buy it at your destination. Forgetting a toothbrush or a pair of socks isn't a crisis; it’s an opportunity for a mini-adventure into a local pharmacy or shop.
Pro-Tip: Once you’ve mastered this universal list, you can find hyper-specific packing lists for destinations from Patagonia to Portugal—all shared by seasoned solo travelers on the TrekGuider platform.
Cleared for Takeoff: Navigating Airport Security with Your Carry-On
Knowing the rules is essential for a stress-free airport experience. For travelers departing from the US, the Transportation Security Administration (TSA) has two key guidelines for carry-on luggage.
The 3-1-1 Liquids Rule: All liquids, gels, creams, and pastes must be in containers of 3.4 ounces (100 milliliters) or smaller. All of these containers must fit into a single, clear, quart-sized bag. Each passenger gets one of these bags.
Electronics: All electronic devices larger than a cell phone (laptops, tablets, e-readers) must be removed from your bag and placed in a separate bin for X-ray screening.
Pack Light, Travel Far, Live Freely
Minimalist packing is not a restrictive set of rules; it's a liberating mindset. It’s a conscious decision to trade the burden of "stuff" for the freedom of experience. By focusing on versatility, quality, and intention, you transform your luggage from an anchor into a launchpad. You are now armed with more than just a checklist; you have a complete philosophy for navigating the world with ease and confidence. This solo female travel packing list is your blueprint for a lighter, smarter, and more enriching journey.

Once your minimalist kit is packed and ready, the only thing left to do is decide where to take it. Explore our collection of expert-written Travel Guide resources to find destination-specific advice and build the adventure of a lifetime.
Don't Miss Out! Subscribe for Exclusive Content
SubscribeComments 0
No comments yet
Be the first to share your experience!
Dont Miss Out! Subscribe for Exclusive Content
Ultimate USA Holidays Guide: Top Picks
FTC Affiliate Disclosure Essentials: Stay Compliant as a Travel Creator
Essential Affiliate Tools: From Tracking to Full Optimization
Booking.com Affiliate Program Review: Pros, Cons, and Earnings Potential
Decoding Affiliate Commission Rates: Benchmarks for Travel Creators