Decoding Affiliate Commission Rates: Benchmarks for Travel Creators
TrekGuider @trekguider
You’re a travel creator, and you’ve entered the world of affiliate marketing to turn your passion into a profession. But you’ve quickly run into a frustrating black box: the commission structure. You see a dizzying array of percentages, acronyms like CPA and EPC, and vague promises of earnings. You’re left wondering what good affiliate commission rates even look like. Are you earning your worth, or are you leaving a significant amount of money on the table?
This confusion isn't just academic; it's a direct threat to your bottom line. The reported average monthly income for affiliates in the travel niche is an impressive $13,847, a figure that proves this is a serious enterprise. But you can't build a sustainable business on guesswork. Partnering with a program offering a flashy 40% commission—only to discover it’s 40% of their tiny margin—is a rookie mistake that costs real money. This lack of clarity makes it impossible to forecast your income, negotiate better terms, or build a truly predictable business. You feel like you’re flying blind.
This guide is your decoder ring. We are pulling back the curtain to give you a comprehensive breakdown of how affiliate commissions actually work. We will deconstruct every major commission model, provide clear, data-backed industry benchmarks, and teach you how to analyze these rates like a seasoned professional. By the end of this deep dive, you will be able to spot high-value opportunities and architect a monetization strategy that truly rewards your influence. For a complete overview of the affiliate landscape, our definitive pillar page, Travel Affiliate Programs: The 2026 Ultimate Guide, is your essential command center.

The Anatomy of a Commission: Deconstructing the Core Models
Let's cut through the jargon. An affiliate commission is simply a reward for a job well done. A company—the merchant—pays you for successfully driving a specific, valuable action, which in the travel world almost always means a completed booking or sale.
But the way that reward is calculated can vary dramatically. Understanding the underlying structure of different affiliate commission rates is the first step toward becoming a high-earning creator.
1. Cost Per Sale (CPS) or Pay Per Sale (PPS): The Industry Workhorse
You'll encounter this model most often—it's the industry's workhorse for a reason. It’s simple and transparent: when a reader clicks your affiliate link and completes a purchase, you earn a percentage of the total sale value. If you recommend a $500 hotel stay and the program offers a 6% CPS commission, you earn $30. This model directly ties your earnings to the revenue you generate, making it the gold standard for most travel bookings and gear sales.
2. Cost Per Action (CPA): Rewarding a Specific Step
CPA is a broader model where you’re compensated for a specific action a user takes. While that action is often a sale (making it identical to CPS), it can also be something else. For example, a travel credit card company might pay you a CPA commission for every user who completes an application, regardless of whether they are approved.
3. Cost Per Lead (CPL): Paying for High-Value Inquiries
With a CPL model, you earn a fixed fee for each qualified lead you generate. This is common in high-ticket travel sectors where the sales cycle is long. A luxury tour operator, for instance, might pay you $50 for every user who fills out a detailed inquiry form for a bespoke African safari. You get paid for delivering a potential customer; their sales team takes it from there.
4. Tiered & Multi-Tier Structures: Incentivizing Growth
This is where commission models get more sophisticated and rewarding.
Tiered Structures: Rewarding Your Growth These are designed to reward high-performing affiliates. Your commission rate increases as you drive more sales. A program might offer a base rate of 6%, which jumps to 8% after you generate $5,000 in sales in a month, and 10% after $10,000.
Multi-Tier Structures: Building a Network These allow you to earn commissions not only on your own sales but also on the sales generated by other affiliates you recruit into the program. This effectively turns you into a partner who helps grow the program itself, creating a secondary, more passive income stream.
5. Cost Per Click (CPC): The Rare Exception
In this model, you are paid a small fee for every click your affiliate link receives, regardless of a sale. Due to its high vulnerability to fraud, the CPC model is now extremely rare in modern affiliate marketing and almost never seen in the travel space.

Industry Benchmarks: What Good Affiliate Commission Rates Look Like
So, what should you actually expect to earn? While rates vary, the travel industry has established clear benchmarks across its major categories. Here’s your cheat sheet.
Hotels & Accommodations: 2% - 7% of Booking Value This is the bread and butter for many creators, but the details are everything. A program like Expedia Group offers up to 6% of the total booking value with a 7-day cookie. In contrast, Booking.com advertises a much higher "25-40%", but this is a percentage of their commission, not the customer's total payment. This opaque structure often results in a much lower effective rate, closer to 2-4% of the final booking value.
Tours, Activities & Experiences: 6% - 8%+ This is a high-margin category with strong potential. Market leaders like Viator and GetYourGuide set the standard with base commissions of 7-8%. Adventure-focused operators like G Adventures offer 6%, which is incredibly powerful when applied to their high-ticket tours that can cost thousands of dollars.
Travel Insurance: 10% or More Insurance is a consistently high-paying vertical. Top programs like SafetyWing and World Nomads both offer a standard 10% commission. SafetyWing takes this a step further with a recurring model, meaning you continue to earn 10% every time your referred customer renews their policy.
Gear & Apparel: 3% - 8% For physical products, rates depend heavily on the retailer. Amazon Associates is the baseline, offering 3-4% for most travel categories. However, partnering with specialty retailers is far more lucrative. A brand like REI, for example, offers a 5-8% commission on high-quality (and often high-priced) outdoor gear.
Pro-Tip: Don't be blinded by the highest percentage. A 6% commission on a $3,000 G Adventures tour is $180. An 8% commission on a $50 city walking tour is $4. Always consider the average order value of the products you are promoting when evaluating affiliate commission rates.

The Metrics That Matter More Than the Rate Itself
An experienced affiliate marketer knows the commission rate is just a starting point. To truly understand a program's profitability, you need to analyze the metrics that measure real-world performance.
Earnings Per Click (EPC): Your True North This is arguably the single most important metric. It’s calculated by dividing your total commission earnings by the total number of clicks you sent. If you sent 100 clicks and earned $50, your EPC is $0.50. This number tells you the average value of every single click. A program with a lower commission but a higher EPC is often the more profitable partner for your specific audience.
Conversion Rate (CR): The Sign of a Healthy Partner This is the percentage of users who take the desired action after clicking your link. A high conversion rate is a sign of a trusted brand with a well-optimized checkout process. A program with a 10% commission that converts at 1% is less profitable than a program with a 5% commission that converts at 5%.
Cookie Duration: The Travel Creator's Safety Net This is critical in the travel space. A longer cookie duration (30, 60, or 90 days) gives your audience the time they need to research a high-consideration purchase while ensuring you still get credit. A short cookie window is a major red flag and a sign that the program may not be structured in your favor.
Pro-Tip: Dive into your affiliate dashboards. Most networks like CJ Affiliate and Travelpayouts provide detailed reports on your EPC and conversion rates for each program. Use this data to identify your true top performers—the results will often surprise you.

The Travel Creator's Toolkit
Feeling overwhelmed by the data? You don't have to be. To help you organize your strategy and implement everything you've learned, we've created the ultimate resource bundle. It includes checklists, templates, and tools designed to accelerate your journey from beginner to pro.
Download Your Free Bundle: The Travel Creator's Toolkit
The High-Margin Alternative: Referral & Revenue Share Models
While traditional commission models are powerful, the most forward-thinking creators are diversifying into referral and revenue-sharing programs. Instead of a one-time payment for a single sale, these models allow you to build long-term, passive income streams by becoming a true platform partner.
This is the philosophy behind the TrekGuider Seller Platform. We believe in empowering creators to build complex businesses. Our platform is designed for you to sell your own digital products—like itineraries and guides—but our referral program adds another powerful layer to your income strategy.
Instead of a simple CPS commission, our model functions like a sophisticated multi-tier system. When you refer other creators to become sellers on TrekGuider, you earn an ongoing share of the revenue they generate, with tiered commissions that start at 4% for referred sellers. You’re not just earning from a single transaction; you’re building a network and earning from its collective success. It's a strategic way to move beyond chasing individual sales and start building a more resilient, high-margin business.
Frequently Asked Questions (FAQ)
1. Is a higher commission rate always better? Not at all. A high commission rate can be misleading if the program has a low conversion rate, a short cookie duration, or a low average order value. Always look at your Earnings Per Click (EPC) to determine the true profitability of a program for your audience.
2. How can I find the EPC for an affiliate program? Most reputable affiliate networks (like CJ Affiliate, ShareASale, or Travelpayouts) provide EPC data. It's often listed as a network-wide average for each merchant, which gives you a good baseline. Once you start sending traffic, you can track your own personal EPC in your performance reports.
3. Can I negotiate my affiliate commission rates? Yes, absolutely. Once you become a proven partner and consistently drive a significant volume of high-quality sales, you have leverage. Many brands are willing to negotiate a higher, private commission rate for their top-performing affiliates. Always track your performance and don't be afraid to ask.

From Confusion to Command
You are no longer in the dark. The world of affiliate commission rates is no longer a confusing black box. You now have the knowledge to deconstruct any program's payment structure, the industry benchmarks to know your worth, and the key metrics to identify what truly drives profit.
This knowledge is power. It empowers you to audit your existing partnerships, confidently seek out new ones, and even negotiate better terms. By focusing on programs with fair commissions, long cookie durations, and high conversion rates, you can ensure your hard work is properly rewarded. Building a profitable travel content business requires a strategic approach, and a deep understanding of affiliate commission rates is a non-negotiable part of that strategy.
Read the full guide: The Travel Blogger's Playbook to Affiliate Marketing Mastery
Don't Miss Out! Subscribe for Exclusive Content
Subscribe


Comments 0
No comments yet
Be the first to share your experience!
Dont Miss Out! Subscribe for Exclusive Content

Ultimate USA Holidays Guide: Top Picks

FTC Affiliate Disclosure Essentials: Stay Compliant as a Travel Creator

Essential Affiliate Tools: From Tracking to Full Optimization

Avoid These 5 Affiliate Landing Page Mistakes for Better Conversions

Affiliate Keyword Research Mastery for Travel Blogs

Booking.com Affiliate Program Review: Pros, Cons, and Earnings Potential
Food & Water Safety Abroad: How to Avoid Getting Sick
TrekGuider @trekguider
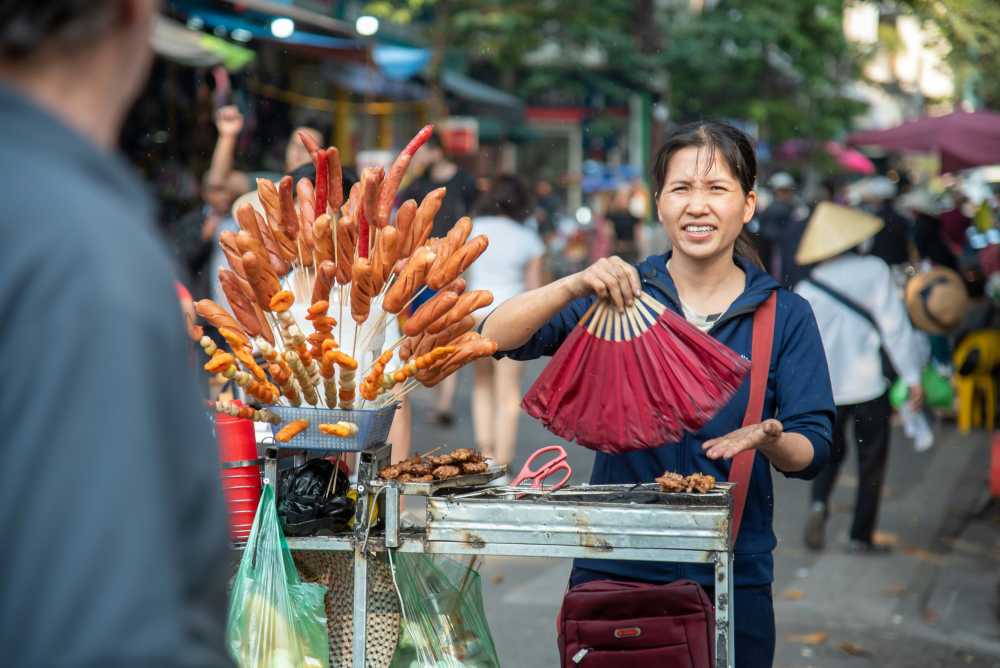
There’s a moment on every trip where the true magic happens: the first bite of a dish you can’t pronounce from a street cart buzzing with locals, the refreshing sip of a regional drink, the discovery of a flavor that will forever define a place in your memory. Food is culture, connection, and the fastest way to the heart of a destination. And that’s the traveler’s paradox, isn’t it? The very experiences that promise the most profound connection also carry a potent, gut-wrenching risk.
One bad meal or a single sip of contaminated water can derail your entire adventure, swapping days of discovery for days spent locked in a hotel room. This fear is agitated by horror stories from fellow travelers and the sheer unpredictability of an unfamiliar environment. It's a valid concern—traveler's diarrhea is unequivocally the most common travel-related illness, affecting up to 80% of international travelers depending on the destination. The fear of getting sick can make you timid, causing you to stick to bland, "safe" foods and miss out on the rich mix of flavors your destination has to offer. It can rob you of the very experiences you traveled so far to find.

But it doesn't have to be this way. This guide is your solution, a definitive and practical playbook for mastering food and water safety abroad. We’ve synthesized actionable advice from the world’s leading health organizations, including the Centers for Disease Control and Prevention (CDC) and the World Health Organization (WHO), to empower you to eat boldly and drink safely. This isn’t a list of things to fear; it’s a set of simple, memorable rules for prevention, identification, and, if necessary, management. This is a critical deep-dive into a core pillar of preparedness we cover in The Ultimate Guide to Travel Safety: A 2026 Playbook, designed to give you the confidence to dive fork-first into the heart of a culture.
The Golden Rule of Food and Water Safety: "Boil It, Cook It, Peel It, or Forget It"
If you remember only one thing from this guide, make it this simple, five-word mantra. Promoted by the CDC and other global health bodies, this single rule is a powerful and easy-to-use filter for nearly every culinary decision you'll make on the road. It’s the foundation of your entire food and water safety strategy.
Boil It: Your Safest Bet for Liquids
Pathogens like bacteria, viruses, and parasites are killed by heat. This makes boiling the most effective method for purifying liquids.
Examples: Drinking water that has been brought to a vigorous, rolling boil for at least one full minute. Hot beverages like tea or coffee that are served steaming hot are also generally safe. Any milk products you consume should be confirmed to be pasteurized or have been boiled.
Cook It: The Power of Heat
Thoroughly cooking food kills the harmful microorganisms that cause illness. The key is to ensure it is cooked all the way through and served hot.
Examples: Meat, poultry, or seafood that is well-cooked (not rare or raw) and served steaming hot to the touch. This is especially crucial for street food; dishes that are cooked fresh to order in front of you are a much safer bet than those that have been sitting out.
Peel It: Nature’s Own Packaging
For raw fruits and vegetables, the contamination is almost always on the outside surface. By peeling it yourself with clean hands, you remove the risk.
Examples: Fruits with a thick, peelable skin like bananas, oranges, mangoes, and avocados are your safest and best friends for a healthy snack. Similarly, vegetables you can peel, such as cucumbers, are also a great option.
Forget It: When in Doubt, Go Without
This is the most critical and sometimes most difficult part of the rule to follow. It requires discipline, but it’s your ultimate defense. If an item of food or drink doesn't meet one of the three criteria above, you must skip it.
Examples: Tap water and ice cubes made from tap water are the biggest culprits. Salads and raw leafy greens like lettuce are high-risk because they are difficult to clean thoroughly and may have been washed in contaminated water. You should also avoid fruits that cannot be peeled, such as grapes and berries, and any unpasteurized dairy products like milk or cheese. Finally, be very wary of any food served at room temperature, such as from a buffet.
Navigating the Streets: A Visual Guide to Spotting Unsafe Food
Street food is often the soul of a city's cuisine, but not all vendors are created equal. Your eyes are your best tool for vetting a stall. Before you order, take thirty seconds to perform a quick visual inspection. Look for these five clear signs of a safe or unsafe operation.
Poor General Cleanliness: This is the most obvious indicator. Red flags include dirty workstations with unwiped spills, visible food waste, rubbish on the ground, and the presence of pests like flies or wasps. The vendor themselves should also appear clean, with tidy clothes and hands.
Improper Food Temperatures: Food left in the "danger zone" (room temperature) is a breeding ground for bacteria. Avoid stalls where cooked food, especially meat, is sitting out in large trays. The safest option is always food that is cooked fresh to order, right in front of you. Hot food should be visibly steaming.
Obvious Cross-Contamination: Watch how the vendor handles ingredients. A major red flag is using the same cutting board, knife, or unwashed hands to handle raw meat and then touch ready-to-eat items like bread, salad, or cooked food.
Use of Contaminated Water: Look at the vendor’s water source. Rinsing dishes, utensils, or vegetables in a single bucket of murky, stagnant water is a sign of a high-risk operation. Likewise, avoid ice in your drinks unless you can confirm it was made from purified water (commercially bagged ice is usually a safe sign).
Lack of a Crowd (Especially Locals): A busy stall with a long line, particularly of local residents, is one of the best indicators of a trusted and safe food source. High customer turnover means the food is fresh and hasn't been sitting out for long. An empty stall is often empty for a reason.
Pro-Tip: Make "follow the locals" your street food mantra. A long line of residents is a walking, talking five-star review of a vendor's quality and safety. It's the most reliable seal of approval you can find.
Securing Your Water Supply: A Deep Dive into Hydration and Purification
Staying hydrated is non-negotiable for your health and energy while traveling, but assuming tap water is safe is one of the most common and dangerous mistakes a traveler can make. Here’s how to ensure every sip you take is safe.
Identifying Safe and Unsafe Drinking Water Sources
The CDC and WHO have clear guidelines. Unless you are in a country with a known, highly-developed sanitation system, you should assume all tap water is unsafe.
Safest Sources: Commercially bottled water in a factory-sealed, tamper-proof container is your most reliable option. Carbonated water is even safer, as a broken seal is immediately obvious. The second safest source is water that you have personally brought to a rolling boil for at least one minute.
Unsafe Sources to Avoid: Tap water, well water, ice made from tap water, fountain drinks mixed with tap water, and even water from clear mountain streams (which can contain germs) should all be avoided unless they have been purified.
Your Purification Playbook: The Top 3 Methods
When bottled or boiled water isn't available, you need a backup plan. Here are the top three recommended purification methods.
Boiling (The Gold Standard): This is consistently ranked by the CDC and WHO as the single most effective method. It kills all known disease-causing microorganisms, including viruses, bacteria, and parasites. Simply bring clear water to a rolling boil for 1 minute (or 3 minutes at elevations above 6,500 feet / 2,000 meters).
Filtration: A high-quality portable water filter is highly effective at removing bacteria and protozoan parasites like Giardia and Cryptosporidium. Look for a filter with an absolute pore size of 1 micron or smaller. The main limitation is that most portable filters do not remove viruses, so in high-risk areas, the CDC recommends following filtration with chemical disinfection.
Chemical Disinfection: Chlorine, iodine, or chlorine dioxide tablets/drops are a lightweight and easy way to kill viruses and bacteria. However, they are not consistently effective against the parasite Cryptosporidium and require a contact time of at least 30 minutes.
For in-depth planning on what gear to pack for every type of trip, from water filters to first-aid supplies, our all-encompassing Travel Guide is the only resource you'll ever need.
Damage Control: How to Manage Traveler's Diarrhea
But let’s be realistic: even the most diligent traveler can have a bad day. When that happens, knowing exactly what to do—and what not to do—can be the difference between a 24-hour nuisance and a trip-ruining ordeal. This is the damage control phase of your food and water safety plan.
The First and Most Critical Step: Oral Rehydration
According to travel medicine doctors, dehydration is the single most likely and dangerous complication of traveler's diarrhea. Replacing lost fluids and electrolytes is your absolute first priority.
Method: The best way to rehydrate is with a dedicated Oral Rehydration Solution (ORS), which comes in packets of salts and sugars that you mix with boiled or bottled water. In a pinch, sports drinks or clear soups can also be used.
Symptomatic Treatment for Mild to Moderate Cases
If the diarrhea is tolerable and not accompanied by a high fever or blood, over-the-counter medications can provide relief and help you get through a travel day.
Medications: An antimotility agent like Loperamide (the active ingredient in Imodium, a top pharmacist-recommended brand) can reduce the frequency of bowel movements. Bismuth Subsalicylate (found in Pepto-Bismol, another pharmacist favorite) can also help decrease the frequency and shorten the duration of the illness.
When to Use Standby Antibiotics (For Severe Cases)
If diarrhea is distressing, incapacitating, or contains blood or mucus, a prescribed antibiotic may be necessary.
Method: Before you travel, speak with your doctor or a travel medicine clinic. For travelers heading to high-risk destinations, they may provide a prescription for a standby antibiotic, such as Azithromycin, to carry with you. A single dose is often highly effective at treating severe cases.
Pro-Tip: Within your main travel first-aid kit, create a dedicated "Digestive Distress" module. Keep it in a separate, clearly-labeled zip-top bag containing a few packets of Oral Rehydration Salts, a strip of Loperamide, and a few antacids. This way, when you need it, you won't have to rummage through your entire kit.

Ready to Pack Like a Pro?
A smart food and water safety strategy is just one piece of your pre-trip preparation. To ensure you don't overlook a single essential item—from documents and finances to clothing and medical supplies—a master checklist is your most powerful tool. Our comprehensive, free checklist has you covered for every stage of your journey.
Download Your Free International Travel Checklist Now!
Food and Water Safety FAQs
A prepared mind is a safe mind. Here are expert answers to common questions that take your preparedness to the next level.
1. Besides traveler's diarrhea, what are the most common travel illnesses?
While traveler's diarrhea is number one, the CDC reports that other common issues include acute respiratory infections (like influenza or COVID-19, often acquired in transit), vector-borne fevers like Dengue and Malaria in tropical regions, and other food-borne illnesses like Hepatitis A and Typhoid Fever. Skin conditions from insect bites are also extremely common.
2. Is it safe to eat at a restaurant if I'm worried about street food?
Generally, restaurants can be safer, but the same principles apply. A busy restaurant full of locals is a great sign. Be cautious with the same high-risk items: salads, unpeeled fruits, and tap water or ice. If you want to find trusted, local-approved gems, explore the TrekGuider platform, where travel creators often share their own curated guides to safe and authentic eats.
3. Should I carry a standby antibiotic in my first-aid kit?
This is a question for your doctor or a travel medicine clinic. For travelers heading to high-risk destinations where severe traveler's diarrhea is common, many doctors will provide a prescription for a standby antibiotic like Azithromycin. It’s not for mild cases but can significantly shorten the duration of a severe bout of illness. Discuss your itinerary with your doctor to see if this is right for you.
Eat Boldly, Travel Well
The world of food is a world of incredible diversity and connection, and it deserves to be explored with an open mind and a curious palate. The goal of mastering food and water safety is not to build a wall of fear that separates you from authentic experiences. It is about building a foundation of knowledge that gives you the freedom to be adventurous. By internalizing the golden rule of "Boil it, cook it, peel it, or forget it," learning to trust your own visual assessment of a food stall, and knowing exactly what to do if you get sick, you replace anxiety with empowerment. You are now equipped with the skills to navigate the world's most exciting cuisines with confidence, ensuring your focus remains on the flavor, connection, and joy that every journey promises. Go explore, eat boldly, and travel well.

Meta Data Suggestions:
SEO Meta Title (Under 60 characters): Food & Water Safety Abroad: How to Avoid Getting Sick
URL Slug: food-water-safety-abroad
SEO Meta Description (Under 155 characters): Avoid traveler's diarrhea with our expert guide to food and water safety abroad. Learn the golden rules for eating street food, purifying water, and staying healthy.
Don't Miss Out! Subscribe for Exclusive Content
SubscribeComments 0
No comments yet
Be the first to share your experience!
Dont Miss Out! Subscribe for Exclusive Content

Chicago Beer Fests: Top 6 Tastings
Ultimate USA Holidays Guide: Top Picks
FTC Affiliate Disclosure Essentials: Stay Compliant as a Travel Creator
Essential Affiliate Tools: From Tracking to Full Optimization
Booking.com Affiliate Program Review: Pros, Cons, and Earnings Potential

Decoding Affiliate Commission Rates: Benchmarks for Travel Creators
Art Basel Miami: 7 Insider Hacks
TrekGuider @trekguider
The email lands, the tickets are booked, and a jolt of excitement hits you. You’re finally going to Art Basel Miami, the undisputed heavyweight champion of art fairs in the Americas. But as you start scrolling through the endless lists of exhibitors, satellite fairs, and after-parties, a subtle wave of panic begins to set in. The sheer scale is dizzying—a sprawling, week-long labyrinth of priceless art, exclusive events, and shoulder-to-shoulder crowds. You start to worry you’ll spend more time stuck in traffic on the MacArthur Causeway than actually seeing art, that you'll miss the truly groundbreaking exhibits, and that you'll leave feeling like you barely scratched the surface.
This anxiety is the invisible wall that separates the tourists from the insiders. Every December, thousands of attendees arrive unprepared, succumbing to sensory overload and logistical nightmares. They wander aimlessly through the cavernous Miami Beach Convention Center, get hit with sticker shock from last-minute parking fees, and completely miss the vibrant, renegade energy of the satellite fairs where the art world’s future is being forged. They leave exhausted and defeated, with a camera roll of blurry photos and a profound sense of having missed out.
That won’t be you. This guide is your secret weapon, your backstage pass. We’ve distilled the chaos into seven actionable, pro-level hacks that will fundamentally transform your experience. You will learn to navigate the city’s complex geography, decode the schedule like a seasoned collector, and discover the hidden gems that most visitors fly right over. This isn't just an art fair; it's a city-wide cultural takeover, and it’s just one of the many incredible events that cement the city’s reputation as a year-round festival hub, a theme we explore in our complete guide to Miami Holidays: 8 Beach Fest Vibes. Prepare to conquer Art Basel Miami with the confidence of an insider.

Hack 1: Master the Map of Art Basel Miami—Go Beyond the Convention Center
The first mistake nearly every newcomer makes is thinking Art Basel Miami is a single event confined to the Miami Beach Convention Center (MBCC). While the MBCC is the mothership—an awe-inspiring spectacle of blue-chip art that you absolutely must see—the true soul of Miami Art Week pulses in the dozens of satellite fairs scattered across the city. Treating the MBCC as your only destination is like visiting Paris and only seeing the Eiffel Tower from the ground.
Think of the MBCC as your anchor, not your cage. By all means, start your journey there to get a feel for the sheer scale of the event.
Navigate the Core Strategically: The main fair is organized into distinct sectors designed to guide your experience. To avoid getting overwhelmed, prioritize starting with Meridians, which features massive, museum-quality installations that are often the most talked-about pieces of the show. Alternatively, head to the Nova sector, which showcases brand-new work from the world's most exciting emerging galleries.
Embrace the Satellites: The real discoveries—the moments that make your heart race—often happen outside the main hall. These smaller, more focused fairs are where you’ll find groundbreaking work from up-and-coming artists, often at more accessible price points. Plan to visit at least two or three.
Your Satellite Fair Hit List:
Untitled Art: Located directly on the sands of Ocean Drive, this fair’s stunning backdrop is part of the experience. It’s often free to access and is a fantastic place to see cutting-edge contemporary art in a uniquely Miami setting.
Wynwood Walls: While not a formal fair, this world-famous outdoor street art museum is an essential pilgrimage during Art Week. It’s completely free to view the incredible murals that cover the district, offering a raw and vibrant contrast to the polished booths of the main fair.
Design Miami/: Occurring concurrently just a stone's throw from the MBCC, this prestigious sister fair is dedicated to collectible design from the 20th and 21st centuries. It’s a must-see for anyone interested in the intersection of art, furniture, lighting, and objects d'art.
Pro-Tip: Don't try to be a hero and see everything in one day. Group your visits geographically. Dedicate one day to Miami Beach (MBCC, Untitled Art, Design Miami/) and another to the mainland neighborhoods like Wynwood and the Design District. This minimizes travel time and maximizes art time.

Hack 2: Conquer Transportation Like a Local
During Art Week, Miami’s already notorious traffic transforms into a city-wide parking lot. This isn't an exaggeration—with an economic impact of over $500 million, the event draws crowds on par with a Super Bowl, and it feels like every single attendee is in a car on the causeway next to you. Driving your own car is the single most stressful, time-consuming, and expensive mistake you can make.
Parking is not just difficult; it’s extremely limited and eye-wateringly expensive. To navigate the city like a pro, you must ditch the idea of driving.
Rideshares Are Non-Negotiable: Services like Uber and Lyft are your lifeline. While surge pricing will be in effect during peak hours, the cost is often still less than a parking garage, and it saves you the soul-crushing headache of navigating closed streets and full lots. Use the "schedule a ride" feature for early morning trips to beat the initial rush.
Leverage Public Transit: Miami-Dade's public transit system is a surprisingly effective and cost-efficient option. The elevated Metromover is free and circles the downtown area, connecting you to the Metrorail and bus routes that cross over to Miami Beach. It’s a great way to bypass the worst of the gridlock while getting a scenic view.
Book Parking in Advance (If You Must): If driving is your only option, do not leave it to chance. Use an app like SpotHero to reserve a parking spot weeks in advance. Be prepared to park a significant distance from the venue and use a rideshare or a long walk for the final leg of your journey.
Hack 3: Decode the Art Basel Miami Schedule—Public vs. Private Days
Understanding the rhythm of the Art Basel schedule is crucial. The fair is not open to the public for its entire duration, and showing up on the wrong day is a common and deflating rookie error. The opening days are reserved for the art world’s heaviest hitters.
Here is the official breakdown for the 2026 show:
Private Days (Invitation-Only): December 3rd – 4th, 2026. These first two days are the exclusive preview for serious collectors, museum curators, celebrities, and accredited media. Access is strictly by a VIP invitation from a participating gallery or Art Basel itself. This is when the majority of high-value sales are negotiated and finalized.
Public Days: December 5th – 7th, 2026. The fair opens its doors to the general public. The official hours are 11:00 AM to 6:00 PM.
While getting into the private viewings is tough without connections, it’s not impossible for aspiring collectors. The key is to build relationships with galleries you admire throughout the year. If you’re serious, inquire about access when you purchase work. For most visitors, the best strategy is to maximize the public days. Arrive shortly before the 11:00 AM opening time to get ahead of the intense afternoon crowds.

Hack 4: Network Smarter, Not Harder
Art Basel Miami is as much a networking event as it is an art exhibition. It’s where artists find gallery representation, collectors discover new talent, and creative professionals forge career-defining collaborations. However, simply handing out business cards in a crowded hall is about as effective as throwing them into the ocean. You need a targeted approach.
Do Your Homework: Before you arrive, study the exhibitor list. Identify the galleries that represent artists or styles that resonate with you. When you approach a gallerist, you can have a much more meaningful conversation if you can say, "I was so excited to see you were showing Artist's Name; I've been following their work since..."
Attend the Talks and Panels: The official Art Basel program is packed with fascinating talks and panel discussions. These are fantastic opportunities to learn directly from leading artists, curators, and critics. The Q&A sessions are a perfect, low-pressure environment to ask an intelligent question and make a memorable impression.
Use the Satellite Fairs: The atmosphere at satellite fairs is often more relaxed and accessible than at the MBCC. Gallerists and artists have more time and energy to engage in genuine conversation. This is where you can build real relationships that last beyond the week.
For many creative professionals, the sheer density of inspiration at Art Basel sparks a torrent of new business ideas. The challenge is turning that spark into a viable product. If you leave Miami buzzing with new concepts, the next step is to structure them for success. Our Digital Product Ideas Guide provides a complete framework for developing, launching, and monetizing your creative passion, helping you transform that art-world fire into a sustainable income stream.
Hack 5: Fuel Your Art Binge Strategically
Walking miles of concrete floors in convention centers and galleries is a marathon, not a sprint. If you don’t plan your food and hydration, you will burn out by day two, guaranteed. The food inside the convention center is notoriously overpriced and underwhelming. You need a better plan.
Book Dinner Reservations Yesterday: If you plan on dining at any of Miami’s top restaurants—especially in South Beach, Wynwood, or the Design District—you need to make reservations weeks, if not months, in advance.
Embrace High-Quality Casual Eats: For lunch, skip the long lines and high prices at sit-down restaurants. Miami has a phenomenal food truck scene, and many pop up near the major art hubs. This is a great way to grab a quick, delicious, and more affordable meal without losing an hour of your day.
Pack Your Own Survival Kit: Be your own hero. Pack a refillable water bottle (most venues have filling stations), a couple of protein bars, and a bag of almonds in your tote. Having snacks on hand will save you from paying $8 for a bottle of water and will keep your energy levels stable, preventing the dreaded "art fatigue" from setting in too early.
Pro-Tip: Many of the top-tier galleries host private cocktail receptions or breakfasts at their booths for their best clients. If you have an established relationship with a gallery, don't be shy about asking if they have any events planned. It’s a fantastic way to see the art and network in a much more civilized setting.
Hack 6: Prioritize Satellite Fairs for True Discovery
We mentioned this in Hack #1, but it’s so critical it deserves its own section. The satellite fairs are the lifeblood of Miami Art Week. While the main fair showcases the blue-chip, established titans of the art world, the satellite fairs are where you’ll find the raw, experimental, and often more exciting work from the next generation of art stars.
Making these fairs a priority will give you a more comprehensive and authentic view of the contemporary art landscape. You’ll see work you won’t find anywhere else and have the chance to buy original art from emerging artists before their prices skyrocket. Fairs like NADA (New Art Dealers Alliance) are renowned for their sharp focus on new talent and are a favorite among seasoned collectors looking for the next big thing. Don't just visit them if you have extra time; build your entire itinerary around them.

Hack 7: Plan Your Post-Basel Decompression
After several days of non-stop art, crowds, and social stimulation, you will experience a unique phenomenon known as "art fatigue." Your eyes will glaze over, and even a Picasso won't be able to hold your attention. It’s an inevitable part of the experience, but the pros know how to plan for it.
Schedule Deliberate Downtime: Do not book every single minute of your trip. Leave your final morning or afternoon completely open to do something unrelated to art. Go to the beach, sit by the hotel pool, or explore a quiet neighborhood like Coconut Grove. Let your brain breathe.
Book a Recovery Day: The ultimate pro-move is to add an extra day to your trip after the fairs close on December 7th. Let the art crowd fly home while you enjoy a quieter, more relaxed Miami. This day of decompression is crucial for processing the immense amount of visual information you’ve absorbed.
Stay Strategically: Consider booking your final night at a hotel slightly removed from the South Beach chaos. A calmer environment in a neighborhood like Coral Gables or Key Biscayne will help you recharge before heading home.
A successful trip isn't just about what you do during the event; it's about how you plan the entire journey. Creating a seamless travel experience, whether for a high-intensity week like Art Basel or a cross-country road trip, requires expert planning. For a comprehensive resource that covers every aspect of trip planning in the U.S., our Travel Guide is the ultimate tool for crafting perfect, stress-free itineraries.
Your Insider’s Guide to Conquering Art Basel
You are now armed with the strategies to transform your Art Basel Miami trip from an overwhelming ordeal into an unforgettable adventure. By looking beyond the convention center, mastering transportation, decoding the schedule, and networking with purpose, you can navigate the world’s most important art week with the ease and confidence of a veteran. Remember to fuel yourself properly, prioritize the satellite fairs for groundbreaking discoveries, and plan for some much-needed decompression.
With these seven insider hacks, your next Art Basel Miami experience will be defined by inspiration, connection, and discovery—not by stress and exhaustion. You are no longer just an attendee; you are an insider, ready to experience the very best the art world has to offer.
Meta Data Suggestions:
SEO Meta Title: Art Basel Miami: 7 Insider Hacks to Navigate Like a Pro
URL Slug: art-basel-miami-insider-hacks
SEO Meta Description: Conquer Art Basel Miami with 7 expert hacks. Learn to navigate satellite fairs, beat the traffic, and network smarter at the world's premier art event.
Don't Miss Out! Subscribe for Exclusive Content
SubscribeComments 0
No comments yet
Be the first to share your experience!
Dont Miss Out! Subscribe for Exclusive Content

San Francisco Cherry Blossoms: A Local's Guide to the Blooms

Halloween SF: Haunts Without Horrors

SF Festivals: 7 Must-See Lineups

Christmas SF: Lights & Wharf Wonders

SF Pride: 6 Route & Party Hacks

Chinese New Year SF: Parade Essentials
Solo Travel Packing: Pack for Freedom, Not Fear
TrekGuider @trekguider
Forget every checklist you’ve ever downloaded. The internet is littered with lists of what to pack, but they all miss the fundamental point. For a solo traveler, the contents of your bag are secondary. What truly matters is the system behind it. Mainstream packing advice is a trap, designed for travelers who can lean on a partner. But for you, every ounce and every decision is a direct reflection of your independence.
The secret the pros know is this: packing isn’t a chore you endure before a trip. It is the first, most critical act of the adventure itself. It’s a declaration of self-reliance. Getting it wrong leads to the classic traveler mistakes: wrestling an overstuffed bag on a crowded train, becoming an obvious target, or having a minor inconvenience like a dead phone escalate into a genuine crisis in an unfamiliar city.
This is not another packing list. This is a manifesto on the philosophy of smart travel. We’re going to dismantle the conventional wisdom and replace it with a set of battle-tested systems. These are the solo travel packing hacks that go beyond gear, transforming your bag from a burdensome anchor into a strategic asset for a safer, more mobile, and profoundly more liberating journey. Of course, packing is just one piece of the puzzle. For the complete playbook on traveling alone, be sure to consult our master resource on Anxious to Adventurous: Solo Travel Tips for Confidence.

The Mindset Shift: Why Your Bag is Your Most Important Travel Companion
For a solo traveler, your pack is your superpower. It’s your home, your toolkit, and your shield. Embracing this mindset is the key. A masterful packing strategy isn’t about what you leave behind; it’s about what you gain—freedom from the tyranny of heavy luggage, the anxiety of unpreparedness, and the vulnerability that comes with looking like a lost tourist.
This philosophy is built on three core pillars:
Radical Self-Reliance: You are your entire support system. Every item must be a tool that empowers your independence, from a simple roll of duct tape for on-the-fly repairs to a power bank that ensures you are never without your digital lifeline.
Calculated Efficiency: Your time and energy are your most precious resources. An intelligently organized bag means less time spent rummaging for a charging cable and more time savoring a sunset. It means navigating cobblestone streets and endless train station stairs with ease, not exhaustion.
Proactive Security: A smart packer moves with confidence, and confidence is a powerful deterrent. This isn't about paranoia; it's about preparation. It’s choosing and organizing your gear in a way that makes you a "hard target," so you can focus on the joy of discovery.
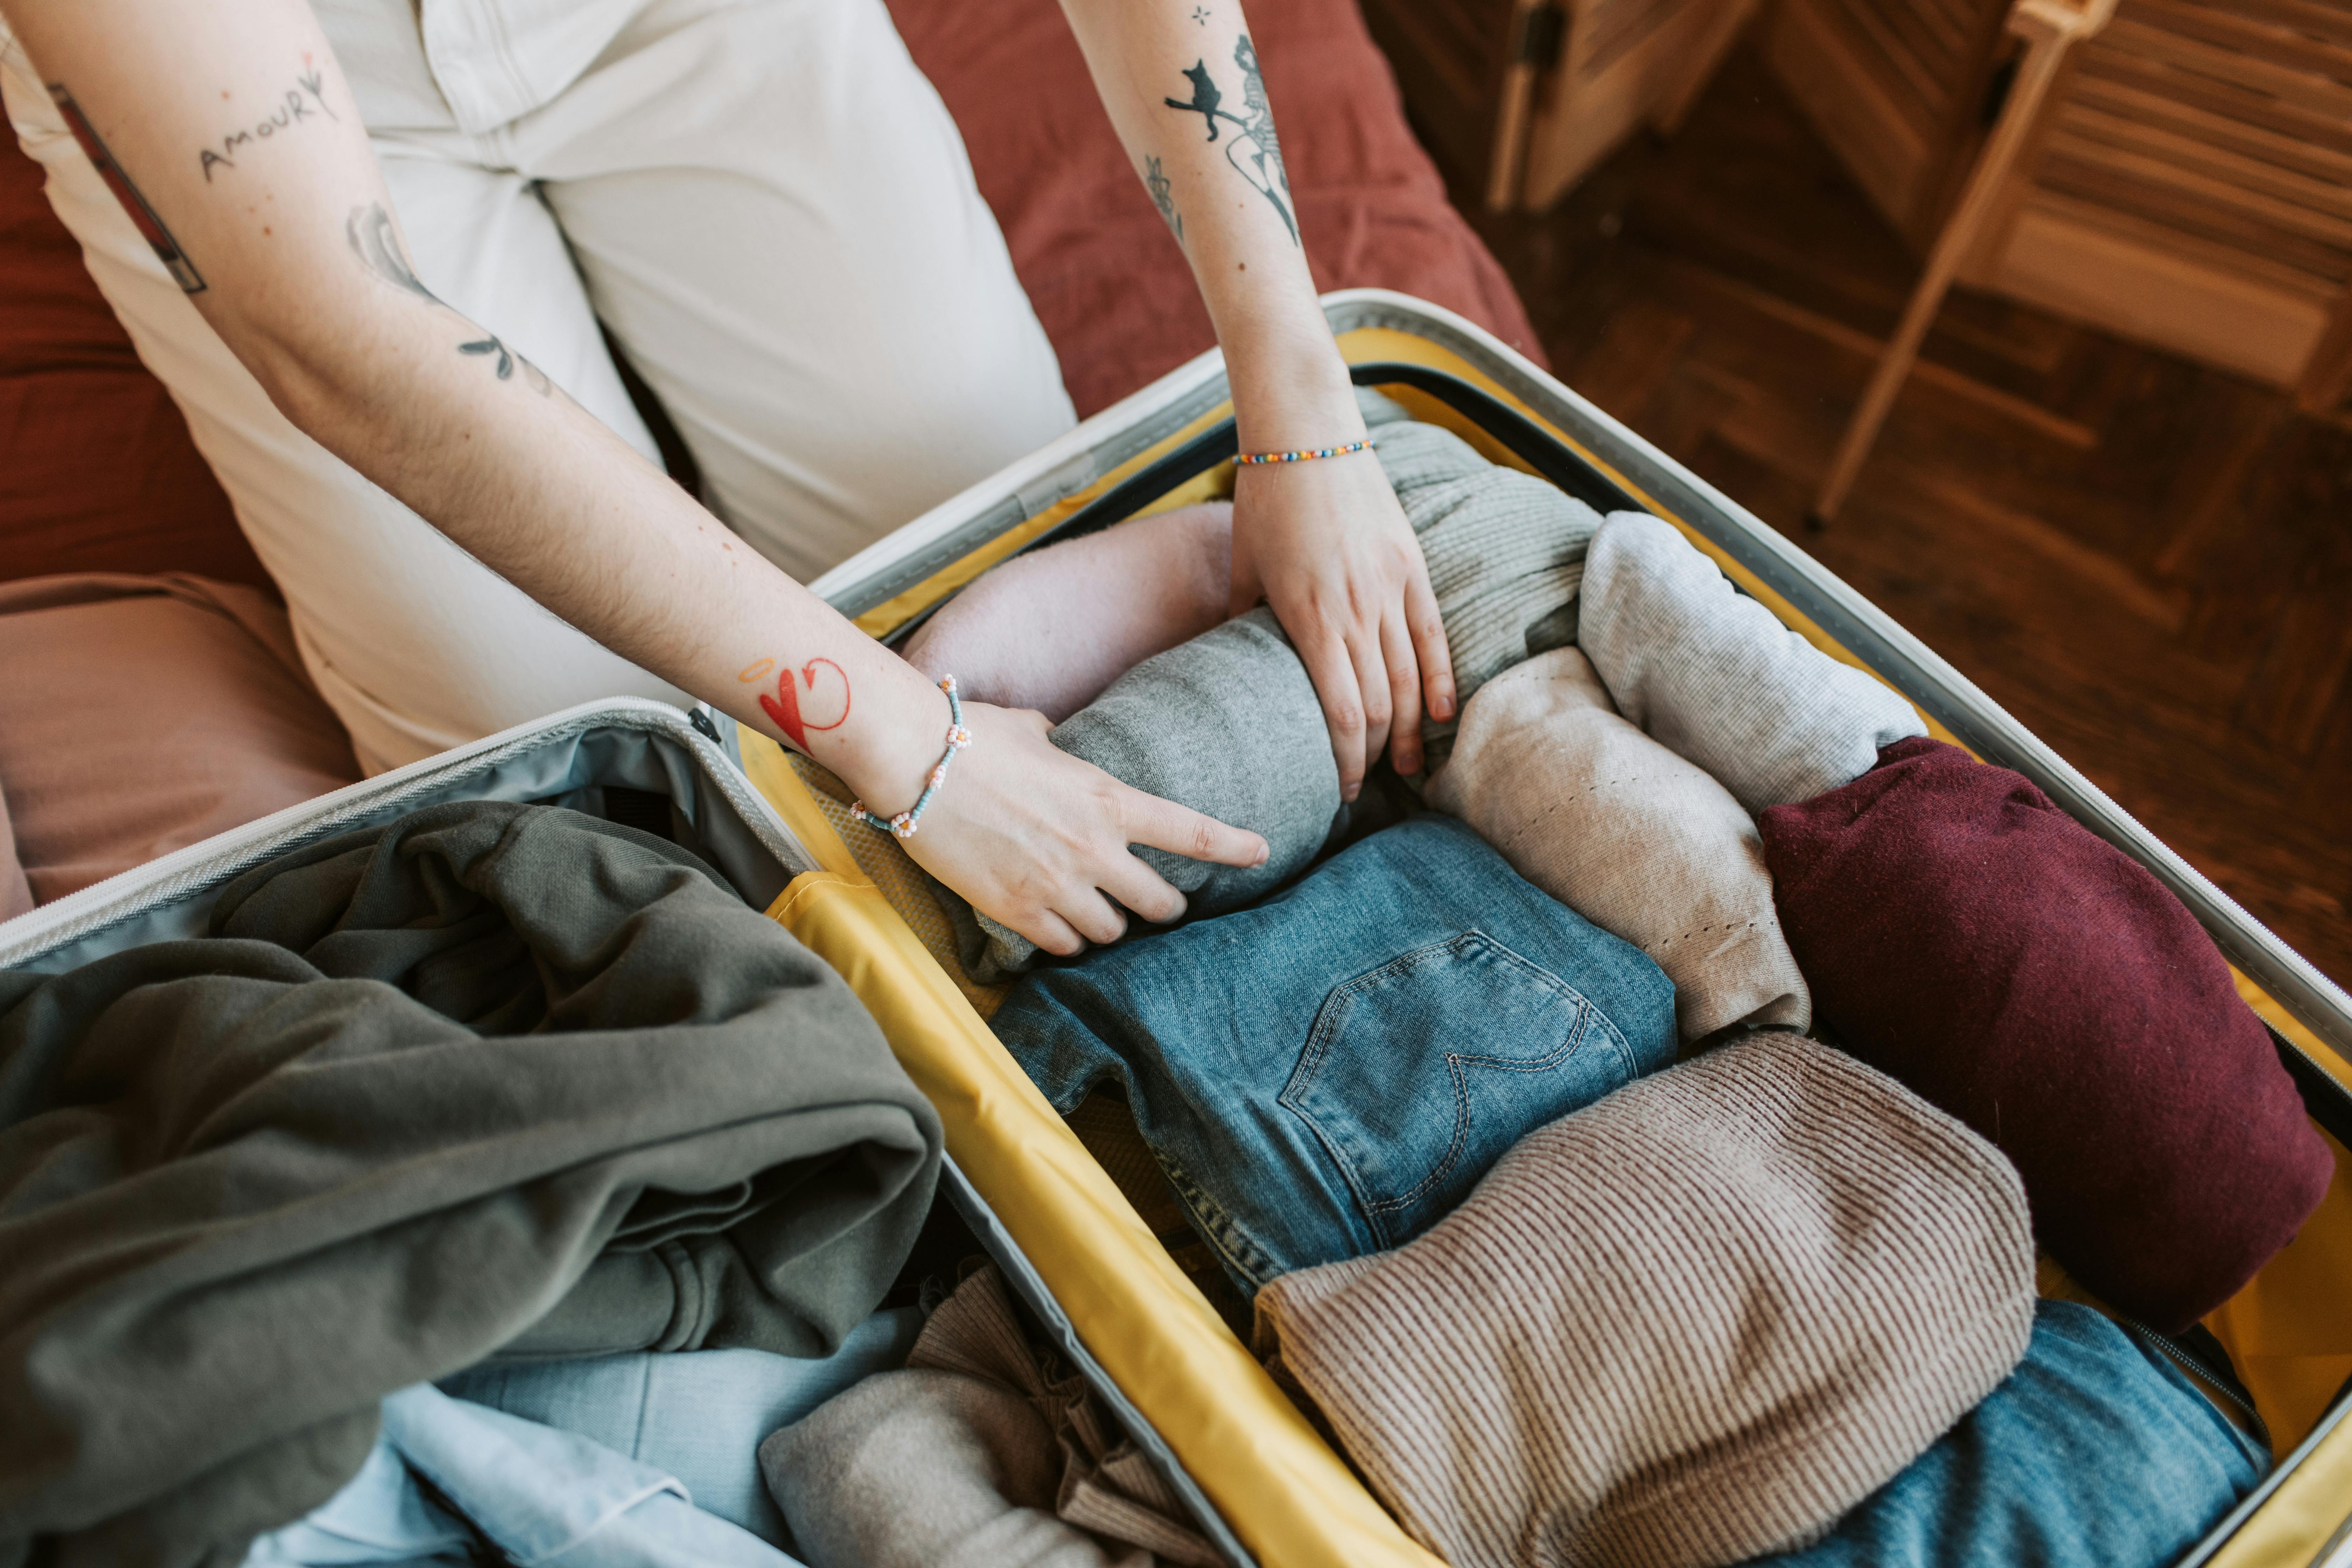
System 1: The Capsule Wardrobe - A Masterclass in Infinite Style, Minimal Space
The Philosophy: More Options from Fewer Items
The capsule wardrobe isn't just a space-saving technique; it's a strategic weapon against decision fatigue. The goal is to create a small, curated collection of versatile, interchangeable clothing. This ensures you feel confident and appropriate in any situation, from a morning market stroll to an impromptu dinner invitation, without ever having to waste mental energy on what to wear.
The Method in Action
This system works by making smart, upfront choices. For example, a common framework for a one-week trip is the 5-4-3-2-1 guideline: 5 sets of socks/underwear, 4 tops, 3 bottoms, 2 pairs of shoes, and 1 layering piece. But the real magic is in the details.
Invest in high-performance fabrics. Merino wool is the undisputed champion for solo travelers; it’s temperature-regulating, moisture-wicking, and naturally odor-resistant, meaning you can wear it multiple times without washing. One merino wool shirt does the work of three cotton ones.
Build on a neutral palette. Sticking to a base of colors that all work together (black, grey, navy, tan) creates dozens of potential outfits. You can then add personality with a lightweight, colorful scarf or a unique accessory—items that provide maximum visual impact for minimal packing space.
System 2: Modular Organization - The Secret to Effortless Efficiency & Discretion
The Philosophy: A Place for Everything, and Everything in Its Place
How you organize your bag is a strategic choice. A chaotic bag bleeds time and energy. Worse, it forces you to expose your entire inventory just to find one item, a critical vulnerability in a shared hostel dorm. The goal is to create a modular system that allows you to access exactly what you need, when you need it, without disrupting anything else.
The Method in Action
The key element of modular organization is compartmentalization.
Packing cubes are the gold standard. They aren’t just for compression; they turn your backpack into a tidy chest of drawers. By using different colored cubes for different categories (e.g., blue for tops, red for bottoms, grey for electronics), you can retrieve an item in seconds, discreetly and efficiently.
The rolling method is foundational. Tightly rolling your clothes is superior to folding. It minimizes wrinkles and allows you to see every piece of clothing at a glance within your packing cube, eliminating the need to dig.
System 3: The Fortress of Self-Reliance - Your Security & Problem-Solving Toolkit
The Philosophy: Prepare for the Worst, Enjoy the Best
True freedom on the road doesn't come from hoping problems won't arise. It comes from the quiet confidence that you can handle them when they do. This system is about building a portable fortress of security and a toolkit for self-reliance, so you can explore with an unshakeable peace of mind.
The Three Layers of Your Fortress
Layer 1: Proactive Gear Security
The goal here is to make yourself a less appealing target. Opportunistic thieves look for easy wins.
Carry a decoy wallet with a small amount of local currency and some expired cards. If confronted, you can hand it over without losing your essential documents.
Use a simple carabiner to clip the zippers of your daypack together. It’s not a high-security lock, but it’s an effective deterrent against a pickpocket trying to subtly slide your bag open in a crowd.
Layer 2: Personal & Digital Safety
Your well-being matters most. These items are non-negotiable.
A rubber door stop is one of the most effective, low-cost security tools you can carry. Shoved under your hotel or Airbnb door, it provides a powerful physical barrier against unwanted entry.
Your phone is your lifeline. A dead phone is a safety crisis. Always carry a fully charged power bank (at least 10,000mAh).
Public Wi-Fi is a hunting ground for data thieves. Using a VPN on your phone and laptop is essential to protect your banking information and passwords.
Layer 3: The "MacGyver" Multi-Tools
When you’re alone, small problems can become major headaches. The MacGyver mindset is about packing a few multi-purpose items that can solve countless issues.
Wrap a few feet of duct tape around a water bottle or pen. It can repair a broken sandal, patch a backpack, or serve as a makeshift bandage.
A bandana or sarong is the ultimate multi-tool. It can be a towel, a sun shield, a dust mask, a makeshift bag, or a privacy screen.
Beyond the Gear: Packing for the Solo Experience
Expert packing goes beyond the purely practical. It’s also about packing for your emotional well-being and enhancing the unique moments that solo travel offers.
Pack a sensory comfort item. Loneliness can strike unexpectedly. Something small that connects you to home—a few of your favorite tea bags, a familiar scent, a silk pillowcase—can be an incredible comfort.
Bring a social icebreaker. A simple deck of playing cards placed on a table in a hostel common room is a universal invitation to connect with other travelers, breaking down language and cultural barriers instantly.
Empower your inner photographer. Don't let being solo stop you from getting great photos. A small, flexible mini tripod allows you to use your phone's self-timer for stunning shots that aren't just selfies. The "video screenshot hack" is another pro move: record a short video of yourself moving through a scene, then scrub through it later to pull out perfect, candid-looking still images.

Conclusion: Stop Packing, Start Preparing
You now possess the framework. The difference between an amateur and an expert traveler isn't what they pack, but how they think. It’s the understanding that a capsule wardrobe is about mental clarity, modular organization is about efficiency, and a fortress of self-reliance is about absolute freedom.
This guide was the "why." You have the philosophy.
Now it's time for the "what." To put these systems into practice, you need the right tools. We've compiled everything—every piece of gear, every item of clothing, every essential document—into one definitive resource.
Your next step is clear. Take these principles and build your ultimate kit with our . It’s the tactical playbook that will bring this strategy to life.
Read the full guide: Anxious to Adventurous: The Ultimate Guide to Solo Travel Confidence
Don't Miss Out! Subscribe for Exclusive Content
SubscribeComments 0
No comments yet
Be the first to share your experience!
Dont Miss Out! Subscribe for Exclusive Content
Ultimate USA Holidays Guide: Top Picks
FTC Affiliate Disclosure Essentials: Stay Compliant as a Travel Creator
Essential Affiliate Tools: From Tracking to Full Optimization
Booking.com Affiliate Program Review: Pros, Cons, and Earnings Potential
Decoding Affiliate Commission Rates: Benchmarks for Travel Creators
