Decoding Affiliate Commission Rates: Benchmarks for Travel Creators
TrekGuider @trekguider
You’re a travel creator, and you’ve entered the world of affiliate marketing to turn your passion into a profession. But you’ve quickly run into a frustrating black box: the commission structure. You see a dizzying array of percentages, acronyms like CPA and EPC, and vague promises of earnings. You’re left wondering what good affiliate commission rates even look like. Are you earning your worth, or are you leaving a significant amount of money on the table?
This confusion isn't just academic; it's a direct threat to your bottom line. The reported average monthly income for affiliates in the travel niche is an impressive $13,847, a figure that proves this is a serious enterprise. But you can't build a sustainable business on guesswork. Partnering with a program offering a flashy 40% commission—only to discover it’s 40% of their tiny margin—is a rookie mistake that costs real money. This lack of clarity makes it impossible to forecast your income, negotiate better terms, or build a truly predictable business. You feel like you’re flying blind.
This guide is your decoder ring. We are pulling back the curtain to give you a comprehensive breakdown of how affiliate commissions actually work. We will deconstruct every major commission model, provide clear, data-backed industry benchmarks, and teach you how to analyze these rates like a seasoned professional. By the end of this deep dive, you will be able to spot high-value opportunities and architect a monetization strategy that truly rewards your influence. For a complete overview of the affiliate landscape, our definitive pillar page, Travel Affiliate Programs: The 2026 Ultimate Guide, is your essential command center.

The Anatomy of a Commission: Deconstructing the Core Models
Let's cut through the jargon. An affiliate commission is simply a reward for a job well done. A company—the merchant—pays you for successfully driving a specific, valuable action, which in the travel world almost always means a completed booking or sale.
But the way that reward is calculated can vary dramatically. Understanding the underlying structure of different affiliate commission rates is the first step toward becoming a high-earning creator.
1. Cost Per Sale (CPS) or Pay Per Sale (PPS): The Industry Workhorse
You'll encounter this model most often—it's the industry's workhorse for a reason. It’s simple and transparent: when a reader clicks your affiliate link and completes a purchase, you earn a percentage of the total sale value. If you recommend a $500 hotel stay and the program offers a 6% CPS commission, you earn $30. This model directly ties your earnings to the revenue you generate, making it the gold standard for most travel bookings and gear sales.
2. Cost Per Action (CPA): Rewarding a Specific Step
CPA is a broader model where you’re compensated for a specific action a user takes. While that action is often a sale (making it identical to CPS), it can also be something else. For example, a travel credit card company might pay you a CPA commission for every user who completes an application, regardless of whether they are approved.
3. Cost Per Lead (CPL): Paying for High-Value Inquiries
With a CPL model, you earn a fixed fee for each qualified lead you generate. This is common in high-ticket travel sectors where the sales cycle is long. A luxury tour operator, for instance, might pay you $50 for every user who fills out a detailed inquiry form for a bespoke African safari. You get paid for delivering a potential customer; their sales team takes it from there.
4. Tiered & Multi-Tier Structures: Incentivizing Growth
This is where commission models get more sophisticated and rewarding.
Tiered Structures: Rewarding Your Growth These are designed to reward high-performing affiliates. Your commission rate increases as you drive more sales. A program might offer a base rate of 6%, which jumps to 8% after you generate $5,000 in sales in a month, and 10% after $10,000.
Multi-Tier Structures: Building a Network These allow you to earn commissions not only on your own sales but also on the sales generated by other affiliates you recruit into the program. This effectively turns you into a partner who helps grow the program itself, creating a secondary, more passive income stream.
5. Cost Per Click (CPC): The Rare Exception
In this model, you are paid a small fee for every click your affiliate link receives, regardless of a sale. Due to its high vulnerability to fraud, the CPC model is now extremely rare in modern affiliate marketing and almost never seen in the travel space.

Industry Benchmarks: What Good Affiliate Commission Rates Look Like
So, what should you actually expect to earn? While rates vary, the travel industry has established clear benchmarks across its major categories. Here’s your cheat sheet.
Hotels & Accommodations: 2% - 7% of Booking Value This is the bread and butter for many creators, but the details are everything. A program like Expedia Group offers up to 6% of the total booking value with a 7-day cookie. In contrast, Booking.com advertises a much higher "25-40%", but this is a percentage of their commission, not the customer's total payment. This opaque structure often results in a much lower effective rate, closer to 2-4% of the final booking value.
Tours, Activities & Experiences: 6% - 8%+ This is a high-margin category with strong potential. Market leaders like Viator and GetYourGuide set the standard with base commissions of 7-8%. Adventure-focused operators like G Adventures offer 6%, which is incredibly powerful when applied to their high-ticket tours that can cost thousands of dollars.
Travel Insurance: 10% or More Insurance is a consistently high-paying vertical. Top programs like SafetyWing and World Nomads both offer a standard 10% commission. SafetyWing takes this a step further with a recurring model, meaning you continue to earn 10% every time your referred customer renews their policy.
Gear & Apparel: 3% - 8% For physical products, rates depend heavily on the retailer. Amazon Associates is the baseline, offering 3-4% for most travel categories. However, partnering with specialty retailers is far more lucrative. A brand like REI, for example, offers a 5-8% commission on high-quality (and often high-priced) outdoor gear.
Pro-Tip: Don't be blinded by the highest percentage. A 6% commission on a $3,000 G Adventures tour is $180. An 8% commission on a $50 city walking tour is $4. Always consider the average order value of the products you are promoting when evaluating affiliate commission rates.

The Metrics That Matter More Than the Rate Itself
An experienced affiliate marketer knows the commission rate is just a starting point. To truly understand a program's profitability, you need to analyze the metrics that measure real-world performance.
Earnings Per Click (EPC): Your True North This is arguably the single most important metric. It’s calculated by dividing your total commission earnings by the total number of clicks you sent. If you sent 100 clicks and earned $50, your EPC is $0.50. This number tells you the average value of every single click. A program with a lower commission but a higher EPC is often the more profitable partner for your specific audience.
Conversion Rate (CR): The Sign of a Healthy Partner This is the percentage of users who take the desired action after clicking your link. A high conversion rate is a sign of a trusted brand with a well-optimized checkout process. A program with a 10% commission that converts at 1% is less profitable than a program with a 5% commission that converts at 5%.
Cookie Duration: The Travel Creator's Safety Net This is critical in the travel space. A longer cookie duration (30, 60, or 90 days) gives your audience the time they need to research a high-consideration purchase while ensuring you still get credit. A short cookie window is a major red flag and a sign that the program may not be structured in your favor.
Pro-Tip: Dive into your affiliate dashboards. Most networks like CJ Affiliate and Travelpayouts provide detailed reports on your EPC and conversion rates for each program. Use this data to identify your true top performers—the results will often surprise you.

The Travel Creator's Toolkit
Feeling overwhelmed by the data? You don't have to be. To help you organize your strategy and implement everything you've learned, we've created the ultimate resource bundle. It includes checklists, templates, and tools designed to accelerate your journey from beginner to pro.
Download Your Free Bundle: The Travel Creator's Toolkit
The High-Margin Alternative: Referral & Revenue Share Models
While traditional commission models are powerful, the most forward-thinking creators are diversifying into referral and revenue-sharing programs. Instead of a one-time payment for a single sale, these models allow you to build long-term, passive income streams by becoming a true platform partner.
This is the philosophy behind the TrekGuider Seller Platform. We believe in empowering creators to build complex businesses. Our platform is designed for you to sell your own digital products—like itineraries and guides—but our referral program adds another powerful layer to your income strategy.
Instead of a simple CPS commission, our model functions like a sophisticated multi-tier system. When you refer other creators to become sellers on TrekGuider, you earn an ongoing share of the revenue they generate, with tiered commissions that start at 4% for referred sellers. You’re not just earning from a single transaction; you’re building a network and earning from its collective success. It's a strategic way to move beyond chasing individual sales and start building a more resilient, high-margin business.
Frequently Asked Questions (FAQ)
1. Is a higher commission rate always better? Not at all. A high commission rate can be misleading if the program has a low conversion rate, a short cookie duration, or a low average order value. Always look at your Earnings Per Click (EPC) to determine the true profitability of a program for your audience.
2. How can I find the EPC for an affiliate program? Most reputable affiliate networks (like CJ Affiliate, ShareASale, or Travelpayouts) provide EPC data. It's often listed as a network-wide average for each merchant, which gives you a good baseline. Once you start sending traffic, you can track your own personal EPC in your performance reports.
3. Can I negotiate my affiliate commission rates? Yes, absolutely. Once you become a proven partner and consistently drive a significant volume of high-quality sales, you have leverage. Many brands are willing to negotiate a higher, private commission rate for their top-performing affiliates. Always track your performance and don't be afraid to ask.

From Confusion to Command
You are no longer in the dark. The world of affiliate commission rates is no longer a confusing black box. You now have the knowledge to deconstruct any program's payment structure, the industry benchmarks to know your worth, and the key metrics to identify what truly drives profit.
This knowledge is power. It empowers you to audit your existing partnerships, confidently seek out new ones, and even negotiate better terms. By focusing on programs with fair commissions, long cookie durations, and high conversion rates, you can ensure your hard work is properly rewarded. Building a profitable travel content business requires a strategic approach, and a deep understanding of affiliate commission rates is a non-negotiable part of that strategy.
Read the full guide: The Travel Blogger's Playbook to Affiliate Marketing Mastery
Don't Miss Out! Subscribe for Exclusive Content
Subscribe


Comments 0
No comments yet
Be the first to share your experience!
Dont Miss Out! Subscribe for Exclusive Content

Ultimate USA Holidays Guide: Top Picks

FTC Affiliate Disclosure Essentials: Stay Compliant as a Travel Creator

Essential Affiliate Tools: From Tracking to Full Optimization

Avoid These 5 Affiliate Landing Page Mistakes for Better Conversions

Affiliate Keyword Research Mastery for Travel Blogs

Booking.com Affiliate Program Review: Pros, Cons, and Earnings Potential
5 Things to Never Do When Traveling Alone
TrekGuider @trekguider
Let’s be honest: society tells women two conflicting stories about traveling alone. On one hand, you have the romanticized, 'Eat, Pray, Love' fantasy of a life-changing journey of self-discovery. On the other, you have a much darker, fear-based narrative—a constant, insidious whisper of warnings about dark alleys and stranger danger. This conflict creates a paralyzing anxiety, trapping would-be adventurers between a deep desire for freedom and a legitimate concern for their well-being. The constant worry about solo travel women safety can feel so overwhelming that the dream of an independent trip starts to feel reckless or irresponsible.

But what if that choice—between being adventurous and being safe—is a false one? What if safety isn't the opposite of adventure, but the very foundation that makes true adventure possible? Confident and secure solo travel is not about eliminating risk; it’s about mastering it. It requires transforming abstract fear into a series of manageable, concrete challenges that you can systematically overcome with the right knowledge and preparation. This guide is your strategic playbook. Bridging the gap between fear and freedom, it combines official expert advice with the hard-won wisdom of experienced travelers. For the bigger picture on planning your first independent journey, explore . This article, however, is your deep dive into the specific art of navigating the world as a strong, savvy, and secure solo female traveler.
Your Pre-Flight Mission: Master Your Destination Before You Go
Incredible journeys are born from careful preparation. The most impactful steps you take to ensure your safety happen long before you ever pack your bag. This proactive phase is the single greatest antidote to travel anxiety, systematically dismantling worries by replacing them with a robust, well-researched plan.
Step 1: Research is Your First and Best Line of Defense
Knowledge is power, and in the context of solo travel, it is your primary shield. A multi-pronged research strategy empowers you to make informed decisions, transforming the unknown into the familiar.
Official Advisories: Your first, non-negotiable stop is the U.S. Department of State's travel advisories. Understand their four-level system (Level 1: Exercise Normal Precautions, Level 2: Exercise Increased Caution, Level 3: Reconsider Travel, Level 4: Do Not Travel). This provides the official, high-level safety assessment for any country you plan to visit.
Cultural Norms: Go beyond government warnings and dig into local customs. Researching appropriate dress codes and social etiquette is not just a sign of respect; it's a key safety strategy. Blending in helps you avoid unwanted attention and navigate social interactions more smoothly.
Location-Specific Vetting: Don't stop at the country level. True safety planning is granular. You must research specific cities and, even more importantly, individual neighborhoods. A city can be generally safe, but have pockets of high crime.
Pro-Tip: Adopt this three-tier research process for total clarity.
Macro-Level (The Official View): Start with the U.S. State Department for the non-negotiable baseline.
Meso-Level (The Community View): Move to community sources like the Solo Female Travelers Club forums or trusted travel blogs for recent, on-the-ground experiences.
Micro-Level (The Street View): Finally, get hyper-local. Use Google Maps Street View to virtually "walk" around a potential hotel. Check local news sites for recent incidents and browse local subreddits for candid discussions about neighborhood safety.

Step 2: Choosing Your Safe Haven: A Masterclass in Vetting Accommodations
Your accommodation is more than just a place to sleep; it’s your secure base of operations. Treat its selection with the seriousness it deserves. While it can be tempting to book the cheapest option, a slight increase in your budget can yield a massive return in safety and peace of mind. Prioritize properties with 24-hour reception, a critical feature for late-night arrivals or if you find yourself in an emergency and need immediate assistance.
When analyzing reviews, learn to read between the lines. Use the search function to look for keywords like "solo female," "safe at night," "helpful staff," and "secure lockers." These comments provide invaluable insights from travelers who share your priorities.
Finally, protect your privacy during the check-in process. When registering, use only your first initial and last name. Avoid titles like "Ms." or "Mrs." that advertise your gender and marital status. It's a small, simple step that prevents staff or other guests from making assumptions about you being alone.
Step 3: Your At-Home Support Network: The Lifeline You Set Up in Advance
Traveling solo never means being completely isolated. A pre-planned, strong communication strategy is a crucial safety net that provides peace of mind for both you and your loved ones back home.
The Itinerary Share: Before you leave, share a comprehensive copy of your itinerary with a trusted friend or family member. This should include flight numbers, hotel names, addresses, and phone numbers, and a general outline of your plans.
The Power of Live Location: Leverage modern technology for an added layer of security. Apps like Apple's "Find My" or the location-sharing feature in WhatsApp allow you to share your real-time GPS location with a trusted contact for the duration of your trip.
Official Registration: Enroll in the U.S. Department of State's free Smart Traveler Enrollment Program (STEP). This service allows the local U.S. embassy to send you security alerts and helps them locate you in an emergency. It's the official, government-backed component of your support network.
Street Smarts on the Ground
Once your trip begins, safety becomes an active practice. It's about conscious behavior, unwavering situational awareness, and projecting a quiet confidence that makes you a less appealing target for opportunistic individuals.
The Golden Rules of Solo Travel Women Safety: 5 Things to Never Do
This is your non-negotiable list of on-the-ground rules, learned from the collective wisdom of thousands of experienced solo female travelers.
NEVER Advertise You're Alone: Master the art of the "white lie." If a stranger's questions make you uncomfortable, mentioning a husband who is "meeting you shortly" or a friend who is "waiting at the hotel" is a highly effective way to shut down unwanted advances. It’s not about shame; it’s about smart information management.
NEVER Bury Your Head in Your Phone: Project confidence, even if you don't feel it. Walk with your head up, shoulders back, and make brief, deliberate eye contact. If you need to check a map, step into a shop or cafe rather than stopping in the middle of a busy sidewalk, which marks you as a lost and distracted tourist.
NEVER Let Politeness Override Your Instincts: This is the most critical rule. Women are often socialized to be polite, but your safety is far more important than a stranger's feelings. If someone or something feels wrong, it is wrong. Trust that gut feeling. Use a firm voice, direct language ("Leave me alone"), and remove yourself from the situation immediately. Being safe is more important than being polite.
NEVER Be Out of Touch: Your communication plan isn't a one-time setup; it's a daily practice. A quick "Goodnight" text or email to your at-home contact maintains that vital link and ensures someone knows you're safe at the end of each day.
NEVER Do Abroad What You Wouldn't Do at Home: This is a simple but powerful gut-check. If you wouldn't walk down a dark, unfamiliar alley alone at 3 AM in your own city, don't do it in Rome or Bangkok. Your common sense is one of your most valuable travel companions.
Mastering Movement: Transportation Safety for the Solo Traveler
How you get from point A to point B is a frequent point of vulnerability. Understanding the hierarchy of safe options is key.
The Gold Standard (App-Based Ride-Shares): Services like Uber and Lyft offer unparalleled safety features. The digital record of the ride, driver identification, PIN verification, and real-time trip sharing create a powerful digital paper trail that deters bad behavior.
Official Taxis: If using a taxi, ensure it is a licensed, reputable one. Look for official markings and a visible meter. Be especially wary of unlicensed "fake taxis," a common scam at airports.
Public Transit: While often practical, public transport requires heightened awareness. Avoid completely empty train cars, which increase isolation, as well as overly crowded ones, which are ideal for pickpockets.
The Hard No: There is no ambiguity here. Do not hitchhike. Ever.
Socializing and Nightlife: How to Stay Safe While Having Fun
Experiencing local culture often includes nightlife, but it demands extra vigilance. One of the biggest concerns is drink spiking. Follow these steps without fail: never accept a drink from a stranger, always watch your drink being made, and physically cover the top of your glass with your hand when you're not sipping it.
Above all, continue to trust your gut. If you get a strange vibe from a new acquaintance, that's all the reason you need to politely excuse yourself and leave. If you ever start to feel strange or unwell in a way that seems inconsistent with your alcohol consumption, immediately inform a trusted person (like a bartender), call for local emergency help, and, if abroad, contact the nearest U.S. embassy.
A Nuanced Guide to Solo Travel Women Safety in the USA
One of the biggest mistakes in travel planning is treating the United States as a single, homogenous entity. Safety in the USA varies dramatically by region, state, city, and even by neighborhood. As one traveler wisely noted, "Do research on specific neighborhoods/towns you want to visit rather than the country as a whole."
The USA is Not a Monolith: A Framework for Regional Risk Assessment
Understanding the context of your environment is critical. The risks in a major city are different from those in a remote national park.
Urban vs. Rural vs. Wilderness: Major cities like New York or Chicago present higher risks of theft and scams, but offer the "safety in numbers" of bustling streets. Rural or wilderness areas, like national parks, involve risks of isolation, wildlife encounters, and the need for self-sufficiency.
State-by-State Variation: Safety metrics can vary wildly. States like Vermont and Maine consistently rank as among the safest, while certain neighborhoods within large cities require a much higher degree of caution, especially after dark.
Pro-Tip: Use this four-step USA Location Vetting Checklist for any domestic trip. 1) Check City-Level Crime Statistics: Look up official data on city police department websites or the FBI's crime data explorer. 2) Use Neighborhood-Specific Tools: Websites like NeighborhoodScout offer detailed local data. Also, use the local knowledge on forums like Reddit (e.g., asking about a specific block on r/AskNYC). 3) Read Local News: A quick Google News search for the neighborhood can reveal any recent patterns of crime. 4) Analyze Accommodation Reviews: Look for reviews that specifically mention feeling safe walking in the immediate area at night.
Practical Scenarios: City Streets, National Parks, and Road Trips
Major Cities (e.g., New York, San Francisco): Understand the rhythm of the city. Subways are generally safe during the day but require more caution late at night. Be aware of common urban scams, like someone trying to "help" you with a broken ATM.
National Parks: The primary risks here are environmental. Always check the weather forecast, carry more water than you think you'll need, be aware of local wildlife, and inform a park ranger or friend of your hiking plans and expected return time.
The Great American Road Trip: Secure your vehicle. Never leave valuables in plain sight, especially at trailheads or in busy city centers. Be cautious at remote, unlit rest stops at night; well-lit, busy truck stops are often a safer choice.

Your Emergency Action Plan & Toolkit
Planning for the worst isn't about fear; it's about building resilience. Knowing exactly what to do in a crisis reduces panic and leads to better outcomes.
Your Step-by-Step Emergency Response Plan
If you are in immediate physical danger, follow these steps in order:
Attract Attention: Get loud. Yell, scream, blow a whistle, or use a personal safety alarm. Creating a disturbance is your best defense.
Contact Local Authorities: In the United States, the emergency number is 911. In Europe, it's 112, and in the UK, it's 999. Save the correct number in your phone.
Contact the U.S. Embassy: If you are abroad, the nearest U.S. embassy or consulate is a critical resource for American citizens who are victims of crime.
Seek Medical Attention: In the event of an assault, seeking immediate medical care is crucial. This is vital for your health and for the collection of potential evidence.
Contact Support Networks: Organizations like the Rape, Abuse, and Incest National Network (RAINN) have 24/7 hotlines and offer confidential support, no matter where you are.

At-a-Glance Emergency Resource Directory
The World is Ready For You. Are You?
Safe solo travel women safety is not about living in a bubble of fear. It is the exact opposite. It's about having the confidence and competence to step out of your comfort zone, armed with the knowledge that you are prepared, aware, and fully capable of handling whatever comes your way. Through diligent research, unwavering trust in your instincts, and a commitment to smart, conscious decision-making, you transform yourself from a potential target into a savvy, empowered world traveler. The world is vast and beautiful, and it is waiting for you to explore it—safely, and on your own terms.
We encourage you to build this community of empowered travelers. Share your own hard-won safety tips in the comments below, and please, share this article with any woman in your life who dreams of a solo adventure.
Read the full guide: Anxious to Adventurous: The Ultimate Guide to Solo Travel Confidence
Don't Miss Out! Subscribe for Exclusive Content
SubscribeComments 0
No comments yet
Be the first to share your experience!
Dont Miss Out! Subscribe for Exclusive Content

How to Avoid Travel Scams: A Global Guide

Is Public WiFi Safe? How to Protect Your Data Abroad

A Woman's Guide to Safe Travel: 10 Critical Tips

7 Hotel Safety & Security Tips for Peace of Mind

9 Beach Safety Tips That Could Save Your Life

How to Stay Safe While Hiking: A Hiker's Safety Guide
The Ultimate Solo Travel Packing List: A Modular Checklist
TrekGuider @trekguider
Staring at an empty suitcase can be overwhelming. This is not another generic article; this is your definitive, actionable solo travel packing list. It’s a methodical system designed to transform packing from a chore into an act of empowerment. We’ve built this checklist on a "Core + Modules" framework: a non-negotiable foundation of essentials, plus optional modules you can add for specific types of travel.
This tactical checklist is your "what." Before you dive into the specific items, we highly recommend reading our guide to to understand the minimalist systems and philosophy that make this list so powerful. Understanding the "why" will make packing the "what" intuitive and stress-free.
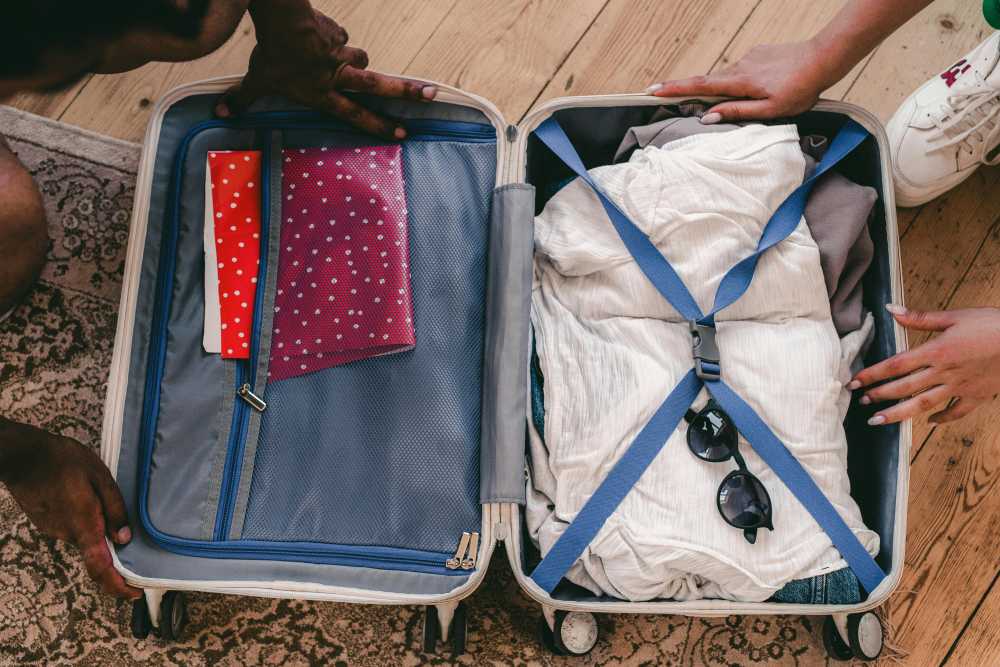
Your Core Essentials
Every trip, regardless of destination or duration, starts here. These are the non-negotiable items that form the base of any smart solo travel plan. Do not leave home without them.
Your Access to Everything
Your ability to move, transact, and prove your identity matters most. Build redundancy into your document strategy.
Passport/Visa: Check that your passport has at least six months of validity from your planned return date.
Digital & Physical Copies: Store a physical photocopy of your passport and driver's license in a separate bag from the originals. Keep high-quality photos of them in a secure cloud service (Google Drive, Dropbox) and in your email.
Travel Insurance Details: Carry a printed copy of your policy and save a PDF to your phone for offline access.
Multiple Bank Cards: Pack at least two different credit cards and one debit card. Store them in separate locations (e.g., one in your wallet, one in your daypack).
Emergency Cash: Hide $100-$200 USD deep within your main bag as a final safety net.
Bank Travel Notifications: Log into your banking apps and set a travel notice for your specific destinations and dates. This five-minute task prevents your accounts from being frozen for suspected fraud.
Your On-the-Go Wellness Kit
Stay healthy and comfortable on the road. The goal is a compact, leak-proof, and comprehensive kit.
Prescription Medications: Pack enough for your entire trip in their original, labeled containers. Bring a copy of the prescription itself.
Mini First-Aid Kit:
Pain relievers (Ibuprofen/Acetaminophen)
Assorted adhesive bandages
Antiseptic wipes
Blister treatment (e.g., Compeed)
Anti-diarrhea medication (e.g., Imodium)
Solid Toiletries: The ultimate packing hack. Eliminates liquid restrictions, prevents leaks, and lasts longer.
Solid shampoo bar
Solid conditioner bar
Solid soap bar
The Basics:
Toothbrush
Solid toothpaste tablets
Deodorant
Your Digital Lifeline
Your smartphone is your navigator, translator, and connection to the world. Keeping it powered is mission-critical.
Smartphone: Your all-in-one command center. Download offline maps for your destination.
Portable Power Bank: A non-negotiable safety item. Choose a 10,000mAh+ model from a reliable brand like Anker to guarantee 2-3 full phone charges. Keep it charged.
Universal Power Adapter: Invest in one high-quality universal adapter with multiple USB ports. This allows you to charge all your devices from a single outlet.
Noise-Canceling Headphones: Essential for focus and peace on loud flights, trains, or in shared hostel rooms.

Essential Solo Travel Safety Gear
This module proactively addresses the "what-if" scenarios, allowing you to explore with confidence and sleep soundly. The gear here is your first line of defense, but true confidence comes from preparation. For a complete guide to situational awareness and navigating new environments securely, our comprehensive article, Anxious to Adventurous: Solo Travel Tips for Confidence, is required reading.
For Your Accommodation
Portable Door Lock (e.g., Addalock): A small, lightweight device that braces your door from the inside, making it impossible to open even with a key.
Door Stop Alarm: A wedge that slides under your door. If opened, it physically blocks the door while emitting a piercingly loud alarm.
For When You're Out & About
Anti-Theft Daypack (e.g., Pacsafe, Travelon): Choose a crossbody bag or backpack with slash-proof straps, lockable zippers, and RFID-blocking pockets.
Personal Safety Alarm: A keychain device that emits an ear-splitting siren and flashing strobe light to attract attention and disorient an attacker.
RFID-Blocking Wallet: Protects your passport and credit cards from electronic "skimming."
The 5-4-3-2-1 Formula
Pack less and wear more with a strategic, versatile wardrobe built on mix-and-match essentials. Choose a neutral color palette (black, gray, navy) for core items.
The 5-4-3-2-1 Formula (1-Week Framework)
5 Tops: Focus on wrinkle-resistant, odor-resistant fabrics. At least one should be merino wool—the ultimate travel fabric for temperature regulation and multi-day wear.
4 Bottoms: A typical mix includes one pair of comfortable travel pants, one pair of jeans or chinos, and one skirt or pair of shorts.
3 Accessories: A lightweight scarf or sarong is incredibly versatile (fashion, beach cover-up, towel, head covering).
2 Pairs of Shoes:
Pair 1: Supremely comfortable, broken-in walking shoes.
Pair 2: A versatile, slightly dressier option (flats, loafers, clean leather sneakers).
1 Jacket: A waterproof, windproof outer shell. Layer with a fleece or sweater for warmth as needed.
Climate Sub-Modules (Choose One)
Cold Climate Add-ons: One set of thermal base layers (top and bottom), a warm hat, gloves, and wool socks.
Tropical Climate Add-ons: A swimsuit, a quick-dry microfiber towel, a wide-brimmed sun hat, and sunglasses.
Digital Nomad's Checklist
This module is for anyone working on the road. It focuses on creating an efficient, ergonomic, and connected remote workstation.

Lightweight Laptop: An ultrabook (e.g., MacBook Air) offers the best balance of power and portability.
Portable Laptop Stand (e.g., Roost, Nexstand): The single best way to prevent neck and back pain.
Ergonomic Peripherals: A slim, portable keyboard (e.g., Logitech K380) and a portable mouse (e.g., Logitech MX Anywhere).
High-Quality Headphones with Mic: Essential for calls and focus in noisy environments.
eSIM: Use an app like Airalo to purchase and install a digital SIM card before you leave. Get connected the moment you land.
High-Capacity "PD" Power Bank: Ensure your power bank is "Power Delivery" rated and has enough capacity to charge your laptop, not just your phone.
What NOT to Pack
Knowing what to leave behind is as important as knowing what to bring.

Expensive or Sentimental Jewelry: Don't bring anything you would be devastated to lose.
Full-Sized Towel: Most accommodations provide them. If needed, a quick-dry travel towel is a superior option.
Multiple "Good" Outfits: Stick to versatile pieces that can be dressed up or down.
Physical Books: An e-reader provides an entire library at a fraction of the weight.
"Just in Case" Items: Unless you're traveling to a very remote location, you can buy most basic items at your destination.
Your Questions Answered
What should a solo female traveler add? Many add a versatile sarong (for modesty at religious sites), a silicone doorstop for extra security, and some opt for a fake wedding ring to deter unwanted attention.
How do I pack for a long-term trip in a carry-on? Commit to doing laundry. Pack one week's worth of clothing using the capsule method and plan to do laundry every 7-10 days.
What are the best shoes for solo travel? The ones you can walk in comfortably for 8+ hours. Never bring new, unbroken-in shoes on a trip.
By starting with the Core Essentials and adding modules tailored to your journey, you have now built the perfect solo travel packing list. This system eliminates guesswork, ensures you are prepared for your adventure, and empowers you to travel with the confidence of a pro.
Read the full guide: Anxious to Adventurous: The Ultimate Guide to Solo Travel Confidence
Don't Miss Out! Subscribe for Exclusive Content
SubscribeComments 0
No comments yet
Be the first to share your experience!
Dont Miss Out! Subscribe for Exclusive Content
Ultimate USA Holidays Guide: Top Picks
FTC Affiliate Disclosure Essentials: Stay Compliant as a Travel Creator
Essential Affiliate Tools: From Tracking to Full Optimization
Booking.com Affiliate Program Review: Pros, Cons, and Earnings Potential

Decoding Affiliate Commission Rates: Benchmarks for Travel Creators

Amazon Associates for Travel: Strategies to Maximize Commissions
Is Public WiFi Safe? How to Protect Your Data Abroad
TrekGuider @trekguider
You’ve just touched down in a new country, a city buzzing with unfamiliar energy. You’re desperate to check the map to your hotel, message family that you’ve arrived safely, or book that last-minute tour. Then you see it, a digital oasis in the chaos of travel: "Free_Airport_WiFi." It feels like a lifesaver. But the moment you connect to that open network, you might as well be shouting your passwords, credit card numbers, and private messages in the middle of a crowded town square.
This isn’t a hypothetical threat; it’s a silent, digital mugging that happens every single day in airports and cafes around the globe. Every unsecured connection is a wide-open door for digital thieves who are masters at exploiting the trust of travelers. They can intercept your data, steal your identity, and drain your bank account before you’ve even claimed your luggage. This menace can cast a shadow of anxiety over your entire trip, turning a tool of convenience into a source of vulnerability.
But it doesn’t have to be this way. This guide is your solution—a simple, non-technical playbook for protecting your digital life abroad. We will demystify the dangers and provide a clear, step-by-step process for using any public network with total confidence. Mastering public wifi safety is a critical skill for the modern traveler and a key part of the masterclass in preparedness we offer in our definitive guide, The Ultimate Guide to Travel Safety: A 2026 Playbook.

The Hidden Danger: What Really Happens on Public WiFi?
The fundamental problem with most public WiFi networks—in cafes, hotels, airports, and libraries—is that they are unencrypted. Think of it like sending a postcard through the mail. Anyone who handles it along the way can read the message written on the back. When you log into your email or check your bank account on an unencrypted network, your data is sent "in the clear," making it trivially easy for a hacker on the same network to intercept and read it.
These hackers don’t need sophisticated government-level equipment. They use readily available software to "sniff" the digital airwaves, plucking your sensitive information out of the stream of data flowing around them. Their primary method for doing this is a shockingly simple and effective strategy known as a "Man-in-the-Middle" attack.
Understanding the "Man-in-the-Middle" Attack
A "Man-in-the-Middle" (MitM) attack is exactly what it sounds like. A hacker secretly positions their computer between your device (your phone or laptop) and the legitimate internet connection point (the WiFi router). You believe you’re communicating directly and securely with the websites you’re visiting, but in reality, the hacker is intercepting, reading, and potentially even altering every piece of information you send and receive.
The most common way they achieve this is through a tactic called a "malicious hotspot" or "evil twin" attack:
The Setup: A hacker sits in a busy airport or coffee shop and sets up a new WiFi network on their laptop. They give it a believable, trustworthy-sounding name, like "Airport_Guest_WiFi" or "Starbucks_Free," often mimicking the name of the legitimate network.
The Connection: Your phone, set to connect to known networks automatically, might connect to this stronger, malicious signal without you even noticing. Or, you might manually select it, assuming it’s the official network.
The Interception: The moment you connect, all of your internet traffic is routed directly through the hacker's computer. They become an invisible eavesdropper on your digital life, capturing your login credentials when you check Facebook, your credit card details when you buy something online, and the contents of your private messages.
To you, the internet works perfectly. You can browse websites and use your apps as usual. You have no idea that a digital thief is silently recording your every move.

Your Digital Bodyguard: The Ultimate Guide to Using a VPN
If an unencrypted network is like sending a postcard, then using a Virtual Private Network (VPN) is like sealing that same message inside a locked, armored briefcase before sending it. A VPN is the single most powerful and essential tool for ensuring your public wifi safety. In simple terms, a VPN is an app for your phone or computer that creates a secure, encrypted tunnel for all your internet traffic, making your data completely unreadable to anyone who tries to intercept it.
When you connect to a VPN, even if you’re on a hacker’s malicious hotspot, all they can see is a stream of indecipherable gibberish. Your passwords, bank details, and messages are completely shielded from prying eyes.
How to Set Up a VPN on Your Smartphone in 4 Simple Steps
You don’t need to be a tech expert to use a VPN. Modern VPN services are designed to be incredibly user-friendly. Here’s a simple, step-by-step guide for any non-technical traveler.
Step 1: Choose and Subscribe to a VPN Service
Before you travel, you need to sign up for a reputable, subscription-based VPN provider. Do some research by reading reviews from trusted tech websites like Wired or The Verge. Crucially, avoid "free" VPN services. These companies have to make money somehow, and they often do it by logging your online activity, selling your data to advertisers, or, in the worst cases, embedding malware in their own software. A paid subscription to a well-known provider is a small investment for ironclad security.
Step 2: Download and Install the VPN App
Once you’ve created an account on the VPN provider’s website, the next step is to get the app on your phone.
On an iPhone: Go to the App Store, search for the name of your chosen VPN (e.g., NordVPN, ExpressVPN, Surfshark), and tap "Get" to download and install it.
On an Android phone: Go to the Google Play Store, search for the name of your VPN provider, and tap "Install."
Step 3: Log In and Grant Permissions
Open the newly installed app. You’ll be prompted to log in using the email and password you created when you subscribed. The very first time you try to connect, the app will ask for permission to add a VPN configuration to your phone's settings. A standard system pop-up from iOS or Android will appear. You must tap "Allow" or "OK." This is a necessary and safe step that allows the app to manage your phone's internet connection.
Step 4: Connect to a VPN Server
This is the easiest part. Most VPN apps are designed for one-tap simplicity.
The app’s main screen will almost always feature a large "Quick Connect" or "Connect" button. Tapping this will automatically connect you to the fastest or nearest server available. For general security on public WiFi, this is all you need to do.
If you want to appear as if you are browsing from a specific country (useful for accessing home-country content), you can tap on the "Locations" or "Servers" list within the app and select a country to connect through.
Once you tap connect, the app will confirm your "Connected" status, and a small VPN icon will appear in your phone’s status bar at the very top of the screen. That’s it. Your internet connection is now fully encrypted and secure.

Pro-Tip: For travelers who work on the road, like digital nomads or content creators, a VPN isn't just a recommendation—it's an essential business tool. Consistent use is key to protecting client data and financial information. This level of professional-grade security is at the heart of the resources we provide in The Travel Creator's Toolkit.
Are You a Travel Creator or Digital Nomad?
Protecting your data is just the beginning. To thrive on the road, you need the right tools for content creation, productivity, and monetization. Our free toolkit has you covered with expert-vetted recommendations for the apps, gear, and platforms that power a successful location-independent career.
Beyond the VPN: 3 Essential Habits for Ironclad Public WiFi Safety
While a VPN is your star player, a few additional habits will complete your digital defense, creating a multi-layered security strategy that protects you from a wider range of threats.
1. Practice Impeccable Device and Password Hygiene
Your first line of defense is the device itself. Before you leave home, make sure your digital house is in order.
Secure Your Devices: Ensure all your devices—laptop, smartphone, tablet—are updated with the latest operating system and security patches. Lock every single device with a strong, complex passphrase or, even better, biometric protection like a fingerprint or facial recognition.
Manage Passwords Securely: Never store passwords in a plain text file on your device. Use a reputable, cloud-based password manager app to generate and store unique, complex passwords for every account.
Perform a Digital "Clean Up": Before you travel, clear your browser's history, cache, and saved passwords. When you return home, make it a habit to change the passwords for any critical accounts you accessed while you were away, especially banking and email.
2. Avoid "Juice Jacking": The Threat of Public USB Ports
Those convenient USB charging stations you see in airports, cafes, and hotel lobbies are a potential security risk. Hackers can modify these public ports in a practice known as "juice jacking," where the USB connection is used not only to charge your device but also to secretly install malware or steal data from it. The data pins on a USB cable can transmit information while the power pins are charging your device.
The solution is simple and non-negotiable: never plug your device directly into a public USB port. Instead, use your own AC power adapter and plug it into a standard electrical outlet, or carry a portable power bank to recharge your devices safely.

3. Beware of Digital Trojan Horses: Untrusted Accessories
This same principle applies to any untrusted digital accessory. If you find a USB drive left behind in a hotel business center or a cafe, do not plug it into your laptop out of curiosity. Criminals sometimes intentionally leave these "bait" drives in public places, loaded with malware that will auto-install the moment it's connected to a computer. Treat any found accessory as a potential threat.
Pro-Tip: Before you leave, do a digital 'pack-up.' Log out of all non-essential apps on your phone and laptop. This reduces your 'attack surface,' meaning that even if your device is compromised, the hacker has access to far less of your personal data.
Public WiFi Safety FAQs
A prepared mind anticipates questions. Here are expert answers to common concerns about staying safe online while traveling.
1. Is WiFi on a plane or in a reputable hotel safer than in a coffee shop?
Not necessarily. While a hotel network may require a password, that doesn't mean the connection itself is encrypted or secure from other guests on the same network. The rule of thumb is to treat any WiFi network you do not personally own and control as untrusted. The same risks of interception and Man-in-the-Middle attacks can apply anywhere, from a budget hostel to a five-star resort. Always use your VPN.
2. Are "Free VPNs" really that bad?
Yes. A reliable VPN service requires significant infrastructure—servers, software development, and security maintenance—which costs money. If a "free" VPN provider isn't charging you a subscription fee, they are making money from you in other ways. Many have been caught logging user activity, selling browsing data to third parties, or even injecting extra ads into your browsing. In the worst cases, the "free VPN" itself is just a front for harvesting your data. A reputable, paid VPN service is a small investment for a massive gain in privacy and security.
3. Can't I just use my phone's cellular data plan instead?
Yes, and you should when possible. Your phone's 4G or 5G cellular data connection is significantly more secure than public WiFi. However, international data roaming charges can be astronomically expensive. Learning to use public WiFi safely is a crucial skill for budget-conscious travelers who need to stay connected without breaking the bank.

Connect with Confidence
Public WiFi is not inherently evil. It is a powerful tool that has become an indispensable part of modern travel. But like any powerful tool, it demands respect and the right safety equipment. The fear and uncertainty surrounding public wifi safety stem from a lack of knowledge, not from an insurmountable threat.
You now possess that knowledge. By understanding the simple risks and adopting the straightforward solutions—led by your essential VPN—you can transform any public hotspot from a potential liability into a trusted resource. You are now equipped to connect with confidence, anywhere in the world, freeing your mind to focus on the adventure in front of you.
This level of digital preparedness is just one part of a truly seamless travel experience. To master every aspect of your journey, from planning and packing to health and logistics, our all-encompassing Travel Guide is the only resource you'll ever need.
Don't Miss Out! Subscribe for Exclusive Content
SubscribeComments 0
No comments yet
Be the first to share your experience!
Dont Miss Out! Subscribe for Exclusive Content
How to Avoid Travel Scams: A Global Guide
A Woman's Guide to Safe Travel: 10 Critical Tips
7 Hotel Safety & Security Tips for Peace of Mind
9 Beach Safety Tips That Could Save Your Life
How to Stay Safe While Hiking: A Hiker's Safety Guide
