TrekGuider @trekguider
Decoding Affiliate Commission Rates: Benchmarks for Travel Creators

You’re a travel creator, and you’ve entered the world of affiliate marketing to turn your passion into a profession. But you’ve quickly run into a frustrating black box: the commission structure. You see a dizzying array of percentages, acronyms like CPA and EPC, and vague promises of earnings. You’re left wondering what good affiliate commission rates even look like. Are you earning your worth, or are you leaving a significant amount of money on the table?
This confusion isn't just academic; it's a direct threat to your bottom line. The reported average monthly income for affiliates in the travel niche is an impressive $13,847, a figure that proves this is a serious enterprise. But you can't build a sustainable business on guesswork. Partnering with a program offering a flashy 40% commission—only to discover it’s 40% of their tiny margin—is a rookie mistake that costs real money. This lack of clarity makes it impossible to forecast your income, negotiate better terms, or build a truly predictable business. You feel like you’re flying blind.
This guide is your decoder ring. We are pulling back the curtain to give you a comprehensive breakdown of how affiliate commissions actually work. We will deconstruct every major commission model, provide clear, data-backed industry benchmarks, and teach you how to analyze these rates like a seasoned professional. By the end of this deep dive, you will be able to spot high-value opportunities and architect a monetization strategy that truly rewards your influence. For a complete overview of the affiliate landscape, our definitive pillar page, Travel Affiliate Programs: The 2026 Ultimate Guide, is your essential command center.
The Anatomy of a Commission: Deconstructing the Core Models
Let's cut through the jargon. An affiliate commission is simply a reward for a job well done. A company—the merchant—pays you for successfully driving a specific, valuable action, which in the travel world almost always means a completed booking or sale.
But the way that reward is calculated can vary dramatically. Understanding the underlying structure of different affiliate commission rates is the first step toward becoming a high-earning creator.
1. Cost Per Sale (CPS) or Pay Per Sale (PPS): The Industry Workhorse
You'll encounter this model most often—it's the industry's workhorse for a reason. It’s simple and transparent: when a reader clicks your affiliate link and completes a purchase, you earn a percentage of the total sale value. If you recommend a $500 hotel stay and the program offers a 6% CPS commission, you earn $30. This model directly ties your earnings to the revenue you generate, making it the gold standard for most travel bookings and gear sales.
2. Cost Per Action (CPA): Rewarding a Specific Step
Recommended: The Solo Female Travel Safety Guide
Recommended: International Travel Checklist (Printable PDF)
CPA is a broader model where you’re compensated for a specific action a user takes. While that action is often a sale (making it identical to CPS), it can also be something else. For example, a travel credit card company might pay you a CPA commission for every user who completes an application, regardless of whether they are approved.
3. Cost Per Lead (CPL): Paying for High-Value Inquiries
With a CPL model, you earn a fixed fee for each qualified lead you generate. This is common in high-ticket travel sectors where the sales cycle is long. A luxury tour operator, for instance, might pay you $50 for every user who fills out a detailed inquiry form for a bespoke African safari. You get paid for delivering a potential customer; their sales team takes it from there.
4. Tiered & Multi-Tier Structures: Incentivizing Growth
This is where commission models get more sophisticated and rewarding.
Tiered Structures: Rewarding Your Growth These are designed to reward high-performing affiliates. Your commission rate increases as you drive more sales. A program might offer a base rate of 6%, which jumps to 8% after you generate $5,000 in sales in a month, and 10% after $10,000.
Multi-Tier Structures: Building a Network These allow you to earn commissions not only on your own sales but also on the sales generated by other affiliates you recruit into the program. This effectively turns you into a partner who helps grow the program itself, creating a secondary, more passive income stream.
5. Cost Per Click (CPC): The Rare Exception
In this model, you are paid a small fee for every click your affiliate link receives, regardless of a sale. Due to its high vulnerability to fraud, the CPC model is now extremely rare in modern affiliate marketing and almost never seen in the travel space.

Industry Benchmarks: What Good Affiliate Commission Rates Look Like
So, what should you actually expect to earn? While rates vary, the travel industry has established clear benchmarks across its major categories. Here’s your cheat sheet.
Hotels & Accommodations: 2% - 7% of Booking Value This is the bread and butter for many creators, but the details are everything. A program like Expedia Group offers up to 6% of the total booking value with a 7-day cookie. In contrast, Booking.com advertises a much higher "25-40%", but this is a percentage of their commission, not the customer's total payment. This opaque structure often results in a much lower effective rate, closer to 2-4% of the final booking value.
Tours, Activities & Experiences: 6% - 8%+ This is a high-margin category with strong potential. Market leaders like Viator and GetYourGuide set the standard with base commissions of 7-8%. Adventure-focused operators like G Adventures offer 6%, which is incredibly powerful when applied to their high-ticket tours that can cost thousands of dollars.
Travel Insurance: 10% or More Insurance is a consistently high-paying vertical. Top programs like SafetyWing and World Nomads both offer a standard 10% commission. SafetyWing takes this a step further with a recurring model, meaning you continue to earn 10% every time your referred customer renews their policy.
Gear & Apparel: 3% - 8% For physical products, rates depend heavily on the retailer. Amazon Associates is the baseline, offering 3-4% for most travel categories. However, partnering with specialty retailers is far more lucrative. A brand like REI, for example, offers a 5-8% commission on high-quality (and often high-priced) outdoor gear.
Pro-Tip: Don't be blinded by the highest percentage. A 6% commission on a $3,000 G Adventures tour is $180. An 8% commission on a $50 city walking tour is $4. Always consider the average order value of the products you are promoting when evaluating affiliate commission rates.

The Metrics That Matter More Than the Rate Itself
An experienced affiliate marketer knows the commission rate is just a starting point. To truly understand a program's profitability, you need to analyze the metrics that measure real-world performance.
Earnings Per Click (EPC): Your True North This is arguably the single most important metric. It’s calculated by dividing your total commission earnings by the total number of clicks you sent. If you sent 100 clicks and earned $50, your EPC is $0.50. This number tells you the average value of every single click. A program with a lower commission but a higher EPC is often the more profitable partner for your specific audience.
Conversion Rate (CR): The Sign of a Healthy Partner This is the percentage of users who take the desired action after clicking your link. A high conversion rate is a sign of a trusted brand with a well-optimized checkout process. A program with a 10% commission that converts at 1% is less profitable than a program with a 5% commission that converts at 5%.
Cookie Duration: The Travel Creator's Safety Net This is critical in the travel space. A longer cookie duration (30, 60, or 90 days) gives your audience the time they need to research a high-consideration purchase while ensuring you still get credit. A short cookie window is a major red flag and a sign that the program may not be structured in your favor.
Pro-Tip: Dive into your affiliate dashboards. Most networks like CJ Affiliate and Travelpayouts provide detailed reports on your EPC and conversion rates for each program. Use this data to identify your true top performers—the results will often surprise you.

The Travel Creator's Toolkit
Feeling overwhelmed by the data? You don't have to be. To help you organize your strategy and implement everything you've learned, we've created the ultimate resource bundle. It includes checklists, templates, and tools designed to accelerate your journey from beginner to pro.
Download Your Free Bundle: The Travel Creator's Toolkit
The High-Margin Alternative: Referral & Revenue Share Models
While traditional commission models are powerful, the most forward-thinking creators are diversifying into referral and revenue-sharing programs. Instead of a one-time payment for a single sale, these models allow you to build long-term, passive income streams by becoming a true platform partner.
This is the philosophy behind the TrekGuider Seller Platform. We believe in empowering creators to build complex businesses. Our platform is designed for you to sell your own digital products—like itineraries and guides—but our referral program adds another powerful layer to your income strategy.
Instead of a simple CPS commission, our model functions like a sophisticated multi-tier system. When you refer other creators to become sellers on TrekGuider, you earn an ongoing share of the revenue they generate, with tiered commissions that start at 4% for referred sellers. You’re not just earning from a single transaction; you’re building a network and earning from its collective success. It's a strategic way to move beyond chasing individual sales and start building a more resilient, high-margin business.
Frequently Asked Questions (FAQ)
1. Is a higher commission rate always better? Not at all. A high commission rate can be misleading if the program has a low conversion rate, a short cookie duration, or a low average order value. Always look at your Earnings Per Click (EPC) to determine the true profitability of a program for your audience.
2. How can I find the EPC for an affiliate program? Most reputable affiliate networks (like CJ Affiliate, ShareASale, or Travelpayouts) provide EPC data. It's often listed as a network-wide average for each merchant, which gives you a good baseline. Once you start sending traffic, you can track your own personal EPC in your performance reports.
3. Can I negotiate my affiliate commission rates? Yes, absolutely. Once you become a proven partner and consistently drive a significant volume of high-quality sales, you have leverage. Many brands are willing to negotiate a higher, private commission rate for their top-performing affiliates. Always track your performance and don't be afraid to ask.

From Confusion to Command
You are no longer in the dark. The world of affiliate commission rates is no longer a confusing black box. You now have the knowledge to deconstruct any program's payment structure, the industry benchmarks to know your worth, and the key metrics to identify what truly drives profit.
This knowledge is power. It empowers you to audit your existing partnerships, confidently seek out new ones, and even negotiate better terms. By focusing on programs with fair commissions, long cookie durations, and high conversion rates, you can ensure your hard work is properly rewarded. Building a profitable travel content business requires a strategic approach, and a deep understanding of affiliate commission rates is a non-negotiable part of that strategy.
Read the full guide: The Travel Blogger's Playbook to Affiliate Marketing Mastery
Travel News


Comments 0
No comments yet
Be the first to share your experience!
You May Also Like

Ultimate USA Holidays Guide: Top Picks

FTC Affiliate Disclosure: Stay Compliant as a Travel Creator

Essential Affiliate Tools: From Tracking to Full Optimization

Avoid These 5 Affiliate Landing Page Mistakes for Better Conversions

Affiliate Keyword Research Mastery for Travel Blogs

Booking.com Affiliate Review: Pros, Cons & Earnings
TrekGuider @trekguider
How to Create a Digital Travel Guide People Will Buy

You’re a travel expert. Your notes are filled with hidden gems, your camera roll is a treasure trove of untold stories, and your advice could save fellow travelers hundreds of dollars and hours of stress. You know your expertise has value, but packaging it into a real, scalable income stream feels like a monumental task. Relying on the slow trickle of ad revenue or the unpredictability of affiliate sales is a frustrating grind, keeping your dream of a truly independent business just out of reach.
This uncertainty keeps you on the content treadmill, trading your valuable time for pennies. You see other creators launching their own products and achieving a level of financial freedom that feels like a distant fantasy. The path forward is a confusing fog of questions about design, content, pricing, and technology, leaving you stuck in analysis paralysis while the immense opportunity of the creator economy—a market projected to nearly double from $250 billion to almost $500 billion by 2027—passes you by.
It’s time to stop trading hours for dollars and start building assets. This is your chronological, step-by-step playbook. We will demystify the entire process and show you exactly how to create a digital travel guide that people will not only buy but will also love and recommend. This is your complete workflow for transforming your hard-won expertise into a polished, professional product that generates passive income for years to come. Think of this as a critical chapter in your business plan; for the complete blueprint on building a modern creator enterprise, be sure to read our ultimate guide to How to Make Money Online: A Creator's Guide for 2026.
Why a Digital Guide is Your Ultimate Scalable Asset
Before diving into the "how," it's critical to understand the "why." Transitioning from promoting others' products to creating and selling your own is the single most powerful step you can take toward building a profitable, independent business. While ads and affiliate links have their place, digital products offer a level of control and scalability that other models simply can't match.
The advantages are transformative:
Infinite Scalability: Digital products operate on a "create once, sell forever" model. Whether you sell 10 copies or 10,000, your workload remains the same. There is no inventory to manage and no shipping to worry about.
Exceptionally High Profit Margins: With no manufacturing or distribution costs, the profit margins are extraordinary. Once you recoup your initial time investment, nearly every sale is pure profit.
Full Ownership and Control: When you sell your own guide, you own the entire process. You control the product, the pricing, the marketing, and the customer relationship. You are no longer dependent on an affiliate partner’s commission rates or an ad network's traffic requirements.
Solidifies Your Authority: Creating and selling a high-quality product instantly positions you as an expert. It builds deep trust with your audience, as you are no longer just recommending other people's stuff—you are standing behind your own valuable creation.
The market reflects this opportunity. The e-learning sector alone, a huge component of the digital product world, is projected to surge to an incredible $848 billion by 2030. This isn't a fleeting trend; it's a fundamental shift in how creators build resilient businesses.
The Blueprint – Research and Validation
The costliest mistake a creator can make is to spend months building a product nobody asked for. Thorough research and validation aren't optional; they are the foundation upon which a profitable product is built.
Identify Audience Needs and Define a Specific Niche
Your first job isn't to be a brilliant inventor; it's to be a sharp detective, uncovering the real, recurring problems your audience is desperate to solve.
Listen to Your Audience: The best ideas are hidden in plain sight. Dive into your blog comments, email replies, and social media DMs. What destinations are people constantly asking about? What part of the travel planning process do they find most challenging or stressful? Their recurring questions are your product ideas.
Define a Hyper-Specific Niche: Avoid creating a generic guide. A broad guide to "Mexico" will get lost in a sea of competition. A highly specific product like "A First-Timer's Foodie Guide to Mexico City's Roma Norte Neighborhood" is more valuable, easier to market, and instantly positions you as a niche expert.
Conduct Keyword and Market Research to Validate Demand
Once you have an idea, you must validate it with data.
Analyze Search Volume: Use an SEO tool to check the search volume for terms related to your guide idea. High search volume for long-tail keywords like "7-day Japan itinerary for foodies" or "what to do in Lisbon with kids" is a strong data signal that a ready market exists for a guide on that topic.
Conduct Competitor Analysis: Find 3-5 comparable digital travel guides in your niche. Your goal isn’t to copy them, but to identify a gap in the market. Analyze their price points, what they include, and, most importantly, read their reviews. What are customers praising? What are they complaining about? This will show you exactly how to create a superior product.
Pro-Tip: True validation comes from the intersection of qualitative and quantitative data. A great product idea is one that your audience is asking for (qualitative) and that a significant number of people are searching for online (quantitative).

The Core – Outlining and Content Creation
With a validated idea, it’s time to build the heart of your product: the content. This is where your unique expertise, voice, and experience shine.
Develop a Logical Structure
A good guide flows intuitively and is easy to navigate. Before you write a single word, create a detailed table of contents. This will be your roadmap and ensure you don't miss any crucial information. A typical structure includes:
Introduction: A brief overview of the destination, essential facts (currency, language), and why your guide is the ultimate resource.
Logistics: The practical nuts and bolts—getting there, getting around, visa requirements, and curated recommendations on where to stay for different budgets.
Experiences: The core of your guide. This includes top attractions, detailed daily itineraries, and deep dives into your niche (e.g., food and drink recommendations, hiking trails, photo spots).
Practicalities: The crucial final details like safety tips, packing lists, a budget breakdown, and useful local phrases.
Write Compelling and Useful Content
This is where you go beyond the generic advice found on a thousand other blogs.
Gather Your Assets: Compile all of your personal notes, journal entries, and high-quality photographs from your travels to the destination. Your first-hand experience and unique visuals are your primary competitive advantage.
Be Both Inspirational and Intensely Practical: Write in an engaging, personal tone. Share anecdotes and insider tips that bring the destination to life. Go beyond simply listing facts; tell your readers why a place is special. Share the hard-won wisdom that can't be found elsewhere, like "skip the line at the Colosseum by booking this specific tour" or "the best gelato is actually found two blocks away from the main square at this tiny shop."
With your raw content compiled, the next step is to give it a professional polish that signals its immense value.

The Polish – Professional Design for Non-Designers
Your guide's content may be brilliant, but in the digital world, packaging matters. A professional, user-friendly design signals quality and dramatically improves the customer experience.
Select a User-Friendly Design Tool
You don't need to be a graphic designer to create a stunning product. For a travel blogger whose primary goal is to efficiently create a static PDF travel guide, a template-based tool like Canva is the strategically superior choice. While powerful professional software like Figma or Adobe Illustrator has a steep learning curve that can delay your launch by weeks, Canva is built specifically for this type of project. Its intuitive, drag-and-drop interface is designed to help non-designers produce high-quality visuals quickly.
Feeling inspired to build your own assets but not sure where to begin? Creating high-value products is the core of a modern creator business. To accelerate your journey, we've bundled together some of our most powerful resources. The Travel Creator's Toolkit is a free collection of checklists, templates, and guides designed to help you streamline your workflow and build your business faster.
5 Essential Mobile-First Design Principles for a User-Friendly Guide
Your guide will almost certainly be used on a mobile phone while your customer is in-destination. Designing with a mobile-first user experience (UX) is not an option; it is essential for your product to be functional and valuable.
Prioritize Legibility and High Contrast: The content must be effortlessly readable on a small screen, often in bright sunlight. Use a clean, simple font of at least 11 points so users don't need to pinch-and-zoom. Crucially, ensure a high contrast ratio between the text and background—at least 4.5:1 as recommended by Web Content Accessibility Guidelines (WCAG)—to maintain readability.
Implement Simplified Navigation: The single most important navigation element is a hyperlinked Table of Contents at the beginning of the document. This allows users to jump directly to the section they need with a single tap, which is crucial when they're trying to find information quickly on a busy street.
Design for Touch with Finger-Friendly Targets: Any included hyperlinks (e.g., a link to a restaurant's website or a Google Maps location) must have a clickable area large enough to be easily tapped with a finger—the industry standard is a minimum touch target size of 44x44 points (approximately 7-10mm).
Minimize Cognitive Load by Eliminating Clutter: Mobile users are often distracted. Their interaction with a guide is typically in short bursts or "micro-tasks". To accommodate this, use short paragraphs, bulleted lists, bolded text for key information, and generous white space. A clean, uncluttered interface helps users find what they need with minimum effort.
Optimize for Performance and Portrait Orientation: The vast majority (94%) of mobile users hold their phones vertically. Your guide must be designed with a portrait layout (e.g., A4 or US Letter size). Crucially, keep the final PDF file size as small as possible by compressing all images before inserting them into your document. A large file will download slowly on a weak cellular connection, creating a poor user experience.

The Launchpad – How to Create a Digital Travel Guide for Sale
You've created a valuable, beautifully designed resource. The final phase is to package it, price it for profit, and get it into the hands of your customers.
How to Price Your First Digital Product
Pricing is one of the most challenging decisions. The most effective strategy for a knowledge-based product is value-based pricing. Instead of focusing on your production costs, price your product based on the transformation it provides to the customer. If your guide saves a user 20 hours of stressful research and helps them discover priceless experiences they would have otherwise missed, its value is immense.
A practical process for setting your price:
Step 1: Research the Market: Identify 3-5 comparable digital travel guides in your niche to establish a realistic market range.
Step 2: Articulate the Value: Make a specific list of the tangible outcomes your guide provides (e.g., "Saves over 15 hours of planning," "Includes a pre-planned 7-day itinerary worth over $100 in planning fees").
Step 3: Set an Initial Price and Test: For a high-quality, first-time travel guide, a price point between $19 and $49 is a strong starting position. It communicates significant value without creating sticker shock for the buyer.
Choose a Sales Platform That Works for You
You need a platform to handle the sale and secure digital delivery of your product. While you can use e-commerce plugins on your own blog, the smartest strategy is to leverage a platform that puts you in front of a built-in audience of motivated buyers.
Pro-Tip: Don't just build a product; build your business inside an ecosystem. A specialized marketplace like TrekGuider is the ideal place to sell your high-quality Travel Guide. It provides a professional, ready-made storefront and connects you with a global audience of passionate travelers who are actively searching for expert resources. You can publish articles to attract new customers directly on the platform, creating a powerful marketing funnel that leads right back to your product page.
Frequently Asked Questions (FAQ)
1. How long should my digital travel guide be?
Value is not measured in page count. A concise, 50-page guide packed with unique, actionable advice is far more valuable than a rambling 200-page guide filled with generic information. Focus on comprehensively solving the specific problem your niche audience has.
2. Do I need to have visited the destination very recently?
While recent, first-hand experience is ideal, an "evergreen" guide focused on core attractions, culture, and logistics can have a long shelf life. The key is transparency. Be clear about when you last visited and focus on information that doesn't change rapidly. You can always update your guide with new editions.
3. What if I'm not a professional writer or photographer?
You don't need to be. Your audience values authenticity and expertise over perfect prose. Write in your natural, conversational voice, as if you were giving advice to a friend. For photos, a modern smartphone can capture high-quality images. The goal is to be clear, helpful, and genuine.

Your Journey from Expert to Entrepreneur Starts Now
You now have the complete, A-to-Z workflow. You've moved from the vague idea of a product to a concrete, actionable blueprint that covers research, content creation, professional design, and a smart launch strategy. The path from being a passionate travel expert to a successful digital entrepreneur is no longer a fog of confusion.
You have the definitive answer to the question of how to create a digital travel guide that provides immense value and generates a sustainable income. The only thing left to do is take the first step. Start the research, outline your expertise, and begin building the asset that will power your business and fund your adventures for years to come.
SEO Meta Data Suggestions:
SEO Meta Title (58 characters): How to Create a Digital Travel Guide People Will Actually Buy
URL Slug: how-to-create-digital-travel-guide
SEO Meta Description (154 characters): A step-by-step playbook for travel creators on how to create a digital travel guide, from research and writing to design, pricing, and selling your product.
Read the full guide: The Travel Blog Business Plan: How to Make Real Money in 2026
Travel News
Comments 0
No comments yet
Be the first to share your experience!
You May Also Like
FTC Affiliate Disclosure: Stay Compliant as a Travel Creator
Essential Affiliate Tools: From Tracking to Full Optimization
Avoid These 5 Affiliate Landing Page Mistakes for Better Conversions
Affiliate Keyword Research Mastery for Travel Blogs
Booking.com Affiliate Review: Pros, Cons & Earnings

7 Proven Affiliate Marketing Tips to Skyrocket Travel Income
TrekGuider @trekguider
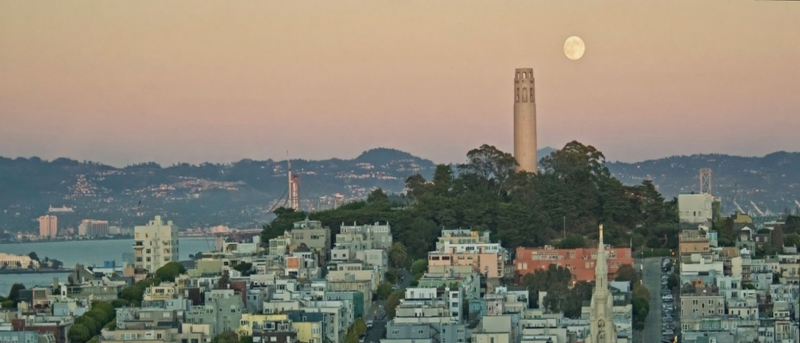
San Francisco Holidays: Bay Area Buzz

San Francisco has never been a city to do things by the book, and its holidays are no exception. Here, tradition isn’t just observed—it’s remixed. Celebrations are infused with the same spirit of innovation, cultural fusion, and defiant creativity that defines the city itself. Planning a trip around the holidays in San Francisco means setting aside expectations of a conventional getaway and preparing for something far more dynamic.
This is a city where the nation's oldest Lunar New Year parade is illuminated by both ancient lanterns and modern drone light shows; where Christmas lights twinkle through a classic Karl the Fog cameo; and where a celebration of love and equality transforms Market Street into the world’s most vibrant runway. From the historic cable cars decked out in tinsel to the neighborhood festivals that pulse with local character, the Bay Area offers a calendar of festivities that is as diverse as its population.
Whether you're drawn by the spectacle of a world-famous parade or the quiet charm of a fog-kissed holiday market, this guide will serve as your compass. We’ll navigate the iconic events, uncover the seasonal secrets, and give you the insider track on making your trip unforgettable.
For a coast-to-coast look at the country's most iconic celebrations, from New York's ball drop to New Orleans' Mardi Gras, see our Ultimate USA Holidays Guide: Top Picks.
The Main Events: SF's Unmissable Street Spectacles
In San Francisco, parades are more than just processions; they are powerful, moving expressions of the city's identity, where entire communities claim the streets to celebrate their heritage and values with the world.

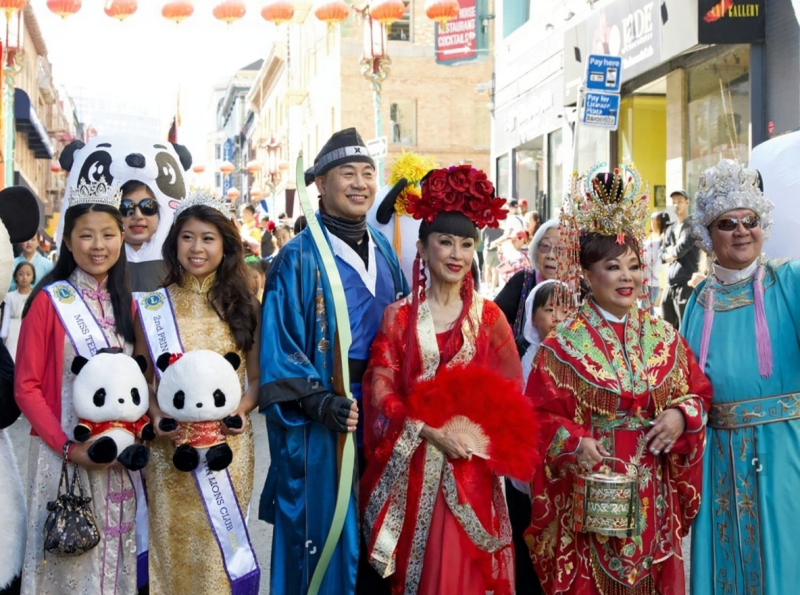
Chinese New Year: A Dazzling Display of Light and Legend
San Francisco is home to the oldest and largest Chinese New Year celebration outside of Asia, a deeply rooted tradition that has captivated the city since 1851. This is no single-day event; it's a vibrant, multi-week festival that leads to one of the few night-illuminated parades in North America. On the evening of around mid-February (dates shift each year), find a spot and prepare for a sensory feast as complex floats, acrobatic lion dancers, and martial arts troupes command the streets. The parade’s breathtaking finale is the 268-foot Golden Dragon, a shimmering marvel that requires a team of over 100 people to guide it through the city. In a perfect marriage of old and new, the spectacle now features a stunning drone light show, painting the sky with symbols of luck for the Year of the Snake.
For a complete playbook on navigating the crowds, securing the best viewing spots, and understanding the rich cultural traditions, see our detailed guide on Chinese New Year SF: Parade Essentials.
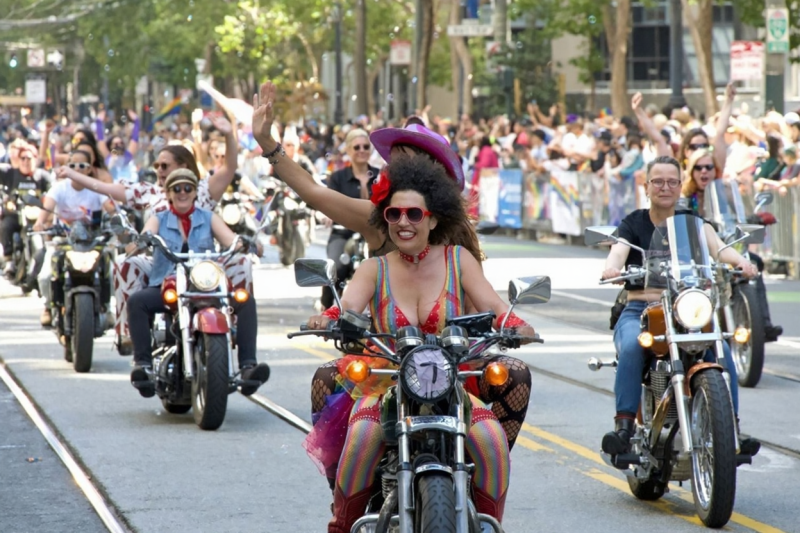
SF Pride: A Radiant March for Equality
Born from the city's legacy as a sanctuary for the LGBTQ+ community, the SF Pride Parade is one of the most iconic and joyous pride celebrations on the planet. Commemorating the first "gay-in" held in Golden Gate Park in 1970, the event has evolved from a protest into a massive, powerful platform for activism, visibility, and pure, unadulterated joy. On Sunday, the last Sunday of June, the parade kicks off at 10:30 AM, transforming Market Street into a sea of rainbow flags, elaborate floats, and ecstatic crowds as it proceeds from Beale to 8th Street. It’s a profound proof of love and resilience, and in a nod to modern realities, the event is known for strong security, including weapon detection technology, to ensure a safe space for all.
To get the inside scoop on the parade route, can't-miss parties, and tips for celebrating with intention, check out our essential guide to SF Pride: 6 Route & Party Hacks.
Seasonal Magic: Autumn & Winter in the City
As the seasons shift, San Francisco’s festive spirit comes alive in a uniquely coastal way. From the spooky energy of autumn to the crisp air of winter, the city offers unforgettable ways to celebrate.
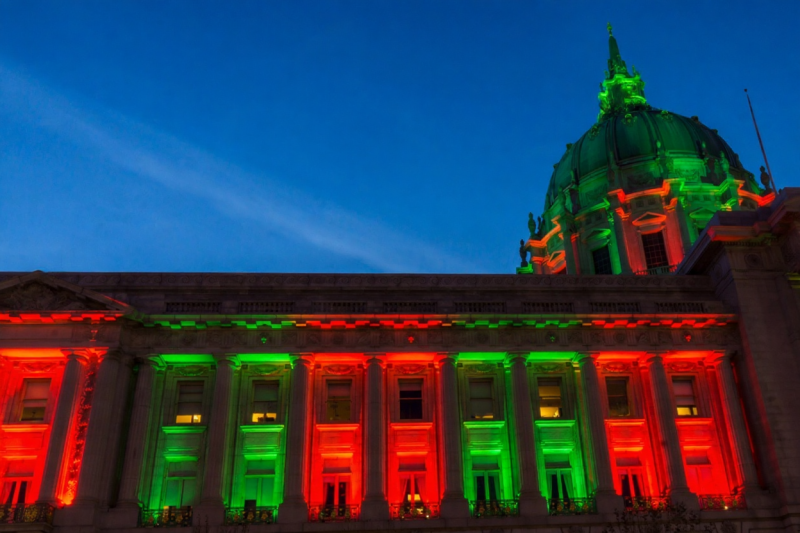
Christmas by the Bay: Lights, Ice, and Wharf Wonders
Christmas in San Francisco is a masterclass in atmosphere, blending classic holiday traditions with a distinct maritime charm. The celebration's epicenter is Union Square, where a colossal, brilliantly lit Christmas tree presides over an outdoor ice rink. Skaters glide below the towering skyscrapers as the cheerful sounds of the season fill the air. For a pro-level view that floats above the crowds, head inside the adjacent Macy's and find a window on one of the upper floors—it’s the best-kept secret for capturing that perfect, glittering photo of the square. Beyond downtown, the entire city gets in on the act, with festive lights adorning everything from the historic streetcars to the bustling piers of Fisherman's Wharf.

Discover the most dazzling light displays, coziest holiday markets, and can't-miss festive events with our complete guide to Christmas SF: Lights & Wharf Wonders.
Halloween: Creative Haunts and Neighborhood Parties
San Francisco’s approach to Halloween favors creative expression and high-energy community gatherings over traditional horror. The Castro District becomes the unofficial heart of the celebration, famous for its spirited pub crawls and an informal street party where costume design is treated as a competitive sport. For those craving a more classic haunted experience, the legendary Winchester Mystery House, with its baffling architecture and ghostly lore, is a short drive away and a Bay Area institution. Whether you're looking for a family-friendly pumpkin patch in Half Moon Bay or a costumed night out on the town, the city offers a diverse menu of spooky fun. A quick tip: rely on rideshares for safe and easy transport between events.
For a curated list of the best family-friendly activities and neighborhood haunts that skip the gore, explore our guide to Halloween SF: Haunts Without Horrors.
A Festival for Every Season
Beyond the marquee holidays, San Francisco’s calendar is a year-round whirlwind of festivals celebrating the city's rich cultural fabric.
The Ultimate SF Festival Guide
There is always something happening in San Francisco. The city’s deep Irish heritage is on full display during its St. Patrick's Day Parade, an event held since 1852 that fills Market Street with the sounds of pipes and traditional dance. A few months later, the Cinco de Mayo celebration, a tradition dating back to 1863, honors Mexican-American culture with vibrant parades and powerful speeches. But that’s just scratching the surface. The Bay Area hosts an incredible variety of events, from massive music festivals in Golden Gate Park to hyper-local street fairs celebrating everything from truffles to jazz. This constant cultural buzz is what makes the city a premier destination for travelers seeking authentic experiences.
To discover the best music, food, and cultural events happening throughout the year, don't miss our essential roundup of SF Festivals: 7 Must-See Lineups.
Japantown in Bloom: A Signature San Francisco Spring
As winter fog gives way to crisp spring air, one of the city's most beautiful and meaningful traditions unfolds. The Northern California Cherry Blossom Festival is one of the oldest and largest of its kind in the country, transforming historic Japantown into a vibrant hub of culture and color. More than just a floral display, it’s a profound tribute to the resilience and heritage of San Francisco's Japanese and Japanese-American community.
For two weekends in April, the neighborhood comes alive with traditional music, martial arts demonstrations, incredible food from street-side yatai, and the spectacular Grand Parade. It’s an immersive cultural experience that stands as a key part of the city's spring calendar. Planning a visit requires a bit of strategy, from timing the unpredictable "peak bloom" to navigating the festival crowds.
For a complete playbook on how to experience this iconic event like a local, including the best viewing spots and transportation hacks, see our detailed guide: San Francisco Cherry Blossoms: A Local's Guide to the Blooms.
Mastering Your Budget for Holidays in San Francisco
A trip to celebrate the holidays in San Francisco is an investment in incredible memories, but it’s no secret that the city can be expensive. With smart planning, however, you can experience the best of the Bay Area without your wallet taking a hit.
First, book flights and accommodations early. This is non-negotiable for major events like Pride or Chinese New Year, when prices can surge. Look at neighborhoods slightly outside the tourist core, like the Inner Sunset or Cole Valley; they offer charming local vibes and are easily accessible via the Muni transit system.

Second, embrace public transport. A multi-day Muni Passport is your golden ticket, offering unlimited rides on buses, historic streetcars, and cable cars. It’s far more economical than relying on rideshares, which are subject to steep surge pricing during peak festival times. Remember, many of the city's best holiday experiences—from the Pride Parade to the Christmas lights at the Palace of Fine Arts—are completely free to enjoy.
This is where the TrekGuider marketplace truly shines. Instead of a generic city guide, you can discover hyper-specific resources—like a "Mission District Mural Walk" or a "Guide to Sausalito's Best Views"—created by local experts who live and breathe the Bay Area. For a comprehensive foundation, our flagship Travel Guide is packed with insider tips and detailed itineraries to help you navigate the city like a pro.
Packing for SF: The Art of the Layer
Packing for San Francisco requires mastering one essential skill: layering. The city’s infamous microclimates are very real. You can start your day in the sunny Mission District and end it in the chilly, fog-drenched Richmond, with a 20-degree temperature drop in between.
A lightweight, waterproof or wind-resistant jacket is your most crucial piece of gear, regardless of the season. The fog doesn’t just cool things down; it brings a damp chill that can cut through a simple sweater. Underneath, think in modules: t-shirts, long-sleeved shirts, and a fleece or cashmere sweater. This allows you to adapt on the fly as you move through the city.

Comfortable walking shoes are absolutely mandatory. San Francisco’s hills are no joke, and you’ll be logging serious mileage. Finally, pack a reusable water bottle and a sturdy tote bag or small backpack. You’ll need it to stash the layers you shed when the sun finally breaks through the clouds.
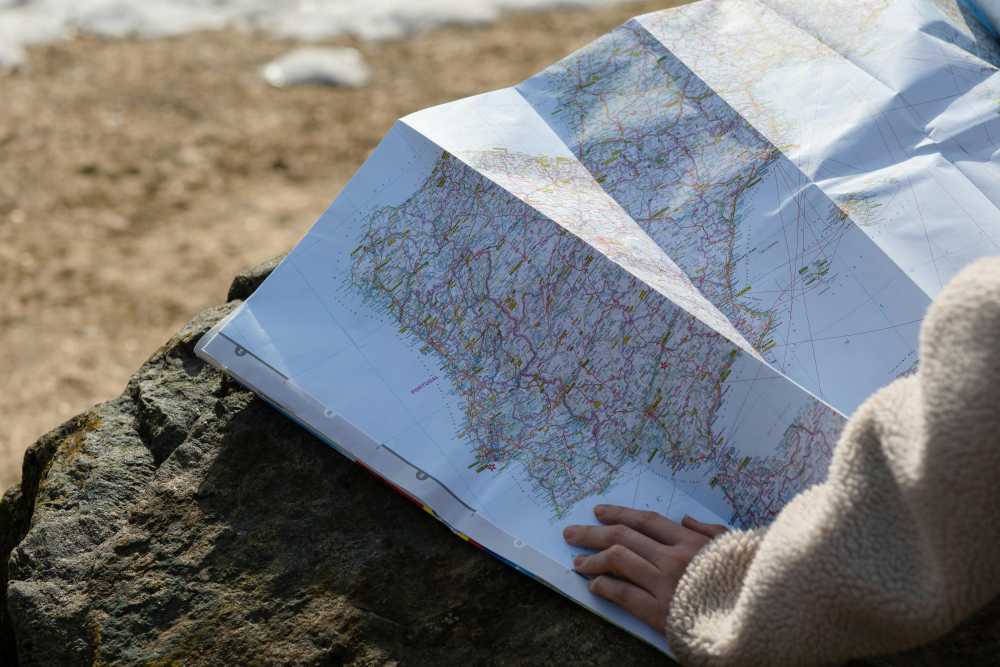
And if the city’s coastal beauty inspires you to see more of California, you’ll be perfectly equipped for the state’s most iconic drive. For the ultimate road trip plan, be sure to download our free Big Sur Map & Itinerary—the perfect companion for your coastal adventure.
Are You a Bay Area Expert?
Do you know the best place to get a Mission-style burrito at 2 AM? The secret history behind the murals in the Clarion Alley? The perfect vantage point for watching the Blue Angels during Fleet Week? If you have deep, authentic knowledge of San Francisco, you’re exactly the kind of creator we love at TrekGuider.
Our platform was built to empower local experts like you to share and monetize your passion. You can publish articles to build your authority, create your own personal creator page to showcase your work, and sell your own digital products—from detailed neighborhood guides to curated food tours—directly to a global audience of curious travelers. TrekGuider provides the tools; you provide the expertise.

Your San Francisco Story Awaits
From the ancient traditions of the Lunar New Year to the modern, joyful expressions of Pride, the holidays in San Francisco offer a rich mix of experiences found nowhere else on earth. This is a city that doesn’t just host events; it invites you to become part of the story. With its singular blend of cultural depth, natural splendor, and innovative fire, every visit promises a new discovery. Let this guide be your starting point, and get ready to feel the unforgettable buzz of the Bay Area.
Travel News
Comments 0
No comments yet
Be the first to share your experience!
You May Also Like

San Francisco Cherry Blossoms: A Local's Guide to the Blooms

Halloween SF: Haunts Without Horrors

SF Festivals: 7 Must-See Lineups

Christmas SF: Lights & Wharf Wonders

SF Pride: 6 Route & Party Hacks

Chinese New Year SF: Parade Essentials
TrekGuider @trekguider
July 4th Chicago: Fireworks Hotspots

The first explosive boom echoes across Lake Michigan, a flash of crimson and gold illuminating an entire wall of skyscrapers. From below, a collective gasp of pure wonder rises from a crowd of thousands. This is the postcard moment, the magic of July 4th in Chicago. But let’s be honest—the path to that perfect moment is often paved with stress. You’re grappling with the classic problem: finding a spot with a clear view that isn’t shoulder-to-shoulder with a million other people, a location you can reach without getting trapped in a traffic apocalypse, and a vantage point that truly does justice to the nation’s birthday.
The agitation is a familiar feeling. You can already picture yourself craning your neck around a forest of selfie sticks, only to catch a sliver of the show. You envision the gridlocked streets, the jaw-dropping parking fees, and that sinking feeling that you’ve missed the best part of the celebration while hunting for a decent patch of grass. The pressure is real, especially when you’re trying to fit this iconic celebration into a larger itinerary of Chicago Holidays: Windy City Thrills, where every moment is precious.
But that's not how your Fourth of July is going to play out. This guide is your strategic blueprint for outsmarting the crowds and securing a front-row seat to one of the country's most spectacular fireworks displays. We’re going to dismantle the chaos by breaking down every option, from the epicenter of the action at Navy Pier to exclusive rooftop lounges and serene lakeside parks. This is your definitive plan for a seamless, memorable, and breathtaking Independence Day Chicago.
The Epicenter: Conquering Navy Pier for Independence Day Chicago
When it comes to July 4th fireworks in Chicago, Navy Pier isn't just an option; it's the option. As the official host of the city’s largest and most dazzling display, the pier offers an unparalleled, up-close-and-personal experience. The fireworks are launched from a barge on Lake Michigan directly in front of the pier, meaning you are at ground zero for the spectacle. The energy of the massive, joyful crowd is electric. However, this prime real estate comes with a significant challenge: everyone wants it. Success here isn’t about luck; it’s about strategy.

The Ultimate Navy Pier Game Plan: A Step-by-Step Timeline
Treating your trip to Navy Pier like a casual evening stroll is the fastest way to disappointment. A successful visit requires a military-like precision that begins hours before the first firework is launched.
1. Early Afternoon (2:00 PM - 4:00 PM): The Arrival & Reconnaissance Phase Do not wait until dusk. Arriving in the early afternoon is your secret weapon against the worst of the traffic and security lines. Use this time to your advantage. Grab a Chicago-style hot dog or a slice of deep-dish from a food vendor before the lines snake around the building. Take a ride on the 200-foot Centennial Wheel for a staggering daytime panorama of the city and lakefront. This is your chance to relax and absorb the festive atmosphere before the masses descend.
2. Late Afternoon (4:00 PM - 7:00 PM): The Encampment Phase This is when the pier transforms from a tourist attraction into a high-stakes real estate market. The official advice is to arrive by 7:00 PM, but by then, you’re looking at leftover spots with obstructed views. Your mission is to claim a prime piece of turf along the South Dock. The farther east you venture down the pier, the more central your view will be. Lay down your blankets, set up your chairs, and establish your base camp. This is the time to settle in for the long, rewarding wait.
3. Evening (7:00 PM - 9:00 PM): The Anticipation Phase As the sun dips below the skyline, the energy on the pier builds to a palpable buzz. This is the perfect time for people-watching, playing a deck of cards, or just enjoying the cool lake breeze. Keep your group together; a simple trip to the restroom can become a challenging expedition through a sea of people. Be patient and soak in the shared sense of excitement.
4. The Main Event (9:00 PM): The Spectacle Just before 9:00 PM, the lights dim, a hush falls over the crowd, and the first firework shrieks into the night sky. For the next 15-20 minutes, you are immersed in a world-class pyrotechnic display. Because you planned ahead, you have a comfortable, direct view, making the entire day’s effort completely worth it.
5. Post-Show (9:30 PM onwards): The Strategic Retreat The moment the grand finale fades, resist the primal urge to bolt. Tens of thousands of people will be flooding the exits at once. Instead, execute a strategic delay. Let the initial human tidal wave recede. Pack up your belongings at a leisurely pace, enjoy the glittering skyline, and plan to start your journey home 30-45 minutes after the show. Your future self will thank you.
The Sensory Experience: More Than Just a Light Show
This isn’t just a visual show; it’s a full sensory assault. The fireworks are perfectly synchronized to a soaring patriotic soundtrack broadcast across the pier, with each concussive boom vibrating through the wooden planks beneath your feet. You can smell the faint, celebratory scent of gunpowder and lake water on the breeze. It’s an immersive experience that a distant view simply cannot replicate.
Your Navy Pier Survival Kit
An hours-long stakeout for fireworks demands a little comfort. Packing smart is non-negotiable.
Seating: A thick blanket or low-profile foldable chairs are essential.
Sustenance: Pack sealed water bottles and plenty of snacks. While food is available, having your own stash saves you from long lines and high prices.
Sun & Wind Protection: The afternoon sun reflecting off the lake is brutal. Bring sunscreen, sunglasses, and a hat. After dark, the breeze off the lake can be surprisingly chilly, so a light jacket is a wise addition.
Power Bank: Between taking photos, coordinating with friends, and passing the time, your phone battery will drain. A portable charger is a lifesaver.
Entertainment: A deck of cards, a book, or downloaded podcasts can make the waiting hours fly by.
To avoid feeling like a pack mule, mastering the art of minimalism is crucial. For pro-level tips on carrying only what you need, our How to Pack Light Guide is an essential read.
Beyond the Pier: Chicago's Best Alternative Fireworks Views
If the thought of the Navy Pier crowds gives you hives, don't worry. Chicago is brimming with fantastic alternative spots that offer breathtaking views without the same level of intensity.
Rooftop Revelry: An Elevated Experience
For a more civilized and comfortable viewing experience, nothing beats a rooftop bar. You trade the massive crowds for a reserved seat, craft cocktails, and an unbeatable panoramic perspective.
Offshore Rooftop & Bar: Perched at the very end of Navy Pier, this is officially the world's largest rooftop bar. It offers the most direct, spectacular view imaginable, but tickets for their July 4th party are a hot commodity, selling out months in advance at a premium price.
Cindy's Rooftop: Sitting atop the historic Chicago Athletic Association hotel, Cindy's provides a stunning, albeit more distant, view across Millennium Park toward the lake. The reflection of the fireworks on the polished surface of "The Bean" is a uniquely Chicago sight.
Terrace 16: Located in the Trump International Hotel & Tower, this elegant terrace offers a direct, sweeping vista of the lakefront and Navy Pier. It’s a high-end option for those looking to celebrate in true luxury.

Pro-Tip: Book any rooftop bar reservation or fireworks cruise ticket the moment they become available. These premium experiences are in high demand and often sell out by early spring. Set a calendar reminder for February or March to start your search.
Lakeside Serenity: Parks and Beaches with a View
For a classic, family-friendly picnic vibe, Chicago’s sprawling lakefront parks and sandy beaches are ideal.
Millennium Park & Grant Park: These iconic parks offer vast lawns perfect for spreading out a blanket. While some views might be partially obstructed by buildings, the atmosphere is wonderfully festive. The key is to find a spot east of DuSable Lake Shore Drive for the clearest line of sight to Navy Pier.
Ohio Street Beach & North Avenue Beach: Just north of the pier, these beaches offer a fantastic, slightly angled view of the fireworks exploding over the water. You get the added bonus of feeling the sand between your toes as you watch. These are beloved local spots, so arrive early to claim your space.
Museum Campus: The grassy areas surrounding the Field Museum, Shedd Aquarium, and Adler Planetarium offer arguably the most iconic skyline view in the city. Watching the fireworks burst behind Chicago’s architectural titans is a photographer’s dream come true.

Set Sail for the Spectacle: Fireworks Cruises on Lake Michigan
To completely escape the land-based crowds and get a truly unique perspective, watch the show from the water. Numerous companies offer special July 4th cruises.
Dinner & Cocktail Cruises: Companies like Odyssey Lake Michigan and Spirit of Chicago offer elegant evenings with dining, dancing, and guaranteed front-row seats on the water for the main event.
Architectural Tours: Many of the city’s famed architectural boat tours offer special holiday cruises that conclude by positioning themselves perfectly on the lake for the fireworks display.
Tall Ship Cruises: For a truly memorable experience, watch the show from the deck of a majestic tall ship like the Windy, adding a touch of nautical history to your patriotic celebration.
A Pro's Guide to July 4th Logistics
A flawless holiday is built on smart planning. Beyond choosing your spot, mastering transportation and safety will ensure your day is stress-free.

Getting Around the City: Transportation Hacks
On Independence Day Chicago, public transit is not just an option; it's a necessity.
CTA 'L' Trains: The elevated and subway trains are the most efficient way to get downtown. The State/Lake (Brown, Green, Orange, Pink, Purple Lines) and Washington/Wabash stops are your best bets for accessing Grant Park and the southern approach to Navy Pier.
CTA Buses: Several bus routes drop off directly at or near Navy Pier, including the #29 State, #65 Grand, #66 Chicago, and the #124 Navy Pier express route. Be prepared for holiday schedules and potential reroutes due to street closures.
Rideshare & Taxis: Avoid them if you can. Surge pricing will be in full effect before and especially after the fireworks. If you must use a rideshare, walk several blocks west of Michigan Avenue to request your ride in a less congested zone.
Safety First: Navigating Crowds Like a Pro
Large crowds require situational awareness. Keep these tips in mind:
Use the Buddy System: Stick with your group. It’s easy to get separated in the post-fireworks shuffle.
Establish a Meeting Point: Before your phone batteries die, pick a clear, specific meeting spot away from the main exit paths in case you get separated. "The front of the Ferris wheel" is a bad idea; "the corner of the W Chicago - Lakeshore hotel" is much better.
Supervise Children Closely: The crowds can be overwhelming for kids. Keep them close, and consider writing your phone number on their arm or a wristband.
Expect Strong Security: At Navy Pier and other major gathering points, expect bag checks and a heavy police presence. Prohibited items typically include alcohol, coolers, grills, and drones. Check the official Navy Pier website for the most up-to-date list.
Your Blueprint for a Flawless Fourth
You are now armed with the ultimate insider’s guide to experiencing the magic of July 4th in Chicago. The anxiety of the unknown has been replaced with a clear, actionable strategy. Whether you brave the vibrant energy of Navy Pier, opt for the chic ambiance of a rooftop bar, or choose the laid-back vibe of a lakeside park, you have a plan to make it happen. You are ready to navigate the crowds, secure the perfect view, and create unforgettable memories against the backdrop of one of America’s greatest cities. This is how you master Independence Day Chicago.
Now that you've conquered the city's biggest patriotic celebration, why stop there? Unlock all the secrets of the Windy City's year-round festivities and hidden gems. For the most comprehensive insights into making the most of your trip, from iconic landmarks to local favorites, our Travel Guide is your ultimate resource for exploring Chicago and beyond.
Meta Data Suggestions:
SEO Meta Title: July 4th Chicago Fireworks: 5 Best Viewing Hotspots
URL Slug: july-4th-chicago-fireworks-hotspots
SEO Meta Description: Planning your Independence Day in Chicago? Discover the best spots to watch the Navy Pier fireworks, from the pier itself to secret rooftops and cruises.
Travel News
Comments 0
No comments yet
Be the first to share your experience!
You May Also Like

Southwest Airlines Pulls Out of Chicago O'Hare and Washington Dulles
San Francisco Cherry Blossoms: A Local's Guide to the Blooms
Halloween SF: Haunts Without Horrors
SF Festivals: 7 Must-See Lineups
Christmas SF: Lights & Wharf Wonders