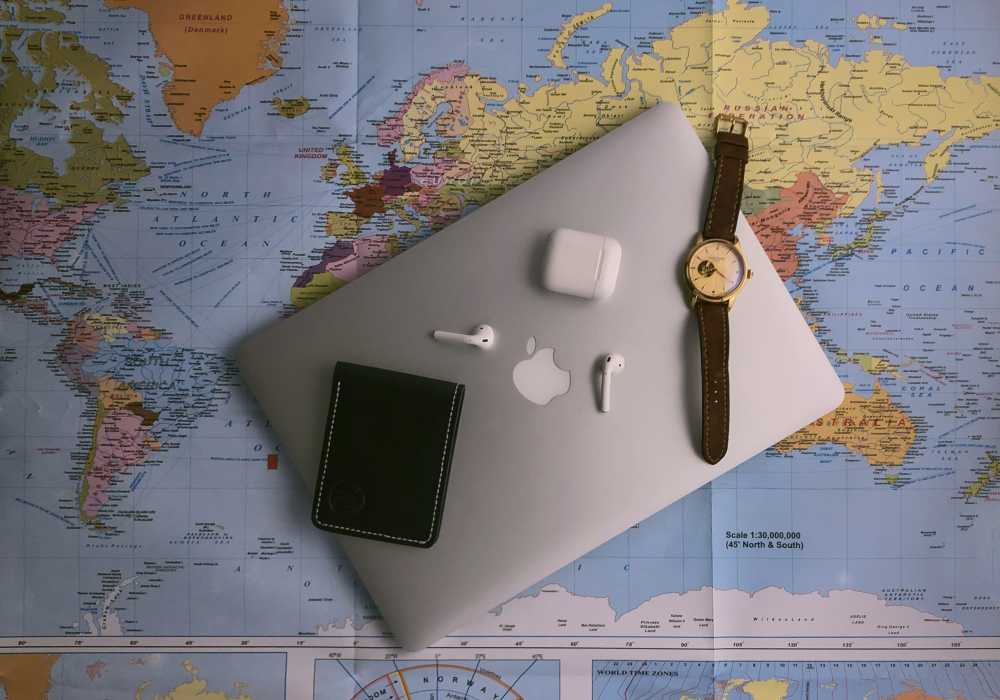
Decoding Affiliate Commission Rates: Benchmarks for Travel Creators
TrekGuider @trekguider
You’re a travel creator, and you’ve entered the world of affiliate marketing to turn your passion into a profession. But you’ve quickly run into a frustrating black box: the commission structure. You see a dizzying array of percentages, acronyms like CPA and EPC, and vague promises of earnings. You’re left wondering what good affiliate commission rates even look like. Are you earning your worth, or are you leaving a significant amount of money on the table?
This confusion isn't just academic; it's a direct threat to your bottom line. The reported average monthly income for affiliates in the travel niche is an impressive $13,847, a figure that proves this is a serious enterprise. But you can't build a sustainable business on guesswork. Partnering with a program offering a flashy 40% commission—only to discover it’s 40% of their tiny margin—is a rookie mistake that costs real money. This lack of clarity makes it impossible to forecast your income, negotiate better terms, or build a truly predictable business. You feel like you’re flying blind.
This guide is your decoder ring. We are pulling back the curtain to give you a comprehensive breakdown of how affiliate commissions actually work. We will deconstruct every major commission model, provide clear, data-backed industry benchmarks, and teach you how to analyze these rates like a seasoned professional. By the end of this deep dive, you will be able to spot high-value opportunities and architect a monetization strategy that truly rewards your influence. For a complete overview of the affiliate landscape, our definitive pillar page, Travel Affiliate Programs: The 2026 Ultimate Guide, is your essential command center.

The Anatomy of a Commission: Deconstructing the Core Models
Let's cut through the jargon. An affiliate commission is simply a reward for a job well done. A company—the merchant—pays you for successfully driving a specific, valuable action, which in the travel world almost always means a completed booking or sale.
But the way that reward is calculated can vary dramatically. Understanding the underlying structure of different affiliate commission rates is the first step toward becoming a high-earning creator.
1. Cost Per Sale (CPS) or Pay Per Sale (PPS): The Industry Workhorse
You'll encounter this model most often—it's the industry's workhorse for a reason. It’s simple and transparent: when a reader clicks your affiliate link and completes a purchase, you earn a percentage of the total sale value. If you recommend a $500 hotel stay and the program offers a 6% CPS commission, you earn $30. This model directly ties your earnings to the revenue you generate, making it the gold standard for most travel bookings and gear sales.
2. Cost Per Action (CPA): Rewarding a Specific Step
CPA is a broader model where you’re compensated for a specific action a user takes. While that action is often a sale (making it identical to CPS), it can also be something else. For example, a travel credit card company might pay you a CPA commission for every user who completes an application, regardless of whether they are approved.
3. Cost Per Lead (CPL): Paying for High-Value Inquiries
With a CPL model, you earn a fixed fee for each qualified lead you generate. This is common in high-ticket travel sectors where the sales cycle is long. A luxury tour operator, for instance, might pay you $50 for every user who fills out a detailed inquiry form for a bespoke African safari. You get paid for delivering a potential customer; their sales team takes it from there.
4. Tiered & Multi-Tier Structures: Incentivizing Growth
This is where commission models get more sophisticated and rewarding.
Tiered Structures: Rewarding Your Growth These are designed to reward high-performing affiliates. Your commission rate increases as you drive more sales. A program might offer a base rate of 6%, which jumps to 8% after you generate $5,000 in sales in a month, and 10% after $10,000.
Multi-Tier Structures: Building a Network These allow you to earn commissions not only on your own sales but also on the sales generated by other affiliates you recruit into the program. This effectively turns you into a partner who helps grow the program itself, creating a secondary, more passive income stream.
5. Cost Per Click (CPC): The Rare Exception
In this model, you are paid a small fee for every click your affiliate link receives, regardless of a sale. Due to its high vulnerability to fraud, the CPC model is now extremely rare in modern affiliate marketing and almost never seen in the travel space.

Industry Benchmarks: What Good Affiliate Commission Rates Look Like
So, what should you actually expect to earn? While rates vary, the travel industry has established clear benchmarks across its major categories. Here’s your cheat sheet.
Hotels & Accommodations: 2% - 7% of Booking Value This is the bread and butter for many creators, but the details are everything. A program like Expedia Group offers up to 6% of the total booking value with a 7-day cookie. In contrast, Booking.com advertises a much higher "25-40%", but this is a percentage of their commission, not the customer's total payment. This opaque structure often results in a much lower effective rate, closer to 2-4% of the final booking value.
Tours, Activities & Experiences: 6% - 8%+ This is a high-margin category with strong potential. Market leaders like Viator and GetYourGuide set the standard with base commissions of 7-8%. Adventure-focused operators like G Adventures offer 6%, which is incredibly powerful when applied to their high-ticket tours that can cost thousands of dollars.
Travel Insurance: 10% or More Insurance is a consistently high-paying vertical. Top programs like SafetyWing and World Nomads both offer a standard 10% commission. SafetyWing takes this a step further with a recurring model, meaning you continue to earn 10% every time your referred customer renews their policy.
Gear & Apparel: 3% - 8% For physical products, rates depend heavily on the retailer. Amazon Associates is the baseline, offering 3-4% for most travel categories. However, partnering with specialty retailers is far more lucrative. A brand like REI, for example, offers a 5-8% commission on high-quality (and often high-priced) outdoor gear.
Pro-Tip: Don't be blinded by the highest percentage. A 6% commission on a $3,000 G Adventures tour is $180. An 8% commission on a $50 city walking tour is $4. Always consider the average order value of the products you are promoting when evaluating affiliate commission rates.

The Metrics That Matter More Than the Rate Itself
An experienced affiliate marketer knows the commission rate is just a starting point. To truly understand a program's profitability, you need to analyze the metrics that measure real-world performance.
Earnings Per Click (EPC): Your True North This is arguably the single most important metric. It’s calculated by dividing your total commission earnings by the total number of clicks you sent. If you sent 100 clicks and earned $50, your EPC is $0.50. This number tells you the average value of every single click. A program with a lower commission but a higher EPC is often the more profitable partner for your specific audience.
Conversion Rate (CR): The Sign of a Healthy Partner This is the percentage of users who take the desired action after clicking your link. A high conversion rate is a sign of a trusted brand with a well-optimized checkout process. A program with a 10% commission that converts at 1% is less profitable than a program with a 5% commission that converts at 5%.
Cookie Duration: The Travel Creator's Safety Net This is critical in the travel space. A longer cookie duration (30, 60, or 90 days) gives your audience the time they need to research a high-consideration purchase while ensuring you still get credit. A short cookie window is a major red flag and a sign that the program may not be structured in your favor.
Pro-Tip: Dive into your affiliate dashboards. Most networks like CJ Affiliate and Travelpayouts provide detailed reports on your EPC and conversion rates for each program. Use this data to identify your true top performers—the results will often surprise you.

The Travel Creator's Toolkit
Feeling overwhelmed by the data? You don't have to be. To help you organize your strategy and implement everything you've learned, we've created the ultimate resource bundle. It includes checklists, templates, and tools designed to accelerate your journey from beginner to pro.
Download Your Free Bundle: The Travel Creator's Toolkit
The High-Margin Alternative: Referral & Revenue Share Models
While traditional commission models are powerful, the most forward-thinking creators are diversifying into referral and revenue-sharing programs. Instead of a one-time payment for a single sale, these models allow you to build long-term, passive income streams by becoming a true platform partner.
This is the philosophy behind the TrekGuider Seller Platform. We believe in empowering creators to build complex businesses. Our platform is designed for you to sell your own digital products—like itineraries and guides—but our referral program adds another powerful layer to your income strategy.
Instead of a simple CPS commission, our model functions like a sophisticated multi-tier system. When you refer other creators to become sellers on TrekGuider, you earn an ongoing share of the revenue they generate, with tiered commissions that start at 4% for referred sellers. You’re not just earning from a single transaction; you’re building a network and earning from its collective success. It's a strategic way to move beyond chasing individual sales and start building a more resilient, high-margin business.
Frequently Asked Questions (FAQ)
1. Is a higher commission rate always better? Not at all. A high commission rate can be misleading if the program has a low conversion rate, a short cookie duration, or a low average order value. Always look at your Earnings Per Click (EPC) to determine the true profitability of a program for your audience.
2. How can I find the EPC for an affiliate program? Most reputable affiliate networks (like CJ Affiliate, ShareASale, or Travelpayouts) provide EPC data. It's often listed as a network-wide average for each merchant, which gives you a good baseline. Once you start sending traffic, you can track your own personal EPC in your performance reports.
3. Can I negotiate my affiliate commission rates? Yes, absolutely. Once you become a proven partner and consistently drive a significant volume of high-quality sales, you have leverage. Many brands are willing to negotiate a higher, private commission rate for their top-performing affiliates. Always track your performance and don't be afraid to ask.

From Confusion to Command
You are no longer in the dark. The world of affiliate commission rates is no longer a confusing black box. You now have the knowledge to deconstruct any program's payment structure, the industry benchmarks to know your worth, and the key metrics to identify what truly drives profit.
This knowledge is power. It empowers you to audit your existing partnerships, confidently seek out new ones, and even negotiate better terms. By focusing on programs with fair commissions, long cookie durations, and high conversion rates, you can ensure your hard work is properly rewarded. Building a profitable travel content business requires a strategic approach, and a deep understanding of affiliate commission rates is a non-negotiable part of that strategy.
Read the full guide: The Travel Blogger's Playbook to Affiliate Marketing Mastery
Don't Miss Out! Subscribe for Exclusive Content
Subscribe


Comments 0
No comments yet
Be the first to share your experience!
Dont Miss Out! Subscribe for Exclusive Content

Ultimate USA Holidays Guide: Top Picks

FTC Affiliate Disclosure Essentials: Stay Compliant as a Travel Creator

Essential Affiliate Tools: From Tracking to Full Optimization

Avoid These 5 Affiliate Landing Page Mistakes for Better Conversions

Affiliate Keyword Research Mastery for Travel Blogs

Booking.com Affiliate Program Review: Pros, Cons, and Earnings Potential
Ultra Festival: Beat the Heat Guide
TrekGuider @trekguider
You’ve done it. You scored the golden ticket to Ultra Music Festival, a three-day sonic pilgrimage in the heart of Miami where the world’s greatest DJs command colossal stages and the energy is nothing short of electric. But as the bass drops, so does the relentless Florida sun. The real problem isn't just the heat; it's the brutal combination of scorching temperatures, suffocating humidity, and tens of thousands of dancing bodies that can quickly turn your dream festival into a dehydrated, sun-stroked nightmare.
Imagine the agony of missing Skrillex’s closing set because you’re dizzy and nauseous, huddled in a medical tent. Picture the sheer frustration of tapping out before sunset on day one, your energy completely drained, while your friends rave on into the night. This isn't a scare tactic; it's a common reality for unprepared attendees who fatally underestimate the physical toll of partying under the Miami sun for three straight days. The line between an unforgettable weekend and a miserable, potentially dangerous one is drawn by a single thing: a bulletproof strategy.
This is that strategy. Forget the generic "drink water" advice you’ve heard a thousand times. This is your new bible for not just surviving, but truly conquering the heat at Ultra. We’re providing a pro-level, comprehensive blueprint covering everything from tactical gear selection and advanced hydration science to strategic stage navigation and leveraging festival tech for your safety. Follow these steps, and you won't just beat the heat—you'll own the entire experience, from the opening beat on Friday to the final fireworks on Sunday.

Understanding the Ultra Music Festival Environment: Sun, Crowds, and Sound
Before you can build a plan, you must understand the battlefield. Ultra Music Festival unfolds in late March at Bayfront Park, a beautiful but notoriously exposed venue. For 2026, the festival runs from March 28-30 (and for you long-term planners, March 27-29 in 2026), a time when Miami’s weather is deceptively intense. While the festival is at the heart of the city's vibrant event calendar—a scene we detail in our complete guide to Miami Holidays: 8 Beach Fest Vibes—its unique environment presents a specific set of challenges you must be prepared for.
The festival operates on a strict "rain or shine" policy, meaning you need to be ready for anything. The schedule itself is a marathon, not a sprint:
Friday, March 28: 4:00 PM – 12:00 AM
Saturday, March 29: 12:00 PM – 12:00 AM
Sunday, March 30: 12:00 PM – 10:00 PM
Notice that Saturday and Sunday demand ten to twelve hours of exposure. The primary obstacles you will face are:
Intense Solar Radiation: The Florida sun is powerful. Without adequate shade, direct exposure can lead to severe sunburn and rapidly increase your core body temperature.
Oppressive Humidity: Miami's humidity cripples your body's natural cooling system. It prevents sweat from evaporating effectively, making 85°F feel like a suffocating 95°F.
Massive Crowds: Dense crowds trap body heat, creating microclimates that are significantly hotter than the ambient air. Navigating these human seas requires immense physical energy.
Constant Movement: You’ll be walking, standing, and dancing for hours on end, burning calories and losing fluids at a dangerously accelerated rate.
The first and most critical mindset shift is to treat Ultra like an athletic event. Your preparation starts long before you ever step foot in Bayfront Park.

Pre-Festival Prep: Your Foundation for Success
Victory is won in the preparation. What you do in the days leading up to the festival and what you pack in your bag will absolutely dictate your endurance and enjoyment.
The Ultimate Packing List: Beyond the Basics
Your packing list is your first line of defense. Every single item should serve a purpose, primarily focused on cooling, hydration, and comfort.
Clothing (The Three B’s: Breathable, Bright, and Barely-There):
Fabrics: Choose lightweight, moisture-wicking materials like polyester, nylon, or bamboo blends. These technical fabrics pull sweat away from your skin, allowing it to evaporate and cool you down. Avoid cotton at all costs; it absorbs moisture, becoming a heavy, suffocating trap for heat.
Colors: Opt for light-colored clothing. White, beige, and pastels reflect sunlight rather than absorbing it like dark colors do.
Fit: Loose-fitting garments are your best friend. They allow for crucial airflow against your skin, preventing heat from getting trapped.
Footwear (Your Most Important Gear): You will be on your feet for 30+ hours over the weekend. Comfortable, well-worn sneakers are non-negotiable. Do not, under any circumstances, wear brand-new shoes, flimsy sandals, or heavy boots. Running or athletic shoes with proven arch support are ideal.
Hydration Hardware:
Hydration Pack: This is the single most important piece of gear you can bring. A CamelBak or a similar backpack with a water bladder allows you to carry 2-3 liters of water and sip continuously without fumbling with a bottle. Ensure it complies with the latest festival size and pocket regulations before you go.
Electrolyte Packets: Pack single-serving powders or tablets (like Liquid I.V., Nuun, or Pedialyte packets). They are small, light, and absolutely essential for true hydration.

Sun & Heat Protection Arsenal:
Sweatproof Sunscreen: A broad-spectrum, water-resistant sunscreen with an SPF of 50 or higher is mandatory. Apply it generously 30 minutes before you enter and reapply every two hours, no exceptions.
Wide-Brimmed Hat: A bucket hat or other wide-brimmed hat provides a portable oasis of shade for your face, neck, and ears, significantly reducing your perceived temperature.
UV-Protective Sunglasses: Protect your eyes from the relentless glare and long-term sun damage.
Cooling Towel: These hyper-evaporative towels, when soaked in water, provide incredible cooling relief when worn around your neck.
Handheld Fan/Mister: A small, battery-operated fan can be a godsend in a stagnant, dense crowd, creating a personal breeze when you need it most.
Physical Conditioning: Don't Underestimate the Marathon
You wouldn't run a 10k without training, and you shouldn't tackle Ultra without some physical prep.
Pre-Hydrate Aggressively: Begin increasing your water intake 2-3 days before the festival. Your goal is to start Day 1 with your body in a state of optimal hydration, not playing a desperate game of catch-up.
Build Endurance: In the weeks leading up, incorporate some light cardio into your routine. Even 30 minutes of brisk walking or jogging a few times a week will dramatically improve your stamina.
Prioritize Sleep: Get a full 8 hours of sleep each night in the week before the festival. A sleep deficit severely impairs your body's ability to regulate temperature and recover.
Just as detailed planning is key for a scenic road trip, like the one we map out in our Big Sur Map & Itinerary, careful preparation is essential for a massive festival. Don't leave your experience to chance.
Mastering Hydration: The Core of Your Ultra Music Festival Strategy
This is the most critical section of this guide. Proper hydration at Ultra is a science. Simply drinking water when you feel thirsty is a recipe for disaster; by the time you feel thirst, you are already significantly dehydrated.

Water Isn't Enough: The Critical Role of Electrolytes
When you sweat, you don't just lose water; you lose vital minerals called electrolytes—primarily sodium, potassium, and magnesium. These minerals are the spark plugs of your body, responsible for regulating nerve and muscle function, hydrating your cells, and balancing blood pressure. Replenishing them is just as important as replenishing water.
Why It Matters: Drinking excessive amounts of plain water without replacing electrolytes can lead to a dangerous condition called hyponatremia, where the sodium levels in your blood become dangerously diluted. Symptoms can mimic dehydration (nausea, headache, confusion) but can be far more severe.
Your Game Plan: For every two refills of your hydration pack with plain water, make the third refill an electrolyte mix. This simple rule ensures you are constantly replenishing what you're sweating out. Avoid relying on sugary energy drinks or sodas for hydration; they can often make dehydration worse.
Your Hydration Schedule: A Sip-by-Sip Plan
Discipline is everything. You need a proactive hydration schedule, not a reactive one.
The Morning Load-Up: Drink at least 16-20 ounces (about half a liter) of water with an electrolyte packet before you even leave for the festival.
The Immediate Refill: The very first thing you do upon entering Bayfront Park is locate a water station and fill your hydration pack to its maximum capacity.
The 15-Minute Rule: Take a few big sips of water from your pack every 15 minutes. Set a recurring alarm on your phone or watch if you have to. Do not wait until you feel thirsty.
The Proactive Refill: Never wait until your pack is empty to refill it. When it's about one-third full, make your way to a water station. The lines are shortest during non-peak times (e.g., during a headliner's set when everyone is at one stage, or early in the day).
The End-of-Night Recovery: Drink another 16-20 ounces of electrolyte-infused water before you go to sleep. This will supercharge your body's recovery overnight and prepare you for the next day.
Pro-Tip: As soon as you get inside, open the festival map on the official app and screenshot the locations of all free water refill stations. The stations located near smaller stages or along the perimeter of the park often have significantly shorter lines than the ones near the main stage.
Strategic Navigation and Lineup Planning
How you move through the festival and plan your day is just as important as what you pack. Wasting energy is a luxury you simply cannot afford.

Decoding the Festival Map for Heat Evasion
The festival grounds are a maze of stages, vendors, and people. Use the map to your real advantage.
Identify Cool Zones: Before you even start thinking about artists, scan the map for any designated shade structures, indoor stages (like the iconic Megastructure), or air-conditioned brand activations. These are your recovery oases.
Plan Efficient Routes: When moving from the Main Stage to the Resistance stage, don't just try to cut through the thickest part of the crowd. Use the perimeter walkways. It might be a slightly longer distance, but it will be faster and require far less energy than pushing through a human traffic jam.
Building a Smart Schedule: Pacing is Everything
With a 2026 lineup featuring titans like John Summit & Dom Dolla, Armin van Buuren, Tiësto, Chase & Status, and Deadmau5, the temptation is to sprint from stage to stage. This is a rookie mistake that will burn you out by 9 PM on Friday.
Prioritize Ruthlessly: Accept that you cannot see every artist. Pick your top 3-4 "can't-miss" sets for each day and build your schedule around them as anchors.
Schedule Deliberate Downtime: The hottest part of the day is typically between 2 PM and 5 PM. This is the perfect time to schedule a tactical break. Find a shady spot, sit down, focus on hydrating, and eat a proper meal. This planned rest will give you the energy you need for the headlining acts at night.
Embrace Discovery: Use the time between your must-see sets to explore smaller stages. They are often less crowded, providing more space to dance, breathe, and discover your new favorite artist.
Pro-Tip: When moving through a dense crowd to get closer to a stage, conserve energy by following directly behind a larger, determined person or group. Let them carve a path for you. It's a simple "drafting" trick that saves a surprising amount of physical effort.
Leveraging Technology and Safety Resources at Ultra Music Festival
In the modern festival era, your phone is an essential survival tool. Ultra has integrated technology to enhance attendee safety, and you should take full advantage of every resource.
Your Phone is Your Lifeline
The Official Ultra App: Download it well in advance. It contains the most up-to-date festival map, set times, and, most importantly, will send push notifications for any emergency alerts or important announcements.
The SaferWatch App: Ultra has partnered with the SaferWatch app, which allows you to report any safety or security concerns (medical emergencies, suspicious activity) directly and anonymously to festival staff in real-time. Have it downloaded and set up before you arrive.
Portable Charger: Your phone is useless with a dead battery. A fully charged portable power bank is not optional; it's mandatory.
Knowing Where to Go for Help
Even with perfect preparation, things can go wrong. Knowing how to recognize a problem and where to get help is crucial.
Locate Medical Tents: Just like the water stations, the first thing you should do is identify the location of all medical tents on your map. They are staffed with professionals who are there to help you, no questions asked. There is no shame in seeking help.
Recognize the Signs of Heat Exhaustion: Be aware of these symptoms in yourself and your friends:
Heavy sweating
Dizziness or lightheadedness
Nausea or vomiting
A throbbing headache
Cool, pale, clammy skin
If you or a friend experience these, get to a medical tent immediately. Do not try to "tough it out."
Be a Good Raver: The Ultra community is known for looking out for one another. If you see someone who looks unwell or is in distress, ask if they need help and guide them toward a medical tent or alert festival staff.

You're Ready to Conquer Ultra
The roar of the crowd, the earth-shaking bass, the Miami skyline lit up against the night sky—these are the moments that define the Ultra Music Festival experience. By approaching the weekend with the mindset of an endurance athlete, you are no longer at the mercy of the elements. You are in control. Preparation is your armor, hydration is your fuel, and a smart strategy is your map to victory. You now have the expert knowledge to stay cool, energized, and safe from the first set to the final encore.
You are now equipped to handle the heat, navigate the crowds, and fully immerse yourself in the magic of one of the world's greatest music festivals. This level of detailed planning is what transforms a good trip into an unforgettable one. For comprehensive strategies on navigating destinations and events worldwide, our master Travel Guide is the ultimate resource for the serious traveler. Now go, stay hydrated, and have the time of your life.
Don't Miss Out! Subscribe for Exclusive Content
SubscribeComments 0
No comments yet
Be the first to share your experience!
Dont Miss Out! Subscribe for Exclusive Content

San Francisco Cherry Blossoms: A Local's Guide to the Blooms

Halloween SF: Haunts Without Horrors

SF Festivals: 7 Must-See Lineups

Christmas SF: Lights & Wharf Wonders

SF Pride: 6 Route & Party Hacks

Chinese New Year SF: Parade Essentials
11 Best Family Travel Blogs for Real Advice
TrekGuider @trekguider
Planning a family vacation feels like it should be an act of joy, but let's be honest—it often descends into a frantic, late-night scroll for answers. You’re drowning in a sea of generic travel advice that simply doesn’t grasp the logistical chaos of navigating an airport with a Tasmanian-devil toddler or the complex psychological warfare of convincing a teenager that a family hike is, in fact, “cool.” You waste hours sifting through posts, a knot of anxiety tightening in your stomach that you’re about to invest your hard-earned money and precious vacation time into a trip that leads to meltdowns for everyone involved. The stress of planning is actively poisoning the very joy you’re trying to create.
What if you could bypass the noise? Imagine tapping directly into a brain trust of seasoned parents who have already navigated these minefields and documented the solutions. Picture finding field-tested, practical advice tailored specifically to your kids’ ages and your family’s unique travel style. This curated list of the best family travel blogs is your direct line to that expertise. While our comprehensive guide to The Best Travel Blogs to Follow in 2026 provides a 30,000-foot view of the entire industry, this article is your specialized ground-level playbook. These are the voices of experience that will help you transform travel chaos into cherished, lifelong memories.

Why Age-Specific Advice is the Key to Family Travel Harmony
Let’s start with a hard truth: the single biggest strategic blunder parents make is assuming "family travel" is a monolith. The reality is that the challenges of traveling with a three-year-old are worlds apart from those of traveling with a fifteen-year-old. As extensive travel industry analysis shows, their needs are fundamentally, diametrically opposed.
Traveling with Toddlers (Ages 1-4): This stage is a masterclass in logistics. The challenges are overwhelmingly physical. Success is measured by your ability to manage rigid nap schedules that are easily derailed, your patience while providing constant supervision for a mobile being with zero sense of danger, and your sheer strength hauling the mountain of required gear—strollers, car seats, diapers, and specialized snacks.
Traveling with Teenagers (Ages 13-18): In stark contrast, the hurdles with teens are primarily psychological and social. This is a game of diplomacy. Victory lies in respecting their craving for independence, granting them downtime away from the family unit, and accepting that their need for reliable WiFi is a non-negotiable part of their travel hierarchy, right alongside food and shelter.
The best family travel blogs don’t just understand this distinction; they build their entire content strategy around it. They provide targeted, actionable solutions to these distinct, age-related pain points, making them an indispensable resource for any parent.

Best Family Travel Blogs for the Toddler & Little Kid Years
This is the age of pure logistics, where the right advice can be the difference between a smooth, joyful trip and a full-blown, public tantrum. These blogs are the undisputed masters of the practical, offering the checklists, packing guides, and sanity-saving strategies you desperately need.
1. Ytravelblog
Run by Australian veterans Caz and Craig Makepeace, Ytravelblog is an institution built on over a decade of trust and real-world experience. They’ve been traveling with their two daughters since they were toddlers, and their content has an incredibly reassuring "we've-been-there" quality that instantly puts parents at ease.
Why They Made Our List:
Honest & Relatable: They excel at addressing the tough, unspoken questions, as evidenced by their iconic post, "
Long-Term Perspective: They offer a rare look at how travel evolves as kids grow, providing wisdom that applies far beyond a single trip.
Balanced Content: They seamlessly cover everything from epic road trips to relaxing resort stays, making them a perfect resource for families who enjoy a variety of travel styles.
2. The Jetsetting Family
Rod, a full-time traveling dad, offers a refreshingly hands-on perspective on family adventure. The Jetsetting Family has become a go-to for parents of toddlers, with unbelievably detailed guides on the nitty-gritty of air travel and packing.
Why They Made Our List:
Logistical Mastery: Their content on managing flights, from booking the right seats to surviving security, is a masterclass in preparation.
Dad's Perspective: Rod’s voice provides a different and valuable viewpoint in a niche often dominated by moms.
High-Quality Visuals: Their video content is especially helpful, showing you exactly how they pack and navigate airports.

3. Marcie in Mommyland
Specializing in travel with babies, toddlers, and preschoolers, Marcie offers some of the most comprehensive and visually appealing content online. Her blog is a goldmine for parents in the demanding early stages of family travel.
Why They Made Our List:
Niche Expertise: Her laser focus on the 0-5 age range means every piece of advice is hyper-relevant and practical.
Product Recommendations: She provides genuinely helpful reviews of travel gear for little ones, saving parents time and money.
Destination Guides for Little Kids: She expertly breaks down popular destinations like Paris and London from the perspective of a parent with a stroller and a diaper bag.
4. Wandering Wagars
Kevin and Christina Wagar are living proof that having kids doesn’t mean the end of adventure. Their blog is a shot of inspiration for parents who want to introduce their young children to diverse, culturally rich experiences from an early age.
Why They Made Our List:
Confidence Building: Their post, "" is packed with actionable advice that empowers hesitant new parents to take that first big trip.
Adventure Focus: They show you how to do more adventurous activities, like caving or hiking, safely with young kids.
Cultural Immersion: They prioritize connecting with local cultures, setting a fantastic example for raising global citizens.
Ready to Conquer the Skies?
For most parents of young children, the flight is the single most daunting part of the entire trip. The thought of keeping a toddler entertained in a confined space for hours, dealing with ear pressure, and avoiding meltdowns at 30,000 feet can be overwhelming. But it doesn't have to be. We’ve compiled the ultimate playbook from experts who have it down to a science.
Download our FREE guide: Stress-Free Flying with Kids Guide and get field-tested tips on booking, packing, and in-flight strategies to ensure a smooth journey for the whole family.
Best Family Travel Blogs for Navigating the Teen Years
Once you enter the teen years, vacation success becomes less about physical logistics and more about masterful diplomacy. It’s a delicate dance of balancing family time with a teenager’s deep-seated need for a teenager’s deep-seated need for independence. These blogs get it.

5. Kids Are A Trip
Created by Kirsten, this blog is an exceptional resource for parents who are past the stroller phase and firmly in the eye-rolling years. She has a real talent for finding activities that genuinely engage the notoriously hard-to-please teenage demographic.
Why They Made Our List:
Teen-Approved Activities: Her content, like "," goes far beyond the obvious tourist traps to find experiences teens will actually enjoy and remember.
Multi-Generational Focus: She provides great ideas for trips that will satisfy everyone from a 14-year-old to a 70-year-old grandparent.
Practical Itineraries: Her sample itineraries are realistic, well-paced, and leave room for the downtime teens desperately need.
6. Ciao Bambino
For families seeking expertly planned, immersive, and often luxurious trips, Ciao Bambino operates in a class of its own. While they cover all ages, their true strength lies in crafting complex itineraries that appeal to multi-generational groups with teens.
Why They Made Our List:
Deep Destination Expertise: Their " " showcases an incredible ability to blend history, food, and culture in a way that captivates every member of the family.
Vetted Recommendations: They have a team of advisors who vet every hotel and activity, providing a level of trust you can count on. It’s this level of curated expertise that inspires the hyper-detailed itineraries you can find from creators on the TrekGuider Platform.
Problem Solving: They excel at solving complex travel puzzles, like planning a trip for a large family with diverse interests and age ranges.
7. Earth Trekkers
The family behind Earth Trekkers—Julie, Tim, and their now-teenage kids Tyler and Kara—have documented their global travels for years. Because their audience has watched their children grow up, their blog serves as a fascinating and incredibly useful roadmap for how family travel evolves over time.
Why They Made Our List:
Real-Time Evolution: They offer an authentic, long-term perspective on transitioning from travel with little kids to travel with independent teens and young adults.
Adventure & Education: They masterfully blend adventure (like hiking in U.S. National Parks) with world schooling and historical context.
Exceptional Photography & Itineraries: Their content is not only inspiring but also carefully detailed, providing a clear path for readers to follow in their footsteps.
Pro-Tip: The #1 piece of advice from blogs that successfully travel with teenagers is to give them ownership. Involve them in the planning process. Let them choose the destination for one day, research the restaurants, or be the official navigator. This simple act of giving them control drastically reduces apathy and disinterest.
How to Vet a Family Travel Blog for Yourself
While our list is a great starting point, knowing how to spot a truly high-quality resource is a skill that will serve you well. Here’s a quick framework based on how our experts evaluate blogs:
Look for Niche Specificity: Does the blogger claim to be an expert on everything, or do they have a clear focus? The best advice often comes from someone who has gone deep on a specific topic, whether that’s RV travel with kids or navigating Disney World with a child who has sensory issues.
Check for Real Community Engagement: Don't just look at follower counts. Read the comments. Does the blogger respond thoughtfully to reader questions? A thriving comment section is a strong signal that the creator has built a genuine, trusting community.
Is the Advice Actionable? Inspirational photos are nice, but the best family travel blogs provide advice you can actually use. Look for detailed budget breakdowns, specific packing lists, and step-by-step instructions. If you finish an article feeling empowered to take action, you’ve found a great resource.

Frequently Asked Questions About Family Travel Blogs
How do family travel blogs make money?
Professional family travel blogs typically use a mix of monetization methods. The most common are affiliate marketing (earning a commission when you buy a product they recommend, like a hotel or travel gear), display advertising (the ads you see on the page), sponsored posts (where a brand pays them to feature a destination or product), and selling their own digital products, like detailed itineraries or travel planning guides.
Is it really safe to take young kids to "adventurous" destinations?
Absolutely, with the right planning and precautions. Blogs like Wandering Wagars and Earth Trekkers are fantastic resources for this. They demonstrate how to approach adventure travel responsibly by choosing age-appropriate activities, prioritizing safety, and managing risk. Their content shows that adventure is scalable and can be an incredible way to build resilience and confidence in kids.
What's the best way to budget for a family trip?
The most effective strategy, echoed by many top travel bloggers, is the "Pay Yourself First" model. This involves setting up a dedicated high-yield savings account for travel and scheduling automatic monthly transfers. You treat your travel fund as a non-negotiable expense, just like a mortgage or car payment. This ensures you’re consistently saving rather than just hoping there’s money left over at the end of the month.
Pro-Tip: When reading any blog, always look for authenticity. The best creators share the highs and the lows. A blogger who admits to a travel mishap or a day when the kids were just not having it is often more trustworthy than one who presents a picture-perfect, flawless feed.
Your Adventure Awaits
The overwhelming task of planning a family trip becomes infinitely more manageable—and even joyful—when you have the right guides. The creators behind these exceptional family travel blogs offer more than just glossy photos and destination ideas; they provide a real-world roadmap for navigating the beautiful, chaotic, and profoundly rewarding journey of exploring the world with your children. They’ve done the trial and error so you don’t have to. By arming yourself with their expert advice, tailored to your family's specific stage and style, you're not just planning a vacation—you're setting the stage for a lifetime of shared adventures.

Meta Data Suggestions:
SEO Meta Title (58 chars): 11 Best Family Travel Blogs for Real Advice (2026 Guide)
URL Slug: best-family-travel-blogs
SEO Meta Description (154 chars): Ditch generic tips. Discover the top 11 family travel blogs with real, field-tested advice for toddlers, teens, and every travel style in between.
Don't Miss Out! Subscribe for Exclusive Content
SubscribeComments 0
No comments yet
Be the first to share your experience!
Dont Miss Out! Subscribe for Exclusive Content
FTC Affiliate Disclosure Essentials: Stay Compliant as a Travel Creator
Essential Affiliate Tools: From Tracking to Full Optimization
Avoid These 5 Affiliate Landing Page Mistakes for Better Conversions
Affiliate Keyword Research Mastery for Travel Blogs
Booking.com Affiliate Program Review: Pros, Cons, and Earnings Potential

Decoding Affiliate Commission Rates: Benchmarks for Travel Creators
7 Digital Products That Sell Themselves for Travelers
TrekGuider @trekguider
The creator grind is real. You’re pouring your soul into a travel blog, publishing brilliant content and stunning photos. But the income trickles in, a frustrating mismatch for the mountain of effort you're putting out. Relying on display ads and the occasional affiliate sale feels like a slow, unpredictable climb, leaving you on an income plateau that barely covers your costs, let alone your travel dreams.
You see other creators achieving a level of financial freedom that feels out of reach, and you’re left wondering what secret they know. The path forward is a confusing fog of conflicting advice, and the constant content creation treadmill is exhausting. You’re trading your valuable time and expertise for pennies, leaving you burnt out and questioning if this can ever become a real, sustainable business.
It’s time to stop trading hours for dollars and start building assets. The solution is to ascend the "Monetization Ladder," transforming from a content creator into a true digital entrepreneur by learning how to sell digital products online.
This guide is your playbook. We are breaking down seven proven, high-margin digital product ideas designed specifically for the travel niche—your first step in building a scalable business that works for you, even when you’re not. This is a crucial piece of the puzzle we explore in our ultimate guide to How to Make Money Online: A Creator's Guide for 2026.

Why You Must Sell Digital Products Online
Before diving into what to create, it's critical to understand why this is the single most powerful strategic move for your business. While ads and affiliate marketing have their place, they are fundamentally limited. Digital products, by contrast, offer a level of control and scalability that other models simply can't match. This is the fundamental shift away from the active-income trap of freelance work—where you're constantly trading time for money—to building a portfolio of passive-income assets that work for you around the clock.
The advantages are transformative:
Infinite Scalability: Digital products operate on a "create once, sell forever" model. Whether you sell 10 copies or 10,000, your workload remains the same. There is no inventory to manage and no shipping to worry about.
Exceptionally High Profit Margins: With no manufacturing or distribution costs, the profit margins are extraordinary. Once you recoup your initial time investment, nearly every sale is pure profit.
Full Ownership and Control: When you sell digital products online, you own the entire process. You control the product, the pricing, the marketing, and the customer relationship. You are no longer dependent on an affiliate partner’s commission rates or an ad network's traffic requirements.
Authority and Trust: Creating and selling a high-quality product instantly positions you as an expert. It builds deep trust with your audience, as you are no longer just recommending other people's stuff—you are standing behind your own valuable creation.
The market reflects this opportunity. The e-learning sector alone, a huge component of the digital product world, is projected to surge to an incredible $848 billion by 2030. This isn't a fleeting trend; it's a fundamental shift in how creators build profitable, resilient businesses.

7 High-Margin Digital Products for Travel Creators
But where do you start? The best digital products aren't just random ideas; they are targeted solutions to the most persistent problems your audience faces. Think less about what you can create and more about what your readers desperately need.
Here are seven field-tested ideas that consistently deliver immense value for travelers.
1. The Hyper-Niche eBook Guide
Forget a generic guide to "Italy." The market for successful eBooks is in hyper-specificity. Think "A First-Timer's Foodie Guide to Mexico City" or "A Hiker's 7-Day Guide to the Scottish Highlands." These focused guides solve a precise problem for a well-defined audience, making them an easy purchase. Your first-hand experience is the unique selling proposition that no one else can replicate.
Why it Works: Travelers are drowning in generic information. A curated, expert guide from someone they trust is a valuable shortcut that saves them dozens of hours of stressful research.
Pro-Tip: Include a "digital bonus" to increase perceived value. This could be a printable packing checklist, a list of useful phrases in the local language, or a custom Google Map with all your recommended spots pinned.
2. Customizable Itinerary Templates
One of the biggest pain points for travelers is the planning process itself. Offer a beautifully designed, plug-and-play solution. These aren't just static lists; they are structured planning documents that users can adapt for their own trips. Create them in user-friendly formats like Notion, Trello, Google Sheets, or as a printable PDF.
Why it Works: You are selling organization and peace of mind. A template with built-in budget trackers, booking checklists, and daily planning sheets is an indispensable tool for overwhelmed planners.
Pro-Tip: Create tiered packages. Offer a template for a 3-day weekend, a 7-day week, and a 14-day trip, each at a different price point, to cater to different traveler needs.
3. Interactive Digital Maps
This is one of the easiest and most valuable products to create. Use Google's "My Maps" feature to build a custom map of a city or region, pinning your curated locations: your favorite cafes, hidden-gem restaurants, secret photo spots, and must-see attractions. You then sell access to the map link.
Why it Works: This product is intensely practical. A traveler can open it on their phone in-destination and instantly have your expert recommendations at their fingertips, ready for navigation. It's a perfect, low-cost impulse buy.
Pro-Tip: Bundle your map with a short companion PDF guide that gives a one-paragraph description of why each pinned spot is worth visiting. This adds context and value with minimal extra effort.

4. Lightroom Photo Presets
If you have a distinct photographic style that your audience loves, you can package your editing settings into "presets." These are one-click filters that allow your followers to achieve a similar aesthetic in their own travel photos.
Why it Works: You are selling an aspirational outcome. Your audience wants their photos to look as beautiful as yours, and presets offer an instant, easy way to do that. They are highly scalable and perfect for visually-driven platforms like Instagram.
Pro-Tip: Sell presets in themed bundles. Create a "Moody Mountains" pack, a "Tropical Beaches" pack, or a "European Cities" pack. This allows you to appeal to different types of photographers and increases the average order value.
5. Niche Stock Photo & Video Packs
As a travel creator, your hard drive is filled with thousands of high-quality photos and video clips. These are valuable assets. Curate them into themed bundles and sell them to other creators, small businesses, or marketers who need authentic, royalty-free visual content.
Why it Works: You are saving other professionals time and money. Sourcing authentic, non-generic stock imagery is a constant challenge. A pack of "20 Vertical Videos from Bali" or "50 Photos of Tuscan Sunsets" is a ready-made solution.
Pro-Tip: Focus on a specific visual niche. Instead of generic landscapes, offer packs that capture a certain mood (e.g., "Wanderlust & Adventure") or a specific subject (e.g., "Overhead Food Shots from Around the World").
6. Printable Travel Planners & Journals
While similar to itinerary templates, this product focuses more on the documentation and mindfulness aspect of travel. Create a beautifully designed PDF pack that users can print at home. This can include packing checklists, budget trackers, daily planning sheets, and guided journal prompts.
Why it Works: This appeals to the highly organized traveler who loves the tactile experience of planning and journaling on paper. It helps build anticipation before a trip and serves as a wonderful keepsake after.
Pro-Tip: Market it as part of a "mindful travel" bundle. Include journal prompts that encourage reflection, gratitude, and being present during their travels.
7. Self-Guided Audio Tours
Use your voice and storytelling skills to create a downloadable audio tour. You act as a virtual guide, leading listeners on a walking tour of a specific neighborhood or historical site. The audio file can guide them from point to point, sharing stories, history, and insider tips along the way.
Why it Works: This offers the value of a guided tour with the flexibility for users to go at their own pace. It's a unique and immersive way to experience a destination, guided by a voice they already trust.
Pro-Tip: Partner with a local expert or historian for an interview segment to include in the audio tour. This adds a layer of unique expertise and credibility that makes your product stand out.

From Idea to Income: Your Digital Product Creation Playbook
Having a great idea is only the first step. Creating a high-quality product that people will love involves a structured, multi-phase process.
Step 1: Validate Your Idea (Before You Build Anything)
The biggest mistake new creators make is spending months creating a product no one wants to buy. Validation is non-negotiable.
Listen to Your Audience: Analyze your blog comments, email replies, and social media questions. What destinations do people constantly ask about? What part of the planning process do they find most frustrating? Their questions are your product ideas.
Conduct Keyword Research: Use an SEO tool to check the search volume for terms related to your idea. High search volume for "7-day Japan itinerary" is a strong data signal that a market exists for a guide on that topic.
Analyze Competitors: Find 3-5 similar products. See what they're charging, what they include, and read their reviews. Your goal isn't to copy them, but to identify a gap in the market that your unique expertise can fill.
Step 2: Create Your Content Like a Pro
With a validated idea, it's time to build.
Create a Detailed Outline: A good product flows intuitively. Develop a logical table of contents before you write a single word. This will be your roadmap and ensure you don't miss any crucial information.
Gather Your Unique Assets: Compile your personal notes, journal entries, and high-quality photographs. Your first-hand experience is your most valuable asset and your primary competitive advantage.
Write with Personality: Go beyond just listing facts. Write in your authentic voice. Share anecdotes, insider tips ("skip the line by going at this time"), and vivid descriptions that bring the destination to life. The content must be both inspirational and intensely practical.
Step 3: Design for the Real World (On a Mobile Device)
Your digital guide will almost certainly be used on a smartphone in-destination. A mobile-first design isn't an option; it's essential for the product to be useful.
Prioritize Legibility: Use a clean, simple font of at least 11 points and ensure high contrast between your text and background. Your customer shouldn't have to pinch and zoom to read.
Simplify Navigation: The single most important design element is a hyperlinked Table of Contents at the beginning of the document. This allows users to instantly jump to the section they need with a single tap.
Use the Right Tool: For non-designers, a template-based tool like Canva is the perfect choice. It's built specifically to help you create professional-looking visual documents quickly and efficiently, without the steep learning curve of complex software like Figma or Adobe Illustrator.
Step 4: Price Your Product for Profit
Pricing is one of the most challenging decisions. The most effective strategy for knowledge-based products is value-based pricing. Price your product based on the transformation it provides. If your guide saves a user 20 hours of research, its value is far greater than the software used to create it.
A great starting point is to research comparable products to establish a market range, then price your product based on its unique value. For a first-time, high-quality travel eBook or template bundle, a price point between $19 and $49 is a strong position that communicates value without creating sticker shock.
Your All-in-One Hub for Creation and Commerce
Creating a brilliant product is half the battle; the other half is building a business around it. What if you had a single platform designed not just to sell your products, but to amplify your entire brand as a travel expert?
Welcome to TrekGuider, the ultimate marketplace and ecosystem built for travel creators like you. We handle the complex tech so you can focus on what you do best: creating.
Sell Everything in One Place: List all your digital creations—guides, maps, templates, eBooks, and more—with flexible options for one-time purchases or recurring subscriptions.
Publish and Profit: Don't just sell—build your authority. Publish articles directly on the marketplace to boost your SEO, attract new buyers, and establish yourself as a go-to expert.
Your Personal Creator Page: Claim your customizable landing page—a professional hub to showcase your bio, link your social networks, feature your articles, and display your entire product catalog.
Engage Your Community: With built-in features for donations and subscriptions, your most loyal followers can support your work directly, creating a predictable income stream.
TrekGuider is more than a storefront; it’s a launchpad for your creator business. Join a community of travel experts and unlock the tools you need to grow.
Claim Your Creator Page and Start Selling Today
The Tech & Tools to Sell Digital Products Online
Once your product is created, the next question is distribution. While using a simple e-commerce tool on your own blog is a great start, the real opportunity lies in joining an ecosystem designed to put your work in front of motivated buyers.
This is where a dedicated marketplace like TrekGuider becomes your most powerful asset. Instead of relying solely on your own traffic, you gain access to a platform where passionate travelers are already searching for high-quality guides, maps, and itineraries. It’s a powerful, ready-made sales channel that amplifies your reach from day one. By combining product sales with article publishing, you create a feedback loop: your articles attract new readers, and your creator page converts those readers into customers.

Frequently Asked Questions
1. Why use a marketplace instead of just selling on my own blog?
You should do both! Selling on your blog is great for your existing audience. Listing your products on a marketplace like TrekGuider exposes your work to a brand-new audience of travelers who may not have found your blog otherwise. It's about diversifying your sales channels.
2. How do I build my brand on the TrekGuider platform?
Your personal creator page is your brand's home base. You can customize it with your photo, bio, social media links, and even links to your personal website. More importantly, by publishing high-quality articles on travel topics, you demonstrate your expertise and drive traffic directly to your products and profile.
3. What kind of support is available for creators?
The platform is built on a secure and reliable foundation (using Stripe Connect) to handle all payment processing and digital delivery. As the platform grows, creators can look forward to an expanding set of tools, including advanced analytics, newsletters, and even opportunities for sharing in advertising revenue.
4. Can I sell more than just guides and maps?
Absolutely. The platform is designed for a wide range of digital travel products. In the future, the vision is to expand to include services, event tickets, and even tours, making it a comprehensive solution for the modern travel entrepreneur.
Your Journey to Entrepreneurship Starts Now
Transitioning from a content creator to a business owner is the most empowering step you can take. The path to building a truly profitable and sustainable online business is paved with assets that you own and control. You now have seven concrete ideas and a step-by-step framework to get started. You have the blueprint to sell digital products online and move beyond trading your time for money.
The freedom and scalability you've been dreaming of are not a secret reserved for a select few. They are the direct result of a strategic shift in focus. Choose one idea from this list, start the validation process today, and take the first step toward building a business that funds your life of travel.
Meta Data Suggestions:
SEO Meta Title (58 characters):
7 Digital Products for Travelers That Sell Themselves in 2026
URL Slug:
digital-products-for-travelers
SEO Meta Description (154 characters):
Ready to sell digital products online? Discover 7 high-margin ideas for travel creators, from itinerary templates to photo presets, and start building passive income.
Read the full guide: The Travel Blog Business Plan: How to Make Real Money in 2026
Don't Miss Out! Subscribe for Exclusive Content
SubscribeComments 0
No comments yet
Be the first to share your experience!
Dont Miss Out! Subscribe for Exclusive Content
FTC Affiliate Disclosure Essentials: Stay Compliant as a Travel Creator
Essential Affiliate Tools: From Tracking to Full Optimization
Avoid These 5 Affiliate Landing Page Mistakes for Better Conversions
Affiliate Keyword Research Mastery for Travel Blogs
Booking.com Affiliate Program Review: Pros, Cons, and Earnings Potential