Chinese New Year SF: Parade Essentials
TrekGuider @trekguider
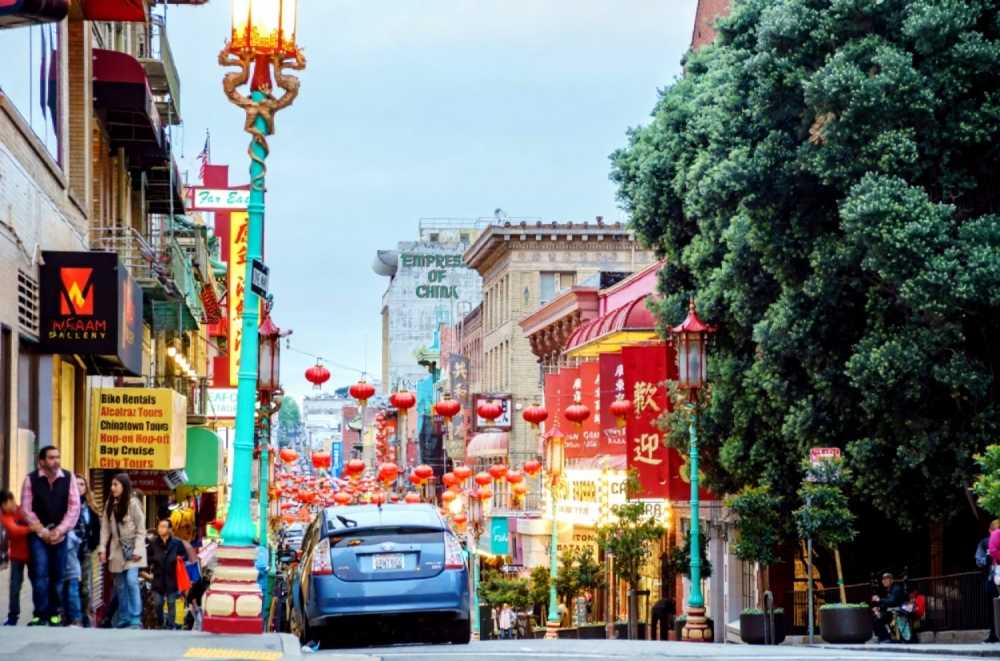
You can feel it before you see it. The low, resonant thump-thump-thump of the drums echoing off the buildings. The scent of roasted chestnuts and sizzling dumplings hanging in the cool February air. This is the magic of Chinese New Year in San Francisco, a tradition that has pulsed through the city’s veins since the Gold Rush. You’re here to witness the largest Lunar New Year celebration outside of Asia, but a thread of anxiety cuts through the excitement. How do you possibly navigate a crowd of half a million people? Where are the secret spots to actually see the famous 268-foot Golden Dragon?
The fear of missing out is real. You imagine being swallowed by the crowd, your view completely blocked, the vibrant floats and lion dancers reduced to a muffled soundtrack. A once-in-a-lifetime cultural immersion could easily devolve into a stressful, shoulder-to-shoulder shuffle. Without a game plan, you risk leaving with nothing but blurry photos and a sense of frustration.
This is your game plan. Forget the chaos and embrace the spectacle. This guide is your all-access pass, a step-by-step blueprint for conquering the parade like a seasoned local. We’ll give you the insider tips on securing the best viewing spots, a deep dive into the must-see moments, and the cultural context that brings it all to life. You’re about to experience the Chinese New Year San Francisco festival not as a tourist, but as an expert. This incredible event is at the heart of the city's cultural calendar, a vibrant highlight we proudly feature in our broader guide to San Francisco Holidays: Bay Area Buzz.

Understanding the Celebration: More Than Just a Parade
The Chinese New Year, also known as the Lunar New Year or Spring Festival, is the most important holiday in Chinese culture and for many other Asian communities worldwide. It marks the beginning of a new year on the traditional lunisolar calendar—a time for sweeping away the old, honoring ancestors, and gathering with family for lavish feasts.
Each year is associated with one of the twelve animals of the Chinese zodiac. The 2026 celebration, which officially begins on late January or February (the date follows the lunar calendar), will usher in the Year of the Snake—an animal symbolizing wisdom, intuition, and grace.
San Francisco’s celebration is steeped in history. First held in 1851, it has grown from a local community event into the oldest and largest festival of its kind outside of Asia, a powerful proof of the city’s deep-rooted Chinese-American heritage. While the parade is the dazzling finale, the festival is a multi-week affair with several key components you won't want to miss:
The Flower Market Fair: A bustling, fragrant market where families purchase fresh flowers and auspicious plants like orchids and peach blossoms to welcome good fortune into their homes.
The Community Street Fair: A vibrant, weekend-long street party that transforms Chinatown with traditional music, dance performances, artisan vendors, and an incredible array of festival foods.
The Grand Parade: The spectacular culmination of the festivities, featuring stunning floats, complex costumes, acrobatic lion dancers, and the legendary Golden Dragon.
The Main Event: Conquering the Chinese New Year San Francisco Parade
The Southwest Airlines Chinese New Year Parade is an unforgettable spectacle, renowned for being one of the few night-illuminated parades in North America. Its dazzling floats and vibrant performers don't just march; they light up the city streets, creating a truly magical atmosphere that has to be seen to be believed.
Mark Your Calendar: 2026 Parade Date and Time
To ensure you don’t miss a single moment of the magic, lock these details into your calendar now:
Date: Saturday, around mid-February (dates shift each year)
Start Time: 5:15 PM
The parade typically lasts for about two and a half hours, winding its way through the heart of the city as darkness falls, which allows the thousands of lights on the floats and costumes to shine their brightest.
The Parade Route: Where to Be and When
While the Chinese Chamber of Commerce confirms the final route closer to the date, it traditionally follows a path designed for maximum spectacle. The parade kicks off at the intersection of Second and Market Streets, proceeds up Market, turns onto Geary Street through Union Square, continues onto Powell Street, then Post Street, and finally enters Chinatown at Kearny Street before concluding near Columbus Avenue.
Choosing your spot is a strategic decision. Here’s the breakdown:
The Start (Market Street): This area is often slightly less congested than Union Square. It’s a great option if you want to see the performers and floats when they are fresh and full of energy.
The Middle (Union Square): This is the epicenter of the action, with massive crowds and an electric atmosphere. The wide streets provide good sightlines, but you must arrive exceptionally early to claim a spot.
The End (Chinatown & North Beach): As the parade passes through the iconic Dragon Gate on Grant Avenue (via Kearny), the energy is palpable. The narrower streets create an intimate, immersive experience, but this also makes it one of the most densely packed areas.
7 Essential Tips for Securing the Perfect Viewing Spot
Arrive Early. No, Earlier. This cannot be overstated. For a prime curbside spot along Geary or Powell, you need to be there hours in advance. Seasoned locals often lay down their blankets by 2:00 PM or even earlier.
Invest in Bleacher Seats. If you want a guaranteed, comfortable, and unobstructed view without a multi-hour wait, purchasing tickets for the bleacher seats is the smartest move you can make. Tickets are sold through the official parade website and are worth every penny for a stress-free experience, especially with family.
Scout the Corners. Intersections where the parade makes a turn—like from Geary onto Powell or Powell onto Post—are strategic goldmines. You get to see the floats approach from one direction and then watch them turn, effectively doubling your viewing time.
Pack for a Marathon, Not a Sprint. You’re in for the long haul. Bring a lightweight folding chair or a thick blanket. Pack snacks and water, but be courteous to your neighbors. This is a communal experience.
Think Vertically. Any slight elevation is an advantage. Look for spots on a small incline or the steps of a building. Some hotels and restaurants along the route host viewing parties, though these are premium, ticketed events.
The Post Street Gambit. The section along Post Street, between Powell and Kearny, is often slightly less chaotic than Union Square proper. It’s a solid choice for those arriving a little later but still hoping for a decent view before the parade plunges into the heart of Chinatown.
Public Transit is Your Only Friend. Do not even think about driving. Road closures begin in the afternoon, and parking is a nightmare of nonexistent spaces and astronomical fees. Use BART or MUNI to get downtown and walk the final blocks.
Pro-Tip: For a less overwhelming experience with kids, consider watching the parade formation near the starting point on Second Street. You'll see the floats and performers up close as they line up, offering a fascinating behind-the-scenes look before the main event's intensity kicks in.
What to Watch For: The Spectacle of the Night Parade
The parade is a rich mix of culture, artistry, and tradition. Knowing what to look for will transform your experience from passive viewing to active appreciation.
The Legendary Golden Dragon (Gum Lung)
The grand finale and undisputed star of the show is the Golden Dragon, or "Gum Lung." This is no ordinary parade float. It's a magnificent, 268-foot-long masterpiece that requires a team of over 100 puppeteers from the Leung's White Crane martial arts association to carry it through the streets. In Chinese culture, the dragon is a benevolent symbol of power, good luck, and prosperity. Watching it weave and dance, illuminated against the night sky, is a core San Francisco memory in the making.

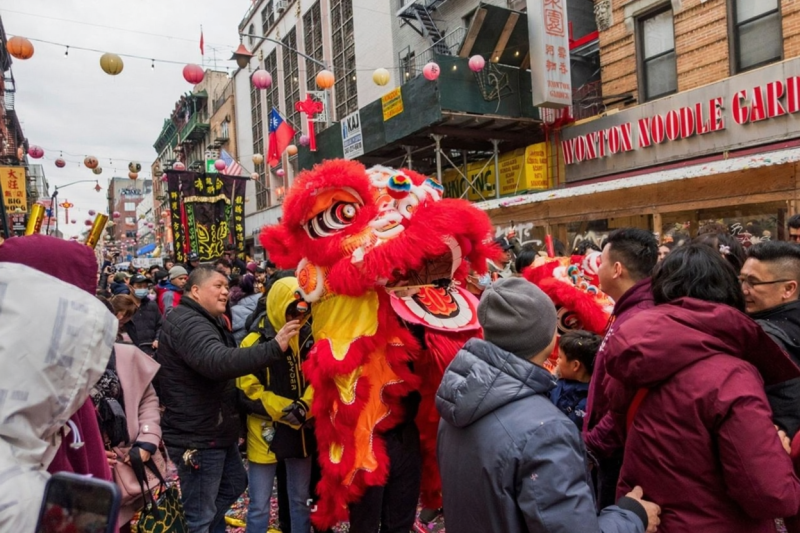
Dazzling Floats and Acrobatic Lion Dancers
This is where the "night-illuminated" aspect truly shines. The floats are breathtaking works of art, depicting scenes from Chinese folklore, the year's zodiac animal, and cultural landmarks, all glowing with thousands of lights. Interspersed between them are the high-energy lion dance troupes. Accompanied by the powerful rhythm of drums, gongs, and cymbals, the lion dancers perform acrobatic feats to scare away evil spirits and usher in a year of good fortune.
A Modern Twist: The Drone Light Show
In a perfect blend of ancient tradition and modern innovation, the parade has incorporated a stunning drone light show. Hundreds of synchronized drones ascend into the night sky, forming complex, glowing patterns—from zodiac animals to Chinese characters—in a display that is uniquely San Franciscan.
Beyond the Parade: Immersing Yourself in the Festivities
To truly capture the spirit of the holiday, you must venture beyond the parade route. The real cultural immersion happens in the days leading up to the main event.
The Chinatown Flower Market Fair
Held on the weekend before the parade, the Flower Market Fair is a sensory explosion. The streets of Chinatown are closed to traffic and filled with vendors selling beautiful flowers, lucky plants, and traditional New Year decorations. It’s a cultural tradition to decorate the home with fresh blooms to symbolize rebirth and new growth. Look for these auspicious items:
Orchids: Symbolizing fertility and abundance.
Tangerines with leaves intact: Representing secure relationships and wealth.
Peach blossoms: Considered sacred and symbolizing romance and prosperity.
The Chinatown Community Street Fair
Taking place on parade weekend, the Community Street Fair is a massive block party that showcases the best of Chinese culture. You’ll find everything from traditional calligraphy and lantern-making demonstrations to folk dance performances and Chinese opera. It’s a fantastic opportunity to shop for unique souvenirs and, most importantly, to sample authentic festival food.
The Symbolism of the Food
Food is the heart of the Lunar New Year celebration, with many dishes carrying symbolic meanings for a prosperous year. As you explore the street fair or local bakeries, be sure to try:
Long Noodles (Chángshòu Miàn): Eaten uncut, these noodles represent a long and happy life.
Dumplings (Jiǎozi): Shaped like ancient Chinese gold ingots, they symbolize wealth.
Rice Cakes (Niángāo): The name is a homophone for "higher year," signifying progress and improvement in the coming year.
Oranges and Tangerines: Their round shape and golden color symbolize fullness and wealth.

Practical Logistics for a Flawless Experience
A little bit of planning will make all the difference between a stressful outing and a cherished memory.
Getting There: Transportation and Parking
Let's be clear: public transportation is your only sane option.
BART (Bay Area Rapid Transit): The Powell Street and Montgomery Street stations will deposit you right on the Market Street parade route.
MUNI Metro & Buses: Numerous lines serve the downtown area. Check the SFMTA website for parade-day reroutes and schedule changes, which are inevitable.
Rideshare (Uber/Lyft): Expect heavy surge pricing and significant delays due to road closures. A better strategy is to be dropped off several blocks away and enjoy the walk in.
What to Wear and What to Pack
San Francisco weather is notoriously unpredictable. A beautiful sunny afternoon can become a bone-chillingly cold night in an instant.
Dress in Layers: A t-shirt, a fleece or hoodie, and a windproof jacket are your best friends. You’ll be grateful for the options as the temperature drops after sunset.
Comfortable Shoes: This is non-negotiable. You will be standing for hours and walking far more than you expect.
Essential Pack List:
A full water bottle.
Snacks to keep your energy levels high.
A portable phone charger (your battery will drain faster than you think).
A small, secure backpack.
For those traveling from abroad to witness this incredible event, ensuring your documents and plans are in order is crucial. Our International Travel Checklist is an indispensable resource for organizing your packing, paperwork, and preparations for a major cultural festival like this.
Safety and Crowd Management
With hundreds of thousands of spectators, situational awareness is key.
Stay Alert: Keep your valuables, like your phone and wallet, in a secure front pocket or a zipped bag worn on your front.
Use the Buddy System: Stick with your group. It is incredibly easy to get separated in the dense crowds.
Establish a Meeting Point: Before the parade starts, agree on a specific, easy-to-find meeting spot away from the main route in case you get separated. Cell service can be spotty in such large crowds.
Your Ultimate Chinese New Year Experience Awaits
You are now armed with the insider knowledge to experience the magic of the Chinese New Year San Francisco celebration to its absolute fullest. From understanding the cultural significance of the Year of the Snake to securing the perfect spot to watch the 268-foot Golden Dragon dance through the illuminated streets, you are ready to move beyond being a mere spectator. You are prepared to become an active participant in one of the world’s most vibrant and historic cultural traditions. Embrace the energy, savor the flavors, and welcome a year of prosperity and good fortune.
This deep dive into a single, spectacular event is just a glimpse of the expert planning we offer. To master your entire U.S. trip, from San Francisco's iconic festivals to the majestic national parks and bustling cityscapes across the country, our comprehensive Travel Guide provides the ultimate roadmap for your adventure.
Meta Data Suggestions:
SEO Meta Title: Chinese New Year San Francisco: Parade Guide & Tips (2026)
URL Slug: chinese-new-year-san-francisco-parade
SEO Meta Description: Your ultimate guide to the 2026 Chinese New Year San Francisco parade. Get expert tips on viewing spots, times, traditions, and how to navigate the crowds.
Don't Miss Out! Subscribe for Exclusive Content
Subscribe


Comments 0
No comments yet
Be the first to share your experience!
Dont Miss Out! Subscribe for Exclusive Content

San Francisco Cherry Blossoms: A Local's Guide to the Blooms

Halloween SF: Haunts Without Horrors

SF Festivals: 7 Must-See Lineups

Christmas SF: Lights & Wharf Wonders

SF Pride: 6 Route & Party Hacks

San Francisco Holidays: Bay Area Buzz
Food & Water Safety Abroad: How to Avoid Getting Sick
TrekGuider @trekguider
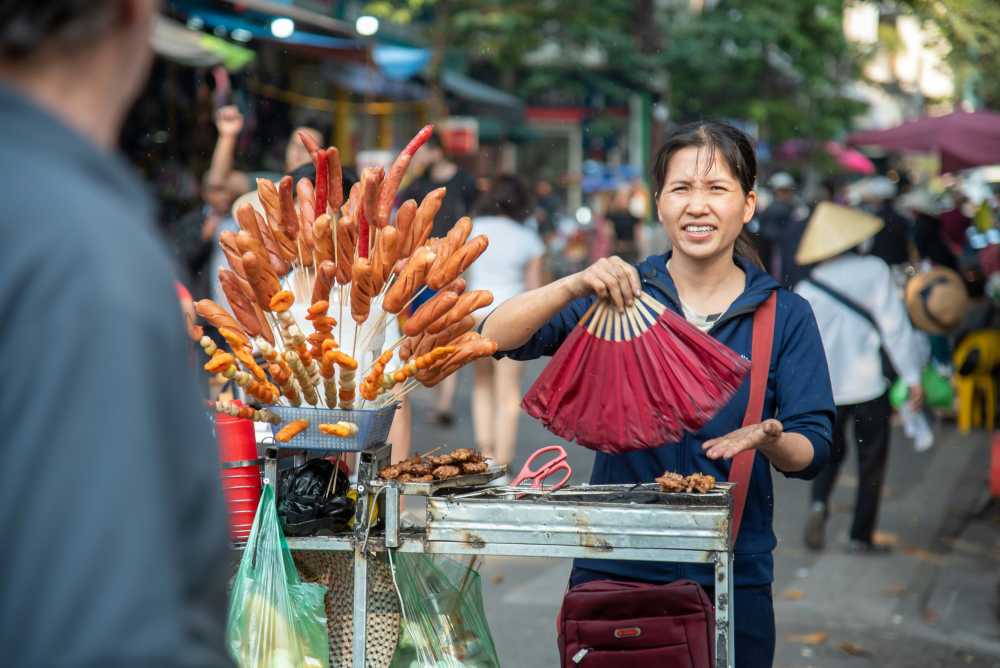
There’s a moment on every trip where the true magic happens: the first bite of a dish you can’t pronounce from a street cart buzzing with locals, the refreshing sip of a regional drink, the discovery of a flavor that will forever define a place in your memory. Food is culture, connection, and the fastest way to the heart of a destination. And that’s the traveler’s paradox, isn’t it? The very experiences that promise the most profound connection also carry a potent, gut-wrenching risk.
One bad meal or a single sip of contaminated water can derail your entire adventure, swapping days of discovery for days spent locked in a hotel room. This fear is agitated by horror stories from fellow travelers and the sheer unpredictability of an unfamiliar environment. It's a valid concern—traveler's diarrhea is unequivocally the most common travel-related illness, affecting up to 80% of international travelers depending on the destination. The fear of getting sick can make you timid, causing you to stick to bland, "safe" foods and miss out on the rich mix of flavors your destination has to offer. It can rob you of the very experiences you traveled so far to find.

But it doesn't have to be this way. This guide is your solution, a definitive and practical playbook for mastering food and water safety abroad. We’ve synthesized actionable advice from the world’s leading health organizations, including the Centers for Disease Control and Prevention (CDC) and the World Health Organization (WHO), to empower you to eat boldly and drink safely. This isn’t a list of things to fear; it’s a set of simple, memorable rules for prevention, identification, and, if necessary, management. This is a critical deep-dive into a core pillar of preparedness we cover in The Ultimate Guide to Travel Safety: A 2026 Playbook, designed to give you the confidence to dive fork-first into the heart of a culture.
The Golden Rule of Food and Water Safety: "Boil It, Cook It, Peel It, or Forget It"
If you remember only one thing from this guide, make it this simple, five-word mantra. Promoted by the CDC and other global health bodies, this single rule is a powerful and easy-to-use filter for nearly every culinary decision you'll make on the road. It’s the foundation of your entire food and water safety strategy.
Boil It: Your Safest Bet for Liquids
Pathogens like bacteria, viruses, and parasites are killed by heat. This makes boiling the most effective method for purifying liquids.
Examples: Drinking water that has been brought to a vigorous, rolling boil for at least one full minute. Hot beverages like tea or coffee that are served steaming hot are also generally safe. Any milk products you consume should be confirmed to be pasteurized or have been boiled.
Cook It: The Power of Heat
Thoroughly cooking food kills the harmful microorganisms that cause illness. The key is to ensure it is cooked all the way through and served hot.
Examples: Meat, poultry, or seafood that is well-cooked (not rare or raw) and served steaming hot to the touch. This is especially crucial for street food; dishes that are cooked fresh to order in front of you are a much safer bet than those that have been sitting out.
Peel It: Nature’s Own Packaging
For raw fruits and vegetables, the contamination is almost always on the outside surface. By peeling it yourself with clean hands, you remove the risk.
Examples: Fruits with a thick, peelable skin like bananas, oranges, mangoes, and avocados are your safest and best friends for a healthy snack. Similarly, vegetables you can peel, such as cucumbers, are also a great option.
Forget It: When in Doubt, Go Without
This is the most critical and sometimes most difficult part of the rule to follow. It requires discipline, but it’s your ultimate defense. If an item of food or drink doesn't meet one of the three criteria above, you must skip it.
Examples: Tap water and ice cubes made from tap water are the biggest culprits. Salads and raw leafy greens like lettuce are high-risk because they are difficult to clean thoroughly and may have been washed in contaminated water. You should also avoid fruits that cannot be peeled, such as grapes and berries, and any unpasteurized dairy products like milk or cheese. Finally, be very wary of any food served at room temperature, such as from a buffet.
Navigating the Streets: A Visual Guide to Spotting Unsafe Food
Street food is often the soul of a city's cuisine, but not all vendors are created equal. Your eyes are your best tool for vetting a stall. Before you order, take thirty seconds to perform a quick visual inspection. Look for these five clear signs of a safe or unsafe operation.
Poor General Cleanliness: This is the most obvious indicator. Red flags include dirty workstations with unwiped spills, visible food waste, rubbish on the ground, and the presence of pests like flies or wasps. The vendor themselves should also appear clean, with tidy clothes and hands.
Improper Food Temperatures: Food left in the "danger zone" (room temperature) is a breeding ground for bacteria. Avoid stalls where cooked food, especially meat, is sitting out in large trays. The safest option is always food that is cooked fresh to order, right in front of you. Hot food should be visibly steaming.
Obvious Cross-Contamination: Watch how the vendor handles ingredients. A major red flag is using the same cutting board, knife, or unwashed hands to handle raw meat and then touch ready-to-eat items like bread, salad, or cooked food.
Use of Contaminated Water: Look at the vendor’s water source. Rinsing dishes, utensils, or vegetables in a single bucket of murky, stagnant water is a sign of a high-risk operation. Likewise, avoid ice in your drinks unless you can confirm it was made from purified water (commercially bagged ice is usually a safe sign).
Lack of a Crowd (Especially Locals): A busy stall with a long line, particularly of local residents, is one of the best indicators of a trusted and safe food source. High customer turnover means the food is fresh and hasn't been sitting out for long. An empty stall is often empty for a reason.
Pro-Tip: Make "follow the locals" your street food mantra. A long line of residents is a walking, talking five-star review of a vendor's quality and safety. It's the most reliable seal of approval you can find.
Securing Your Water Supply: A Deep Dive into Hydration and Purification
Staying hydrated is non-negotiable for your health and energy while traveling, but assuming tap water is safe is one of the most common and dangerous mistakes a traveler can make. Here’s how to ensure every sip you take is safe.
Identifying Safe and Unsafe Drinking Water Sources
The CDC and WHO have clear guidelines. Unless you are in a country with a known, highly-developed sanitation system, you should assume all tap water is unsafe.
Safest Sources: Commercially bottled water in a factory-sealed, tamper-proof container is your most reliable option. Carbonated water is even safer, as a broken seal is immediately obvious. The second safest source is water that you have personally brought to a rolling boil for at least one minute.
Unsafe Sources to Avoid: Tap water, well water, ice made from tap water, fountain drinks mixed with tap water, and even water from clear mountain streams (which can contain germs) should all be avoided unless they have been purified.
Your Purification Playbook: The Top 3 Methods
When bottled or boiled water isn't available, you need a backup plan. Here are the top three recommended purification methods.
Boiling (The Gold Standard): This is consistently ranked by the CDC and WHO as the single most effective method. It kills all known disease-causing microorganisms, including viruses, bacteria, and parasites. Simply bring clear water to a rolling boil for 1 minute (or 3 minutes at elevations above 6,500 feet / 2,000 meters).
Filtration: A high-quality portable water filter is highly effective at removing bacteria and protozoan parasites like Giardia and Cryptosporidium. Look for a filter with an absolute pore size of 1 micron or smaller. The main limitation is that most portable filters do not remove viruses, so in high-risk areas, the CDC recommends following filtration with chemical disinfection.
Chemical Disinfection: Chlorine, iodine, or chlorine dioxide tablets/drops are a lightweight and easy way to kill viruses and bacteria. However, they are not consistently effective against the parasite Cryptosporidium and require a contact time of at least 30 minutes.
For in-depth planning on what gear to pack for every type of trip, from water filters to first-aid supplies, our all-encompassing Travel Guide is the only resource you'll ever need.
Damage Control: How to Manage Traveler's Diarrhea
But let’s be realistic: even the most diligent traveler can have a bad day. When that happens, knowing exactly what to do—and what not to do—can be the difference between a 24-hour nuisance and a trip-ruining ordeal. This is the damage control phase of your food and water safety plan.
The First and Most Critical Step: Oral Rehydration
According to travel medicine doctors, dehydration is the single most likely and dangerous complication of traveler's diarrhea. Replacing lost fluids and electrolytes is your absolute first priority.
Method: The best way to rehydrate is with a dedicated Oral Rehydration Solution (ORS), which comes in packets of salts and sugars that you mix with boiled or bottled water. In a pinch, sports drinks or clear soups can also be used.
Symptomatic Treatment for Mild to Moderate Cases
If the diarrhea is tolerable and not accompanied by a high fever or blood, over-the-counter medications can provide relief and help you get through a travel day.
Medications: An antimotility agent like Loperamide (the active ingredient in Imodium, a top pharmacist-recommended brand) can reduce the frequency of bowel movements. Bismuth Subsalicylate (found in Pepto-Bismol, another pharmacist favorite) can also help decrease the frequency and shorten the duration of the illness.
When to Use Standby Antibiotics (For Severe Cases)
If diarrhea is distressing, incapacitating, or contains blood or mucus, a prescribed antibiotic may be necessary.
Method: Before you travel, speak with your doctor or a travel medicine clinic. For travelers heading to high-risk destinations, they may provide a prescription for a standby antibiotic, such as Azithromycin, to carry with you. A single dose is often highly effective at treating severe cases.
Pro-Tip: Within your main travel first-aid kit, create a dedicated "Digestive Distress" module. Keep it in a separate, clearly-labeled zip-top bag containing a few packets of Oral Rehydration Salts, a strip of Loperamide, and a few antacids. This way, when you need it, you won't have to rummage through your entire kit.

Ready to Pack Like a Pro?
A smart food and water safety strategy is just one piece of your pre-trip preparation. To ensure you don't overlook a single essential item—from documents and finances to clothing and medical supplies—a master checklist is your most powerful tool. Our comprehensive, free checklist has you covered for every stage of your journey.
Download Your Free International Travel Checklist Now!
Food and Water Safety FAQs
A prepared mind is a safe mind. Here are expert answers to common questions that take your preparedness to the next level.
1. Besides traveler's diarrhea, what are the most common travel illnesses?
While traveler's diarrhea is number one, the CDC reports that other common issues include acute respiratory infections (like influenza or COVID-19, often acquired in transit), vector-borne fevers like Dengue and Malaria in tropical regions, and other food-borne illnesses like Hepatitis A and Typhoid Fever. Skin conditions from insect bites are also extremely common.
2. Is it safe to eat at a restaurant if I'm worried about street food?
Generally, restaurants can be safer, but the same principles apply. A busy restaurant full of locals is a great sign. Be cautious with the same high-risk items: salads, unpeeled fruits, and tap water or ice. If you want to find trusted, local-approved gems, explore the TrekGuider platform, where travel creators often share their own curated guides to safe and authentic eats.
3. Should I carry a standby antibiotic in my first-aid kit?
This is a question for your doctor or a travel medicine clinic. For travelers heading to high-risk destinations where severe traveler's diarrhea is common, many doctors will provide a prescription for a standby antibiotic like Azithromycin. It’s not for mild cases but can significantly shorten the duration of a severe bout of illness. Discuss your itinerary with your doctor to see if this is right for you.
Eat Boldly, Travel Well
The world of food is a world of incredible diversity and connection, and it deserves to be explored with an open mind and a curious palate. The goal of mastering food and water safety is not to build a wall of fear that separates you from authentic experiences. It is about building a foundation of knowledge that gives you the freedom to be adventurous. By internalizing the golden rule of "Boil it, cook it, peel it, or forget it," learning to trust your own visual assessment of a food stall, and knowing exactly what to do if you get sick, you replace anxiety with empowerment. You are now equipped with the skills to navigate the world's most exciting cuisines with confidence, ensuring your focus remains on the flavor, connection, and joy that every journey promises. Go explore, eat boldly, and travel well.

Meta Data Suggestions:
SEO Meta Title (Under 60 characters): Food & Water Safety Abroad: How to Avoid Getting Sick
URL Slug: food-water-safety-abroad
SEO Meta Description (Under 155 characters): Avoid traveler's diarrhea with our expert guide to food and water safety abroad. Learn the golden rules for eating street food, purifying water, and staying healthy.
Don't Miss Out! Subscribe for Exclusive Content
SubscribeComments 0
No comments yet
Be the first to share your experience!
Dont Miss Out! Subscribe for Exclusive Content

Chicago Beer Fests: Top 6 Tastings

Ultimate USA Holidays Guide: Top Picks

FTC Affiliate Disclosure Essentials: Stay Compliant as a Travel Creator

Essential Affiliate Tools: From Tracking to Full Optimization

Booking.com Affiliate Program Review: Pros, Cons, and Earnings Potential

Decoding Affiliate Commission Rates: Benchmarks for Travel Creators
The Ultimate Travel First Aid Kit Checklist (2026)
TrekGuider @trekguider
But it doesn’t have to be that way. The single most powerful tool for ensuring a healthy, stress-free journey is one you create before you even leave home: a comprehensive travel first aid kit. This isn’t just a box of bandages; it’s a personalized arsenal of preparedness that empowers you to handle common health issues with confidence and ease. Building your own kit is at the heart of the proactive mindset we cover in our comprehensive The Ultimate Guide to Travel Safety: A 2026 Playbook. Think of this guide less as a simple shopping list and more as a masterclass in preparedness, backed by pharmacist-approved advice to help you build the ultimate defense against travel’s minor medical curveballs.
DIY vs. Pre-Made: Which Travel First Aid Kit is Right for You?
Before we dive into the specific items, it’s worth considering whether to build your kit from scratch or buy a pre-made one.
Pre-Made Kits: These offer undeniable convenience. They come in a compact case and provide a decent baseline of supplies. However, they are often filled with low-quantity, generic items and may lack the specific medications you need for your trip.
DIY Kits: Building your own kit requires a bit more effort upfront but is superior in every other way. It allows you to choose high-quality brands, pack sufficient quantities, and tailor the contents specifically to your destination, your planned activities, and your personal health needs.
Our recommendation? Start with a high-quality pre-made kit as your base and then use this checklist to supercharge it, swapping out generic items and adding the crucial medications and tools it’s missing. This hybrid approach gives you the best of both worlds.
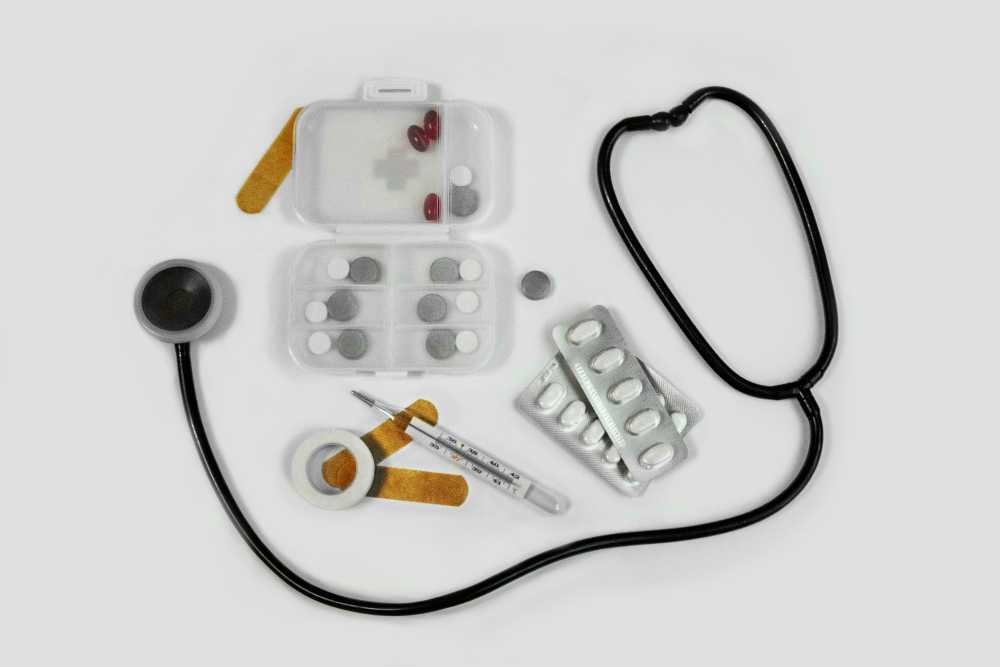
The Core Components of Your Ultimate Travel First Aid Kit
A truly effective travel first aid kit is organized like a mobile clinic, with specific supplies to treat the most common categories of travel-related ailments. Here is the definitive breakdown of what you need.
Wound & Burn Care: For Life's Little Scrapes
From a papercut to a scraped knee on a cobblestone street, any break in the skin is an open invitation for infection, especially in new environments. Here’s how you shut that door, fast.
Antiseptic Wipes (BZK or alcohol-based): For cleaning wounds, scrapes, and your hands before providing treatment. Individual packets are perfect for travel.
Antibiotic Ointment (e.g., bacitracin): A crucial step to prevent infection in minor cuts, scrapes, and burns after cleaning.
Assorted Adhesive Bandages: Pack a variety of sizes. Fabric bandages are generally more durable and flexible than plastic ones.
Butterfly Bandages / Wound-Closure Strips: Essential for taping the edges of a minor cut together to help it heal cleanly.
Sterile Gauze Pads and a Roll of Gauze: For dressing larger wounds or as a compress to control bleeding. Pack a few different sizes.
Medical Adhesive Tape: To secure gauze and bandages in place.
Moleskin or Blister Treatment Pads: An absolute lifesaver for any trip involving significant walking or hiking. Apply it as soon as you feel a "hot spot" to prevent a blister from forming.
Aloe Vera Gel: Provides soothing relief for minor sunburns.
Pain, Fever & Sprains: Managing Aches and Injuries
Long days of sightseeing, sleeping in unfamiliar beds, and carrying luggage can lead to aches and pains. Be prepared to manage them effectively so they don't slow you down.
Pain Relievers/Fever Reducers: Pack both an ibuprofen-based and an acetaminophen-based option. Pharmacists consistently recommend trusted brands like Advil/Motrin (Ibuprofen) for inflammation and pain, and Tylenol (Acetaminophen) for general pain and fever.
Aspirin: While not for general pain relief for everyone, a dose of aspirin can be life-saving for an adult experiencing symptoms of a heart attack.
Elastic Wrap Bandage: Invaluable for providing support and compression to a sprained ankle, wrist, or knee.
Instant Cold Packs: These single-use packs are activated by squeezing them and are excellent for reducing swelling from sprains, strains, and other minor injuries in the first 24-48 hours.
Pro-Tip: Decant pills into small, clearly labeled travel containers to save space, but take a photo of the original packaging first. This helps you remember dosages and provides information for pharmacists or doctors abroad if needed.

Digestive Issues: Your Defense Against Traveler's Diarrhea
Let’s be direct: traveler’s diarrhea is the single most common illness to strike travelers, affecting up to 80% of visitors in some destinations. Having a dedicated section in your kit to manage digestive distress is absolutely critical.
Anti-diarrhea Medication: To manage symptoms when you need to travel or get through a planned activity. The top pharmacist-recommended brand is Imodium (Loperamide).
Antacids: For relief from indigestion, heartburn, and general upset stomach. Pepto-Bismol is another pharmacist-favorite that can also help with mild diarrhea.
Oral Rehydration Salts: This is arguably the most important item in this section. Dehydration is the primary risk of diarrhea and vomiting. These pre-measured packets mix with safe, bottled water to replenish the essential fluids and electrolytes your body has lost.
Anti-nausea or Motion Sickness Medication: Essential if you’re prone to motion sickness on planes, boats, or winding bus rides.
Allergies, Bites & Skin: Soothing Irritations
New environments mean new pollens, unfamiliar insects, and different plants. Be ready to tackle itches, rashes, and allergic reactions before they become a major annoyance.
Antihistamine (e.g., diphenhydramine): For treating allergic reactions, hives, and severe itching. Note that some antihistamines can cause drowsiness.
Hydrocortisone Cream (1%): A topical steroid cream that provides fast relief from the irritation and itching of rashes and insect bites.
Insect Repellent: In any region with mosquito-borne illnesses like Dengue or Malaria, this is as important as your passport. Choose a repellent with an effective active ingredient like DEET or Picaridin.
Epinephrine Auto-Injector (e.g., EpiPen): This requires a prescription and is absolutely essential for travelers with a history of severe allergic reactions (anaphylaxis).
Ready to Pack Like a Pro?
Your travel first aid kit is a critical piece of your travel puzzle, but it's not the only one. To ensure you don't overlook a single essential item—from documents and finances to clothing and gear—you need a master list. Our comprehensive, free checklist has you covered.
Download Your Free International Travel Checklist Now!
Essential Tools & Personal Medications
The final layer of your kit includes the tools to use your supplies effectively and your own personal health necessities.
Fine-Point Tweezers: For removing splinters, ticks, or other foreign objects from the skin.
Small, Rounded-Tip Scissors: For cutting medical tape, gauze, or moleskin. (Ensure they meet TSA guidelines if packing in a carry-on).
Disposable Non-Latex Gloves: To protect your hands and prevent infection when treating a wound on yourself or someone else.
Digital Thermometer: For accurately checking for fever.
Personal Medications: This is the most critical category. Pack a sufficient supply for your entire trip, plus at least a few extra days' worth in case of delays. Always keep your personal medications in your carry-on luggage in their original, labeled containers.
Pro-Tip: Before you leave, ask your doctor for a letter describing your condition and the medications you take, including their generic names. Keep a digital copy of this and your prescriptions on your phone. This can be invaluable if your medication is lost or you need to see a doctor abroad.

Beyond the Basics: Customizing Your Kit
The ultimate travel first aid kit is not one-size-fits-all. Once you have the core components, elevate your preparedness by customizing it for your specific journey.
By Destination:
Tropical/Developing Countries: Add anti-fungal cream, more insect repellent, and potentially a prescription for a standby antibiotic for severe traveler's diarrhea (consult your doctor).
High-Altitude Destinations: Speak with your doctor about medication to prevent altitude sickness.
By Activity:
Hiking/Trekking: Double down on blister care (moleskin, gel pads), pack an elastic wrap for sprains, and add pain-relieving gel.
Beach Vacation: Add extra aloe vera gel, sting-relief spray, and waterproof bandages.
By Traveler:
With Children: Include children’s formulations and dosages of pain/fever reducers, kid-friendly bandages, and any specific allergy medications they need.
Travel First Aid Kit FAQs
A great kit anticipates problems. Here are answers to common questions that take your preparedness to the next level.
1. What’s the first thing I should do if I get traveler’s diarrhea?
According to the CDC and travel medicine doctors, the first and most important step is oral rehydration. Dehydration is the biggest risk. Start sipping an Oral Rehydration Solution (ORS), sports drinks, or clear broths immediately. For mild to moderate cases that don't have a high fever or blood, an antimotility drug like Loperamide (Imodium) can help manage the symptoms. If symptoms are severe, incapacitating, or include a high fever or blood, it's time to consider a prescribed standby antibiotic and seek medical advice.
2. Should I pack a standby antibiotic in my kit?
This is a question for your doctor or a travel medicine clinic. For travelers heading to high-risk destinations where severe traveler's diarrhea is common, many doctors will provide a prescription for a standby antibiotic like Azithromycin. It’s not for mild cases but can significantly shorten the duration of a severe bout of illness. Discuss your itinerary with your doctor to see if this is right for you.
3. Is it okay to pack medications outside their original bottles to save space?
While it's tempting, it's safest to keep prescription medications in their original, clearly labeled containers. This avoids any confusion or legal issues with customs officials. For over-the-counter pills, you have more flexibility. If you use a travel pill organizer, consider taking a photo of the original packaging so you have the dosage information and ingredients handy.

Pack Confidence for Every Journey
A carefully assembled travel first aid kit does more than just prepare you for minor medical issues; it provides profound peace of mind. It transforms you from a worried passenger into a self-sufficient, empowered traveler, ready to handle the small bumps in the road so you can stay focused on the incredible experiences ahead. By following this checklist, you’re not just packing supplies—you’re packing the confidence to explore the world freely and fully.
Now that your health and safety are covered, you can focus on the other details that make a trip unforgettable. For a complete, deep-dive into every facet of trip planning, from health and safety to budgeting and logistics, our comprehensive Travel Guide is the only resource you'll ever need.
Meta Data Suggestions:
SEO Meta Title (55 characters): The Ultimate Travel First Aid Kit Checklist (2026)
URL Slug: travel-first-aid-kit-checklist
SEO Meta Description (154 characters): Build the perfect travel first aid kit. Our 2026 checklist, with pharmacist-approved tips, covers everything from wound care to stomach issues. Be prepared.
Don't Miss Out! Subscribe for Exclusive Content
SubscribeComments 0
No comments yet
Be the first to share your experience!
Dont Miss Out! Subscribe for Exclusive Content
Ultimate USA Holidays Guide: Top Picks
FTC Affiliate Disclosure Essentials: Stay Compliant as a Travel Creator
Essential Affiliate Tools: From Tracking to Full Optimization
Booking.com Affiliate Program Review: Pros, Cons, and Earnings Potential
Decoding Affiliate Commission Rates: Benchmarks for Travel Creators

Amazon Associates for Travel: Strategies to Maximize Commissions
Amazon Associates for Travel: Strategies to Maximize Commissions
TrekGuider @trekguider
Let’s be blunt: the Amazon Associates program feels like a paradox. On one hand, it’s the undisputed titan of e-commerce, a platform your audience uses weekly, if not daily. On the other, its core metrics—a paltry 3-4% commission for most travel gear and a 24-hour cookie—seem purpose-built to underwhelm.
This isn't just a feeling; it's a business problem that breeds frustration. You see the industry reports—the affiliate marketing market soaring past $93 billion, with travel creators hitting a reported average of $13,847 a month—and it feels like your Amazon efforts are a high-effort, low-reward distraction. You’re stuck in a cycle of creating content for a platform that seems designed to underpay you, leaving a fortune on the table.
This guide is your way out of that cycle. This is a hyper-focused masterclass on transforming Amazon Associates from a minor annoyance into a consistent and significant revenue stream. We’re moving beyond the basics to deliver advanced, actionable strategies tailored specifically for amazon associates for travel bloggers. You will learn to master high-conversion gear lists, use the SiteStripe tool for maximum efficiency, and navigate the treacherous waters of Amazon’s Terms of Service to build a bulletproof and profitable system, a topic we deconstruct from every angle in our definitive command center for the entire affiliate ecosystem: Travel Affiliate Programs: The 2026 Ultimate Guide.

The Amazon Paradox: Why a Low-Commission Program is a Top Earner
At first glance, the program’s core metrics are discouraging. So why is Amazon Associates an essential, non-negotiable tool for virtually every top-earning travel creator?
The answer lies in two powerful forces: universal trust and the strategic magic of the 24-hour universal cookie.
First, you don’t have to sell your audience on the legitimacy of Amazon. They already have an account, their credit card is saved, and they trust the platform implicitly. This pre-existing brand equity dramatically reduces friction and leads to higher conversion rates than almost any other retailer.
Second, and most importantly, is the secret weapon: the 24-hour universal cookie. When a reader clicks your affiliate link for a travel adapter, a tracking cookie is placed on their browser. For the next 24 hours, you earn a commission on everything they add to their cart and purchase, not just the travel adapter.
Here’s how this plays out in the real world:
A reader clicks your link for a $15 travel adapter.
While on Amazon, they remember they also need a new $400 camera for their trip, a $150 suitcase, and $50 worth of toiletries.
They add it all to their cart and check out.
You don’t earn a commission on just the $15 adapter. You earn a commission on the entire $615 cart. This is the hidden engine that turns tiny clicks into substantial payouts. Your job isn’t just to sell a single product; it’s to open the 24-hour window.
Strategy 1: Master High-Conversion Content
Because the cookie window is so short, your content must be engineered to capture a user who is in the final stages of planning and ready to buy. Generic travelogues won’t cut it. Your focus must be on creating hyper-specific, product-focused content that solves an immediate purchasing need.

The Power of the Hyper-Specific Gear List
This is your bread and butter. But you must move beyond the generic "My Ultimate Packing List." The key to success is targeting long-tail keywords that attract a user with a very specific problem. Instead of competing with a million other packing lists, you become the definitive resource for a targeted niche.
Instead of: "My Packing List"
Target: "What to Pack for a Two-Week Safari in Tanzania"
Instead of: "Best Travel Cameras"
Target: "Best Vlogging Cameras and Mics for YouTube Travel Channels"
Instead of: "What to Wear in Europe"
Target: "What to Wear in Italy in October (That Isn't Jeans)"
These posts attract highly motivated buyers and are far less competitive to rank for in Google.
The "What's In My Bag?" Post
This is a classic for a reason: it works. This format allows you to showcase your gear in an authentic, personal context. The key is to use your own high-quality photos. Show the gear in use, show it laid out, and explain why each item has earned its place in your bag. This builds immense trust and makes your recommendations feel like they’re coming from a savvy friend, not a salesperson.
The Standalone Product Review
Reserve these for key, high-value, or truly exceptional pieces of gear that are central to your niche. If you are an adventure travel blogger, a deep-dive review of your favorite hiking boots or travel backpack can become an evergreen asset that earns commissions for years. Go into excruciating detail, share your real-world experiences, and include plenty of authentic photos and videos.
Strategy 2: The SiteStripe Workflow for Maximum Efficiency
One of the biggest hurdles to effectively monetizing with Amazon is the time it takes to generate links. Logging into your dashboard, searching for a product, and creating a custom link is a slow, clunky process. This is where mastering the Amazon SiteStripe is a game-changer.
SiteStripe is a free, official toolbar from Amazon that appears at the top of your browser whenever you’re logged into your Associates account and browsing Amazon.com. It allows you to generate a custom affiliate link for any product page with a single click.

Your High-Speed Workflow:
Find the Product: Navigate to the exact product page you want to recommend on Amazon.
Click to Generate: At the top of the page, use the SiteStripe toolbar to instantly get a link. You can choose:
Text: A clean, short amzn.to link.
Image: An image-based link with your tracking ID embedded.
Text + Image: A rich-text box with both the image and a text link.
Copy and Paste: Paste the link or code directly into your blog post.
What used to be a five-minute process now takes five seconds. This efficiency is critical. It allows you to quickly and easily add affiliate links to all relevant content, ensuring you never miss an opportunity to monetize.
Pro-Tip: Use SiteStripe to quickly grab image links. Product images hosted by Amazon are high-quality and load quickly. Using these official image links is often better than uploading your own product photos (for non-personal shots) and can help improve your page load speed.
Strategy 3: Build a Bulletproof System with TOS Mastery
Amazon is notoriously strict, and getting banned from the Associates program is a real risk. An accidental violation of their extensive Terms of Service (TOS) can result in the immediate termination of your account and the forfeiture of all your hard-earned commissions. Protecting your account matters most for any serious amazon associates for travel bloggers.

While you must read the full Associates Program Policies, here are the most common and critical violations that travel creators unwittingly commit:
Never Use Links in Emails: This is a cardinal sin. Amazon strictly forbids the use of affiliate links in any offline manner, including emails, newsletters, PDFs, or e-books. Always link from your email to a page on your blog, and place the Amazon links there.
Don't Cloak Your Links: While link cloaking is a best practice for most affiliate programs, Amazon has specific rules against it. They must be able to clearly identify that the link is coming from your site. Using a standard amzn.to short link generated by SiteStripe is always the safest bet.
Never Mention Specific Prices: Prices on Amazon fluctuate constantly. Stating a price in your article ("This backpack costs $199") is a violation because it can quickly become inaccurate. Instead, use a call-to-action like, "Check the latest price on Amazon."
Disclose, Disclose, Disclose: You must have a clear FTC disclosure on your site. Amazon also requires specific language: "As an Amazon Associate, I earn from qualifying purchases." This should be easily visible on your site.
Comply with Google's Rules: Beyond Amazon's rules, you must also comply with Google's. All paid links, including affiliate links, must use the rel="sponsored" HTML attribute. This signals to search engines that the link is commercial. Thankfully, most modern link management plugins can add this tag automatically, but it is your responsibility to ensure it’s there.
The Professional's Playbook: The Travel Creator's Toolkit
Mastering Amazon is a critical piece of the puzzle, but it's just one piece. To build a truly professional and profitable content business, you need a complete system. Our ultimate resource bundle, The Travel Creator's Toolkit, is packed with the checklists, content templates, and guides you need to build a resilient and diversified affiliate income stream.
Strategy 4: The Pro-Level Play - Combine Amazon with High-Margin Digital Products
The ultimate strategy for top-earning creators is to use Amazon as a foundational layer in a more sophisticated, diversified income strategy. Amazon is perfect for recommending physical products, but its commissions will never match the profit margins of selling your own digital products.
This is where you combine the high-volume nature of Amazon with the high-margin nature of your own expertise. This is the evolution from affiliate to owner.

The Funnel in Action:
The Blog Post: You write your hyper-specific gear list, "The Ultimate Packing List for a 7-Day Trek in Patagonia."
The Amazon Links: You populate the post with your affiliate links for the perfect hiking boots, waterproof jacket, wool socks, and trekking poles available on Amazon. You solve your reader's immediate gear problem.
The High-Margin Upsell: At the end of the post, you offer the perfect next step. You add a call-to-action that says: "Now that you have the gear, get the complete plan. My premium 'Patagonia Self-Guided Trekking Itinerary' is a downloadable guide with detailed maps, daily schedules, and booking links for all the campsites. Get it now on the TrekGuider Platform."
This is the master strategy. You use Amazon to earn commissions on the "what" (the gear) and then sell your own high-margin product that provides the "how" (the plan). This allows you to fully monetize your expertise and build a business that you control completely.
Frequently Asked Questions (FAQ)
1. Can I use Amazon affiliate links on social media like Instagram or Pinterest? Yes, but with extreme caution. You must use the special links generated through the Amazon mobile app's "Mobile GetLink" feature or SiteStripe. You also must clearly identify yourself as an Amazon Associate on the social media profile where the links are shared. Most importantly, the link cannot be on a page that is "behind a gate" (like a private Facebook group).
2. What happens if a product I link to is out of stock? The link will still work and the 24-hour cookie will still be set. If the customer buys something else on Amazon during that window, you will still earn a commission. However, it creates a poor user experience. It's good practice to periodically check your top-performing links to ensure the products are still available.
3. How do I handle international traffic? My readers are from all over the world? This is a critical issue for travel creators. By default, a link to Amazon.com will only earn you a commission if the purchase is made on the US store. To monetize your global audience, you must use a link localization service. Amazon has its own called "OneLink," which can automatically redirect your international visitors to their local Amazon storefront. Third-party services like Geniuslink (Geni.us) offer more advanced features and are very popular with professional affiliates.
Your Blueprint for Amazon Mastery
Stop thinking of Amazon Associates as a low-paying chore. Start seeing it for what it is: a high-volume conversion machine that, when used strategically, can become a powerful and reliable pillar of your income. The key is not to focus on the low commission rate but to obsess over leveraging the 24-hour universal cookie.
By mastering the strategies for amazon associates for travel bloggers—creating hyper-specific content, working efficiently with SiteStripe, staying relentlessly compliant with the TOS, and layering it with your own high-margin products—you transform the program from a source of frustration into a predictable engine for revenue. This is a foundational skill for any serious travel creator looking to build a diversified and resilient business that can fund their adventures for years to come.
Read the full guide: The Travel Blogger's Playbook to Affiliate Marketing Mastery
Don't Miss Out! Subscribe for Exclusive Content
SubscribeComments 0
No comments yet
Be the first to share your experience!
Dont Miss Out! Subscribe for Exclusive Content
Ultimate USA Holidays Guide: Top Picks
FTC Affiliate Disclosure Essentials: Stay Compliant as a Travel Creator
Essential Affiliate Tools: From Tracking to Full Optimization

Avoid These 5 Affiliate Landing Page Mistakes for Better Conversions

Affiliate Keyword Research Mastery for Travel Blogs