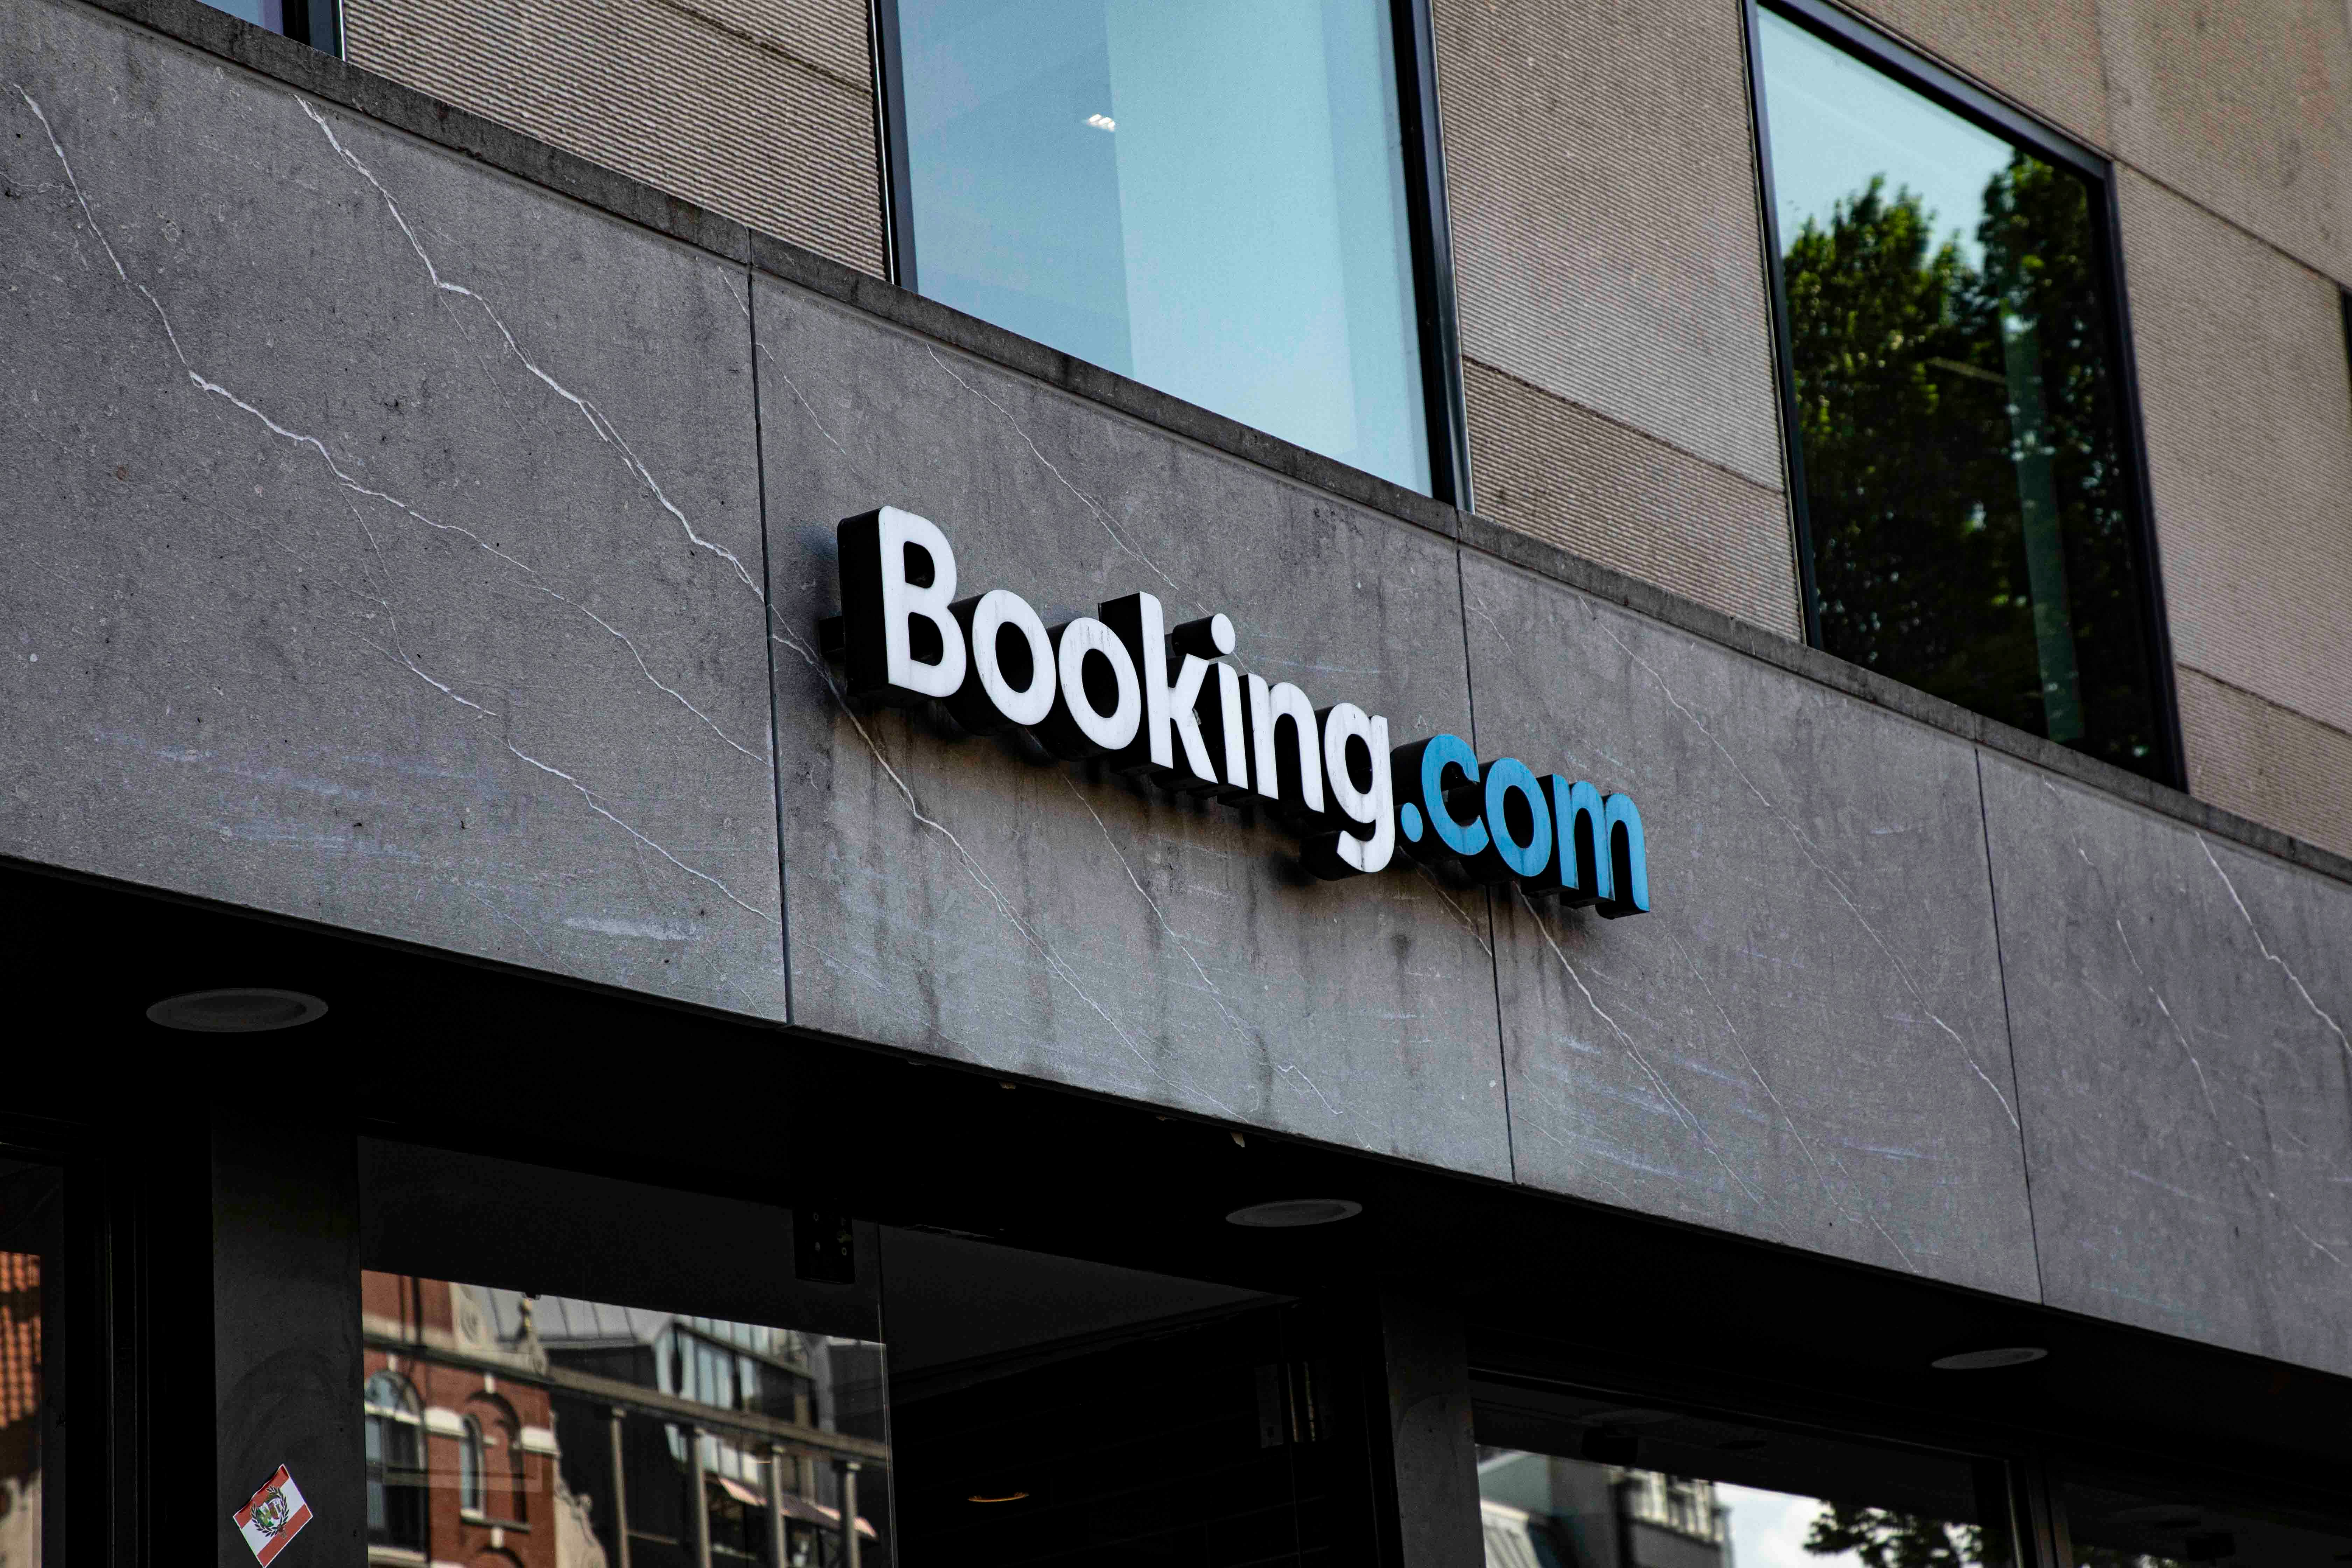
Booking.com Affiliate Program Review: Pros, Cons, and Earnings Potential
TrekGuider @trekguider
As a travel creator, you know accommodations are the bedrock of every trip. Your audience trusts you to recommend the perfect hotel, hostel, or vacation rental. Monetizing that trust is the logical next step, and one name looms larger than any other: Booking.com. With its colossal brand recognition and an inventory of over 28 million listings, joining its affiliate program feels like an obvious, can’t-miss opportunity. After all, with the average monthly income for travel affiliates hitting a reported $13,847, choosing the right partners is a high-stakes game.
But you’ve heard the whispers. In creator communities and private forums, there’s a nagging feeling that behind the slick marketing, something is fundamentally broken. You hear stories of a confusing commission structure, a cookie policy that seems designed to fail, and account issues that leave creators in the lurch. Is the biggest player in the game truly the best partner for your business, or is the booking affiliate program a trap for unwary creators lured in by a big name?
This is the definitive, unbiased review you’ve been searching for. We are cutting through the hype to deliver a clear-eyed analysis of the Booking.com affiliate program. We’ll dissect the legitimate pros, expose the critical, deal-breaking cons, and analyze the true earnings potential so you can make a strategic decision for your business. This deep dive is a crucial part of mastering the affiliate landscape, a topic we cover comprehensively in our pillar guide and essential command center: Travel Affiliate Programs: The 2026 Ultimate Guide.

The Allure: Why the Booking.com Program Is So Tempting
Let's be clear: the pull of the Booking.com affiliate program is undeniable. It’s a household name with the gravitational force of a market giant, and for creators, that brand recognition feels like a shortcut to credibility and conversions. These are the legitimate advantages that make it a top consideration.
Unmatched Brand Recognition and Trust
When you link to Booking.com, you are sending your audience to a platform they already know and trust. This pre-existing brand equity is a powerful conversion tool. You don't have to waste a single word "selling" your audience on the legitimacy of the booking platform itself; you can focus entirely on why that specific hotel is the right choice. This can lead to stronger initial click-through and conversion rates compared to lesser-known platforms.
A Colossal, Unrivaled Inventory
With over 28 million listings that span hotels, apartments, resorts, and even treehouses, Booking.com’s inventory is virtually limitless. No matter how niche your destination—from a major metropolis like Tokyo to a remote village in the Andes—you are almost certain to find a relevant, bookable property for your audience. This vast selection makes it a one-stop shop, simplifying the process of finding accommodation links for your content.
The Potential for High-Volume Conversions
For creators with significant traffic, especially those who attract visitors in the final, decisive stages of trip planning, the sheer volume of bookings processed by the platform can translate into substantial income. The platform's user-friendly interface and powerful search filters make it easy for users to find and book properties quickly, which can be a major asset for high-traffic websites.
The Critical Flaws: The Cons You Absolutely Cannot Ignore
While the pros are appealing, the operational realities of the booking affiliate program contain several severe, structural flaws that can cripple your earnings potential. These are not minor inconveniences; for many creators, they are deal-breakers.
The Achilles' Heel: Why the Session-Based Cookie Is a Deal-Breaker
This is, without question, the single most critical flaw in the Booking.com affiliate program. The program operates on a session-based cookie.
What does this mean? It means you only earn a commission if a user clicks your affiliate link and completes a booking within the exact same browser session. If they click your link, browse a few hotels, close the tab to think about it, and then return to Booking.com an hour later—or the next day—to make their booking, you earn nothing. Your tracking cookie has vanished.
Travel is a high-consideration purchase. People rarely book a multi-hundred or multi-thousand dollar trip on impulse. The typical customer journey looks like this:
They read your inspiring blog post.
They click your link to explore the hotels you recommend.
They compare prices and read a few more reviews.
They discuss options with a spouse or travel partner.
They return the next day, ready and excited to book.
With a session-based cookie, you are only compensated for the rare, impulsive booker. You lose the commission for every single thoughtful, deliberate customer you inspired. This policy is fundamentally misaligned with how real people plan travel, making it a structurally unsafe and potentially unprofitable model for content creators.

Pro-Tip: When evaluating any affiliate program, the cookie duration is often more important than the commission rate. A partner like Expedia Group offers a 7-day cookie, which is vastly superior as it respects the user's decision-making process and ensures you get paid for the value you create.
The "Black Box" Commission: Why 40% Isn't What It Seems
Booking.com often advertises a commission rate of 25-40%, which sounds incredibly high. However, this is deeply misleading. You do not earn a percentage of the total booking value. You earn a percentage of Booking.com's commission.
Here’s how that math actually breaks down:
A customer books a $500 hotel stay through your link.
The hotel pays Booking.com a commission (let's say 15%, which is $75).
You then earn your commission based on that $75, not the original $500.
If your rate is 25%, you earn 25% of $75, which is $18.75. Your effective commission rate on the total booking value is a mere 3.75%. This opaque structure makes it incredibly difficult to forecast your earnings and often results in a much lower payout than creators expect from the flashy headline numbers.
A History of Account Instability and Support Issues
Numerous affiliates have reported frustrating experiences with the program's administration. These complaints often center on sudden account closures without clear explanation, forced migrations to network platforms like Awin or CJ Affiliate, and a history of losing pending commissions during these transitions. While any large program will have some user issues, the volume of these reports suggests a level of instability that should be a major concern for any creator looking to build a reliable, long-term income stream.
The Verdict: Analyzing the True Earnings Potential
So, can you actually make money with the booking affiliate program? The answer is a qualified "yes," but only for a very specific type of publisher.
Who It Might Be Good For:
High-Traffic Deal & Discount Sites: Websites that focus on last-minute deals and attract users who are ready to book immediately can succeed with the session-based model. Their audience is impulsive by nature.
Metasearch Engines: Large-scale travel search engines that operate on a massive volume of clicks may find the program profitable due to sheer scale.
Who Should Avoid It:
Content Creators & Bloggers: If your content strategy is based on inspiration and long-term trip planning—creating itineraries, destination guides, and detailed reviews—this program is fundamentally at odds with your business model. You are inspiring a journey, not a single-session transaction.
Anyone Building a Sustainable, Predictable Income: The combination of a session-based cookie, an opaque commission structure, and reported account instability makes this a high-risk partner for anyone looking to build a reliable business.
Pro-Tip: The most resilient affiliate strategy is built on diversification. Never rely on a single program for your income. A healthy portfolio for a travel creator should include partners for accommodations, tours, insurance, and gear to create multiple, stable revenue streams.
Strategic Alternatives: Safer Bets for Higher Returns
The flaws in the Booking.com program do not mean you should abandon monetizing accommodations. It simply means you should partner with programs structured to favor creator success.
The most direct and superior alternative is the Expedia Group Affiliate Program. It covers major brands like Hotels.com and Vrbo and, most importantly, offers a 7-day cookie duration. This gives your audience a full week to make their decision after clicking your link, ensuring you are properly compensated for your influence.
Ultimately, the most secure path to a stable income is to reduce your reliance on any single affiliate program and start building assets you own. Instead of sending all your traffic to other brands, you can create and sell your own high-value digital products—like detailed itineraries, travel guides, or planning checklists. Platforms like the TrekGuider Seller Platform are designed specifically for this, allowing you to build your own digital storefront and keep a much larger share of the revenue. It's the ultimate strategy for taking control of your financial future.

Build Your Perfect Itinerary (and Monetize It)
Creating high-value, bookable itineraries is one of the best ways to serve your audience and drive affiliate sales. But starting from scratch can be daunting. Our free Travel Itinerary Template gives you the perfect framework to build beautiful, useful guides your readers will love—and a powerful asset you control.
Frequently Asked Questions
1. Is the Booking.com affiliate program free to join? Yes, the program is free to join either directly or through an affiliate network like Awin or CJ Affiliate.
2. What are the payment methods for the Booking.com affiliate program? Payments are typically made via PayPal or bank transfer, but this can depend on the network you join through. There is usually a minimum payout threshold (e.g., €100) that you must reach before you can receive your earnings.
3. Can I use my own affiliate links to make personal bookings? No. Like almost all affiliate programs, using your own links for personal purchases or bookings is a violation of the terms of service and can lead to your account being terminated and commissions being voided.
A Powerful Brand with a Flawed Partnership
The Booking.com affiliate program exists in a paradox. It leverages one of the most powerful and trusted brands in travel, offering a massive inventory that seems perfect for creators. However, its core mechanics—specifically the session-based cookie and the opaque commission structure—are fundamentally anti-creator. They are relics of an older affiliate model that fails to properly value the influence of content creators who build trust and inspire a customer's journey over days or weeks.
While it might work for a small subset of high-traffic, transactional websites, for the vast majority of travel bloggers and content creators, the booking affiliate program represents a significant and unnecessary risk. Your time, effort, and influence are better invested in partners with more favorable, transparent, and creator-friendly terms. By choosing strategic alternatives and diversifying your income streams, you can build a more profitable and resilient business for the long term.
Read the full guide: The Travel Blogger's Playbook to Affiliate Marketing Mastery
Don't Miss Out! Subscribe for Exclusive Content
Subscribe


Comments 0
No comments yet
Be the first to share your experience!
Dont Miss Out! Subscribe for Exclusive Content

Ultimate USA Holidays Guide: Top Picks

FTC Affiliate Disclosure Essentials: Stay Compliant as a Travel Creator

Essential Affiliate Tools: From Tracking to Full Optimization

Avoid These 5 Affiliate Landing Page Mistakes for Better Conversions

Affiliate Keyword Research Mastery for Travel Blogs

Decoding Affiliate Commission Rates: Benchmarks for Travel Creators
How to Make a Solo Travel Budget (That You'll Actually Keep)
TrekGuider @trekguider
You have the destination pinned on a map, the screenshots saved, the dream of a life-changing solo trip burning bright. But a huge, intimidating question mark looms over the entire fantasy: the money. You have no real idea how much it costs, how to save for it, or how you’ll manage it all on your own. This financial uncertainty is paralyzing, isn't it? It’s the anchor that keeps your dream moored in the harbor of "someday," while you watch others set sail. You worry that you’ll either never save enough or, even worse, that you’ll miscalculate and run out of money halfway through your adventure, turning a dream trip into a stressful nightmare.
This guide is your anchor chain cutter. It is the definitive, step-by-step system to create a realistic, achievable, and stress-free financial plan for your adventure. We’re going to demystify the process of how to budget for solo travel, breaking down every potential cost, from pre-flight essentials to daily gelato. This isn't about restriction; it's about empowerment. It's about giving you the clarity and control to turn "someday" into a firm departure date. For a complete roadmap of your entire journey, start with our foundational pillar article, The Ultimate Guide to Solo Female Travel (15 Essential Tips).
The "Why" Before the "How": A Solo Traveler's Financial Mindset
Before we open a single spreadsheet, let's establish a crucial mindset shift. For a solo traveler, a budget is not a cage—it is the key that unlocks the cage. When you travel with others, costs are often shared or split. When you travel alone, you bear 100% of the financial responsibility for every room, ride, and meal. While this may seem daunting, it grants you an unparalleled superpower: absolute financial agility and control.
You, and you alone, decide where to splurge and where to save. You can choose a hostel in Prague to save for a Michelin-starred meal in Paris. This level of autonomy is a core part of the solo travel experience, a movement dominated by women who make up a staggering 84% of the market. Mastering your budget is the first and most critical step in mastering the art of traveling on your own terms.
From Dream to Departure: Your Step-by-Step Guide on How to Budget for Solo Travel
Creating a comprehensive travel budget isn't guesswork; it's a systematic process that transforms a vague dream into an actionable financial goal. Follow these four steps to build a plan you can trust.
Step 1: Research and Estimate Your "Big Three" Costs
Your first task is to get a realistic, high-level estimate of what your trip will cost. Focus your research on the three largest categories of expense that will form the foundation of your budget.
Pre-Trip Fixed Costs: These are the one-time expenses you'll incur before you even leave home. This category includes things like necessary visas, travel insurance (an absolute non-negotiable), essential gear you need to buy (like a good backpack or walking shoes), and any required vaccinations.
Major Transportation: For most trips, this will be your round-trip flight to and from your destination region. Use tools like Google Flights or Skyscanner and search with flexible dates to get a ballpark figure for this significant cost.
Average Daily On-the-Ground Cost: This is the most variable part of your budget, and it's heavily influenced by your destination and travel style. Research is key here. As we'll see below, the difference between regions is dramatic. A budget-conscious solo traveler could comfortably explore Prague on around €65 per day, while maintaining a similar travel style in Paris would require at least €115 per day, according to cost-of-living data.

Step 2: Build Your Master Budget Spreadsheet
Once you have your "Big Three" estimates, it's time to get granular. Create a detailed spreadsheet or use a budgeting app to break down your total estimated cost into specific, itemized categories. This detailed view is crucial because it shows you exactly where your money is going and helps you identify areas where you can potentially cut back.
Your spreadsheet should include the following categories:
Pre-Trip Costs: (Visa fees, travel insurance, vaccinations, new gear)
International Transport: (Flights, long-distance trains)
Daily Lodging: (Your estimated nightly cost x number of nights)
Daily Food: (Your estimated daily cost x number of days)
Daily Activities: (Museum tickets, tours, special experiences)
Local Transport: (Subway passes, buses, occasional taxis)
Miscellaneous: (Souvenirs, laundry, toiletries)
Your Ultimate Planning Companion
A great budget is the foundation of a great itinerary. To help you organize every aspect of your trip, from flight details and accommodation confirmations to your daily spending plan, we've created the perfect tool to put this plan into action.
Download your free Travel Itinerary Template now! This comprehensive template will help you keep all your essential information in one organized place, making your planning process seamless and stress-free.
Step 3: Set a Savings Goal and Automate Your Success
With a tangible number in your sights, the path to your departure date sharpens from a hazy dream into simple, motivating math. Divide the total cost by the number of months you have until your departure. This number is your required monthly savings target.
The single most effective strategy for hitting this target is automation. Don't rely on willpower. Set up an automatic, recurring transfer from your checking account to a dedicated high-yield savings account for the day after you get paid. By treating your travel savings as a non-negotiable monthly bill, you pay your future self first and ensure you stay on track without having to think about it.
Step 4: The Golden Rule: Build a 15-20% Contingency Fund
This is the most crucial, and most often overlooked, step in building a resilient budget. After you’ve calculated your total estimated trip cost, add a buffer of 15% to 20% on top of that total. This is your contingency fund.
This fund is not just for emergencies like a missed flight or a medical issue. It is also your "opportunity fund." It’s the financial freedom to say "yes" to a spontaneous, can't-miss experience—like a last-minute ticket to the opera or a day trip with new friends from your hostel. This buffer is what prevents financial stress on the road and allows you to travel with confidence and flexibility.
The Cost of Style: Decoding Daily Expenses for Three Travel Tiers
That four-step framework gives you the how, but the biggest variable will always be the where and the what. To give you tangible financial targets, let's break down what those "on-the-ground costs" actually look like across three distinct travel styles, based on global averages for popular destinations. These figures are for a single person in USD and do not include major pre-trip costs like international flights.

The Budget Backpacker: Stays in hostel dorms, primarily eats street food or cooks in the hostel kitchen, and focuses on free activities like walking tours.
The Mid-Range Comfort Seeker: Stays in private hostel rooms or budget hotels, eats a mix of cafe meals and local restaurants, and enjoys a paid activity each day.
The Affordable Luxury Traveler: Stays in boutique hotels, dines out for most meals, uses ride-shares, and books multiple guided tours or unique experiences.
To see these numbers in action, explore the Travel Guide marketplace on TrekGuider. Many of our expert guides, published by seasoned solo travelers, include detailed budget breakdowns from their own trips, giving you invaluable real-world insight.
Hacking the System: 5 Actionable Tips for Slashing Your Biggest Costs
For a solo traveler, flights and accommodation are the two largest line items in the budget. Employing a few savvy strategies can dramatically reduce these costs, freeing up more of your hard-earned money for actual experiences.
Travel in the Shoulder Season: The months just before and after peak tourist season (typically spring and autumn) are the sweet spot. You’ll enjoy pleasant weather, fewer crowds, and flight and accommodation costs that can be 25-50% cheaper than in peak summer.
Embrace Modern Hostels (and Their Private Rooms): The stereotype of dingy dorms is long gone. Many modern hostels are stylish, social hubs that offer private rooms with ensuite bathrooms at a fraction of the cost of a hotel. You get privacy plus access to money-saving amenities like a communal kitchen.
Filter for Single Rooms: When searching on booking sites, specifically look for "single rooms" or studios. Many traditional European guesthouses offer smaller rooms designed for one person at a lower price than a standard double.
Use Flight Scanners with Flexible Date Searches: Instead of searching for a specific date on Google Flights or Skyscanner, use their calendar or "whole month" functions. You’ll often find that shifting your departure by just a day or two can result in massive savings.
Leverage Loyalty Programs: Before your trip, sign up for the free loyalty programs of the airlines and hotel chains you plan to use. More significantly, using a travel-focused credit card to pay for your trip expenses can earn valuable points and miles for free flights and hotel stays in the future.

How to Budget for Solo Travel and Avoid the "Budget Busters"
Even a perfect plan can be derailed by unexpected expenses. Being aware of these common "hidden" costs allows you to account for them in your contingency fund from the start.
The Single Supplement: The most notorious cost for solo travelers. Many tours and cruises base their pricing on double occupancy and charge extra for a single person. Always look for companies that cater to solo travelers or offer to pair you with a roommate to waive this fee.
ATM and Foreign Transaction Fees: This is death by a thousand cuts. Using the wrong card can mean paying a 3% fee on every purchase and $5-$10 for every cash withdrawal.
Baggage Fees: Budget airlines are famous for their exorbitant fees for both checked and carry-on luggage. Always read the fine print on baggage allowances before booking.
Local Tourist Taxes: Many cities charge a small tourist tax per person, per night, that is often not included in your prepaid booking price and must be paid in cash at your hotel.
International Data: Relying on your home carrier's roaming plan can be incredibly expensive. Budget for a local SIM card or an eSIM to ensure affordable connectivity.
Pro-Tip: Your most powerful tool against hidden fees is a strategic financial setup. Travel with two key products: a credit card that has no foreign transaction fees (like the Chase Sapphire Preferred®) and a debit card from a bank that offers worldwide ATM fee reimbursements (like the Charles Schwab Bank High Yield Investor Checking Account). This combination alone can save you hundreds of dollars.
Pro-Tip: Before you leave, create a "financial lifeline." Photocopy the front and back of every credit and debit card you plan to carry. Leave one copy with a trusted emergency contact at home and keep a digital copy in a secure cloud storage service. If your wallet is lost or stolen, having the card numbers and the international toll-free numbers on the back will make the cancellation process infinitely smoother.
Frequently Asked Questions About Solo Travel Budgeting
How far in advance should I start budgeting for a big solo trip?
Ideally, start your high-level research 9-12 months out. This gives you plenty of time to track flight deals, understand seasonal price shifts, and, most importantly, allows you to set a smaller, less intimidating monthly savings goal over a longer period.
Is it better to bring a lot of cash or just use cards?
Never carry large amounts of cash. The best strategy is a multi-pronged approach. Use a no-foreign-transaction-fee credit card for the majority of your purchases (hotels, restaurants, tours) to maximize security and rewards. Use a fee-reimbursing debit card to withdraw small amounts of local currency every few days for things like small market purchases, tips, or cash-only street food.
The 15-20% contingency fund seems like a lot. Is it really necessary?
Absolutely. Think of it as buying peace of mind. On a $3,000 trip, a 15% buffer is $450. That single fund could cover a last-minute flight change, a necessary trip to a doctor, or the spontaneous decision to take a ferry to a Greek island with new friends. Without it, any unexpected event becomes a major crisis. With it, it’s just a manageable part of the adventure.
Your Journey to Financial Freedom Awaits
A budget is not about what you can't do; it's about empowering everything you can do. It transforms a vague, anxiety-inducing dream into a clear, tangible, and achievable goal. By following this systematic approach, you now have the tools to build a financial plan that is not just a spreadsheet of numbers, but a roadmap to the world. You have a framework for how to budget for solo travel that puts you in complete control of your adventure.
This financial competence is the foundation upon which the most incredible solo journeys are built. With your budget sorted, you can focus on the real magic: planning your itinerary, discovering new cultures, and, most importantly, discovering yourself.

SEO Meta Data Suggestions:
SEO Meta Title (59 characters): How to Make a Solo Travel Budget You'll Actually Stick To
URL Slug: /how-to-budget-for-solo-travel
SEO Meta Description (154 characters): A step-by-step guide on how to budget for solo travel. Learn to estimate costs, save effectively, and avoid hidden fees for your next adventure.
Don't Miss Out! Subscribe for Exclusive Content
SubscribeComments 0
No comments yet
Be the first to share your experience!
Dont Miss Out! Subscribe for Exclusive Content
Ultimate USA Holidays Guide: Top Picks
FTC Affiliate Disclosure Essentials: Stay Compliant as a Travel Creator
Essential Affiliate Tools: From Tracking to Full Optimization

Booking.com Affiliate Program Review: Pros, Cons, and Earnings Potential
Decoding Affiliate Commission Rates: Benchmarks for Travel Creators

Top 11 High-Paying Affiliate Programs for Travel Bloggers
Avoid These 5 Affiliate Landing Page Mistakes for Better Conversions
TrekGuider @trekguider
You’ve done the work. You’ve mastered the keyword research, built the perfect post, and watched the traffic roll in. But the commissions aren’t following. It’s the sound of silence that every creator dreads—the digital equivalent of pouring water into a leaky bucket.
This is the silent killer of affiliate income. You see the industry reports—like the one stating the average monthly income for travel affiliates is a staggering $13,847—and it feels like a world away. The problem isn't your content or your traffic; it's the subtle, conversion-killing mistakes baked into your affiliate landing pages. These pages are the most critical link in your monetization chain, where even the smallest leaks can lead to a massive loss in revenue over time.

The good news is that these leaks are entirely fixable. This guide is your diagnostic toolkit. We will dissect the five most common and costly mistakes that plague travel creator landing pages and provide you with the exact, actionable fixes to plug the leaks, optimize your user’s journey, and dramatically increase your conversion rates. This is how you turn traffic into income. For a complete command of the entire affiliate ecosystem, from program selection to advanced strategy, our definitive pillar page, Travel Affiliate Programs: The 2026 Ultimate Guide, is your essential command center.
Mistake #1: Inducing “Analysis Paralysis” with Too Many Choices
You want to be helpful, so you provide your audience with every possible option. Your guide to the "Best Hotels in Paris" lists 25 different properties, each with a detailed description.
Your intentions are noble, but the psychological effect is catastrophic. You’ve just triggered "analysis paralysis." Faced with a wall of options, the human brain defaults to the easiest choice: none at all. The reader feels overwhelmed, their decision-making stalls, and they click the "back" button—taking their wallet with them.
The Fix: Become a Ruthless Curator and Guide
Your audience doesn't want a directory; they want your expert opinion. Your job is to eliminate the noise and guide them to the best decision for them.
The Rule of Three (or Five): Drastically cut down your recommendations. Instead of 25 options, present a highly curated list of the top 3-5. This immediately makes the choice feel manageable and authoritative.
Declare a "Top Pick": Go a step further and anoint a clear winner. Use visually distinct callout boxes to segment your top pick for different types of travelers. For example:
Top Pick for Luxury: The Ritz Paris
Top Pick for Families: Le Bristol Paris
Top Pick for Budget Travelers: Generator Paris
Use Comparison Tables: For head-to-head reviews, a well-structured comparison table is your most powerful tool. It allows users to scan key features, pros, and cons at a glance, making their decision process simple and logical. This visual clarity is highly effective at driving clicks to your preferred options.

By curating your recommendations, you shift from being a simple list-maker to a trusted advisor, a role that is infinitely more valuable and profitable.
Mistake #2: Using Weak, Generic Calls-to-Action (CTAs)
Your Call-to-Action is the single most important element for turning a reader into a buyer. It's the final instruction you give them. Yet, countless affiliate landing pages are littered with the weakest CTAs imaginable: a simple, uninspiring "Click Here" or a generic "Buy Now" button lost in a sea of text. These CTAs are passionless, vague, and fail to communicate any value. They don't motivate, they don't direct, and they certainly don't convert.
The Fix: Craft Compelling, Specific, and Visually Dominant CTAs
A high-converting CTA is a masterclass in micro-copywriting and visual psychology. It must be specific, benefit-oriented, and impossible to ignore.
Use Action-Oriented, Specific Language: Your CTA text should tell the user exactly what they will get when they click. Instead of "Click Here," use powerful, descriptive language that aligns with the user's goal.
"Check Prices & Availability on Viator"
"See the Latest Reviews on Tripadvisor"
"Get a Free Quote from SafetyWing"
Make It a Button, Not a Link: Simple text links are easy to miss. Encase your CTAs in visually distinct buttons that stand out from the rest of your content. Use a bold, contrasting color that draws the eye but still fits your brand's palette.
Create a Sense of Urgency (When Appropriate): Language that implies scarcity or timeliness can be a powerful motivator. Phrases like "Book Now Before It Sells Out" or "Check Today's Prices" can encourage immediate action, especially for time-sensitive bookings like tours and hotels.
Pro-Tip: A/B test your CTAs relentlessly. Test a red button versus a green one. Test "Check Prices" versus "Check Availability." Small changes in language and color can lead to surprisingly large lifts in conversion rates. Use data, not guesswork, to find your winning combination.

Mistake #3: A Critical Lack of Trust Signals
In the digital world, a click on an affiliate link is an act of trust. The user is trusting that your recommendation is genuine, that the link is safe, and that the product or service on the other side is legitimate. If your page is missing the key signals that build this trust, a skeptical user will never make that leap. They will assume you're just trying to make a quick buck, and their browser tab will close before you can say "commission."
The Fix: Engineer Your Page to Radiate Credibility
Trust isn't a given; it must be earned. Weave these essential trust signals into the very fabric of your affiliate landing pages.
Radical Transparency: Your FTC disclosure is non-negotiable. Place a clear, easy-to-read disclosure at the very top of your post, before any affiliate links appear. This isn't just a legal requirement; it's a sign of honesty that savvy readers actively look for.
Show, Don't Just Tell: Share your genuine, personal experience. Instead of just listing a product's features, tell the story of how you used it. Include your own photos and videos of the product in action. This authentic proof is a thousand times more powerful than a stock photo.
Leverage Social Proof: Humans are social creatures. We look to others to validate our decisions. Incorporate social proof directly into your content by including screenshots of positive reviews, user ratings, or testimonials.
Acknowledge the Flaws: No product is perfect. Mentioning a minor drawback or clarifying who a product is not for makes your review exponentially more believable. This balanced perspective proves you are an honest broker, not a blind salesperson.
Pro-Tip: Don't underestimate the power of video. With industry projections showing that video will account for 55% of all affiliate traffic by 2026, embedding a short, authentic video review of a product can be the most powerful trust signal in your arsenal.
Ready to Build Your Own High-Trust Product?
The most successful creators know that affiliate income is just one piece of the puzzle. The ultimate trust signal is having the expertise to create and sell your own digital products. This offers unparalleled profit margins and authority. But where do you start?
Our free Digital Product Ideas Guide is packed with dozens of proven, profitable ideas specifically for travel creators. Download it today for the blueprint to building your own content empire.
Mistake #4: Ignoring the Conversion-Killing Impact of Page Load Speed
This is the invisible mistake that can sabotage even the most perfectly designed page. In a world of fleeting attention spans, speed is everything. If your page takes more than a few seconds to load, your visitor is gone—often before your headline even appears. They will simply not wait. All the work you put into your content, CTAs, and trust signals becomes irrelevant if the page itself fails the first and most important test.
The Fix: Obsess Over Milliseconds
Optimizing your page speed is one of the highest-leverage activities you can undertake. According to industry data, a mere 1-second delay in page load can reduce conversions by a staggering 7%.
Compress Every Image: Large, unoptimized image files are the number one cause of slow pages. Use a free tool like TinyPNG to compress every single image before you upload it to your site.
Choose a Lightweight Theme: Not all website themes are created equal. Avoid bloated, feature-heavy themes that are loaded with unnecessary code. Opt for a clean, lightweight, and well-coded theme that is built for speed.
Leverage a Content Delivery Network (CDN): A CDN stores copies of your site on servers around the world. When a user visits your page, the content is delivered from the server closest to them, dramatically reducing load times.

Mistake #5: Adopting a "Set It and Forget It" Mindset
You’ve published your perfectly optimized affiliate landing page. The job is done, right? Wrong. This is one of the most pervasive and costly mistakes creators make. An affiliate landing page is not a static museum piece; it is a dynamic business asset that requires ongoing monitoring and optimization. The digital landscape changes, offers expire, and user behavior evolves. A page that is left untouched for a year is a page that is leaking money.
The Fix: Become a Data-Driven Optimizer
The highest-earning affiliates are relentless testers. They treat their affiliate landing pages like a science experiment, constantly forming hypotheses and using data to find out what works best.
Track Everything: Use Google Analytics to understand user behavior. Where are they coming from? How long are they staying? At what point are they dropping off? Use your affiliate network's dashboard to see which links are getting the most clicks and generating the most revenue.
A/B Test Your Key Elements: Systematically test variations of your most important page elements. Create two versions of your page with one single difference—a new headline, a different main image, a relocated CTA button—and use software to show each version to 50% of your traffic. The data will give you a clear winner.
Take Full Control: The ultimate act of optimization is to create an asset where you control every variable—the product, the price and the page. By selling your own digital products on a platform like the TrekGuider Seller Platform, you move beyond optimizing for a 5% commission and start optimizing for 100% of the revenue. It's the final step from affiliate to entrepreneur.
Pro-Tip: Use a link management plugin like ThirstyAffiliates or Pretty Links. These tools not only create shorter, cleaner URLs but also provide detailed click-tracking analytics. This allows you to see exactly which links within a single post are performing best, giving you invaluable data for your optimization efforts.

Frequently Asked Questions (FAQ)
1. How many CTAs should I have on one landing page? There's no magic number, but the key is relevance and clarity. Have one primary, visually dominant CTA for your main recommendation. You can then have secondary, contextual text-link CTAs where appropriate. The goal is to guide, not overwhelm.
2. Can a "busy" design with lots of colors and fonts hurt conversions? Absolutely. A cluttered design creates cognitive friction, making it hard for a user to find the information they need and identify the action you want them to take. A clean, simple design with plenty of white space and a clear visual hierarchy will almost always convert better.
3. How do I know if my page is fast enough? Use Google's free PageSpeed Insights tool. Just enter your URL, and it will give you a detailed report on your page's performance for both mobile and desktop, along with specific recommendations for improvement. Aim for a "Good" score in the green.
Your Blueprint for High-Converting Pages
You now have a professional-grade audit for your most valuable content. By systematically finding and fixing these five common mistakes, you can transform your underperforming affiliate landing pages from leaky buckets into high-efficiency conversion machines. The difference between a page that earns $50 a month and one that earns $5,000 is often just a handful of strategic optimizations.
Don't let these simple errors continue to cost you money. Pick one of your highest-traffic posts, run it through this checklist, and implement the fixes. By moving from a "set it and forget it" mindset to one of a data-driven optimizer, you take back control of your income and build a more profitable, resilient, and successful travel content business.
Read the full guide: The Travel Blogger's Playbook to Affiliate Marketing Mastery
Don't Miss Out! Subscribe for Exclusive Content
SubscribeComments 0
No comments yet
Be the first to share your experience!
Dont Miss Out! Subscribe for Exclusive Content
FTC Affiliate Disclosure Essentials: Stay Compliant as a Travel Creator
Essential Affiliate Tools: From Tracking to Full Optimization
Affiliate Keyword Research Mastery for Travel Blogs
Booking.com Affiliate Program Review: Pros, Cons, and Earnings Potential
Decoding Affiliate Commission Rates: Benchmarks for Travel Creators

7 Proven Affiliate Marketing Tips to Skyrocket Travel Income
Food & Water Safety Abroad: How to Avoid Getting Sick
TrekGuider @trekguider
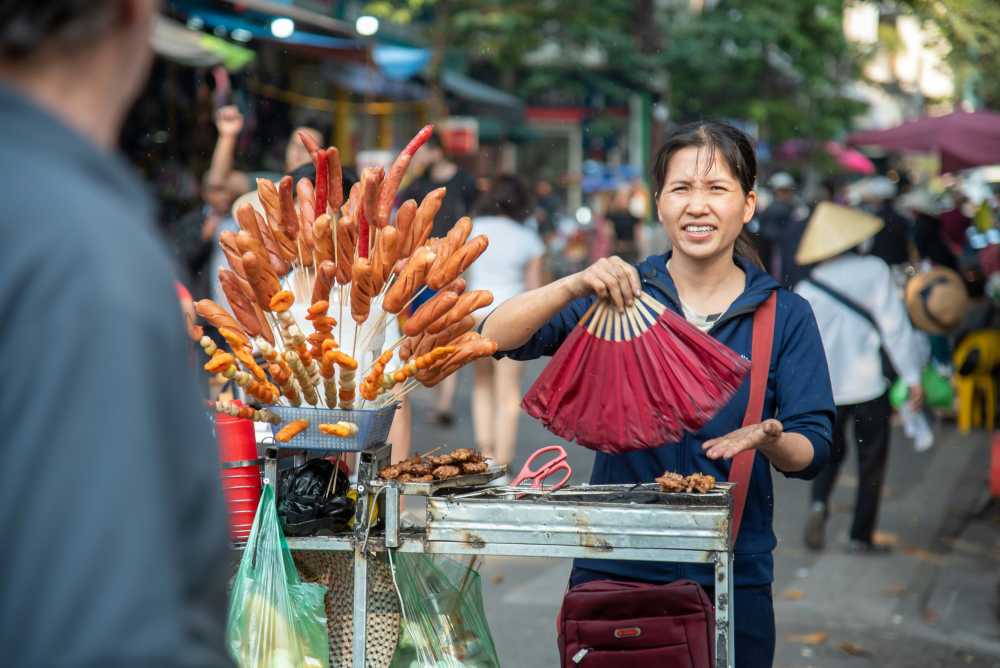
There’s a moment on every trip where the true magic happens: the first bite of a dish you can’t pronounce from a street cart buzzing with locals, the refreshing sip of a regional drink, the discovery of a flavor that will forever define a place in your memory. Food is culture, connection, and the fastest way to the heart of a destination. And that’s the traveler’s paradox, isn’t it? The very experiences that promise the most profound connection also carry a potent, gut-wrenching risk.
One bad meal or a single sip of contaminated water can derail your entire adventure, swapping days of discovery for days spent locked in a hotel room. This fear is agitated by horror stories from fellow travelers and the sheer unpredictability of an unfamiliar environment. It's a valid concern—traveler's diarrhea is unequivocally the most common travel-related illness, affecting up to 80% of international travelers depending on the destination. The fear of getting sick can make you timid, causing you to stick to bland, "safe" foods and miss out on the rich mix of flavors your destination has to offer. It can rob you of the very experiences you traveled so far to find.

But it doesn't have to be this way. This guide is your solution, a definitive and practical playbook for mastering food and water safety abroad. We’ve synthesized actionable advice from the world’s leading health organizations, including the Centers for Disease Control and Prevention (CDC) and the World Health Organization (WHO), to empower you to eat boldly and drink safely. This isn’t a list of things to fear; it’s a set of simple, memorable rules for prevention, identification, and, if necessary, management. This is a critical deep-dive into a core pillar of preparedness we cover in The Ultimate Guide to Travel Safety: A 2026 Playbook, designed to give you the confidence to dive fork-first into the heart of a culture.
The Golden Rule of Food and Water Safety: "Boil It, Cook It, Peel It, or Forget It"
If you remember only one thing from this guide, make it this simple, five-word mantra. Promoted by the CDC and other global health bodies, this single rule is a powerful and easy-to-use filter for nearly every culinary decision you'll make on the road. It’s the foundation of your entire food and water safety strategy.
Boil It: Your Safest Bet for Liquids
Pathogens like bacteria, viruses, and parasites are killed by heat. This makes boiling the most effective method for purifying liquids.
Examples: Drinking water that has been brought to a vigorous, rolling boil for at least one full minute. Hot beverages like tea or coffee that are served steaming hot are also generally safe. Any milk products you consume should be confirmed to be pasteurized or have been boiled.
Cook It: The Power of Heat
Thoroughly cooking food kills the harmful microorganisms that cause illness. The key is to ensure it is cooked all the way through and served hot.
Examples: Meat, poultry, or seafood that is well-cooked (not rare or raw) and served steaming hot to the touch. This is especially crucial for street food; dishes that are cooked fresh to order in front of you are a much safer bet than those that have been sitting out.
Peel It: Nature’s Own Packaging
For raw fruits and vegetables, the contamination is almost always on the outside surface. By peeling it yourself with clean hands, you remove the risk.
Examples: Fruits with a thick, peelable skin like bananas, oranges, mangoes, and avocados are your safest and best friends for a healthy snack. Similarly, vegetables you can peel, such as cucumbers, are also a great option.
Forget It: When in Doubt, Go Without
This is the most critical and sometimes most difficult part of the rule to follow. It requires discipline, but it’s your ultimate defense. If an item of food or drink doesn't meet one of the three criteria above, you must skip it.
Examples: Tap water and ice cubes made from tap water are the biggest culprits. Salads and raw leafy greens like lettuce are high-risk because they are difficult to clean thoroughly and may have been washed in contaminated water. You should also avoid fruits that cannot be peeled, such as grapes and berries, and any unpasteurized dairy products like milk or cheese. Finally, be very wary of any food served at room temperature, such as from a buffet.
Navigating the Streets: A Visual Guide to Spotting Unsafe Food
Street food is often the soul of a city's cuisine, but not all vendors are created equal. Your eyes are your best tool for vetting a stall. Before you order, take thirty seconds to perform a quick visual inspection. Look for these five clear signs of a safe or unsafe operation.
Poor General Cleanliness: This is the most obvious indicator. Red flags include dirty workstations with unwiped spills, visible food waste, rubbish on the ground, and the presence of pests like flies or wasps. The vendor themselves should also appear clean, with tidy clothes and hands.
Improper Food Temperatures: Food left in the "danger zone" (room temperature) is a breeding ground for bacteria. Avoid stalls where cooked food, especially meat, is sitting out in large trays. The safest option is always food that is cooked fresh to order, right in front of you. Hot food should be visibly steaming.
Obvious Cross-Contamination: Watch how the vendor handles ingredients. A major red flag is using the same cutting board, knife, or unwashed hands to handle raw meat and then touch ready-to-eat items like bread, salad, or cooked food.
Use of Contaminated Water: Look at the vendor’s water source. Rinsing dishes, utensils, or vegetables in a single bucket of murky, stagnant water is a sign of a high-risk operation. Likewise, avoid ice in your drinks unless you can confirm it was made from purified water (commercially bagged ice is usually a safe sign).
Lack of a Crowd (Especially Locals): A busy stall with a long line, particularly of local residents, is one of the best indicators of a trusted and safe food source. High customer turnover means the food is fresh and hasn't been sitting out for long. An empty stall is often empty for a reason.
Pro-Tip: Make "follow the locals" your street food mantra. A long line of residents is a walking, talking five-star review of a vendor's quality and safety. It's the most reliable seal of approval you can find.
Securing Your Water Supply: A Deep Dive into Hydration and Purification
Staying hydrated is non-negotiable for your health and energy while traveling, but assuming tap water is safe is one of the most common and dangerous mistakes a traveler can make. Here’s how to ensure every sip you take is safe.
Identifying Safe and Unsafe Drinking Water Sources
The CDC and WHO have clear guidelines. Unless you are in a country with a known, highly-developed sanitation system, you should assume all tap water is unsafe.
Safest Sources: Commercially bottled water in a factory-sealed, tamper-proof container is your most reliable option. Carbonated water is even safer, as a broken seal is immediately obvious. The second safest source is water that you have personally brought to a rolling boil for at least one minute.
Unsafe Sources to Avoid: Tap water, well water, ice made from tap water, fountain drinks mixed with tap water, and even water from clear mountain streams (which can contain germs) should all be avoided unless they have been purified.
Your Purification Playbook: The Top 3 Methods
When bottled or boiled water isn't available, you need a backup plan. Here are the top three recommended purification methods.
Boiling (The Gold Standard): This is consistently ranked by the CDC and WHO as the single most effective method. It kills all known disease-causing microorganisms, including viruses, bacteria, and parasites. Simply bring clear water to a rolling boil for 1 minute (or 3 minutes at elevations above 6,500 feet / 2,000 meters).
Filtration: A high-quality portable water filter is highly effective at removing bacteria and protozoan parasites like Giardia and Cryptosporidium. Look for a filter with an absolute pore size of 1 micron or smaller. The main limitation is that most portable filters do not remove viruses, so in high-risk areas, the CDC recommends following filtration with chemical disinfection.
Chemical Disinfection: Chlorine, iodine, or chlorine dioxide tablets/drops are a lightweight and easy way to kill viruses and bacteria. However, they are not consistently effective against the parasite Cryptosporidium and require a contact time of at least 30 minutes.
For in-depth planning on what gear to pack for every type of trip, from water filters to first-aid supplies, our all-encompassing Travel Guide is the only resource you'll ever need.
Damage Control: How to Manage Traveler's Diarrhea
But let’s be realistic: even the most diligent traveler can have a bad day. When that happens, knowing exactly what to do—and what not to do—can be the difference between a 24-hour nuisance and a trip-ruining ordeal. This is the damage control phase of your food and water safety plan.
The First and Most Critical Step: Oral Rehydration
According to travel medicine doctors, dehydration is the single most likely and dangerous complication of traveler's diarrhea. Replacing lost fluids and electrolytes is your absolute first priority.
Method: The best way to rehydrate is with a dedicated Oral Rehydration Solution (ORS), which comes in packets of salts and sugars that you mix with boiled or bottled water. In a pinch, sports drinks or clear soups can also be used.
Symptomatic Treatment for Mild to Moderate Cases
If the diarrhea is tolerable and not accompanied by a high fever or blood, over-the-counter medications can provide relief and help you get through a travel day.
Medications: An antimotility agent like Loperamide (the active ingredient in Imodium, a top pharmacist-recommended brand) can reduce the frequency of bowel movements. Bismuth Subsalicylate (found in Pepto-Bismol, another pharmacist favorite) can also help decrease the frequency and shorten the duration of the illness.
When to Use Standby Antibiotics (For Severe Cases)
If diarrhea is distressing, incapacitating, or contains blood or mucus, a prescribed antibiotic may be necessary.
Method: Before you travel, speak with your doctor or a travel medicine clinic. For travelers heading to high-risk destinations, they may provide a prescription for a standby antibiotic, such as Azithromycin, to carry with you. A single dose is often highly effective at treating severe cases.
Pro-Tip: Within your main travel first-aid kit, create a dedicated "Digestive Distress" module. Keep it in a separate, clearly-labeled zip-top bag containing a few packets of Oral Rehydration Salts, a strip of Loperamide, and a few antacids. This way, when you need it, you won't have to rummage through your entire kit.

Ready to Pack Like a Pro?
A smart food and water safety strategy is just one piece of your pre-trip preparation. To ensure you don't overlook a single essential item—from documents and finances to clothing and medical supplies—a master checklist is your most powerful tool. Our comprehensive, free checklist has you covered for every stage of your journey.
Download Your Free International Travel Checklist Now!
Food and Water Safety FAQs
A prepared mind is a safe mind. Here are expert answers to common questions that take your preparedness to the next level.
1. Besides traveler's diarrhea, what are the most common travel illnesses?
While traveler's diarrhea is number one, the CDC reports that other common issues include acute respiratory infections (like influenza or COVID-19, often acquired in transit), vector-borne fevers like Dengue and Malaria in tropical regions, and other food-borne illnesses like Hepatitis A and Typhoid Fever. Skin conditions from insect bites are also extremely common.
2. Is it safe to eat at a restaurant if I'm worried about street food?
Generally, restaurants can be safer, but the same principles apply. A busy restaurant full of locals is a great sign. Be cautious with the same high-risk items: salads, unpeeled fruits, and tap water or ice. If you want to find trusted, local-approved gems, explore the TrekGuider platform, where travel creators often share their own curated guides to safe and authentic eats.
3. Should I carry a standby antibiotic in my first-aid kit?
This is a question for your doctor or a travel medicine clinic. For travelers heading to high-risk destinations where severe traveler's diarrhea is common, many doctors will provide a prescription for a standby antibiotic like Azithromycin. It’s not for mild cases but can significantly shorten the duration of a severe bout of illness. Discuss your itinerary with your doctor to see if this is right for you.
Eat Boldly, Travel Well
The world of food is a world of incredible diversity and connection, and it deserves to be explored with an open mind and a curious palate. The goal of mastering food and water safety is not to build a wall of fear that separates you from authentic experiences. It is about building a foundation of knowledge that gives you the freedom to be adventurous. By internalizing the golden rule of "Boil it, cook it, peel it, or forget it," learning to trust your own visual assessment of a food stall, and knowing exactly what to do if you get sick, you replace anxiety with empowerment. You are now equipped with the skills to navigate the world's most exciting cuisines with confidence, ensuring your focus remains on the flavor, connection, and joy that every journey promises. Go explore, eat boldly, and travel well.

Meta Data Suggestions:
SEO Meta Title (Under 60 characters): Food & Water Safety Abroad: How to Avoid Getting Sick
URL Slug: food-water-safety-abroad
SEO Meta Description (Under 155 characters): Avoid traveler's diarrhea with our expert guide to food and water safety abroad. Learn the golden rules for eating street food, purifying water, and staying healthy.
Don't Miss Out! Subscribe for Exclusive Content
SubscribeComments 0
No comments yet
Be the first to share your experience!
Dont Miss Out! Subscribe for Exclusive Content

Chicago Beer Fests: Top 6 Tastings
Ultimate USA Holidays Guide: Top Picks
FTC Affiliate Disclosure Essentials: Stay Compliant as a Travel Creator
Essential Affiliate Tools: From Tracking to Full Optimization
Booking.com Affiliate Program Review: Pros, Cons, and Earnings Potential