Booking.com Affiliate Program Review: Pros, Cons, and Earnings Potential
TrekGuider @trekguider
As a travel creator, you know accommodations are the bedrock of every trip. Your audience trusts you to recommend the perfect hotel, hostel, or vacation rental. Monetizing that trust is the logical next step, and one name looms larger than any other: Booking.com. With its colossal brand recognition and an inventory of over 28 million listings, joining its affiliate program feels like an obvious, can’t-miss opportunity. After all, with the average monthly income for travel affiliates hitting a reported $13,847, choosing the right partners is a high-stakes game.
But you’ve heard the whispers. In creator communities and private forums, there’s a nagging feeling that behind the slick marketing, something is fundamentally broken. You hear stories of a confusing commission structure, a cookie policy that seems designed to fail, and account issues that leave creators in the lurch. Is the biggest player in the game truly the best partner for your business, or is the booking affiliate program a trap for unwary creators lured in by a big name?
This is the definitive, unbiased review you’ve been searching for. We are cutting through the hype to deliver a clear-eyed analysis of the Booking.com affiliate program. We’ll dissect the legitimate pros, expose the critical, deal-breaking cons, and analyze the true earnings potential so you can make a strategic decision for your business. This deep dive is a crucial part of mastering the affiliate landscape, a topic we cover comprehensively in our pillar guide and essential command center: Travel Affiliate Programs: The 2026 Ultimate Guide.

The Allure: Why the Booking.com Program Is So Tempting
Let's be clear: the pull of the Booking.com affiliate program is undeniable. It’s a household name with the gravitational force of a market giant, and for creators, that brand recognition feels like a shortcut to credibility and conversions. These are the legitimate advantages that make it a top consideration.
Unmatched Brand Recognition and Trust
When you link to Booking.com, you are sending your audience to a platform they already know and trust. This pre-existing brand equity is a powerful conversion tool. You don't have to waste a single word "selling" your audience on the legitimacy of the booking platform itself; you can focus entirely on why that specific hotel is the right choice. This can lead to stronger initial click-through and conversion rates compared to lesser-known platforms.
A Colossal, Unrivaled Inventory
With over 28 million listings that span hotels, apartments, resorts, and even treehouses, Booking.com’s inventory is virtually limitless. No matter how niche your destination—from a major metropolis like Tokyo to a remote village in the Andes—you are almost certain to find a relevant, bookable property for your audience. This vast selection makes it a one-stop shop, simplifying the process of finding accommodation links for your content.
The Potential for High-Volume Conversions
For creators with significant traffic, especially those who attract visitors in the final, decisive stages of trip planning, the sheer volume of bookings processed by the platform can translate into substantial income. The platform's user-friendly interface and powerful search filters make it easy for users to find and book properties quickly, which can be a major asset for high-traffic websites.
The Critical Flaws: The Cons You Absolutely Cannot Ignore
While the pros are appealing, the operational realities of the booking affiliate program contain several severe, structural flaws that can cripple your earnings potential. These are not minor inconveniences; for many creators, they are deal-breakers.
The Achilles' Heel: Why the Session-Based Cookie Is a Deal-Breaker
This is, without question, the single most critical flaw in the Booking.com affiliate program. The program operates on a session-based cookie.
What does this mean? It means you only earn a commission if a user clicks your affiliate link and completes a booking within the exact same browser session. If they click your link, browse a few hotels, close the tab to think about it, and then return to Booking.com an hour later—or the next day—to make their booking, you earn nothing. Your tracking cookie has vanished.
Travel is a high-consideration purchase. People rarely book a multi-hundred or multi-thousand dollar trip on impulse. The typical customer journey looks like this:
They read your inspiring blog post.
They click your link to explore the hotels you recommend.
They compare prices and read a few more reviews.
They discuss options with a spouse or travel partner.
They return the next day, ready and excited to book.
With a session-based cookie, you are only compensated for the rare, impulsive booker. You lose the commission for every single thoughtful, deliberate customer you inspired. This policy is fundamentally misaligned with how real people plan travel, making it a structurally unsafe and potentially unprofitable model for content creators.

Pro-Tip: When evaluating any affiliate program, the cookie duration is often more important than the commission rate. A partner like Expedia Group offers a 7-day cookie, which is vastly superior as it respects the user's decision-making process and ensures you get paid for the value you create.
The "Black Box" Commission: Why 40% Isn't What It Seems
Booking.com often advertises a commission rate of 25-40%, which sounds incredibly high. However, this is deeply misleading. You do not earn a percentage of the total booking value. You earn a percentage of Booking.com's commission.
Here’s how that math actually breaks down:
A customer books a $500 hotel stay through your link.
The hotel pays Booking.com a commission (let's say 15%, which is $75).
You then earn your commission based on that $75, not the original $500.
If your rate is 25%, you earn 25% of $75, which is $18.75. Your effective commission rate on the total booking value is a mere 3.75%. This opaque structure makes it incredibly difficult to forecast your earnings and often results in a much lower payout than creators expect from the flashy headline numbers.
A History of Account Instability and Support Issues
Numerous affiliates have reported frustrating experiences with the program's administration. These complaints often center on sudden account closures without clear explanation, forced migrations to network platforms like Awin or CJ Affiliate, and a history of losing pending commissions during these transitions. While any large program will have some user issues, the volume of these reports suggests a level of instability that should be a major concern for any creator looking to build a reliable, long-term income stream.
The Verdict: Analyzing the True Earnings Potential
So, can you actually make money with the booking affiliate program? The answer is a qualified "yes," but only for a very specific type of publisher.
Who It Might Be Good For:
High-Traffic Deal & Discount Sites: Websites that focus on last-minute deals and attract users who are ready to book immediately can succeed with the session-based model. Their audience is impulsive by nature.
Metasearch Engines: Large-scale travel search engines that operate on a massive volume of clicks may find the program profitable due to sheer scale.
Who Should Avoid It:
Content Creators & Bloggers: If your content strategy is based on inspiration and long-term trip planning—creating itineraries, destination guides, and detailed reviews—this program is fundamentally at odds with your business model. You are inspiring a journey, not a single-session transaction.
Anyone Building a Sustainable, Predictable Income: The combination of a session-based cookie, an opaque commission structure, and reported account instability makes this a high-risk partner for anyone looking to build a reliable business.
Pro-Tip: The most resilient affiliate strategy is built on diversification. Never rely on a single program for your income. A healthy portfolio for a travel creator should include partners for accommodations, tours, insurance, and gear to create multiple, stable revenue streams.
Strategic Alternatives: Safer Bets for Higher Returns
The flaws in the Booking.com program do not mean you should abandon monetizing accommodations. It simply means you should partner with programs structured to favor creator success.
The most direct and superior alternative is the Expedia Group Affiliate Program. It covers major brands like Hotels.com and Vrbo and, most importantly, offers a 7-day cookie duration. This gives your audience a full week to make their decision after clicking your link, ensuring you are properly compensated for your influence.
Ultimately, the most secure path to a stable income is to reduce your reliance on any single affiliate program and start building assets you own. Instead of sending all your traffic to other brands, you can create and sell your own high-value digital products—like detailed itineraries, travel guides, or planning checklists. Platforms like the TrekGuider Seller Platform are designed specifically for this, allowing you to build your own digital storefront and keep a much larger share of the revenue. It's the ultimate strategy for taking control of your financial future.

Build Your Perfect Itinerary (and Monetize It)
Creating high-value, bookable itineraries is one of the best ways to serve your audience and drive affiliate sales. But starting from scratch can be daunting. Our free Travel Itinerary Template gives you the perfect framework to build beautiful, useful guides your readers will love—and a powerful asset you control.
Frequently Asked Questions
1. Is the Booking.com affiliate program free to join? Yes, the program is free to join either directly or through an affiliate network like Awin or CJ Affiliate.
2. What are the payment methods for the Booking.com affiliate program? Payments are typically made via PayPal or bank transfer, but this can depend on the network you join through. There is usually a minimum payout threshold (e.g., €100) that you must reach before you can receive your earnings.
3. Can I use my own affiliate links to make personal bookings? No. Like almost all affiliate programs, using your own links for personal purchases or bookings is a violation of the terms of service and can lead to your account being terminated and commissions being voided.
A Powerful Brand with a Flawed Partnership
The Booking.com affiliate program exists in a paradox. It leverages one of the most powerful and trusted brands in travel, offering a massive inventory that seems perfect for creators. However, its core mechanics—specifically the session-based cookie and the opaque commission structure—are fundamentally anti-creator. They are relics of an older affiliate model that fails to properly value the influence of content creators who build trust and inspire a customer's journey over days or weeks.
While it might work for a small subset of high-traffic, transactional websites, for the vast majority of travel bloggers and content creators, the booking affiliate program represents a significant and unnecessary risk. Your time, effort, and influence are better invested in partners with more favorable, transparent, and creator-friendly terms. By choosing strategic alternatives and diversifying your income streams, you can build a more profitable and resilient business for the long term.
Read the full guide: The Travel Blogger's Playbook to Affiliate Marketing Mastery
Don't Miss Out! Subscribe for Exclusive Content
Subscribe


Comments 0
No comments yet
Be the first to share your experience!
Dont Miss Out! Subscribe for Exclusive Content

Ultimate USA Holidays Guide: Top Picks

FTC Affiliate Disclosure Essentials: Stay Compliant as a Travel Creator

Essential Affiliate Tools: From Tracking to Full Optimization

Avoid These 5 Affiliate Landing Page Mistakes for Better Conversions

Affiliate Keyword Research Mastery for Travel Blogs

Decoding Affiliate Commission Rates: Benchmarks for Travel Creators
How to Stay Safe While Hiking: A Hiker's Safety Guide
TrekGuider @trekguider
The call of the trail is a powerful one. It promises sweeping vistas, the quiet solitude of the forest, and the profound satisfaction of reaching a summit under your own power. But for all its beauty, the wilderness is impartial and unforgiving. The same trail that offers bliss on a sunny morning can present serious danger when the weather turns, a wrong turn is made, or an ankle is twisted. This is the problem every hiker faces: the gap between the adventure we dream of and the preparation it demands.
That gap is often filled with anxiety. A flicker of doubt about reading the map, a worry about the approaching clouds, or a sudden fear of what that noise was in the undergrowth can rob an incredible experience of its joy. Too often, hikers—both novice and experienced—find themselves in serious trouble simply by underestimating the trail and overestimating their preparedness. According to Search and Rescue (SAR) teams, most emergencies are the result of small, preventable mistakes. This guide is your definitive playbook for closing that gap for good. We’re providing the essential, expert-backed hiking safety tips you need to move through the backcountry with unwavering confidence. This isn't about fear; it's about empowerment. By mastering these skills, you’re ensuring every hike is a safe one, a core pillar of the responsible adventurer’s mindset we explore in our definitive The Ultimate Guide to Travel Safety: A 2026 Playbook. Let’s gear up, get smart, and get you ready to hit the trail.

This journey from novice to self-sufficient hiker begins not on the trail itself, but with a simple, powerful philosophy of preparedness that has been tested and refined by generations of mountaineers and wilderness experts. It all starts with your pack.
The Foundation of Safety: The 10 Essentials System
Long before your boots touch the dirt, your safety on the trail has already been decided by one thing: what’s inside your pack. Endorsed by the National Park Service and outdoor organizations like REI, the "10 Essentials" is not just a packing list; it's a systematic approach to preparedness. It ensures you have the tools to handle common problems and survive an unexpected night outdoors. Think of these not as ten individual items, but as ten crucial systems.
Navigation: Your primary system for knowing where you are and where you’re going. This must include a physical topographic map of the area and a compass. A GPS device or a smartphone with downloaded offline maps is a great tool, but electronics can fail. A map and compass are your foolproof backup.
Illumination: You need to be able to see in the dark, period. Carry a headlamp or flashlight with a full charge, and always pack extra batteries. A headlamp is superior as it keeps your hands free for other tasks.
Sun Protection: Sunburn and sunstroke can be serious dangers on the trail. This system includes sunglasses, broad-spectrum sunscreen (SPF 30+), and a wide-brimmed hat. Sun-protective clothing can also be a game-changer.
First-Aid Supplies: You must have the ability to treat common trail injuries. Your kit should be equipped to handle blisters, cuts, scrapes, and sprains. A basic kit is good; a custom-built one is better.
Repair Kit and Tools: Gear can break. A multi-tool or knife is invaluable, and a small roll of duct tape can repair everything from a torn jacket to a broken tent pole.
Fire: In an emergency, fire provides warmth, a way to purify water, and a powerful psychological boost. Carry waterproof matches, a reliable lighter, and a dedicated fire starter like dryer lint or a commercial fire-starting block.
Insulation: Weather can change in an instant, especially at elevation. You must carry an extra layer of clothing beyond what you start the hike in, regardless of the forecast. This should be a moisture-wicking layer, like a fleece jacket or thermal top—never cotton, which loses all insulating properties when wet.
Nutrition: Always pack more food than you think you’ll need. An extra day’s worth of non-perishable, high-energy food is the standard. Items like protein bars, nuts, and dried fruit are perfect.
Hydration: Carry more water than you expect to need and have a way to purify more. This means carrying a water filter or purification tablets to safely treat water from streams or lakes in an emergency.
Emergency Shelter: If you’re forced to spend an unplanned night out, protection from the elements is critical to preventing hypothermia. This doesn't mean a tent. A lightweight, packable emergency space blanket or bivy sack is all you need.

For expert-vetted gear lists and detailed trail guides from seasoned creators, the TrekGuider Marketplace is an invaluable resource for taking your preparation to the next level.
"Never Get Lost Again": Mastering Trail Navigation
Of all the potential hiking dangers, getting lost is one of the most common and terrifying. A recent study of SAR missions revealed that "error in judgment" was a leading cause of hikers needing rescue, and a huge part of that is poor navigation. Relying solely on your phone’s GPS is one of the biggest hiking safety tips to ignore—service is unreliable in the backcountry, and batteries die. True navigational confidence comes from time-tested skills.
How to Use a Map and Compass
This fundamental skill is easier than you think and is your most reliable tool.
Place the Compass on the Map: Lay your map flat. Identify your current location and your destination. Place your compass so the long edge of its baseplate creates a line connecting the two points, with the "Direction of Travel" arrow on the compass pointing toward your destination.
Set the Compass Bezel: Keeping the baseplate still, rotate the round bezel (the dial) until the orienting lines inside it are parallel with the map's north-south grid lines. Make sure the "N" on the bezel is pointing to North on the map. The number on the bezel aligned with the Direction of Travel arrow is now your bearing.
Follow the Bearing: Lift the compass off the map and hold it level in front of you. Turn your body until the red magnetic needle is "in the shed"—that is, perfectly inside the red orienting arrow on the bezel. The Direction of Travel arrow now points precisely to your destination. Pick a landmark in that direction, walk to it, and repeat the process.
Pro-Tip: The difference between "true north" (on your map) and "magnetic north" (where your compass points) is called declination. For precise navigation, you must adjust your compass for the local declination, which will be printed on your map.

Wildlife on the Trail: A Guide to Safe Encounters
Seeing wildlife is a thrilling part of hiking, but it’s crucial to remember that you are a visitor in their home. The core principles of every encounter are to maintain a safe distance, never feed wildlife, and know how to react to avoid escalating a situation.
Bear Encounters (Black vs. Grizzly)
Making noise while you hike (talking, clapping) is the best way to avoid surprising a bear. If you do encounter one, your reaction depends on the species.
If a Black Bear Approaches: Never run. Make yourself look as large as possible by raising your arms and opening your jacket. Yell, clap, and make loud noises. If it attacks, fight back aggressively. Target the bear's face and nose with anything you have—rocks, trekking poles, your fists. Do not play dead.
If a Grizzly Bear Approaches/Charges: Do not run and do not make direct eye contact. Speak in a calm, low voice to show you are not a threat. If it charges, stand your ground and use bear spray when it is within 30 feet. If it makes contact, play dead. Lie flat on your stomach, protect the back of your neck with your hands, and use your pack as a shield.
Mountain Lion (Cougar) Encounters
These predators are ambush hunters, so an encounter is rare. If you see one, it has likely been watching you.
Protocol: Do not run, as this triggers their chase instinct. Make direct eye contact. Make yourself appear larger by raising your arms and opening your jacket. Speak in a loud, firm voice. Slowly back away, giving the cat an escape route.
If Attacked: Fight back with everything you've got. Use rocks, sticks, or your hands to target the animal's eyes and face.
Venomous Snake Encounters
Snakes have no interest in humans and will only strike if they feel threatened.
Protocol: If you see a snake, freeze. Do not make any sudden movements. Once you've located the snake, slowly back away and give it a wide berth to move on. Be careful where you step and place your hands, especially when scrambling over rocks or logs.
If Bitten: The priority is to stay calm to slow the spread of venom. Limit physical activity and get to a hospital as quickly and safely as possible for evaluation and potential antivenom treatment.
Handling Trail Emergencies: What to Do When Things Go Wrong
Even with perfect preparation, accidents can happen. A twisted ankle, a sudden illness, or getting turned around can escalate quickly. Your ability to stay calm and make rational decisions is your most valuable asset. If you find yourself in trouble, remember the acronym S.T.O.P.
Stop: The moment you realize you are in trouble, stop moving. Sit down.
Think: Assess your situation calmly. What went wrong? What resources do you have?
Observe: Look around you. Where is the sun? Can you see any landmarks? Is there a source of water or shelter nearby?
Plan: Formulate a simple, logical plan. Don't make panicked decisions.
First Aid on the Trail
Your first-aid kit from the 10 Essentials is your go-to tool for injuries. Here's how to handle the most common trail ailments:
Blisters: The moment you feel a "hot spot" on your foot, stop and address it. Clean the area and apply moleskin or a blister-specific pad. Don't wait for it to become a full-blown blister.
Sprains: For a twisted ankle or knee, use an elastic wrap bandage from your kit to provide compression and support. Loosen it if you feel any numbness or tingling. Elevate the joint when you rest, and use a trekking pole or sturdy branch as a crutch if needed.
Cuts and Scrapes: Control any bleeding with direct pressure using a sterile gauze pad. Once it stops, clean the wound thoroughly with an antiseptic wipe and apply antibiotic ointment before covering it with a bandage.
A well-stocked daypack is crucial, but so is a plan for the whole trip. Before you head out to explore our incredible national parks, make sure your vehicle and supplies are just as prepared as your hiking gear.
Your Ultimate Adventure Blueprint
Ready to hit the road? Don't leave home without our expert-vetted National Park Road Trip Checklist. This free guide covers everything from vehicle prep and essential gear to can't-miss stops, ensuring your adventure is seamless from start to finish. Download it for free now!
Hiking Safety FAQs
A prepared mind anticipates questions. Here are expert answers to common concerns.
1. What's the right way to signal for help?
If you determine you cannot get yourself out of a situation safely, you need to signal for help. The universal distress signal is three of anything: three whistle blasts, three flashes of a headlamp, or three piles of rocks. A whistle is a must-have item that uses far less energy and carries further than shouting. For serious backcountry travel, consider investing in a personal locator beacon (PLB) or satellite messenger, which can send an SOS signal with your exact location to emergency services.
2. Is it safe to hike alone?
Solo hiking can be an incredibly rewarding experience, but it requires a higher level of preparation and self-sufficiency. All the rules in this guide become even more critical. It is absolutely essential that you leave a detailed itinerary with a trusted friend or family member. Include your planned route, your start and end times, and a "panic time"—the specific time they should call for help if they haven't heard from you.
3. What do I do if the weather turns bad unexpectedly?
Your first priority is to get below the treeline if you're in an exposed area to reduce the risk of lightning strikes. Put on your extra insulating layer and your rain gear before you get wet and cold. Assess your map and your situation. It is often safer to turn back, even if you're close to your destination, than to push on into deteriorating conditions.
Pro-Tip: Always tell someone your plan. Before every hike, leave a detailed itinerary with a trusted friend or family member. This is the single most important safety net you have.

Your Adventure, Empowered by Preparation
The goal of these hiking safety tips is not to fill you with fear, but to arm you with confidence. Every piece of gear you pack and every skill you learn is a key that unlocks a new level of freedom on the trail. Preparation allows you to push your boundaries, explore wilder places, and immerse yourself in the beauty of nature without the nagging whisper of anxiety. By respecting the wilderness and committing to self-sufficiency, you transform from a simple visitor into a capable, confident adventurer.
Now that you have the skills for a safe hike, you can integrate that adventure into a larger, perfectly planned journey. For a complete master plan covering everything from budgeting and logistics to finding the best trails and tours, our all-encompassing Travel Guide is the only resource you'll ever need.
Don't Miss Out! Subscribe for Exclusive Content
SubscribeComments 0
No comments yet
Be the first to share your experience!
Dont Miss Out! Subscribe for Exclusive Content

How to Avoid Travel Scams: A Global Guide

Is Public WiFi Safe? How to Protect Your Data Abroad

A Woman's Guide to Safe Travel: 10 Critical Tips

7 Hotel Safety & Security Tips for Peace of Mind

9 Beach Safety Tips That Could Save Your Life

7 Travel Insurance Red Flags to Spot Before You Buy
Lollapalooza: 7 Stage-Hopping Tips
TrekGuider @trekguider
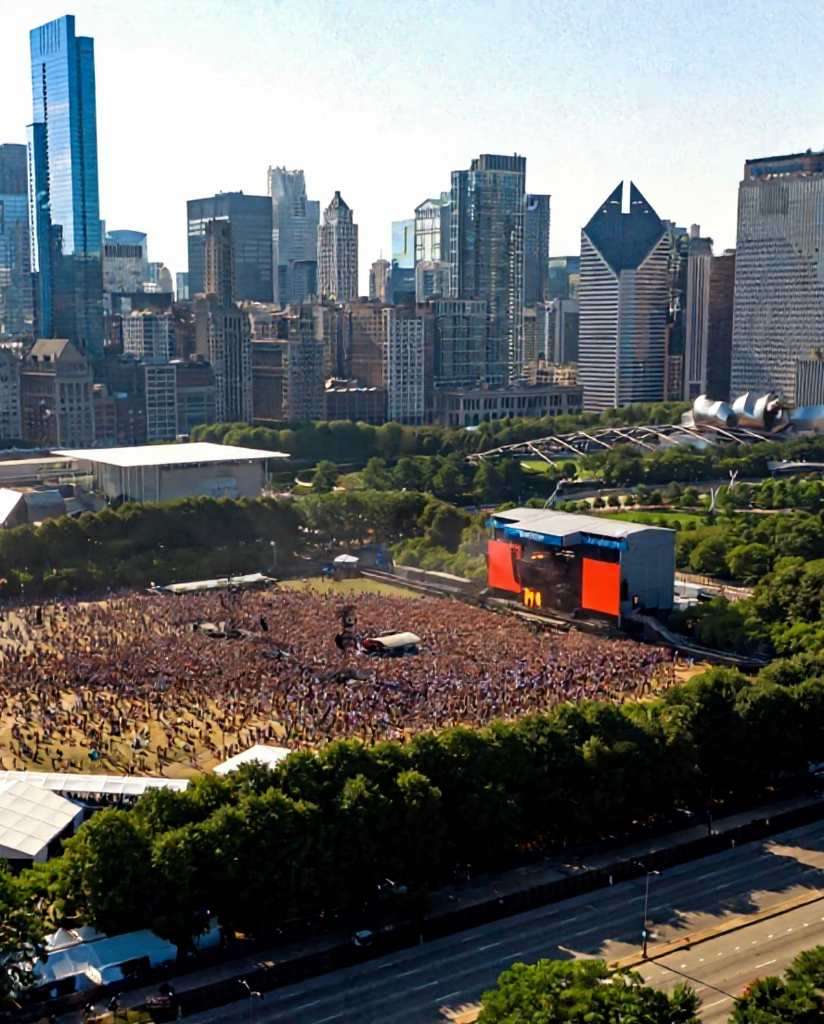
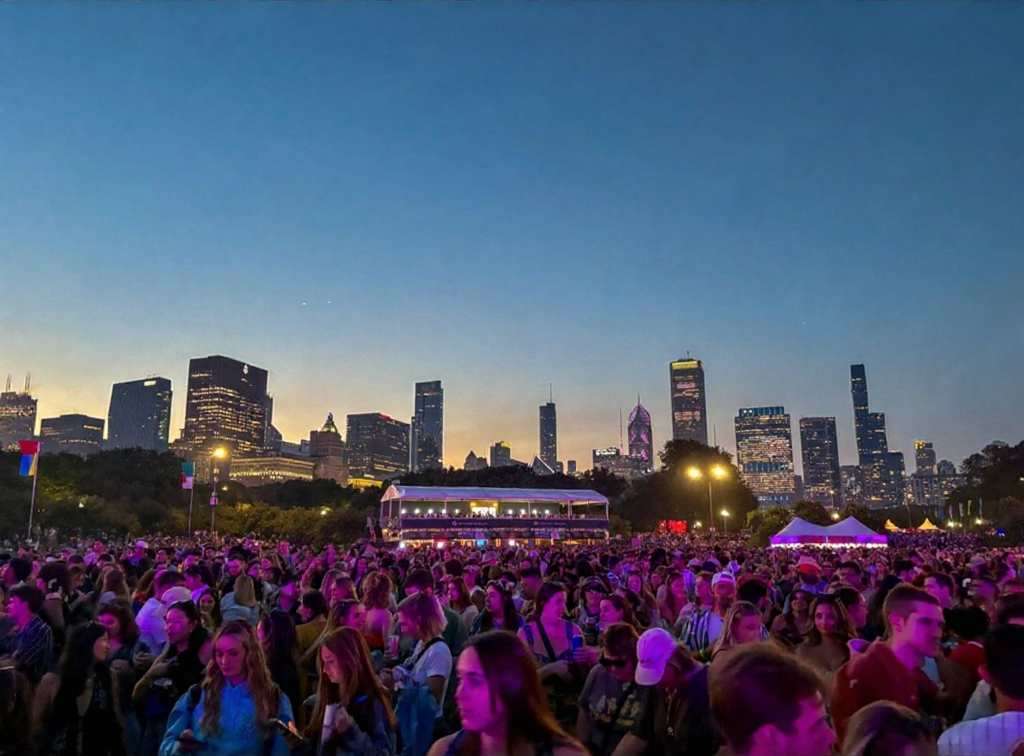
You’ve done it. You scored the golden ticket to Lollapalooza, the four-day musical marathon that transforms Chicago’s Grant Park into the center of the universe. But now, staring at a schedule that looks more like a complex circuit board than a concert lineup, the reality sets in. Dozens of artists you’re dying to see are scattered across a dozen stages, their set times overlapping in a cruel twist of fate. The sheer scale of the festival, with its massive crowds and sprawling grounds, suddenly feels less like a dream and more like a daunting logistical nightmare.
The anxiety begins to bubble. You picture yourself spending half the day trudging from the T-Mobile stage at the south end to the Bud Light stage at the north, only to arrive sweaty, exhausted, and just in time to hear the final chords of your favorite song. The fear of missing out becomes a palpable threat, turning the promise of unforgettable musical moments into a frantic race against the clock. Without a rock-solid plan, your festival experience could be defined by endless walks, missed opportunities, and the nagging feeling of being perpetually in the wrong place. This isn't just about seeing bands; it's about conquering one of the keystone events in a city known for its epic celebrations, a true highlight among the many experiences we cover in our definitive guide to Chicago Holidays: Windy City Thrills.
Forget the stress. This guide is your strategic playbook for navigating the glorious chaos of Lollapalooza Chicago. We’re breaking down the art of stage-hopping into seven actionable, pro-level tips that will transform you from a frantic fan into a festival veteran. From mastering the map before you even step foot in Grant Park to planning a seamless exit, these strategies will ensure you maximize your time, conserve your energy, and catch every single performance on your must-see list.
1. Become a Pre-Festival Master of the Map & Schedule
The biggest mistake a Lollapalooza rookie can make is showing up and trying to figure it all out on the fly. Grant Park is a massive urban oasis, and when it’s filled with stages, vendors, and hundreds of thousands of people, it becomes a complex, pulsating labyrinth. Your success begins long before you scan your wristband.
Download the Official App Immediately
Long before you even think about packing, your first move is to download the official Lollapalooza app. Consider it your digital command center for the entire weekend, running from July 31 to the final day of the festival. The app provides the most up-to-date schedule, a detailed festival map, and, most importantly, real-time push notifications. If a set time changes, a stage is delayed, or a surprise guest appears, the app will be the first to tell you. It also sends out crucial emergency alerts, making it an indispensable tool for staying safe and informed.
Create Your Artist Tiers
Once the full schedule drops, it’s time for strategy. Open the lineup—featuring titans like Olivia Rodrigo, Tyler the Creator, Sabrina Carpenter, and A$AP Rocky for the 2026 festival—and categorize every artist into two simple lists:
Tier 1 (Must-See): These are your non-negotiables. The artists you bought the ticket for. You will be at their set, no matter what.
Tier 2 (Nice-to-See): These are the artists you’d love to catch if the timing and location work out. They are your flexible options, the happy bonuses.
This simple act of prioritization is the bedrock of your stage-hopping plan. It allows you to build your day around your top-tier artists and fill the gaps with others, preventing the decision paralysis that comes from having too many choices.
Internalize the Grant Park Layout
Study the festival map like you’re planning a heist. The two main stages are typically located at the far north and south ends of Grant Park, a walk that can easily take 20-30 minutes through a thick crowd. Identify the locations of your Tier 1 artists and mentally map the routes between them. Note the locations of smaller stages, food courts (Chow Town), and, critically, the free water stations. Understanding the physical distances involved will help you make realistic calls about which back-to-back sets are doable and which are pure fantasy.

2. Master the "Perimeter Path" to Navigate Crowds
The center of any festival crowd is a slow-moving, densely packed sea of humanity. Trying to cut directly through the middle to get from one stage to another is a rookie move that wastes time and energy. The secret to swift movement is to think like a river, flowing where the resistance is lowest.
Stick to the Arteries
The most effective way to navigate Lollapalooza Chicago is by using the perimeter paths. Instead of plunging into the heart of the crowd, stick to the designated walkways along the sides. These paths, often lining the edges of the park or separating vendor areas, are the festival's arteries. While they may look like the longer route on a map, they are almost always faster than trying to push through a stationary audience. Make a mental note of these pathways when you first arrive.
Live by the 15-Minute Rule
If your next Tier 1 artist is on a stage across the park, you need to be ruthless with your timing. Implement the 15-Minute Rule: leave the current set 15 minutes before it ends. This gives you a critical head start, allowing you to exit the immediate crowd before the mass exodus begins when the music stops. It might sting to walk away from the end of a great performance, but that small sacrifice ensures you’re in a good position for the next one, rather than hearing it faintly from a quarter-mile away.
3. Hydrate and Fuel Like a Seasoned Athlete
Stage-hopping is a sport. You’ll be on your feet for 10 hours a day, walking several miles under the summer sun. You’re not just attending a concert; you’re entering a temporary city that generates a staggering economic impact—estimated at over $440 million. That scale demands respect and a bit of preparation.
Make Water Your First Priority
Lollapalooza provides free water refill stations throughout the grounds. When you first enter Grant Park, make it your mission to locate the station nearest the entrance and the stages you’ll be frequenting. Dehydration is the number one enemy of the festival-goer; it saps your energy, causes headaches, and can ruin your entire weekend. Make it a personal rule to refill your water bottle every single time you pass a station.
Pro-Tip: Bring a collapsible water bottle or an empty hydration pack. It's light, complies with security rules, and allows you to carry more water than a standard bottle. This means fewer trips to the refill station and more time enjoying the music.

4. Dress for a Four-Day Marathon, Not a Fashion Sprint
While Lollapalooza is a prime spot for people-watching and showing off your style, practicality should be your guiding principle. Your fashion choices can make or break your physical ability to enjoy the festival.
Your Shoes Are Your Most Important Gear
You will be walking and standing on concrete, grass, and uneven ground for hours on end. This is not the time for brand-new boots that need breaking in, flimsy sandals, or anything with a heel. Your number one priority should be comfortable, supportive, and already broken-in sneakers or walking shoes. Your feet are your foundation for the entire weekend; treat them well.
Prepare for All Four Chicago Seasons in One Day
Chicago weather is famously unpredictable. A day that starts hot and sunny can quickly turn cool and rainy. The key is to dress in layers. Start with a lightweight, breathable base layer and bring a flannel, hoodie, or light jacket that you can tie around your waist during the day and put on after the sun goes down. Most importantly, pack a poncho. It’s small, light, and will be an absolute lifesaver if a sudden downpour occurs.
5. Establish a "Home Base" for Your Crew
Navigating Lollapalooza Chicago with friends is a core part of the experience, but it’s incredibly easy to get separated. Cell service is notoriously unreliable when tens of thousands of people are trying to use it at once, so you can’t count on a text message or call to find your group.
Why a Meeting Point is Non-Negotiable
Before you even think about splitting up to see different artists, establish a clear, specific, and easy-to-find meeting point. This is your group’s "home base." If anyone gets lost, their phone dies, or you just need to regroup, everyone knows exactly where to go.
How to Choose a Good Spot
Don’t pick a generic spot like "the fountain" or "the food court." Choose a unique and unmistakable landmark. A good meeting point is something like, "the giant silver sculpture near the Buckingham Fountain" or "the corner of the 'Deep Dish' pizza stand in Chow Town." Pick a spot that is slightly away from the main walkways to avoid being constantly jostled. Check in at your home base at pre-determined times to ensure everyone is safe and accounted for.

6. Embrace the Journey Between the Stages
Stage-hopping isn’t just a commute; it’s an opportunity. The journey from one performance to another is part of the festival experience itself. Instead of seeing it as a chore, reframe it as a chance for discovery and inspiration.
Discover Your Next Favorite Band
As you walk the perimeter paths, you’ll pass smaller stages where artists you’ve never heard of are playing. Pause for a few minutes and listen. This is how you stumble upon incredible new music. Some of the most memorable Lollapalooza moments happen not at the massive headliner stages, but in the intimate settings of the BMI or Grove stages. Let your ears guide you.
Explore the Full Festival Experience
Lollapalooza is more than just a concert. It’s a massive cultural event filled with creativity. On your way from one stage to the next, take a detour through the art installations, check out the merch tents, or see what activations the sponsors have set up. This spirit of creative discovery is what fuels the best entrepreneurs. If you're feeling inspired by the artistry around you, channel that energy into your own project with our free Digital Product Ideas Guide. By exploring, you break up the monotony of walking and get a richer, more complete festival experience.

7. Plan Your Grand Escape in Advance
How you leave the festival is just as important as how you navigate it. At 10 PM, when the final headliner finishes, a massive wave of people will pour out of the Grant Park exits, creating a human traffic jam that can be overwhelming and slow.
Beat the Final Rush
Just as with the 15-Minute Rule for stage-hopping, consider leaving a few minutes before the absolute end of the night. Slipping out during the last song or just before the encore can save you up to an hour of being stuck in a slow-moving crowd. You’ll get to public transit or your rideshare pickup spot ahead of the main surge, which is a priceless advantage after a long day.
Know Your Public Transit Route Cold
The best way to get to and from Lollapalooza Chicago is by using the CTA rail system. Multiple downtown street closures make driving or using rideshares near the park a nightmare. Before the festival, identify the closest CTA station to your accommodation and memorize the route to and from the park exits. Having this plan locked in will prevent you from wandering aimlessly with a dead phone at the end of a long day.
Pro-Tip: If you must use a rideshare, set your pickup location several blocks away from the Grant Park exits. Walk away from the chaos and toward your pin. You'll escape the immediate surge pricing, and your driver will be able to find you much more easily than in the gridlock traffic near the festival grounds.
Your Blueprint for Lollapalooza Domination
The overwhelming scale of Lollapalooza can intimidate even the most enthusiastic music fan, but it doesn’t have to. With a strategic approach, the festival transforms from a logistical puzzle into the ultimate musical playground. By preparing in advance, navigating smartly, and taking care of your body, you shift from being a passive attendee to the master of your own experience. With these stage-hopping tips, you're now fully equipped with the knowledge of a seasoned pro, ready to conquer Lollapalooza Chicago and create a weekend of flawless, unforgettable memories.

Your Lollapalooza adventure is just one part of an incredible trip. To make the most of your time in the Windy City and beyond, check out our comprehensive Travel Guide. It’s packed with insider tips for exploring the best destinations across the USA.
Don't Miss Out! Subscribe for Exclusive Content
SubscribeComments 0
No comments yet
Be the first to share your experience!
Dont Miss Out! Subscribe for Exclusive Content

San Francisco Cherry Blossoms: A Local's Guide to the Blooms

Halloween SF: Haunts Without Horrors

SF Festivals: 7 Must-See Lineups

Christmas SF: Lights & Wharf Wonders

SF Pride: 6 Route & Party Hacks

Chinese New Year SF: Parade Essentials
How to Solo Travel Europe: A Step-by-Step First-Timer's Plan
TrekGuider @trekguider
You have a dozen tabs open, a saved folder of dream destinations on Instagram, and that creeping sense of anxiety that it’s all just too complicated. The dream of wandering through Parisian streets or watching a sunset in Lisbon feels buried under an avalanche of questions about budgets, safety, and the fear of being utterly alone. You're stuck in analysis paralysis, and the excitement is slowly being replaced by dread.
You don't need another list of vague 'tips.' You need a plan.
This guide is that plan. This is your complete roadmap for solo travel in Europe. We will walk you through every single step, from your first budget spreadsheet to your first solo dinner abroad, turning your overwhelming 'what ifs' into a confident, resounding, 'I'm ready.'

From Jitters to Jet-Set: Your Four-Week Plan to Conquer Pre-Trip Anxiety
The single greatest weapon against travel anxiety is a competent, actionable plan. Every item you check off a list is a small victory, a piece of tangible proof that you are capable and in control. This guide will provide the specific, step-by-step strategy for your European adventure. But before we dive in, it's vital to build a strong foundation. For a complete overview of the core principles and mindset needed for any solo journey, is the perfect place to start.
Your 4-Week Countdown: A Week-by-Week Planning Checklist
Transform anxiety into action by breaking down the process into manageable weekly goals.
4 Weeks Out: Finalize your budget and book your round-trip flights. Purchase comprehensive travel insurance (this is non-negotiable). Ensure your passport is valid for at least six months beyond your planned return date.
3 Weeks Out: Book your accommodation for the first city on your itinerary. Begin booking major train routes between countries, as prices often increase closer to the date.
2 Weeks Out: Plan your packing list and purchase any necessary gear, like a universal adapter or packing cubes. Notify your bank and credit card companies of your travel dates.
1 Week Out: Download offline maps (Google Maps) and language packs (Google Translate). Confirm all bookings and share your detailed itinerary with a trusted contact back home. Pack your carry-on.
Identifying Your Travel Fears (and How to Systematically Crush Them)
Write down your top three fears. Are they about safety? Loneliness? Getting lost? Now, for each one, write down one concrete, actionable step you can take to mitigate it.
Fear of safety? Research and book a hotel in a neighborhood with a high GeoSure Women's Safety score.
Fear of loneliness? Pre-book a group walking tour for your first full day in a new city.
Fear of getting lost? Spend 30 minutes on Google Street View "walking" the route from your arrival airport/train station to your hotel. Familiarity breeds confidence.
How to Master Your Money in Europe
Financial stress can suffocate an otherwise amazing trip. A clear, realistic budget is an act of self-care that empowers you to enjoy your adventure without worry. Understanding the real costs of solo travel in Europe is the first step to financial freedom on the road.
How Much Does a Solo Trip to Europe Actually Cost?
Let's talk numbers. While your personal travel style is the biggest variable, here are some realistic daily budgets to anchor your planning (these exclude flights):
The Budget Backpacker: $50 - $75/day. This means staying in hostel dorms, cooking some of your own meals, focusing on free activities like walking tours, and using buses or pre-booked trains.
The Mid-Range Explorer: $100 - $175/day. This allows for private rooms in hostels or budget hotels, a mix of restaurant meals and street food, museum entries, and more comfortable train travel.
The Comfort Seeker: $200+/day. This budget accommodates boutique hotels, multi-course dinners, guided tours, and last-minute travel plans.

Destination Cost Tiers
Not all of Europe is priced equally. Stretch your budget further by focusing on these regions:
Budget-Friendly: Portugal, Spain, Czechia, Hungary, Poland, and the Balkan countries (Croatia, Albania, Bosnia and Herzegovina).
Mid-Range: Italy, Germany, France (outside of Paris), Ireland, Slovenia.
Splurge-Worthy: Switzerland, Iceland, Norway, Denmark, Sweden, and the United Kingdom (especially London).
Pro-Tip: The easiest way to save money on food is to make lunch your main meal. Many European restaurants offer a prix fixe lunch menu (menu of the day) which includes multiple courses for a fraction of the evening price.
Choosing Your Perfect First Solo Adventure
Your first destination should be a launching pad for success. Prioritize countries known for safety, excellent tourist infrastructure, and ease of navigation. This isn't about being unadventurous; it's about setting yourself up for a win.
For the Cautious Explorer: The 5 Safest & Easiest Countries for a First Trip
These countries consistently rank high on the Global Peace Index and are incredibly welcoming to solo travelers.
Portugal: Safe, affordable, fantastic public transport, and English is widely spoken in tourist areas. Lisbon is arguably the perfect first-time solo travel city.
Iceland: Staggeringly safe with otherworldly landscapes. Ideal for nature lovers. Easy to navigate with tours, though it is expensive.
Slovenia: A hidden gem. It has the beauty of Switzerland at a fraction of the cost, is incredibly safe, and is small enough to explore thoroughly.
Ireland: Famously friendly locals, easy to navigate, and a cozy pub culture that makes it easy to strike up a conversation.
Austria: Clean, efficient, and beautiful. Vienna is a solo traveler's dream with its cafe culture and walkable city center.

Understanding the Schengen Zone: How to Maximize Your 90 Days
For U.S. citizens, the Schengen Area is a collection of 27 European countries that have abolished internal border controls. You can travel freely between these countries for up to 90 days within any 180-day period without a visa. Be sure to track your days carefully if you're planning a longer trip. Countries like the UK and Ireland are not in the Schengen Zone and have their own entry rules.
Navigating Europe Like a Pro
Europe's transportation network is a marvel of efficiency. Mastering it is a core skill that transforms you from a tourist into a traveler.
Flights vs. Trains vs. Buses
Flights: Use budget airlines like Ryanair or EasyJet for long distances (e.g., Lisbon to Rome). Book well in advance and be ruthless about their baggage weight limits to avoid exorbitant fees.
Trains: The best option for distances under 5 hours. It’s scenic, comfortable, and delivers you directly to the city center. A Eurail pass can be cost-effective if you plan on frequent, long-distance train travel, but always compare the pass price to buying individual tickets in advance.
Buses: The cheapest, but slowest, option. Companies like FlixBus and BlaBlaCar Bus are great for budget-conscious travelers and for routes not well-served by trains.
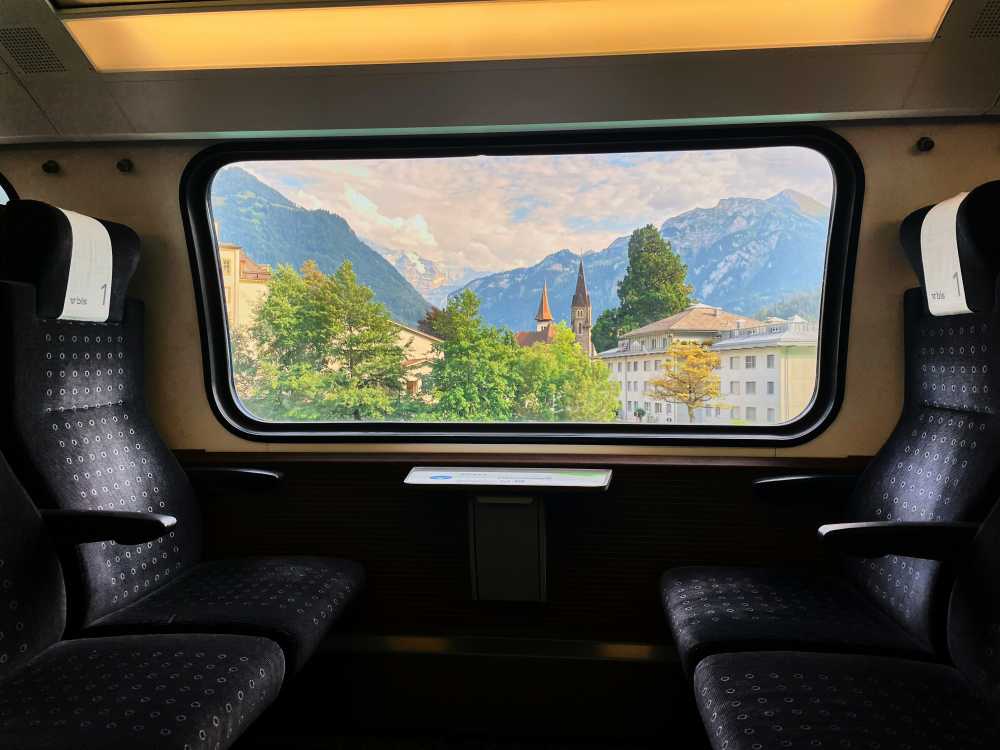
A Beginner's Guide to Navigating Europe's Train Systems
Booking trains can feel intimidating. The key is using the right tools. Apps like Trainline or Omio are great for comparing options, but they sometimes add a small service fee. For the best price, go directly to the website of the country's national rail service (e.g., Deutsche Bahn in Germany, Trenitalia in Italy).
Pro-Tip: In some countries (like Italy and France), you must validate your paper ticket in a small machine on the platform before boarding. Forgetting this step can result in a steep fine. When in doubt, watch what the locals do!
Finding Your Home Away From Home
Where you sleep is your sanctuary. It’s your base of operations, your charging station, and your place to feel secure.
Hostels vs. Hotels vs. Airbnbs for Solo Travelers
Hostels: The best choice for budget and social connection. Modern hostels offer private rooms, female-only dorms, and organized social events. They are the easiest place to meet fellow travelers.
Hotels: The right choice when you prioritize privacy, comfort, and security. A hotel gives you a guaranteed quiet space to decompress after a long day of exploring.
Airbnbs: Can offer great value and a local feel, but can also be isolating. For a first-timer, a "private room" in a host's apartment is a good middle ground, offering a local connection with more privacy than a hostel.
How to Pick a Safe and Social Hostel (Even If You're Not 21)
Read recent reviews like a detective, specifically filtering for "solo traveler" or "solo female traveler." Prioritize properties with:
24-hour reception
Secure individual lockers (bring your own padlock)
A well-lit, central location
Organized events like walking tours or group dinners

Your Guide to Staying Safe and Savvy on a Solo Travel in Europe
Let’s be clear: safety isn't about paranoia; it's about preparation. It's the quiet confidence that comes from being aware and intentional, which makes you a less appealing target from the start.
Blending In and Walking with Purpose
Dress to blend: Observe what local women are wearing. Ditching the tourist "uniform" of athletic wear can help you stand out less.
Walk with confidence: Even when lost, walk like you know where you're going. Duck into a cafe or shop to consult your map rather than stopping in the middle of the sidewalk.
Avoid "distracted" behaviors: Keep your phone away when walking through crowded areas. Being present and aware of your surroundings is your number one deterrent.
Proven Tactics to Beat Pickpockets
Major European cities are notorious for pickpockets who target distracted tourists.
Use a crossbody bag worn in front of your body, always with the zipper closed.
Never put your phone or wallet in your back pocket.
At restaurants, don't hang your bag on the back of your chair or place your phone on the table. Keep your belongings in your lap.
The Art of Solo Socializing
One of the biggest anxieties about a solo travel Europe trip is loneliness. The beauty of it is that you are in complete control of your social meter. You can dial it up or down at will.
How to Confidently Eat Alone (and Actually Enjoy It)
Reframe this act. It's not a sign of loneliness; it's a moment of luxurious self-indulgence.
Sit at the bar: It's more casual and invites conversation with the bartender or neighbors.
Bring a prop: A book signals "I'm content," while a journal signals "I'm an interesting person reflecting on my day."
Engage with the experience: Focus on the food. Take notes. Be present. You'll forget to feel self-conscious.

5 Easy Ways to Meet Other Travelers
Free Walking Tours: The #1 hack. Instant group for a few hours.
Cooking Classes: A shared activity is a natural icebreaker.
Hostel Common Areas: Simply being present in these spaces makes you approachable.
Meetup.com: Find events for locals and expats interested in everything from hiking to language exchange.
Small Group Day Trips: Use platforms like GetYourGuide or Viator to join tours to nearby attractions.
Your Solo Travel Europe Questions, Answered
What is the best European country to visit for the first time alone?
For its unbeatable combination of safety, affordability, friendly locals, and excellent tourist infrastructure, Portugal is widely considered the best choice for a first-time solo trip in Europe.
Is Europe safe for a young solo female traveler?
Yes, overwhelmingly so. By choosing safe destinations, practicing situational awareness, and following standard safety protocols like those outlined in this guide, Europe is an incredibly safe and rewarding place for solo female travelers.
How do I handle language barriers when traveling alone?
In most major tourist destinations, English will be sufficient. However, learning a few key phrases in the local language ("Hello," "Please," "Thank you," "Excuse me") shows respect and will be greatly appreciated. Use the Google Translate app's offline and camera features for menus and signs.
The journey of solo travel in Europe is one of the most empowering experiences a person can have. It will challenge you, thrill you, and teach you more about your own resilience and capability than you thought possible. You've read the plan, you have the tools, and you understand the strategies. The fear you feel now will be a distant memory the moment you navigate a new city's metro system by yourself for the first time. That feeling of profound competence and freedom is what awaits. The adventure is yours to claim.
Read the full guide: Anxious to Adventurous: The Ultimate Guide to Solo Travel Confidence
Don't Miss Out! Subscribe for Exclusive Content
SubscribeComments 0
No comments yet
Be the first to share your experience!
Dont Miss Out! Subscribe for Exclusive Content
Ultimate USA Holidays Guide: Top Picks
FTC Affiliate Disclosure Essentials: Stay Compliant as a Travel Creator
Essential Affiliate Tools: From Tracking to Full Optimization

Booking.com Affiliate Program Review: Pros, Cons, and Earnings Potential
Decoding Affiliate Commission Rates: Benchmarks for Travel Creators
