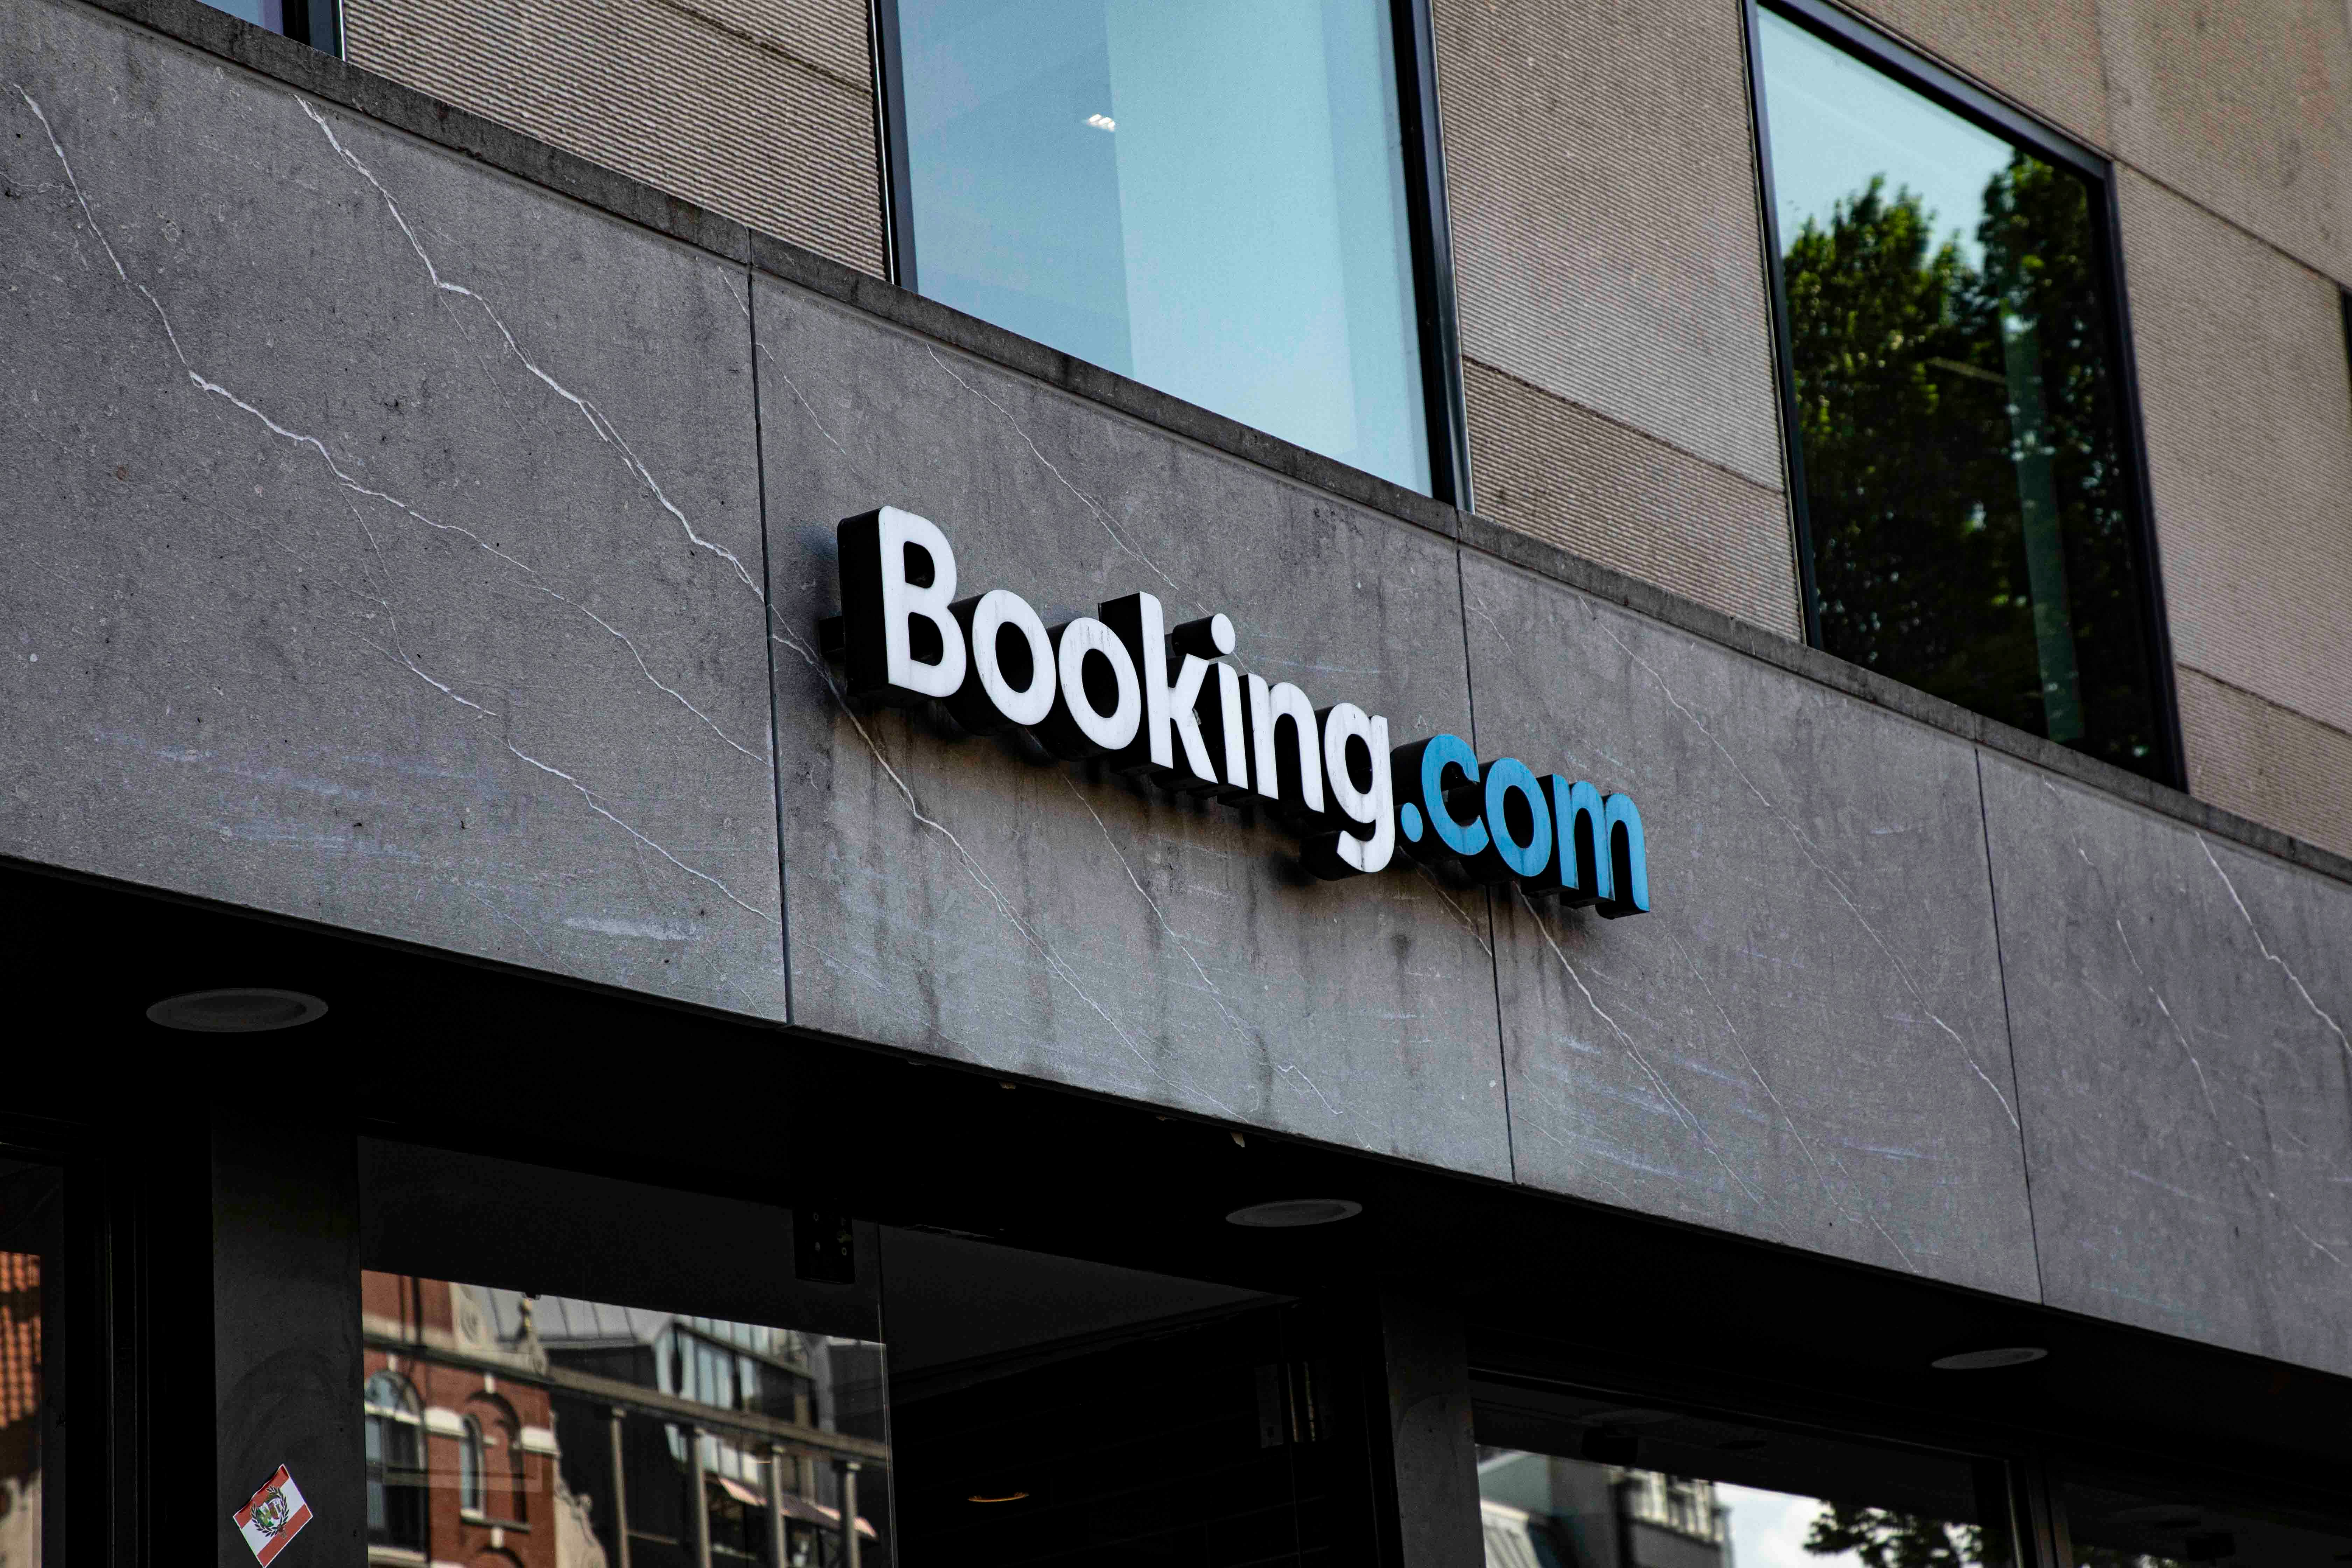
Booking.com Affiliate Program Review: Pros, Cons, and Earnings Potential
TrekGuider @trekguider
As a travel creator, you know accommodations are the bedrock of every trip. Your audience trusts you to recommend the perfect hotel, hostel, or vacation rental. Monetizing that trust is the logical next step, and one name looms larger than any other: Booking.com. With its colossal brand recognition and an inventory of over 28 million listings, joining its affiliate program feels like an obvious, can’t-miss opportunity. After all, with the average monthly income for travel affiliates hitting a reported $13,847, choosing the right partners is a high-stakes game.
But you’ve heard the whispers. In creator communities and private forums, there’s a nagging feeling that behind the slick marketing, something is fundamentally broken. You hear stories of a confusing commission structure, a cookie policy that seems designed to fail, and account issues that leave creators in the lurch. Is the biggest player in the game truly the best partner for your business, or is the booking affiliate program a trap for unwary creators lured in by a big name?
This is the definitive, unbiased review you’ve been searching for. We are cutting through the hype to deliver a clear-eyed analysis of the Booking.com affiliate program. We’ll dissect the legitimate pros, expose the critical, deal-breaking cons, and analyze the true earnings potential so you can make a strategic decision for your business. This deep dive is a crucial part of mastering the affiliate landscape, a topic we cover comprehensively in our pillar guide and essential command center: Travel Affiliate Programs: The 2026 Ultimate Guide.

The Allure: Why the Booking.com Program Is So Tempting
Let's be clear: the pull of the Booking.com affiliate program is undeniable. It’s a household name with the gravitational force of a market giant, and for creators, that brand recognition feels like a shortcut to credibility and conversions. These are the legitimate advantages that make it a top consideration.
Unmatched Brand Recognition and Trust
When you link to Booking.com, you are sending your audience to a platform they already know and trust. This pre-existing brand equity is a powerful conversion tool. You don't have to waste a single word "selling" your audience on the legitimacy of the booking platform itself; you can focus entirely on why that specific hotel is the right choice. This can lead to stronger initial click-through and conversion rates compared to lesser-known platforms.
A Colossal, Unrivaled Inventory
With over 28 million listings that span hotels, apartments, resorts, and even treehouses, Booking.com’s inventory is virtually limitless. No matter how niche your destination—from a major metropolis like Tokyo to a remote village in the Andes—you are almost certain to find a relevant, bookable property for your audience. This vast selection makes it a one-stop shop, simplifying the process of finding accommodation links for your content.
The Potential for High-Volume Conversions
For creators with significant traffic, especially those who attract visitors in the final, decisive stages of trip planning, the sheer volume of bookings processed by the platform can translate into substantial income. The platform's user-friendly interface and powerful search filters make it easy for users to find and book properties quickly, which can be a major asset for high-traffic websites.
The Critical Flaws: The Cons You Absolutely Cannot Ignore
While the pros are appealing, the operational realities of the booking affiliate program contain several severe, structural flaws that can cripple your earnings potential. These are not minor inconveniences; for many creators, they are deal-breakers.
The Achilles' Heel: Why the Session-Based Cookie Is a Deal-Breaker
This is, without question, the single most critical flaw in the Booking.com affiliate program. The program operates on a session-based cookie.
What does this mean? It means you only earn a commission if a user clicks your affiliate link and completes a booking within the exact same browser session. If they click your link, browse a few hotels, close the tab to think about it, and then return to Booking.com an hour later—or the next day—to make their booking, you earn nothing. Your tracking cookie has vanished.
Travel is a high-consideration purchase. People rarely book a multi-hundred or multi-thousand dollar trip on impulse. The typical customer journey looks like this:
They read your inspiring blog post.
They click your link to explore the hotels you recommend.
They compare prices and read a few more reviews.
They discuss options with a spouse or travel partner.
They return the next day, ready and excited to book.
With a session-based cookie, you are only compensated for the rare, impulsive booker. You lose the commission for every single thoughtful, deliberate customer you inspired. This policy is fundamentally misaligned with how real people plan travel, making it a structurally unsafe and potentially unprofitable model for content creators.

Pro-Tip: When evaluating any affiliate program, the cookie duration is often more important than the commission rate. A partner like Expedia Group offers a 7-day cookie, which is vastly superior as it respects the user's decision-making process and ensures you get paid for the value you create.
The "Black Box" Commission: Why 40% Isn't What It Seems
Booking.com often advertises a commission rate of 25-40%, which sounds incredibly high. However, this is deeply misleading. You do not earn a percentage of the total booking value. You earn a percentage of Booking.com's commission.
Here’s how that math actually breaks down:
A customer books a $500 hotel stay through your link.
The hotel pays Booking.com a commission (let's say 15%, which is $75).
You then earn your commission based on that $75, not the original $500.
If your rate is 25%, you earn 25% of $75, which is $18.75. Your effective commission rate on the total booking value is a mere 3.75%. This opaque structure makes it incredibly difficult to forecast your earnings and often results in a much lower payout than creators expect from the flashy headline numbers.
A History of Account Instability and Support Issues
Numerous affiliates have reported frustrating experiences with the program's administration. These complaints often center on sudden account closures without clear explanation, forced migrations to network platforms like Awin or CJ Affiliate, and a history of losing pending commissions during these transitions. While any large program will have some user issues, the volume of these reports suggests a level of instability that should be a major concern for any creator looking to build a reliable, long-term income stream.
The Verdict: Analyzing the True Earnings Potential
So, can you actually make money with the booking affiliate program? The answer is a qualified "yes," but only for a very specific type of publisher.
Who It Might Be Good For:
High-Traffic Deal & Discount Sites: Websites that focus on last-minute deals and attract users who are ready to book immediately can succeed with the session-based model. Their audience is impulsive by nature.
Metasearch Engines: Large-scale travel search engines that operate on a massive volume of clicks may find the program profitable due to sheer scale.
Who Should Avoid It:
Content Creators & Bloggers: If your content strategy is based on inspiration and long-term trip planning—creating itineraries, destination guides, and detailed reviews—this program is fundamentally at odds with your business model. You are inspiring a journey, not a single-session transaction.
Anyone Building a Sustainable, Predictable Income: The combination of a session-based cookie, an opaque commission structure, and reported account instability makes this a high-risk partner for anyone looking to build a reliable business.
Pro-Tip: The most resilient affiliate strategy is built on diversification. Never rely on a single program for your income. A healthy portfolio for a travel creator should include partners for accommodations, tours, insurance, and gear to create multiple, stable revenue streams.
Strategic Alternatives: Safer Bets for Higher Returns
The flaws in the Booking.com program do not mean you should abandon monetizing accommodations. It simply means you should partner with programs structured to favor creator success.
The most direct and superior alternative is the Expedia Group Affiliate Program. It covers major brands like Hotels.com and Vrbo and, most importantly, offers a 7-day cookie duration. This gives your audience a full week to make their decision after clicking your link, ensuring you are properly compensated for your influence.
Ultimately, the most secure path to a stable income is to reduce your reliance on any single affiliate program and start building assets you own. Instead of sending all your traffic to other brands, you can create and sell your own high-value digital products—like detailed itineraries, travel guides, or planning checklists. Platforms like the TrekGuider Seller Platform are designed specifically for this, allowing you to build your own digital storefront and keep a much larger share of the revenue. It's the ultimate strategy for taking control of your financial future.

Build Your Perfect Itinerary (and Monetize It)
Creating high-value, bookable itineraries is one of the best ways to serve your audience and drive affiliate sales. But starting from scratch can be daunting. Our free Travel Itinerary Template gives you the perfect framework to build beautiful, useful guides your readers will love—and a powerful asset you control.
Frequently Asked Questions
1. Is the Booking.com affiliate program free to join? Yes, the program is free to join either directly or through an affiliate network like Awin or CJ Affiliate.
2. What are the payment methods for the Booking.com affiliate program? Payments are typically made via PayPal or bank transfer, but this can depend on the network you join through. There is usually a minimum payout threshold (e.g., €100) that you must reach before you can receive your earnings.
3. Can I use my own affiliate links to make personal bookings? No. Like almost all affiliate programs, using your own links for personal purchases or bookings is a violation of the terms of service and can lead to your account being terminated and commissions being voided.
A Powerful Brand with a Flawed Partnership
The Booking.com affiliate program exists in a paradox. It leverages one of the most powerful and trusted brands in travel, offering a massive inventory that seems perfect for creators. However, its core mechanics—specifically the session-based cookie and the opaque commission structure—are fundamentally anti-creator. They are relics of an older affiliate model that fails to properly value the influence of content creators who build trust and inspire a customer's journey over days or weeks.
While it might work for a small subset of high-traffic, transactional websites, for the vast majority of travel bloggers and content creators, the booking affiliate program represents a significant and unnecessary risk. Your time, effort, and influence are better invested in partners with more favorable, transparent, and creator-friendly terms. By choosing strategic alternatives and diversifying your income streams, you can build a more profitable and resilient business for the long term.
Read the full guide: The Travel Blogger's Playbook to Affiliate Marketing Mastery
Don't Miss Out! Subscribe for Exclusive Content
Subscribe


Comments 0
No comments yet
Be the first to share your experience!
Dont Miss Out! Subscribe for Exclusive Content

Ultimate USA Holidays Guide: Top Picks

FTC Affiliate Disclosure Essentials: Stay Compliant as a Travel Creator

Essential Affiliate Tools: From Tracking to Full Optimization

Avoid These 5 Affiliate Landing Page Mistakes for Better Conversions

Affiliate Keyword Research Mastery for Travel Blogs

Decoding Affiliate Commission Rates: Benchmarks for Travel Creators
7-Day Solo Travel Itinerary: A Perfect First-Trip Template
TrekGuider @trekguider
You're ready for an adventure that's entirely your own. No more compromising on destinations, no more syncing schedules. Just you, the open road, and the profound freedom of solo travel.

But a blank page can be intimidating. The excitement of the idea is quickly replaced by the paralysis of planning. Where do I start? How do I build a solo travel itinerary that's exciting but not overwhelming? How do I stay safe?
The good news is that you don't need to reinvent the wheel. You need a proven framework, a reliable playbook to guide you. This article provides the ultimate solution: a flexible 7-day solo travel itinerary that acts as the perfect template for your first independent adventure. It’s designed to eliminate guesswork, build confidence, and ensure an unforgettable experience.
While planning a trip for one has a very different set of challenges than coordinating group travel, as detailed in our guide to Family Travel Ideas: The 2026 Guide to Unforgettable Trips, the need for a solid plan remains universal. This guide is your key to unlocking that journey, transforming apprehension into pure excitement.
Your Pre-Flight Checklist: Engineering a Stress-Free Start
A smooth trip begins long before you pack your bags. Solid preparation is the antidote to travel anxiety, transforming "what ifs" into "I've got this."

1. Choose a Beginner-Friendly Destination
For your first solo trip, set yourself up for success by picking a location known for its strong tourist infrastructure and safety. You're looking for a "soft landing."
Top Contenders: Think cities like Lisbon (Portugal Travel Guide), Dublin, Kyoto (Japan Travel Guide), or Vancouver. These spots are celebrated for being affordable, walkable, friendly, and supremely safe.
The Litmus Test: Can you get around easily on public transport? Is it known for being safe, particularly for solo travelers? Is Wi-Fi widely available?
2. Select Your Home Base Wisely
Your accommodation is more than a place to sleep; it's your sanctuary and command center.
Boutique Hostels (with Private Rooms): The gold standard for many first-timers. You get the social energy of a common room and organized tours, plus the quiet retreat of your own space. It's the perfect balance of community and privacy.
Boutique Hotels or Guesthouses: A step up in privacy and comfort. Small, locally-owned spots often provide a warmer, more personal touch than soulless chains, and the staff can be a goldmine of local tips.
Centrally Located Airbnbs: Ideal if you crave a "live like a local" vibe and a kitchen. Stick exclusively to hosts with a "Superhost" designation and dozens of positive reviews that specifically mention safety, cleanliness, and an excellent location.
3. A Quick Word on Budgeting for Your First Solo Trip
A clear budget isn't a restriction; it's freedom. It frees you from money-related stress on the road. For a 7-day city trip, a simple framework is:
Fixed Costs: Pre-booked flights and accommodation.
Daily Average: Set a realistic daily budget for food, activities, and transport. Research costs in your chosen city (e.g., a meal in Lisbon is far cheaper than in Zurich). A good starting point for many European or North American cities is $75-$125 per day.
Contingency Fund: Always have an extra 20% of your total budget tucked away in a separate account for unexpected opportunities or emergencies.
4. A Pro's Approach to Solo Safety
Your confidence is directly linked to how safe you feel. Build a fortress of preparation. For a deeper dive, especially for female travelers, our Solo Female Travel Safety Guide is an essential resource.
Digital Security: Download offline maps of your city on Google Maps. Use a VPN on public Wi-Fi. Scan your passport and important documents and save them to a secure cloud service like Dropbox.
Situational Awareness: The "Morning Photo" protocol is a great habit for solo travelers. Snap a quick selfie each morning. In an emergency, it provides an exact, current visual reference.
Contingency Plan: Before you leave, share your detailed itinerary with someone at home. Establish a simple check-in cadence (e.g., a quick "all good" text each night).
Financial Safety: Carry a "decoy" wallet with a small amount of cash and an expired credit card. Keep your primary cards and the bulk of your cash in a secure money belt or a hidden internal pocket. Never keep all your money in one place.
Pro-Tip: Download the Noonlight app. It's a discreet safety button on your phone. If you're feeling uneasy, you can hold your thumb on the button. Release it and don't enter your PIN, and it will automatically alert local authorities with your exact location.
Your Ultimate Pre-Trip Tool
Feeling organized is feeling confident. Before you book a single flight, download our free International Travel Checklist. It’s a comprehensive resource that covers everything from passports and visas to packing and travel insurance, ensuring you don't miss a single crucial step.
The Perfect 7-Day Solo Travel Itinerary Blueprint
This is your playbook. The specific sights will change, but the strategic rhythm of this week is designed to maximize discovery while preventing burnout.

Day 1: Land Softly, Start Slow
Your only goal on day one is to land softly. Forget the pressure to do anything "touristy." The mission is simple: arrive, check-in, and breathe.
Afternoon (Arrival & Settle): Navigate from the airport to your lodging using a pre-vetted option—an official taxi stand, Uber/Lyft, or the city's express train. Avoid unsolicited ride offers. Once you drop your bags, take 30 minutes to actually unpack. This small act of nesting transforms a sterile room into your personal space.
Late Afternoon (The Reconnaissance Walk): Take a short, aimless walk with a purpose: to locate your vitals. Find the nearest ATM, pharmacy, small grocery store, and metro/bus stop. This simple recon mission builds a mental map and makes you feel instantly more capable.
Evening (The Easiest Dinner Ever): Your first meal should be low-stress. Find a casual, well-lit café or bistro within a few blocks of your accommodation. Ask for a table with a view of the street. This isn't just dinner; it's your first immersion.
Day 2: Find Your Anchor, Catch the Vibe
Today is about orientation. You'll anchor yourself with a major landmark and then plug into the city's authentic energy.
Morning (The Iconic Anchor): Head to the city's most famous landmark—the one on all the postcards. Book your ticket online, weeks in advance, to bypass the soul-crushing queues. Seeing this "anchor point" early gives your mental map a center of gravity.
Lunch (A Feast for the Senses): Skip the tourist-trap restaurants and head for a bustling local food market. It's a vibrant, low-pressure way to sample authentic cuisine. Graze from different stalls, trying whatever looks and smells incredible.
Afternoon (The Ultimate Solo Travel Hack): Join a "free" walking tour (they run on tips, so bring cash). A passionate local guide will give you a brilliant crash course in the city's history, secrets, and layout. It's also an effortless way to be around fellow travelers.
Evening (Culture or Comfort): If you're energized, catch a local performance—traditional music, a play, anything that gives you a taste of the culture. If you're tired, there is zero shame in a simple dinner and an early night. Listen to your body.
Day 3: Pursue Your Passion
This is your trip. Today is dedicated entirely to whatever makes you tick.

Morning (The Deep Dive):
Art Lover? Lose yourself in a world-class museum or hunt for street art in a bohemian neighborhood.
History Buff? Explore that niche museum or archaeological site that fascinates you.
Foodie? Take a local cooking class. It's one of the best ways to meet people, learn a skill, and eat an amazing meal.
Nature Enthusiast? Escape to the city's largest park or botanical garden for a few hours of green therapy.
Afternoon (The Art of Getting Lost): Pick a neighborhood that intrigued you and put your phone on airplane mode. Allow yourself to wander without a destination. Follow a charming alleyway, pop into a random shop, sit on a bench. This is where the magic happens.
Evening (A Table for One, with a View): Treat yourself. Find a restaurant or rooftop bar with a spectacular view. Order a great meal, and toast to your adventure. Worried about dining alone? Bring a journal and write about your day—it makes you look like a mysterious travel writer, not a lonely tourist.
Day 4: Gain Perspective with a Day Trip
Escaping the city for a day provides a vital change of scenery and proves your growing travel competence.
Full Day: Choose a destination one or two hours away by train or bus. Think a coastal village, a historic castle, or a national park. The journey itself is part of the adventure.
The Mission: This trip breaks the routine and shows you a completely different facet of the country. It also flexes your navigation skills and builds immense confidence. Successfully planning and executing a day trip on your own is a huge milestone.
Logistics: Research train/bus schedules the night before. Pack a small daypack with a water bottle, snacks, a portable charger, and a light jacket.
Day 5: Live Like You Belong Here
Today, your goal is to blend in. Shed the tourist skin and adopt the rhythms of a local.

Morning (The Café Ritual): Find a small, neighborhood café far from the tourist trail. Order a coffee, grab a pastry, and settle in with a book or journal for an hour. Watch the morning commute, listen to the chatter—just be.
Mid-Day (A Mundane Mission): Do a normal-person errand. Browse a local bookstore, buy fruit at a grocer, or find a post office to mail cards home. These simple tasks ground you in the reality of the place.
Afternoon (Scheduled Downtime): Hit the pause button. You are not a travel machine. Go back to your room for a nap. Read a book on a park bench. Do absolutely nothing. This is a vital part of sustainable travel.
Evening (The Local's Recommendation): Ask a local you've had a pleasant interaction with—your barista, a friendly shopkeeper—"Where's your favorite place to eat around here?" Their recommendation will almost always be more authentic and delicious than anything on a top-ten list.
Day 6: The Open Road and a Fond Farewell
Leave this day largely unplanned. It's a blank page for you to fill with whatever your heart desires.
Morning (Encore or Exploration): Is there a neighborhood you fell in love with? Go back. Did a fellow traveler tell you about a hidden gem you can't stop thinking about? Go find it. This is your flex day to chase your curiosity.
Afternoon (Meaningful Mementos): If you're buying souvenirs, seek out items that tell a story. Skip the generic trinkets and look for local crafts, specialty foods, a vintage poster, or a book from a local author.
Evening (The Last Supper): Make your final dinner a celebration of your journey. Return to a favorite spot or try that one special place you've been saving. As you eat, reflect on the week. Think about what you've learned, the challenges you've overcome, and the person you've become.
Day 7: Depart with Your Head Held High
The last day is for a smooth, grateful exit. No frantic rushing.
Morning: Enjoy one last coffee and pastry at your favorite café. Take a final, mindful walk down a beloved street, soaking in the sights and sounds.
Pack & Go: Head back to your room for a final pack-up. Leave ample time for your journey to the airport. Strolling calmly to your gate is a far better feeling than sprinting.
At the Airport: Once you're through security, pause. Take a deep breath. You did it. You took the dream of solo travel and forged it into reality. Acknowledge the magnitude of that achievement.
Frequently Asked Questions
What is the best way to handle feeling lonely on a solo trip?
It's completely normal to feel a pang of loneliness. The best strategy is to be proactive. Stay in social accommodations like a boutique hostel, join a walking tour or a cooking class on days you crave interaction, and find a cozy café to simply be around the comforting buzz of other people.
Is it awkward to eat at restaurants alone?
Not at all! It's a skill that gets easier with practice. Start with casual cafes, bring a book or journal to feel more comfortable, and try sitting at the bar where you can often chat with the bartender. Soon you'll find it's a peaceful and empowering experience.
How can I stay safe when going out at night by myself?
A: Prioritize well-lit, busy areas and research neighborhoods beforehand. Tell someone where you're going, use ride-sharing apps like Uber instead of walking in unfamiliar areas late at night, and always be mindful of your drink. Trust your intuition—if a place feels off, leave immediately.
What's the most common mistake first-time solo travelers make?
The most common mistake is over-scheduling. New solo travelers often try to fill every single minute to avoid being alone with their thoughts. The real magic happens in the unplanned moments, so be sure to build plenty of downtime and flexibility into your itinerary.
Welcome Home, Traveler: This Is Just the Beginning
Walk through that arrival gate on your way home, and you won't be the same person who left. A solo trip is a declaration—proof that you are more capable, resilient, and fiercely independent than you might have ever allowed yourself to believe.

This solo travel itinerary was never just about seeing a new place; it was about discovering a new version of yourself. Use this template, adapt it, and carry the confidence you've earned into planning your next adventure. When you're ready to go from template to a fully-realized plan, our comprehensive Travel Guide is the perfect next step to turning your dream trip into a reality. Because this isn't the end of one journey; it's the beginning of a lifetime of them.
Read the full guide: Family Travel Ideas: The 2026 Guide to Unforgettable Trips
Don't Miss Out! Subscribe for Exclusive Content
SubscribeComments 0
No comments yet
Be the first to share your experience!
Dont Miss Out! Subscribe for Exclusive Content
Ultimate USA Holidays Guide: Top Picks
FTC Affiliate Disclosure Essentials: Stay Compliant as a Travel Creator
Essential Affiliate Tools: From Tracking to Full Optimization

Booking.com Affiliate Program Review: Pros, Cons, and Earnings Potential
Decoding Affiliate Commission Rates: Benchmarks for Travel Creators

Amazon Associates for Travel: Strategies to Maximize Commissions
Lollapalooza: 7 Stage-Hopping Tips
TrekGuider @trekguider
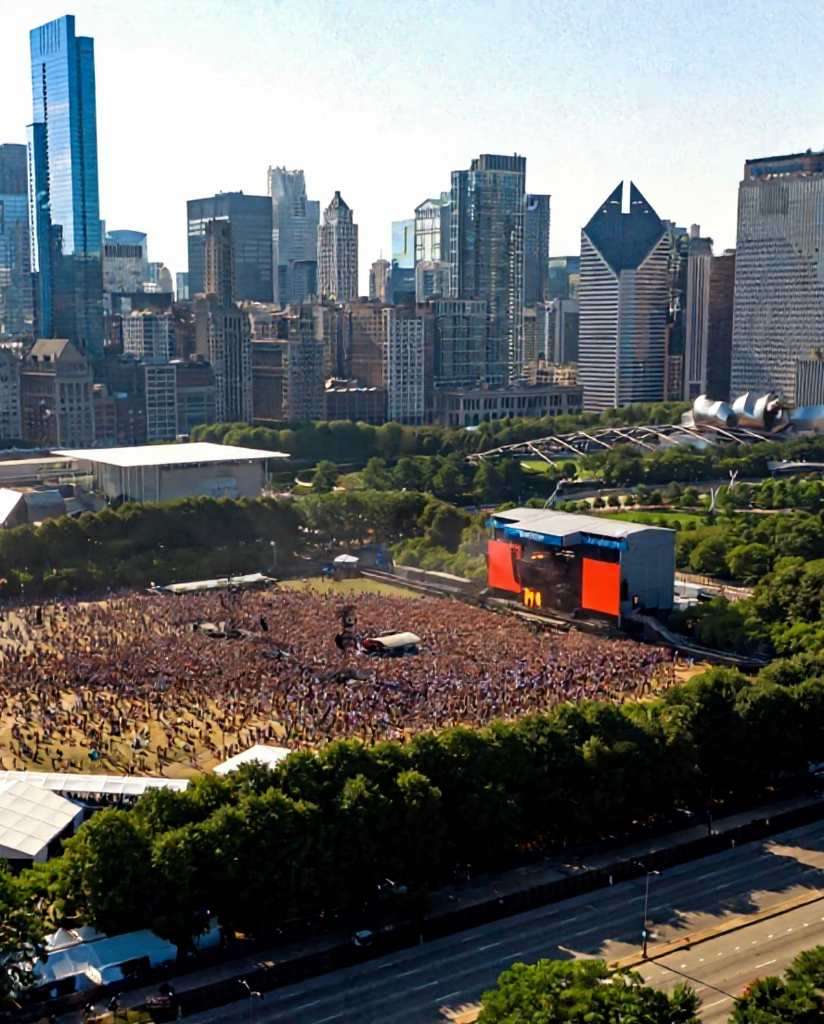
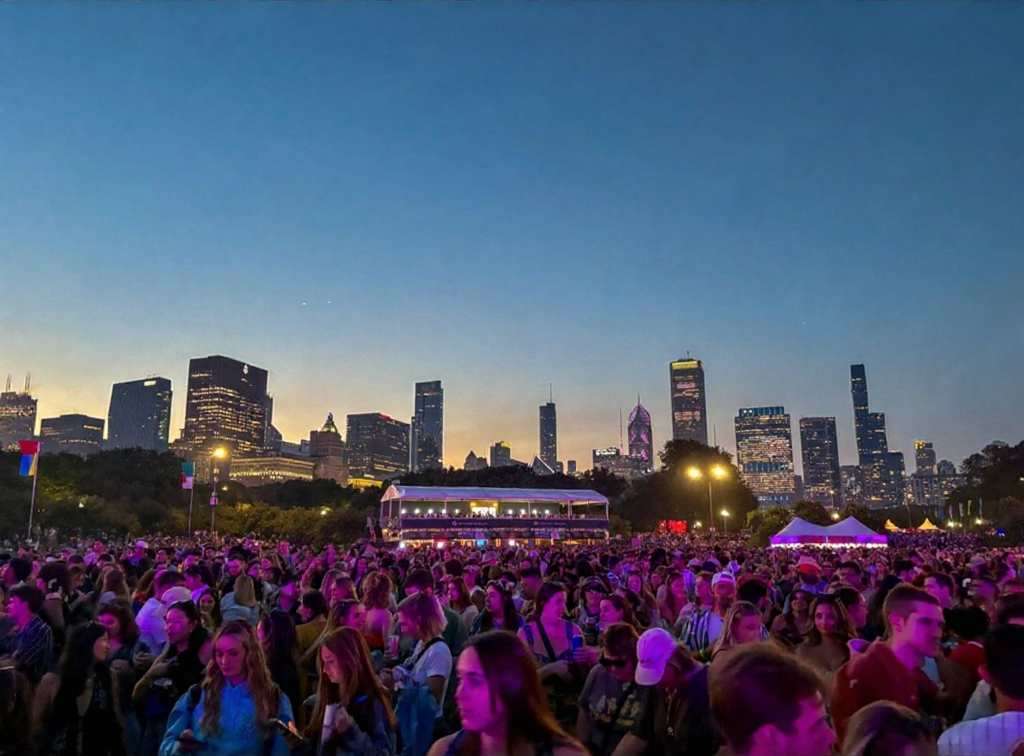
You’ve done it. You scored the golden ticket to Lollapalooza, the four-day musical marathon that transforms Chicago’s Grant Park into the center of the universe. But now, staring at a schedule that looks more like a complex circuit board than a concert lineup, the reality sets in. Dozens of artists you’re dying to see are scattered across a dozen stages, their set times overlapping in a cruel twist of fate. The sheer scale of the festival, with its massive crowds and sprawling grounds, suddenly feels less like a dream and more like a daunting logistical nightmare.
The anxiety begins to bubble. You picture yourself spending half the day trudging from the T-Mobile stage at the south end to the Bud Light stage at the north, only to arrive sweaty, exhausted, and just in time to hear the final chords of your favorite song. The fear of missing out becomes a palpable threat, turning the promise of unforgettable musical moments into a frantic race against the clock. Without a rock-solid plan, your festival experience could be defined by endless walks, missed opportunities, and the nagging feeling of being perpetually in the wrong place. This isn't just about seeing bands; it's about conquering one of the keystone events in a city known for its epic celebrations, a true highlight among the many experiences we cover in our definitive guide to Chicago Holidays: Windy City Thrills.
Forget the stress. This guide is your strategic playbook for navigating the glorious chaos of Lollapalooza Chicago. We’re breaking down the art of stage-hopping into seven actionable, pro-level tips that will transform you from a frantic fan into a festival veteran. From mastering the map before you even step foot in Grant Park to planning a seamless exit, these strategies will ensure you maximize your time, conserve your energy, and catch every single performance on your must-see list.
1. Become a Pre-Festival Master of the Map & Schedule
The biggest mistake a Lollapalooza rookie can make is showing up and trying to figure it all out on the fly. Grant Park is a massive urban oasis, and when it’s filled with stages, vendors, and hundreds of thousands of people, it becomes a complex, pulsating labyrinth. Your success begins long before you scan your wristband.
Download the Official App Immediately
Long before you even think about packing, your first move is to download the official Lollapalooza app. Consider it your digital command center for the entire weekend, running from July 31 to the final day of the festival. The app provides the most up-to-date schedule, a detailed festival map, and, most importantly, real-time push notifications. If a set time changes, a stage is delayed, or a surprise guest appears, the app will be the first to tell you. It also sends out crucial emergency alerts, making it an indispensable tool for staying safe and informed.
Create Your Artist Tiers
Once the full schedule drops, it’s time for strategy. Open the lineup—featuring titans like Olivia Rodrigo, Tyler the Creator, Sabrina Carpenter, and A$AP Rocky for the 2026 festival—and categorize every artist into two simple lists:
Tier 1 (Must-See): These are your non-negotiables. The artists you bought the ticket for. You will be at their set, no matter what.
Tier 2 (Nice-to-See): These are the artists you’d love to catch if the timing and location work out. They are your flexible options, the happy bonuses.
This simple act of prioritization is the bedrock of your stage-hopping plan. It allows you to build your day around your top-tier artists and fill the gaps with others, preventing the decision paralysis that comes from having too many choices.
Internalize the Grant Park Layout
Study the festival map like you’re planning a heist. The two main stages are typically located at the far north and south ends of Grant Park, a walk that can easily take 20-30 minutes through a thick crowd. Identify the locations of your Tier 1 artists and mentally map the routes between them. Note the locations of smaller stages, food courts (Chow Town), and, critically, the free water stations. Understanding the physical distances involved will help you make realistic calls about which back-to-back sets are doable and which are pure fantasy.

2. Master the "Perimeter Path" to Navigate Crowds
The center of any festival crowd is a slow-moving, densely packed sea of humanity. Trying to cut directly through the middle to get from one stage to another is a rookie move that wastes time and energy. The secret to swift movement is to think like a river, flowing where the resistance is lowest.
Stick to the Arteries
The most effective way to navigate Lollapalooza Chicago is by using the perimeter paths. Instead of plunging into the heart of the crowd, stick to the designated walkways along the sides. These paths, often lining the edges of the park or separating vendor areas, are the festival's arteries. While they may look like the longer route on a map, they are almost always faster than trying to push through a stationary audience. Make a mental note of these pathways when you first arrive.
Live by the 15-Minute Rule
If your next Tier 1 artist is on a stage across the park, you need to be ruthless with your timing. Implement the 15-Minute Rule: leave the current set 15 minutes before it ends. This gives you a critical head start, allowing you to exit the immediate crowd before the mass exodus begins when the music stops. It might sting to walk away from the end of a great performance, but that small sacrifice ensures you’re in a good position for the next one, rather than hearing it faintly from a quarter-mile away.
3. Hydrate and Fuel Like a Seasoned Athlete
Stage-hopping is a sport. You’ll be on your feet for 10 hours a day, walking several miles under the summer sun. You’re not just attending a concert; you’re entering a temporary city that generates a staggering economic impact—estimated at over $440 million. That scale demands respect and a bit of preparation.
Make Water Your First Priority
Lollapalooza provides free water refill stations throughout the grounds. When you first enter Grant Park, make it your mission to locate the station nearest the entrance and the stages you’ll be frequenting. Dehydration is the number one enemy of the festival-goer; it saps your energy, causes headaches, and can ruin your entire weekend. Make it a personal rule to refill your water bottle every single time you pass a station.
Pro-Tip: Bring a collapsible water bottle or an empty hydration pack. It's light, complies with security rules, and allows you to carry more water than a standard bottle. This means fewer trips to the refill station and more time enjoying the music.
4. Dress for a Four-Day Marathon, Not a Fashion Sprint
While Lollapalooza is a prime spot for people-watching and showing off your style, practicality should be your guiding principle. Your fashion choices can make or break your physical ability to enjoy the festival.
Your Shoes Are Your Most Important Gear
You will be walking and standing on concrete, grass, and uneven ground for hours on end. This is not the time for brand-new boots that need breaking in, flimsy sandals, or anything with a heel. Your number one priority should be comfortable, supportive, and already broken-in sneakers or walking shoes. Your feet are your foundation for the entire weekend; treat them well.
Prepare for All Four Chicago Seasons in One Day
Chicago weather is famously unpredictable. A day that starts hot and sunny can quickly turn cool and rainy. The key is to dress in layers. Start with a lightweight, breathable base layer and bring a flannel, hoodie, or light jacket that you can tie around your waist during the day and put on after the sun goes down. Most importantly, pack a poncho. It’s small, light, and will be an absolute lifesaver if a sudden downpour occurs.
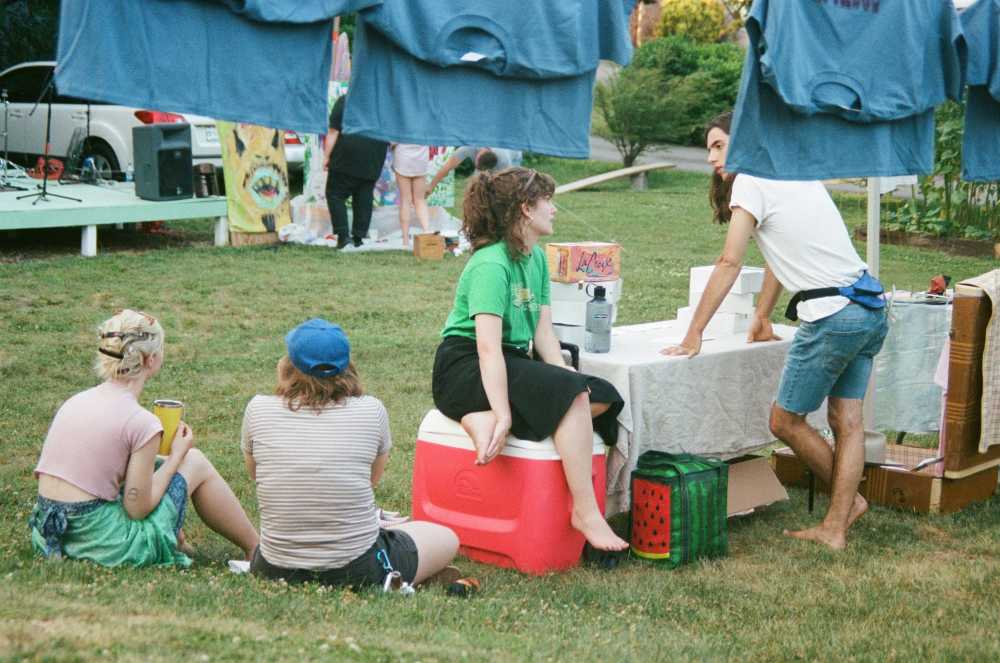
5. Establish a "Home Base" for Your Crew
Navigating Lollapalooza Chicago with friends is a core part of the experience, but it’s incredibly easy to get separated. Cell service is notoriously unreliable when tens of thousands of people are trying to use it at once, so you can’t count on a text message or call to find your group.
Why a Meeting Point is Non-Negotiable
Before you even think about splitting up to see different artists, establish a clear, specific, and easy-to-find meeting point. This is your group’s "home base." If anyone gets lost, their phone dies, or you just need to regroup, everyone knows exactly where to go.
How to Choose a Good Spot
Don’t pick a generic spot like "the fountain" or "the food court." Choose a unique and unmistakable landmark. A good meeting point is something like, "the giant silver sculpture near the Buckingham Fountain" or "the corner of the 'Deep Dish' pizza stand in Chow Town." Pick a spot that is slightly away from the main walkways to avoid being constantly jostled. Check in at your home base at pre-determined times to ensure everyone is safe and accounted for.

6. Embrace the Journey Between the Stages
Stage-hopping isn’t just a commute; it’s an opportunity. The journey from one performance to another is part of the festival experience itself. Instead of seeing it as a chore, reframe it as a chance for discovery and inspiration.
Discover Your Next Favorite Band
As you walk the perimeter paths, you’ll pass smaller stages where artists you’ve never heard of are playing. Pause for a few minutes and listen. This is how you stumble upon incredible new music. Some of the most memorable Lollapalooza moments happen not at the massive headliner stages, but in the intimate settings of the BMI or Grove stages. Let your ears guide you.
Explore the Full Festival Experience
Lollapalooza is more than just a concert. It’s a massive cultural event filled with creativity. On your way from one stage to the next, take a detour through the art installations, check out the merch tents, or see what activations the sponsors have set up. This spirit of creative discovery is what fuels the best entrepreneurs. If you're feeling inspired by the artistry around you, channel that energy into your own project with our free Digital Product Ideas Guide. By exploring, you break up the monotony of walking and get a richer, more complete festival experience.

7. Plan Your Grand Escape in Advance
How you leave the festival is just as important as how you navigate it. At 10 PM, when the final headliner finishes, a massive wave of people will pour out of the Grant Park exits, creating a human traffic jam that can be overwhelming and slow.
Beat the Final Rush
Just as with the 15-Minute Rule for stage-hopping, consider leaving a few minutes before the absolute end of the night. Slipping out during the last song or just before the encore can save you up to an hour of being stuck in a slow-moving crowd. You’ll get to public transit or your rideshare pickup spot ahead of the main surge, which is a priceless advantage after a long day.
Know Your Public Transit Route Cold
The best way to get to and from Lollapalooza Chicago is by using the CTA rail system. Multiple downtown street closures make driving or using rideshares near the park a nightmare. Before the festival, identify the closest CTA station to your accommodation and memorize the route to and from the park exits. Having this plan locked in will prevent you from wandering aimlessly with a dead phone at the end of a long day.
Pro-Tip: If you must use a rideshare, set your pickup location several blocks away from the Grant Park exits. Walk away from the chaos and toward your pin. You'll escape the immediate surge pricing, and your driver will be able to find you much more easily than in the gridlock traffic near the festival grounds.
Your Blueprint for Lollapalooza Domination
The overwhelming scale of Lollapalooza can intimidate even the most enthusiastic music fan, but it doesn’t have to. With a strategic approach, the festival transforms from a logistical puzzle into the ultimate musical playground. By preparing in advance, navigating smartly, and taking care of your body, you shift from being a passive attendee to the master of your own experience. With these stage-hopping tips, you're now fully equipped with the knowledge of a seasoned pro, ready to conquer Lollapalooza Chicago and create a weekend of flawless, unforgettable memories.

Your Lollapalooza adventure is just one part of an incredible trip. To make the most of your time in the Windy City and beyond, check out our comprehensive Travel Guide. It’s packed with insider tips for exploring the best destinations across the USA.
Don't Miss Out! Subscribe for Exclusive Content
SubscribeComments 0
No comments yet
Be the first to share your experience!
Dont Miss Out! Subscribe for Exclusive Content

San Francisco Cherry Blossoms: A Local's Guide to the Blooms

Halloween SF: Haunts Without Horrors

SF Festivals: 7 Must-See Lineups

Christmas SF: Lights & Wharf Wonders

SF Pride: 6 Route & Party Hacks

Chinese New Year SF: Parade Essentials
New York Holidays: 10 Must-Do Events
TrekGuider @trekguider
New York City doesn’t just celebrate holidays; it becomes the main event. From the first crisp autumn air that signals the start of parade season to the dazzling fireworks that burst over the East River, the city offers an energy you simply won't find anywhere else. Planning a trip around the holidays in New York is more than a vacation—it’s an immersion, a chance to step directly into the scenes you’ve watched on screen your whole life.
Whether you're dreaming of ice skating beneath the world-famous Rockefeller Center tree, marching with millions for Pride, or securing the perfect spot to watch giant balloons float down Broadway, this guide is your essential starting point. We'll walk you through the city's most iconic celebrations and provide the insider tips you need to navigate the crowds, sidestep the stress, and create memories that last. Forget just visiting; it's time to be part of the magic.

And while New York’s celebrations are truly in a class of their own, they are just one piece of the country's festive puzzle; for a complete overview of the nation's top events, be sure to explore our Ultimate USA Holidays Guide: Top Picks.
1. Master the Art of a Holiday Budget
A trip to celebrate the holidays in New York can feel financially intimidating, but many of the city's most cherished traditions are surprisingly accessible. The secret is to balance a few well-chosen splurges with the wealth of free activities the city has to offer.
Some of the most unforgettable experiences won't cost you a dime. Watching the larger-than-life balloons at the Thanksgiving Day Parade, feeling the vibrant energy of the NYC Pride March, or joining the creative chaos of the Village Halloween Parade are all completely free to attend. The same goes for finding a spot in a public park to watch the Fourth of July fireworks or strolling through Brooklyn's Dyker Heights neighborhood to see the jaw-dropping, professionally-done Christmas light displays.
For ticketed events, like a terrifying tour of the Blood Manor haunted house or a glamorous New Year's Eve party, booking online weeks—or even months—in advance is the smartest move. You’ll often secure a better price and, more importantly, guarantee your spot before they inevitably sell out. When it comes to food, you can save a fortune by embracing the city's incredible culinary scene beyond pricey sit-down restaurants. Grab a classic New York slice, explore a bustling food hall like Chelsea Market, or enjoy a delicious and affordable meal from a street vendor.
2. Navigate the City Like a New Yorker
Let's be clear: tackling New York during a major holiday without a game plan is a rookie mistake. But with a little insider knowledge, you can bypass the chaos and experience the city at its most electric.
First and foremost, the city’s subway system is your best friend. During massive events like the New Year's Eve ball drop or the Macy's Thanksgiving Day Parade, many streets are completely closed to all traffic. Taxis and rideshares become impractical, with gridlock and surge pricing making them a slow and painfully expensive option. The subway, however, will keep running and is by far the most efficient way to bypass the chaos above ground. Download a transit app before you go and set up the OMNY tap-to-pay system on your phone for the most seamless travels.
When it comes to accommodation, booking far in advance is non-negotiable, particularly if your trip coincides with Christmas, New Year's Eve, or Thanksgiving. Hotels in Midtown Manhattan, while central, see their prices skyrocket during these peak times. For a more authentic and often more affordable stay, consider looking at neighborhoods in Brooklyn or Queens with easy subway access to the main attractions. You'll not only save money but also get a taste of local life away from the tourist hubs.

A Year of Unforgettable New York Celebrations
No matter when you visit, New York City is ready with a world-class event. Here’s a look at the must-do celebrations that define the city’s calendar, complete with the insider knowledge you need to experience them like a pro.
3. March for Love at the NYC Pride March (June)
The NYC Pride March is more than just a parade; it's a powerful and joyous declaration of identity, history, and resilience. Commemorating the 1969 Stonewall Uprising that ignited the modern fight for LGBTQ+ rights, this event transforms the streets of Manhattan into a vibrant sea of color, music, and celebration. The first march was held in 1970, and it has since grown into one of the largest Pride parades in the world.
On Sunday, the last Sunday of June, the festivities kick off between 11:00 AM and 12:00 PM. The route is a journey through historic and iconic neighborhoods, beginning at 26th Street and 5th Avenue, heading south toward the Stonewall National Monument on Christopher Street, and concluding near 15th Street and 7th Avenue. To truly soak in the atmosphere, find a spot along 5th Avenue early or position yourself near the end of the route where the energy is palpable.
For a deep dive into the route, accessibility, and how to best participate in the celebration, check out our complete guide: NYC Pride: Parade Route Essentials.

4. Witness the July 4th Fireworks Spectacle (July)
Celebrating Independence Day in New York City means witnessing one of the most spectacular fireworks displays on the planet. The annual Macy's 4th of July Fireworks show is a breathtaking patriotic event, lighting up the skyline with a dazzling, perfectly choreographed pyrotechnic performance over the East River. This makes the waterfronts of Manhattan, Brooklyn, and Queens the most coveted front-row seats in town.
For the best views, head to parks along the Brooklyn waterfront, like Transmitter Park. Be prepared for an intense security presence; in past years, this has included everything from drones and metal detectors to NYPD scuba divers ensuring the area is safe. To secure a good spot, you’ll need to arrive by 6 PM at the latest. It's crucial to know which areas to avoid, as viewing is often restricted at FDR Midtown, Battery Park, and the Brooklyn Heights Promenade.
To get the full breakdown of the best viewing locations, what to bring, and how to navigate the crowds, see our detailed guide: July 4th NYC: Best Fireworks Views.
5. Unleash Your Creativity at the Village Halloween Parade (October)
On October 31st, Greenwich Village undergoes a spooky and spectacular transformation. The Village Halloween Parade is a legendary New York institution, famous for its wild creativity, giant puppets, and an electric, anything-goes atmosphere. This isn't a spectator-only event; the parade’s official motto is "All those in costume are welcome to join!" This unique rule turns the parade into a massive, moving street party where thousands of New Yorkers showcase their most inventive and outrageous creations.
The parade kicks off at 7 PM, marching up Sixth Avenue. If you want to participate, you'll need to line up at the designated entry point with your costume on. For those who prefer to watch, find a spot along the route early, as the sidewalks fill up quickly. Beyond the parade, the city buzzes with Halloween energy, from elaborate rooftop parties to terrifying haunted houses.
For tips on creating the perfect costume, parade etiquette, and other spooky festivities, explore our complete guide: Halloween NYC: 5 Spooky Parades.

6. Experience the Magic of the Thanksgiving Day Parade (November)
For millions, the Macy's Thanksgiving Day Parade is the official start of the holiday season. Waking up on the fourth Thursday of November to the sight of giant character balloons, elaborate floats, and the nation's best marching bands is a cherished American tradition. Seeing it in person is an experience of a lifetime. The parade kicks off at 8:30 AM sharp and concludes around noon, making its way from Central Park West and 77th Street down to the iconic Macy's flagship store at Herald Square.
To get a decent viewing spot, you need to be an early bird—plan to arrive by 6 AM and stake out a location along Central Park West or Sixth Avenue. The areas near the start and finish lines have restricted public viewing, so it's best to avoid them. Dress in warm layers, as November mornings can be frigid. For families, a word of caution: avoid bringing strollers into the most crowded sections, as they become nearly impossible to maneuver.
For a complete route map, a list of the best viewing spots, and tips for a stress-free morning, read our expert guide: Thanksgiving Parade: 6 Prime Spots.
7. Embrace the Sparkle of Christmas in New York (December)
There is nothing in the world quite like Christmas in New York. The city transforms into a true winter wonderland, sparkling with millions of lights and filled with an almost tangible festive cheer. The undisputed heart of the celebration is the Rockefeller Center Christmas Tree, an iconic symbol of the season. For a magical, crowd-free photo opportunity, visit the tree at dawn. Nearby, the Saks Fifth Avenue facade comes alive with an enchanting holiday light and music show that runs every ten minutes after dusk.
For a quintessential holiday experience, head to the Bryant Park Winter Village, where you can skate on the ice rink and browse the charming pop-up shops for unique gifts. If you're looking for the most spectacular neighborhood light displays, take a trip to Dyker Heights in Brooklyn, where homeowners engage in a friendly competition to create the most over-the-top, dazzling decorations you've ever seen.
To discover the city's most enchanting holiday markets, light displays, and festive activities, explore our detailed guide: Christmas in NYC: 7 Magical Markets.
8. Brave the New Year's Eve Ball Drop in Times Square (December)
The New Year's Eve ball drop in Times Square is the world's most famous countdown celebration. Being there in person as the crystal ball descends and confetti rains down on a million cheering people is an electrifying, once-in-a-lifetime experience. However, it requires serious endurance and planning. To secure a spot in one of the viewing pens, you must arrive by 3 PM on December 31st, and once you're in, there is no re-entry.
This means committing to standing in one spot for about nine hours without access to restrooms or food vendors outside your designated area. Public transportation is the only sane way to get there, as all surrounding streets are closed. Despite the challenges, those who brave the cold and the crowds are rewarded with an unforgettable memory and a front-row seat to a global tradition.
If you're ready to take on the challenge, our survival guide has all the essential tips you need to know before you go: NYE Times Square: How to Survive Crowds.
9. Capture Unforgettable Photos
With so many iconic backdrops, your camera will be working overtime. But getting that perfect shot amidst the crowds requires a plan. Instead of just snapping away, think like a photographer. For the Rockefeller tree, try a low-angle shot looking up to capture its scale. During a parade, use a fast shutter speed to freeze the motion of the floats and performers.
To make your sightseeing even more efficient, a well-planned route is essential. We've curated a guide to the city's most stunning locations, from famous landmarks to hidden gems, so you can create your own unforgettable walking tour. Download our free Best NYC Photo Spots Map to discover the exact locations for your most memorable holiday pictures.
10. Dress for the Elements
New York weather is notoriously fickle, and being uncomfortable can ruin an otherwise perfect day. During the winter holidays, layering is not just a suggestion—it's a survival strategy. A thermal base layer, a fleece or sweater, and a windproof/waterproof outer jacket will allow you to adapt to changing conditions. Don't forget a warm hat, gloves, and a scarf. Most importantly, wear comfortable, broken-in waterproof boots. You will be doing an incredible amount of walking, and nothing ends a day of exploring faster than sore, cold feet. In the summer, lightweight and breathable fabrics are key, but always pack a light jacket or poncho, as summer thunderstorms can appear suddenly.

Take Your NYC Adventure to the Next Level
Planning a trip around one of New York's iconic holidays is just the beginning. To truly master the city, you need a resource that goes beyond the main events, helping you discover hidden gems, navigate the five boroughs like a pro, and find the best slice of pizza after a long day of sightseeing.
Our comprehensive Travel Guide is designed to be your ultimate companion for any New York City adventure. It’s packed with detailed neighborhood guides, curated restaurant recommendations for every budget, transportation hacks, and insider tips that will help you save time and money. Whether you're a first-time visitor or a seasoned traveler, this guide will unlock a side of the city that most tourists never see, turning a great holiday trip into an extraordinary one.
Are You an NYC Expert? Share Your Knowledge
Are you the go-to travel planner for your friends? Have you mastered the art of navigating NYC's biggest events? On TrekGuider, you can turn that hard-won expertise into a business. Our platform is built for travel creators to publish their own in-depth guides, sell digital products like custom maps or itineraries, and build a brand around their passion. Discover how top travel experts are monetizing their knowledge and find your own audience.

Your unforgettable New York holiday awaits. The energy is infectious, the memories are lasting, and the stories you'll bring home are priceless. So pick a celebration, book your ticket, and get ready to be part of the world's greatest show.
Don't Miss Out! Subscribe for Exclusive Content
SubscribeComments 0
No comments yet
Be the first to share your experience!
Dont Miss Out! Subscribe for Exclusive Content
San Francisco Cherry Blossoms: A Local's Guide to the Blooms
Halloween SF: Haunts Without Horrors
SF Festivals: 7 Must-See Lineups
Christmas SF: Lights & Wharf Wonders
SF Pride: 6 Route & Party Hacks