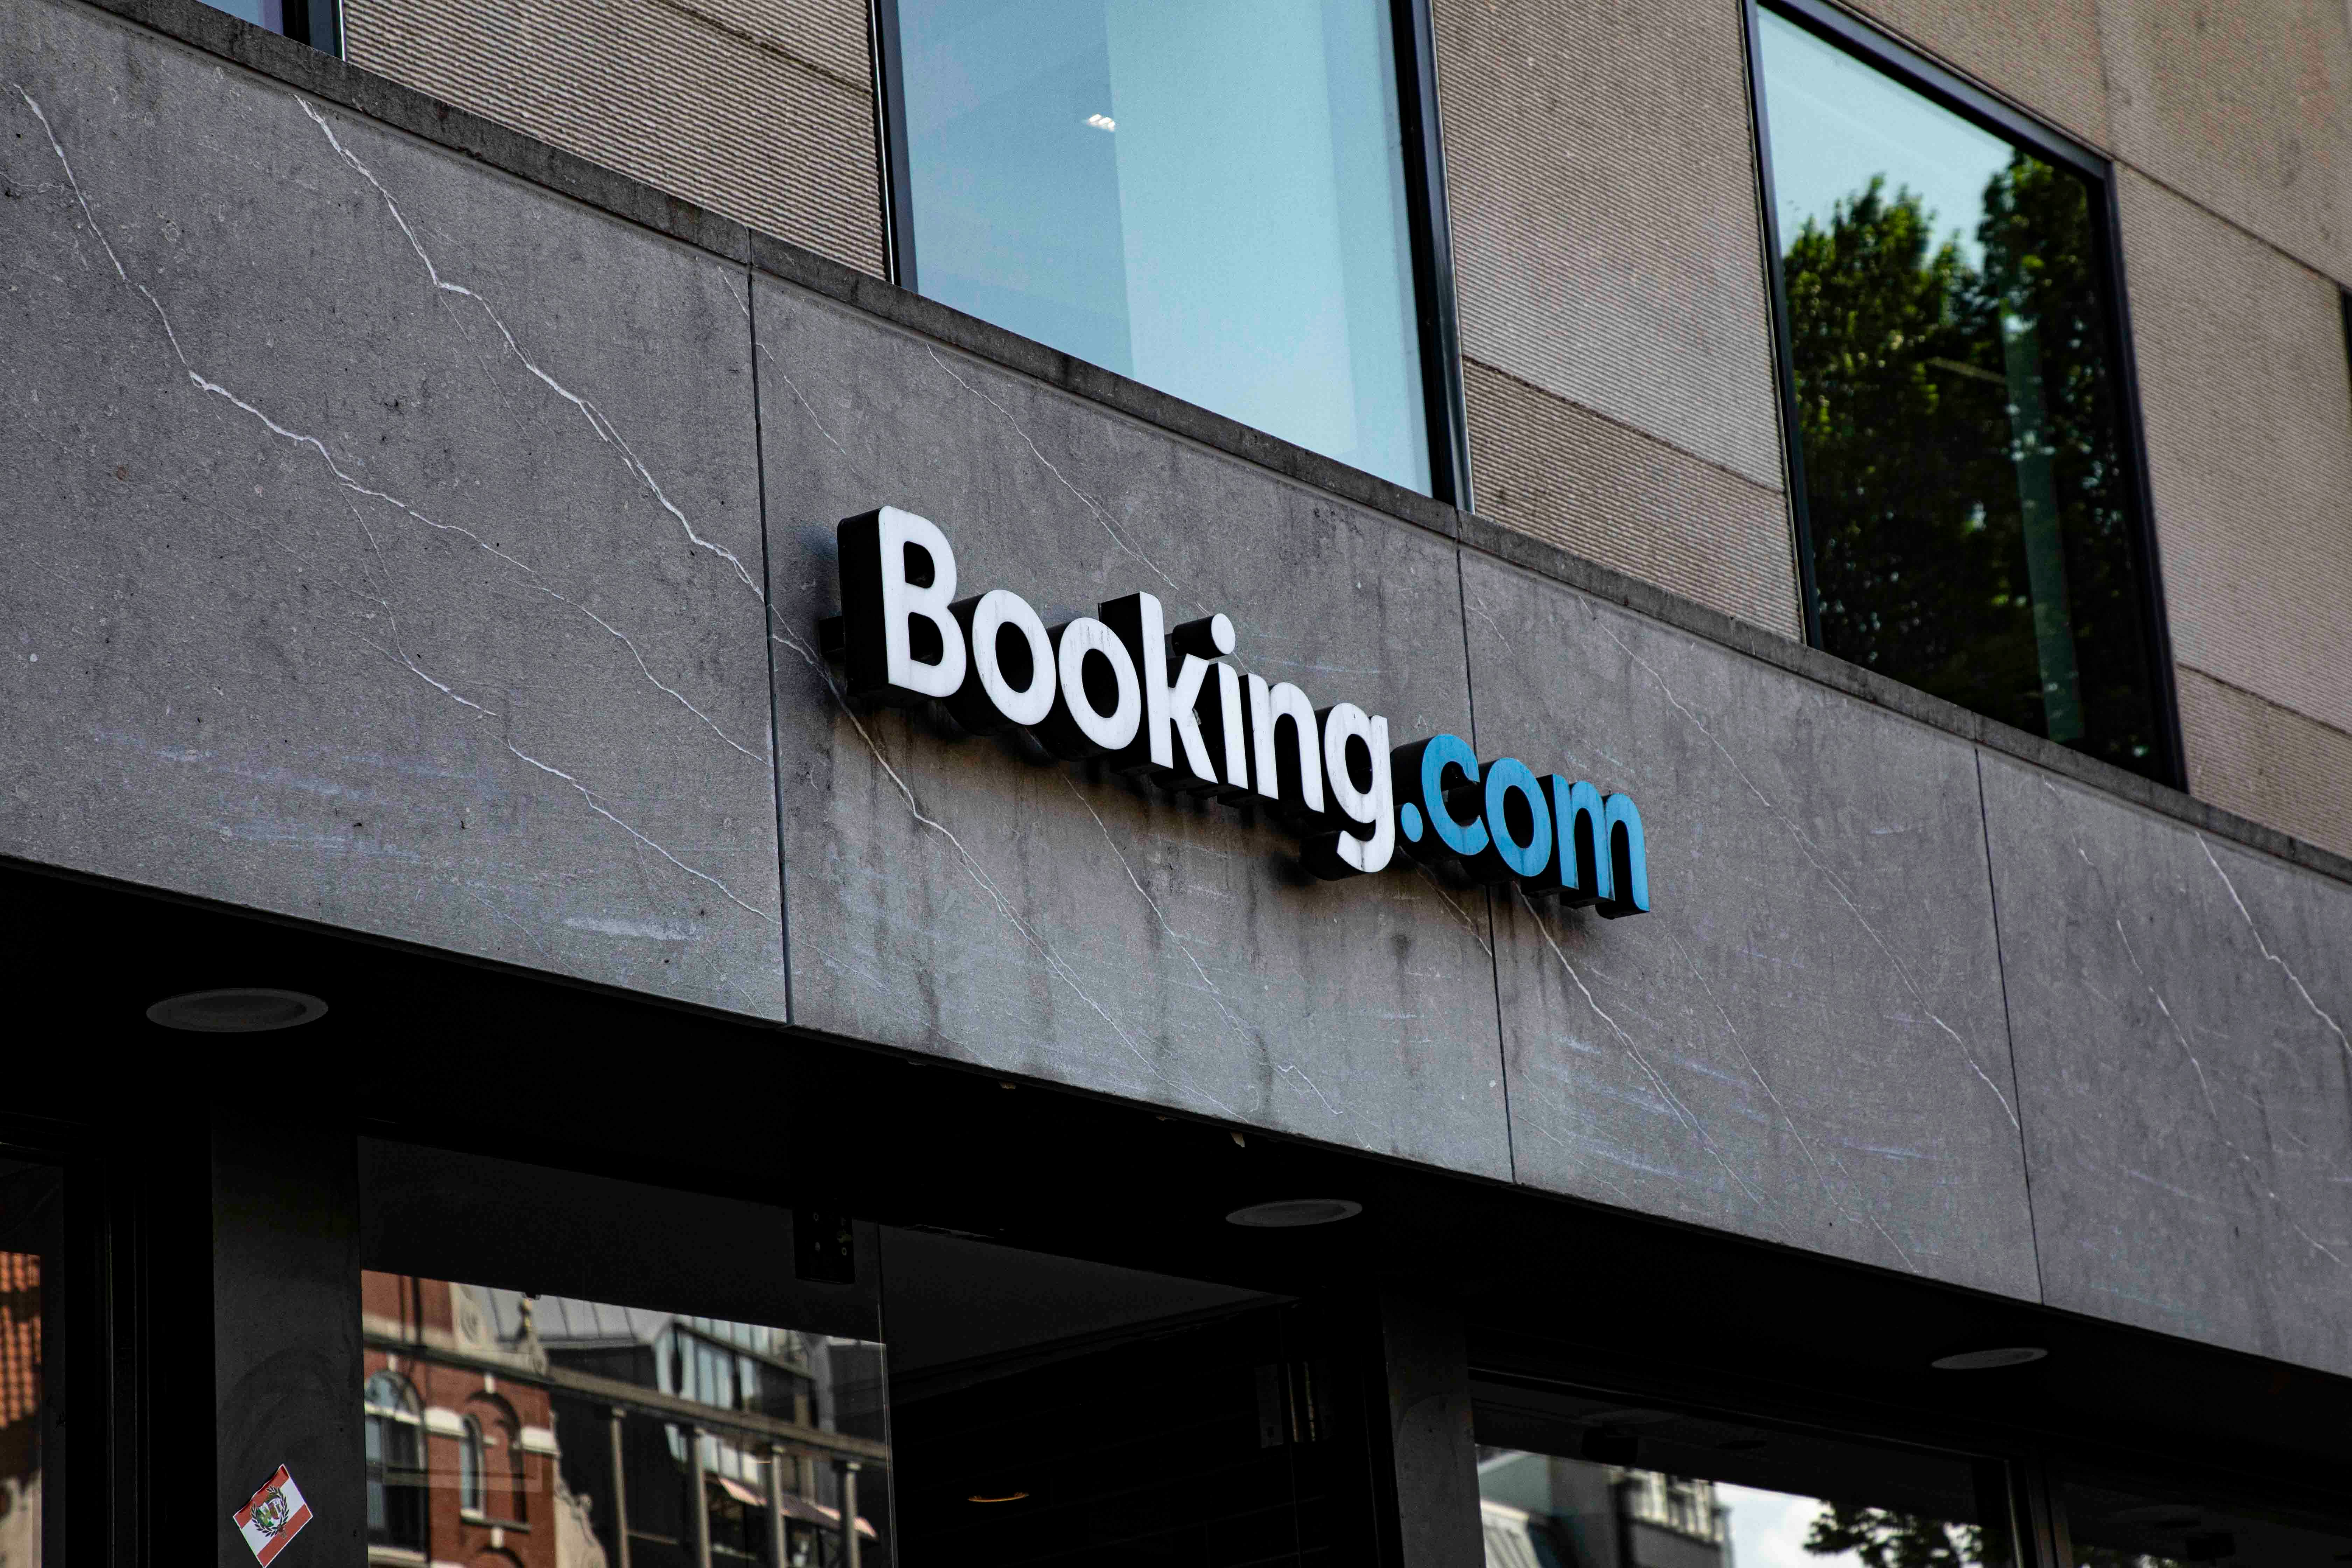
Booking.com Affiliate Program Review: Pros, Cons, and Earnings Potential
TrekGuider @trekguider
As a travel creator, you know accommodations are the bedrock of every trip. Your audience trusts you to recommend the perfect hotel, hostel, or vacation rental. Monetizing that trust is the logical next step, and one name looms larger than any other: Booking.com. With its colossal brand recognition and an inventory of over 28 million listings, joining its affiliate program feels like an obvious, can’t-miss opportunity. After all, with the average monthly income for travel affiliates hitting a reported $13,847, choosing the right partners is a high-stakes game.
But you’ve heard the whispers. In creator communities and private forums, there’s a nagging feeling that behind the slick marketing, something is fundamentally broken. You hear stories of a confusing commission structure, a cookie policy that seems designed to fail, and account issues that leave creators in the lurch. Is the biggest player in the game truly the best partner for your business, or is the booking affiliate program a trap for unwary creators lured in by a big name?
This is the definitive, unbiased review you’ve been searching for. We are cutting through the hype to deliver a clear-eyed analysis of the Booking.com affiliate program. We’ll dissect the legitimate pros, expose the critical, deal-breaking cons, and analyze the true earnings potential so you can make a strategic decision for your business. This deep dive is a crucial part of mastering the affiliate landscape, a topic we cover comprehensively in our pillar guide and essential command center: Travel Affiliate Programs: The 2026 Ultimate Guide.

The Allure: Why the Booking.com Program Is So Tempting
Let's be clear: the pull of the Booking.com affiliate program is undeniable. It’s a household name with the gravitational force of a market giant, and for creators, that brand recognition feels like a shortcut to credibility and conversions. These are the legitimate advantages that make it a top consideration.
Unmatched Brand Recognition and Trust
When you link to Booking.com, you are sending your audience to a platform they already know and trust. This pre-existing brand equity is a powerful conversion tool. You don't have to waste a single word "selling" your audience on the legitimacy of the booking platform itself; you can focus entirely on why that specific hotel is the right choice. This can lead to stronger initial click-through and conversion rates compared to lesser-known platforms.
A Colossal, Unrivaled Inventory
With over 28 million listings that span hotels, apartments, resorts, and even treehouses, Booking.com’s inventory is virtually limitless. No matter how niche your destination—from a major metropolis like Tokyo to a remote village in the Andes—you are almost certain to find a relevant, bookable property for your audience. This vast selection makes it a one-stop shop, simplifying the process of finding accommodation links for your content.
The Potential for High-Volume Conversions
For creators with significant traffic, especially those who attract visitors in the final, decisive stages of trip planning, the sheer volume of bookings processed by the platform can translate into substantial income. The platform's user-friendly interface and powerful search filters make it easy for users to find and book properties quickly, which can be a major asset for high-traffic websites.
The Critical Flaws: The Cons You Absolutely Cannot Ignore
While the pros are appealing, the operational realities of the booking affiliate program contain several severe, structural flaws that can cripple your earnings potential. These are not minor inconveniences; for many creators, they are deal-breakers.
The Achilles' Heel: Why the Session-Based Cookie Is a Deal-Breaker
This is, without question, the single most critical flaw in the Booking.com affiliate program. The program operates on a session-based cookie.
What does this mean? It means you only earn a commission if a user clicks your affiliate link and completes a booking within the exact same browser session. If they click your link, browse a few hotels, close the tab to think about it, and then return to Booking.com an hour later—or the next day—to make their booking, you earn nothing. Your tracking cookie has vanished.
Travel is a high-consideration purchase. People rarely book a multi-hundred or multi-thousand dollar trip on impulse. The typical customer journey looks like this:
They read your inspiring blog post.
They click your link to explore the hotels you recommend.
They compare prices and read a few more reviews.
They discuss options with a spouse or travel partner.
They return the next day, ready and excited to book.
With a session-based cookie, you are only compensated for the rare, impulsive booker. You lose the commission for every single thoughtful, deliberate customer you inspired. This policy is fundamentally misaligned with how real people plan travel, making it a structurally unsafe and potentially unprofitable model for content creators.

Pro-Tip: When evaluating any affiliate program, the cookie duration is often more important than the commission rate. A partner like Expedia Group offers a 7-day cookie, which is vastly superior as it respects the user's decision-making process and ensures you get paid for the value you create.
The "Black Box" Commission: Why 40% Isn't What It Seems
Booking.com often advertises a commission rate of 25-40%, which sounds incredibly high. However, this is deeply misleading. You do not earn a percentage of the total booking value. You earn a percentage of Booking.com's commission.
Here’s how that math actually breaks down:
A customer books a $500 hotel stay through your link.
The hotel pays Booking.com a commission (let's say 15%, which is $75).
You then earn your commission based on that $75, not the original $500.
If your rate is 25%, you earn 25% of $75, which is $18.75. Your effective commission rate on the total booking value is a mere 3.75%. This opaque structure makes it incredibly difficult to forecast your earnings and often results in a much lower payout than creators expect from the flashy headline numbers.
A History of Account Instability and Support Issues
Numerous affiliates have reported frustrating experiences with the program's administration. These complaints often center on sudden account closures without clear explanation, forced migrations to network platforms like Awin or CJ Affiliate, and a history of losing pending commissions during these transitions. While any large program will have some user issues, the volume of these reports suggests a level of instability that should be a major concern for any creator looking to build a reliable, long-term income stream.
The Verdict: Analyzing the True Earnings Potential
So, can you actually make money with the booking affiliate program? The answer is a qualified "yes," but only for a very specific type of publisher.
Who It Might Be Good For:
High-Traffic Deal & Discount Sites: Websites that focus on last-minute deals and attract users who are ready to book immediately can succeed with the session-based model. Their audience is impulsive by nature.
Metasearch Engines: Large-scale travel search engines that operate on a massive volume of clicks may find the program profitable due to sheer scale.
Who Should Avoid It:
Content Creators & Bloggers: If your content strategy is based on inspiration and long-term trip planning—creating itineraries, destination guides, and detailed reviews—this program is fundamentally at odds with your business model. You are inspiring a journey, not a single-session transaction.
Anyone Building a Sustainable, Predictable Income: The combination of a session-based cookie, an opaque commission structure, and reported account instability makes this a high-risk partner for anyone looking to build a reliable business.
Pro-Tip: The most resilient affiliate strategy is built on diversification. Never rely on a single program for your income. A healthy portfolio for a travel creator should include partners for accommodations, tours, insurance, and gear to create multiple, stable revenue streams.
Strategic Alternatives: Safer Bets for Higher Returns
The flaws in the Booking.com program do not mean you should abandon monetizing accommodations. It simply means you should partner with programs structured to favor creator success.
The most direct and superior alternative is the Expedia Group Affiliate Program. It covers major brands like Hotels.com and Vrbo and, most importantly, offers a 7-day cookie duration. This gives your audience a full week to make their decision after clicking your link, ensuring you are properly compensated for your influence.
Ultimately, the most secure path to a stable income is to reduce your reliance on any single affiliate program and start building assets you own. Instead of sending all your traffic to other brands, you can create and sell your own high-value digital products—like detailed itineraries, travel guides, or planning checklists. Platforms like the TrekGuider Seller Platform are designed specifically for this, allowing you to build your own digital storefront and keep a much larger share of the revenue. It's the ultimate strategy for taking control of your financial future.

Build Your Perfect Itinerary (and Monetize It)
Creating high-value, bookable itineraries is one of the best ways to serve your audience and drive affiliate sales. But starting from scratch can be daunting. Our free Travel Itinerary Template gives you the perfect framework to build beautiful, useful guides your readers will love—and a powerful asset you control.
Frequently Asked Questions
1. Is the Booking.com affiliate program free to join? Yes, the program is free to join either directly or through an affiliate network like Awin or CJ Affiliate.
2. What are the payment methods for the Booking.com affiliate program? Payments are typically made via PayPal or bank transfer, but this can depend on the network you join through. There is usually a minimum payout threshold (e.g., €100) that you must reach before you can receive your earnings.
3. Can I use my own affiliate links to make personal bookings? No. Like almost all affiliate programs, using your own links for personal purchases or bookings is a violation of the terms of service and can lead to your account being terminated and commissions being voided.
A Powerful Brand with a Flawed Partnership
The Booking.com affiliate program exists in a paradox. It leverages one of the most powerful and trusted brands in travel, offering a massive inventory that seems perfect for creators. However, its core mechanics—specifically the session-based cookie and the opaque commission structure—are fundamentally anti-creator. They are relics of an older affiliate model that fails to properly value the influence of content creators who build trust and inspire a customer's journey over days or weeks.
While it might work for a small subset of high-traffic, transactional websites, for the vast majority of travel bloggers and content creators, the booking affiliate program represents a significant and unnecessary risk. Your time, effort, and influence are better invested in partners with more favorable, transparent, and creator-friendly terms. By choosing strategic alternatives and diversifying your income streams, you can build a more profitable and resilient business for the long term.
Read the full guide: The Travel Blogger's Playbook to Affiliate Marketing Mastery
Don't Miss Out! Subscribe for Exclusive Content
Subscribe


Comments 0
No comments yet
Be the first to share your experience!
Dont Miss Out! Subscribe for Exclusive Content

Ultimate USA Holidays Guide: Top Picks

FTC Affiliate Disclosure Essentials: Stay Compliant as a Travel Creator

Essential Affiliate Tools: From Tracking to Full Optimization

Avoid These 5 Affiliate Landing Page Mistakes for Better Conversions

Affiliate Keyword Research Mastery for Travel Blogs

Decoding Affiliate Commission Rates: Benchmarks for Travel Creators
7 Hotel Safety & Security Tips for Peace of Mind
TrekGuider @trekguider
You’ve finally made it. After a long day of navigating airports, taxis, and unfamiliar streets, you slide the key card into your hotel room door and a wave of relief washes over you. This is your sanctuary, your home base for the adventures ahead. But as you drop your bags, another feeling can creep in, spoiling the moment. Let’s be honest: that sterile, anonymous hotel room doesn't feel as secure as your own home. It’s a vulnerability that can cast a shadow over an entire trip, a persistent whisper of "what if" that prevents you from ever truly relaxing.

The good news is that safety isn't a matter of luck; it's a repeatable skill. This guide is your new ritual, a systematic playbook for transforming any hotel room into a personal fortress. We’ve synthesized advice from former hotel security personnel and fire safety experts to bring you seven essential hotel safety tips. This isn’t about paranoia; it's about empowerment. By making these simple checks a habit, you can ensure your peace of mind is the most valuable thing you pack. These strategies are a critical part of the accommodation-specific awareness we cover in our comprehensive guide to The Ultimate Guide to Travel Safety: A 2026 Playbook.
The 60-Second Security Sweep: Your First Check-In Ritual
Your first minute inside a new hotel room is the most important. This is your window to verify, secure, and orient yourself before you get distracted by unpacking or collapsing on the bed. By turning the following steps into an unbreakable habit, you proactively eliminate the most common security and safety risks. Think of it as a professional-grade inspection that takes less time than it does to check your email.
Tip 1: Secure the Door and Verify the Room is Empty
Before you do anything else, take control of your entry point. A common mistake is to walk in, close the door, and immediately turn your back to it while dealing with luggage. This makes you vulnerable. Instead, follow this security-conscious procedure.
Prop the Door: As you enter, use your luggage to prop the door open so it can't be closed behind you.
Conduct a Visual Clear: From the doorway, quickly scan the room to ensure it is empty. This includes a glance behind the curtains, in the closet, under the bed, and inside the shower.
Close and Lock: Once you've confirmed the room is unoccupied, remove your luggage from the entryway, close the door, and immediately test every single locking mechanism. This includes the primary deadbolt and any secondary security devices like a security chain or a flip latch. Ensure they are all functional and engage smoothly. Don't assume they work; physically test them.
Tip 2: Check Your Communication and Safety Gear
Now that the room is secure, your next step is to verify your lifelines. You need to know that the room’s built-in safety equipment is present and functional.
Test the Phone: Pick up the in-room phone and confirm there’s a dial tone or call the front desk for a quick "hello." This ensures you have a reliable way to call for help if your cell phone has no service or the battery dies.
Locate Safety Devices: Visually identify the smoke detector and fire alarm sprinkler heads. It’s also wise to check for a carbon monoxide detector, especially in hotels with in-room fireplaces or those attached to large parking garages. If one isn't present and you have concerns, report it to the front desk.
Tip 3: Create a Mental Fire Escape Map
This is one of the most critical hotel safety tips, yet it's the one most often ignored. In the event of a fire, heavy smoke can reduce visibility to absolute zero. The evacuation map on the back of your door is not decoration; it's your key to survival.

According to fire safety experts, you must identify three key things:
Your Primary and Secondary Exits: The map will show the nearest emergency exit stairwell. Crucially, you must also identify an alternative, secondary exit in case your primary route is blocked by fire or smoke. Remember, elevators must never be used in a fire.
The Door Count: This is the most important part. Physically walk out into the hallway and count the number of doors between your room and the nearest emergency exit. Memorize this number. In a dark, smoke-filled hallway, this knowledge will allow you to feel your way along the wall to safety, counting the doors as you go.
Location of Safety Equipment: As you identify your route, note the location of fire alarm pull stations and fire extinguishers in the hallway.
Tip 4: Fortify Your Privacy
Your final step in the initial sweep is to ensure your room is a truly private space.
Check Windows and Connecting Doors: Go to every window and make sure it is locked securely. If your room has a connecting door to an adjacent room, verify that it is locked from your side. A good practice is to slide a chair or your luggage in front of a connecting door as an extra physical and audible barrier.
Close the Curtains: Fully close the curtains to ensure privacy from the outside, especially in ground-floor rooms or those that face other buildings.
Scan for Oddities: While rare, hidden cameras are a modern concern. Conduct a quick visual scan for any electronics or objects that seem out of place. Pay attention to smoke detectors, alarm clocks, and USB wall outlets, looking for unusual pinholes or lenses.
Beyond the Locks: Advanced Hotel Safety Tips
Okay, the room is secure. But a locked door is just the first line of defense. Now it’s time to think like a pro and protect your belongings with the kind of savvy that separates seasoned travelers from the rest.
Tip 5: Outsmart a Thief: How to Hide Your Valuables
The in-room safe should always be your first choice for storing passports, extra cash, and small electronics. However, if a safe is unavailable, broken, or you simply don't trust it, you need a smart hiding strategy. The key is to avoid the first places a thief would look: in drawers, under the mattress, and inside your suitcase.

Security consultants recommend using non-obvious, "high-friction" hiding spots that take time and effort to find.
Taped in an Inconspicuous Location: Use a small amount of duct tape to secure an envelope containing cash or cards to a surface that is out of sight. Think creatively: the underside of a heavy desk, the back panel of a chest of drawers, or high up on a closet shelf.
Inside a Common, Uninteresting Object: Hide valuables in plain sight by placing them inside items a thief would ignore. A popular tactic is to place cash inside a bag of dirty laundry, as it's highly unlikely to be searched. You can also slip flat items like cash or cards inside the hotel room's bible or another book on a shelf.
Within the Room's Fixtures: Some parts of a hotel room offer clever nooks. For a laptop, a surprisingly effective tactic is to hide it inside a pillowcase on the bed, then pile the other pillows on top to disguise its shape.
Pro-Tip: When hiding cash or cards in an envelope, tape it flat against a surface and choose a dark color for the envelope (e.g., black or brown) to prevent it from being seen through any gaps.
Tip 6: Bring Your Own Security: Portable Safety Devices
For the ultimate peace of mind, especially when staying in older hotels, budget accommodations, or short-term rentals, consider investing in a portable security device. These lightweight gadgets are designed to provide an extra layer of defense against unauthorized entry.
Portable Door Locks: These devices brace against the door frame from the inside, making it physically impossible for the door to be opened from the outside, even with a key.
Door Stop Alarms: These are simple, wedge-shaped door stops that you place under your door from the inside. If the door is pushed open, it triggers a piercingly loud alarm, startling the intruder and alerting you and others to the breach.
The Final Layer of Protection: Personal Habits
Your physical security measures are only half the battle. The other half is cultivating smart habits and maintaining a high level of situational awareness throughout your stay.
Tip 7: Practice Smart "Hotel Habits"
Small, consistent habits can significantly reduce your risk profile.
Sanitize High-Touch Surfaces: Upon arrival, use a disinfectant wipe to clean the objects that are most frequently handled but often overlooked by cleaning staff: the TV remote, light switches, doorknobs, and the phone.
Be Discreet with Your Room Number: When checking in, if the front desk clerk announces your room number out loud, politely ask for a different room and for them to write it down for you instead. Never leave your key card sleeve, which often has the room number written on it, lying around in public areas.
Use the "Do Not Disturb" Sign: When you are in your room, hang the "Do Not Disturb" sign on the outside of your door. This is a clear signal that the room is occupied and can deter someone from trying to enter, whether by mistake or with ill intent.
Verify All Visitors: Never blindly open your door. If someone knocks claiming to be hotel staff, call the front desk to verify that they sent someone to your room before opening the door.
Pro-Tip: If you order room service or have hotel staff coming to your room, call the front desk to verify the person's identity before opening the door. It's a simple step that confirms the visitor is legitimate.
A secure hotel stay is at the heart of a well-planned trip. To ensure every other aspect of your journey is just as prepared, from packing lists to financial planning, a comprehensive resource is essential. The right Travel Guide can be the difference between a good trip and a flawless one.
Your Pre-Trip Master Plan
A secure hotel room is just one piece of your travel safety puzzle. To ensure you don't overlook a single essential item—from documents and finances to clothing and gear—a master checklist is your most powerful tool. Our comprehensive, free checklist has you covered for every stage of your trip.

Download Your Free International Travel Checklist Now!
Hotel Safety FAQs
A prepared mind anticipates questions. Here are expert answers to common concerns.
1. Is an in-room safe really the most secure option?
For the vast majority of travelers, yes. Modern electronic safes are quite secure against opportunistic theft. However, hotel management does have a master key or code for emergencies. The greatest risk often comes from user error (choosing an obvious code like 1234) or a dishonest staff member (which is rare in reputable hotels). For irreplaceable items, using a smart hiding spot in addition to the safe, or keeping them on your person, can provide an extra layer of security.
2. Are short-term rentals (like an Airbnb) more or less secure than hotels?
It varies dramatically. A professionally managed rental in a secure building can be safer than a budget motel. However, rentals lack the 24/7 staff, multiple security cameras, and controlled access points of a hotel. When booking a rental, read reviews carefully for any mention of safety concerns, check the lock quality upon arrival, and consider bringing your own portable door lock.
3. What should I do if hotel staff need to enter my room while I'm out?
If you have requested maintenance or housekeeping, you have a reasonable expectation they will enter. Secure all valuables in the safe or hide them before you leave. If you are concerned, you can request that these services only be performed while you are present in the room. Always leave the "Do Not Disturb" sign on your door when you leave if you do not want anyone entering.
Travel with True Peace of Mind
Your hotel room should be a sanctuary—a place where you can recharge after a day of exploration and sleep soundly through the night. It shouldn't be a source of anxiety. By incorporating these seven hotel safety tips into your check-in routine, you are taking active control of your environment. You are replacing uncertainty with a plan and vulnerability with empowerment. This simple, 60-second ritual does more than just secure a room; it secures your peace of mind, freeing you to focus on the real purpose of your journey: the adventure that awaits outside your door.

Meta Data Suggestions:
SEO Meta Title (Under 60 characters):
7 Essential Hotel Safety Tips for Travelers
URL Slug:
hotel-safety-security-tips
SEO Meta Description (Under 155 characters):
Sleep soundly on your next trip. Our expert-backed hotel safety tips cover room security, hiding valuables, fire safety, and more for total peace of mind.
Don't Miss Out! Subscribe for Exclusive Content
SubscribeComments 0
No comments yet
Be the first to share your experience!
Dont Miss Out! Subscribe for Exclusive Content
Ultimate USA Holidays Guide: Top Picks
FTC Affiliate Disclosure Essentials: Stay Compliant as a Travel Creator
Essential Affiliate Tools: From Tracking to Full Optimization

Booking.com Affiliate Program Review: Pros, Cons, and Earnings Potential
Decoding Affiliate Commission Rates: Benchmarks for Travel Creators

Amazon Associates for Travel: Strategies to Maximize Commissions
7-Day Solo Travel Itinerary: A Perfect First-Trip Template
TrekGuider @trekguider
You're ready for an adventure that's entirely your own. No more compromising on destinations, no more syncing schedules. Just you, the open road, and the profound freedom of solo travel.

But a blank page can be intimidating. The excitement of the idea is quickly replaced by the paralysis of planning. Where do I start? How do I build a solo travel itinerary that's exciting but not overwhelming? How do I stay safe?
The good news is that you don't need to reinvent the wheel. You need a proven framework, a reliable playbook to guide you. This article provides the ultimate solution: a flexible 7-day solo travel itinerary that acts as the perfect template for your first independent adventure. It’s designed to eliminate guesswork, build confidence, and ensure an unforgettable experience.
While planning a trip for one has a very different set of challenges than coordinating group travel, as detailed in our guide to Family Travel Ideas: The 2026 Guide to Unforgettable Trips, the need for a solid plan remains universal. This guide is your key to unlocking that journey, transforming apprehension into pure excitement.
Your Pre-Flight Checklist: Engineering a Stress-Free Start
A smooth trip begins long before you pack your bags. Solid preparation is the antidote to travel anxiety, transforming "what ifs" into "I've got this."

1. Choose a Beginner-Friendly Destination
For your first solo trip, set yourself up for success by picking a location known for its strong tourist infrastructure and safety. You're looking for a "soft landing."
Top Contenders: Think cities like Lisbon (Portugal Travel Guide), Dublin, Kyoto (Japan Travel Guide), or Vancouver. These spots are celebrated for being affordable, walkable, friendly, and supremely safe.
The Litmus Test: Can you get around easily on public transport? Is it known for being safe, particularly for solo travelers? Is Wi-Fi widely available?
2. Select Your Home Base Wisely
Your accommodation is more than a place to sleep; it's your sanctuary and command center.
Boutique Hostels (with Private Rooms): The gold standard for many first-timers. You get the social energy of a common room and organized tours, plus the quiet retreat of your own space. It's the perfect balance of community and privacy.
Boutique Hotels or Guesthouses: A step up in privacy and comfort. Small, locally-owned spots often provide a warmer, more personal touch than soulless chains, and the staff can be a goldmine of local tips.
Centrally Located Airbnbs: Ideal if you crave a "live like a local" vibe and a kitchen. Stick exclusively to hosts with a "Superhost" designation and dozens of positive reviews that specifically mention safety, cleanliness, and an excellent location.
3. A Quick Word on Budgeting for Your First Solo Trip
A clear budget isn't a restriction; it's freedom. It frees you from money-related stress on the road. For a 7-day city trip, a simple framework is:
Fixed Costs: Pre-booked flights and accommodation.
Daily Average: Set a realistic daily budget for food, activities, and transport. Research costs in your chosen city (e.g., a meal in Lisbon is far cheaper than in Zurich). A good starting point for many European or North American cities is $75-$125 per day.
Contingency Fund: Always have an extra 20% of your total budget tucked away in a separate account for unexpected opportunities or emergencies.
4. A Pro's Approach to Solo Safety
Your confidence is directly linked to how safe you feel. Build a fortress of preparation. For a deeper dive, especially for female travelers, our Solo Female Travel Safety Guide is an essential resource.
Digital Security: Download offline maps of your city on Google Maps. Use a VPN on public Wi-Fi. Scan your passport and important documents and save them to a secure cloud service like Dropbox.
Situational Awareness: The "Morning Photo" protocol is a great habit for solo travelers. Snap a quick selfie each morning. In an emergency, it provides an exact, current visual reference.
Contingency Plan: Before you leave, share your detailed itinerary with someone at home. Establish a simple check-in cadence (e.g., a quick "all good" text each night).
Financial Safety: Carry a "decoy" wallet with a small amount of cash and an expired credit card. Keep your primary cards and the bulk of your cash in a secure money belt or a hidden internal pocket. Never keep all your money in one place.
Pro-Tip: Download the Noonlight app. It's a discreet safety button on your phone. If you're feeling uneasy, you can hold your thumb on the button. Release it and don't enter your PIN, and it will automatically alert local authorities with your exact location.
Your Ultimate Pre-Trip Tool
Feeling organized is feeling confident. Before you book a single flight, download our free International Travel Checklist. It’s a comprehensive resource that covers everything from passports and visas to packing and travel insurance, ensuring you don't miss a single crucial step.
The Perfect 7-Day Solo Travel Itinerary Blueprint
This is your playbook. The specific sights will change, but the strategic rhythm of this week is designed to maximize discovery while preventing burnout.

Day 1: Land Softly, Start Slow
Your only goal on day one is to land softly. Forget the pressure to do anything "touristy." The mission is simple: arrive, check-in, and breathe.
Afternoon (Arrival & Settle): Navigate from the airport to your lodging using a pre-vetted option—an official taxi stand, Uber/Lyft, or the city's express train. Avoid unsolicited ride offers. Once you drop your bags, take 30 minutes to actually unpack. This small act of nesting transforms a sterile room into your personal space.
Late Afternoon (The Reconnaissance Walk): Take a short, aimless walk with a purpose: to locate your vitals. Find the nearest ATM, pharmacy, small grocery store, and metro/bus stop. This simple recon mission builds a mental map and makes you feel instantly more capable.
Evening (The Easiest Dinner Ever): Your first meal should be low-stress. Find a casual, well-lit café or bistro within a few blocks of your accommodation. Ask for a table with a view of the street. This isn't just dinner; it's your first immersion.
Day 2: Find Your Anchor, Catch the Vibe
Today is about orientation. You'll anchor yourself with a major landmark and then plug into the city's authentic energy.
Morning (The Iconic Anchor): Head to the city's most famous landmark—the one on all the postcards. Book your ticket online, weeks in advance, to bypass the soul-crushing queues. Seeing this "anchor point" early gives your mental map a center of gravity.
Lunch (A Feast for the Senses): Skip the tourist-trap restaurants and head for a bustling local food market. It's a vibrant, low-pressure way to sample authentic cuisine. Graze from different stalls, trying whatever looks and smells incredible.
Afternoon (The Ultimate Solo Travel Hack): Join a "free" walking tour (they run on tips, so bring cash). A passionate local guide will give you a brilliant crash course in the city's history, secrets, and layout. It's also an effortless way to be around fellow travelers.
Evening (Culture or Comfort): If you're energized, catch a local performance—traditional music, a play, anything that gives you a taste of the culture. If you're tired, there is zero shame in a simple dinner and an early night. Listen to your body.
Day 3: Pursue Your Passion
This is your trip. Today is dedicated entirely to whatever makes you tick.

Morning (The Deep Dive):
Art Lover? Lose yourself in a world-class museum or hunt for street art in a bohemian neighborhood.
History Buff? Explore that niche museum or archaeological site that fascinates you.
Foodie? Take a local cooking class. It's one of the best ways to meet people, learn a skill, and eat an amazing meal.
Nature Enthusiast? Escape to the city's largest park or botanical garden for a few hours of green therapy.
Afternoon (The Art of Getting Lost): Pick a neighborhood that intrigued you and put your phone on airplane mode. Allow yourself to wander without a destination. Follow a charming alleyway, pop into a random shop, sit on a bench. This is where the magic happens.
Evening (A Table for One, with a View): Treat yourself. Find a restaurant or rooftop bar with a spectacular view. Order a great meal, and toast to your adventure. Worried about dining alone? Bring a journal and write about your day—it makes you look like a mysterious travel writer, not a lonely tourist.
Day 4: Gain Perspective with a Day Trip
Escaping the city for a day provides a vital change of scenery and proves your growing travel competence.
Full Day: Choose a destination one or two hours away by train or bus. Think a coastal village, a historic castle, or a national park. The journey itself is part of the adventure.
The Mission: This trip breaks the routine and shows you a completely different facet of the country. It also flexes your navigation skills and builds immense confidence. Successfully planning and executing a day trip on your own is a huge milestone.
Logistics: Research train/bus schedules the night before. Pack a small daypack with a water bottle, snacks, a portable charger, and a light jacket.
Day 5: Live Like You Belong Here
Today, your goal is to blend in. Shed the tourist skin and adopt the rhythms of a local.

Morning (The Café Ritual): Find a small, neighborhood café far from the tourist trail. Order a coffee, grab a pastry, and settle in with a book or journal for an hour. Watch the morning commute, listen to the chatter—just be.
Mid-Day (A Mundane Mission): Do a normal-person errand. Browse a local bookstore, buy fruit at a grocer, or find a post office to mail cards home. These simple tasks ground you in the reality of the place.
Afternoon (Scheduled Downtime): Hit the pause button. You are not a travel machine. Go back to your room for a nap. Read a book on a park bench. Do absolutely nothing. This is a vital part of sustainable travel.
Evening (The Local's Recommendation): Ask a local you've had a pleasant interaction with—your barista, a friendly shopkeeper—"Where's your favorite place to eat around here?" Their recommendation will almost always be more authentic and delicious than anything on a top-ten list.
Day 6: The Open Road and a Fond Farewell
Leave this day largely unplanned. It's a blank page for you to fill with whatever your heart desires.
Morning (Encore or Exploration): Is there a neighborhood you fell in love with? Go back. Did a fellow traveler tell you about a hidden gem you can't stop thinking about? Go find it. This is your flex day to chase your curiosity.
Afternoon (Meaningful Mementos): If you're buying souvenirs, seek out items that tell a story. Skip the generic trinkets and look for local crafts, specialty foods, a vintage poster, or a book from a local author.
Evening (The Last Supper): Make your final dinner a celebration of your journey. Return to a favorite spot or try that one special place you've been saving. As you eat, reflect on the week. Think about what you've learned, the challenges you've overcome, and the person you've become.
Day 7: Depart with Your Head Held High
The last day is for a smooth, grateful exit. No frantic rushing.
Morning: Enjoy one last coffee and pastry at your favorite café. Take a final, mindful walk down a beloved street, soaking in the sights and sounds.
Pack & Go: Head back to your room for a final pack-up. Leave ample time for your journey to the airport. Strolling calmly to your gate is a far better feeling than sprinting.
At the Airport: Once you're through security, pause. Take a deep breath. You did it. You took the dream of solo travel and forged it into reality. Acknowledge the magnitude of that achievement.
Frequently Asked Questions
What is the best way to handle feeling lonely on a solo trip?
It's completely normal to feel a pang of loneliness. The best strategy is to be proactive. Stay in social accommodations like a boutique hostel, join a walking tour or a cooking class on days you crave interaction, and find a cozy café to simply be around the comforting buzz of other people.
Is it awkward to eat at restaurants alone?
Not at all! It's a skill that gets easier with practice. Start with casual cafes, bring a book or journal to feel more comfortable, and try sitting at the bar where you can often chat with the bartender. Soon you'll find it's a peaceful and empowering experience.
How can I stay safe when going out at night by myself?
A: Prioritize well-lit, busy areas and research neighborhoods beforehand. Tell someone where you're going, use ride-sharing apps like Uber instead of walking in unfamiliar areas late at night, and always be mindful of your drink. Trust your intuition—if a place feels off, leave immediately.
What's the most common mistake first-time solo travelers make?
The most common mistake is over-scheduling. New solo travelers often try to fill every single minute to avoid being alone with their thoughts. The real magic happens in the unplanned moments, so be sure to build plenty of downtime and flexibility into your itinerary.
Welcome Home, Traveler: This Is Just the Beginning
Walk through that arrival gate on your way home, and you won't be the same person who left. A solo trip is a declaration—proof that you are more capable, resilient, and fiercely independent than you might have ever allowed yourself to believe.

This solo travel itinerary was never just about seeing a new place; it was about discovering a new version of yourself. Use this template, adapt it, and carry the confidence you've earned into planning your next adventure. When you're ready to go from template to a fully-realized plan, our comprehensive Travel Guide is the perfect next step to turning your dream trip into a reality. Because this isn't the end of one journey; it's the beginning of a lifetime of them.
Read the full guide: Family Travel Ideas: The 2026 Guide to Unforgettable Trips
Don't Miss Out! Subscribe for Exclusive Content
SubscribeComments 0
No comments yet
Be the first to share your experience!
Dont Miss Out! Subscribe for Exclusive Content
Ultimate USA Holidays Guide: Top Picks
FTC Affiliate Disclosure Essentials: Stay Compliant as a Travel Creator
Essential Affiliate Tools: From Tracking to Full Optimization
Booking.com Affiliate Program Review: Pros, Cons, and Earnings Potential
Decoding Affiliate Commission Rates: Benchmarks for Travel Creators
Amazon Associates for Travel: Strategies to Maximize Commissions
Crafting Travel Product Reviews That Drive Affiliate Sales
TrekGuider @trekguider
You’ve poured hours into it. The photos are stunning, the details are careful, and your personal story is woven throughout. You hit “publish” on your latest travel product review, certain that this is the one. But weeks later, the affiliate dashboard tells a familiar, frustrating story: plenty of clicks, but a whisper of commissions. You’re creating genuinely valuable content, but it feels like you’re leaving a fortune on the table, unable to bridge the chasm between your effort and your earnings.
This isn't just a feeling; it's a critical business problem. You see the industry reports—the affiliate marketing market soaring past $93 billion, with the average travel affiliate earning a reported $13,847 a month—and it feels like a world away. The issue isn't your passion or your expertise. The issue is that a travel product review that simply informs is a hobby; a review that is engineered to convert is a business. You're missing the formula, the psychological triggers, and the conversion-focused structure that turns a reader's trust into a reliable revenue stream.

Forget vague tips. This is a skill workshop—a definitive blueprint for how to write a product review that drives affiliate sales with the precision of a finely tuned engine. We will deconstruct the anatomy of a high-conversion review, from the headline that hooks to the call-to-action that closes. This is a masterclass in a single, vital skill, a topic we explore from every angle in our definitive command center for the entire affiliate ecosystem: Travel Affiliate Programs: The 2026 Ultimate Guide.
The Mindset Shift: From "Informing" to "Converting"
The first and most crucial step is a fundamental mindset shift. Most creators approach a product review as a report. They list the features, describe their experience, and hope the reader is inspired enough to click. This is a passive strategy that yields passive results.
A high-earning creator understands that a product review is their most valuable sales asset. Its primary purpose is not just to describe the product, but to guide the reader to a confident purchase decision. Every word, every image, and every design element must work in concert to achieve one goal: to solve the reader's problem so effectively that clicking your affiliate link becomes the most logical and desirable next step.
This isn't about being a pushy salesperson. It's about being a master problem-solver. Your reader has arrived on your page with a need: "Is this the right backpack for my trip to Europe?" or "Will this travel insurance actually cover me if I get sick in Thailand?" A review that converts answers these questions with such clarity, authority, and empathy that it eliminates all doubt and inspires action.

The Anatomy of a High-Conversion Review: A 7-Part Formula
A product review that consistently drives sales is not an accident of creative inspiration; it is a carefully constructed system. By following this seven-part formula, you create a user experience that caters to every type of reader—from the quick skimmer to the deep diver—and guides them seamlessly toward conversion.
Part 1: The Headline That Hooks and Qualifies
Your headline has one job: to make an undeniable promise of value to a specific audience. It must grab attention in a crowded search result and instantly signal that your review will solve their problem. Generic headlines like "My Review of the Osprey Backpack" are a death sentence.
Instead, use proven, high-impact formulas:
The "Real World Test" Formula: The Product Name Review: After Number Miles / Number Countries / Time Period
Example: The Osprey Farpoint 40 Review: After 6 Months & 15 Countries
The "Balanced Verdict" Formula: Product Name Review: Number Things I Loved & Number I Hated
Example: The Away Bigger Carry-On Review: 5 Things I Loved & 2 I Hated
The "Is It Worth It?" Formula: Is the Product Name Worth the Hype? An Honest 2026 Review
Example: Is the Nomatic Travel Pack Worth the Hype? An Honest 2026 Review
These headlines work because they promise authenticity, detail, and a balanced perspective—exactly what a user wants when researching a purchase.
Part 2: The Empathetic Introduction (The Hook)
Your introduction must accomplish three things in the first 100 words: connect with the reader's problem, establish your authority, and present the product as the potential solution. Use the PAS (Problem, Agitate, Solve) framework for maximum impact.
Problem: "Finding the perfect carry-on backpack is a nightmare. Most are either too bulky, too disorganized, or fall apart after one trip."
Agitate: "You end up repacking at the airport check-in counter, digging through a black hole of gear to find your passport, or worse, dealing with a broken zipper mid-adventure."
Solve: "For the past six months, I've been testing the Osprey Farpoint 40 across Southeast Asia to see if it's the ultimate solution for one-bag travel. In this review, I'll break down exactly who this bag is for, who should avoid it, and whether it lives up to its legendary reputation."
Part 3: The "At a Glance" Summary Box
Many of your readers are skimmers. They are busy and want a quick verdict. An "At a Glance" summary box at the top of your review is the single best way to serve this audience and capture an immediate conversion.
This box should be visually distinct (using a different background color or a border) and contain:
Product Image: A high-quality, authentic photo of the product in use.
A Quick Summary: A one-sentence verdict. (e.g., "The ultimate travel backpack for versatile adventurers who value comfort and organization.")
Key Specifications: A bulleted list of the most important specs (e.g., Capacity, Weight, Dimensions).
Overall Rating: A simple star rating (e.g., 4.5 / 5 Stars).
The Primary CTA: A bold, unmissable button with a clear call-to-action.
Part 4: The Deep Dive: Storytelling Over Specs
This is the heart of your review. This is where amateurs list features, but professionals tell stories. Your mission is to translate every specification into a tangible, real-world benefit, wrapped in the context of your personal experience.
Amateur: "The backpack has a 15-inch padded laptop sleeve."
Professional: "The Padded Laptop Compartment That Saved My MacBook: When my bus in Vietnam took a corner too fast, my bag went flying. My heart stopped, but the heavily padded, suspended laptop sleeve kept my MacBook safe without a scratch. For digital nomads, that peace of mind is priceless."
Structure this section with clear H3 subheadings for each key feature or benefit (e.g., "Comfort & Fit," "Organization & Pockets," "Durability & Materials"). This makes the content scannable and allows readers to jump to the sections that matter most to them.

Part 5: The Unbeatable Proof: Your Photos & Videos
Stock photos are a conversion killer. They scream "I've never actually used this product." Your review's credibility hinges on authentic, high-quality visual proof.
Show the Product in Action: Include photos of you wearing the backpack, packing the suitcase, or using the camera in a real travel environment.
Highlight Key Features: Take detailed close-up shots of the zippers, the materials, the specific pockets you're talking about.
Embrace Video: This isn't just a nice-to-have; it's a strategic imperative. With industry projections showing that video will account for a staggering 55% of all affiliate traffic by 2026, embedding a short, authentic video review is one of the most powerful trust signals in your arsenal.
Part 6: The Honest Verdict: Pros, Cons, and "Who It's For"
Radical transparency is the ultimate trust signal. No product is perfect, and acknowledging its flaws makes your praise exponentially more believable.
Create a simple, two-column list of Pros and Cons. Be specific and honest. Then, create a dedicated section that clearly defines who this product is perfect for and, just as importantly, who should look for something else.
This Product is Perfect For: "Digital nomads, weekend travelers, and anyone who prioritizes a comfortable carry and smart organization."
You Should Avoid This Product If: "You're a photographer who needs to carry multiple camera bodies or if you require a fully waterproof bag for extreme conditions."
Part 7: The Compelling Conclusion & Final CTA
Your conclusion should be short, powerful, and decisive. Summarize the product's single biggest benefit and give the reader one final, clear instruction. Reiterate your overall verdict and guide them to the click with a final, compelling call-to-action button.

The Psychology of Persuasion: Advanced Conversion Tactics
A great structure is the foundation, but layering in proven psychological triggers is how you maximize conversions.
Build Unshakable Trust: Your FTC disclosure must be clear and placed at the very top of your review. This isn't just a legal requirement; it's a badge of honor that signals transparency.
Leverage Social Proof: Weave in screenshots of other positive reviews or user ratings. Phrases like "With over 5,000 five-star reviews on Amazon..." validate the reader's potential decision.
Create Urgency (Ethically): For products with fluctuating prices, like flights or hotels, use CTAs that encourage immediate action. "Check Today's Prices on Booking.com" is both helpful and urgent.
Pro-Tip: One of the most effective ways to increase conversions is to use a comparison table. Pit the product you're reviewing against its main competitor. This not only helps the reader make a final decision but also gives you the opportunity to place two high-value affiliate links side-by-side.
The Ultimate Conversion Play: From Affiliate to Owner
A product review is the perfect place to introduce your audience to your own high-value offerings. After you've solved their immediate problem, you can guide them toward a deeper solution that you control completely. This is the natural evolution of your expertise.
For example, after the main body of your review for a travel backpack, you could add a section like:
"Now that you've found the perfect backpack, the next step is knowing what to put inside it. For my complete, field-tested packing system, check out my 'Ultimate Carry-On Packing List' available on the TrekGuider Platform. It's the exact checklist I use to pack for every trip."
This is a natural, value-driven upsell that transitions the reader from a potential affiliate commission to a direct customer, where you keep a much larger share of the revenue.

Pro-Tip: To supercharge your affiliate sales, offer a "bonus stack" for anyone who buys through your link. For example, "If you purchase the Osprey Farpoint 40 through my link, just forward me your receipt and I'll send you my personal 'Perfect Packing' video tutorial for free!" This small, value-added incentive can dramatically increase your conversion rate.
Ready to Build Your Own High-Margin Product? The most profitable product you can ever promote is your own. Affiliate marketing is the perfect training ground, but selling your own digital products—like guides, itineraries, or presets—offers unparalleled profit margins and brand authority. Our free Digital Product Ideas Guide is packed with dozens of proven, profitable ideas specifically for travel creators. Download it today to find the perfect product for your audience and start building your content empire.
Frequently Asked Questions (FAQ)
1. How long should a product review be? There's no magic number, but a high-converting review is typically comprehensive, often falling between 1,500 and 3,000 words. The goal is to be the most thorough and helpful resource on the internet for that specific product. Answer every possible question a reader might have.
2. Is it better to review a product I got for free or one I bought myself? A product you purchased with your own money will always carry more weight and authenticity with your audience. However, if you do receive a product for free, you can still write a credible review as long as you are radically transparent about it in your disclosure and maintain an honest, balanced perspective.
3. How many affiliate links are too many in one review? Focus on strategic placement over sheer quantity. A high-converting review might only have 5-10 well-placed links. Include them in your summary box, on your primary CTA buttons, and contextually on the product name throughout the text. The goal is to make it easy for the reader to click when they are ready, not to overwhelm them with links on every other word.
Your Blueprint for a Profitable Review Engine
You now have the complete formula for how to write a product review that doesn't just get traffic—it gets results. By shifting your mindset from informing to converting and carefully applying this seven-part framework, you transform your content from a simple article into a high-performance business asset.
This is a system you can replicate for every product you recommend, creating a reliable and scalable engine for affiliate income. Stop guessing and start engineering. The path to becoming a top-earning travel creator is paved with reviews that are strategic, persuasive, and relentlessly helpful. Now, go build your engine.
Read the full guide: The Travel Blogger's Playbook to Affiliate Marketing Mastery
Don't Miss Out! Subscribe for Exclusive Content
SubscribeComments 0
No comments yet
Be the first to share your experience!
Dont Miss Out! Subscribe for Exclusive Content
FTC Affiliate Disclosure Essentials: Stay Compliant as a Travel Creator
Essential Affiliate Tools: From Tracking to Full Optimization
Avoid These 5 Affiliate Landing Page Mistakes for Better Conversions
Affiliate Keyword Research Mastery for Travel Blogs
Booking.com Affiliate Program Review: Pros, Cons, and Earnings Potential