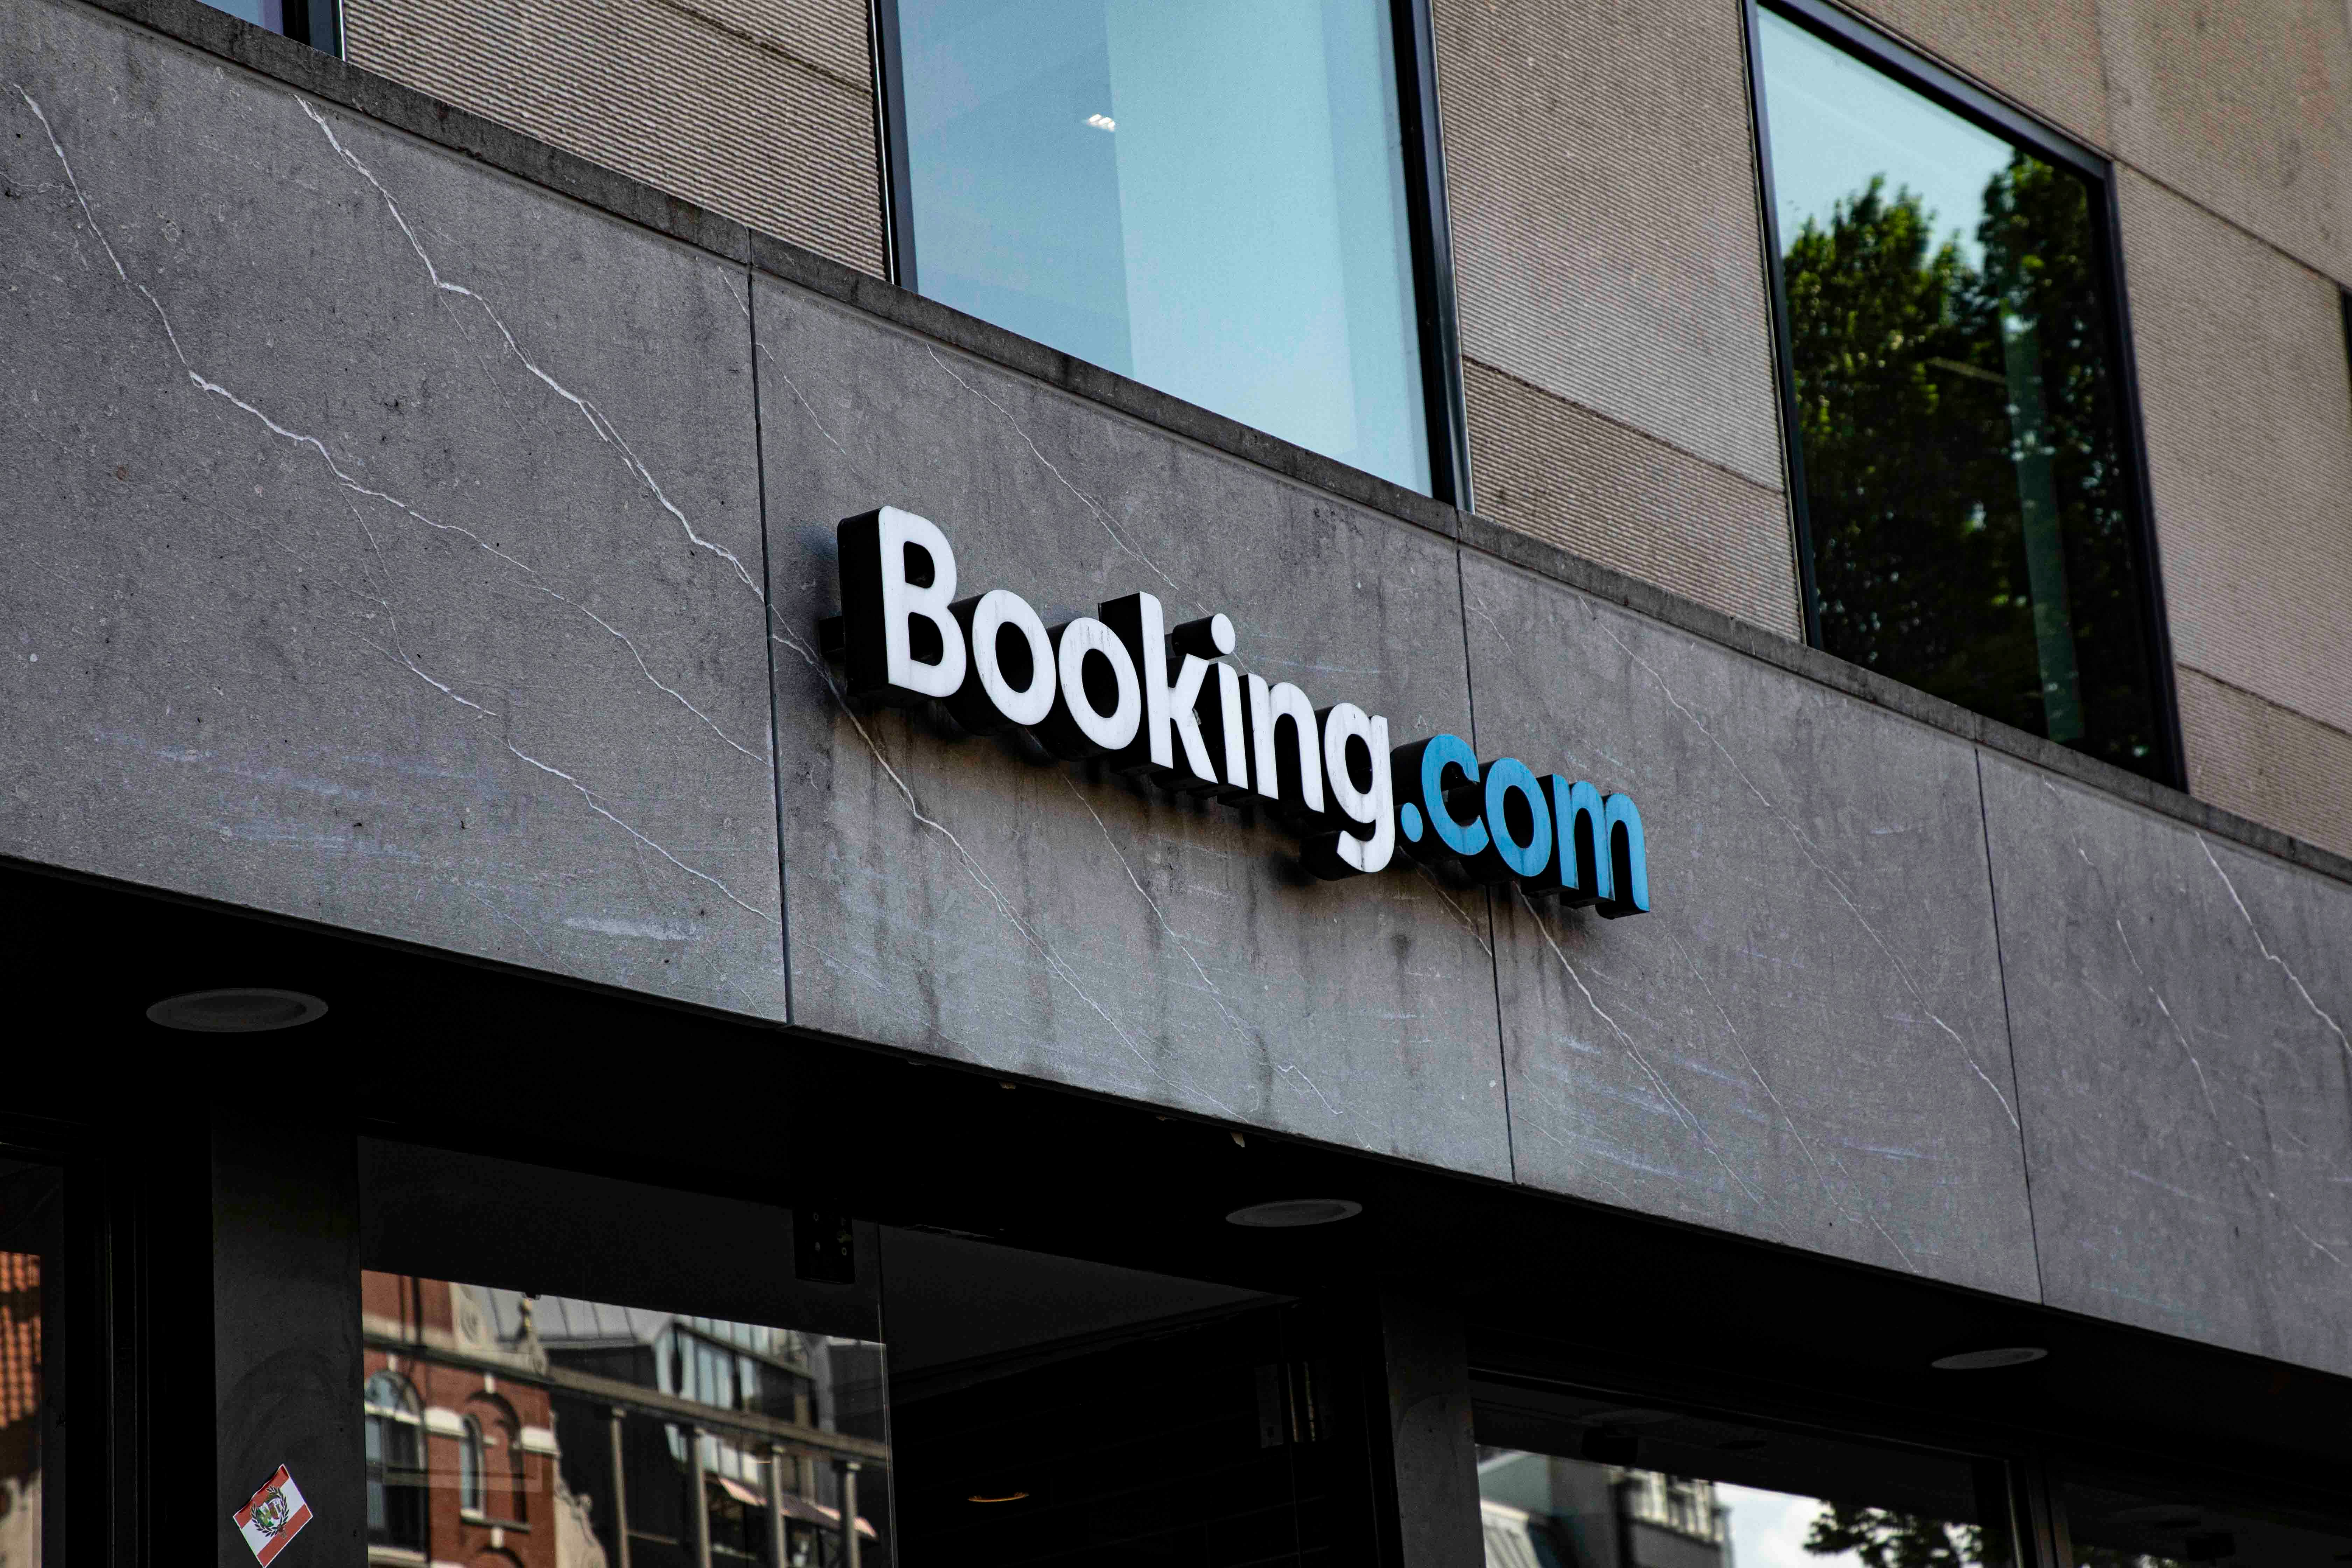
Booking.com Affiliate Program Review: Pros, Cons, and Earnings Potential
TrekGuider @trekguider
As a travel creator, you know accommodations are the bedrock of every trip. Your audience trusts you to recommend the perfect hotel, hostel, or vacation rental. Monetizing that trust is the logical next step, and one name looms larger than any other: Booking.com. With its colossal brand recognition and an inventory of over 28 million listings, joining its affiliate program feels like an obvious, can’t-miss opportunity. After all, with the average monthly income for travel affiliates hitting a reported $13,847, choosing the right partners is a high-stakes game.
But you’ve heard the whispers. In creator communities and private forums, there’s a nagging feeling that behind the slick marketing, something is fundamentally broken. You hear stories of a confusing commission structure, a cookie policy that seems designed to fail, and account issues that leave creators in the lurch. Is the biggest player in the game truly the best partner for your business, or is the booking affiliate program a trap for unwary creators lured in by a big name?
This is the definitive, unbiased review you’ve been searching for. We are cutting through the hype to deliver a clear-eyed analysis of the Booking.com affiliate program. We’ll dissect the legitimate pros, expose the critical, deal-breaking cons, and analyze the true earnings potential so you can make a strategic decision for your business. This deep dive is a crucial part of mastering the affiliate landscape, a topic we cover comprehensively in our pillar guide and essential command center: Travel Affiliate Programs: The 2026 Ultimate Guide.

The Allure: Why the Booking.com Program Is So Tempting
Let's be clear: the pull of the Booking.com affiliate program is undeniable. It’s a household name with the gravitational force of a market giant, and for creators, that brand recognition feels like a shortcut to credibility and conversions. These are the legitimate advantages that make it a top consideration.
Unmatched Brand Recognition and Trust
When you link to Booking.com, you are sending your audience to a platform they already know and trust. This pre-existing brand equity is a powerful conversion tool. You don't have to waste a single word "selling" your audience on the legitimacy of the booking platform itself; you can focus entirely on why that specific hotel is the right choice. This can lead to stronger initial click-through and conversion rates compared to lesser-known platforms.
A Colossal, Unrivaled Inventory
With over 28 million listings that span hotels, apartments, resorts, and even treehouses, Booking.com’s inventory is virtually limitless. No matter how niche your destination—from a major metropolis like Tokyo to a remote village in the Andes—you are almost certain to find a relevant, bookable property for your audience. This vast selection makes it a one-stop shop, simplifying the process of finding accommodation links for your content.
The Potential for High-Volume Conversions
For creators with significant traffic, especially those who attract visitors in the final, decisive stages of trip planning, the sheer volume of bookings processed by the platform can translate into substantial income. The platform's user-friendly interface and powerful search filters make it easy for users to find and book properties quickly, which can be a major asset for high-traffic websites.
The Critical Flaws: The Cons You Absolutely Cannot Ignore
While the pros are appealing, the operational realities of the booking affiliate program contain several severe, structural flaws that can cripple your earnings potential. These are not minor inconveniences; for many creators, they are deal-breakers.
The Achilles' Heel: Why the Session-Based Cookie Is a Deal-Breaker
This is, without question, the single most critical flaw in the Booking.com affiliate program. The program operates on a session-based cookie.
What does this mean? It means you only earn a commission if a user clicks your affiliate link and completes a booking within the exact same browser session. If they click your link, browse a few hotels, close the tab to think about it, and then return to Booking.com an hour later—or the next day—to make their booking, you earn nothing. Your tracking cookie has vanished.
Travel is a high-consideration purchase. People rarely book a multi-hundred or multi-thousand dollar trip on impulse. The typical customer journey looks like this:
They read your inspiring blog post.
They click your link to explore the hotels you recommend.
They compare prices and read a few more reviews.
They discuss options with a spouse or travel partner.
They return the next day, ready and excited to book.
With a session-based cookie, you are only compensated for the rare, impulsive booker. You lose the commission for every single thoughtful, deliberate customer you inspired. This policy is fundamentally misaligned with how real people plan travel, making it a structurally unsafe and potentially unprofitable model for content creators.

Pro-Tip: When evaluating any affiliate program, the cookie duration is often more important than the commission rate. A partner like Expedia Group offers a 7-day cookie, which is vastly superior as it respects the user's decision-making process and ensures you get paid for the value you create.
The "Black Box" Commission: Why 40% Isn't What It Seems
Booking.com often advertises a commission rate of 25-40%, which sounds incredibly high. However, this is deeply misleading. You do not earn a percentage of the total booking value. You earn a percentage of Booking.com's commission.
Here’s how that math actually breaks down:
A customer books a $500 hotel stay through your link.
The hotel pays Booking.com a commission (let's say 15%, which is $75).
You then earn your commission based on that $75, not the original $500.
If your rate is 25%, you earn 25% of $75, which is $18.75. Your effective commission rate on the total booking value is a mere 3.75%. This opaque structure makes it incredibly difficult to forecast your earnings and often results in a much lower payout than creators expect from the flashy headline numbers.
A History of Account Instability and Support Issues
Numerous affiliates have reported frustrating experiences with the program's administration. These complaints often center on sudden account closures without clear explanation, forced migrations to network platforms like Awin or CJ Affiliate, and a history of losing pending commissions during these transitions. While any large program will have some user issues, the volume of these reports suggests a level of instability that should be a major concern for any creator looking to build a reliable, long-term income stream.
The Verdict: Analyzing the True Earnings Potential
So, can you actually make money with the booking affiliate program? The answer is a qualified "yes," but only for a very specific type of publisher.
Who It Might Be Good For:
High-Traffic Deal & Discount Sites: Websites that focus on last-minute deals and attract users who are ready to book immediately can succeed with the session-based model. Their audience is impulsive by nature.
Metasearch Engines: Large-scale travel search engines that operate on a massive volume of clicks may find the program profitable due to sheer scale.
Who Should Avoid It:
Content Creators & Bloggers: If your content strategy is based on inspiration and long-term trip planning—creating itineraries, destination guides, and detailed reviews—this program is fundamentally at odds with your business model. You are inspiring a journey, not a single-session transaction.
Anyone Building a Sustainable, Predictable Income: The combination of a session-based cookie, an opaque commission structure, and reported account instability makes this a high-risk partner for anyone looking to build a reliable business.
Pro-Tip: The most resilient affiliate strategy is built on diversification. Never rely on a single program for your income. A healthy portfolio for a travel creator should include partners for accommodations, tours, insurance, and gear to create multiple, stable revenue streams.
Strategic Alternatives: Safer Bets for Higher Returns
The flaws in the Booking.com program do not mean you should abandon monetizing accommodations. It simply means you should partner with programs structured to favor creator success.
The most direct and superior alternative is the Expedia Group Affiliate Program. It covers major brands like Hotels.com and Vrbo and, most importantly, offers a 7-day cookie duration. This gives your audience a full week to make their decision after clicking your link, ensuring you are properly compensated for your influence.
Ultimately, the most secure path to a stable income is to reduce your reliance on any single affiliate program and start building assets you own. Instead of sending all your traffic to other brands, you can create and sell your own high-value digital products—like detailed itineraries, travel guides, or planning checklists. Platforms like the TrekGuider Seller Platform are designed specifically for this, allowing you to build your own digital storefront and keep a much larger share of the revenue. It's the ultimate strategy for taking control of your financial future.

Build Your Perfect Itinerary (and Monetize It)
Creating high-value, bookable itineraries is one of the best ways to serve your audience and drive affiliate sales. But starting from scratch can be daunting. Our free Travel Itinerary Template gives you the perfect framework to build beautiful, useful guides your readers will love—and a powerful asset you control.
Frequently Asked Questions
1. Is the Booking.com affiliate program free to join? Yes, the program is free to join either directly or through an affiliate network like Awin or CJ Affiliate.
2. What are the payment methods for the Booking.com affiliate program? Payments are typically made via PayPal or bank transfer, but this can depend on the network you join through. There is usually a minimum payout threshold (e.g., €100) that you must reach before you can receive your earnings.
3. Can I use my own affiliate links to make personal bookings? No. Like almost all affiliate programs, using your own links for personal purchases or bookings is a violation of the terms of service and can lead to your account being terminated and commissions being voided.
A Powerful Brand with a Flawed Partnership
The Booking.com affiliate program exists in a paradox. It leverages one of the most powerful and trusted brands in travel, offering a massive inventory that seems perfect for creators. However, its core mechanics—specifically the session-based cookie and the opaque commission structure—are fundamentally anti-creator. They are relics of an older affiliate model that fails to properly value the influence of content creators who build trust and inspire a customer's journey over days or weeks.
While it might work for a small subset of high-traffic, transactional websites, for the vast majority of travel bloggers and content creators, the booking affiliate program represents a significant and unnecessary risk. Your time, effort, and influence are better invested in partners with more favorable, transparent, and creator-friendly terms. By choosing strategic alternatives and diversifying your income streams, you can build a more profitable and resilient business for the long term.
Read the full guide: The Travel Blogger's Playbook to Affiliate Marketing Mastery
Don't Miss Out! Subscribe for Exclusive Content
Subscribe


Comments 0
No comments yet
Be the first to share your experience!
Dont Miss Out! Subscribe for Exclusive Content

Ultimate USA Holidays Guide: Top Picks

FTC Affiliate Disclosure Essentials: Stay Compliant as a Travel Creator

Essential Affiliate Tools: From Tracking to Full Optimization

Avoid These 5 Affiliate Landing Page Mistakes for Better Conversions

Affiliate Keyword Research Mastery for Travel Blogs

Decoding Affiliate Commission Rates: Benchmarks for Travel Creators
Thanksgiving Parade: 6 Prime Spots
TrekGuider @trekguider
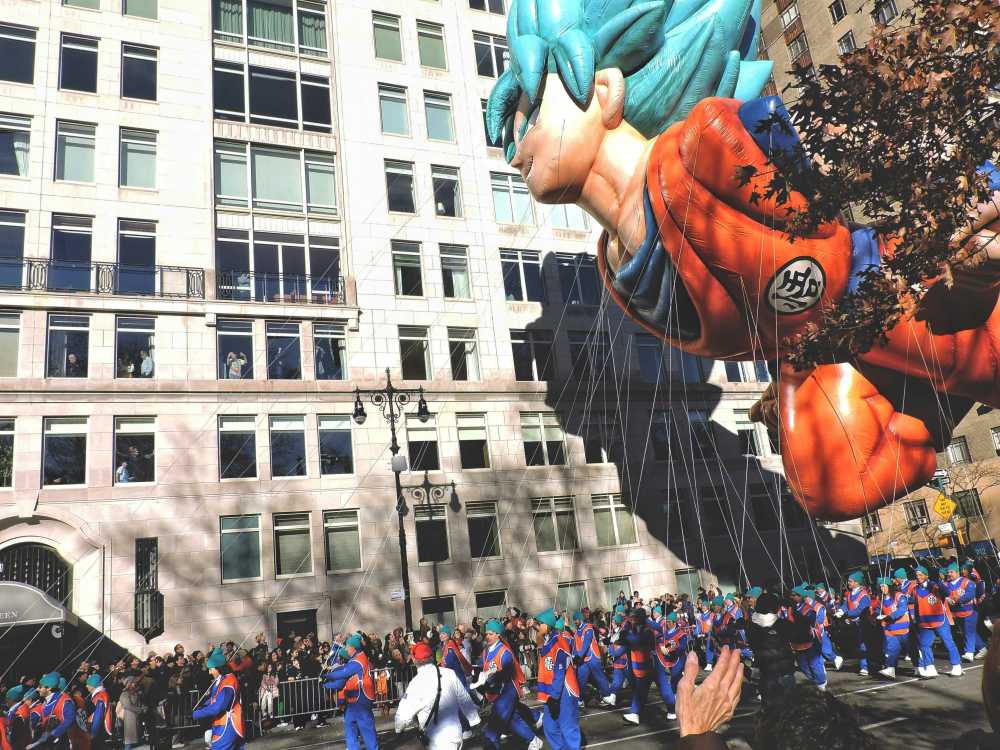
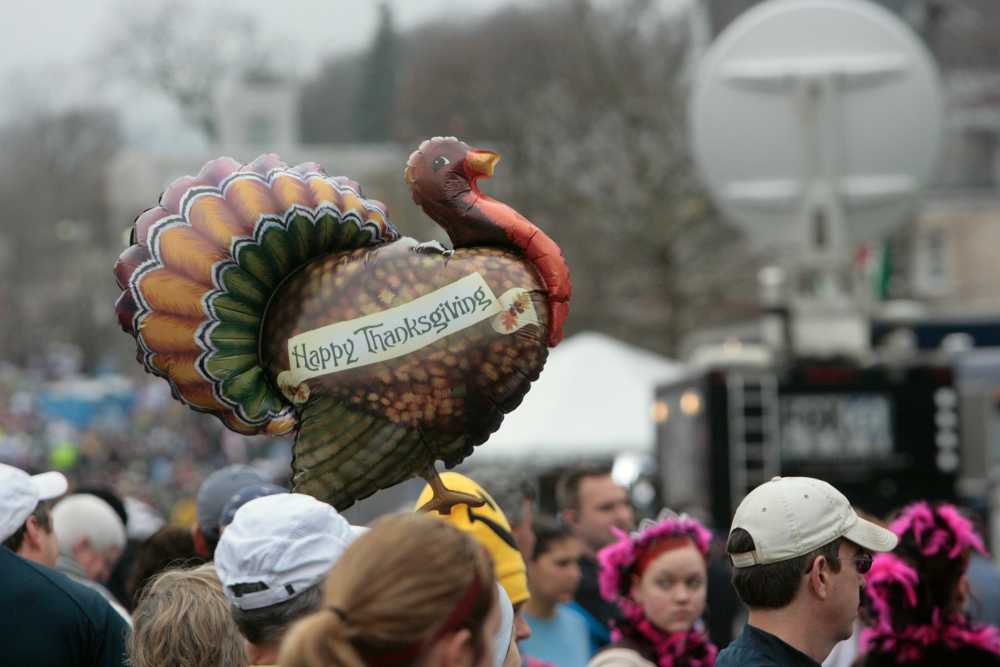
You’ve seen it on television your whole life: colossal cartoon characters floating between skyscrapers, world-class marching bands sending echoes through the avenues, and the final, festive arrival of Santa Claus himself. The Macy's Thanksgiving Day Parade is an American institution, the magical kick-off to the holiday season. But the dream of seeing it in person is often haunted by a logistical nightmare. You’re worried about battling millions for a tiny patch of sidewalk, only to have your view blocked, your kids get restless, and the entire enchanting experience devolve into a cold, stressful ordeal.
That anxiety is completely valid. Every year, over 3.5 million people descend on the route, and without a rock-solid plan, you’ll see more of the back of someone’s head than you will of the giant Snoopy balloon. You risk waking up before dawn only to find every good spot claimed, leaving your family disappointed and shivering. The magic you traveled for feels impossibly out of reach, lost in a sea of chaos. You deserve to experience the wonder, not the worry.
Forget the frustration. This is your strategic blueprint for success. We’re going to bypass the chaos and transform you into a parade-viewing expert. We’ll unveil the six prime spots to watch the spectacle, complete with insider strategies on timing, what to pack, and how to navigate the city like a local. This is your definitive plan for conquering the Thanksgiving parade in New York and creating memories that will last a lifetime. It’s one of the most iconic events in the city, a true highlight that we cover in our broader guide to New York Holidays: 10 Must-Do Events.
Understanding the Parade Route: Your Strategic Map
Before you can pick your spot, you need to understand the battlefield. The Macy's Thanksgiving Day Parade is a massive operation, and its route is the key to everything. Knowing the path, the timing, and—most importantly—the restricted zones will give you a powerful advantage.
The parade officially kicks off at 8:30 AM sharp on Thanksgiving morning, Thursday, the fourth Thursday of November. It begins on the Upper West Side and marches for 2.5 miles, concluding around noon.
Here’s the official step-by-step route:
Starts: 77th Street & Central Park West at 8:30 AM.
Travels South: Proceeds down Central Park West to Columbus Circle.
Turns: At Columbus Circle, it turns onto Broadway.
Continues South: It follows Broadway through the heart of Midtown.
Ends: The parade concludes around noon at the iconic Macy's Herald Square on 34th Street.
Our internal research confirms two critical areas to avoid at all costs: the start zone around 77th Street and the finish zone near Herald Square (from 34th to 38th Street). These areas have heavily restricted public viewing and are reserved for television broadcasting. Trying to watch from here is a rookie mistake that guarantees disappointment. Your strategy must focus on the long stretches in between.
The 6 Prime Viewing Spots for the Thanksgiving Parade in New York
Now for the main event. Choosing your location is the single most important decision you’ll make. Each of these six spots offers a unique advantage, whether it’s fewer crowds, better photo opportunities, or more family-friendly conditions.
1. The Upper West Side: The Classic Family Choice
Location: Along Central Park West, from 77th Street down to Columbus Circle (specifically the west side of the street).
Why It’s Prime: As the parade’s very first leg, this 16-block stretch is where the magic is freshest. The performers are electric with energy, the marching bands are at their most thunderous, and the balloon handlers are still wrangling their colossal characters into perfect formation. Because it's more residential, the crowds feel slightly more manageable and family-oriented than in the commercial chaos of Midtown. The backdrop of Central Park on one side and historic apartment buildings on the other makes for stunning photos.
Your Strategy:
Timing is Everything: You must arrive by 6:00 AM. The front-row spots are often claimed by locals before the sun is up. By 6:30 AM, the area will be packed several rows deep.
Positioning: Plant yourself on the west side of Central Park West. This gives you a direct, unobstructed view as the parade marches south.
What to Expect: It will be cold and dark when you arrive. This spot requires a commitment to waiting, but the payoff is a fantastic, high-energy viewing experience.
2. The Shops at Columbus Circle: The VIP Indoor View
Location: The second and third floors of The Shops at Columbus Circle, overlooking the parade’s turn from Central Park West onto Broadway.
Why It’s Prime: This is the ultimate parade hack for those who want to avoid the cold and the crowds. You get a warm, elevated, bird’s-eye view of the entire spectacle. Plus, you have immediate access to restrooms, coffee, and food—luxuries that are unthinkable for those on the street.
Your Strategy:
This Isn't Free: This is not a public viewing area. Access is typically granted to customers of the shops and restaurants within the mall.
Plan Months Ahead: Check with stores like Williams-Sonoma or restaurants with windows facing the circle. Many host private, ticketed viewing events that sell out far in advance.
Be Prepared to Spend: You will need to make a purchase or pay for a breakfast event to gain entry. Consider it the price of unparalleled comfort and convenience.

3. The Sixth Avenue Stretch: The Urban Canyon Experience
Location: Along Sixth Avenue (Avenue of the Americas) from 59th Street down to 38th Street.
Why It’s Prime: This is the longest and straightest portion of the route, offering dozens of blocks for potential viewing. Watching the giant balloons squeeze between the towering skyscrapers of Midtown is a uniquely New York experience. The sheer scale of the buildings creates a dramatic "urban canyon" effect that makes the parade feel even more grand.
Your Strategy:
Arrive Early: The secret is out on this spot. To get a decent view, be in position by 6:30 AM at the latest. The blocks closest to Central Park (59th to 50th) fill up the fastest.
Avoid Corners: Set up in the middle of a block. Corners are notoriously crowded and chaotic, with people constantly moving and blocking views.
Look for Scaffolding: Sometimes, construction scaffolding can be a blessing in disguise, creating a covered area that offers some protection from the elements and can deter massive crowds from forming in that exact spot.
Pro-Tip: The area between 70th and 75th streets on Central Park West offers a slightly wider sidewalk, giving you a little more breathing room. Pack a thermos of hot chocolate to stay warm while you wait—it’s a game-changer.
4. The "Quiet Zone" Near Radio City Music Hall
Location: The stretch of Sixth Avenue between 49th and 51st Streets.
Why It’s Prime: While no part of the route is truly "quiet," this section is designated as a no-marching-band-performance zone to accommodate the national television broadcast headquartered at Radio City. This means you get a brief respite from the loudest musical numbers—a great option for families with young children or those with sensory sensitivities.
Your Strategy:
Know the Trade-Off: You will see all the floats and balloons perfectly, but you will miss the live performances from the marching bands as they pass this specific area.
Use the Location: This spot is fantastic for its iconic backdrop. You can capture incredible photos of the balloons with the famous Radio City Music Hall marquee in the background.
Post-Parade Plans: You are perfectly positioned to see the Rockettes' Christmas Spectacular later in the day or head over to Rockefeller Center.

5. The South Side of 38th Street: The Late-Arrival Lifeline
Location: The blocks along Sixth Avenue from 40th Street down to 38th Street.
Why It’s Prime: Let's be realistic: not everyone can wake up at 4 AM. If you’re running late, this is your last best chance. As the parade nears its end at 34th Street, the area becomes a restricted broadcast zone. Therefore, the blocks just before this cutoff are the final public viewing areas.
Your Strategy:
Manage Expectations: You will not get a front-row view here. This is a spot for seeing the tops of the balloons and catching the general energy of the event.
Look Up: Your view will be mostly vertical. It’s less about seeing the performers on the street and more about witnessing the spectacle of the giant balloons against the sky.
Quick Exit: The advantage of being near the end of the route is that you can make a quick exit once the final float passes, beating some of the mass exodus heading for the subway.
6. The Virtual View: Your Hotel Room Perch
Location: Any hotel with rooms directly overlooking the parade route on Central Park West or Sixth Avenue.
Why It’s Prime: This is the most comfortable, stress-free, and luxurious way to experience the Thanksgiving parade in New York. You can watch the entire event from the warmth of your room, in your pajamas, with a cup of coffee in hand. You have your own bathroom, your own food, and an unbeatable, unobstructed view.
Your Strategy:
Book a Year in Advance: Rooms with parade views are often booked a year or more ahead and come at a significant premium.
Confirm the View: When booking, you must call the hotel directly to confirm that your specific room has a "parade view." An "avenue view" is not always sufficient.
Notable Hotels: Some hotels famous for their parade views include the JW Marriott Essex House, the Mandarin Oriental, New York, the Warwick New York, and the New York Hilton Midtown.
Pro-Level Survival Guide for Parade Day
Securing a great spot is only half the battle. You need a solid plan for the hours you’ll spend waiting. Follow these tips to ensure your experience is comfortable and memorable for all the right reasons.
The Ultimate Timing Strategy
The golden rule, confirmed by years of experience, is to arrive by 6:00 AM. This is non-negotiable for a front-row or second-row spot along Central Park West or the prime stretches of Sixth Avenue. By 6:30 AM, these areas are typically full. By 7:00 AM, you’ll be lucky to find a spot where you can see anything at all. Set your alarm, bundle up, and get there early. The early bird gets the best view of the parade.
What to Wear and Pack: The Family Checklist
New York in late November is cold. Standing still for hours makes it feel even colder.
Dress in Layers: Start with a thermal base layer, add a fleece or sweater, and top it off with a warm, wind-resistant winter coat. Don't forget a hat, gloves, and a scarf.
Comfortable Footwear: Wear warm, waterproof boots. Your feet will thank you.
The Essentials Bag: Pack a backpack with:
Snacks and Drinks: A thermos of hot chocolate or coffee is a must. Bring water and easy-to-eat snacks like granola bars and fruit.
Entertainment: A book, a deck of cards, or a fully charged phone with headphones can help pass the time.
Portable Phone Charger: Your battery will drain faster in the cold.
Small Folding Stools: If you have space, these can be a lifesaver for your back and legs.
For a comprehensive list of what to bring on any family adventure, our National Park Road Trip Checklist has you covered, with tips that apply just as well to an urban expedition.

Navigating the Crowds with Kids
The parade is a magical experience for children, but the crowds and waiting can be tough.
Avoid Strollers: In the most crowded areas, strollers are more of a liability than a help. They are difficult to maneuver and take up valuable space. A carrier is a much better option for very young children.
Establish a Meeting Point: As soon as you claim your spot, pick a clear, fixed landmark (e.g., a specific lamppost, a store entrance) as your family's meeting point in case you get separated.
Use a Buddy System: Ensure everyone has a partner.
Ladders: You will see people with small ladders for their kids to see over the crowd. If you bring one, be sure to place it a safe distance from the street and be courteous to those around you.
Pro-Tip: Skip the car. Public transportation is your best friend. The subway will be running on a holiday schedule, but expect crowded stations near the route. Plan your subway route in advance and buy your MetroCard the day before to avoid long lines at the machines on Thanksgiving morning.
Beyond the Parade: Making it a Full Thanksgiving Experience
Remember, the parade ends around noon, leaving you with a full day to enjoy the city. Many people head straight to a Thanksgiving dinner. If you plan to eat out, you must make reservations weeks, if not months, in advance. New York City is one of the world's culinary capitals, and a festive meal is the perfect way to cap off a magical morning.
Planning the perfect holiday trip, from the parade to the feast, requires expert knowledge. Our comprehensive Travel Guide provides detailed itineraries and booking advice for major US cities, ensuring your entire vacation is seamless and spectacular.

Your Mission, Should You Choose to Accept It
Watching the Macy's Thanksgiving Day Parade in person is a bucket-list dream, and with this guide, it’s a dream you can turn into a flawless reality. You now have the route, the prime locations, and the pro-level strategies to outsmart the crowds and secure a fantastic viewing experience. You’re no longer a tourist hoping for a glimpse; you’re a prepared strategist ready to claim your prime spot and soak in every moment of the magic. The Thanksgiving parade in New York is waiting for you.
Now go make those once-in-a-lifetime memories!
Meta Data Suggestions:
SEO Meta Title: 6 Prime Spots for the NYC Thanksgiving Day Parade (2026)
URL Slug: thanksgiving-parade-new-york-viewing-spots
SEO Meta Description: Don't just watch the Thanksgiving parade in New York, conquer it. Our guide reveals 6 prime viewing spots and insider tips for a stress-free family experience.
Don't Miss Out! Subscribe for Exclusive Content
SubscribeComments 0
No comments yet
Be the first to share your experience!
Dont Miss Out! Subscribe for Exclusive Content

San Francisco Cherry Blossoms: A Local's Guide to the Blooms

Halloween SF: Haunts Without Horrors

SF Festivals: 7 Must-See Lineups

Christmas SF: Lights & Wharf Wonders

SF Pride: 6 Route & Party Hacks

Chinese New Year SF: Parade Essentials
Transportation Safety: Staying Safe on Planes & Trains
TrekGuider @trekguider
There's a certain magic to being in transit—that liminal space where you're neither here nor there, just a passenger watching the world blur past your window. It’s the very heart of travel, but it’s also a moment of profound vulnerability. The problem is, amidst the controlled chaos of an airport, the anonymous bustle of a train station, or the quiet confines of a taxi, our focus can drift.
This constant motion agitates a core travel anxiety: the fear that one moment of distraction could lead to a lost passport, a stolen wallet, or a compromised sense of security that sours an entire trip. But it doesn't have to be this way. The solution is to trade that anxiety for a set of simple, repeatable habits—a tactical playbook for navigating every mode of transport with unshakable confidence. This guide delivers the essential transportation safety tips you need, broken down by the unique challenges of air, rail, and ground travel. Mastering these routines is a critical part of any smart travel strategy, a foundation we explore in our comprehensive guide to The Ultimate Guide to Travel Safety: A 2026 Playbook.
Think of your journey in stages, with each mode of transport presenting its own unique playbook. We’ll start where most international trips begin: the controlled chaos of the airport.

Mastering the Airport: Your Guide to Air Travel Security
An airport is a marvel of modern logistics, but for a traveler, it’s a gauntlet of queues, checkpoints, and crowds. Its process-driven environment creates unique security challenges, but a few smart transportation safety tips can make all the difference from the moment you pack your bags to the second you reclaim them.
Before You Leave: Smart Packing & Luggage Security
Your airport safety strategy begins at home. How you pack and secure your luggage is your first and most important line of defense.
Never Pack Valuables in Checked Luggage: This is the cardinal rule of air travel. If it’s valuable or irreplaceable, it belongs with you in the cabin. Your carry-on is the only secure place for:
Passport, IDs, and all travel documents
Cash, credit cards, and debit cards
Electronics (laptops, tablets, cameras, power banks)
Essential medications (plus extra for delays)
Jewelry and any other items of sentimental or high monetary value
Use Globally Recognized Locks: The TSA needs to be able to inspect checked bags. If you use a non-approved lock, they will cut it off. To avoid this, use locks recognized by the TSA. According to their official guidelines, these can be opened by security officers using universal master keys. Look for the Travel Sentry (red diamond) or Safe Skies logo when buying a lock. This isn't just a U.S. system; it's a global standard used by security agencies in Canada, the UK, Germany, Japan, and dozens of other countries.
Make Your Bag Stand Out: In a sea of black roller bags, a little personality is a security feature. Use a colorful luggage strap, a unique tag, or a bright ribbon to make your bag instantly identifiable. This dramatically reduces the chance of an accidental bag swap at the carousel.
Photograph Your Evidence: Before you hand over your bag, take a quick photo of your packed suitcase (both open and closed). If your bag is lost, delayed, or damaged, this provides an indisputable visual record for your airline and insurance claims.

Pack Smarter, Not Harder
A lighter bag is a safer bag. It’s easier to manage, less likely to be checked, and keeps your essentials within arm's reach. Our definitive guide shows you how to fit everything you need into a single carry-on, saving you time, money, and the stress of lost luggage.
Download the Free How to Pack Light Guide
Navigating the Security Checkpoint
The security line is a notorious chokepoint where travelers are distracted, rushed, and temporarily separated from their belongings. This is a time for heightened focus.
Guard Your Bins: As your items slide onto the conveyor belt, keep your eyes on them. Wait to walk through the metal detector until you see your bins beginning to enter the X-ray machine. This minimizes the time your valuables are sitting unattended on the other side.
Consolidate Before the Line: Don't wait until you're at the bins to fumble with loose items. Before you even join the queue, place your phone, wallet, passport, and boarding pass inside a zipped pocket of your jacket or deep within your carry-on.
Beware of Coordinated Distractions: Professional thieves sometimes work in teams at security. One person might create a delay in front of you (e.g., setting off the metal detector repeatedly) while an accomplice on the other side of the scanner quickly grabs your emerging laptop or wallet. Be patient, but stay vigilant and focused on your belongings.
On the Rails: A Playbook for Safe Train Travel
Train travel offers a romantic and scenic way to see the world, but the open nature of stations and the shared spaces on board require a specific approach to security.
General Security on Daytime Trains
During the day, the primary risk is opportunistic theft in crowded stations or on busy carriages.
Maintain Physical Contact: In a chaotic station, your luggage should be in direct physical contact with you at all times. Loop a strap around your foot or keep a hand on the handle. When waiting on a platform, stand with your back to a wall and your bags in front of you.
Position Luggage Strategically: On the train, store your main suitcase on an overhead rack that is across the aisle from you, not directly above. This keeps it constantly within your line of sight. If you must use the large luggage racks at the end of a carriage, use a lightweight cable lock to secure your bag to the rack itself.
Never Let Your Daypack Go: Your small bag containing your valuables should be treated as an extension of your body. Keep it on your lap, on the seat next to you, or in a crossbody position. When you get up to use the restroom or walk to the dining car, it goes with you. No exceptions.

Overnight on the Rails: Your Security Checklist
Sleeping on a train is an unforgettable experience, but it’s also when you are most vulnerable. Follow these three protocols to ensure a safe and restful journey.
Physically Secure Your Main Luggage: A thief can silently walk through a dark train car and lift a bag from an unlocked compartment. Make your bag an inconvenient, noisy target. Use a small cable lock or even your bag’s own strap to attach it to a fixed object like:
The luggage rack frame
The ladder to the top bunk
The metal frame under your seat
Keep Essential Valuables on Your Person: Your most critical items—passport, phone, cash, cards—should never be in your main luggage while you sleep. The only secure place is on your body.
Use a money belt worn under your clothes.
Sleep with your small daypack physically on your bunk. Use it as a pillow or loop a strap around your arm or leg. This ensures your essentials remain safe even if your main bag is compromised.
Secure Your Compartment Door: The door is your primary barrier. As soon as everyone is settled for the night, lock it from the inside. Private sleeper cabins have strong locks. In a shared couchette, have a polite conversation with your cabin mates and agree to keep the door locked. Train staff or border officials will knock loudly enough to wake you if they need entry.
Pro-Tip: When booking a bunk in a shared couchette, the top bunk is often the most secure choice. It is harder for anyone to access your belongings without waking you and keeps you out of the general foot traffic in the compartment.
On the Ground: Staying Safe in Taxis & Ride-Shares
Your journey isn’t over until you’ve reached your hotel. Ground transportation is the final leg, and it’s a critical moment to apply your safety knowledge.

Your Ride-Share Safety Checklist
Ride-sharing apps have built-in safety features, but they only work if you use them. Before you get into any vehicle, run through this non-negotiable verification checklist.
Verify the Vehicle:
Match the License Plate: This is the most important step. The license plate number in the app must match the plate on the car. If it doesn’t, do not get in. Cancel the ride and report the mismatch.
Match the Car Details: Confirm the make, model, and color of the car also match the information in the app.
Verify the Driver:
Check the Driver's Photo: Glance at the driver and ensure they match the photo in the app.
Confirm Your Name: Ask the driver, "Who are you here for?" or "What's my name?" They must be able to say your name. Never volunteer it by asking, "Are you here for Jane?" This gives a fraudulent driver the information they need.
Use PIN Verification: Many apps now offer a PIN verification feature. Enable it. The trip cannot start until you provide the correct PIN to your driver, guaranteeing you are in the right car.
Share Your Trip Details:
As soon as the trip starts, use the app’s built-in "Share Trip Status" function. This sends a live map of your journey, including the car's route and your ETA, to a trusted contact.
Sit in the Back Seat:
Especially when traveling alone, sitting in the back provides personal space and allows you to exit from either side of the vehicle if you feel uncomfortable.
Trust Your Instincts:
If anything feels off—the driver, the vehicle, the situation—do not get in. Cancel the ride, report your concerns, and order another car. Your safety is worth more than a cancellation fee.
Navigating Taxis and Tuk-Tuks Safely
When using traditional taxis, you are more reliant on your own judgment and vigilance.
Insist on the Meter: The "broken meter" is one of the oldest travel scams in the book, designed to lock you into a wildly inflated flat fare. Before getting in, point to the meter and say, "Meter, please." If the driver refuses, simply find another taxi.
Follow Your Route: Have your destination pulled up on a map app on your phone. This helps you ensure the driver is taking a logical route and not an inefficient "scenic" one designed to drive up the fare.
Use Official Taxi Ranks: At airports and train stations, always use the designated, official taxi queue. Avoid the freelance drivers who approach you in the arrivals hall, as they are often unlicensed and operating illegally.
Pro-Tip: Ask your hotel or restaurant to call a taxi for you. They almost always have a relationship with a reputable, trusted local company. Before you get in, take a quick, discreet photo of the taxi's license plate and driver ID card (usually displayed on the dash).

Frequently Asked Questions (FAQ)
Q: What's the safest way to carry my passport and money while in transit? A: The best method is to use multiple locations. Keep your passport, one credit card, and the bulk of your cash in a secure money belt or neck wallet worn under your clothing. Keep a small amount of daily cash and a second credit card in a more accessible wallet in a front pocket or a secure crossbody bag.
Q: Are airport charging stations safe to use? A: Avoid using the public USB ports. Hackers can modify these stations for "juice jacking," which can install malware or steal data from your phone. Always use your own AC power adapter and plug it into a standard electrical outlet, or carry a portable power bank.
Q: Should I use my phone's data plan abroad or rely on public WiFi? A: Using your own cellular data plan (either an international plan or a local SIM card) is always more secure than public WiFi. If you must use public WiFi, you absolutely need to use a VPN (Virtual Private Network) to encrypt your connection and protect your data from hackers.
Travel with Confidence
Transportation is the thread that connects the incredible moments of your journey. By mastering these transportation safety tips, you transform these in-between moments from periods of uncertainty into a seamless and secure part of your adventure. Whether you’re locking your bag before a flight, securing your cabin on an overnight train, or verifying your ride-share before hopping in, these proactive habits build a powerful foundation of security.
This allows you to move through the world not with fear, but with the calm confidence of a prepared and savvy traveler. For a more comprehensive look at planning your entire journey, our all-encompassing Travel Guide is the perfect resource. And for expert advice on navigating the specific transit systems of your next destination—from the Tokyo Metro to the Swiss rail network—be sure to explore the detailed guides from our expert creators on the TrekGuider. You're now equipped to handle the journey, so you can focus on the destination.
Don't Miss Out! Subscribe for Exclusive Content
SubscribeComments 0
No comments yet
Be the first to share your experience!
Dont Miss Out! Subscribe for Exclusive Content
Ultimate USA Holidays Guide: Top Picks
FTC Affiliate Disclosure Essentials: Stay Compliant as a Travel Creator
Essential Affiliate Tools: From Tracking to Full Optimization

Booking.com Affiliate Program Review: Pros, Cons, and Earnings Potential
Decoding Affiliate Commission Rates: Benchmarks for Travel Creators

Amazon Associates for Travel: Strategies to Maximize Commissions
The Complete Guide to Solo Road Trips: Planning, Safety & Vehicle Prep
TrekGuider @trekguider
You see the pictures, you hear the stories—the ultimate solo road trip, a journey of pure freedom on the open road. But when you actually start to think about it, a wave of very real questions hits hard: What if I get a flat tire in the middle of nowhere? How do I stay safe alone at a motel? Can I really handle all the planning, driving, and navigating by myself?
That initial thrill can quickly turn to anxiety, paralyzing you before you even check your tire pressure. Without a rock-solid plan, a dream trip can easily become a stressful, expensive, or even dangerous ordeal. The difference between a life-changing experience and a cautionary tale lies in preparation. While the logistics of solo travel are unique, the core principles of smart preparation are universal—a foundation just as crucial when mapping out Family Travel Ideas: The 2026 Guide to Unforgettable Trips as it is for hitting the road alone.
This guide is your solution. It is the definitive roadmap designed to systematically dismantle every fear and answer every question. We will replace uncertainty with a comprehensive, step-by-step framework covering everything from strategic planning and budgeting to critical safety protocols and vehicle preparation. After reading this, you will not only feel capable but completely empowered to pack your bags, turn the key, and confidently hit the road for one of the great solo road trips you've always imagined.

Why a Solo Trip is a Powerful Investment in Yourself
Before we dive into logistics, let's anchor ourselves in the why. A solo road trip is more than a change of scenery; it’s an active opportunity to disconnect from the demands of daily life and reconnect with the one person you can sometimes lose track of: yourself.
Absolute Freedom: You decide when to start, where to stop, and how long to linger. There are no compromises on the itinerary, the music, or the choice between a greasy-spoon diner and a scenic picnic. Every decision is yours alone.
Radical Self-Reliance: Successfully navigating hundreds of miles on your own is a profound confidence builder. You’ll learn to solve problems on the fly, trust your judgment, and discover a deep well of resilience you never knew you had.
The Luxury of Headspace: The long stretches of highway provide the mental space for deep thought and reflection. It’s a chance to process, dream, and learn what truly energizes you without the noise of external influence.
The Blueprint: Strategic Planning for the Open Road
While the soul of a road trip lives in its moments of spontaneity, its backbone is forged in smart preparation. This isn't about creating a rigid, fun-killing schedule; it's about building the strong framework that enables true freedom and removes decision fatigue when it matters most.

Define Your Mission: Destination & Purpose
First things first: What kind of journey are you craving? Your answer will be the compass for your entire plan. Are you seeking:
Rejuvenation? Picture a scenic drive along Oregon's coast, with stops in quiet towns and fog-laced forests.
High Adventure? A route looping through Utah's "Mighty 5" national parks, filled with challenging hikes and epic vistas. Planning a park-centric journey is a classic for a reason, and our National Park Road Trip Checklist can be an invaluable tool.
Cultural Discovery? A trip winding through the historic backroads of New England or the music-rich towns of the Mississippi Delta.
Your "why" dictates your route. The iconic Pacific Coast Highway delivers on coastal drama, while a journey along Route 66 is a nostalgic dive into Americana. Use tools like Google Maps, Roadtrippers, and travel blogs to map a general path, but also search for terms like "scenic byways in California" (or whichever state you're exploring) to uncover less-traveled gems.
The Art of the Flexible Itinerary
A rigid, minute-by-minute schedule is the enemy of a great road trip. The goal is to create a structured yet pliable plan.
Respect Your Driving Limits: This is the golden rule. Aim for no more than 4-6 hours of actual driving per day. This prevents burnout, gives you ample time to explore your stops, and, crucially, ensures you can arrive at your lodging before dark.
Anchor Your Journey: Always pre-book your accommodation for the first night and the last night of your trip. This brackets your journey, removing the stress of finding a place to stay when you’re either buzzing with first-day energy or exhausted from the final leg.
Identify Key "Pillars": Pinpoint the 2-3 must-see sights, cities, or parks on your route. These are your pillars. Plan your overnight stays around them, giving yourself enough time to explore them properly.
Embrace the In-Between: For the days between your pillars, keep your plans loose. This is where the magic happens. It allows you to follow a sign for a quirky roadside museum, spend an extra two hours at a breathtaking viewpoint, or explore a town that just feels right.
Budgeting: Your Financial Freedom Fund
A clear budget isn't a leash; it’s the tool that frees you from financial stress on the road.
Fuel: Use an app like GasBuddy to estimate total fuel costs based on your car's MPG and planned mileage. Be conservative and round up.
Lodging: Research average costs for hotels, motels, or campgrounds in your target areas. Prices can fluctuate wildly by season and local events.
Food & Drink: Set a daily food budget. Packing a cooler with drinks, snacks, and breakfast items is a pro move that drastically cuts costs.
Activities: Account for national park passes (an "America the Beautiful" annual pass is often a great value), museum tickets, and tours.
The "Uh-Oh" Fund: This is non-negotiable. Set aside 15-20% of your total budget as a contingency. This fund is for the flat tire, the surprise concert ticket, or the necessary hotel upgrade after a rough day.
Pro-Tip: Before you go, call your bank and credit card companies to notify them of your travel plans. This prevents them from freezing your account due to "unusual activity" when you're buying gas 500 miles from home.
Mastering Solo Road Trips with Confidence
Your personal safety matters most. A proactive, systematic approach doesn't create fear; it builds the confidence you need to explore freely.

Personal Safety
Think of your awareness as your most critical travel companion—the one piece of gear that should never be packed away. It's your built-in radar for navigating the world with confidence.
Share Your Battle Plan: Leave a detailed copy of your itinerary with at least two trusted friends or family members. Include hotel names, addresses, and phone numbers.
The Daily Check-In: Establish a simple system. A quick "Made it to Flagstaff! All good." text each evening provides peace of mind for everyone.
Daylight is Your Ally: Plan your driving to end well before sunset. Navigating unfamiliar roads and finding your hotel is infinitely easier and safer in the light.
Trust Your Gut Instinct: Your intuition is a highly evolved threat-detection system. If a gas station, rest stop, or situation feels wrong, it is wrong for you. Leave immediately. Don't second-guess it.
Walk with Purpose: Project confidence. Be aware of your surroundings. Avoid looking lost or glued to your phone. If you need to check a map, step inside a coffee shop or store.
Social Media Lag Time: Share your amazing photos after you've left a location. Posting your real-time whereabouts can broadcast your solo status to the wrong people.
A DEEPER DIVE ON SAFETY
For many independent travelers, safety is the number one concern. We've compiled a comprehensive resource filled with actionable strategies and expert advice specifically for navigating the world on your own.
Download our free Solo Female Travel Safety Guide to build unshakeable confidence for your next adventure.
The Solo Mindset: From Loneliness to Solitude
Let’s address the elephant in the room: loneliness. It's a valid concern, but it's crucial to differentiate it from solitude. Loneliness is a lack; solitude is a presence—the presence of yourself.
Embrace Dinners for One: Bring a book or a journal. Use the time to people-watch and savor your meal without distraction.
Strike Up Casual Conversations: Chat with the barista, the park ranger, or the shopkeeper. These small interactions can provide a welcome dose of human connection without any obligation.
Schedule Calls Home: Plan a few calls with friends or family during your trip. Hearing a familiar voice can be a great reset if you're feeling isolated.
Your Co-Pilot Check
On a solo trip, your car isn't just transportation; it's your partner. Ensuring it's in peak condition is the single most important thing you can do before you leave.

The Pre-Flight Mechanical Inspection
At least one week before you depart, have your vehicle inspected by a trusted mechanic, or do it yourself if you're knowledgeable.
Tires (The Four You See and The One You Don't): Check the pressure on all four tires plus the spare. Inspect the tread depth using the "penny test." If the tread doesn't cover Lincoln's head, you need new tires.
Fluids: Check your oil, coolant, brake fluid, and windshield washer fluid. Get an oil change if you're within 1,000 miles of your next service interval.
Brakes: Listen for squealing. Feel for any vibration when braking. Don't compromise here; get them checked if there's any doubt.
Battery: Look for corrosion (a white, powdery substance) on the terminals. If your battery is over three years old, have it load-tested at an auto parts store (it's often free).
Lights & Wipers: Test all lights. Replace wiper blades if they're cracked or leave streaks. A sudden downpour is a terrible time to discover they're useless.
Building the Ultimate Roadside Emergency Kit
A well-stocked kit can turn a trip-ending crisis into a manageable inconvenience. Having a comprehensive checklist is key. A great starting point for any major is our International Travel Checklist, which you can adapt for a domestic journey.
Jumper cables and a portable jump starter
Tire pressure gauge and a portable 12V air compressor
A complete first-aid kit
A powerful LED flashlight or headlamp (with extra batteries)
Basic toolkit (multi-tool, adjustable wrench, screwdrivers, gloves)
Duct tape and zip ties
Reflective warning triangles
A warm blanket, emergency rain poncho
High-energy, non-perishable snacks (protein bars, nuts)
At least one gallon of water
Pro-Tip: A portable jump starter (a small lithium-ion battery pack) is the best safety device a solo traveler can buy. It allows you to jump-start your own car without the need for another vehicle or the risk of asking a stranger for help.
Frequently Asked Questions
How much should I budget for a solo road trip?
Your main costs will be fuel, lodging, and food. A good starting point for a domestic US trip is to budget $150-$250 per day. This can be much lower if you're camping and cooking your own meals, or higher if you prefer nicer hotels and restaurants. Always add a 15-20% contingency fund for unexpected costs.
What's the best way to stay safe at rest stops or gas stations?
Choose busy, well-lit locations whenever possible. Before you get out of the car, take a moment to observe your surroundings. Stay off your phone, be aware of who is around you, and trust your gut instinct. If a place feels unsafe, leave and find the next one.
Is it better to book all my accommodations in advance for a solo trip?
We recommend a hybrid approach. Book your first and last nights in advance to reduce stress. For the nights in between, having flexibility is great, but it's wise to book your next night's stay at least 24 hours in advance, especially in popular areas, so you're not left scrambling at dusk.
Turn the Key: Your Adventure Begins Now
The journey of a thousand miles begins not with a single step, but with a decision—the decision to prepare. By now, the idea of a solo adventure should feel less like a daunting challenge and more like an exciting, achievable reality. You have the framework for careful planning, the knowledge to build a strong safety net, and the checklist to ensure your vehicle is a reliable partner.
You are equipped to handle the road with confidence and embrace the unparalleled freedom that only solo road trips can offer. The open road is not just a path to a new destination; it’s a path to a more capable and self-aware version of yourself. The planning is part of the adventure. The preparation is part of the empowerment. Now, it's time to put it all into action. Go create a story that is entirely your own.

Don't Miss Out! Subscribe for Exclusive Content
SubscribeComments 0
No comments yet
Be the first to share your experience!
Dont Miss Out! Subscribe for Exclusive Content
San Francisco Cherry Blossoms: A Local's Guide to the Blooms
Halloween SF: Haunts Without Horrors
SF Festivals: 7 Must-See Lineups
Christmas SF: Lights & Wharf Wonders
SF Pride: 6 Route & Party Hacks