How to Start Affiliate Marketing as a Travel Creator
TrekGuider @trekguider
You’ve built an audience that hangs on your every word. They trust your travel advice, save your destination guides, and flood your DMs asking for your gear recommendations. You have the passion and the platform, but there’s a frustrating disconnect: your content isn’t generating the income you need to make this a sustainable career. You see other creators seemingly living the dream, funding their travels through their content, and you’re left wondering, “What’s the missing piece?”

The missing piece isn’t a secret; it’s a business model. The global affiliate marketing industry is on a trajectory to surpass $93 billion, and the creator economy is right there with it. For travel creators, this intersection is the single greatest economic opportunity of our time. The average monthly income for affiliates in the travel niche is a reported $13,847—a figure that proves this isn't a side hustle; it's a serious enterprise. But from the outside, it can feel like a complex maze of networks, links, and legal jargon.
This is your way through the maze. This guide is your definitive, zero-to-launch roadmap to start affiliate marketing the right way. We’re cutting through the noise to give you a simple, actionable, step-by-step process for transforming your trusted recommendations into a powerful and predictable revenue stream. This is your blueprint for building a real business. For a complete command of the entire landscape, from program deep-dives to advanced conversion tactics, our comprehensive pillar guide to Travel Affiliate Programs: The 2026 Ultimate Guide is your essential next read.
Building Your Foundation (Before You Touch a Link)
Let’s address the single biggest mistake new creators make: they chase the links first. They see affiliate marketing as a task of finding products and sprinkling links across a page. This is backward. Elite affiliate marketing isn’t about selling; it’s the final, natural step in the process of serving an audience. Before you ever apply to a single program, you must build these three non-negotiable pillars.
Step 1: Define Your Niche (The Most Critical Decision You'll Make)
The travel market is a roaring ocean. Trying to be a general "travel creator" is like trying to boil that ocean. You’ll exhaust yourself and make no impact. Your first and most important task is to specialize. A well-defined niche allows you to become the undisputed expert for a specific group of people, building the kind of deep trust that makes monetization feel effortless.
A powerful niche exists at the intersection of three circles:
Your Authentic Passion: What part of travel makes you come alive? Is it the grit of adventure travel, the elegance of luxury hotels, the history of ancient sites, or the thrill of finding the best street food? Your genuine enthusiasm is an un-fakeable asset.
Proven Audience Demand: Are people actively searching for information on this topic? Use free tools like Google Trends or simply type phrases into the Pinterest and TikTok search bars to see what queries autocomplete. That’s your demand signal.
Clear Monetization Potential: Are there high-quality products, services, or experiences within this niche that you can confidently recommend?
Don't be a "travel blogger." Be the go-to resource for:
Budget Family Road Trips in the American Southwest
Luxury Eco-Tourism & Conservation in Costa Rica
Solo Female Backpacking in Southeast Asia
Digital Nomad Life & Co-working in Eastern Europe
A sharp niche makes every subsequent step—from content creation to product selection—infinitely easier and more effective.
Step 2: Build Your Owned Platform (Your Digital Command Center)
Instagram, TikTok, YouTube—these are phenomenal tools for reaching people and building community. But they are rented land. An algorithm change can vaporize your reach overnight. Your single most important business asset is a platform you own and control: your website.
An owned website is your digital home base. It’s where you:
Exercise Full Control: You dictate the content, the user experience, and the monetization strategy.
Build a Long-Term Asset: A well-optimized article can rank on Google for years, becoming an evergreen asset that drives traffic and affiliate sales while you sleep.
Establish Unshakable Credibility: A professional website signals to your audience, brands, and affiliate managers that you are a serious business owner.
This is where you need a digital command center. While a traditional blog is a fine starting point, modern creator platforms are built to accelerate this process. On the TrekGuider Seller Platform, for instance, your articles, bio, social links, and digital products all live in one central hub—instantly establishing you as a multi-faceted expert, not just a blogger.
Step 3: Create a Library of Foundational, High-Value Content
Before you ask for the sale, you must first provide immense value. Affiliate managers are looking to partner with creators who have a proven ability to engage an audience. Your job is to build a small library of 5-10 "pillar" content pieces that are purely focused on helping your audience solve a problem.
This content should not have a single affiliate link. Its sole purpose is to build trust and showcase your expertise. Examples include:
"The Perfect 7-Day Itinerary for First-Timers in Rome"
"The Ultimate Packing List for a Safari in Tanzania"
"10 Costly Mistakes to Avoid When Planning a Trip to Japan"
By creating this content first, you build a portfolio that makes your affiliate applications irresistible. You’re not just another hopeful creator; you’re a valuable partner with a demonstrated track record.

The Launch Sequence (From Application to First Commission)
With your foundation poured and cured, it’s time to start framing the house. This is the launch sequence—the phase where you strategically integrate monetization and work toward that first, exhilarating commission.
Step 4: How to Start Affiliate Marketing Program Selection
The goal here is precision, not volume. Joining dozens of programs leads to overwhelm and inaction. Start by identifying and joining 3-5 core programs that are a perfect fit for your niche. The most resilient strategy is a hybrid one:
Join a Major Network: An affiliate network acts as a marketplace, giving you access to hundreds of brands through a single dashboard. A travel-specific network like Travelpayouts or a broad one like CJ Affiliate is the perfect place to start.
Partner Directly with Core Brands: Identify the handful of brands your audience already knows, uses, and trusts. If you focus on outdoor adventure, a direct partnership with REI is non-negotiable.
Pro-Tip: When evaluating programs, look beyond the commission percentage. A 30-day "cookie duration" (the window in which you get credit for a sale after a click) is far more valuable than a high commission with a 24-hour window, especially for considered purchases like travel.
Step 5: Get Your Unique Links and Weave Them In
Once approved, you’ll gain access to your affiliate dashboard. This is where you’ll find your unique tracking links. Now, revisit your foundational content and look for natural, organic opportunities to place them. The key is to be a helpful guide, not a pushy salesperson.
Contextual In-Text Links: "For our day trips, we booked everything through Viator, which had the best cancellation policies."
Visually Distinct Buttons & Boxes: Use eye-catching design elements for your most important recommendations to make them stand out.
Specific Calls-to-Action (CTAs): Ditch "Click Here." Use compelling, specific language like, "Check Prices & Availability on Booking.com" or "See the Latest Reviews on Tripadvisor."
Pro-Tip: Transparency is the foundation of trust. The U.S. Federal Trade Commission (FTC) legally requires you to disclose your affiliate relationships. Place a clear, simple disclosure at the very top of any post containing affiliate links. A simple, "This post contains affiliate links, which means I may earn a commission if you make a purchase at no extra cost to you," is perfect.
Scaling Your Success (The Path to a Full-Time Income)
Earning your first commission is a monumental milestone. It’s proof of concept. Now, it’s time to build a system for sustainable growth that can transform this into a reliable, full-time income stream.
Step 6: How to Start Affiliate Marketing Traffic Generation
Great content with affiliate links is useless without eyeballs. Your affiliate business lives and dies by its ability to attract the right audience. Focus your energy on two primary channels:
Search Engine Optimization (SEO): This is your long-term wealth-building strategy. Focus your SEO efforts on keywords with commercial investigation intent. These are the phrases people use when they are actively researching a purchase. Think "best carry-on luggage for Europe," "Viator vs. GetYourGuide," or "SafetyWing insurance review." Ranking for these terms attracts an audience that is already primed to buy.
Social Media & Email Promotion: This is your short-term traffic-driving strategy. Every time you publish a new monetized article, promote it across your social channels and to your email list to get an immediate influx of engaged readers.
Step 7: Analyze, Optimize, and Scale
You cannot improve what you do not measure. Your affiliate dashboards are a goldmine of data. Every month, review your analytics and ask:
Which articles are driving the most clicks and commissions?
Which products are resonating most with my audience?
What questions are people asking that I can answer with a new piece of content?
Use this data to double down on what’s working. If your review of a specific hiking boot is generating consistent sales, create a comprehensive guide to "The Best Hiking Gear for the Pacific Crest Trail." This data-driven approach is what separates amateurs from professional affiliate marketers.
Frequently Asked Questions for New Creators
1. How much does it cost to start affiliate marketing? The startup costs are incredibly low. You can start a professional website with a domain name and hosting for less than $100 a year. The primary investment is your time in creating high-quality content.
2. How long does it take to start making money? This depends on your niche and your ability to create helpful content and drive traffic. It's realistic to expect to earn your first commission within 3-6 months if you are consistent. Think of the first six months as building the foundation of a business that will pay you for years to come.
3. Can I do affiliate marketing without a blog or website? While you can share links on social media or in a newsletter, it's highly discouraged as a primary strategy. A website is an asset you own. It builds credibility, allows for long-form content that ranks on Google, and insulates you from the risk of being de-platformed.
Ready to Build Your Travel Content Business?
Download our free resource bundle, The Travel Creator's Toolkit, is packed with the checklists, content templates, and guides you need to put these steps into action and start building your affiliate income today.
Your Business Blueprint is Set
To start affiliate marketing is to start a real business. By following this framework—building a solid foundation, launching with precision, and scaling with data—you have the exact blueprint for success. You are no longer just a creator sharing your passion; you are the CEO of a modern media company.
The path is clear. The opportunity is immense. Your journey from passionate traveler to profitable creator starts now.
Read the full guide: The Travel Blogger's Playbook to Affiliate Marketing Mastery
Don't Miss Out! Subscribe for Exclusive Content
Subscribe


Comments 0
No comments yet
Be the first to share your experience!
Dont Miss Out! Subscribe for Exclusive Content

FTC Affiliate Disclosure Essentials: Stay Compliant as a Travel Creator

Essential Affiliate Tools: From Tracking to Full Optimization

Avoid These 5 Affiliate Landing Page Mistakes for Better Conversions

Affiliate Keyword Research Mastery for Travel Blogs

Booking.com Affiliate Program Review: Pros, Cons, and Earnings Potential

Decoding Affiliate Commission Rates: Benchmarks for Travel Creators
How to Plan a Stress-Free Hawaii Family Trip
TrekGuider @trekguider
Planning a family trip to Hawaii should feel exciting, but the reality can be overwhelming. You're juggling how to pack for unpredictable weather, what activities will actually entertain everyone from toddlers to teens, and how to manage the logistics without losing your mind. The fear of getting it wrong—forgetting something crucial or planning a day that ends in meltdowns—can quickly overshadow the promise of paradise.

Imagine arriving on Maui only to realize you’ve forgotten the reef-safe sunscreen now required by law, forcing a frantic, expensive search. Picture the meltdowns—from kids and adults alike—when a carefully planned beach day is met with groans of boredom, or the crushing disappointment of discovering the lūʻau you dreamed of has been sold out for weeks. Without a strategic plan, the logistical details can overshadow the magic you’re seeking.
This guide is the antidote to that anxiety. It’s your strategic playbook, crafted from hard-won experience to eliminate the guesswork and transform your planning process into an exciting prelude to your adventure. While this article drills down into Hawaii-specifics, it's part of our complete library of Family Travel Ideas: The 2026 Guide to Unforgettable Trips. Consider this your roadmap to a seamless, stress-free, and truly magical Hawaiian escape.
What to Bring and What to Leave Behind
A successful packing strategy for Hawaii isn't about bringing everything; it's about bringing the right things. The islands’ unique environment—from intense equatorial sun to sudden tropical showers—demands a thoughtful approach. For a deep dive into the core principles, our How to Pack Light Guide is a great resource. This Hawaii-specific blueprint ensures you’re prepared for every possibility without hauling unnecessary weight across the Pacific.
Your In-Flight & First-Day Survival Kit
Think of your carry-on bag as your mission-critical command center. If your checked luggage gets delayed, this bag should contain everything you need to not just survive, but thrive for the first 24 hours.
A Complete Change of Clothes for Everyone: One full, lightweight outfit per person. Don't forget underwear and socks.
Swimsuits: This is non-negotiable. You can change in the lobby restroom and head straight to the pool, starting your vacation immediately.
Essential Medications: All prescription medications, plus a small first-aid kit with children’s pain relievers, allergy medicine, band-aids, and antibacterial ointment.
Documents & Valuables: IDs, credit cards, and digital or printed copies of your key reservations (hotel, rental car, first big tour).
The "Boredom Buster" Kit: Fully charge all electronics and pre-load them with movies and games. For younger kids, pack a small bag with a new coloring book or a few wrapped dollar-store toys to reveal mid-flight.
A Feast of Snacks: Pack more than you think you’ll need to combat travel delays and grumpy tummies.
Empty Reusable Water Bottles: Fill them up post-security to stay hydrated and save money.
Your Flight Plan for Happy Kids
The long flight to Hawaii is often the most dreaded part of the trip. To make it a breeze, download our free, sanity-saving checklist.
Stress-Free Flying with Kids Guide
It's packed with simple, actionable tips to keep kids of all ages happy and occupied from takeoff to landing.
The Checked Luggage
Chaos is the enemy of a relaxing vacation. To combat this, we rely on a modular system built around packing cubes. This simple technique transforms your luggage from a chaotic pit into a structured, mobile dresser where everything has its place.

The Clothing System (Lightweight & Layered): Hawaii’s climate is defined by humidity and trade winds. Pack lightweight, breathable fabrics like cotton and linen. Focus on mix-and-match pieces. For a week, plan on 5-6 tops and 3-4 bottoms per person. Everyone should have a light jacket or cardigan for breezy evenings and a packable rain jacket.
The Beach Gear System (Protect & Play): This is the core of your Hawaii packing.
Reef-Safe Sunscreen: An absolute must. Pack at least one large tube of mineral-based (zinc oxide or titanium dioxide) sunscreen lotion.
Total Sun Protection: Wide-brimmed sun hats, UV-protective sunglasses, and long-sleeved rash guards for every family member.
Minimalist Beach Toys: A collapsible bucket and a few small shovels are all you need.
Goggles: For kids who love to put their face in the water, a good pair of goggles is invaluable.
The Footwear System (The Rule of Three): You only need three pairs of shoes per person.
Water Shoes/Aqua Socks: Essential for exploring rocky tide pools or beaches with sharp lava rock.
Sandals/Flip-Flops: For the beach, pool, and casual strolls.
Closed-Toe Shoes: A comfortable pair of sneakers for travel days, hikes, or activities like ziplining.
What to Leave at Home (And Rent or Buy in Hawaii)
Beach Towels: Every hotel and condo complex will provide these.
Bulky Floaties and Pool Noodles: Buy them there and leave them for another family when you depart.
Full-Sized Snorkel Sets: Renting high-quality, sanitized equipment on the island is far more convenient.
Formal Wear: Hawaii is overwhelmingly casual. A sundress or a collared shirt with nice shorts is as dressed-up as you’ll need to get.
Pro-Tip: Assign each family member a specific color of packing cubes. This simple trick makes it incredibly easy to identify whose clothes are whose.
Crafting Your Perfect Itinerary for Family Beach Vacations in Hawaii
While building sandcastles is a rite of passage, the true magic of Hawaii lies in its diverse experiences. Tailoring activities to your children's developmental stage is the secret to a trip that engages everyone. And to keep it all organized, our Travel Itinerary Template is a game-changer.
For Families with Toddlers & Preschoolers (Ages 0-5)
At this age, the goals are safety, sensory engagement, and maintaining routines. Focus on manageable outings that spark wonder without causing overstimulation.
Master the Art of the Lagoon: The man-made lagoons of Ko Olina on Oahu are a toddler parent’s paradise. The water is virtually waveless, creating a giant, safe saltwater pool. On Kauai, Lydgate Beach Park offers similarly protected swimming.
Meet the Marine Life (Up Close): The Maui Ocean Center is a world-class aquarium with a walk-through tunnel and touch pools. The Waikiki Aquarium on Oahu is smaller but equally captivating.
Discover the Magic of Shave Ice: Don't underestimate the joy of this simple treat. Trying authentic Hawaiian shave ice is a core memory on a hot afternoon.

For School-Aged Kids (Ages 6-12)
This is the golden age of family travel. Kids are old enough for bigger activities and to truly learn from their experiences.
Become a Junior Snorkeler: This is the perfect age to introduce kids to the underwater world. Start at an ultra-calm spot like Kapalua Bay on Maui or Hanauma Bay on Oahu (reservations required!).
Experience a Family Lūʻau: A lūʻau is a quintessential Hawaiian experience. Opt for one known for being family-friendly, like the Smith Family Garden Lūʻau on Kauai.
Become a Volcano Voyager: On the Big Island, a visit to Hawaiʻi Volcanoes National Park is like a real-life science lesson. Pick up a Junior Ranger booklet to transform your kids into active explorers.

For Teenagers (Ages 13-18)
For teenagers, the key is balancing family time with a sense of independence and adventure. Involve them in the planning.
Learn to Surf: Book a group lesson from a reputable surf school in a beginner-friendly area like Waikiki on Oahu or Kihei on Maui.
Conquer an Epic Hike: Challenge your teens with an iconic hike like the summit of Diamond Head on Oahu, which offers panoramic vistas of Waikiki.
Zipline Through Paradise: Soaring through the rainforest canopy on a zipline is a pure adrenaline rush that provides a thrilling adventure for the whole family.
Pro-Tip: The most popular activities in Hawaii—especially lūʻaus, timed-entry parks like Hanauma Bay, and surf lessons—book up weeks, if not months, in advance. Make your reservations the moment you have your travel dates confirmed.
The Aloha Code: Essential Rules for a Safe and Respectful Trip
A little local knowledge goes a long way. These are the non-negotiable rules for any family visiting the islands.
Ocean Safety Comes First
The Pacific Ocean is powerful. The most important rule in Hawaii is "Never turn your back on the ocean." Rogue waves can appear on even the calmest-looking days.
Swim at Lifeguarded Beaches: Whenever possible, choose a beach with a lifeguard on duty.
Understand Shore Break: Many Hawaiian beaches have a powerful shore break, where waves crash directly onto the sand. This can be dangerous for young children.
Respect the Warnings: Pay attention to all posted warning signs regarding strong currents, high surf, or dangerous marine life.
Protecting the 'Āina (Land)
Hawaii's coral reefs are fragile, living ecosystems. Protecting them is not just a suggestion; it's the law.

Use Mineral-Based LOTION Only: By law, you must only use sunscreens with zinc oxide or titanium dioxide. Critically, avoid aerosol sprays. Even "reef-safe" sprays settle on the sand and wash into the ocean, harming the reef.
Apply Early and Often: Apply sunscreen 20 minutes before sun exposure and reapply every two hours, or immediately after swimming.
Respecting the Wildlife
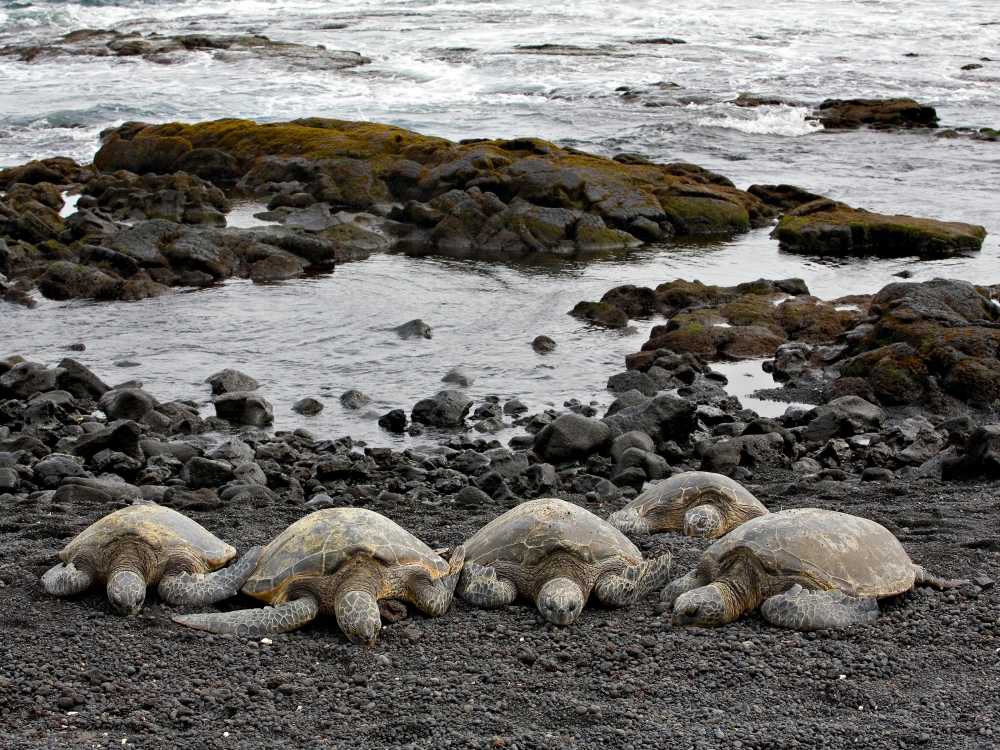
Hawaii is home to the Hawaiian green sea turtle (honu) and the endangered Hawaiian monk seal.

Keep Your Distance—It's the Law: You must maintain a distance of at least 10 feet (3 meters) from sea turtles and 50 feet (15 meters) from monk seals. It is illegal to touch, chase, or harass them.
View Responsibly: Use a zoom lens for photos. If an animal approaches you, calmly and slowly move away.
Frequently Asked Questions
What is the single most important thing to pack for a Hawaii family trip?
The most crucial item is reef-safe, mineral-based sunscreen LOTION. Sunscreens containing oxybenzone and octinoxate are banned in Hawaii to protect the coral reefs, and aerosol sprays are highly discouraged as they pollute the sand and water.
Is Hawaii a safe destination for toddlers and young children?
Absolutely. Many beaches are perfect for little ones, especially the man-made lagoons at Ko Olina on Oahu or the protected rock ponds at Lydgate Beach Park on Kauai, which have calm, waveless water perfect for safe splashing.
Do I really need to book Hawaiian activities in advance?
Yes, it is critical. Popular activities like lūʻaus, boat tours, surf lessons, and timed-entry parks like Hanauma Bay on Oahu often sell out weeks or even months in advance. Booking ahead is essential to avoid disappointment.
What are the essential types of shoes to bring to Hawaii?
You only need three pairs per person: water shoes for rocky beaches and tide pools, comfortable sandals or flip-flops for the beach and pool, and a pair of closed-toe sneakers for travel days and hiking.
Conclusion
The key to crafting the perfect trip isn’t about finding a secret beach; it’s about making a series of smart, informed choices. By implementing a strategic packing system and thoughtfully selecting age-appropriate activities, you transform the stress of planning into the joy of anticipation. You now have the framework to pack with confidence and design an itinerary that weaves together relaxation, adventure, and connection. This is how you create the legendary Hawaiian family vacation that becomes a key part of your family's story. For even more in-depth strategies on planning unforgettable trips anywhere in the world, explore our comprehensive Travel Guide. Aloha.
Read the full guide: Family Travel Ideas: The 2026 Guide to Unforgettable Trips
Don't Miss Out! Subscribe for Exclusive Content
SubscribeComments 0
No comments yet
Be the first to share your experience!
Dont Miss Out! Subscribe for Exclusive Content

Ultimate USA Holidays Guide: Top Picks
FTC Affiliate Disclosure Essentials: Stay Compliant as a Travel Creator
Essential Affiliate Tools: From Tracking to Full Optimization
Booking.com Affiliate Program Review: Pros, Cons, and Earnings Potential
Decoding Affiliate Commission Rates: Benchmarks for Travel Creators

Amazon Associates for Travel: Strategies to Maximize Commissions
How to Travel Europe Alone: A 2026 First-Timer's Guide
TrekGuider @trekguider
You see the photos and you feel the pull. The ancient stones of the Colosseum bathed in golden light, the staggering peaks of the Swiss Alps, the charming canals of Amsterdam—a European adventure calls to you. But a shadow of apprehension quickly follows. The thought of navigating this vast, diverse continent entirely on your own feels overwhelming, even paralyzing. How do you even begin to compare a Eurail pass to a budget flight? How do you stay safe from the sophisticated tourist scams you’ve heard about in crowded piazzas? The logistical and safety concerns can feel like an insurmountable mountain, turning a lifelong dream into a source of anxiety.

This guide is your step-by-step plan to conquer that mountain. It is the definitive, practical blueprint for your first solo female travel Europe adventure, designed to replace abstract fear with concrete knowledge and confident action. This isn't just about seeing Europe; it's about discovering your own capability. For a complete overview of a solo traveler's journey, be sure to read our comprehensive pillar article, The Ultimate Guide to Solo Female Travel (15 Essential Tips).
Why Europe is the Perfect Stage for Your First Solo Trip
Before we dive into the logistics, let's establish why Europe is arguably the best destination on earth for a first-time solo traveler. Think about it: where else on Earth can you find such an unparalleled density of cultures, languages, and histories packed into a single, navigable continent? You can have breakfast with Belgian waffles in Brussels, lunch beneath the Eiffel Tower in Paris, and a late-night pasta in Lyon—all in a single day, if you’re ambitious.
More importantly, the tourist infrastructure is second to none. Reliable and extensive public transportation, a wide range of accommodation from social hostels to private hotels, and the widespread use of English in major hubs significantly lower the barrier to entry. Furthermore, numerous European countries consistently rank among the safest and most peaceful in the world. The 2026 Global Peace Index, for instance, lists countries like Iceland, Ireland, Portugal, and Slovenia in its top tiers, making them outstanding choices for building your solo travel confidence.

Conquering the Continent: A First-Timer's Guide to European Transport
Your biggest logistical decision will be how to move between cities and countries. Europe offers a fantastic array of options, each with a distinct balance of cost, speed, and experience. Your choice will define the rhythm of your trip.
Pro-Tip: Don't commit to a single mode of transport for your entire trip. The savviest travelers use a hybrid approach. Use budget airlines for long-haul jumps across the continent, scenic trains for shorter regional travel where the journey is the destination, and buses for budget-friendly hops between nearby cities.
Nailing your transportation strategy is the first step to unlocking the continent. Now, let’s talk about the fuel for your adventure: your budget. For a solo traveler, who bears the full cost of every room and ride, this is where savvy planning truly pays off.
Smart Budgeting for Solo Female Travel Europe: West vs. East
The single most important factor influencing your budget in Europe is geography. A week in Western Europe can easily cost double what you’d spend in the East, and understanding this allows you to craft an itinerary that matches your bank account.
The Paris vs. Prague Paradigm: A Tale of Two Budgets
To understand this disparity, let’s compare the approximate daily costs for a "Budget Soloist" in two iconic capitals, based on data synthesized from cost-of-living aggregator sites.
Accommodation: This is the biggest driver of cost. A bed in a well-rated hostel dorm in Prague might cost you €25. In Paris, a similar dorm will likely start at €50.
Food: A hearty, traditional sit-down dinner in Prague can be found for €10-€15. A comparable meal in a Parisian bistro could easily be €25-€35.
Daily Total: When you add in local transport and activities, a budget-conscious solo traveler could comfortably explore Prague on around €65 per day. To maintain a similar travel style in Paris, you would need to budget at least €115 per day.
This doesn't mean you should skip Western Europe. It means you should plan for it. You can balance your overall trip budget by spending more time in affordable countries like Poland, Hungary, and the Czech Republic, and shorter, more focused time in more expensive destinations like France, Switzerland, and the UK.
Your Pre-Departure Blueprint
Feeling organized is the first step to feeling confident. A detailed checklist ensures you don't miss a single crucial step, from visa applications to travel insurance. Download our free, comprehensive International Travel Checklist to start your planning process with total clarity.
Your Tactical Safety Guide to Europe

While Europe is generally very safe, its popular tourist hubs are magnets for petty crime and sophisticated scams. Your best defense is awareness. While a significant 66% of women who travel solo report worrying about their personal safety, data from recent surveys paints a more empowering picture. While 25% have found themselves in a situation they perceived as dangerous, a mere 1% were the victim of a crime. This shows that women are overwhelmingly successful at navigating the world safely. The key is trading abstract fear for concrete knowledge. This is the core of safe solo female travel Europe.
Recognizing and Dodging Common Tourist Scams
Scammers rely on distraction, confusion, and your natural inclination to be polite. By knowing their playbook, you can recognize the performance and walk away before you become a part of it.
The Friendship Bracelet/Rose Scam: Found near major landmarks, a person will approach, grab your wrist, and quickly weave a "friendship bracelet" onto it, or thrust a "free" rose into your hand. Once the item is attached or accepted, they aggressively demand payment. Defense: Keep your hands in your pockets in these areas. Do not stop walking. Use a firm, clear "No" and pull away if contact is made.
The Petition Scam: Common in cities like Paris and Berlin, a person shoves a clipboard at you for a signature. While you’re distracted, an accomplice pickpocket's you. Defense: Legitimate charities rarely operate this way. Never stop for street petitions. Ignore the person and keep moving.
The "Found Gold Ring" Scam: Someone "finds" a gold-colored ring on the ground in front of you and asks if you dropped it. They'll then offer to sell you the worthless brass ring for a "good price." Defense: Recognize it's a performance. Do not engage; simply shake your head and walk away.
The Spilled Drink/Fake Bird Poop Scam: Someone "accidentally" spills a substance on you. They will be profusely apologetic and immediately start "helping" you clean up, using the distraction to steal your wallet or phone. Defense: If a stranger spills something on you, your first move is to clutch your bag and secure your valuables. Create physical distance, firmly state, "I'm fine," and walk away to a safe place.
The Broken Taxi Meter Scam: A driver claims the meter is broken after the ride has started, then demands an exorbitant fare. Defense: Whenever possible, use reputable ride-sharing apps. With local taxis, use official stands and confirm they will use the meter before you get in.
The Secure Sanctuary: Your Hotel Room Safety Checklist
Your accommodation is your safe haven. Performing this consistent security check upon arrival provides critical peace of mind.
Prop the Door: Before entering, use your luggage to prop the main door open. This ensures an escape route if the room is unexpectedly occupied.
Sweep the Room: Do a quick but thorough search of the entire space—under the bed, in closets, behind the shower curtain.
Test All Locks: Once clear, close the door and immediately test the deadbolt, chain lock, and any other security latches. Check that all windows and balcony doors lock securely.
Deploy a Portable Lock: Use your own device, like a rubber doorstop alarm or a portable metal lock, to provide a layer of security that is entirely within your control.
Perform a Hidden Camera Scan: Use your phone's flashlight to scan for the glint of a tiny camera lens in unusual places like smoke detectors, clocks, and USB chargers. In the dark, your phone's front-facing camera is more sensitive to the small IR lights used by night-vision cameras.
Map Your Exits: Find the fire escape map on the back of the door and physically walk the route to the two nearest exits.
Pro-Tip: Your intuition is your most advanced piece of security gear. If a person, place, or situation feels "off," it probably is. Don't hesitate to leave a street or enter a different train car. You don’t need to justify this feeling; just honor it and act on it.
Crafting Your Perfect First-Time Itinerary

With your transport, budget, and safety strategies in place, the fun begins: deciding where to go! For a first-timer, the best destinations are those with excellent infrastructure, low crime rates, and an easy-to-navigate environment. Countries like Portugal, Ireland, and Slovenia are fantastic choices. They offer stunning scenery, friendly locals, and a well-trodden tourist path that makes independent travel feel seamless and secure.
For a destination that perfectly blends history, sunshine, and an incredible solo-friendly infrastructure, Spain is an incredible choice. From the energetic tapas bars of Madrid to the fantastical architecture of Barcelona, it's a country that feels made for independent exploration. Our comprehensive travel guides to Spain and Portugal contain detailed itineraries and local secrets that will make your trip unforgettable.
Frequently Asked Questions for a First-Time Solo Trip to Europe
Even with a plan, questions will pop up. Here are answers to the most common anxieties first-timers face.
Is it weird to eat alone in Europe?
Absolutely not. Dining solo is common across the continent. To feel more comfortable, choose a seat at the bar or a counter, which are natural spots for single diners. Bringing a book or a travel journal also gives you a purposeful focus.
How do I handle language barriers?
In most major tourist destinations, English is widely spoken in hotels, restaurants, and attractions. However, learning a few key phrases in the local language ("Hello," "Please," "Thank you," "Do you speak English?") is a sign of respect that goes a long way. Download the Google Translate app and pre-download the language pack for your destination for offline use.
What's the best way to meet other people?
Stay in a modern hostel (even in a private room) to access social common areas and events. Joining a free walking tour on your first day in a new city is a classic and effective strategy. Small group activities like a local cooking class or a day tour also create a natural environment for connection.
Do I really need travel insurance?
Yes. It is non-negotiable. For a solo traveler, it's your financial and logistical safety net for everything from a medical emergency to lost luggage or a canceled flight. Look for policies with strong emergency medical and evacuation coverage.

Your European Adventure Awaits
The dream of a European adventure doesn't have to remain a distant fantasy. It is an achievable, empowering, and profoundly rewarding journey that is more accessible to you now than ever before. By breaking down the process into manageable steps, you can conquer the logistics of transport and budgeting. By arming yourself with tactical safety knowledge, you can move through the world with confidence and awareness. This guide has given you the blueprint for your first solo female travel Europe adventure, transforming overwhelming questions into a clear, actionable plan.
The personal growth, resilience, and radical self-reliance you will discover on this journey will become a permanent part of who you are. The world is waiting.
Don't Miss Out! Subscribe for Exclusive Content
SubscribeComments 0
No comments yet
Be the first to share your experience!
Dont Miss Out! Subscribe for Exclusive Content

A Woman's Guide to Safe Travel: 10 Critical Tips

7 Hotel Safety & Security Tips for Peace of Mind

11 Essential Solo Travel Safety Tips You Need to Know

The Ultimate Guide to Travel Safety: A 2026 Playbook

How to Meet People While Traveling Solo (Without Being Awkward)
