How to Start a Travel Blog in 2026 (For Profit)
TrekGuider @trekguider
Do you find yourself endlessly scrolling through travel photos, dreaming of turning your own adventures into something more? The idea of starting a travel blog is captivating—a path to sharing your stories, connecting with a global community, and building a life of freedom. But that initial spark is often extinguished by a wave of overwhelm. The market seems impossibly crowded, the technical steps feel like learning a new language, and the road from passion project to profitable business is shrouded in mystery.
You see other creators living the dream, and you know you have the stories and the drive. But the fear of pouring your heart, time, and savings into a simple online diary that never earns a dime is paralyzing. You're not looking to build a hobby; you're looking to build a real asset, a brand, a business. You need more than just another checklist—you need a battle-tested business plan.
This is that plan. Forget the outdated advice. This is your comprehensive, step-by-step playbook on how to start a travel blog that is engineered for profit from day one. We’ll move beyond the basics of setting up a website and dive deep into the strategy of building a modern media brand. The goal isn't just to get you a byline; it's to get you paid. Before you can join the ranks of The Best Travel Blogs to Follow in 2026, you need a rock-solid foundation, and that’s exactly what we’re going to build—right now.
Why Start a Travel Blog in 2026? The Shift to Media Entrepreneur
Let's address the elephant in the room: is travel blogging still a viable business? The answer is an emphatic yes, but the game has fundamentally changed. The global travel blogging market, valued at an impressive $4.5 billion in 2026, is projected to double to $9 billion by 2032. That growth isn't for hobbyists; it's for savvy creators who understand the key market shift.

Success is no longer about simply documenting your trips. The most successful bloggers are evolving from content creators into media entrepreneurs. They are building focused, niche brands that serve a specific audience with unparalleled expertise. They understand that their blog is not the final product; it is the marketing engine for their actual products. This guide is built on that modern, profitable philosophy.
Phase 1: Building Your Brand Foundation (Before You Touch a Computer)
The single biggest mistake new bloggers make is rushing the technical setup. In 2026, the strategic barriers to success are significantly higher than the technical ones. Dedicate 80% of your initial effort to this phase, and you’ll be miles ahead of the competition.

Step 1: Niche Down to Stand Out
The era of the generalist travel blog is over. To succeed, you cannot be everything to everyone. You must become the undisputed, go-to expert for a specific audience. This is called "niching down," and frankly, it’s the most critical strategic decision you'll make. A narrow focus allows you to build deep expertise, attract a loyal and targeted audience, and charge premium prices for your knowledge.
Based on current market trends, here are five sub-niches with significant growth and commercial potential for 2026:
Accessible Travel: This historically underserved market caters to travelers with disabilities, offering content on wheelchair-friendly destinations and sensory-friendly experiences.
National Parks for Families: This niche combines the booming interest in outdoor, domestic travel with the evergreen family market, providing guides on kid-friendly hikes and lodging.
Vegan Food Travel: A highly specific subset of the food travel niche, this area serves a passionate and growing demographic with guides to plant-based restaurants and cooking classes worldwide.
Digital Nomad & Remote Work Lifestyle: With the explosion of remote work, this niche focuses on the logistics of the lifestyle—managing visas, finding reliable WiFi, and balancing work with travel.
Sustainable & Eco-Tourism: Driven by a powerful wave of consumer consciousness, this niche highlights eco-friendly accommodations, low-impact tours, and tips for responsible travel.
Step 2: Define Your Ideal Reader
Once you have your niche, get granular. Create a detailed profile of your ideal reader. Don't just think about demographics; think about psychographics.
What are their biggest travel-related frustrations?
What does their dream trip look like, and what's stopping them from taking it?
What kind of budget are they working with?
What questions do they type into Google at 11 PM while trip planning?
Understanding their pain points is the key to creating content and products they will feel were made just for them.
Step 3: Choose a Brandable Blog Name
Your blog name is a critical piece of your brand identity. It should be memorable, easy to spell, and hint at what your blog is about. Follow this practical framework to find the perfect name:
Keyword Brainstorming: List words associated with your niche, tone, and audience. For a "Sustainable & Eco-Tourism" blog, you might list: Green, Conscious, Atlas, Compass, Earth, Kind, Trek, Journey, Collective.
Apply Naming Formulas: Experiment with common conventions using your keywords.
Niche-Specific: The Vegan Voyager, The Frugal Flier
Alliteration: Roaming Roads, Compass Chronicles
Evocative & Abstract: The Saffron Trail, Velvet Atlas
Modern & Simple: The Travel Edit, Trip Theory
Verify Availability: This is non-negotiable. Your chosen name must be available as a .com domain. A ".com" is the universal standard and signals professionalism. Simultaneously, check if the name is available as a consistent handle on your primary social media platforms (Instagram, TikTok, Pinterest, etc.).
Conduct Conflict Avoidance: Do a quick Google search to ensure the name isn't already heavily associated with another major brand.
Pro-Tip: Your blog name is your brand's first impression. A short, memorable, and easily pronounceable name with an available .com domain is the gold standard for building a serious online business.
Step 4: Secure Your Digital Real Estate
Found a name that's available? Don't wait. Immediately purchase the .com domain and create the social media accounts. This secures your brand identity across the web, even if you don't plan to use all the platforms right away.
Phase 2: The Smart Launchpad — Build Your Business, Not Just a Website
With your brand strategy set, it's time to build your blog's home. For years, this meant wrestling with web hosting, WordPress installations, themes, and a dozen plugins before you could even write a word. This was the slow, expensive, and technically frustrating path.
In 2026, the smartest creators are skipping that entire phase. Instead of building a house from scratch on an empty plot of land, they're launching their business from a penthouse suite in a bustling city. They are plugging directly into a marketplace ecosystem like TrekGuider, which is designed specifically for travel entrepreneurs. This approach lets you bypass the technical headaches and focus on what actually drives your business forward: creating high-value content and selling digital products.

Step 5: Launch Your Professional Creator Page in Minutes
Instead of buying a domain and hosting, your first step is to set up your professional creator page on the TrekGuider marketplace. This is your new home base, a beautiful, pre-built landing page that establishes your brand's credibility from day one—no coding or design skills required. Within minutes, you can have:
A professional bio and profile photo that tells your story.
A showcase for your digital products, front and center.
A feed of your latest articles published on the platform.
Direct links to all your social media channels.
A built-in donation feature for your audience to support you directly.
Step 6: Upload Your Digital Products and Start Selling
The old way involved researching and configuring complex e-commerce plugins. The TrekGuider way is to simply upload your digital products. Whether you've created a custom map, an in-depth city guide, a PDF itinerary, or an e-book, our platform is built to handle the sale and delivery. You can start monetizing your expertise immediately by listing your products in our catalog, where they're discoverable by a global audience of travelers ready to buy.
Step 7: Publish Your First Articles and Tap into a New Audience
Forget worrying about SEO plugins and site speed. Your blog now lives within our Articles and News section. You can publish your high-quality, long-form content directly onto the platform. Every article you publish is automatically featured on your creator page and becomes discoverable to the entire TrekGuider community. You're not just writing for your existing audience; you're tapping into a built-in stream of traffic from day one, dramatically accelerating your growth.
Step 8: Focus on Creation, Not Maintenance
By building your presence on our marketplace, you eliminate the hidden work that plagues self-hosted bloggers: website security, plugin updates, theme compatibility issues, and performance optimization. We handle the entire technical infrastructure. Your time is freed up to focus on the only two things that will grow your income: creating exceptional content that helps travelers and developing valuable digital products they want to buy. This is the ultimate accelerator for building a travel blog for profit.
Phase 3: Content Strategy & Launching for Profit
With your brand strategy in place and your website built, you're ready to focus on the two things that will actually grow your business: creating world-class content and intelligent monetization.
Step 9: Develop Your Foundational Content Strategy
Before you write a single word, plan your first 10-20 "pillar" articles. These are in-depth, foundational posts that cover the core topics of your niche. A solid content strategy ensures you are purposefully creating assets that will attract your ideal reader and rank in search engines. This is the real secret behind how to start a travel blog that gets traffic. For example, if your niche is "National Parks for Families," your pillar posts might be "The Ultimate Guide to Visiting Yellowstone with Kids" and "10 Best Toddler-Friendly Hikes in Zion National Park."
Step 10: Writing and Publishing Your First Posts
With your content plan in place, it's time to create. Focus on producing the highest quality content possible. Your goal is to be so incredibly helpful that your readers feel like they've struck gold. Write in-depth, solve their problems, and let your unique personality shine through. Publish at least 5-10 of your pillar articles before you officially "launch" your blog to the world.
Step 11: Monetization: Planning for Profit from Day One
A profitable blog diversifies its income. While there are five primary monetization models, one stands far above the rest for long-term, scalable profit.
The future is selling your own digital products.
While display ads seem like the easiest path, they are the least profitable. To make a significant income, you need massive traffic. Digital products, on the other hand, allow you to generate substantial revenue with a much smaller, more engaged audience. The data is clear: recent blogger surveys show the average revenue per 1,000 visitors (RPM) for digital products can be as high as $283.64, compared to just $33.80 for ads.

A simple calculation shows that if just 0.2% of 50,000 monthly visitors (100 people) buy your $30 digital product, you earn $3,000. That same traffic might only generate $1,000-$2,000 from ads. This is the core of the modern travel creator's business model. Instead of earning pennies from ads, you build valuable assets that solve your audience's problems directly.
A few examples of high-value digital products include:
A hyper-detailed "7-Day Off-the-Beaten-Path Itinerary for Kyoto."
A Lightroom "Tropical Blues & Greens" preset pack.
A comprehensive travel planning template for Notion or Google Sheets.
An e-book like "The Ultimate Guide to Travel Hacking."
And when you're ready to sell your own itineraries, templates, or photo presets, a platform like the TrekGuider Platform gives you the tools to build your own digital storefront, connect directly with your customers, and build a sustainable business you control.
Frequently Asked Questions
How much does it really cost to start a travel blog?
While you can start for a very low cost, plan for a realistic initial investment of $150-$200 for your first year. This covers three years of quality hosting (like Hostinger, to lock in low rates), your domain name, and a premium theme. Think of it as the startup cost for your business.
How long does it take to make money travel blogging?
Treat it like a business, not a get-rich-quick scheme. It typically takes 6-12 months of consistent, high-quality content creation and promotion before you start seeing meaningful traffic from search engines. Most bloggers start earning their first significant income in the 12-24 month range.
Do I need to be traveling full-time to have a travel blog?
Absolutely not. Some of the most successful blogs are run by people with full-time jobs who are experts on a specific destination or travel style (e.g., weekend trips, maximizing vacation days). Your expertise and the value you provide are far more important than being a full-time nomad.
Your Journey as a Creator Starts Now
Starting a travel blog in 2026 is less about being a writer and more about being an entrepreneur. It's about building a focused brand, serving a specific audience with undeniable value, and creating assets that generate income long after you've hit "publish." You are no longer just a traveler; you are the CEO of your own media company.
The path from dreamer to doer is paved with strategic action. You now have the complete playbook for how to start a travel blog for profit in 2026. The overwhelm is gone, replaced by a clear, step-by-step plan.
Your journey starts now. Take the first step, choose your niche, and start building the travel media brand of your dreams.
Meta Data Suggestions:
SEO Meta Title (59 characters): How to Start a Travel Blog in 2026 (For Profit)
URL Slug: how-to-start-a-travel-blog
SEO Meta Description (154 characters): A step-by-step business playbook for aspiring creators. Learn how to start a travel blog for profit, from niche selection and tech setup to monetization.
Don't Miss Out! Subscribe for Exclusive Content
Subscribe


Comments 0
No comments yet
Be the first to share your experience!
Dont Miss Out! Subscribe for Exclusive Content

FTC Affiliate Disclosure Essentials: Stay Compliant as a Travel Creator

Essential Affiliate Tools: From Tracking to Full Optimization

Avoid These 5 Affiliate Landing Page Mistakes for Better Conversions

Affiliate Keyword Research Mastery for Travel Blogs

Booking.com Affiliate Program Review: Pros, Cons, and Earnings Potential

Decoding Affiliate Commission Rates: Benchmarks for Travel Creators
How to Stay Safe While Hiking: A Hiker's Safety Guide
TrekGuider @trekguider
The call of the trail is a powerful one. It promises sweeping vistas, the quiet solitude of the forest, and the profound satisfaction of reaching a summit under your own power. But for all its beauty, the wilderness is impartial and unforgiving. The same trail that offers bliss on a sunny morning can present serious danger when the weather turns, a wrong turn is made, or an ankle is twisted. This is the problem every hiker faces: the gap between the adventure we dream of and the preparation it demands.
That gap is often filled with anxiety. A flicker of doubt about reading the map, a worry about the approaching clouds, or a sudden fear of what that noise was in the undergrowth can rob an incredible experience of its joy. Too often, hikers—both novice and experienced—find themselves in serious trouble simply by underestimating the trail and overestimating their preparedness. According to Search and Rescue (SAR) teams, most emergencies are the result of small, preventable mistakes. This guide is your definitive playbook for closing that gap for good. We’re providing the essential, expert-backed hiking safety tips you need to move through the backcountry with unwavering confidence. This isn't about fear; it's about empowerment. By mastering these skills, you’re ensuring every hike is a safe one, a core pillar of the responsible adventurer’s mindset we explore in our definitive The Ultimate Guide to Travel Safety: A 2026 Playbook. Let’s gear up, get smart, and get you ready to hit the trail.

This journey from novice to self-sufficient hiker begins not on the trail itself, but with a simple, powerful philosophy of preparedness that has been tested and refined by generations of mountaineers and wilderness experts. It all starts with your pack.
The Foundation of Safety: The 10 Essentials System
Long before your boots touch the dirt, your safety on the trail has already been decided by one thing: what’s inside your pack. Endorsed by the National Park Service and outdoor organizations like REI, the "10 Essentials" is not just a packing list; it's a systematic approach to preparedness. It ensures you have the tools to handle common problems and survive an unexpected night outdoors. Think of these not as ten individual items, but as ten crucial systems.
Navigation: Your primary system for knowing where you are and where you’re going. This must include a physical topographic map of the area and a compass. A GPS device or a smartphone with downloaded offline maps is a great tool, but electronics can fail. A map and compass are your foolproof backup.
Illumination: You need to be able to see in the dark, period. Carry a headlamp or flashlight with a full charge, and always pack extra batteries. A headlamp is superior as it keeps your hands free for other tasks.
Sun Protection: Sunburn and sunstroke can be serious dangers on the trail. This system includes sunglasses, broad-spectrum sunscreen (SPF 30+), and a wide-brimmed hat. Sun-protective clothing can also be a game-changer.
First-Aid Supplies: You must have the ability to treat common trail injuries. Your kit should be equipped to handle blisters, cuts, scrapes, and sprains. A basic kit is good; a custom-built one is better.
Repair Kit and Tools: Gear can break. A multi-tool or knife is invaluable, and a small roll of duct tape can repair everything from a torn jacket to a broken tent pole.
Fire: In an emergency, fire provides warmth, a way to purify water, and a powerful psychological boost. Carry waterproof matches, a reliable lighter, and a dedicated fire starter like dryer lint or a commercial fire-starting block.
Insulation: Weather can change in an instant, especially at elevation. You must carry an extra layer of clothing beyond what you start the hike in, regardless of the forecast. This should be a moisture-wicking layer, like a fleece jacket or thermal top—never cotton, which loses all insulating properties when wet.
Nutrition: Always pack more food than you think you’ll need. An extra day’s worth of non-perishable, high-energy food is the standard. Items like protein bars, nuts, and dried fruit are perfect.
Hydration: Carry more water than you expect to need and have a way to purify more. This means carrying a water filter or purification tablets to safely treat water from streams or lakes in an emergency.
Emergency Shelter: If you’re forced to spend an unplanned night out, protection from the elements is critical to preventing hypothermia. This doesn't mean a tent. A lightweight, packable emergency space blanket or bivy sack is all you need.

For expert-vetted gear lists and detailed trail guides from seasoned creators, the TrekGuider Marketplace is an invaluable resource for taking your preparation to the next level.
"Never Get Lost Again": Mastering Trail Navigation
Of all the potential hiking dangers, getting lost is one of the most common and terrifying. A recent study of SAR missions revealed that "error in judgment" was a leading cause of hikers needing rescue, and a huge part of that is poor navigation. Relying solely on your phone’s GPS is one of the biggest hiking safety tips to ignore—service is unreliable in the backcountry, and batteries die. True navigational confidence comes from time-tested skills.
How to Use a Map and Compass
This fundamental skill is easier than you think and is your most reliable tool.
Place the Compass on the Map: Lay your map flat. Identify your current location and your destination. Place your compass so the long edge of its baseplate creates a line connecting the two points, with the "Direction of Travel" arrow on the compass pointing toward your destination.
Set the Compass Bezel: Keeping the baseplate still, rotate the round bezel (the dial) until the orienting lines inside it are parallel with the map's north-south grid lines. Make sure the "N" on the bezel is pointing to North on the map. The number on the bezel aligned with the Direction of Travel arrow is now your bearing.
Follow the Bearing: Lift the compass off the map and hold it level in front of you. Turn your body until the red magnetic needle is "in the shed"—that is, perfectly inside the red orienting arrow on the bezel. The Direction of Travel arrow now points precisely to your destination. Pick a landmark in that direction, walk to it, and repeat the process.
Pro-Tip: The difference between "true north" (on your map) and "magnetic north" (where your compass points) is called declination. For precise navigation, you must adjust your compass for the local declination, which will be printed on your map.

Wildlife on the Trail: A Guide to Safe Encounters
Seeing wildlife is a thrilling part of hiking, but it’s crucial to remember that you are a visitor in their home. The core principles of every encounter are to maintain a safe distance, never feed wildlife, and know how to react to avoid escalating a situation.
Bear Encounters (Black vs. Grizzly)
Making noise while you hike (talking, clapping) is the best way to avoid surprising a bear. If you do encounter one, your reaction depends on the species.
If a Black Bear Approaches: Never run. Make yourself look as large as possible by raising your arms and opening your jacket. Yell, clap, and make loud noises. If it attacks, fight back aggressively. Target the bear's face and nose with anything you have—rocks, trekking poles, your fists. Do not play dead.
If a Grizzly Bear Approaches/Charges: Do not run and do not make direct eye contact. Speak in a calm, low voice to show you are not a threat. If it charges, stand your ground and use bear spray when it is within 30 feet. If it makes contact, play dead. Lie flat on your stomach, protect the back of your neck with your hands, and use your pack as a shield.
Mountain Lion (Cougar) Encounters
These predators are ambush hunters, so an encounter is rare. If you see one, it has likely been watching you.
Protocol: Do not run, as this triggers their chase instinct. Make direct eye contact. Make yourself appear larger by raising your arms and opening your jacket. Speak in a loud, firm voice. Slowly back away, giving the cat an escape route.
If Attacked: Fight back with everything you've got. Use rocks, sticks, or your hands to target the animal's eyes and face.
Venomous Snake Encounters
Snakes have no interest in humans and will only strike if they feel threatened.
Protocol: If you see a snake, freeze. Do not make any sudden movements. Once you've located the snake, slowly back away and give it a wide berth to move on. Be careful where you step and place your hands, especially when scrambling over rocks or logs.
If Bitten: The priority is to stay calm to slow the spread of venom. Limit physical activity and get to a hospital as quickly and safely as possible for evaluation and potential antivenom treatment.
Handling Trail Emergencies: What to Do When Things Go Wrong
Even with perfect preparation, accidents can happen. A twisted ankle, a sudden illness, or getting turned around can escalate quickly. Your ability to stay calm and make rational decisions is your most valuable asset. If you find yourself in trouble, remember the acronym S.T.O.P.
Stop: The moment you realize you are in trouble, stop moving. Sit down.
Think: Assess your situation calmly. What went wrong? What resources do you have?
Observe: Look around you. Where is the sun? Can you see any landmarks? Is there a source of water or shelter nearby?
Plan: Formulate a simple, logical plan. Don't make panicked decisions.
First Aid on the Trail
Your first-aid kit from the 10 Essentials is your go-to tool for injuries. Here's how to handle the most common trail ailments:
Blisters: The moment you feel a "hot spot" on your foot, stop and address it. Clean the area and apply moleskin or a blister-specific pad. Don't wait for it to become a full-blown blister.
Sprains: For a twisted ankle or knee, use an elastic wrap bandage from your kit to provide compression and support. Loosen it if you feel any numbness or tingling. Elevate the joint when you rest, and use a trekking pole or sturdy branch as a crutch if needed.
Cuts and Scrapes: Control any bleeding with direct pressure using a sterile gauze pad. Once it stops, clean the wound thoroughly with an antiseptic wipe and apply antibiotic ointment before covering it with a bandage.
A well-stocked daypack is crucial, but so is a plan for the whole trip. Before you head out to explore our incredible national parks, make sure your vehicle and supplies are just as prepared as your hiking gear.
Your Ultimate Adventure Blueprint
Ready to hit the road? Don't leave home without our expert-vetted National Park Road Trip Checklist. This free guide covers everything from vehicle prep and essential gear to can't-miss stops, ensuring your adventure is seamless from start to finish. Download it for free now!
Hiking Safety FAQs
A prepared mind anticipates questions. Here are expert answers to common concerns.
1. What's the right way to signal for help?
If you determine you cannot get yourself out of a situation safely, you need to signal for help. The universal distress signal is three of anything: three whistle blasts, three flashes of a headlamp, or three piles of rocks. A whistle is a must-have item that uses far less energy and carries further than shouting. For serious backcountry travel, consider investing in a personal locator beacon (PLB) or satellite messenger, which can send an SOS signal with your exact location to emergency services.
2. Is it safe to hike alone?
Solo hiking can be an incredibly rewarding experience, but it requires a higher level of preparation and self-sufficiency. All the rules in this guide become even more critical. It is absolutely essential that you leave a detailed itinerary with a trusted friend or family member. Include your planned route, your start and end times, and a "panic time"—the specific time they should call for help if they haven't heard from you.
3. What do I do if the weather turns bad unexpectedly?
Your first priority is to get below the treeline if you're in an exposed area to reduce the risk of lightning strikes. Put on your extra insulating layer and your rain gear before you get wet and cold. Assess your map and your situation. It is often safer to turn back, even if you're close to your destination, than to push on into deteriorating conditions.
Pro-Tip: Always tell someone your plan. Before every hike, leave a detailed itinerary with a trusted friend or family member. This is the single most important safety net you have.

Your Adventure, Empowered by Preparation
The goal of these hiking safety tips is not to fill you with fear, but to arm you with confidence. Every piece of gear you pack and every skill you learn is a key that unlocks a new level of freedom on the trail. Preparation allows you to push your boundaries, explore wilder places, and immerse yourself in the beauty of nature without the nagging whisper of anxiety. By respecting the wilderness and committing to self-sufficiency, you transform from a simple visitor into a capable, confident adventurer.
Now that you have the skills for a safe hike, you can integrate that adventure into a larger, perfectly planned journey. For a complete master plan covering everything from budgeting and logistics to finding the best trails and tours, our all-encompassing Travel Guide is the only resource you'll ever need.
Don't Miss Out! Subscribe for Exclusive Content
SubscribeComments 0
No comments yet
Be the first to share your experience!
Dont Miss Out! Subscribe for Exclusive Content

How to Avoid Travel Scams: A Global Guide

Is Public WiFi Safe? How to Protect Your Data Abroad

A Woman's Guide to Safe Travel: 10 Critical Tips

7 Hotel Safety & Security Tips for Peace of Mind

9 Beach Safety Tips That Could Save Your Life

7 Travel Insurance Red Flags to Spot Before You Buy
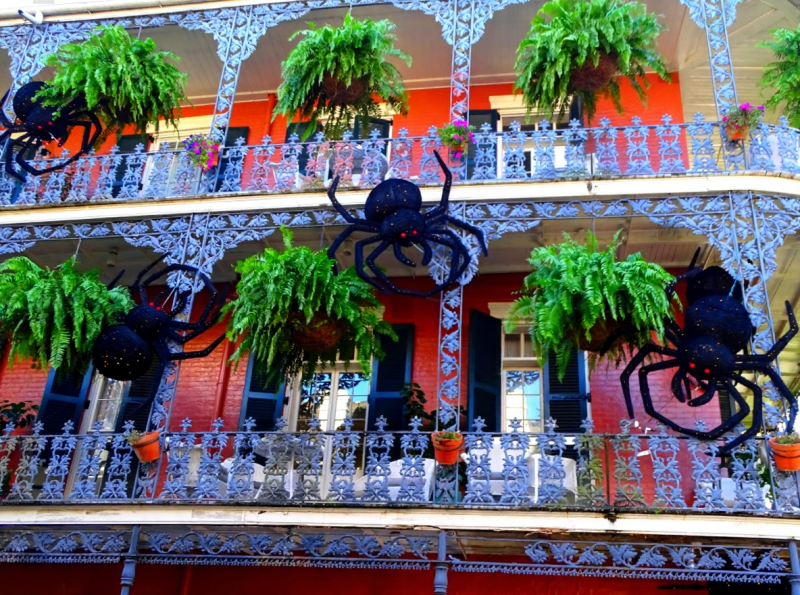
Halloween NOLA: Voodoo Haunts Guide
TrekGuider @trekguider
Are you tired of the same predictable Halloween? The plastic skeletons, the generic haunted houses, and the soulless loop of monster-themed pop songs. You’re searching for an experience that’s genuinely unsettling, one steeped in real history and a palpable sense of the supernatural. You want a Halloween that feels less like a costume party and more like stepping through a veil into another world, and you've heard that New Orleans hosts some of the most legendary Halloween events USA has to offer.
The Crescent City promises exactly that, but navigating its intoxicating chaos can be a nightmare in itself. The French Quarter throngs with tourists, every corner has a barker selling a ghost tour, and the line between authentic tradition and cheap theatrics is dangerously blurred. How do you find the real Voodoo priestess and not a costumed actor? How do you walk the city’s most haunted streets safely? How do you experience the true, spine-chilling spirit of a New Orleans Halloween without getting lost in the tourist traps?
Consider this your sacred map. This guide cuts through the Bourbon Street noise to lead you directly to the soul of Halloween in New Orleans. We will explore the authentic Voodoo traditions that permeate the holiday, guide you through the macabre elegance of the city’s official parade, and reveal the best ways to encounter the spirits that never left. This isn’t just a trip; it’s an initiation into the most unique Halloween celebration in America.

Why a New Orleans Halloween is Unlike Any Other
Forget everything you know about Halloween. In New Orleans, the holiday isn’t just a single night of spooky fun; it’s a city-wide season where the veil between the living and the dead feels impossibly thin. The city's unique cultural gumbo—a rich mix of French, Spanish, African, and Creole heritage—has created a celebration that is deeply intertwined with its own ghost tales and Voodoo traditions. This isn't a manufactured haunt; the city's very foundations are built on a history of plagues, fires, and mysterious legends, providing a genuinely eerie backdrop that you can feel in the humid, heavy air.
This deep, almost sacred connection to its own folklore is what makes the city’s celebrations so profound, setting it apart from anywhere else in the country. It’s a key part of what we explore in our definitive guide to New Orleans Holidays: Cultural Feasts. While Mardi Gras has its world-famous pageantry, a New Orleans Halloween offers something more intimate, more mysterious. The holiday here incorporates authentic Vodou practices, with locals holding ceremonies to honor their ancestors and connect with the spirit world. It’s a time when the city’s folklore feels intensely alive, and every shadowy, gaslit courtyard seems to hold a story whispered on the breeze.
The Krewe of Boo: A Macabre March Through the Quarter
Forget your hometown’s charming little costume march. New Orleans doesn’t do 'quaint' for Halloween. Instead, it unleashes the Krewe of Boo, the city’s official, full-scale Mardi Gras-style parade dedicated entirely to the ghoulish, the ghostly, and the gloriously grotesque. Expect towering, professionally crafted floats depicting zombies, vampires, and monsters from Louisiana folklore, all rolling through the historic French Quarter under the watchful eyes of its centuries-old buildings.

Mark your calendar: the parade is scheduled to roll on the evening of Saturday, the last weekend of October. The route typically begins in the Marigny, travels through the French Quarter, and ends in the Warehouse District. Krewes on the floats don’t just wave; they throw unique Halloween-themed items to the screaming crowds below. Forget beads—you’re more likely to catch spooky-themed doubloons, pralines, or even ghoulish rubber chickens.
To make the most of the Krewe of Boo, follow these essential tips:
Arrive Early: The French Quarter becomes incredibly crowded. Find a spot along the route at least two hours before the parade starts, especially if you want a front-row view. The sections along Decatur Street or Canal Street are often prime locations.
Dress the Part: Costumes are not just encouraged; they are practically mandatory for the full experience. The more creative and elaborate, the better. You’re not just a spectator; you’re part of the city-wide spectacle.
Mind Your Throws: The items thrown from floats can be surprisingly heavy. Keep your head up and be aware of your surroundings to avoid getting bonked by a flying skeleton toy.
Plan Your Exit: Know how you’re getting back to your accommodations before the parade ends. Streets will be closed, and rideshares will be in high demand with significant surge pricing.
Pro-Tip: For a slightly less chaotic viewing experience, find a spot near the beginning of the route in the Marigny. The crowds are often thinner, and the krewes are just starting their procession, full of energy and with plenty of throws left to give.
Diving into the Voodoo Veil: Authentic Spiritual Experiences
The true magic of a New Orleans Halloween lies in its deep, misunderstood connection to Voodoo. This is not the sensationalized "voodoo doll" caricature you see in movies. Louisiana Voodoo, or Vodou, is a legitimate spiritual practice with West African roots, and Halloween aligns with a sacred time for honoring the dead and communicating with ancestors.

For a truly authentic experience, visitors should approach the city’s Voodoo culture with reverence and respect. Many of the most powerful moments happen away from the main tourist drags.
Visit St. Louis Cemetery No. 1: This is the final resting place of the legendary Voodoo Queen, Marie Laveau. During the Halloween season, ceremonies are often held near her grave, and it’s common to find offerings of flowers, candles, and other tokens left in her honor. Access is now restricted to licensed tour guides, but a guided visit provides invaluable historical context. Remember, this is a sacred site, not a theme park attraction. Behave with the utmost respect.
Explore Authentic Voodoo Shops: Skip the kitschy souvenir stores and seek out genuine Voodoo apothecaries and cultural centers. Shops like Voodoo Authentica or Island of Salvation Botanica are run by actual practitioners (Mambos and Houngans) who can provide insight into the religion’s true nature. Here, you can purchase handmade gris-gris bags, candles, and oils, and sometimes even arrange for a spiritual consultation or reading.
Attend a Public Ceremony (with permission): Some Voodoo communities hold public or semi-public ceremonies around Halloween to honor the spirits. These are deeply spiritual events, not performances. If you are fortunate enough to find an opportunity to attend one, do so quietly and respectfully. Do not take photos unless explicitly permitted, and consider leaving a small donation.
Haunted New Orleans: Top Tours for True Ghost Hunters
New Orleans is widely considered one of America’s most haunted cities, and there is no better time to connect with its resident spirits than Halloween. The city offers a dizzying array of ghost tours, but they are not all created equal. Here’s how to find a tour that delivers genuine chills instead of cheap jump-scares.
French Quarter Phantom Tours: These walking tours are the classic choice. The best ones are led by charismatic storytellers who are also passionate history buffs. They’ll guide you through the gaslit streets of the Vieux Carré, stopping at infamous locations like the LaLaurie Mansion (known for its horrific history of torture) and the Gardette-LePretre Mansion, site of a mysterious and bloody mass murder.
Cemetery "Cities of the Dead" Tours: Because New Orleans is built on a swampy delta with a high water table, its deceased are interred in elaborate, above-ground tombs, creating these hauntingly beautiful necropolises. A daytime tour of St. Louis Cemetery No. 1 or Lafayette Cemetery No. 1 is a must. You’ll learn about the city’s unique burial traditions and the famous (and infamous) figures buried within.
Vampire Legends Tours: New Orleans has a curious connection to vampire folklore, most famously through author Anne Rice. These tours dig into the city’s darker, bloodier legends, separating fact from fiction and exploring the real-life stories that may have inspired the myths of the undead.
Navigating these spooky streets after dark requires awareness, especially if you are traveling alone. It’s about being smart and prepared so you can fully immerse yourself in the experience without worry. That’s why our Solo Female Travel Safety Guide is an essential download for anyone exploring the city's haunts, offering practical tips for staying safe while seeking out the supernatural.
Beyond the Haunts: Legendary Parties & Top Halloween Events USA Style
When the sun goes down, New Orleans transforms into one giant, city-wide costume party. The energy is electric, and the people-watching is second to none, solidifying its reputation for hosting some of the best Halloween events USA has to offer.
The epicenter of the chaos is Bourbon Street, which becomes a pedestrian-only sea of costumed revelers. The street is lined with bars offering potent drinks in souvenir cups, and the historic wrought-iron balconies are packed with people throwing beads to the crowds below. While it’s an experience every visitor should have, it can be intense. The key to surviving and enjoying Bourbon Street is to stay in a group and remain aware of your surroundings at all times.
For a more curated experience, look for one of the many large-scale Halloween parties and balls held across the city. Events like the Endless Night Vampire Ball offer a more gothic, formal affair with a strict dress code, while numerous hotels and music venues host massive costume contests with significant cash prizes.
Pro-Tip: The best parties sell out weeks, if not months, in advance. As soon as you book your trip, start researching major events and purchase your tickets online. This will save you from waiting in long lines or, worse, being turned away at the door.
A Practical Guide to a Spooky & Safe New Orleans Halloween
To ensure your supernatural sojourn is memorable for all the right reasons, keep these practical tips in mind:
Book Everything in Advance: Halloween is one of the busiest times of the year in New Orleans. Flights, hotels, and popular tours should be booked months ahead to avoid surge pricing and lack of availability.
Comfort is Key: You will be doing a lot of walking. While your costume is important, make sure your footwear is comfortable enough to handle miles of cobblestone streets and uneven sidewalks. The weather in late October can also be unpredictable; it might be warm and humid or surprisingly cool, so pack layers.
Stay Hydrated and Fed: It’s easy to get caught up in the excitement (and the cocktails), but remember to drink plenty of water. Also, take advantage of the city’s incredible culinary scene. A hearty meal of gumbo or jambalaya will give you the energy you need for a long night of haunting.
Use Rideshares Wisely: While the French Quarter is walkable, you may need transportation to other neighborhoods. Use reputable rideshare apps, but be prepared for surge pricing during peak hours. Always confirm the license plate and driver before getting into a vehicle.
Planning a trip of this magnitude involves many moving parts. For a complete plan covering the best neighborhoods for accommodations, can't-miss restaurants, and a full itinerary for all the city's attractions, our comprehensive Travel Guide is the ultimate resource for your New Orleans adventure.
Embrace the Spirits of the Crescent City
A New Orleans Halloween is more than just a party; it's an immersion into a world of history, mystery, and vibrant tradition that you cannot find anywhere else. It’s a chance to walk in a city where the past is always present, where every corner holds a story, and where the spirits of centuries past feel like they’re just a whisper away. You now have the insider knowledge to bypass the tourist traps and experience the authentic, supernatural soul of one of the most captivating Halloween events USA has to offer.
You are ready to dance with ghosts in Jackson Square, to catch throws from a monster-themed float, and to feel the powerful spiritual energy that makes this celebration so unique.
Ready to plan the ultimate spooky getaway? Download our Solo Female Travel Safety Guide for peace of mind and grab your copy of the Travel Guide to make your trip seamless and unforgettable. The spirits of New Orleans are waiting for you.
Don't Miss Out! Subscribe for Exclusive Content
SubscribeComments 0
No comments yet
Be the first to share your experience!
Dont Miss Out! Subscribe for Exclusive Content

San Francisco Cherry Blossoms: A Local's Guide to the Blooms

Halloween SF: Haunts Without Horrors

SF Festivals: 7 Must-See Lineups

Christmas SF: Lights & Wharf Wonders

SF Pride: 6 Route & Party Hacks
