TrekGuider @trekguider
Thanksgiving Parade: 6 Prime Spots
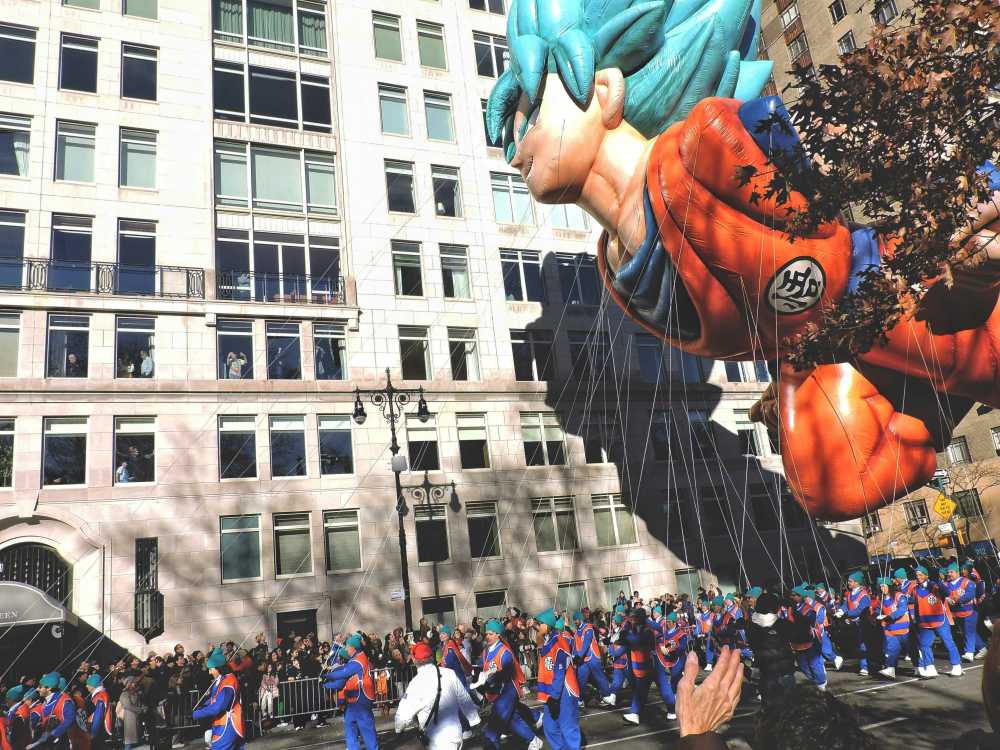
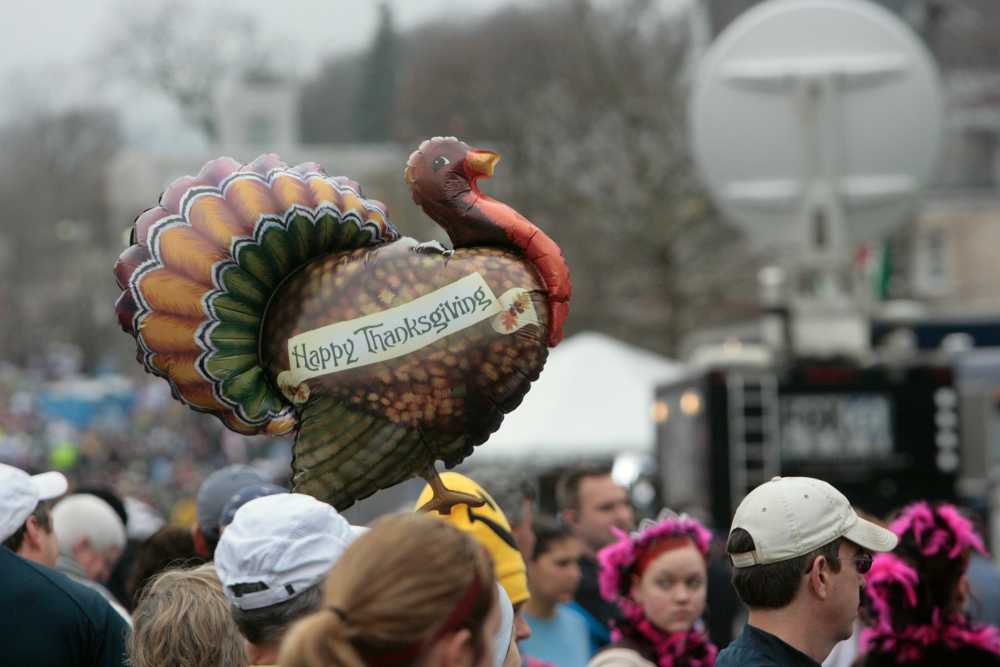
You’ve seen it on television your whole life: colossal cartoon characters floating between skyscrapers, world-class marching bands sending echoes through the avenues, and the final, festive arrival of Santa Claus himself. The Macy's Thanksgiving Day Parade is an American institution, the magical kick-off to the holiday season. But the dream of seeing it in person is often haunted by a logistical nightmare. You’re worried about battling millions for a tiny patch of sidewalk, only to have your view blocked, your kids get restless, and the entire enchanting experience devolve into a cold, stressful ordeal.
That anxiety is completely valid. Every year, over 3.5 million people descend on the route, and without a rock-solid plan, you’ll see more of the back of someone’s head than you will of the giant Snoopy balloon. You risk waking up before dawn only to find every good spot claimed, leaving your family disappointed and shivering. The magic you traveled for feels impossibly out of reach, lost in a sea of chaos. You deserve to experience the wonder, not the worry.
Forget the frustration. This is your strategic blueprint for success. We’re going to bypass the chaos and transform you into a parade-viewing expert. We’ll unveil the six prime spots to watch the spectacle, complete with insider strategies on timing, what to pack, and how to navigate the city like a local. This is your definitive plan for conquering the Thanksgiving parade in New York and creating memories that will last a lifetime. It’s one of the most iconic events in the city, a true highlight that we cover in our broader guide to New York Holidays: 10 Must-Do Events.
Understanding the Parade Route: Your Strategic Map
Before you can pick your spot, you need to understand the battlefield. The Macy's Thanksgiving Day Parade is a massive operation, and its route is the key to everything. Knowing the path, the timing, and—most importantly—the restricted zones will give you a powerful advantage.
The parade officially kicks off at 8:30 AM sharp on Thanksgiving morning, Thursday, the fourth Thursday of November. It begins on the Upper West Side and marches for 2.5 miles, concluding around noon.
Here’s the official step-by-step route:
Starts: 77th Street & Central Park West at 8:30 AM.
Travels South: Proceeds down Central Park West to Columbus Circle.
Turns: At Columbus Circle, it turns onto Broadway.
Continues South: It follows Broadway through the heart of Midtown.
Ends: The parade concludes around noon at the iconic Macy's Herald Square on 34th Street.
Our internal research confirms two critical areas to avoid at all costs: the start zone around 77th Street and the finish zone near Herald Square (from 34th to 38th Street). These areas have heavily restricted public viewing and are reserved for television broadcasting. Trying to watch from here is a rookie mistake that guarantees disappointment. Your strategy must focus on the long stretches in between.
The 6 Prime Viewing Spots for the Thanksgiving Parade in New York
Now for the main event. Choosing your location is the single most important decision you’ll make. Each of these six spots offers a unique advantage, whether it’s fewer crowds, better photo opportunities, or more family-friendly conditions.
1. The Upper West Side: The Classic Family Choice
Location: Along Central Park West, from 77th Street down to Columbus Circle (specifically the west side of the street).
Why It’s Prime: As the parade’s very first leg, this 16-block stretch is where the magic is freshest. The performers are electric with energy, the marching bands are at their most thunderous, and the balloon handlers are still wrangling their colossal characters into perfect formation. Because it's more residential, the crowds feel slightly more manageable and family-oriented than in the commercial chaos of Midtown. The backdrop of Central Park on one side and historic apartment buildings on the other makes for stunning photos.
Your Strategy:
Timing is Everything: You must arrive by 6:00 AM. The front-row spots are often claimed by locals before the sun is up. By 6:30 AM, the area will be packed several rows deep.
Positioning: Plant yourself on the west side of Central Park West. This gives you a direct, unobstructed view as the parade marches south.
What to Expect: It will be cold and dark when you arrive. This spot requires a commitment to waiting, but the payoff is a fantastic, high-energy viewing experience.
2. The Shops at Columbus Circle: The VIP Indoor View
Location: The second and third floors of The Shops at Columbus Circle, overlooking the parade’s turn from Central Park West onto Broadway.
Why It’s Prime: This is the ultimate parade hack for those who want to avoid the cold and the crowds. You get a warm, elevated, bird’s-eye view of the entire spectacle. Plus, you have immediate access to restrooms, coffee, and food—luxuries that are unthinkable for those on the street.
Your Strategy:
This Isn't Free: This is not a public viewing area. Access is typically granted to customers of the shops and restaurants within the mall.
Plan Months Ahead: Check with stores like Williams-Sonoma or restaurants with windows facing the circle. Many host private, ticketed viewing events that sell out far in advance.
Be Prepared to Spend: You will need to make a purchase or pay for a breakfast event to gain entry. Consider it the price of unparalleled comfort and convenience.

3. The Sixth Avenue Stretch: The Urban Canyon Experience
Location: Along Sixth Avenue (Avenue of the Americas) from 59th Street down to 38th Street.
Why It’s Prime: This is the longest and straightest portion of the route, offering dozens of blocks for potential viewing. Watching the giant balloons squeeze between the towering skyscrapers of Midtown is a uniquely New York experience. The sheer scale of the buildings creates a dramatic "urban canyon" effect that makes the parade feel even more grand.
Your Strategy:
Arrive Early: The secret is out on this spot. To get a decent view, be in position by 6:30 AM at the latest. The blocks closest to Central Park (59th to 50th) fill up the fastest.
Avoid Corners: Set up in the middle of a block. Corners are notoriously crowded and chaotic, with people constantly moving and blocking views.
Look for Scaffolding: Sometimes, construction scaffolding can be a blessing in disguise, creating a covered area that offers some protection from the elements and can deter massive crowds from forming in that exact spot.
Pro-Tip: The area between 70th and 75th streets on Central Park West offers a slightly wider sidewalk, giving you a little more breathing room. Pack a thermos of hot chocolate to stay warm while you wait—it’s a game-changer.
4. The "Quiet Zone" Near Radio City Music Hall
Location: The stretch of Sixth Avenue between 49th and 51st Streets.
Why It’s Prime: While no part of the route is truly "quiet," this section is designated as a no-marching-band-performance zone to accommodate the national television broadcast headquartered at Radio City. This means you get a brief respite from the loudest musical numbers—a great option for families with young children or those with sensory sensitivities.
Your Strategy:
Know the Trade-Off: You will see all the floats and balloons perfectly, but you will miss the live performances from the marching bands as they pass this specific area.
Use the Location: This spot is fantastic for its iconic backdrop. You can capture incredible photos of the balloons with the famous Radio City Music Hall marquee in the background.
Post-Parade Plans: You are perfectly positioned to see the Rockettes' Christmas Spectacular later in the day or head over to Rockefeller Center.

5. The South Side of 38th Street: The Late-Arrival Lifeline
Location: The blocks along Sixth Avenue from 40th Street down to 38th Street.
Why It’s Prime: Let's be realistic: not everyone can wake up at 4 AM. If you’re running late, this is your last best chance. As the parade nears its end at 34th Street, the area becomes a restricted broadcast zone. Therefore, the blocks just before this cutoff are the final public viewing areas.
Your Strategy:
Manage Expectations: You will not get a front-row view here. This is a spot for seeing the tops of the balloons and catching the general energy of the event.
Look Up: Your view will be mostly vertical. It’s less about seeing the performers on the street and more about witnessing the spectacle of the giant balloons against the sky.
Quick Exit: The advantage of being near the end of the route is that you can make a quick exit once the final float passes, beating some of the mass exodus heading for the subway.
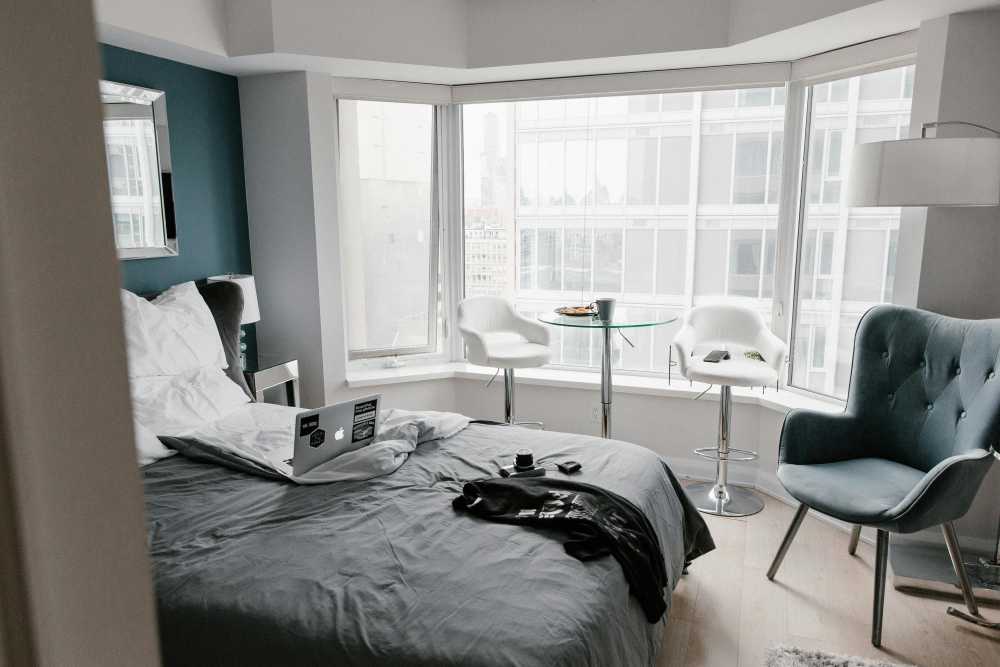
6. The Virtual View: Your Hotel Room Perch
Location: Any hotel with rooms directly overlooking the parade route on Central Park West or Sixth Avenue.
Why It’s Prime: This is the most comfortable, stress-free, and luxurious way to experience the Thanksgiving parade in New York. You can watch the entire event from the warmth of your room, in your pajamas, with a cup of coffee in hand. You have your own bathroom, your own food, and an unbeatable, unobstructed view.
Your Strategy:
Book a Year in Advance: Rooms with parade views are often booked a year or more ahead and come at a significant premium.
Confirm the View: When booking, you must call the hotel directly to confirm that your specific room has a "parade view." An "avenue view" is not always sufficient.
Notable Hotels: Some hotels famous for their parade views include the JW Marriott Essex House, the Mandarin Oriental, New York, the Warwick New York, and the New York Hilton Midtown.
Pro-Level Survival Guide for Parade Day
Securing a great spot is only half the battle. You need a solid plan for the hours you’ll spend waiting. Follow these tips to ensure your experience is comfortable and memorable for all the right reasons.
The Ultimate Timing Strategy
The golden rule, confirmed by years of experience, is to arrive by 6:00 AM. This is non-negotiable for a front-row or second-row spot along Central Park West or the prime stretches of Sixth Avenue. By 6:30 AM, these areas are typically full. By 7:00 AM, you’ll be lucky to find a spot where you can see anything at all. Set your alarm, bundle up, and get there early. The early bird gets the best view of the parade.
What to Wear and Pack: The Family Checklist
New York in late November is cold. Standing still for hours makes it feel even colder.
Dress in Layers: Start with a thermal base layer, add a fleece or sweater, and top it off with a warm, wind-resistant winter coat. Don't forget a hat, gloves, and a scarf.
Comfortable Footwear: Wear warm, waterproof boots. Your feet will thank you.
The Essentials Bag: Pack a backpack with:
Snacks and Drinks: A thermos of hot chocolate or coffee is a must. Bring water and easy-to-eat snacks like granola bars and fruit.
Entertainment: A book, a deck of cards, or a fully charged phone with headphones can help pass the time.
Portable Phone Charger: Your battery will drain faster in the cold.
Small Folding Stools: If you have space, these can be a lifesaver for your back and legs.
For a comprehensive list of what to bring on any family adventure, our National Park Road Trip Checklist has you covered, with tips that apply just as well to an urban expedition.

Navigating the Crowds with Kids
The parade is a magical experience for children, but the crowds and waiting can be tough.
Avoid Strollers: In the most crowded areas, strollers are more of a liability than a help. They are difficult to maneuver and take up valuable space. A carrier is a much better option for very young children.
Establish a Meeting Point: As soon as you claim your spot, pick a clear, fixed landmark (e.g., a specific lamppost, a store entrance) as your family's meeting point in case you get separated.
Use a Buddy System: Ensure everyone has a partner.
Ladders: You will see people with small ladders for their kids to see over the crowd. If you bring one, be sure to place it a safe distance from the street and be courteous to those around you.
Pro-Tip: Skip the car. Public transportation is your best friend. The subway will be running on a holiday schedule, but expect crowded stations near the route. Plan your subway route in advance and buy your MetroCard the day before to avoid long lines at the machines on Thanksgiving morning.
Beyond the Parade: Making it a Full Thanksgiving Experience
Remember, the parade ends around noon, leaving you with a full day to enjoy the city. Many people head straight to a Thanksgiving dinner. If you plan to eat out, you must make reservations weeks, if not months, in advance. New York City is one of the world's culinary capitals, and a festive meal is the perfect way to cap off a magical morning.
Planning the perfect holiday trip, from the parade to the feast, requires expert knowledge. Our comprehensive Travel Guide provides detailed itineraries and booking advice for major US cities, ensuring your entire vacation is seamless and spectacular.

Your Mission, Should You Choose to Accept It
Watching the Macy's Thanksgiving Day Parade in person is a bucket-list dream, and with this guide, it’s a dream you can turn into a flawless reality. You now have the route, the prime locations, and the pro-level strategies to outsmart the crowds and secure a fantastic viewing experience. You’re no longer a tourist hoping for a glimpse; you’re a prepared strategist ready to claim your prime spot and soak in every moment of the magic. The Thanksgiving parade in New York is waiting for you.
Now go make those once-in-a-lifetime memories!
Meta Data Suggestions:
SEO Meta Title: 6 Prime Spots for the NYC Thanksgiving Day Parade (2026)
URL Slug: thanksgiving-parade-new-york-viewing-spots
SEO Meta Description: Don't just watch the Thanksgiving parade in New York, conquer it. Our guide reveals 6 prime viewing spots and insider tips for a stress-free family experience.
Travel News


Comments 0
No comments yet
Be the first to share your experience!
You May Also Like

San Francisco Cherry Blossoms: A Local's Guide to the Blooms

Halloween SF: Haunts Without Horrors

SF Festivals: 7 Must-See Lineups

Christmas SF: Lights & Wharf Wonders

SF Pride: 6 Route & Party Hacks

Chinese New Year SF: Parade Essentials
TrekGuider @trekguider
7 Hotel Safety & Security Tips for Peace of Mind

You’ve finally made it. After a long day of navigating airports, taxis, and unfamiliar streets, you slide the key card into your hotel room door and a wave of relief washes over you. This is your sanctuary, your home base for the adventures ahead. But as you drop your bags, another feeling can creep in, spoiling the moment. Let’s be honest: that sterile, anonymous hotel room doesn't feel as secure as your own home. It’s a vulnerability that can cast a shadow over an entire trip, a persistent whisper of "what if" that prevents you from ever truly relaxing.
The good news is that safety isn't a matter of luck; it's a repeatable skill. This guide is your new ritual, a systematic playbook for transforming any hotel room into a personal fortress. We’ve synthesized advice from former hotel security personnel and fire safety experts to bring you seven essential hotel safety tips. This isn’t about paranoia; it's about empowerment. By making these simple checks a habit, you can ensure your peace of mind is the most valuable thing you pack. These strategies are a critical part of the accommodation-specific awareness we cover in our comprehensive guide to The Ultimate Guide to Travel Safety: A 2026 Playbook.
The 60-Second Security Sweep: Your First Check-In Ritual
Your first minute inside a new hotel room is the most important. This is your window to verify, secure, and orient yourself before you get distracted by unpacking or collapsing on the bed. By turning the following steps into an unbreakable habit, you proactively eliminate the most common security and safety risks. Think of it as a professional-grade inspection that takes less time than it does to check your email.
Tip 1: Secure the Door and Verify the Room is Empty
Before you do anything else, take control of your entry point. A common mistake is to walk in, close the door, and immediately turn your back to it while dealing with luggage. This makes you vulnerable. Instead, follow this security-conscious procedure.
Prop the Door: As you enter, use your luggage to prop the door open so it can't be closed behind you.
Conduct a Visual Clear: From the doorway, quickly scan the room to ensure it is empty. This includes a glance behind the curtains, in the closet, under the bed, and inside the shower.
Close and Lock: Once you've confirmed the room is unoccupied, remove your luggage from the entryway, close the door, and immediately test every single locking mechanism. This includes the primary deadbolt and any secondary security devices like a security chain or a flip latch. Ensure they are all functional and engage smoothly. Don't assume they work; physically test them.
Tip 2: Check Your Communication and Safety Gear
Now that the room is secure, your next step is to verify your lifelines. You need to know that the room’s built-in safety equipment is present and functional.
Test the Phone: Pick up the in-room phone and confirm there’s a dial tone or call the front desk for a quick "hello." This ensures you have a reliable way to call for help if your cell phone has no service or the battery dies.
Locate Safety Devices: Visually identify the smoke detector and fire alarm sprinkler heads. It’s also wise to check for a carbon monoxide detector, especially in hotels with in-room fireplaces or those attached to large parking garages. If one isn't present and you have concerns, report it to the front desk.
Tip 3: Create a Mental Fire Escape Map
This is one of the most critical hotel safety tips, yet it's the one most often ignored. In the event of a fire, heavy smoke can reduce visibility to absolute zero. The evacuation map on the back of your door is not decoration; it's your key to survival.
According to fire safety experts, you must identify three key things:
Your Primary and Secondary Exits: The map will show the nearest emergency exit stairwell. Crucially, you must also identify an alternative, secondary exit in case your primary route is blocked by fire or smoke. Remember, elevators must never be used in a fire.
The Door Count: This is the most important part. Physically walk out into the hallway and count the number of doors between your room and the nearest emergency exit. Memorize this number. In a dark, smoke-filled hallway, this knowledge will allow you to feel your way along the wall to safety, counting the doors as you go.
Location of Safety Equipment: As you identify your route, note the location of fire alarm pull stations and fire extinguishers in the hallway.
Tip 4: Fortify Your Privacy
Your final step in the initial sweep is to ensure your room is a truly private space.
Check Windows and Connecting Doors: Go to every window and make sure it is locked securely. If your room has a connecting door to an adjacent room, verify that it is locked from your side. A good practice is to slide a chair or your luggage in front of a connecting door as an extra physical and audible barrier.
Close the Curtains: Fully close the curtains to ensure privacy from the outside, especially in ground-floor rooms or those that face other buildings.
Scan for Oddities: While rare, hidden cameras are a modern concern. Conduct a quick visual scan for any electronics or objects that seem out of place. Pay attention to smoke detectors, alarm clocks, and USB wall outlets, looking for unusual pinholes or lenses.
Beyond the Locks: Advanced Hotel Safety Tips
Okay, the room is secure. But a locked door is just the first line of defense. Now it’s time to think like a pro and protect your belongings with the kind of savvy that separates seasoned travelers from the rest.
Tip 5: Outsmart a Thief: How to Hide Your Valuables
The in-room safe should always be your first choice for storing passports, extra cash, and small electronics. However, if a safe is unavailable, broken, or you simply don't trust it, you need a smart hiding strategy. The key is to avoid the first places a thief would look: in drawers, under the mattress, and inside your suitcase.

Security consultants recommend using non-obvious, "high-friction" hiding spots that take time and effort to find.
Taped in an Inconspicuous Location: Use a small amount of duct tape to secure an envelope containing cash or cards to a surface that is out of sight. Think creatively: the underside of a heavy desk, the back panel of a chest of drawers, or high up on a closet shelf.
Inside a Common, Uninteresting Object: Hide valuables in plain sight by placing them inside items a thief would ignore. A popular tactic is to place cash inside a bag of dirty laundry, as it's highly unlikely to be searched. You can also slip flat items like cash or cards inside the hotel room's bible or another book on a shelf.
Within the Room's Fixtures: Some parts of a hotel room offer clever nooks. For a laptop, a surprisingly effective tactic is to hide it inside a pillowcase on the bed, then pile the other pillows on top to disguise its shape.
Pro-Tip: When hiding cash or cards in an envelope, tape it flat against a surface and choose a dark color for the envelope (e.g., black or brown) to prevent it from being seen through any gaps.
Tip 6: Bring Your Own Security: Portable Safety Devices
For the ultimate peace of mind, especially when staying in older hotels, budget accommodations, or short-term rentals, consider investing in a portable security device. These lightweight gadgets are designed to provide an extra layer of defense against unauthorized entry.
Portable Door Locks: These devices brace against the door frame from the inside, making it physically impossible for the door to be opened from the outside, even with a key.
Door Stop Alarms: These are simple, wedge-shaped door stops that you place under your door from the inside. If the door is pushed open, it triggers a piercingly loud alarm, startling the intruder and alerting you and others to the breach.
The Final Layer of Protection: Personal Habits
Your physical security measures are only half the battle. The other half is cultivating smart habits and maintaining a high level of situational awareness throughout your stay.
Tip 7: Practice Smart "Hotel Habits"
Small, consistent habits can significantly reduce your risk profile.
Sanitize High-Touch Surfaces: Upon arrival, use a disinfectant wipe to clean the objects that are most frequently handled but often overlooked by cleaning staff: the TV remote, light switches, doorknobs, and the phone.
Be Discreet with Your Room Number: When checking in, if the front desk clerk announces your room number out loud, politely ask for a different room and for them to write it down for you instead. Never leave your key card sleeve, which often has the room number written on it, lying around in public areas.
Use the "Do Not Disturb" Sign: When you are in your room, hang the "Do Not Disturb" sign on the outside of your door. This is a clear signal that the room is occupied and can deter someone from trying to enter, whether by mistake or with ill intent.
Verify All Visitors: Never blindly open your door. If someone knocks claiming to be hotel staff, call the front desk to verify that they sent someone to your room before opening the door.
Pro-Tip: If you order room service or have hotel staff coming to your room, call the front desk to verify the person's identity before opening the door. It's a simple step that confirms the visitor is legitimate.
A secure hotel stay is at the heart of a well-planned trip. To ensure every other aspect of your journey is just as prepared, from packing lists to financial planning, a comprehensive resource is essential. The right Travel Guide can be the difference between a good trip and a flawless one.
Your Pre-Trip Master Plan
A secure hotel room is just one piece of your travel safety puzzle. To ensure you don't overlook a single essential item—from documents and finances to clothing and gear—a master checklist is your most powerful tool. Our comprehensive, free checklist has you covered for every stage of your trip.

Download Your Free International Travel Checklist Now!
Hotel Safety FAQs
A prepared mind anticipates questions. Here are expert answers to common concerns.
1. Is an in-room safe really the most secure option?
For the vast majority of travelers, yes. Modern electronic safes are quite secure against opportunistic theft. However, hotel management does have a master key or code for emergencies. The greatest risk often comes from user error (choosing an obvious code like 1234) or a dishonest staff member (which is rare in reputable hotels). For irreplaceable items, using a smart hiding spot in addition to the safe, or keeping them on your person, can provide an extra layer of security.
2. Are short-term rentals (like an Airbnb) more or less secure than hotels?
It varies dramatically. A professionally managed rental in a secure building can be safer than a budget motel. However, rentals lack the 24/7 staff, multiple security cameras, and controlled access points of a hotel. When booking a rental, read reviews carefully for any mention of safety concerns, check the lock quality upon arrival, and consider bringing your own portable door lock.
3. What should I do if hotel staff need to enter my room while I'm out?
If you have requested maintenance or housekeeping, you have a reasonable expectation they will enter. Secure all valuables in the safe or hide them before you leave. If you are concerned, you can request that these services only be performed while you are present in the room. Always leave the "Do Not Disturb" sign on your door when you leave if you do not want anyone entering.
Travel with True Peace of Mind
Your hotel room should be a sanctuary—a place where you can recharge after a day of exploration and sleep soundly through the night. It shouldn't be a source of anxiety. By incorporating these seven hotel safety tips into your check-in routine, you are taking active control of your environment. You are replacing uncertainty with a plan and vulnerability with empowerment. This simple, 60-second ritual does more than just secure a room; it secures your peace of mind, freeing you to focus on the real purpose of your journey: the adventure that awaits outside your door.

Meta Data Suggestions:
SEO Meta Title (Under 60 characters):
7 Essential Hotel Safety Tips for Travelers
URL Slug:
hotel-safety-security-tips
SEO Meta Description (Under 155 characters):
Sleep soundly on your next trip. Our expert-backed hotel safety tips cover room security, hiding valuables, fire safety, and more for total peace of mind.
Travel News
Comments 0
No comments yet
Be the first to share your experience!
You May Also Like

Ultimate USA Holidays Guide: Top Picks

FTC Affiliate Disclosure: Stay Compliant as a Travel Creator

Essential Affiliate Tools: From Tracking to Full Optimization

Booking.com Affiliate Review: Pros, Cons & Earnings

Decoding Affiliate Commission Rates: Benchmarks for Travel Creators

Amazon Associates for Travel: Strategies to Maximize Commissions
TrekGuider @trekguider
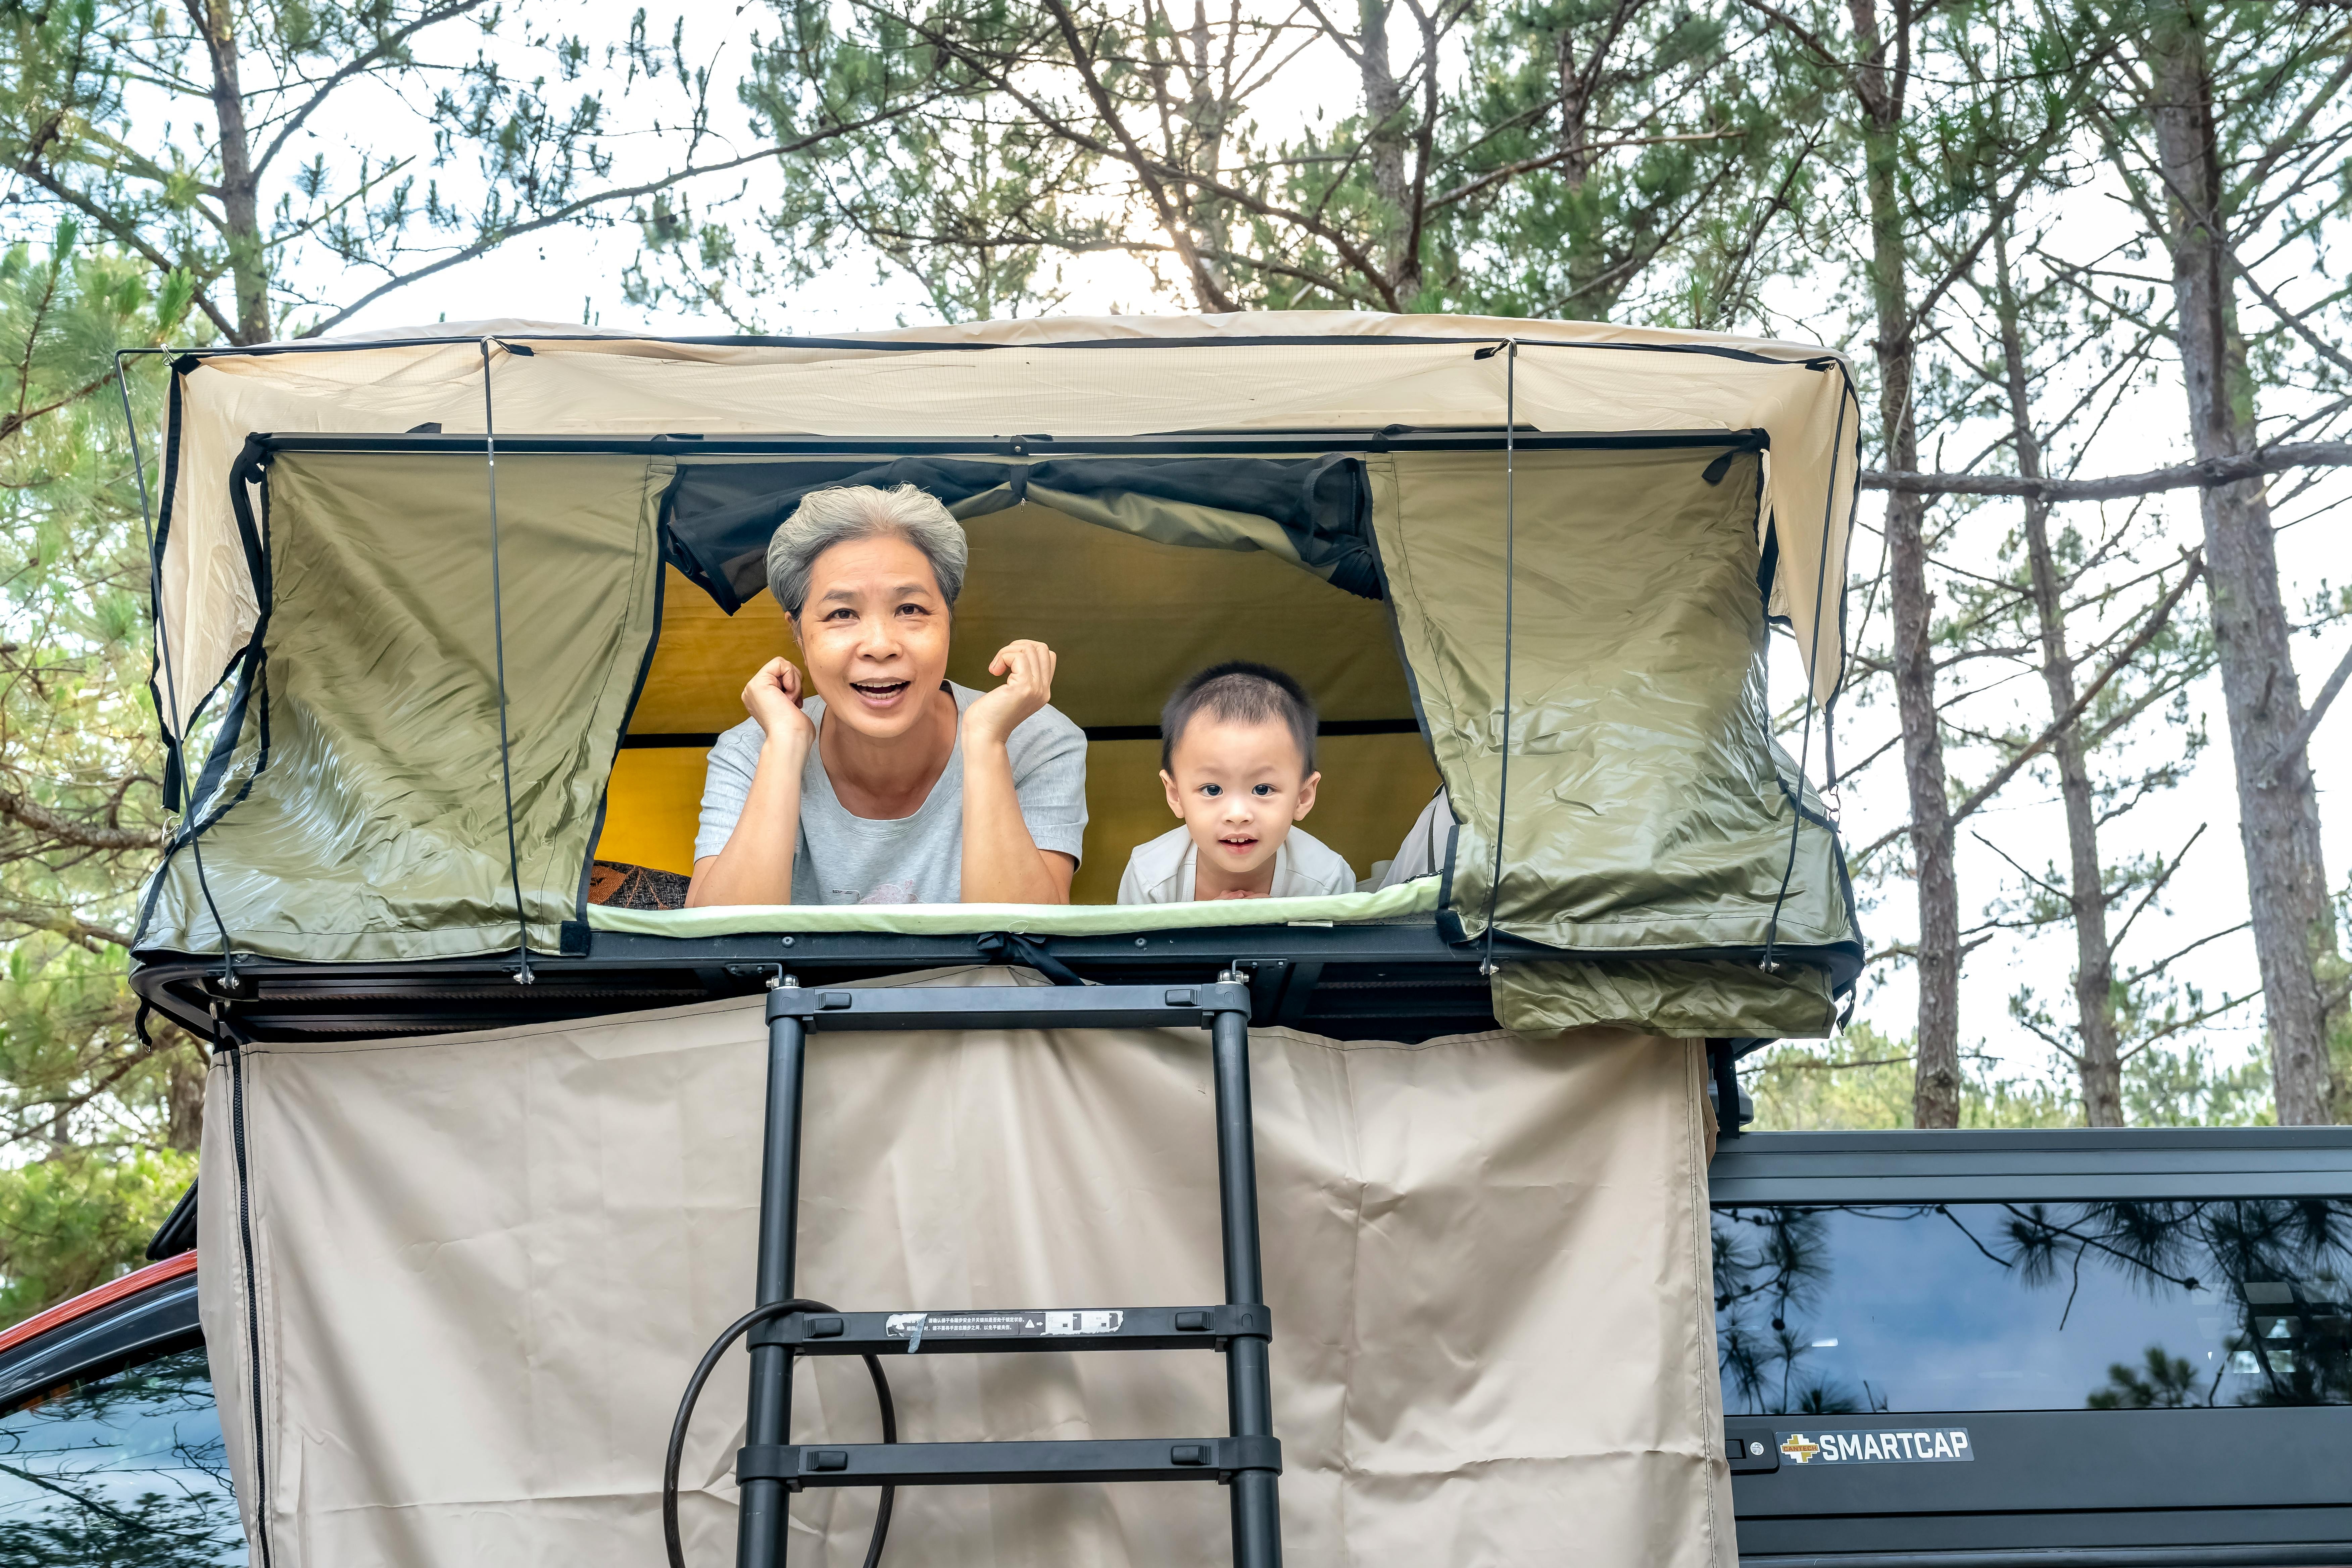
The Sanity-Saving System for Your Next Family Road Trip

Staring down a long family road trip and picturing more chaos than cherished memories? You're not alone. The line between an 'epic family adventure' and a 'mobile hostage situation' can be perilously thin, often hinging on a single forgotten charging cable or a rogue juice box.
The internet offers an avalanche of checklists, but this overload often creates more anxiety than it solves. What you really need isn't another random list—it's a bulletproof system designed to transform potential chaos into predictable calm.
This is that system. Forget frantic, last-minute packing. We're moving beyond what to pack and showing you how to orchestrate a seamless journey, from pre-trip vehicle checks to a sanity-saving in-car entertainment strategy.
While this guide focuses on the mechanics of a successful road trip, it’s a critical component of a larger travel philosophy. For a broader look at destinations and trip styles, be sure to explore our comprehensive guide to Family Travel Ideas: The 2026 Guide to Unforgettable Trips to find your next perfect adventure.
Your Pre-Launch Sequence: Mastering the 2-Week Countdown
A smooth trip begins long before you pull out of the driveway. This phase is about laying a foundation of safety and organization, giving you unshakable peace of mind before the wheels even start rolling.
The Essential Vehicle Safety Audit: Your First Step
Two weeks before your departure date, it’s time to give your vehicle a thorough check-up. While entrusting this to a certified mechanic is the gold standard, you can perform a solid initial inspection yourself.
Tires: Check the pressure on all four tires (and the spare!) to ensure it matches the recommended PSI on the driver’s side doorjamb. Inspect the tread for wear; a simple way to do this is with a penny. If you can see all of Lincoln's head, it’s time for new tires.
Fluids: Check and top off all essential fluids, including engine oil, coolant, brake fluid, and windshield washer fluid.
Brakes: Listen for any squeaking or grinding noises. If you notice any changes in performance or feel a vibration when braking, have them inspected by a professional immediately.
Lights & Wipers: Test all exterior and interior lights. Check your wiper blades for signs of cracking or wear and replace them if necessary. A sudden downpour is a terrible time to discover your wipers are shot.
Child Car Seat Safety
Vehicle safety extends to your most precious cargo. An improperly installed car seat can be a critical point of failure in an accident. Take these steps:
Check for Recalls: Visit the National Highway Traffic Safety Administration (NHTSA) website to ensure your car seat model has not been recalled.
Verify Fit: Ensure your child meets the height and weight requirements for their current seat.
Confirm Installation: A properly installed car seat should not move more than one inch in any direction at the belt path. Many local fire departments have certified technicians who will inspect your installation for free.
Assembling Your Complete Roadside Emergency Kit
Your vehicle should be equipped with more than just a jack and spare tire. A well-stocked roadside emergency kit is a non-negotiable part of your travel gear.
Jumper cables
Tire pressure gauge and portable air compressor
A well-stocked first-aid kit
Roadside flares or reflective triangles
A multi-tool and a small set of wrenches
Duct tape (because it fixes everything)
Flashlight with extra batteries
Portable phone charger or power bank
High-energy, non-perishable snacks and bottled water
Documentation & Digital Organization
Ensure your car's registration and insurance information are current and easily accessible. It's also wise to have digital copies saved to your phone. Use an app to plan your route, but to keep everything in one place—from reservations to daily plans—a dedicated Travel Itinerary Template is invaluable.
Your Ultimate Road Trip Blueprint
Planning a trip through America's greatest landscapes? Don't leave anything to chance. Our free, printable National Park Road Trip Checklist covers everything from vehicle prep to the one snack you can't forget. Download it now and guarantee a smoother adventure.
A System for Your Family Road Trip Essentials
Effective packing is about organization and accessibility, not just volume. This system ensures that everything you need is exactly where you need it, preventing roadside archaeology in your trunk.

The "Car Command Center": Organizing Your In-Reach Essentials
The front passenger seat area is your mission control. Use a seat-back organizer or a small bin to keep critical items within arm’s reach.
Phone mounts and charging cables
A roll of paper towels and a pack of wet wipes
Hand sanitizer
A small trash bag or designated car trash can
Lip balm, pain relievers, and personal medications
Sunglasses for the driver and co-pilot
The Comfort Kit: Blankets, Pillows, and Personal Items
A comfortable child is a happy child. For each kid, pack a small bag containing their comfort items like a travel pillow, a soft blanket, noise-canceling headphones, and a reusable water bottle.
The Kids' "Go-Bags": Empowering Young Travelers
Give each child a small backpack that is their responsibility. This fosters independence and dramatically reduces "Can you get my...?" requests. Let them help pack it with small toys, a coloring book, a reading book, and their tablet (if applicable).
The Overnight Bag: The Hotel Stop Lifesaver
If your trip includes an overnight hotel stay, this single tactic will save your sanity. Pack one duffel bag with everything the entire family needs for a single night: a change of clothes for everyone, pajamas, toiletries, medications, and charging cables. This prevents you from lugging every suitcase into the hotel.
Your In-Car Entertainment Playbook
Boredom is the mortal enemy of a peaceful road trip. Don’t leave entertainment to chance; deploy a structured strategy to keep spirits high and sibling squabbles low.
Your Secret Weapon Against Boredom
Instead of giving kids all their new activities at once, wrap a few small, inexpensive items and present one every hour or two. The anticipation and novelty work wonders to break up the monotony.
Pro-Tip: Use a hanging shoe organizer on the back of the front seat. Each pocket can hold a new activity, snack, or surprise. This visual countdown gives kids a clear answer to "how much longer?"
The Screen-Free Activity Arsenal
Engage their minds and prevent the glazed-over look of too much screen time with these proven winners:
Audiobooks: A captivating story can make hours fly by. Borrow digital audiobooks for free from your local library using the Libby app.
Podcasts for Kids: Shows like "Wow in the World" or "Story Pirates" are both entertaining and educational.
The License Plate Game: A classic for a reason. Find a printable checklist online to track which states you’ve found.
Travel Journals: Give each older child a blank notebook and encourage them to document the trip.
Travel Bingo: Create or print bingo cards with things to spot on the road (a red truck, a cow, a bridge, etc.).
Using Technology as a Tool, Not a Crutch
Screen time isn't the enemy, but mindless screen time can lead to crankiness. Use it strategically.
Download Everything: Do not rely on cellular service. Download movies, shows, and games onto tablets before you leave.
Set Clear Boundaries: Establish rules for screen time before you start the car.
Invest in Headphone Splitters: This cheap device allows two kids to watch the same movie on one device, preventing arguments.
Mastering Snacks and Drinks for the Road
Constant stops for overpriced gas station food can derail your budget and schedule. A well-planned mobile kitchen keeps everyone fed, hydrated, and happy.

How to Pack a Cooler for Freshness
Pre-chill: Bring your cooler inside the night before and pre-chill it with a "sacrificial" bag of ice.
Ice on the Bottom: Use solid blocks of ice or frozen water bottles on the bottom, as they melt slower than cubed ice.
Layer Strategically: Place drinks at the bottom and more delicate items like sandwiches on top.
Fill the Gaps: Air is the enemy of cold. Fill any empty space with extra ice cubes.
The "Low-Mess" Snack Box
Keep a separate, easily accessible box with snacks that don't require refrigeration and minimize mess. Think protein-packed (string cheese, nuts), clean fruits & veggies (grapes, baby carrots), and crunchy classics (pretzels, goldfish).
Pro-Tip: Use a craft organizer or a tackle box with small compartments to create a "snackle box." This turns snack time into a fun, self-serve activity.
Setting the Tone for a Great Trip
The final piece of your strategy involves managing expectations and the rhythm of the journey itself.
The 2-Hour Rule: Making Pit Stops Part of the Adventure
Plan to stop every two to three hours, even if nobody needs a bathroom break. Use your map app to find interesting parks, quirky roadside attractions, or local ice cream shops. Some of the 4 Unforgettable National Park Family Travel Ideas make for incredible, itinerary-worthy stops.
Embracing Spontaneity
No matter how well you plan, things will go wrong. You’ll hit traffic, or a child will have a meltdown. The most important thing you can pack is a flexible mindset. A relaxed attitude from the parents is contagious and sets the tone for the entire trip.
Frequently Asked Questions
How do you survive a 12-hour car ride with kids?
The key is breaking the trip into manageable chunks. Use the "Slow Reveal" method for new toys and activities, and plan to stop every 2-3 hours. Have one longer stop at a park or playground midday to burn off significant energy.
What are the best mess-free snacks for toddlers in the car?
Focus on dry, bite-sized items that won't cause a sticky disaster. Puffs, small crackers (like goldfish), dry cereal, and raisins are all excellent choices. Avoid anything juicy or crumbly like peaches or flaky pastries.
What should I check on my car before a long road trip?
Recommended: Stress-Free Flying with Kids: Airport, TSA, and In-Flight Guide
Recommended: Travel Guide: Trip Planning, Flights, and Avoiding Tourist Traps
At a minimum, you must check your tire pressure (including the spare), oil and other fluid levels, brakes, lights, and windshield wipers. For maximum peace of mind on a major trip, have a trusted mechanic perform a full inspection.
Your System for a Memorable Journey
You now have more than just a packing list; you have a complete, systems-based playbook for executing a smooth and memorable road trip. By investing time in this preparation, you’re not eliminating challenges—you're building the confidence and structure to handle them with grace.
You are transforming the drive from a stressful chore into a core part of the family adventure. Pack your bags, load up the car, and get ready to create memories that will last a lifetime.
Read the full guide: Family Travel Ideas: The 2026 Guide to Unforgettable Trips
Travel News
Comments 0
No comments yet
Be the first to share your experience!
You May Also Like
Ultimate USA Holidays Guide: Top Picks
FTC Affiliate Disclosure: Stay Compliant as a Travel Creator
Essential Affiliate Tools: From Tracking to Full Optimization
Booking.com Affiliate Review: Pros, Cons & Earnings
Decoding Affiliate Commission Rates: Benchmarks for Travel Creators