9 Beach Safety Tips That Could Save Your Life
TrekGuider @trekguider
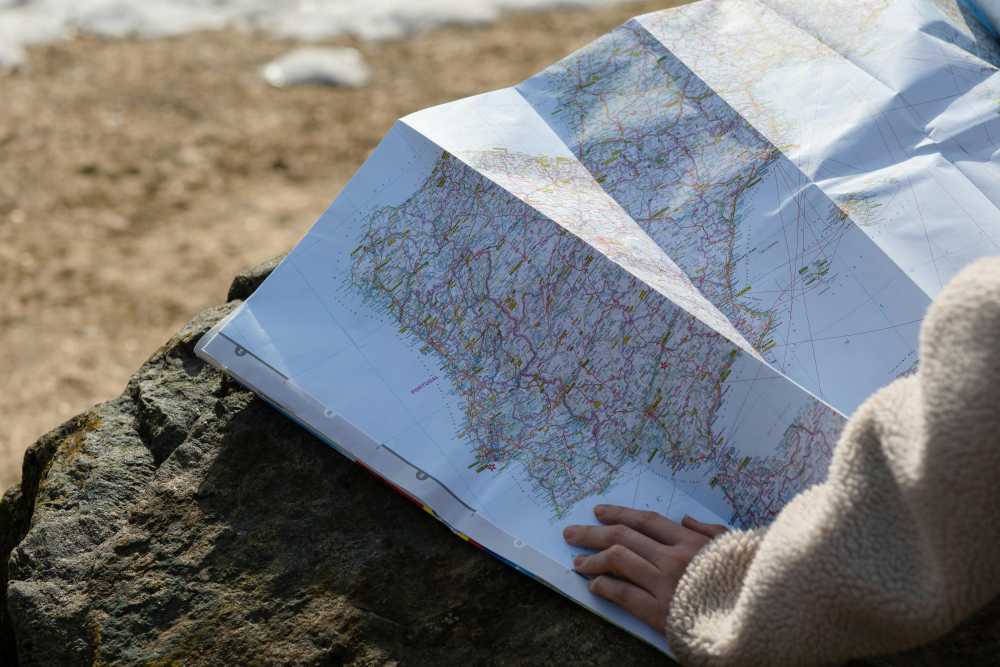
There’s a moment on every beach trip that feels like pure magic. It’s the feeling of warm sand between your toes, the hypnotic sound of waves crashing, and the endless blue horizon stretching out before you. It’s a picture of perfect relaxation. But beneath that tranquil surface, the ocean holds immense and impartial power. A beautiful day can turn dangerous in an instant from a hidden current, underestimated waves, or the relentless sun, transforming a dream vacation into a terrifying emergency. Every year, countless beachgoers find themselves in preventable peril simply because they misread the water or weren't prepared for the environment.
This isn't a guide to make you fear the ocean; it's a playbook to empower you to respect it. We’re here to give you the essential, expert-backed beach safety tips that can mean the difference between a blissful day and a life-altering one. These strategies, drawn from lifeguarding associations and national weather experts, are a critical component of the situational awareness we cover in our comprehensive guide, The Ultimate Guide to Travel Safety: A 2026 Playbook. By learning to see the beach not just as a playground, but as a dynamic natural environment, you can ensure your only takeaways are seashells and incredible memories. Let’s dive in.

Master the Water: Essential Ocean Safety Tips
The vast majority of beach-related dangers originate in the water itself. From powerful currents to unpredictable surf, understanding the ocean's behavior is the most critical skill any beachgoer can possess. These are the foundational beach safety tips for staying safe in the surf.
1. Become an Expert at Spotting Rip Currents
Rip currents are the number one danger at most surf beaches, responsible for the majority of ocean rescues performed by lifeguards. They are not undertows that pull you under the water; they are powerful, narrow channels of water that flow away from the shore at high speed. According to NOAA and the United States Lifesaving Association (USLA), knowing how to visually identify one from the shore is your first and best line of defense.
Here’s what to look for, especially from an elevated position like the dunes or a lifeguard tower:
A Channel of Churning, Choppy Water: Look for a specific area where the water seems agitated or rough, moving in a different direction than the surrounding waves.
A Break in the Incoming Wave Pattern: This is often the easiest sign to spot. You'll see a gap in the line of breaking waves—an area that looks deceptively calm. This flat spot is the rip current pulling water back out to sea, disrupting the incoming waves.
A Difference in Water Color: Because the current is carrying sand and sediment offshore, the water within a rip current often appears darker, murky, or sandy brown compared to the clearer, greener water on either side.
A Line of Foam or Debris Moving Seaward: This is a dead giveaway. If you see a line of foam, seaweed, or other floating debris moving steadily away from the beach, perpendicular to the shore, you are looking directly at a rip current.
Pro-Tip: Before you even set up your umbrella, take five minutes to stand back and observe the water. Actively look for these signs. Identifying potential rip currents before you get in the water is the single most important safety action you can take.
2. Know the "Flip, Float, Follow" Rule for Rip Current Survival
If you do get caught in a rip current, your instinctive reaction—to panic and swim directly against it back to shore—is the most dangerous thing you can do. Fighting a rip current will exhaust you to the point of drowning. The correct response is simple and could save your life.
Flip: Flip onto your back to stay afloat and conserve energy.
Float: The current will not pull you under; it will only pull you away from shore. Stay calm and float with it.
Follow: Once you are out of the main pull of the current, begin swimming parallel to the shoreline. Do not swim toward the beach. Once you have swum out of the current, you can then turn and swim back to shore, ideally at an angle away from where you were caught.
If you are unable to swim out of it, continue to float and wave your arms and yell for help to attract the attention of a lifeguard or other swimmers.

3. Understand and Obey the Beach Warning Flag System
While knowing how to escape an invisible current is a vital reactive skill, your most powerful proactive tool is the one flapping in the breeze. Beach warning flags are a simple, universal language used by lifeguards to communicate the current water conditions. This system, adopted by the International Lifesaving Federation, provides a quick, visual assessment of the hazard level. Ignoring these flags is a gamble you should never take.
Green Flag: Low Hazard. Conditions are calm, but you should still exercise caution.
Yellow Flag: Medium Hazard. Moderate surf and/or currents are present. Weak swimmers should stay out of the water, and everyone else should use extra care.
Red Flag: High Hazard. The surf is high, and/or strong currents make conditions dangerous. It is recommended that no one enters the water.
Double Red Flag: Water Closed to Public. Conditions are extremely dangerous. The water is closed to all swimming, and entering it is prohibited.
Purple Flag: Dangerous Marine Life. This flag indicates that potentially hazardous marine life, like jellyfish or sharks, has been spotted. It is always flown with another color flag that indicates the surf conditions.
Pro-Tip: The absence of flags does not automatically mean the water is safe. If there is no flag, it likely means there is no lifeguard on duty. In that case, you are swimming entirely at your own risk. Always try to swim at a beach protected by lifeguards.
Master the Environment: Sun and Shoreline Safety Tips
While the ocean poses the most immediate threats, the beach environment itself has its own set of risks. The sun, sand, and heat can cause serious health issues if not managed properly. These beach safety tips will keep you safe on the shore.
4. Know the Signs of Heat Exhaustion vs. Heatstroke
That perfect, sun-drenched beach day holds a hidden danger. When the temperature climbs, the line between bliss and a medical emergency can blur with alarming speed. According to the Red Cross, it's crucial to know the difference between heat exhaustion and the more severe, life-threatening heatstroke (sunstroke).
Heat Exhaustion Symptoms:
Headache, dizziness, and confusion
Excessive sweating with cool, moist, or pale skin
Nausea and muscle cramps
A rapid, weak pulse
First-Aid for Heat Exhaustion:
Move to a Cool Place: Immediately get the person out of the direct sun and into shade or air conditioning.
Cool Them Down: Loosen their clothing and apply cool, wet cloths or spray them with cool water.
Rehydrate: If they are conscious and able to swallow, have them sip small amounts of a sports drink or water.
If their condition doesn't improve or they start vomiting, call for emergency help immediately, as it can progress to heatstroke.
5. Recognize the Emergency of Heatstroke (Sunstroke)
Heatstroke is a full-blown medical emergency where the body's internal cooling system completely fails.
Heatstroke Symptoms:
Changes in mental status (confusion, agitation, loss of consciousness)
Hot, flushed, and often dry skin (sweating may have stopped)
A dangerously high body temperature (often above 104°F / 40°C)
A rapid, strong pulse, which may become weak later
First-Aid for Heatstroke:
Call 911 Immediately: This is a life-threatening emergency that requires professional medical intervention.
Begin Rapid Cooling: While waiting for help, do everything you can to cool the person's body. Immerse them in cool water if possible, or douse them with water and apply ice packs to the neck, groin, and armpits.

6. Practice Proactive Sun Protection
The best way to deal with a heat-related illness is to never let it start. Sun protection is a continuous strategy, not a one-time action.
Hydrate Constantly: Drink plenty of water throughout the day, even before you feel thirsty.
Use Broad-Spectrum Sunscreen: Apply a sunscreen with at least SPF 30 and reapply it every two hours, and always immediately after swimming or excessive sweating.
Seek Shade: Use an umbrella and take breaks from the sun, especially during the peak intensity hours of 10 a.m. to 4 p.m.
Wear Protective Clothing: A wide-brimmed hat and UV-blocking sunglasses are non-negotiable.
7. The "Stingray Shuffle" Rule
In many coastal areas, stingrays bury themselves in the sand in shallow water. Stepping directly on one can result in an excruciatingly painful sting from the barb on their tail. To avoid this, never walk normally through the shallows. Instead, shuffle your feet along the sand. The vibrations from the shuffle will alert any nearby stingrays to your presence, giving them a chance to swim away peacefully.
Master Your Preparation: Final Beach Safety Tips
A safe and relaxing beach day begins before you even leave home. Smart planning and having the right gear can make all the difference, especially when traveling with family.
8. Pack a Dedicated Beach First-Aid Kit
While your main travel medical kit should be comprehensive, your beach bag needs a few specific items to handle common coastal issues:
Waterproof Bandages: For minor cuts and scrapes from shells or rocks.
Aloe Vera Gel: For immediate relief from minor sunburn.
Antihistamine Cream: To soothe the itch from insect bites.
Tweezers: For removing splinters or shell fragments.
Vinegar: A small bottle of white vinegar is a secret weapon; it can help neutralize the sting from some types of jellyfish.
9. Always Designate a "Water Watcher"
When you're at the beach with a group, especially with children, it's easy to fall into the trap of "diffusion of responsibility," where everyone assumes someone else is watching the kids in the water. The solution is to formally designate one adult as the "Water Watcher" for a set period (e.g., 15-20 minutes). During their shift, that person's only job is to watch the water without distraction—no phones, no books, no conversations. Then, you switch. This simple system ensures there are always eyes on the swimmers.
Your Ultimate Guide to Family Beach Travel
Keeping kids safe and entertained at the beach is a unique challenge. From packing the right gear to navigating meltdowns and keeping them safe in the sun and surf, a little extra preparation goes a long way. Our specialized guide takes the stress out of the equation.
Download our free Stress-Free Flying with Kids Guide for expert tips on making every part of your family vacation, from the airport to the beach, a breeze!
Beach Safety FAQs
A prepared mind is a safe mind. Here are quick answers to other common beach safety questions.
1. What’s the right way to treat a jellyfish sting?
First, get out of the water. Rinse the affected area with vinegar (if available) for about 30 seconds to deactivate the stingers. Do not use fresh water, as it can make it worse. Carefully pluck out any visible tentacles with tweezers. Soaking the skin in hot water (as hot as can be tolerated without burning) for 20-45 minutes can also help relieve the pain.
2. Is it safe to dig deep holes in the sand?
Digging in the sand is a classic beach activity, but deep holes can be incredibly dangerous. They can collapse unexpectedly, burying a person in seconds. Never dig a hole deeper than the knees of the smallest person in your group, and always fill in any holes you dig before you leave the beach.
3. What should I do if I see someone in trouble in the water?
Do not attempt a swimming rescue yourself unless you are trained in water rescue. An untrained rescuer can quickly become a second victim. The best course of action is to call for help immediately. Yell to alert a lifeguard and call 911. If you can, throw the person something that floats, like a cooler or a boogie board.
By embracing these nine essential beach safety tips, you shift from being a passive visitor to an active, aware, and prepared participant in one of nature’s most magnificent environments. The goal isn't to diminish the fun but to ensure it. A healthy respect for the ocean and a solid plan for your day are the keys to unlocking a truly carefree and unforgettable experience by the sea.

Now that you've mastered the art of staying safe on the coast, you can focus on the rest of your adventure. For a complete, deep-dive into every facet of trip planning, from health and safety to budgeting and logistics, our comprehensive Travel Guide is the only resource you'll ever need.
Don't Miss Out! Subscribe for Exclusive Content
Subscribe


Comments 0
No comments yet
Be the first to share your experience!
Dont Miss Out! Subscribe for Exclusive Content

Ultimate USA Holidays Guide: Top Picks

FTC Affiliate Disclosure Essentials: Stay Compliant as a Travel Creator

Essential Affiliate Tools: From Tracking to Full Optimization

Booking.com Affiliate Program Review: Pros, Cons, and Earnings Potential

Decoding Affiliate Commission Rates: Benchmarks for Travel Creators

Amazon Associates for Travel: Strategies to Maximize Commissions
How to Create a Digital Travel Guide People Will Buy
TrekGuider @trekguider
You’re a travel expert. Your notes are filled with hidden gems, your camera roll is a treasure trove of untold stories, and your advice could save fellow travelers hundreds of dollars and hours of stress. You know your expertise has value, but packaging it into a real, scalable income stream feels like a monumental task. Relying on the slow trickle of ad revenue or the unpredictability of affiliate sales is a frustrating grind, keeping your dream of a truly independent business just out of reach.
This uncertainty keeps you on the content treadmill, trading your valuable time for pennies. You see other creators launching their own products and achieving a level of financial freedom that feels like a distant fantasy. The path forward is a confusing fog of questions about design, content, pricing, and technology, leaving you stuck in analysis paralysis while the immense opportunity of the creator economy—a market projected to nearly double from $250 billion to almost $500 billion by 2027—passes you by.
It’s time to stop trading hours for dollars and start building assets. This is your chronological, step-by-step playbook. We will demystify the entire process and show you exactly how to create a digital travel guide that people will not only buy but will also love and recommend. This is your complete workflow for transforming your hard-won expertise into a polished, professional product that generates passive income for years to come. Think of this as a critical chapter in your business plan; for the complete blueprint on building a modern creator enterprise, be sure to read our ultimate guide to How to Make Money Online: A Creator's Guide for 2026.

Why a Digital Guide is Your Ultimate Scalable Asset
Before diving into the "how," it's critical to understand the "why." Transitioning from promoting others' products to creating and selling your own is the single most powerful step you can take toward building a profitable, independent business. While ads and affiliate links have their place, digital products offer a level of control and scalability that other models simply can't match.
The advantages are transformative:
Infinite Scalability: Digital products operate on a "create once, sell forever" model. Whether you sell 10 copies or 10,000, your workload remains the same. There is no inventory to manage and no shipping to worry about.
Exceptionally High Profit Margins: With no manufacturing or distribution costs, the profit margins are extraordinary. Once you recoup your initial time investment, nearly every sale is pure profit.
Full Ownership and Control: When you sell your own guide, you own the entire process. You control the product, the pricing, the marketing, and the customer relationship. You are no longer dependent on an affiliate partner’s commission rates or an ad network's traffic requirements.
Solidifies Your Authority: Creating and selling a high-quality product instantly positions you as an expert. It builds deep trust with your audience, as you are no longer just recommending other people's stuff—you are standing behind your own valuable creation.
The market reflects this opportunity. The e-learning sector alone, a huge component of the digital product world, is projected to surge to an incredible $848 billion by 2030. This isn't a fleeting trend; it's a fundamental shift in how creators build resilient businesses.
The Blueprint – Research and Validation
The costliest mistake a creator can make is to spend months building a product nobody asked for. Thorough research and validation aren't optional; they are the foundation upon which a profitable product is built.
Identify Audience Needs and Define a Specific Niche
Your first job isn't to be a brilliant inventor; it's to be a sharp detective, uncovering the real, recurring problems your audience is desperate to solve.
Listen to Your Audience: The best ideas are hidden in plain sight. Dive into your blog comments, email replies, and social media DMs. What destinations are people constantly asking about? What part of the travel planning process do they find most challenging or stressful? Their recurring questions are your product ideas.
Define a Hyper-Specific Niche: Avoid creating a generic guide. A broad guide to "Mexico" will get lost in a sea of competition. A highly specific product like "A First-Timer's Foodie Guide to Mexico City's Roma Norte Neighborhood" is more valuable, easier to market, and instantly positions you as a niche expert.
Conduct Keyword and Market Research to Validate Demand
Once you have an idea, you must validate it with data.
Analyze Search Volume: Use an SEO tool to check the search volume for terms related to your guide idea. High search volume for long-tail keywords like "7-day Japan itinerary for foodies" or "what to do in Lisbon with kids" is a strong data signal that a ready market exists for a guide on that topic.
Conduct Competitor Analysis: Find 3-5 comparable digital travel guides in your niche. Your goal isn’t to copy them, but to identify a gap in the market. Analyze their price points, what they include, and, most importantly, read their reviews. What are customers praising? What are they complaining about? This will show you exactly how to create a superior product.
Pro-Tip: True validation comes from the intersection of qualitative and quantitative data. A great product idea is one that your audience is asking for (qualitative) and that a significant number of people are searching for online (quantitative).

The Core – Outlining and Content Creation
With a validated idea, it’s time to build the heart of your product: the content. This is where your unique expertise, voice, and experience shine.
Develop a Logical Structure
A good guide flows intuitively and is easy to navigate. Before you write a single word, create a detailed table of contents. This will be your roadmap and ensure you don't miss any crucial information. A typical structure includes:
Introduction: A brief overview of the destination, essential facts (currency, language), and why your guide is the ultimate resource.
Logistics: The practical nuts and bolts—getting there, getting around, visa requirements, and curated recommendations on where to stay for different budgets.
Experiences: The core of your guide. This includes top attractions, detailed daily itineraries, and deep dives into your niche (e.g., food and drink recommendations, hiking trails, photo spots).
Practicalities: The crucial final details like safety tips, packing lists, a budget breakdown, and useful local phrases.
Write Compelling and Useful Content
This is where you go beyond the generic advice found on a thousand other blogs.
Gather Your Assets: Compile all of your personal notes, journal entries, and high-quality photographs from your travels to the destination. Your first-hand experience and unique visuals are your primary competitive advantage.
Be Both Inspirational and Intensely Practical: Write in an engaging, personal tone. Share anecdotes and insider tips that bring the destination to life. Go beyond simply listing facts; tell your readers why a place is special. Share the hard-won wisdom that can't be found elsewhere, like "skip the line at the Colosseum by booking this specific tour" or "the best gelato is actually found two blocks away from the main square at this tiny shop."
With your raw content compiled, the next step is to give it a professional polish that signals its immense value.

The Polish – Professional Design for Non-Designers
Your guide's content may be brilliant, but in the digital world, packaging matters. A professional, user-friendly design signals quality and dramatically improves the customer experience.
Select a User-Friendly Design Tool
You don't need to be a graphic designer to create a stunning product. For a travel blogger whose primary goal is to efficiently create a static PDF travel guide, a template-based tool like Canva is the strategically superior choice. While powerful professional software like Figma or Adobe Illustrator has a steep learning curve that can delay your launch by weeks, Canva is built specifically for this type of project. Its intuitive, drag-and-drop interface is designed to help non-designers produce high-quality visuals quickly.
Feeling inspired to build your own assets but not sure where to begin? Creating high-value products is the core of a modern creator business. To accelerate your journey, we've bundled together some of our most powerful resources. The Travel Creator's Toolkit is a free collection of checklists, templates, and guides designed to help you streamline your workflow and build your business faster.
5 Essential Mobile-First Design Principles for a User-Friendly Guide
Your guide will almost certainly be used on a mobile phone while your customer is in-destination. Designing with a mobile-first user experience (UX) is not an option; it is essential for your product to be functional and valuable.
Prioritize Legibility and High Contrast: The content must be effortlessly readable on a small screen, often in bright sunlight. Use a clean, simple font of at least 11 points so users don't need to pinch-and-zoom. Crucially, ensure a high contrast ratio between the text and background—at least 4.5:1 as recommended by Web Content Accessibility Guidelines (WCAG)—to maintain readability.
Implement Simplified Navigation: The single most important navigation element is a hyperlinked Table of Contents at the beginning of the document. This allows users to jump directly to the section they need with a single tap, which is crucial when they're trying to find information quickly on a busy street.
Design for Touch with Finger-Friendly Targets: Any included hyperlinks (e.g., a link to a restaurant's website or a Google Maps location) must have a clickable area large enough to be easily tapped with a finger—the industry standard is a minimum touch target size of 44x44 points (approximately 7-10mm).
Minimize Cognitive Load by Eliminating Clutter: Mobile users are often distracted. Their interaction with a guide is typically in short bursts or "micro-tasks". To accommodate this, use short paragraphs, bulleted lists, bolded text for key information, and generous white space. A clean, uncluttered interface helps users find what they need with minimum effort.
Optimize for Performance and Portrait Orientation: The vast majority (94%) of mobile users hold their phones vertically. Your guide must be designed with a portrait layout (e.g., A4 or US Letter size). Crucially, keep the final PDF file size as small as possible by compressing all images before inserting them into your document. A large file will download slowly on a weak cellular connection, creating a poor user experience.

The Launchpad – How to Create a Digital Travel Guide for Sale
You've created a valuable, beautifully designed resource. The final phase is to package it, price it for profit, and get it into the hands of your customers.
How to Price Your First Digital Product
Pricing is one of the most challenging decisions. The most effective strategy for a knowledge-based product is value-based pricing. Instead of focusing on your production costs, price your product based on the transformation it provides to the customer. If your guide saves a user 20 hours of stressful research and helps them discover priceless experiences they would have otherwise missed, its value is immense.
A practical process for setting your price:
Step 1: Research the Market: Identify 3-5 comparable digital travel guides in your niche to establish a realistic market range.
Step 2: Articulate the Value: Make a specific list of the tangible outcomes your guide provides (e.g., "Saves over 15 hours of planning," "Includes a pre-planned 7-day itinerary worth over $100 in planning fees").
Step 3: Set an Initial Price and Test: For a high-quality, first-time travel guide, a price point between $19 and $49 is a strong starting position. It communicates significant value without creating sticker shock for the buyer.
Choose a Sales Platform That Works for You
You need a platform to handle the sale and secure digital delivery of your product. While you can use e-commerce plugins on your own blog, the smartest strategy is to leverage a platform that puts you in front of a built-in audience of motivated buyers.
Pro-Tip: Don't just build a product; build your business inside an ecosystem. A specialized marketplace like TrekGuider is the ideal place to sell your high-quality Travel Guide. It provides a professional, ready-made storefront and connects you with a global audience of passionate travelers who are actively searching for expert resources. You can publish articles to attract new customers directly on the platform, creating a powerful marketing funnel that leads right back to your product page.
Frequently Asked Questions (FAQ)
1. How long should my digital travel guide be?
Value is not measured in page count. A concise, 50-page guide packed with unique, actionable advice is far more valuable than a rambling 200-page guide filled with generic information. Focus on comprehensively solving the specific problem your niche audience has.
2. Do I need to have visited the destination very recently?
While recent, first-hand experience is ideal, an "evergreen" guide focused on core attractions, culture, and logistics can have a long shelf life. The key is transparency. Be clear about when you last visited and focus on information that doesn't change rapidly. You can always update your guide with new editions.
3. What if I'm not a professional writer or photographer?
You don't need to be. Your audience values authenticity and expertise over perfect prose. Write in your natural, conversational voice, as if you were giving advice to a friend. For photos, a modern smartphone can capture high-quality images. The goal is to be clear, helpful, and genuine.

Your Journey from Expert to Entrepreneur Starts Now
You now have the complete, A-to-Z workflow. You've moved from the vague idea of a product to a concrete, actionable blueprint that covers research, content creation, professional design, and a smart launch strategy. The path from being a passionate travel expert to a successful digital entrepreneur is no longer a fog of confusion.
You have the definitive answer to the question of how to create a digital travel guide that provides immense value and generates a sustainable income. The only thing left to do is take the first step. Start the research, outline your expertise, and begin building the asset that will power your business and fund your adventures for years to come.
SEO Meta Data Suggestions:
SEO Meta Title (58 characters): How to Create a Digital Travel Guide People Will Actually Buy
URL Slug: how-to-create-digital-travel-guide
SEO Meta Description (154 characters): A step-by-step playbook for travel creators on how to create a digital travel guide, from research and writing to design, pricing, and selling your product.
Read the full guide: The Travel Blog Business Plan: How to Make Real Money in 2026
Don't Miss Out! Subscribe for Exclusive Content
SubscribeComments 0
No comments yet
Be the first to share your experience!
Dont Miss Out! Subscribe for Exclusive Content
FTC Affiliate Disclosure Essentials: Stay Compliant as a Travel Creator
Essential Affiliate Tools: From Tracking to Full Optimization

Avoid These 5 Affiliate Landing Page Mistakes for Better Conversions

Affiliate Keyword Research Mastery for Travel Blogs
Booking.com Affiliate Program Review: Pros, Cons, and Earnings Potential
Decoding Affiliate Commission Rates: Benchmarks for Travel Creators
NYC Pride: Parade Route Essentials
TrekGuider @trekguider
The air crackles with anticipation. You feel the bass from a distant float thumping in your chest, a rhythmic heartbeat for a city ready to explode in a celebration of love, identity, and history. The NYC Pride Parade is one of the most iconic, life-affirming events on the planet. But as you picture the cascade of rainbow flags, a knot of logistical questions tightens in your stomach. With millions of people flooding Manhattan, where do you even begin? How early is early enough? How do you navigate a multi-mile route to actually see the parade without getting swallowed by the crowd?
Without a smart plan, the dream experience can dissolve into a logistical nightmare. You risk being stuck ten-deep behind a wall of people, catching only glimpses of the spectacle. You could spend hours feeling overwhelmed, battling for a sliver of sidewalk instead of immersing yourself in the powerful current of community and celebration. The line between an unforgettable day of joy and a frustrating ordeal is drawn by preparation.
This is your definitive playbook for conquering the chaos. Forget the guesswork. We are breaking down the entire pride parade New York route, section by section, arming you with insider strategies and actionable essentials. From the electric energy of the formation zone to the historic heart of the Village, this guide will help you navigate the day like a seasoned pro. Get ready to transform potential stress into pure, unadulterated Pride.

The Heartbeat of Pride: A Journey from Protest to Celebration
But to truly appreciate the river of rainbow flags and joyous noise, you have to understand its source. This isn’t just a party; it’s a pilgrimage. The modern NYC Pride Parade is the direct descendant of the Christopher Street Liberation Day March, first held in 1970, exactly one year after the Stonewall Uprising of 1969. That rebellion, a series of spontaneous and defiant demonstrations against a police raid on the Stonewall Inn, was the flashpoint that ignited the modern gay rights movement.
What began as a protest march has evolved over decades into a powerful dual-purpose event: a joyous celebration of identity and a formidable platform for activism. In the 1980s, as the AIDS crisis devastated the community, the parade became a vital and visible front line for raising awareness and demanding action, cementing its role as the community's conscience and its loudest voice. Its deep historical roots and unwavering commitment to progress make it a key element event—and for good reason, a non-negotiable highlight in our definitive guide to New York Holidays: 10 Must-Do Events. Understanding this legacy enriches the entire experience, transforming you from a spectator into a participant in living history.
Mark Your Calendar: 2026 NYC Pride Parade Date and Time
Precision is your best friend when planning for an event of this magnitude. Get these details locked into your calendar now.
Date: Sunday, the last Sunday of June
Start Time: The parade officially kicks off between 11:00 AM and 12:00 PM.
A word of caution: Do not mistake the start time for your arrival time. The parade route is miles long, and the best viewing spots are claimed hours in advance. For a prime location, especially in the more popular sections, you should be in position no later than 9:00 AM. For the truly iconic spots, even earlier is better.

Deconstructing the Route: A Mile-by-Mile Guide to the Pride Parade New York
The official route for the pride parade New York is a journey through the city's cultural and historical soul. Each segment offers a distinct atmosphere and viewing experience. Your perfect spot depends entirely on the vibe you’re seeking.
The Kick-Off: 26th Street and 5th Avenue (The Formation Zone)
The Vibe: This is the epicenter of pure, unharnessed anticipation. The energy here is electric, a fascinating mix of organized chaos and raw excitement. You’ll see floats getting their final sound checks, dance troupes running through their choreography one last time, and thousands of marchers buzzing with adrenaline before they take their first official step. It’s less of a polished performance and more of an authentic, behind-the-scenes look at the massive human effort powering the event.
Viewing Advice: Standing near the start means you see every contingent at its absolute freshest. The costumes are pristine, the energy is at its peak, and the performances are sharp. It’s a fantastic spot for photographers wanting to capture candid moments and fine details. The crowds here are intense as everyone jockeys for that first glimpse.
Logistics: Arrive extra early—think 8:00 AM—to secure a spot with a clear line of sight. Amenities are scarcer here compared to further down the route. Pack what you need for the morning, as ducking into a local shop will be a major, time-consuming undertaking.
The Main Artery: South on 5th Avenue (The Spectator Hub)
The Vibe: As the parade marches down the world-famous 5th Avenue, it hits its full, spectacular stride. This is the quintessential big-city parade experience. The avenue is wide, the crowds are massive, and the backdrop is pure New York City grandeur. The sound of music and cheering reverberates off the tall buildings, creating an immersive wall of sound. You’ll be surrounded by a diverse mix of families, tourists, and locals, all united in a shared celebration.
Viewing Advice: This is the longest stretch of the parade and where most spectators naturally congregate. For a slightly less condensed crowd, try to find a spot further north, perhaps in the high 30s or 40s. The closer you get to the Village, the exponentially denser the crowds become.
Logistics: This section offers the best access to delis, coffee shops, and stores for restrooms and refreshments. However, be prepared for long lines for absolutely everything. Public transportation is your best friend here; the numerous subway stops along 6th Avenue run parallel to the route, making access relatively straightforward.
The Historic Turn: 8th Street to Christopher Street (The Soul of Pride)
The Vibe: This is the emotional and historical heart of the entire parade. As the route makes its key turn off 5th Avenue and winds through the narrower streets of Greenwich Village towards the Stonewall National Monument, the atmosphere shifts. It becomes more intimate, more intense, and deeply resonant. The sense of history is palpable. This is where the cheers often feel the loudest and the connection between the marchers and the crowd feels most profound.
Viewing Advice: This is, without question, the most meaningful and popular place to watch the parade. Consequently, it is the most crowded. To get a spot here, you must be committed. Arrive by 8:00 AM at the absolute latest, and be prepared to hold your ground for hours. The experience, however, is powerful and unparalleled.
Logistics: Once you’re in a spot here, you’re in for the duration. The narrow streets and dense crowds make movement nearly impossible. Pack everything you need for several hours. There are fewer commercial establishments directly on these streets, so plan accordingly.

Pro-Tip: For a less obstructed view, look for spots near intersections on the opposite side of the street from the parade's direction of travel. Crowd density is often slightly lower there as people tend to cluster on the inside of the turns.
The Grand Finale: Finishing Near 15th Street and 7th Avenue (The Dispersal Zone)
The Vibe: The energy at the end of the route is one of joyous exhaustion and collective accomplishment. Marchers, who have been on their feet for hours, are often interacting more freely with the crowd as they complete their long journey. It’s less of a formal procession and more of a massive, mobile street party winding down into its final, celebratory moments.
Viewing Advice: This is by far the least crowded section of the route, making it an excellent choice for families, those with accessibility concerns, or anyone who couldn't arrive at the crack of dawn. You’ll still see every float and group, but with significantly more room to breathe and move.
Logistics: This area offers the easiest exit strategy. With the parade dispersing, streets begin to reopen sooner, and access to multiple subway lines on 7th Avenue (like the 1, 2, and 3 trains) makes for a quicker trip home or to your next destination.

Your Strategic Viewing Plan: 7 Essential Tips for the Best Experience
A little strategy goes a long way in a crowd of millions. Follow these essential tips to ensure your day is smooth, safe, and spectacular.
Arrive Early, Then Arrive Earlier: This cannot be overstated. For a front-row spot anywhere south of 23rd Street, 9:00 AM is a good baseline. For a coveted spot in the West Village or near Christopher Street, you need to be thinking 7:30 AM or 8:00 AM. The most dedicated spectators arrive with breakfast and a blanket.
Pack Your Urban Survival Kit: You are essentially setting up a base camp for the day. Your kit should include: a large, reusable water bottle (staying hydrated is non-negotiable), high-SPF sunscreen, a portable phone charger, and plenty of snacks. Relying on local bodegas is a rookie mistake; they will be overwhelmed and may run out of supplies.
Master Public Transit: Driving is not an option. Street closures are extensive and begin in the early morning. The subway is your only logical choice. Use lines that run along 6th Avenue (B, D, F, M) or Lexington Avenue (4, 5, 6) and walk west. Avoid stations directly on the route, as they will be dangerously crowded.
Choose Your Vibe, Not Just a Spot: Before you pick a location, decide what kind of experience you want. Do you crave the high-energy launch? The massive midtown spectacle? The deeply emotional historic heart? Or the relaxed, celebratory finish? Matching the location to your desired vibe is the secret to a perfect day.
Stay Connected (But Have a Backup): With millions of people in one area, cell service can be notoriously unreliable. While you should keep your phone charged, don’t depend on it for communication. Use a buddy system, and if you’re with a group, establish a clear, physical meeting point and time in case you get separated.
Prioritize Accessibility: Organizers are continually working to make the event more accessible. Check the official NYC Pride website in the weeks leading up to the parade for detailed information on designated viewing areas for people with disabilities. These locations offer better sightlines and a less congested environment.
Embrace the Virtual Experience: If you can't make it in person or prefer to avoid massive crowds, don't worry. The NYC Pride Parade is live-streamed across multiple platforms. You can catch all the action from the comfort of your home, a powerful option for those who want to participate from afar.
Pro-Tip: The blocks just after the parade turns off 5th Avenue onto 8th Street can be a strategic viewing sweet spot. The crowd thins slightly as it navigates the corner, offering a brief window for better photos and a bit more breathing room before it swells again towards Christopher Street.
Beyond the Sidelines: Documenting Your Day
The spirit of Pride is participation. Even as a spectator, you are a vital part of the event. Wear your brightest colors, create a supportive sign, and cheer loudly for the groups that resonate with you. Your energy is what fuels the marchers on their long walk.
For many, capturing the day is part of the experience. The vibrant colors, powerful emotions, and incredible stories of the pride parade New York make it a content creator's dream. If you're looking to capture and share the experience like a pro, preparation is everything. To elevate your storytelling, our The Travel Creator's Toolkit provides the essential checklists and guides to turn your passion into compelling content that does justice to this incredible event.

Planning the Perfect Pride Weekend in NYC
The parade is the magnificent centerpiece of a city-wide, month-long celebration. Pride Month in New York is packed with parties, cultural events, and community gatherings. Don’t limit your experience to just a few hours on a Sunday afternoon. Make it the anchor of an unforgettable weekend or a longer trip to the city.
Navigating the parade is just one piece of an unforgettable trip. To build a complete itinerary—from finding the best LGBTQ+-friendly hotels in Chelsea or Hell's Kitchen to exploring other iconic city sights that have shaped queer history—our comprehensive Travel Guide is the ultimate resource for planning your entire New York adventure. It helps you weave the parade into a broader, richer travel experience.
Your Mission: Experience Pride to the Fullest
You are now armed with the essential knowledge to navigate the pride parade New York not just as a spectator, but as an informed participant in a powerful celebration. You know the history that fuels the march, the unique vibe of each section of the route, and the practical strategies to make your day a resounding success. The parade is more than a route on a map; it's a journey through history, proof of resilience, and an explosion of pure joy.
So pick your spot, pack your survival kit, and get ready to experience the love, history, and unbreakable community of NYC Pride. Go with an open heart, a loud voice, and a solid plan.
Meta Data Suggestions:
SEO Meta Title: NYC Pride Parade Route Guide: Best Viewing Spots & Tips 2026
URL Slug: /nyc-pride-parade-route-essentials
SEO Meta Description: Your ultimate guide to the 2026 NYC Pride Parade. Discover the best viewing spots, route map, start times, and essential tips to navigate the crowds.
Don't Miss Out! Subscribe for Exclusive Content
SubscribeComments 0
No comments yet
Be the first to share your experience!
Dont Miss Out! Subscribe for Exclusive Content

San Francisco Cherry Blossoms: A Local's Guide to the Blooms

Halloween SF: Haunts Without Horrors

SF Festivals: 7 Must-See Lineups

Christmas SF: Lights & Wharf Wonders

SF Pride: 6 Route & Party Hacks
