7 Travel Insurance Red Flags to Spot Before You Buy
TrekGuider @trekguider
You’ve done it. You’ve booked the flights, reserved the hotel with the incredible view, and started daydreaming about the adventures that await. But amidst the excitement, a nagging thought creeps in: What if something goes wrong? A sudden illness, a cancelled flight, a lost bag—these are the travel gremlins that can turn a dream trip into a logistical and financial nightmare. You know you need travel insurance, but as you stare at policies, your eyes glaze over. It’s a dense jungle of jargon, fine print, and confusing clauses, and you’re terrified of making a costly mistake.
The truth is, not all travel insurance is created equal. A cheap policy can be worse than no policy at all, luring you in with a low price only to deny your claim with a hidden exclusion you never saw coming. This is more than just an inconvenience; a denied medical claim abroad can lead to financially crippling bills. But it doesn’t have to be this way. Consider this guide your consumer advocate, your secret decoder ring for the complex world of travel insurance. We’re here to provide the critical travel insurance tips you need to buy with confidence, ensuring your policy is a true safety net, not a tangled mess of loopholes. This is a vital piece of the puzzle we cover in our comprehensive guide to The Ultimate Guide to Travel Safety: A 2026 Playbook. Let’s pull back the curtain and expose the seven most critical red flags you must spot before you buy.

Red Flag #1: The Vague "Pre-Existing Medical Conditions" Clause
This is, without a doubt, the single most common landmine in any policy and the reason countless claims are denied. A "pre-existing condition" is generally any injury or illness for which you've had symptoms or received treatment before your policy's start date. The problem is that the definition and the "look-back" period can vary wildly.
A major red flag is an overly broad or unclear definition. Many basic policies will flat-out refuse to cover any claim that arises, directly or indirectly, from a pre-existing condition. This could be something as common as asthma, a managed heart condition, or even a recent knee injury. Furthermore, many travelers are shocked to discover that mental health conditions like anxiety or depression are frequently excluded under this clause.
What to look for:
A Clear "Look-Back Period": A good policy will specify the exact time frame it examines for pre-existing conditions (e.g., 60, 90, or 180 days before you bought the policy).
Waiver of Exclusion: Many comprehensive policies offer a "waiver for pre-existing medical conditions" if you purchase the plan within a short window (typically 14-21 days) of your initial trip deposit. This is an incredibly valuable benefit.
Coverage for "Stable" Conditions: Some policies will cover conditions that have been stable (no change in medication, no new symptoms) for the duration of the look-back period.
Pro-Tip: Honesty is the only policy. When getting a quote, you must declare all medical conditions. Failure to disclose a condition can give the insurer grounds to void your entire policy and deny any claim, even one completely unrelated to your non-disclosure.
Red Flag #2: The "Adventure & High-Risk Activities" Exclusion
That thrilling scuba dive in the Red Sea, the exhilarating ski trip down a black diamond run, or even a "tame" activity like hot-air ballooning might not be covered by a standard policy. Insurers create a list of activities they deem "high-risk," and if you get injured while participating, you're on your own. For any traveler whose itinerary is more ambitious than a stroll from the hotel to the pool, this is a five-alarm fire.
The list of excluded activities can be surprisingly long and sometimes illogical. It can include everything from bungee jumping and skydiving to motorcycle riding and even certain types of high-altitude trekking. If you're booking an excursion, the first thing you should do is check if that specific activity is covered. Never assume it is.
What to look for:
A Clearly Defined List: Scrutinize the policy document for a specific section on "Excluded Activities." If you can't find a clear list, that's a red flag in itself.
Optional "Adventure Sports" Rider: Reputable insurance providers will offer an optional add-on or a specific, higher-tiered plan that provides coverage for a wide range of adventure sports. It will cost more, but it’s non-negotiable if you plan to partake.
Check Specifics: Don't just see "scuba diving" is covered. Check the details. Does it cover you to a certain depth? Does it require a specific certification? The details are everything.
Red Flag #3: The "Government Travel Advisory" Loophole
In an unstable world, government travel advisories are a key tool for assessing risk. They can also become a loophole for insurers to deny claims. Most policies contain a clause that voids your coverage if you travel to a country or region for which your home government has issued a "Do Not Travel" or equivalent high-level warning before your departure.
Where this gets tricky is when an advisory is issued after you've booked your trip. While some policies will cover trip cancellation in this scenario, many will not provide any medical or evacuation coverage if you choose to go against the official advice. This red flag effectively shifts the entire financial risk of traveling to a potentially volatile destination onto your shoulders.
What to look for:
Specific Wording on Advisories: Look for the exact language the policy uses. Does it only exclude travel to destinations with a warning in place at the time of purchase, or does it also apply if a warning is issued later?
"Cancel for Any Reason" Upgrade: This is one of the best ways to protect yourself against last-minute travel advisory changes. More on this below.

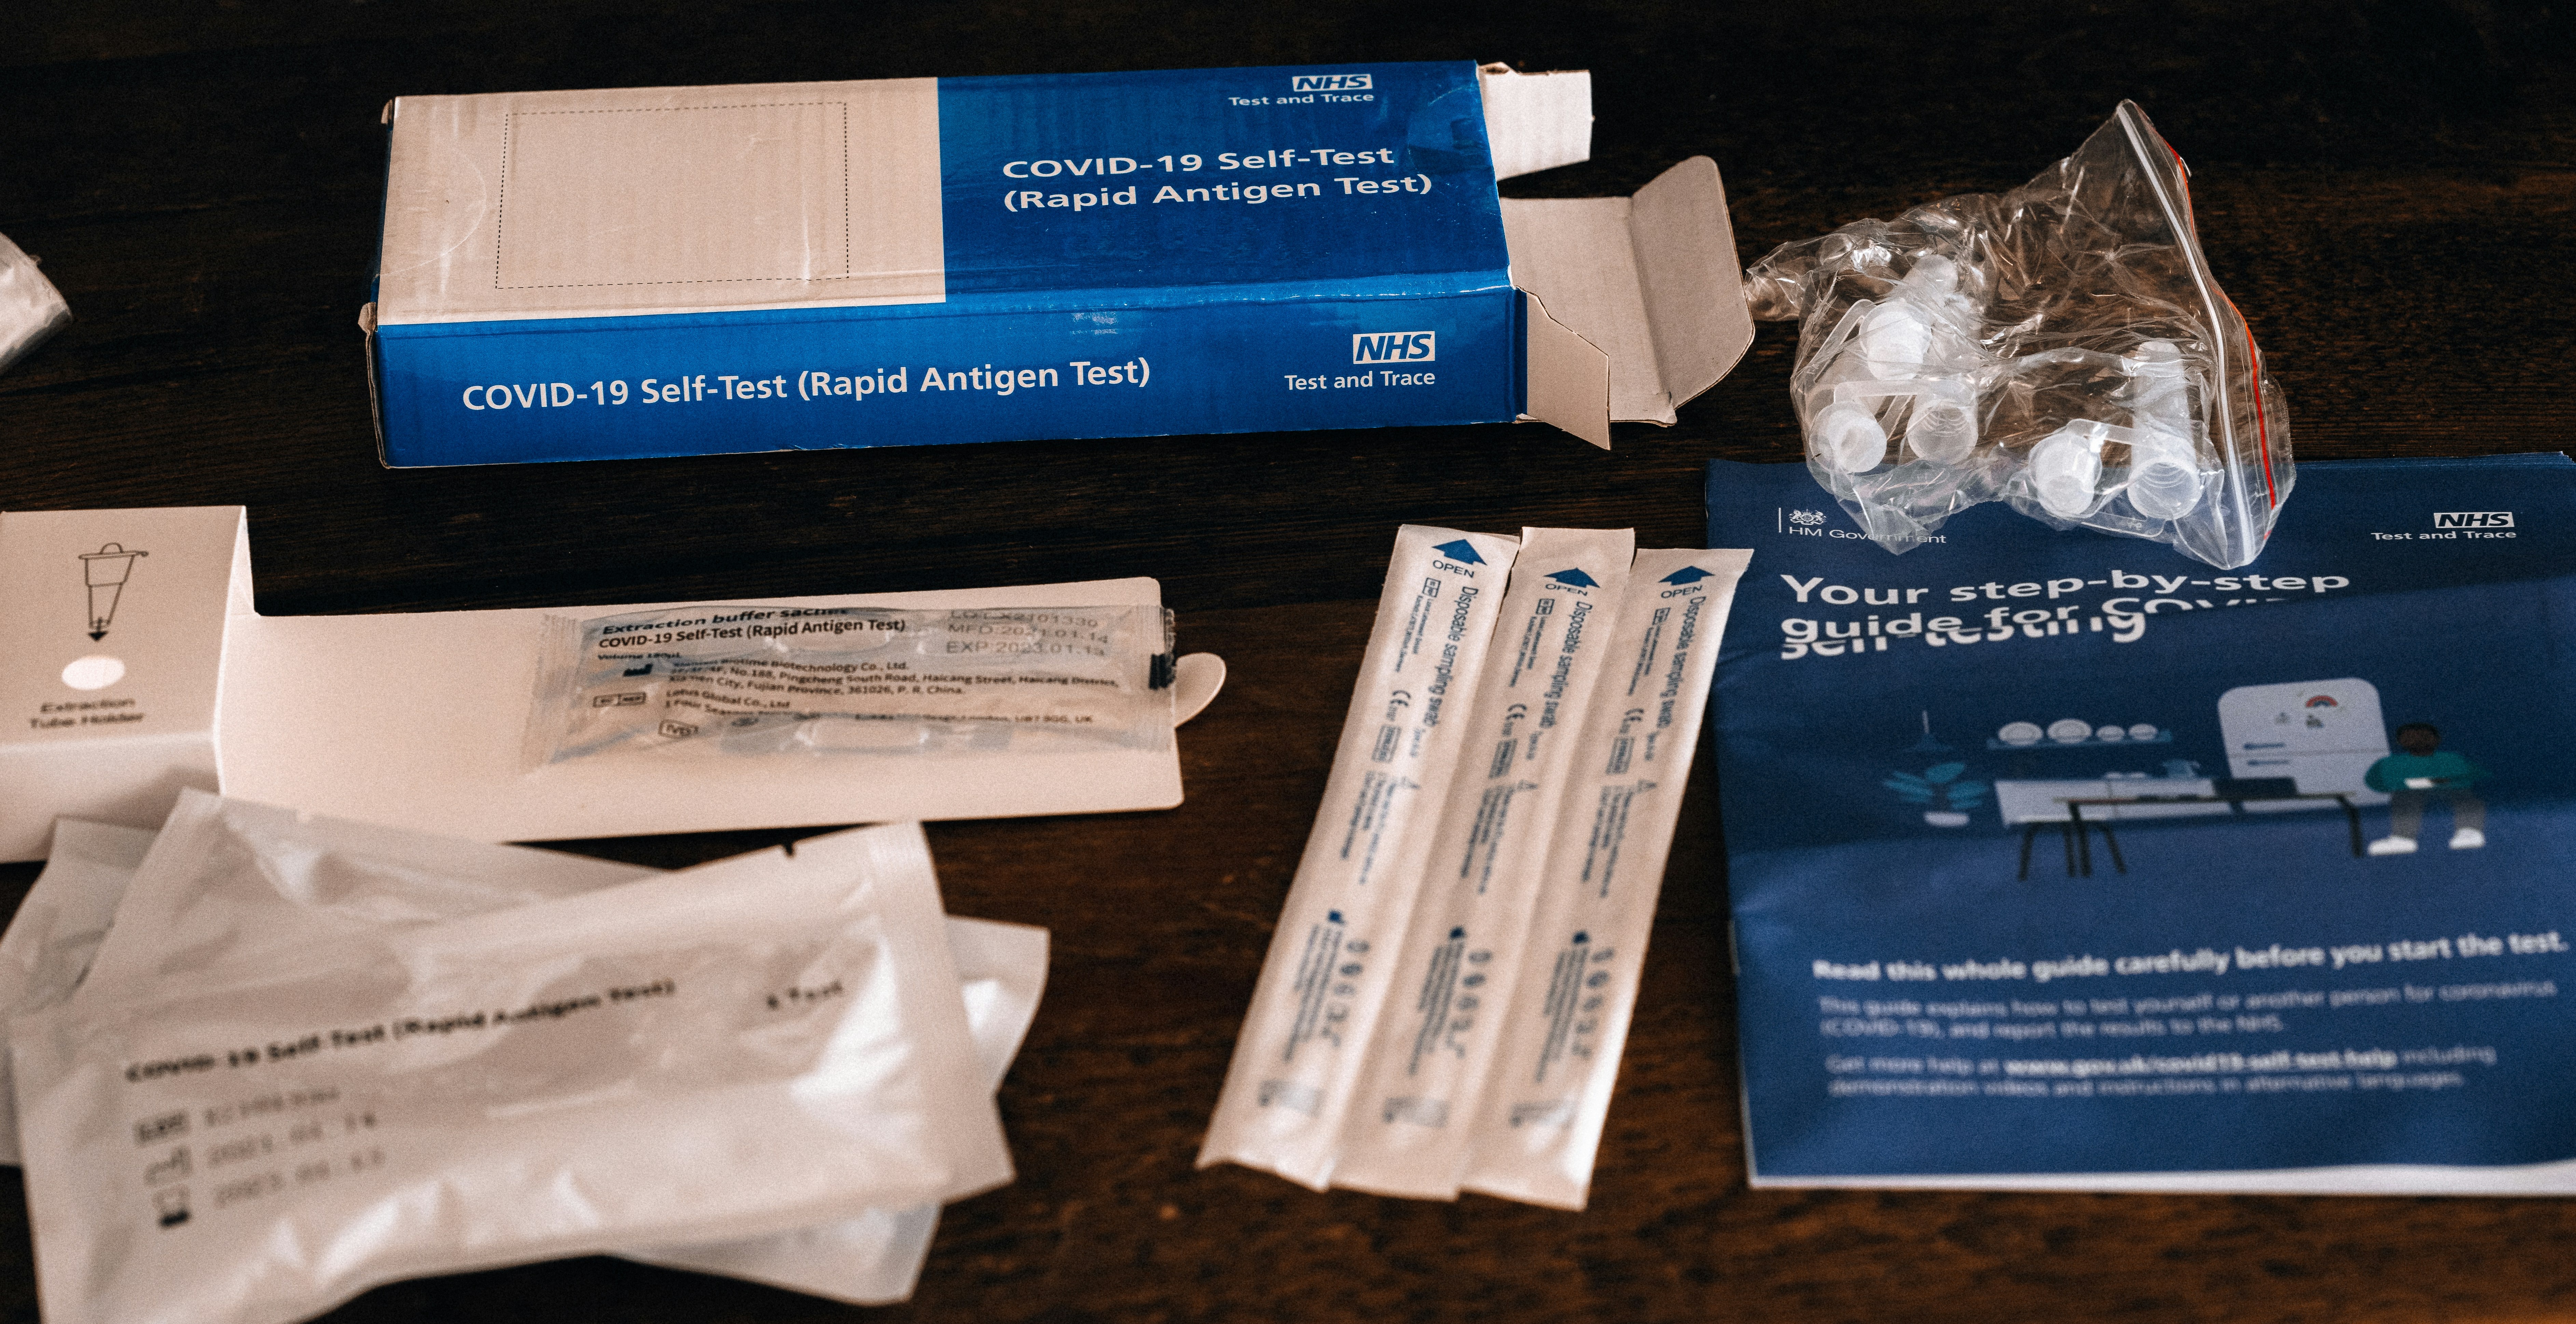
Red Flag #4: The Blanket "Pandemic & Epidemic" Exclusion
In the wake of the COVID-19 pandemic, nearly every provider updated its policies to address communicable diseases. A major red flag is a policy with a broad, all-encompassing exclusion for any losses "due to, arising from, or in connection with any pandemic or epidemic."
This sweeping language could mean you have no coverage for a wide range of scenarios. It could mean you can't cancel if a new lockdown is imposed, if you're afraid to travel due to an outbreak, or even if you contract the illness yourself just before or during your trip.
What to look for:
Named Perils Coverage: Look for policies that, at a minimum, treat a specific disease (e.g., COVID-19) like any other illness. This means if you are medically diagnosed and can't travel, your trip cancellation should be covered. Likewise, your emergency medical expenses should be covered if you get sick on your trip.
Clarity on Quarantine Costs: The best policies today will explicitly state whether they cover the costs of a mandatory quarantine (e.g., extra hotel nights, food) if you test positive while abroad.
Red Flag #5: The "Named Perils Only" Cancellation Clause
Many travelers believe "trip cancellation coverage" means they can cancel for any reason and get their money back. This is a dangerous and costly misconception. Standard policies operate on a "named perils" basis, meaning they will only reimburse you for non-refundable costs if you cancel for one of the very specific, listed reasons in the policy document.
A red flag is a policy with a short and restrictive list. Common covered reasons include the unforeseen illness or death of the traveler or a close family member, a house fire, or being called for jury duty. Common reasons that are often not covered include changing your mind, a relationship breakup, or work conflicts. This means if you have to cancel because your pet-sitter backs out or your boss denies your vacation time at the last minute, you get nothing.
Red Flag #6: The Restrictive "Pregnancy & Childbirth" Limitation
Traveling while pregnant requires an extra layer of precaution, and your insurance policy needs to reflect that. A significant red flag is a policy that either completely excludes pregnancy or has highly restrictive limitations.
Many standard policies will not cover costs related to a normal, routine pregnancy. This means if you go into labor while on your trip, the costs of a routine childbirth and care for a healthy newborn will likely not be covered. Coverage for unforeseen complications is often only provided up to a certain stage of the pregnancy (e.g., 23 to 32 weeks), and many policies will not cover pregnancies that resulted from IVF.
What to look for:
A Clear Definition of "Complication": The policy should specify what it considers an unforeseen complication of pregnancy.
Stated Gestational Week Limit: Look for the exact week up to which coverage for complications is provided.
Coverage for Newborn Care: Check if the policy provides any coverage for the care of a newborn if they are born prematurely on the trip.

Your Pre-Trip Master Plan
Navigating insurance is just one piece of the pre-travel puzzle. To ensure you've covered every base—from passports and visas to packing and finances—a master checklist is your most powerful tool. Download our free, comprehensive checklist to make your preparation seamless.
Download Your Free International Travel Checklist Now!
Red Flag #7: The "Mental Health Conditions" Blind Spot
This is a frequently overlooked but critically important exclusion. Many travel insurance policies contain a specific clause that excludes any claims arising from "mental or nervous health disorders." This can include conditions like anxiety disorders, depression, dementia, and other psychiatric conditions.
This means if you have a panic attack and need to be hospitalized, or if you need to cancel your trip due to a severe depressive episode, your policy may offer no coverage. For the millions of people who manage mental health conditions, this is a glaring and dangerous gap in coverage.
What to look for:
Review the Exclusions List: Carefully read the general exclusions section for any mention of "mental," "nervous," or "psychological" disorders.
Specialized Policies: Some providers are beginning to offer more inclusive plans. You may need to seek out a specialty provider or a higher-end comprehensive plan that explicitly states it provides coverage for acute episodes of a pre-existing mental health condition.
Pro-Tip: Cancel For Any Reason (CFAR) is an optional upgrade that acts as your ultimate safety net against uncovered cancellation reasons. It typically reimburses 50-80% of your non-refundable costs. But be aware: you must purchase a CFAR add-on within a short window, usually 14-21 days, of your initial trip payment. Don't wait!
Travel Insurance FAQs
Spotting red flags is easier when you speak the language. Here are answers to common questions, providing some essential travel insurance tips for understanding policy jargon.
1. What's the real difference between primary and secondary medical coverage?
This determines the order of payment and how much work you have to do. A primary policy pays first. You file your claim directly with the travel insurer, which means less paperwork and faster reimbursement. Secondary coverage only pays after your other insurance (like your regular health plan) has paid its share. It requires you to file twice and is generally less convenient. For international travel, primary coverage is strongly recommended.
2. Is travel insurance worth it for a domestic trip?
Often, yes. While your regular health insurance will likely work in another state, it won't cover trip cancellation, interruption, or lost baggage. If you've prepaid for expensive flights and non-refundable hotels for a trip to a national park, for instance, trip insurance can protect that investment if you have to cancel for a covered reason.
3. When is the best time to buy travel insurance?
You should buy your policy as soon as you make your first non-refundable trip payment (like booking flights or a tour). This ensures you are covered for the longest possible period. More importantly, it's the only way to be eligible for time-sensitive benefits like the "pre-existing condition waiver" and the "Cancel for Any Reason" upgrade, which often must be purchased within 14-21 days of your initial deposit.

Travel with True Peace of Mind
Buying travel insurance isn’t just about ticking a box on your pre-trip to-do list. It’s about making an informed decision to purchase a strong financial safety net. By using these travel insurance tips to read a policy like a pro, you can confidently spot the red flags, avoid the worthless plans, and choose a policy that delivers on its promise. An investment in the right coverage—and in a comprehensive resource like our all-encompassing Travel Guide—is an investment in your own peace of mind. Now you can focus on the adventure ahead, knowing you’re protected no matter what the journey throws your way.
Meta Data Suggestions:
SEO Meta Title (59 characters): 7 Travel Insurance Red Flags to Spot Before You Buy
URL Slug: travel-insurance-red-flags
SEO Meta Description (154 characters): Don't get burned by bad travel insurance. Learn the 7 critical red flags to spot in any policy with these essential travel insurance tips before you buy.
Don't Miss Out! Subscribe for Exclusive Content
Subscribe


Comments 0
No comments yet
Be the first to share your experience!
Dont Miss Out! Subscribe for Exclusive Content

Ultimate USA Holidays Guide: Top Picks

FTC Affiliate Disclosure Essentials: Stay Compliant as a Travel Creator

Essential Affiliate Tools: From Tracking to Full Optimization

Booking.com Affiliate Program Review: Pros, Cons, and Earnings Potential

Decoding Affiliate Commission Rates: Benchmarks for Travel Creators

Top 11 High-Paying Affiliate Programs for Travel Bloggers
Crafting Travel Product Reviews That Drive Affiliate Sales
TrekGuider @trekguider
You’ve poured hours into it. The photos are stunning, the details are careful, and your personal story is woven throughout. You hit “publish” on your latest travel product review, certain that this is the one. But weeks later, the affiliate dashboard tells a familiar, frustrating story: plenty of clicks, but a whisper of commissions. You’re creating genuinely valuable content, but it feels like you’re leaving a fortune on the table, unable to bridge the chasm between your effort and your earnings.
This isn't just a feeling; it's a critical business problem. You see the industry reports—the affiliate marketing market soaring past $93 billion, with the average travel affiliate earning a reported $13,847 a month—and it feels like a world away. The issue isn't your passion or your expertise. The issue is that a travel product review that simply informs is a hobby; a review that is engineered to convert is a business. You're missing the formula, the psychological triggers, and the conversion-focused structure that turns a reader's trust into a reliable revenue stream.

Forget vague tips. This is a skill workshop—a definitive blueprint for how to write a product review that drives affiliate sales with the precision of a finely tuned engine. We will deconstruct the anatomy of a high-conversion review, from the headline that hooks to the call-to-action that closes. This is a masterclass in a single, vital skill, a topic we explore from every angle in our definitive command center for the entire affiliate ecosystem: Travel Affiliate Programs: The 2026 Ultimate Guide.
The Mindset Shift: From "Informing" to "Converting"
The first and most crucial step is a fundamental mindset shift. Most creators approach a product review as a report. They list the features, describe their experience, and hope the reader is inspired enough to click. This is a passive strategy that yields passive results.
A high-earning creator understands that a product review is their most valuable sales asset. Its primary purpose is not just to describe the product, but to guide the reader to a confident purchase decision. Every word, every image, and every design element must work in concert to achieve one goal: to solve the reader's problem so effectively that clicking your affiliate link becomes the most logical and desirable next step.
This isn't about being a pushy salesperson. It's about being a master problem-solver. Your reader has arrived on your page with a need: "Is this the right backpack for my trip to Europe?" or "Will this travel insurance actually cover me if I get sick in Thailand?" A review that converts answers these questions with such clarity, authority, and empathy that it eliminates all doubt and inspires action.

The Anatomy of a High-Conversion Review: A 7-Part Formula
A product review that consistently drives sales is not an accident of creative inspiration; it is a carefully constructed system. By following this seven-part formula, you create a user experience that caters to every type of reader—from the quick skimmer to the deep diver—and guides them seamlessly toward conversion.
Part 1: The Headline That Hooks and Qualifies
Your headline has one job: to make an undeniable promise of value to a specific audience. It must grab attention in a crowded search result and instantly signal that your review will solve their problem. Generic headlines like "My Review of the Osprey Backpack" are a death sentence.
Instead, use proven, high-impact formulas:
The "Real World Test" Formula: The Product Name Review: After Number Miles / Number Countries / Time Period
Example: The Osprey Farpoint 40 Review: After 6 Months & 15 Countries
The "Balanced Verdict" Formula: Product Name Review: Number Things I Loved & Number I Hated
Example: The Away Bigger Carry-On Review: 5 Things I Loved & 2 I Hated
The "Is It Worth It?" Formula: Is the Product Name Worth the Hype? An Honest 2026 Review
Example: Is the Nomatic Travel Pack Worth the Hype? An Honest 2026 Review
These headlines work because they promise authenticity, detail, and a balanced perspective—exactly what a user wants when researching a purchase.
Part 2: The Empathetic Introduction (The Hook)
Your introduction must accomplish three things in the first 100 words: connect with the reader's problem, establish your authority, and present the product as the potential solution. Use the PAS (Problem, Agitate, Solve) framework for maximum impact.
Problem: "Finding the perfect carry-on backpack is a nightmare. Most are either too bulky, too disorganized, or fall apart after one trip."
Agitate: "You end up repacking at the airport check-in counter, digging through a black hole of gear to find your passport, or worse, dealing with a broken zipper mid-adventure."
Solve: "For the past six months, I've been testing the Osprey Farpoint 40 across Southeast Asia to see if it's the ultimate solution for one-bag travel. In this review, I'll break down exactly who this bag is for, who should avoid it, and whether it lives up to its legendary reputation."
Part 3: The "At a Glance" Summary Box
Many of your readers are skimmers. They are busy and want a quick verdict. An "At a Glance" summary box at the top of your review is the single best way to serve this audience and capture an immediate conversion.
This box should be visually distinct (using a different background color or a border) and contain:
Product Image: A high-quality, authentic photo of the product in use.
A Quick Summary: A one-sentence verdict. (e.g., "The ultimate travel backpack for versatile adventurers who value comfort and organization.")
Key Specifications: A bulleted list of the most important specs (e.g., Capacity, Weight, Dimensions).
Overall Rating: A simple star rating (e.g., 4.5 / 5 Stars).
The Primary CTA: A bold, unmissable button with a clear call-to-action.
Part 4: The Deep Dive: Storytelling Over Specs
This is the heart of your review. This is where amateurs list features, but professionals tell stories. Your mission is to translate every specification into a tangible, real-world benefit, wrapped in the context of your personal experience.
Amateur: "The backpack has a 15-inch padded laptop sleeve."
Professional: "The Padded Laptop Compartment That Saved My MacBook: When my bus in Vietnam took a corner too fast, my bag went flying. My heart stopped, but the heavily padded, suspended laptop sleeve kept my MacBook safe without a scratch. For digital nomads, that peace of mind is priceless."
Structure this section with clear H3 subheadings for each key feature or benefit (e.g., "Comfort & Fit," "Organization & Pockets," "Durability & Materials"). This makes the content scannable and allows readers to jump to the sections that matter most to them.

Part 5: The Unbeatable Proof: Your Photos & Videos
Stock photos are a conversion killer. They scream "I've never actually used this product." Your review's credibility hinges on authentic, high-quality visual proof.
Show the Product in Action: Include photos of you wearing the backpack, packing the suitcase, or using the camera in a real travel environment.
Highlight Key Features: Take detailed close-up shots of the zippers, the materials, the specific pockets you're talking about.
Embrace Video: This isn't just a nice-to-have; it's a strategic imperative. With industry projections showing that video will account for a staggering 55% of all affiliate traffic by 2026, embedding a short, authentic video review is one of the most powerful trust signals in your arsenal.
Part 6: The Honest Verdict: Pros, Cons, and "Who It's For"
Radical transparency is the ultimate trust signal. No product is perfect, and acknowledging its flaws makes your praise exponentially more believable.
Create a simple, two-column list of Pros and Cons. Be specific and honest. Then, create a dedicated section that clearly defines who this product is perfect for and, just as importantly, who should look for something else.
This Product is Perfect For: "Digital nomads, weekend travelers, and anyone who prioritizes a comfortable carry and smart organization."
You Should Avoid This Product If: "You're a photographer who needs to carry multiple camera bodies or if you require a fully waterproof bag for extreme conditions."
Part 7: The Compelling Conclusion & Final CTA
Your conclusion should be short, powerful, and decisive. Summarize the product's single biggest benefit and give the reader one final, clear instruction. Reiterate your overall verdict and guide them to the click with a final, compelling call-to-action button.

The Psychology of Persuasion: Advanced Conversion Tactics
A great structure is the foundation, but layering in proven psychological triggers is how you maximize conversions.
Build Unshakable Trust: Your FTC disclosure must be clear and placed at the very top of your review. This isn't just a legal requirement; it's a badge of honor that signals transparency.
Leverage Social Proof: Weave in screenshots of other positive reviews or user ratings. Phrases like "With over 5,000 five-star reviews on Amazon..." validate the reader's potential decision.
Create Urgency (Ethically): For products with fluctuating prices, like flights or hotels, use CTAs that encourage immediate action. "Check Today's Prices on Booking.com" is both helpful and urgent.
Pro-Tip: One of the most effective ways to increase conversions is to use a comparison table. Pit the product you're reviewing against its main competitor. This not only helps the reader make a final decision but also gives you the opportunity to place two high-value affiliate links side-by-side.
The Ultimate Conversion Play: From Affiliate to Owner
A product review is the perfect place to introduce your audience to your own high-value offerings. After you've solved their immediate problem, you can guide them toward a deeper solution that you control completely. This is the natural evolution of your expertise.
For example, after the main body of your review for a travel backpack, you could add a section like:
"Now that you've found the perfect backpack, the next step is knowing what to put inside it. For my complete, field-tested packing system, check out my 'Ultimate Carry-On Packing List' available on the TrekGuider Platform. It's the exact checklist I use to pack for every trip."
This is a natural, value-driven upsell that transitions the reader from a potential affiliate commission to a direct customer, where you keep a much larger share of the revenue.

Pro-Tip: To supercharge your affiliate sales, offer a "bonus stack" for anyone who buys through your link. For example, "If you purchase the Osprey Farpoint 40 through my link, just forward me your receipt and I'll send you my personal 'Perfect Packing' video tutorial for free!" This small, value-added incentive can dramatically increase your conversion rate.
Ready to Build Your Own High-Margin Product? The most profitable product you can ever promote is your own. Affiliate marketing is the perfect training ground, but selling your own digital products—like guides, itineraries, or presets—offers unparalleled profit margins and brand authority. Our free Digital Product Ideas Guide is packed with dozens of proven, profitable ideas specifically for travel creators. Download it today to find the perfect product for your audience and start building your content empire.
Frequently Asked Questions (FAQ)
1. How long should a product review be? There's no magic number, but a high-converting review is typically comprehensive, often falling between 1,500 and 3,000 words. The goal is to be the most thorough and helpful resource on the internet for that specific product. Answer every possible question a reader might have.
2. Is it better to review a product I got for free or one I bought myself? A product you purchased with your own money will always carry more weight and authenticity with your audience. However, if you do receive a product for free, you can still write a credible review as long as you are radically transparent about it in your disclosure and maintain an honest, balanced perspective.
3. How many affiliate links are too many in one review? Focus on strategic placement over sheer quantity. A high-converting review might only have 5-10 well-placed links. Include them in your summary box, on your primary CTA buttons, and contextually on the product name throughout the text. The goal is to make it easy for the reader to click when they are ready, not to overwhelm them with links on every other word.
Your Blueprint for a Profitable Review Engine
You now have the complete formula for how to write a product review that doesn't just get traffic—it gets results. By shifting your mindset from informing to converting and carefully applying this seven-part framework, you transform your content from a simple article into a high-performance business asset.
This is a system you can replicate for every product you recommend, creating a reliable and scalable engine for affiliate income. Stop guessing and start engineering. The path to becoming a top-earning travel creator is paved with reviews that are strategic, persuasive, and relentlessly helpful. Now, go build your engine.
Read the full guide: The Travel Blogger's Playbook to Affiliate Marketing Mastery
Don't Miss Out! Subscribe for Exclusive Content
SubscribeComments 0
No comments yet
Be the first to share your experience!
Dont Miss Out! Subscribe for Exclusive Content
FTC Affiliate Disclosure Essentials: Stay Compliant as a Travel Creator
Essential Affiliate Tools: From Tracking to Full Optimization

Avoid These 5 Affiliate Landing Page Mistakes for Better Conversions

Affiliate Keyword Research Mastery for Travel Blogs
Booking.com Affiliate Program Review: Pros, Cons, and Earnings Potential
Decoding Affiliate Commission Rates: Benchmarks for Travel Creators
Food & Water Safety Abroad: How to Avoid Getting Sick
TrekGuider @trekguider
There’s a moment on every trip where the true magic happens: the first bite of a dish you can’t pronounce from a street cart buzzing with locals, the refreshing sip of a regional drink, the discovery of a flavor that will forever define a place in your memory. Food is culture, connection, and the fastest way to the heart of a destination. And that’s the traveler’s paradox, isn’t it? The very experiences that promise the most profound connection also carry a potent, gut-wrenching risk.
One bad meal or a single sip of contaminated water can derail your entire adventure, swapping days of discovery for days spent locked in a hotel room. This fear is agitated by horror stories from fellow travelers and the sheer unpredictability of an unfamiliar environment. It's a valid concern—traveler's diarrhea is unequivocally the most common travel-related illness, affecting up to 80% of international travelers depending on the destination. The fear of getting sick can make you timid, causing you to stick to bland, "safe" foods and miss out on the rich mix of flavors your destination has to offer. It can rob you of the very experiences you traveled so far to find.

But it doesn't have to be this way. This guide is your solution, a definitive and practical playbook for mastering food and water safety abroad. We’ve synthesized actionable advice from the world’s leading health organizations, including the Centers for Disease Control and Prevention (CDC) and the World Health Organization (WHO), to empower you to eat boldly and drink safely. This isn’t a list of things to fear; it’s a set of simple, memorable rules for prevention, identification, and, if necessary, management. This is a critical deep-dive into a core pillar of preparedness we cover in The Ultimate Guide to Travel Safety: A 2026 Playbook, designed to give you the confidence to dive fork-first into the heart of a culture.
The Golden Rule of Food and Water Safety: "Boil It, Cook It, Peel It, or Forget It"
If you remember only one thing from this guide, make it this simple, five-word mantra. Promoted by the CDC and other global health bodies, this single rule is a powerful and easy-to-use filter for nearly every culinary decision you'll make on the road. It’s the foundation of your entire food and water safety strategy.
Boil It: Your Safest Bet for Liquids
Pathogens like bacteria, viruses, and parasites are killed by heat. This makes boiling the most effective method for purifying liquids.
Examples: Drinking water that has been brought to a vigorous, rolling boil for at least one full minute. Hot beverages like tea or coffee that are served steaming hot are also generally safe. Any milk products you consume should be confirmed to be pasteurized or have been boiled.
Cook It: The Power of Heat
Thoroughly cooking food kills the harmful microorganisms that cause illness. The key is to ensure it is cooked all the way through and served hot.
Examples: Meat, poultry, or seafood that is well-cooked (not rare or raw) and served steaming hot to the touch. This is especially crucial for street food; dishes that are cooked fresh to order in front of you are a much safer bet than those that have been sitting out.
Peel It: Nature’s Own Packaging
For raw fruits and vegetables, the contamination is almost always on the outside surface. By peeling it yourself with clean hands, you remove the risk.
Examples: Fruits with a thick, peelable skin like bananas, oranges, mangoes, and avocados are your safest and best friends for a healthy snack. Similarly, vegetables you can peel, such as cucumbers, are also a great option.
Forget It: When in Doubt, Go Without
This is the most critical and sometimes most difficult part of the rule to follow. It requires discipline, but it’s your ultimate defense. If an item of food or drink doesn't meet one of the three criteria above, you must skip it.
Examples: Tap water and ice cubes made from tap water are the biggest culprits. Salads and raw leafy greens like lettuce are high-risk because they are difficult to clean thoroughly and may have been washed in contaminated water. You should also avoid fruits that cannot be peeled, such as grapes and berries, and any unpasteurized dairy products like milk or cheese. Finally, be very wary of any food served at room temperature, such as from a buffet.
Navigating the Streets: A Visual Guide to Spotting Unsafe Food
Street food is often the soul of a city's cuisine, but not all vendors are created equal. Your eyes are your best tool for vetting a stall. Before you order, take thirty seconds to perform a quick visual inspection. Look for these five clear signs of a safe or unsafe operation.
Poor General Cleanliness: This is the most obvious indicator. Red flags include dirty workstations with unwiped spills, visible food waste, rubbish on the ground, and the presence of pests like flies or wasps. The vendor themselves should also appear clean, with tidy clothes and hands.
Improper Food Temperatures: Food left in the "danger zone" (room temperature) is a breeding ground for bacteria. Avoid stalls where cooked food, especially meat, is sitting out in large trays. The safest option is always food that is cooked fresh to order, right in front of you. Hot food should be visibly steaming.
Obvious Cross-Contamination: Watch how the vendor handles ingredients. A major red flag is using the same cutting board, knife, or unwashed hands to handle raw meat and then touch ready-to-eat items like bread, salad, or cooked food.
Use of Contaminated Water: Look at the vendor’s water source. Rinsing dishes, utensils, or vegetables in a single bucket of murky, stagnant water is a sign of a high-risk operation. Likewise, avoid ice in your drinks unless you can confirm it was made from purified water (commercially bagged ice is usually a safe sign).
Lack of a Crowd (Especially Locals): A busy stall with a long line, particularly of local residents, is one of the best indicators of a trusted and safe food source. High customer turnover means the food is fresh and hasn't been sitting out for long. An empty stall is often empty for a reason.
Pro-Tip: Make "follow the locals" your street food mantra. A long line of residents is a walking, talking five-star review of a vendor's quality and safety. It's the most reliable seal of approval you can find.

Securing Your Water Supply: A Deep Dive into Hydration and Purification
Staying hydrated is non-negotiable for your health and energy while traveling, but assuming tap water is safe is one of the most common and dangerous mistakes a traveler can make. Here’s how to ensure every sip you take is safe.
Identifying Safe and Unsafe Drinking Water Sources
The CDC and WHO have clear guidelines. Unless you are in a country with a known, highly-developed sanitation system, you should assume all tap water is unsafe.
Safest Sources: Commercially bottled water in a factory-sealed, tamper-proof container is your most reliable option. Carbonated water is even safer, as a broken seal is immediately obvious. The second safest source is water that you have personally brought to a rolling boil for at least one minute.
Unsafe Sources to Avoid: Tap water, well water, ice made from tap water, fountain drinks mixed with tap water, and even water from clear mountain streams (which can contain germs) should all be avoided unless they have been purified.
Your Purification Playbook: The Top 3 Methods
When bottled or boiled water isn't available, you need a backup plan. Here are the top three recommended purification methods.
Boiling (The Gold Standard): This is consistently ranked by the CDC and WHO as the single most effective method. It kills all known disease-causing microorganisms, including viruses, bacteria, and parasites. Simply bring clear water to a rolling boil for 1 minute (or 3 minutes at elevations above 6,500 feet / 2,000 meters).
Filtration: A high-quality portable water filter is highly effective at removing bacteria and protozoan parasites like Giardia and Cryptosporidium. Look for a filter with an absolute pore size of 1 micron or smaller. The main limitation is that most portable filters do not remove viruses, so in high-risk areas, the CDC recommends following filtration with chemical disinfection.
Chemical Disinfection: Chlorine, iodine, or chlorine dioxide tablets/drops are a lightweight and easy way to kill viruses and bacteria. However, they are not consistently effective against the parasite Cryptosporidium and require a contact time of at least 30 minutes.
For in-depth planning on what gear to pack for every type of trip, from water filters to first-aid supplies, our all-encompassing Travel Guide is the only resource you'll ever need.
Damage Control: How to Manage Traveler's Diarrhea
But let’s be realistic: even the most diligent traveler can have a bad day. When that happens, knowing exactly what to do—and what not to do—can be the difference between a 24-hour nuisance and a trip-ruining ordeal. This is the damage control phase of your food and water safety plan.
The First and Most Critical Step: Oral Rehydration
According to travel medicine doctors, dehydration is the single most likely and dangerous complication of traveler's diarrhea. Replacing lost fluids and electrolytes is your absolute first priority.
Method: The best way to rehydrate is with a dedicated Oral Rehydration Solution (ORS), which comes in packets of salts and sugars that you mix with boiled or bottled water. In a pinch, sports drinks or clear soups can also be used.
Symptomatic Treatment for Mild to Moderate Cases
If the diarrhea is tolerable and not accompanied by a high fever or blood, over-the-counter medications can provide relief and help you get through a travel day.
Medications: An antimotility agent like Loperamide (the active ingredient in Imodium, a top pharmacist-recommended brand) can reduce the frequency of bowel movements. Bismuth Subsalicylate (found in Pepto-Bismol, another pharmacist favorite) can also help decrease the frequency and shorten the duration of the illness.
When to Use Standby Antibiotics (For Severe Cases)
If diarrhea is distressing, incapacitating, or contains blood or mucus, a prescribed antibiotic may be necessary.
Method: Before you travel, speak with your doctor or a travel medicine clinic. For travelers heading to high-risk destinations, they may provide a prescription for a standby antibiotic, such as Azithromycin, to carry with you. A single dose is often highly effective at treating severe cases.
Pro-Tip: Within your main travel first-aid kit, create a dedicated "Digestive Distress" module. Keep it in a separate, clearly-labeled zip-top bag containing a few packets of Oral Rehydration Salts, a strip of Loperamide, and a few antacids. This way, when you need it, you won't have to rummage through your entire kit.

Ready to Pack Like a Pro?
A smart food and water safety strategy is just one piece of your pre-trip preparation. To ensure you don't overlook a single essential item—from documents and finances to clothing and medical supplies—a master checklist is your most powerful tool. Our comprehensive, free checklist has you covered for every stage of your journey.
Download Your Free International Travel Checklist Now!
Food and Water Safety FAQs
A prepared mind is a safe mind. Here are expert answers to common questions that take your preparedness to the next level.
1. Besides traveler's diarrhea, what are the most common travel illnesses?
While traveler's diarrhea is number one, the CDC reports that other common issues include acute respiratory infections (like influenza or COVID-19, often acquired in transit), vector-borne fevers like Dengue and Malaria in tropical regions, and other food-borne illnesses like Hepatitis A and Typhoid Fever. Skin conditions from insect bites are also extremely common.
2. Is it safe to eat at a restaurant if I'm worried about street food?
Generally, restaurants can be safer, but the same principles apply. A busy restaurant full of locals is a great sign. Be cautious with the same high-risk items: salads, unpeeled fruits, and tap water or ice. If you want to find trusted, local-approved gems, explore the TrekGuider platform, where travel creators often share their own curated guides to safe and authentic eats.
3. Should I carry a standby antibiotic in my first-aid kit?
This is a question for your doctor or a travel medicine clinic. For travelers heading to high-risk destinations where severe traveler's diarrhea is common, many doctors will provide a prescription for a standby antibiotic like Azithromycin. It’s not for mild cases but can significantly shorten the duration of a severe bout of illness. Discuss your itinerary with your doctor to see if this is right for you.
Eat Boldly, Travel Well
The world of food is a world of incredible diversity and connection, and it deserves to be explored with an open mind and a curious palate. The goal of mastering food and water safety is not to build a wall of fear that separates you from authentic experiences. It is about building a foundation of knowledge that gives you the freedom to be adventurous. By internalizing the golden rule of "Boil it, cook it, peel it, or forget it," learning to trust your own visual assessment of a food stall, and knowing exactly what to do if you get sick, you replace anxiety with empowerment. You are now equipped with the skills to navigate the world's most exciting cuisines with confidence, ensuring your focus remains on the flavor, connection, and joy that every journey promises. Go explore, eat boldly, and travel well.

Meta Data Suggestions:
SEO Meta Title (Under 60 characters): Food & Water Safety Abroad: How to Avoid Getting Sick
URL Slug: food-water-safety-abroad
SEO Meta Description (Under 155 characters): Avoid traveler's diarrhea with our expert guide to food and water safety abroad. Learn the golden rules for eating street food, purifying water, and staying healthy.
Don't Miss Out! Subscribe for Exclusive Content
SubscribeComments 0
No comments yet
Be the first to share your experience!
Dont Miss Out! Subscribe for Exclusive Content

Chicago Beer Fests: Top 6 Tastings
Ultimate USA Holidays Guide: Top Picks
FTC Affiliate Disclosure Essentials: Stay Compliant as a Travel Creator
Essential Affiliate Tools: From Tracking to Full Optimization
Booking.com Affiliate Program Review: Pros, Cons, and Earnings Potential