9 Beach Safety Tips That Could Save Your Life
TrekGuider @trekguider
There’s a moment on every beach trip that feels like pure magic. It’s the feeling of warm sand between your toes, the hypnotic sound of waves crashing, and the endless blue horizon stretching out before you. It’s a picture of perfect relaxation. But beneath that tranquil surface, the ocean holds immense and impartial power. A beautiful day can turn dangerous in an instant from a hidden current, underestimated waves, or the relentless sun, transforming a dream vacation into a terrifying emergency. Every year, countless beachgoers find themselves in preventable peril simply because they misread the water or weren't prepared for the environment.
This isn't a guide to make you fear the ocean; it's a playbook to empower you to respect it. We’re here to give you the essential, expert-backed beach safety tips that can mean the difference between a blissful day and a life-altering one. These strategies, drawn from lifeguarding associations and national weather experts, are a critical component of the situational awareness we cover in our comprehensive guide, The Ultimate Guide to Travel Safety: A 2026 Playbook. By learning to see the beach not just as a playground, but as a dynamic natural environment, you can ensure your only takeaways are seashells and incredible memories. Let’s dive in.

Master the Water: Essential Ocean Safety Tips
The vast majority of beach-related dangers originate in the water itself. From powerful currents to unpredictable surf, understanding the ocean's behavior is the most critical skill any beachgoer can possess. These are the foundational beach safety tips for staying safe in the surf.
1. Become an Expert at Spotting Rip Currents
Rip currents are the number one danger at most surf beaches, responsible for the majority of ocean rescues performed by lifeguards. They are not undertows that pull you under the water; they are powerful, narrow channels of water that flow away from the shore at high speed. According to NOAA and the United States Lifesaving Association (USLA), knowing how to visually identify one from the shore is your first and best line of defense.
Here’s what to look for, especially from an elevated position like the dunes or a lifeguard tower:
A Channel of Churning, Choppy Water: Look for a specific area where the water seems agitated or rough, moving in a different direction than the surrounding waves.
A Break in the Incoming Wave Pattern: This is often the easiest sign to spot. You'll see a gap in the line of breaking waves—an area that looks deceptively calm. This flat spot is the rip current pulling water back out to sea, disrupting the incoming waves.
A Difference in Water Color: Because the current is carrying sand and sediment offshore, the water within a rip current often appears darker, murky, or sandy brown compared to the clearer, greener water on either side.
A Line of Foam or Debris Moving Seaward: This is a dead giveaway. If you see a line of foam, seaweed, or other floating debris moving steadily away from the beach, perpendicular to the shore, you are looking directly at a rip current.
Pro-Tip: Before you even set up your umbrella, take five minutes to stand back and observe the water. Actively look for these signs. Identifying potential rip currents before you get in the water is the single most important safety action you can take.
2. Know the "Flip, Float, Follow" Rule for Rip Current Survival
If you do get caught in a rip current, your instinctive reaction—to panic and swim directly against it back to shore—is the most dangerous thing you can do. Fighting a rip current will exhaust you to the point of drowning. The correct response is simple and could save your life.
Flip: Flip onto your back to stay afloat and conserve energy.
Float: The current will not pull you under; it will only pull you away from shore. Stay calm and float with it.
Follow: Once you are out of the main pull of the current, begin swimming parallel to the shoreline. Do not swim toward the beach. Once you have swum out of the current, you can then turn and swim back to shore, ideally at an angle away from where you were caught.
If you are unable to swim out of it, continue to float and wave your arms and yell for help to attract the attention of a lifeguard or other swimmers.

3. Understand and Obey the Beach Warning Flag System
While knowing how to escape an invisible current is a vital reactive skill, your most powerful proactive tool is the one flapping in the breeze. Beach warning flags are a simple, universal language used by lifeguards to communicate the current water conditions. This system, adopted by the International Lifesaving Federation, provides a quick, visual assessment of the hazard level. Ignoring these flags is a gamble you should never take.
Green Flag: Low Hazard. Conditions are calm, but you should still exercise caution.
Yellow Flag: Medium Hazard. Moderate surf and/or currents are present. Weak swimmers should stay out of the water, and everyone else should use extra care.
Red Flag: High Hazard. The surf is high, and/or strong currents make conditions dangerous. It is recommended that no one enters the water.
Double Red Flag: Water Closed to Public. Conditions are extremely dangerous. The water is closed to all swimming, and entering it is prohibited.
Purple Flag: Dangerous Marine Life. This flag indicates that potentially hazardous marine life, like jellyfish or sharks, has been spotted. It is always flown with another color flag that indicates the surf conditions.
Pro-Tip: The absence of flags does not automatically mean the water is safe. If there is no flag, it likely means there is no lifeguard on duty. In that case, you are swimming entirely at your own risk. Always try to swim at a beach protected by lifeguards.
Master the Environment: Sun and Shoreline Safety Tips
While the ocean poses the most immediate threats, the beach environment itself has its own set of risks. The sun, sand, and heat can cause serious health issues if not managed properly. These beach safety tips will keep you safe on the shore.
4. Know the Signs of Heat Exhaustion vs. Heatstroke
That perfect, sun-drenched beach day holds a hidden danger. When the temperature climbs, the line between bliss and a medical emergency can blur with alarming speed. According to the Red Cross, it's crucial to know the difference between heat exhaustion and the more severe, life-threatening heatstroke (sunstroke).
Heat Exhaustion Symptoms:
Headache, dizziness, and confusion
Excessive sweating with cool, moist, or pale skin
Nausea and muscle cramps
A rapid, weak pulse
First-Aid for Heat Exhaustion:
Move to a Cool Place: Immediately get the person out of the direct sun and into shade or air conditioning.
Cool Them Down: Loosen their clothing and apply cool, wet cloths or spray them with cool water.
Rehydrate: If they are conscious and able to swallow, have them sip small amounts of a sports drink or water.
If their condition doesn't improve or they start vomiting, call for emergency help immediately, as it can progress to heatstroke.
5. Recognize the Emergency of Heatstroke (Sunstroke)
Heatstroke is a full-blown medical emergency where the body's internal cooling system completely fails.
Heatstroke Symptoms:
Changes in mental status (confusion, agitation, loss of consciousness)
Hot, flushed, and often dry skin (sweating may have stopped)
A dangerously high body temperature (often above 104°F / 40°C)
A rapid, strong pulse, which may become weak later
First-Aid for Heatstroke:
Call 911 Immediately: This is a life-threatening emergency that requires professional medical intervention.
Begin Rapid Cooling: While waiting for help, do everything you can to cool the person's body. Immerse them in cool water if possible, or douse them with water and apply ice packs to the neck, groin, and armpits.

6. Practice Proactive Sun Protection
The best way to deal with a heat-related illness is to never let it start. Sun protection is a continuous strategy, not a one-time action.
Hydrate Constantly: Drink plenty of water throughout the day, even before you feel thirsty.
Use Broad-Spectrum Sunscreen: Apply a sunscreen with at least SPF 30 and reapply it every two hours, and always immediately after swimming or excessive sweating.
Seek Shade: Use an umbrella and take breaks from the sun, especially during the peak intensity hours of 10 a.m. to 4 p.m.
Wear Protective Clothing: A wide-brimmed hat and UV-blocking sunglasses are non-negotiable.
7. The "Stingray Shuffle" Rule
In many coastal areas, stingrays bury themselves in the sand in shallow water. Stepping directly on one can result in an excruciatingly painful sting from the barb on their tail. To avoid this, never walk normally through the shallows. Instead, shuffle your feet along the sand. The vibrations from the shuffle will alert any nearby stingrays to your presence, giving them a chance to swim away peacefully.
Master Your Preparation: Final Beach Safety Tips
A safe and relaxing beach day begins before you even leave home. Smart planning and having the right gear can make all the difference, especially when traveling with family.
8. Pack a Dedicated Beach First-Aid Kit
While your main travel medical kit should be comprehensive, your beach bag needs a few specific items to handle common coastal issues:
Waterproof Bandages: For minor cuts and scrapes from shells or rocks.
Aloe Vera Gel: For immediate relief from minor sunburn.
Antihistamine Cream: To soothe the itch from insect bites.
Tweezers: For removing splinters or shell fragments.
Vinegar: A small bottle of white vinegar is a secret weapon; it can help neutralize the sting from some types of jellyfish.
9. Always Designate a "Water Watcher"
When you're at the beach with a group, especially with children, it's easy to fall into the trap of "diffusion of responsibility," where everyone assumes someone else is watching the kids in the water. The solution is to formally designate one adult as the "Water Watcher" for a set period (e.g., 15-20 minutes). During their shift, that person's only job is to watch the water without distraction—no phones, no books, no conversations. Then, you switch. This simple system ensures there are always eyes on the swimmers.
Your Ultimate Guide to Family Beach Travel
Keeping kids safe and entertained at the beach is a unique challenge. From packing the right gear to navigating meltdowns and keeping them safe in the sun and surf, a little extra preparation goes a long way. Our specialized guide takes the stress out of the equation.
Download our free Stress-Free Flying with Kids Guide for expert tips on making every part of your family vacation, from the airport to the beach, a breeze!
Beach Safety FAQs
A prepared mind is a safe mind. Here are quick answers to other common beach safety questions.
1. What’s the right way to treat a jellyfish sting?
First, get out of the water. Rinse the affected area with vinegar (if available) for about 30 seconds to deactivate the stingers. Do not use fresh water, as it can make it worse. Carefully pluck out any visible tentacles with tweezers. Soaking the skin in hot water (as hot as can be tolerated without burning) for 20-45 minutes can also help relieve the pain.
2. Is it safe to dig deep holes in the sand?
Digging in the sand is a classic beach activity, but deep holes can be incredibly dangerous. They can collapse unexpectedly, burying a person in seconds. Never dig a hole deeper than the knees of the smallest person in your group, and always fill in any holes you dig before you leave the beach.
3. What should I do if I see someone in trouble in the water?
Do not attempt a swimming rescue yourself unless you are trained in water rescue. An untrained rescuer can quickly become a second victim. The best course of action is to call for help immediately. Yell to alert a lifeguard and call 911. If you can, throw the person something that floats, like a cooler or a boogie board.
By embracing these nine essential beach safety tips, you shift from being a passive visitor to an active, aware, and prepared participant in one of nature’s most magnificent environments. The goal isn't to diminish the fun but to ensure it. A healthy respect for the ocean and a solid plan for your day are the keys to unlocking a truly carefree and unforgettable experience by the sea.

Now that you've mastered the art of staying safe on the coast, you can focus on the rest of your adventure. For a complete, deep-dive into every facet of trip planning, from health and safety to budgeting and logistics, our comprehensive Travel Guide is the only resource you'll ever need.
Don't Miss Out! Subscribe for Exclusive Content
Subscribe


Comments 0
No comments yet
Be the first to share your experience!
Dont Miss Out! Subscribe for Exclusive Content

Ultimate USA Holidays Guide: Top Picks

FTC Affiliate Disclosure Essentials: Stay Compliant as a Travel Creator

Essential Affiliate Tools: From Tracking to Full Optimization

Booking.com Affiliate Program Review: Pros, Cons, and Earnings Potential

Decoding Affiliate Commission Rates: Benchmarks for Travel Creators

Amazon Associates for Travel: Strategies to Maximize Commissions
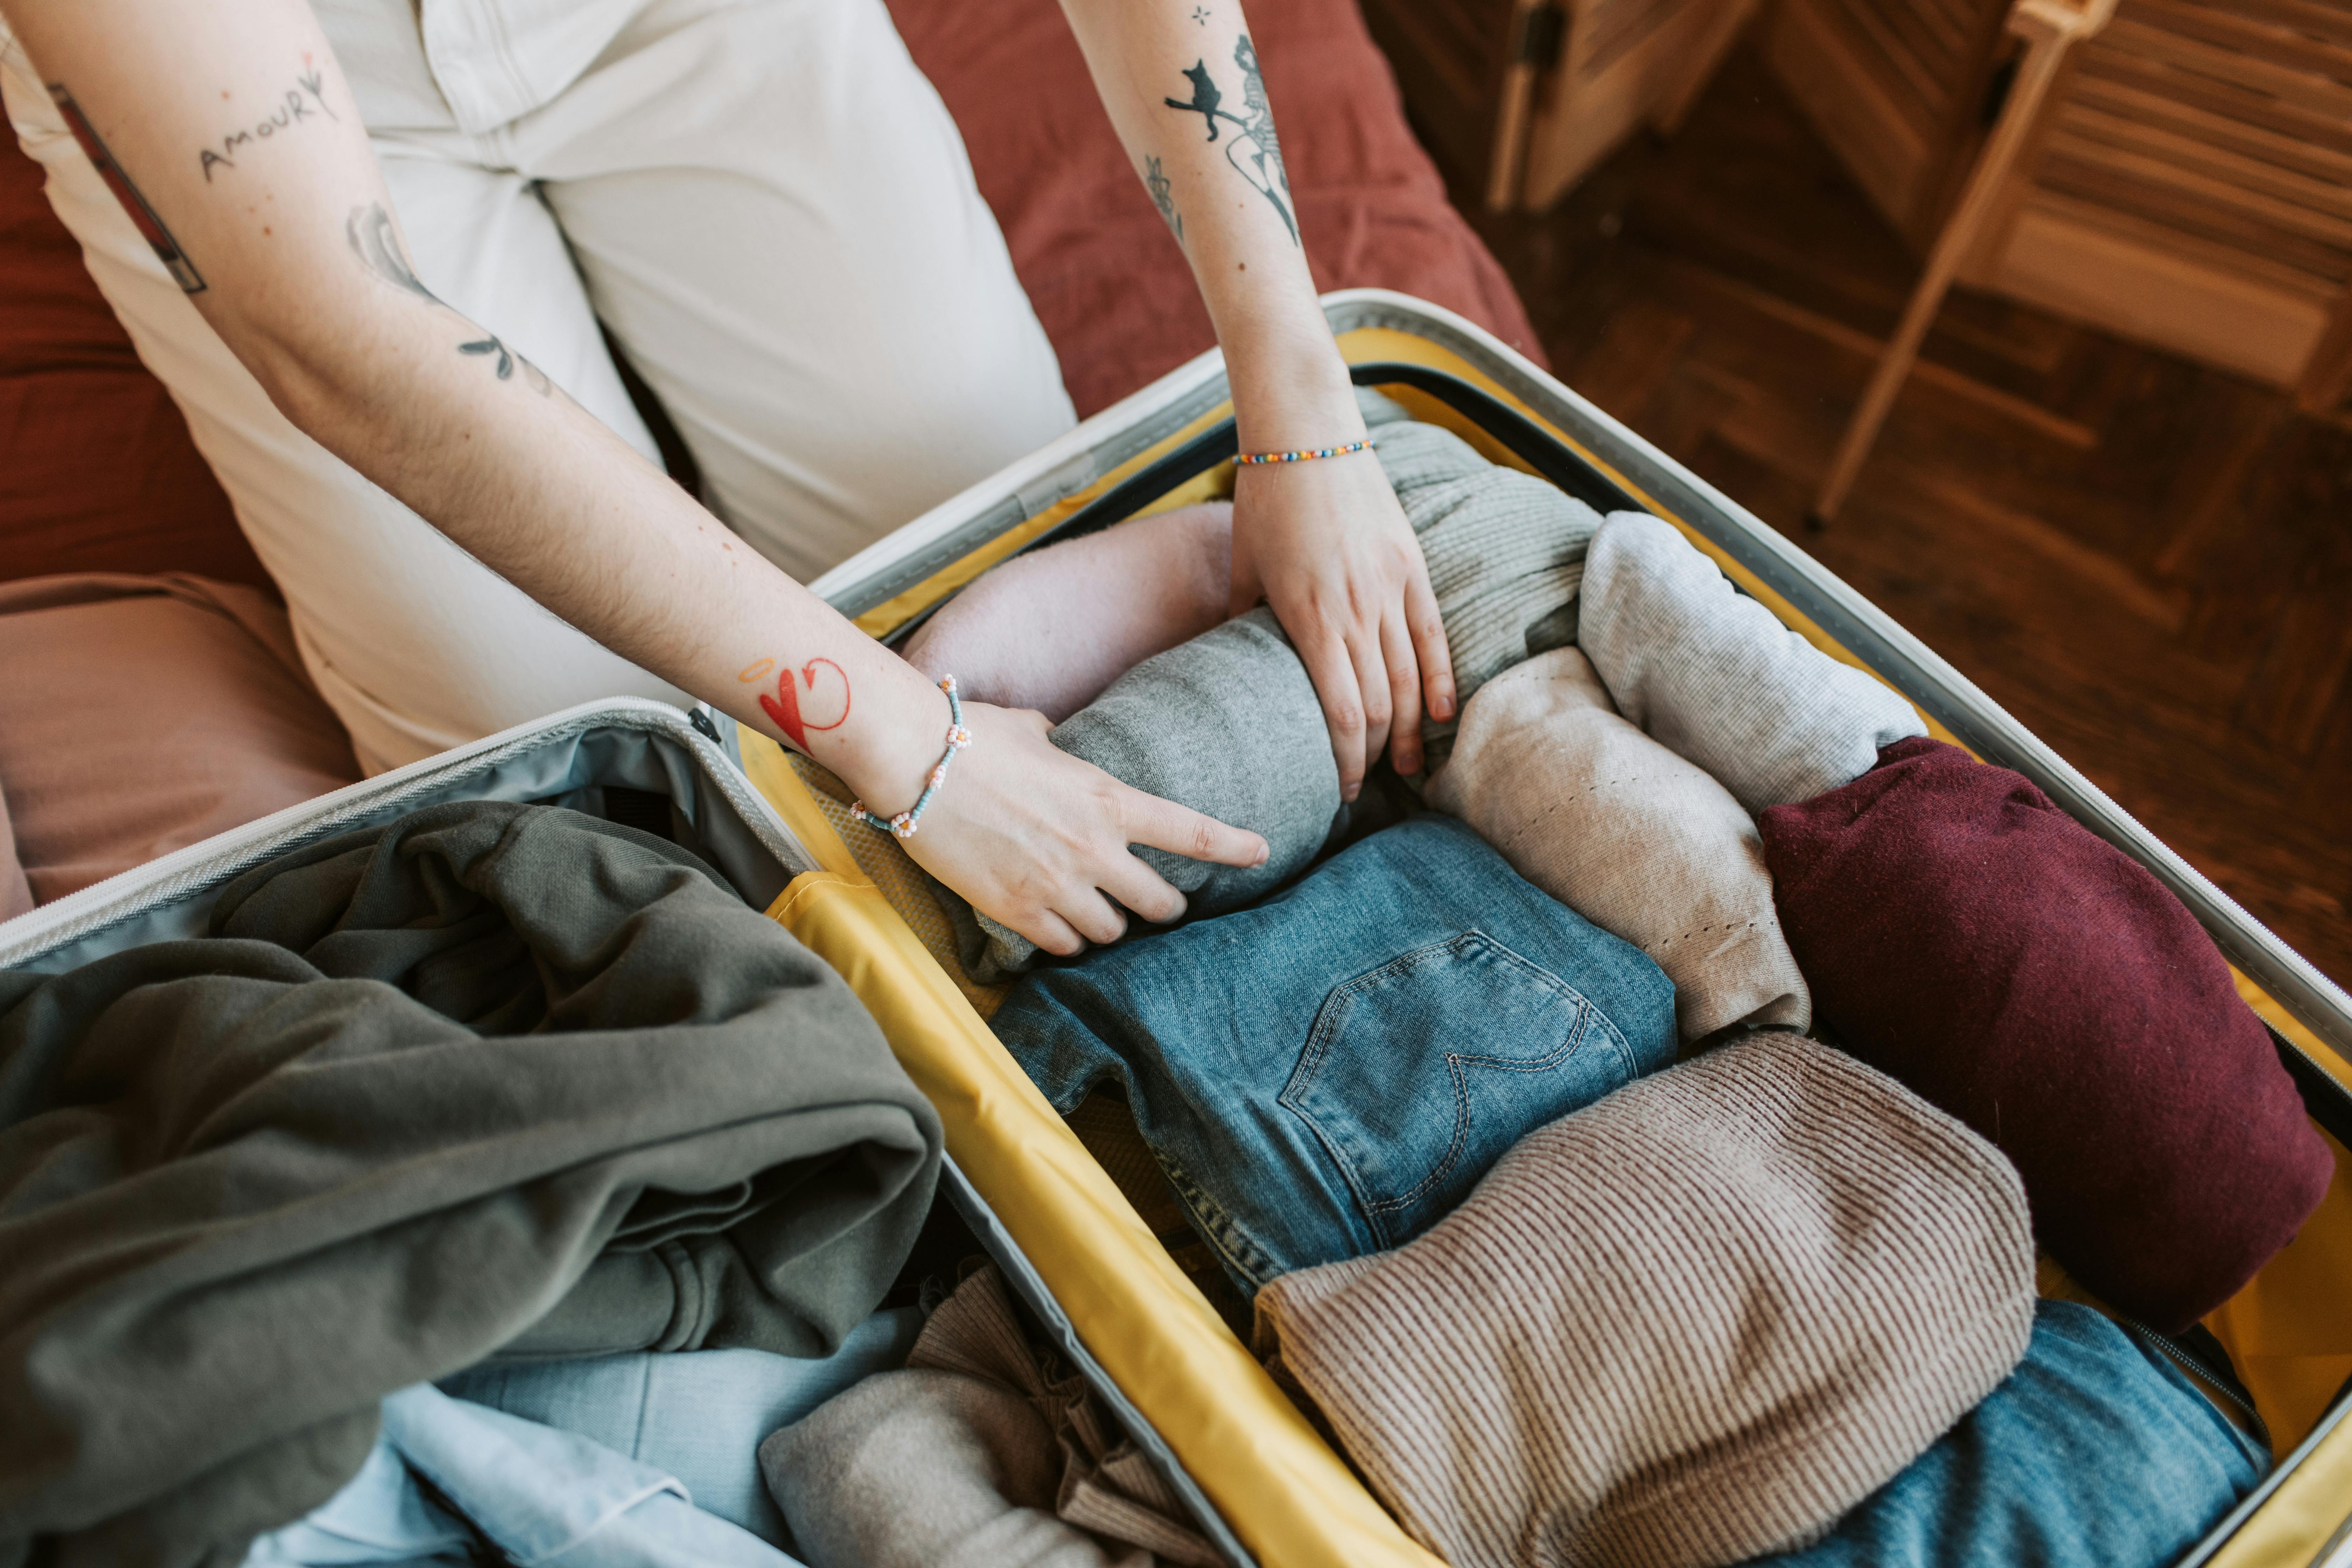
Solo Travel Packing: Pack for Freedom, Not Fear
TrekGuider @trekguider
Forget every checklist you’ve ever downloaded. The internet is littered with lists of what to pack, but they all miss the fundamental point. For a solo traveler, the contents of your bag are secondary. What truly matters is the system behind it. Mainstream packing advice is a trap, designed for travelers who can lean on a partner. But for you, every ounce and every decision is a direct reflection of your independence.
The secret the pros know is this: packing isn’t a chore you endure before a trip. It is the first, most critical act of the adventure itself. It’s a declaration of self-reliance. Getting it wrong leads to the classic traveler mistakes: wrestling an overstuffed bag on a crowded train, becoming an obvious target, or having a minor inconvenience like a dead phone escalate into a genuine crisis in an unfamiliar city.
This is not another packing list. This is a manifesto on the philosophy of smart travel. We’re going to dismantle the conventional wisdom and replace it with a set of battle-tested systems. These are the solo travel packing hacks that go beyond gear, transforming your bag from a burdensome anchor into a strategic asset for a safer, more mobile, and profoundly more liberating journey. Of course, packing is just one piece of the puzzle. For the complete playbook on traveling alone, be sure to consult our master resource on Anxious to Adventurous: Solo Travel Tips for Confidence.

The Mindset Shift: Why Your Bag is Your Most Important Travel Companion
For a solo traveler, your pack is your superpower. It’s your home, your toolkit, and your shield. Embracing this mindset is the key. A masterful packing strategy isn’t about what you leave behind; it’s about what you gain—freedom from the tyranny of heavy luggage, the anxiety of unpreparedness, and the vulnerability that comes with looking like a lost tourist.
This philosophy is built on three core pillars:
Radical Self-Reliance: You are your entire support system. Every item must be a tool that empowers your independence, from a simple roll of duct tape for on-the-fly repairs to a power bank that ensures you are never without your digital lifeline.
Calculated Efficiency: Your time and energy are your most precious resources. An intelligently organized bag means less time spent rummaging for a charging cable and more time savoring a sunset. It means navigating cobblestone streets and endless train station stairs with ease, not exhaustion.
Proactive Security: A smart packer moves with confidence, and confidence is a powerful deterrent. This isn't about paranoia; it's about preparation. It’s choosing and organizing your gear in a way that makes you a "hard target," so you can focus on the joy of discovery.
System 1: The Capsule Wardrobe - A Masterclass in Infinite Style, Minimal Space
The Philosophy: More Options from Fewer Items
The capsule wardrobe isn't just a space-saving technique; it's a strategic weapon against decision fatigue. The goal is to create a small, curated collection of versatile, interchangeable clothing. This ensures you feel confident and appropriate in any situation, from a morning market stroll to an impromptu dinner invitation, without ever having to waste mental energy on what to wear.
The Method in Action
This system works by making smart, upfront choices. For example, a common framework for a one-week trip is the 5-4-3-2-1 guideline: 5 sets of socks/underwear, 4 tops, 3 bottoms, 2 pairs of shoes, and 1 layering piece. But the real magic is in the details.
Invest in high-performance fabrics. Merino wool is the undisputed champion for solo travelers; it’s temperature-regulating, moisture-wicking, and naturally odor-resistant, meaning you can wear it multiple times without washing. One merino wool shirt does the work of three cotton ones.
Build on a neutral palette. Sticking to a base of colors that all work together (black, grey, navy, tan) creates dozens of potential outfits. You can then add personality with a lightweight, colorful scarf or a unique accessory—items that provide maximum visual impact for minimal packing space.
System 2: Modular Organization - The Secret to Effortless Efficiency & Discretion
The Philosophy: A Place for Everything, and Everything in Its Place
How you organize your bag is a strategic choice. A chaotic bag bleeds time and energy. Worse, it forces you to expose your entire inventory just to find one item, a critical vulnerability in a shared hostel dorm. The goal is to create a modular system that allows you to access exactly what you need, when you need it, without disrupting anything else.
The Method in Action
The key element of modular organization is compartmentalization.
Packing cubes are the gold standard. They aren’t just for compression; they turn your backpack into a tidy chest of drawers. By using different colored cubes for different categories (e.g., blue for tops, red for bottoms, grey for electronics), you can retrieve an item in seconds, discreetly and efficiently.
The rolling method is foundational. Tightly rolling your clothes is superior to folding. It minimizes wrinkles and allows you to see every piece of clothing at a glance within your packing cube, eliminating the need to dig.
System 3: The Fortress of Self-Reliance - Your Security & Problem-Solving Toolkit
The Philosophy: Prepare for the Worst, Enjoy the Best
True freedom on the road doesn't come from hoping problems won't arise. It comes from the quiet confidence that you can handle them when they do. This system is about building a portable fortress of security and a toolkit for self-reliance, so you can explore with an unshakeable peace of mind.
The Three Layers of Your Fortress
Layer 1: Proactive Gear Security
The goal here is to make yourself a less appealing target. Opportunistic thieves look for easy wins.
Carry a decoy wallet with a small amount of local currency and some expired cards. If confronted, you can hand it over without losing your essential documents.
Use a simple carabiner to clip the zippers of your daypack together. It’s not a high-security lock, but it’s an effective deterrent against a pickpocket trying to subtly slide your bag open in a crowd.
Layer 2: Personal & Digital Safety
Your well-being matters most. These items are non-negotiable.
A rubber door stop is one of the most effective, low-cost security tools you can carry. Shoved under your hotel or Airbnb door, it provides a powerful physical barrier against unwanted entry.
Your phone is your lifeline. A dead phone is a safety crisis. Always carry a fully charged power bank (at least 10,000mAh).
Public Wi-Fi is a hunting ground for data thieves. Using a VPN on your phone and laptop is essential to protect your banking information and passwords.
Layer 3: The "MacGyver" Multi-Tools
When you’re alone, small problems can become major headaches. The MacGyver mindset is about packing a few multi-purpose items that can solve countless issues.
Wrap a few feet of duct tape around a water bottle or pen. It can repair a broken sandal, patch a backpack, or serve as a makeshift bandage.
A bandana or sarong is the ultimate multi-tool. It can be a towel, a sun shield, a dust mask, a makeshift bag, or a privacy screen.
Beyond the Gear: Packing for the Solo Experience
Expert packing goes beyond the purely practical. It’s also about packing for your emotional well-being and enhancing the unique moments that solo travel offers.
Pack a sensory comfort item. Loneliness can strike unexpectedly. Something small that connects you to home—a few of your favorite tea bags, a familiar scent, a silk pillowcase—can be an incredible comfort.
Bring a social icebreaker. A simple deck of playing cards placed on a table in a hostel common room is a universal invitation to connect with other travelers, breaking down language and cultural barriers instantly.
Empower your inner photographer. Don't let being solo stop you from getting great photos. A small, flexible mini tripod allows you to use your phone's self-timer for stunning shots that aren't just selfies. The "video screenshot hack" is another pro move: record a short video of yourself moving through a scene, then scrub through it later to pull out perfect, candid-looking still images.

Conclusion: Stop Packing, Start Preparing
You now possess the framework. The difference between an amateur and an expert traveler isn't what they pack, but how they think. It’s the understanding that a capsule wardrobe is about mental clarity, modular organization is about efficiency, and a fortress of self-reliance is about absolute freedom.
This guide was the "why." You have the philosophy.
Now it's time for the "what." To put these systems into practice, you need the right tools. We've compiled everything—every piece of gear, every item of clothing, every essential document—into one definitive resource.
Your next step is clear. Take these principles and build your ultimate kit with our . It’s the tactical playbook that will bring this strategy to life.
Read the full guide: Anxious to Adventurous: The Ultimate Guide to Solo Travel Confidence
Don't Miss Out! Subscribe for Exclusive Content
SubscribeComments 0
No comments yet
Be the first to share your experience!
Dont Miss Out! Subscribe for Exclusive Content
Ultimate USA Holidays Guide: Top Picks
FTC Affiliate Disclosure Essentials: Stay Compliant as a Travel Creator
Essential Affiliate Tools: From Tracking to Full Optimization
Booking.com Affiliate Program Review: Pros, Cons, and Earnings Potential
Decoding Affiliate Commission Rates: Benchmarks for Travel Creators
Amazon Associates for Travel: Strategies to Maximize Commissions
7-Day Solo Travel Itinerary: A Perfect First-Trip Template
TrekGuider @trekguider
You're ready for an adventure that's entirely your own. No more compromising on destinations, no more syncing schedules. Just you, the open road, and the profound freedom of solo travel.

But a blank page can be intimidating. The excitement of the idea is quickly replaced by the paralysis of planning. Where do I start? How do I build a solo travel itinerary that's exciting but not overwhelming? How do I stay safe?
The good news is that you don't need to reinvent the wheel. You need a proven framework, a reliable playbook to guide you. This article provides the ultimate solution: a flexible 7-day solo travel itinerary that acts as the perfect template for your first independent adventure. It’s designed to eliminate guesswork, build confidence, and ensure an unforgettable experience.
While planning a trip for one has a very different set of challenges than coordinating group travel, as detailed in our guide to Family Travel Ideas: The 2026 Guide to Unforgettable Trips, the need for a solid plan remains universal. This guide is your key to unlocking that journey, transforming apprehension into pure excitement.
Your Pre-Flight Checklist: Engineering a Stress-Free Start
A smooth trip begins long before you pack your bags. Solid preparation is the antidote to travel anxiety, transforming "what ifs" into "I've got this."

1. Choose a Beginner-Friendly Destination
For your first solo trip, set yourself up for success by picking a location known for its strong tourist infrastructure and safety. You're looking for a "soft landing."
Top Contenders: Think cities like Lisbon (Portugal Travel Guide), Dublin, Kyoto (Japan Travel Guide), or Vancouver. These spots are celebrated for being affordable, walkable, friendly, and supremely safe.
The Litmus Test: Can you get around easily on public transport? Is it known for being safe, particularly for solo travelers? Is Wi-Fi widely available?
2. Select Your Home Base Wisely
Your accommodation is more than a place to sleep; it's your sanctuary and command center.
Boutique Hostels (with Private Rooms): The gold standard for many first-timers. You get the social energy of a common room and organized tours, plus the quiet retreat of your own space. It's the perfect balance of community and privacy.
Boutique Hotels or Guesthouses: A step up in privacy and comfort. Small, locally-owned spots often provide a warmer, more personal touch than soulless chains, and the staff can be a goldmine of local tips.
Centrally Located Airbnbs: Ideal if you crave a "live like a local" vibe and a kitchen. Stick exclusively to hosts with a "Superhost" designation and dozens of positive reviews that specifically mention safety, cleanliness, and an excellent location.
3. A Quick Word on Budgeting for Your First Solo Trip
A clear budget isn't a restriction; it's freedom. It frees you from money-related stress on the road. For a 7-day city trip, a simple framework is:
Fixed Costs: Pre-booked flights and accommodation.
Daily Average: Set a realistic daily budget for food, activities, and transport. Research costs in your chosen city (e.g., a meal in Lisbon is far cheaper than in Zurich). A good starting point for many European or North American cities is $75-$125 per day.
Contingency Fund: Always have an extra 20% of your total budget tucked away in a separate account for unexpected opportunities or emergencies.
4. A Pro's Approach to Solo Safety
Your confidence is directly linked to how safe you feel. Build a fortress of preparation. For a deeper dive, especially for female travelers, our Solo Female Travel Safety Guide is an essential resource.
Digital Security: Download offline maps of your city on Google Maps. Use a VPN on public Wi-Fi. Scan your passport and important documents and save them to a secure cloud service like Dropbox.
Situational Awareness: The "Morning Photo" protocol is a great habit for solo travelers. Snap a quick selfie each morning. In an emergency, it provides an exact, current visual reference.
Contingency Plan: Before you leave, share your detailed itinerary with someone at home. Establish a simple check-in cadence (e.g., a quick "all good" text each night).
Financial Safety: Carry a "decoy" wallet with a small amount of cash and an expired credit card. Keep your primary cards and the bulk of your cash in a secure money belt or a hidden internal pocket. Never keep all your money in one place.
Pro-Tip: Download the Noonlight app. It's a discreet safety button on your phone. If you're feeling uneasy, you can hold your thumb on the button. Release it and don't enter your PIN, and it will automatically alert local authorities with your exact location.
Your Ultimate Pre-Trip Tool
Feeling organized is feeling confident. Before you book a single flight, download our free International Travel Checklist. It’s a comprehensive resource that covers everything from passports and visas to packing and travel insurance, ensuring you don't miss a single crucial step.
The Perfect 7-Day Solo Travel Itinerary Blueprint
This is your playbook. The specific sights will change, but the strategic rhythm of this week is designed to maximize discovery while preventing burnout.

Day 1: Land Softly, Start Slow
Your only goal on day one is to land softly. Forget the pressure to do anything "touristy." The mission is simple: arrive, check-in, and breathe.
Afternoon (Arrival & Settle): Navigate from the airport to your lodging using a pre-vetted option—an official taxi stand, Uber/Lyft, or the city's express train. Avoid unsolicited ride offers. Once you drop your bags, take 30 minutes to actually unpack. This small act of nesting transforms a sterile room into your personal space.
Late Afternoon (The Reconnaissance Walk): Take a short, aimless walk with a purpose: to locate your vitals. Find the nearest ATM, pharmacy, small grocery store, and metro/bus stop. This simple recon mission builds a mental map and makes you feel instantly more capable.
Evening (The Easiest Dinner Ever): Your first meal should be low-stress. Find a casual, well-lit café or bistro within a few blocks of your accommodation. Ask for a table with a view of the street. This isn't just dinner; it's your first immersion.
Day 2: Find Your Anchor, Catch the Vibe
Today is about orientation. You'll anchor yourself with a major landmark and then plug into the city's authentic energy.
Morning (The Iconic Anchor): Head to the city's most famous landmark—the one on all the postcards. Book your ticket online, weeks in advance, to bypass the soul-crushing queues. Seeing this "anchor point" early gives your mental map a center of gravity.
Lunch (A Feast for the Senses): Skip the tourist-trap restaurants and head for a bustling local food market. It's a vibrant, low-pressure way to sample authentic cuisine. Graze from different stalls, trying whatever looks and smells incredible.
Afternoon (The Ultimate Solo Travel Hack): Join a "free" walking tour (they run on tips, so bring cash). A passionate local guide will give you a brilliant crash course in the city's history, secrets, and layout. It's also an effortless way to be around fellow travelers.
Evening (Culture or Comfort): If you're energized, catch a local performance—traditional music, a play, anything that gives you a taste of the culture. If you're tired, there is zero shame in a simple dinner and an early night. Listen to your body.
Day 3: Pursue Your Passion
This is your trip. Today is dedicated entirely to whatever makes you tick.

Morning (The Deep Dive):
Art Lover? Lose yourself in a world-class museum or hunt for street art in a bohemian neighborhood.
History Buff? Explore that niche museum or archaeological site that fascinates you.
Foodie? Take a local cooking class. It's one of the best ways to meet people, learn a skill, and eat an amazing meal.
Nature Enthusiast? Escape to the city's largest park or botanical garden for a few hours of green therapy.
Afternoon (The Art of Getting Lost): Pick a neighborhood that intrigued you and put your phone on airplane mode. Allow yourself to wander without a destination. Follow a charming alleyway, pop into a random shop, sit on a bench. This is where the magic happens.
Evening (A Table for One, with a View): Treat yourself. Find a restaurant or rooftop bar with a spectacular view. Order a great meal, and toast to your adventure. Worried about dining alone? Bring a journal and write about your day—it makes you look like a mysterious travel writer, not a lonely tourist.
Day 4: Gain Perspective with a Day Trip
Escaping the city for a day provides a vital change of scenery and proves your growing travel competence.
Full Day: Choose a destination one or two hours away by train or bus. Think a coastal village, a historic castle, or a national park. The journey itself is part of the adventure.
The Mission: This trip breaks the routine and shows you a completely different facet of the country. It also flexes your navigation skills and builds immense confidence. Successfully planning and executing a day trip on your own is a huge milestone.
Logistics: Research train/bus schedules the night before. Pack a small daypack with a water bottle, snacks, a portable charger, and a light jacket.
Day 5: Live Like You Belong Here
Today, your goal is to blend in. Shed the tourist skin and adopt the rhythms of a local.

Morning (The Café Ritual): Find a small, neighborhood café far from the tourist trail. Order a coffee, grab a pastry, and settle in with a book or journal for an hour. Watch the morning commute, listen to the chatter—just be.
Mid-Day (A Mundane Mission): Do a normal-person errand. Browse a local bookstore, buy fruit at a grocer, or find a post office to mail cards home. These simple tasks ground you in the reality of the place.
Afternoon (Scheduled Downtime): Hit the pause button. You are not a travel machine. Go back to your room for a nap. Read a book on a park bench. Do absolutely nothing. This is a vital part of sustainable travel.
Evening (The Local's Recommendation): Ask a local you've had a pleasant interaction with—your barista, a friendly shopkeeper—"Where's your favorite place to eat around here?" Their recommendation will almost always be more authentic and delicious than anything on a top-ten list.
Day 6: The Open Road and a Fond Farewell
Leave this day largely unplanned. It's a blank page for you to fill with whatever your heart desires.
Morning (Encore or Exploration): Is there a neighborhood you fell in love with? Go back. Did a fellow traveler tell you about a hidden gem you can't stop thinking about? Go find it. This is your flex day to chase your curiosity.
Afternoon (Meaningful Mementos): If you're buying souvenirs, seek out items that tell a story. Skip the generic trinkets and look for local crafts, specialty foods, a vintage poster, or a book from a local author.
Evening (The Last Supper): Make your final dinner a celebration of your journey. Return to a favorite spot or try that one special place you've been saving. As you eat, reflect on the week. Think about what you've learned, the challenges you've overcome, and the person you've become.
Day 7: Depart with Your Head Held High
The last day is for a smooth, grateful exit. No frantic rushing.
Morning: Enjoy one last coffee and pastry at your favorite café. Take a final, mindful walk down a beloved street, soaking in the sights and sounds.
Pack & Go: Head back to your room for a final pack-up. Leave ample time for your journey to the airport. Strolling calmly to your gate is a far better feeling than sprinting.
At the Airport: Once you're through security, pause. Take a deep breath. You did it. You took the dream of solo travel and forged it into reality. Acknowledge the magnitude of that achievement.
Frequently Asked Questions
What is the best way to handle feeling lonely on a solo trip?
It's completely normal to feel a pang of loneliness. The best strategy is to be proactive. Stay in social accommodations like a boutique hostel, join a walking tour or a cooking class on days you crave interaction, and find a cozy café to simply be around the comforting buzz of other people.
Is it awkward to eat at restaurants alone?
Not at all! It's a skill that gets easier with practice. Start with casual cafes, bring a book or journal to feel more comfortable, and try sitting at the bar where you can often chat with the bartender. Soon you'll find it's a peaceful and empowering experience.
How can I stay safe when going out at night by myself?
A: Prioritize well-lit, busy areas and research neighborhoods beforehand. Tell someone where you're going, use ride-sharing apps like Uber instead of walking in unfamiliar areas late at night, and always be mindful of your drink. Trust your intuition—if a place feels off, leave immediately.
What's the most common mistake first-time solo travelers make?
The most common mistake is over-scheduling. New solo travelers often try to fill every single minute to avoid being alone with their thoughts. The real magic happens in the unplanned moments, so be sure to build plenty of downtime and flexibility into your itinerary.
Welcome Home, Traveler: This Is Just the Beginning
Walk through that arrival gate on your way home, and you won't be the same person who left. A solo trip is a declaration—proof that you are more capable, resilient, and fiercely independent than you might have ever allowed yourself to believe.

This solo travel itinerary was never just about seeing a new place; it was about discovering a new version of yourself. Use this template, adapt it, and carry the confidence you've earned into planning your next adventure. When you're ready to go from template to a fully-realized plan, our comprehensive Travel Guide is the perfect next step to turning your dream trip into a reality. Because this isn't the end of one journey; it's the beginning of a lifetime of them.
Read the full guide: Family Travel Ideas: The 2026 Guide to Unforgettable Trips
Don't Miss Out! Subscribe for Exclusive Content
SubscribeComments 0
No comments yet
Be the first to share your experience!
Dont Miss Out! Subscribe for Exclusive Content
Ultimate USA Holidays Guide: Top Picks
FTC Affiliate Disclosure Essentials: Stay Compliant as a Travel Creator
Essential Affiliate Tools: From Tracking to Full Optimization
Booking.com Affiliate Program Review: Pros, Cons, and Earnings Potential
Decoding Affiliate Commission Rates: Benchmarks for Travel Creators