9 Beach Safety Tips That Could Save Your Life
TrekGuider @trekguider
There’s a moment on every beach trip that feels like pure magic. It’s the feeling of warm sand between your toes, the hypnotic sound of waves crashing, and the endless blue horizon stretching out before you. It’s a picture of perfect relaxation. But beneath that tranquil surface, the ocean holds immense and impartial power. A beautiful day can turn dangerous in an instant from a hidden current, underestimated waves, or the relentless sun, transforming a dream vacation into a terrifying emergency. Every year, countless beachgoers find themselves in preventable peril simply because they misread the water or weren't prepared for the environment.
This isn't a guide to make you fear the ocean; it's a playbook to empower you to respect it. We’re here to give you the essential, expert-backed beach safety tips that can mean the difference between a blissful day and a life-altering one. These strategies, drawn from lifeguarding associations and national weather experts, are a critical component of the situational awareness we cover in our comprehensive guide, [The Ultimate Guide to Travel Safety: A 2026 Playbook]. By learning to see the beach not just as a playground, but as a dynamic natural environment, you can ensure your only takeaways are seashells and incredible memories. Let’s dive in.

Master the Water: Essential Ocean Safety Tips
The vast majority of beach-related dangers originate in the water itself. From powerful currents to unpredictable surf, understanding the ocean's behavior is the most critical skill any beachgoer can possess. These are the foundational beach safety tips for staying safe in the surf.
1. Become an Expert at Spotting Rip Currents
Rip currents are the number one danger at most surf beaches, responsible for the majority of ocean rescues performed by lifeguards. They are not undertows that pull you under the water; they are powerful, narrow channels of water that flow away from the shore at high speed. According to NOAA and the United States Lifesaving Association (USLA), knowing how to visually identify one from the shore is your first and best line of defense.
Here’s what to look for, especially from an elevated position like the dunes or a lifeguard tower:
A Channel of Churning, Choppy Water: Look for a specific area where the water seems agitated or rough, moving in a different direction than the surrounding waves.
A Break in the Incoming Wave Pattern: This is often the easiest sign to spot. You'll see a gap in the line of breaking waves—an area that looks deceptively calm. This flat spot is the rip current pulling water back out to sea, disrupting the incoming waves.
A Difference in Water Color: Because the current is carrying sand and sediment offshore, the water within a rip current often appears darker, murky, or sandy brown compared to the clearer, greener water on either side.
A Line of Foam or Debris Moving Seaward: This is a dead giveaway. If you see a line of foam, seaweed, or other floating debris moving steadily away from the beach, perpendicular to the shore, you are looking directly at a rip current.
Pro-Tip: Before you even set up your umbrella, take five minutes to stand back and observe the water. Actively look for these signs. Identifying potential rip currents before you get in the water is the single most important safety action you can take.
2. Know the "Flip, Float, Follow" Rule for Rip Current Survival
If you do get caught in a rip current, your instinctive reaction—to panic and swim directly against it back to shore—is the most dangerous thing you can do. Fighting a rip current will exhaust you to the point of drowning. The correct response is simple and could save your life.
Flip: Flip onto your back to stay afloat and conserve energy.
Float: The current will not pull you under; it will only pull you away from shore. Stay calm and float with it.
Follow: Once you are out of the main pull of the current, begin swimming parallel to the shoreline. Do not swim toward the beach. Once you have swum out of the current, you can then turn and swim back to shore, ideally at an angle away from where you were caught.
If you are unable to swim out of it, continue to float and wave your arms and yell for help to attract the attention of a lifeguard or other swimmers.

3. Understand and Obey the Beach Warning Flag System
While knowing how to escape an invisible current is a vital reactive skill, your most powerful proactive tool is the one flapping in the breeze. Beach warning flags are a simple, universal language used by lifeguards to communicate the current water conditions. This system, adopted by the International Lifesaving Federation, provides a quick, visual assessment of the hazard level. Ignoring these flags is a gamble you should never take.
Green Flag: Low Hazard. Conditions are calm, but you should still exercise caution.
Yellow Flag: Medium Hazard. Moderate surf and/or currents are present. Weak swimmers should stay out of the water, and everyone else should use extra care.
Red Flag: High Hazard. The surf is high, and/or strong currents make conditions dangerous. It is recommended that no one enters the water.
Double Red Flag: Water Closed to Public. Conditions are extremely dangerous. The water is closed to all swimming, and entering it is prohibited.
Purple Flag: Dangerous Marine Life. This flag indicates that potentially hazardous marine life, like jellyfish or sharks, has been spotted. It is always flown with another color flag that indicates the surf conditions.
Pro-Tip: The absence of flags does not automatically mean the water is safe. If there is no flag, it likely means there is no lifeguard on duty. In that case, you are swimming entirely at your own risk. Always try to swim at a beach protected by lifeguards.
Master the Environment: Sun and Shoreline Safety Tips
While the ocean poses the most immediate threats, the beach environment itself has its own set of risks. The sun, sand, and heat can cause serious health issues if not managed properly. These beach safety tips will keep you safe on the shore.
4. Know the Signs of Heat Exhaustion vs. Heatstroke
That perfect, sun-drenched beach day holds a hidden danger. When the temperature climbs, the line between bliss and a medical emergency can blur with alarming speed. According to the Red Cross, it's crucial to know the difference between heat exhaustion and the more severe, life-threatening heatstroke (sunstroke).
Heat Exhaustion Symptoms:
Headache, dizziness, and confusion
Excessive sweating with cool, moist, or pale skin
Nausea and muscle cramps
A rapid, weak pulse
First-Aid for Heat Exhaustion:
Move to a Cool Place: Immediately get the person out of the direct sun and into shade or air conditioning.
Cool Them Down: Loosen their clothing and apply cool, wet cloths or spray them with cool water.
Rehydrate: If they are conscious and able to swallow, have them sip small amounts of a sports drink or water.
If their condition doesn't improve or they start vomiting, call for emergency help immediately, as it can progress to heatstroke.
5. Recognize the Emergency of Heatstroke (Sunstroke)
Heatstroke is a full-blown medical emergency where the body's internal cooling system completely fails.
Heatstroke Symptoms:
Changes in mental status (confusion, agitation, loss of consciousness)
Hot, flushed, and often dry skin (sweating may have stopped)
A dangerously high body temperature (often above 104°F / 40°C)
A rapid, strong pulse, which may become weak later
First-Aid for Heatstroke:
Call 911 Immediately: This is a life-threatening emergency that requires professional medical intervention.
Begin Rapid Cooling: While waiting for help, do everything you can to cool the person's body. Immerse them in cool water if possible, or douse them with water and apply ice packs to the neck, groin, and armpits.

6. Practice Proactive Sun Protection
The best way to deal with a heat-related illness is to never let it start. Sun protection is a continuous strategy, not a one-time action.
Hydrate Constantly: Drink plenty of water throughout the day, even before you feel thirsty.
Use Broad-Spectrum Sunscreen: Apply a sunscreen with at least SPF 30 and reapply it every two hours, and always immediately after swimming or excessive sweating.
Seek Shade: Use an umbrella and take breaks from the sun, especially during the peak intensity hours of 10 a.m. to 4 p.m.
Wear Protective Clothing: A wide-brimmed hat and UV-blocking sunglasses are non-negotiable.
7. The "Stingray Shuffle" Rule
In many coastal areas, stingrays bury themselves in the sand in shallow water. Stepping directly on one can result in an excruciatingly painful sting from the barb on their tail. To avoid this, never walk normally through the shallows. Instead, shuffle your feet along the sand. The vibrations from the shuffle will alert any nearby stingrays to your presence, giving them a chance to swim away peacefully.
Master Your Preparation: Final Beach Safety Tips
A safe and relaxing beach day begins before you even leave home. Smart planning and having the right gear can make all the difference, especially when traveling with family.
8. Pack a Dedicated Beach First-Aid Kit
While your main travel medical kit should be comprehensive, your beach bag needs a few specific items to handle common coastal issues:
Waterproof Bandages: For minor cuts and scrapes from shells or rocks.
Aloe Vera Gel: For immediate relief from minor sunburn.
Antihistamine Cream: To soothe the itch from insect bites.
Tweezers: For removing splinters or shell fragments.
Vinegar: A small bottle of white vinegar is a secret weapon; it can help neutralize the sting from some types of jellyfish.
9. Always Designate a "Water Watcher"
When you're at the beach with a group, especially with children, it's easy to fall into the trap of "diffusion of responsibility," where everyone assumes someone else is watching the kids in the water. The solution is to formally designate one adult as the "Water Watcher" for a set period (e.g., 15-20 minutes). During their shift, that person's only job is to watch the water without distraction—no phones, no books, no conversations. Then, you switch. This simple system ensures there are always eyes on the swimmers.
Your Ultimate Guide to Family Beach Travel
Keeping kids safe and entertained at the beach is a unique challenge. From packing the right gear to navigating meltdowns and keeping them safe in the sun and surf, a little extra preparation goes a long way. Our specialized guide takes the stress out of the equation.
Download our free [Stress-Free Flying with Kids Guide] for expert tips on making every part of your family vacation, from the airport to the beach, a breeze!
Beach Safety FAQs
A prepared mind is a safe mind. Here are quick answers to other common beach safety questions.
1. What’s the right way to treat a jellyfish sting?
First, get out of the water. Rinse the affected area with vinegar (if available) for about 30 seconds to deactivate the stingers. Do not use fresh water, as it can make it worse. Carefully pluck out any visible tentacles with tweezers. Soaking the skin in hot water (as hot as can be tolerated without burning) for 20-45 minutes can also help relieve the pain.
2. Is it safe to dig deep holes in the sand?
Digging in the sand is a classic beach activity, but deep holes can be incredibly dangerous. They can collapse unexpectedly, burying a person in seconds. Never dig a hole deeper than the knees of the smallest person in your group, and always fill in any holes you dig before you leave the beach.
3. What should I do if I see someone in trouble in the water?
Do not attempt a swimming rescue yourself unless you are trained in water rescue. An untrained rescuer can quickly become a second victim. The best course of action is to call for help immediately. Yell to alert a lifeguard and call 911. If you can, throw the person something that floats, like a cooler or a boogie board.
By embracing these nine essential beach safety tips, you shift from being a passive visitor to an active, aware, and prepared participant in one of nature’s most magnificent environments. The goal isn't to diminish the fun but to ensure it. A healthy respect for the ocean and a solid plan for your day are the keys to unlocking a truly carefree and unforgettable experience by the sea.

Now that you've mastered the art of staying safe on the coast, you can focus on the rest of your adventure. For a complete, deep-dive into every facet of trip planning, from health and safety to budgeting and logistics, our comprehensive [Travel Guide] is the only resource you'll ever need.
Don't Miss Out! Subscribe for Exclusive Content
Subscribe


Comments 0
No comments yet
Be the first to share your experience!
Dont Miss Out! Subscribe for Exclusive Content

Ultimate USA Holidays Guide: Top Picks

FTC Affiliate Disclosure Essentials: Stay Compliant as a Travel Creator

Essential Affiliate Tools: From Tracking to Full Optimization

Booking.com Affiliate Program Review: Pros, Cons, and Earnings Potential

Decoding Affiliate Commission Rates: Benchmarks for Travel Creators

Amazon Associates for Travel: Strategies to Maximize Commissions
The 5 Unexpected Benefits of Traveling by Yourself
TrekGuider @trekguider
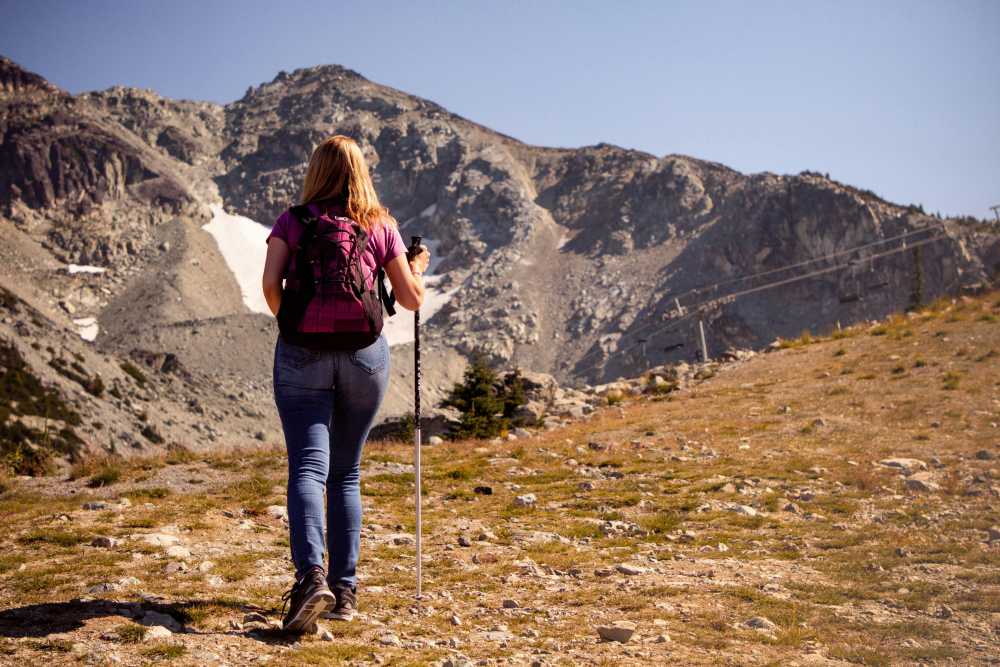
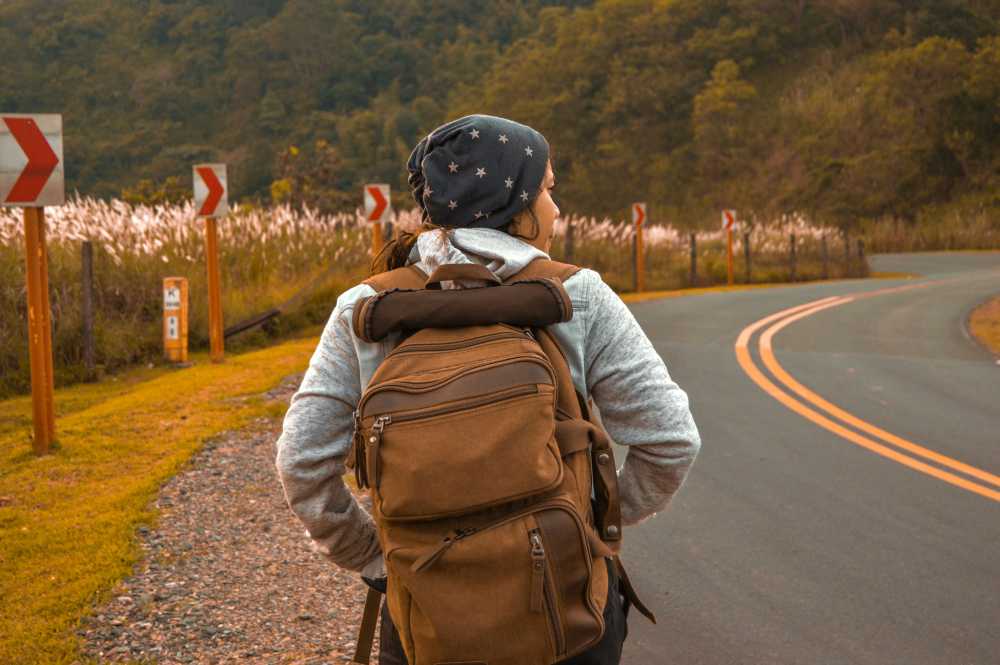
You’re on the fence. The idea of a solo trip is a powerful, persistent whisper, promising adventure and absolute freedom. You see the photos—a lone backpacker watching a sunrise over a mountain peak, a woman confidently navigating a bustling foreign market—and you feel an undeniable pull. But that whisper is quickly drowned out by a chorus of doubts. Is it safe? Will I be lonely? What will people think? The logistical hurdles seem daunting, but it’s the deeper, more personal questions that truly hold you back, anchoring your dream in the harbor of "maybe someday."
This hesitation is a thief, quietly stealing what could be the most profound and transformative experience of your life. It’s a feeling shared by many, yet the data shows a powerful movement underway. Women now constitute a staggering 84% of the solo travel market, and a recent report found that a staggering 68% of women who travel solo are pursuing personal growth. They aren’t just seeking a vacation; they’re making an investment in themselves. For a complete tactical guide on how to get started, our comprehensive pillar page, [The Ultimate Guide to Solo Female Travel (15 Essential Tips)], is your roadmap from daydream to departure. But first, you need to understand the destination is not just a place on a map; it's a new version of yourself.

This is the definitive "why." These are the five unexpected benefits of solo travel that don’t just make for a great vacation—they have the power to fundamentally reshape your life, long after you’ve unpacked your bags.
1. You'll Discover a Reservoir of Radical Self-Reliance
At home, you exist within a comfortable web of support. When your car makes a strange noise, you call a mechanic. When you’re unsure of directions, you rely on a shared decision. On a solo trip, that web is gone. Suddenly, you are your own navigator, translator, problem-solver, and chief decision-maker. Every choice, from which train to catch to what to eat for dinner, rests solely on your shoulders.
But this isn't a burden; it's a battlefield promotion. You learn—through the direct, undeniable evidence of your own successes—that you are more capable and resourceful than you ever gave yourself credit for. When you successfully navigate a foreign subway system in a language you don’t speak or handle a cancelled flight on your own, you are forging a new neural pathway—one that screams competence.
Travel creator Christine Kaaloa of GRRRLTRAVELER found herself in this very position when she had to unexpectedly continue a trip through India alone. She recalls, "Although I had self-doubt and worry, the moment I committed to my new solo status, a rush of freedom, courage and survival instinct automatically snapped into place. I knew I would do whatever it took to survive and turn this trip into the best trip of my life (which it was)!" This is the essence of radical self-reliance. It’s the quiet, unshakable confidence that comes from knowing, not just hoping, that you can handle whatever the world throws your way.
Pro-Tip: Before your trip, download offline maps of your destination via Google Maps. This allows your phone's GPS to function without a data connection, giving you a powerful navigational tool that boosts your confidence and allows you to explore without the fear of getting truly lost.
2. You'll Forge Unbreakable Adaptability and Resilience
Travel is rarely seamless. Flights get delayed, reservations are lost, weather turns sour. When you travel with others, these challenges are often met with group deliberation or shared complaint. When you are alone, you are the sole architect of the solution.
This constant, low-stakes problem-solving is a masterclass in resilience. A missed train is no longer a crisis; it’s a puzzle to be solved. Do you find the next train, or do you take this as an opportunity to explore the small town you're currently in? This forced adaptability teaches you to think on your feet, to pivot without panic, and to find the opportunity hidden within the obstacle.
Psychologists note that this process of overcoming minor adversities builds a powerful resilience that translates directly back to your life at home. After you’ve successfully re-booked a cancelled flight in a foreign airport at 3 AM, a challenging project at work suddenly seems far less intimidating. You learn to trust your ability to navigate uncertainty, a skill that is invaluable in every aspect of life. You stop seeing setbacks as failures and start seeing them as unexpected detours on an already incredible adventure. This is one of the most practical and enduring benefits of solo travel.
3. You’ll Experience Authentic, Unfiltered Self-Discovery
Who are you when no one is watching? At home, we are often defined by our roles: employee, daughter, partner, friend. Our choices, from the restaurant we pick to the movie we watch, are often subtle compromises, influenced by the preferences and expectations of those around us. Solo travel is a powerful act of stripping all of that away.
In the anonymity of a new place, you are free. Free from your social context, free from the expectations of others, and free from your own well-worn habits. This creates a unique and sacred space for introspection. You have the quiet moments to ask yourself, without any external influence, what you truly want to do. Do you want to spend six hours in an art museum, or would you rather sit in a park and read all afternoon? Do you want to wake up for the sunrise hike, or sleep in and enjoy a leisurely breakfast?
This is more than just freedom; it’s a process of authentic self-discovery. You begin to distinguish your own desires from the desires you’ve absorbed from your environment. You reconnect with your own intuition, your own rhythm, and your own passions. As Alice Teacake of Teacake Travels puts it, her mission as a solo traveler has always been to "reach my full potential by facing my fears and pushing my boundaries." This journey of self-discovery is the first step on that path.
The journey of self-discovery begins with the first step: planning an adventure that is 100% for you.
Design a Trip That's Truly Yours
Our free [Travel Itinerary Template] is the perfect tool to start mapping out the trip of your dreams. Download it now to organize your thoughts, plan your days, and take control of your adventure from the very beginning.
4. You’ll Unlock a State of True Mindfulness and Presence
When you travel with a companion, much of your attention is naturally directed toward them—through conversation, shared decision-making, and the simple act of experiencing things together. While wonderful, this constant social interaction can create a filter between you and your surroundings.
When you travel alone, that filter dissolves. Without the distraction of constant conversation, your senses are heightened. You become acutely aware of the world around you in a way that is profoundly mindful. You notice the fine details of the architecture, the specific aroma of the street food, the cadence of the local language, the way the light hits a cobblestone street in the late afternoon. You become an observer, not just a visitor.
This state of heightened awareness is a form of mindfulness, allowing you to be fully present in the moment. You absorb your destination with a depth and richness that is often missed in a group. A meal isn't just a meal; it's a quiet meditation on new flavors. A walk through a city isn't just a route from A to B; it's an immersive experience of sights, sounds, and smells. You learn to find richness in the small, quiet moments that are often overlooked, and this ability to be fully present is a skill that dramatically enhances your quality of life, both on the road and at home.
Pro-Tip: Use your solo meals as a dedicated mindfulness practice. Put your phone away, bring a journal, and spend the time actively observing the world around you. Write down what you see, hear, and taste. This transforms a potentially awkward moment into a rich, reflective experience.
5. You'll Master the Empowering Benefits of Solo Travel: "Alone" vs. "Lonely"
Let’s address the biggest fear head-on: loneliness. The specter of profound social isolation—of having no one to share a beautiful sunset with—can be the single most powerful deterrent to a solo trip. But one of the most profound benefits of solo travel is learning the crucial and empowering distinction between being "lonely" and being "alone."
Loneliness is a feeling of lack, of involuntary isolation. Being alone, on the other hand, can be a choice—a state of contentment, peace, and self-possession. Solo travel is your training ground for mastering this skill. It forces you to get comfortable in your own skin, to find joy in your own company, and to realize that you are enough.
This fear is universal. Alexandra Baackes of Alex in Wanderland recalls the night before her first solo trip: "she cried; terrified over the thought of eating dinner alone, getting lost in the airport, and having her camera stolen." That summer, she fell "head-over-flip-flops in love with the adrenaline of travel." Her story is proof of the fact that courage isn't the absence of fear, but the act of moving forward despite it. You will have moments where you feel a pang of loneliness, but you will also have moments of pure, unadulterated joy in your own solitude. You learn that you can be both independent and connected, seeking out social interaction on your own terms and then retreating into your peaceful solitude when you choose. This ability to be at peace with oneself is a superpower.

Frequently Asked Questions About Solo Travel's Personal Growth
I'm an introvert. Will I still experience these benefits?
Absolutely. In fact, many introverts find solo travel to be the ideal way to explore. It allows you to engage with the world on your own terms, without the social battery drain of constant group interaction. The self-reliance and resilience you build are universal, and you have complete control over when and how you socialize.
Is it selfish to travel by myself?
Not at all. Investing in your own growth, resilience, and happiness is one of the least selfish things you can do. The confident, capable, and more worldly person you become after a solo trip is a gift to everyone in your life.
How long does a trip need to be to feel these benefits?
It's not about the duration, but the intention. A long weekend trip to a new city where you are fully responsible for your own itinerary can be just as impactful as a month-long backpacking adventure. The key is to step outside your comfort zone and embrace the autonomy, no matter the timeline.
Your Journey Awaits
The call to travel solo is a call to grow. It’s an invitation to discover the depths of your own capability, to find comfort in your own company, and to see the world not as a scary, intimidating place, but as a vast and beautiful classroom. The fears are valid, but they are not your future. The profound benefits of solo travel—radical self-reliance, unbreakable resilience, authentic self-discovery, heightened mindfulness, and the mastery of solitude—are the rewards that await you on the other side of that fear.
This is your "why." It’s one of the most direct and powerful investments you can ever make in yourself. The question is no longer "should I go?" but rather, "how can I not?"

The path to your transformation starts with a single step. On the TrekGuider marketplace, you can explore a collection of expert-written travel guides from seasoned solo travelers, packed with the kind of real-world advice that builds confidence. Find your destination, build your plan, and begin the adventure that will change your life. The world is waiting.
Meta Data Suggestions:
SEO Meta Title (59 characters): 5 Unexpected Benefits of Solo Travel for Personal Growth
URL Slug: /benefits-of-solo-travel
SEO Meta Description (154 characters): Thinking about a solo trip? Discover the 5 unexpected benefits of solo travel, from radical self-reliance to authentic self-discovery. It's more than a trip; it's a transformation.
Don't Miss Out! Subscribe for Exclusive Content
SubscribeComments 0
No comments yet
Be the first to share your experience!
Dont Miss Out! Subscribe for Exclusive Content
Ultimate USA Holidays Guide: Top Picks
FTC Affiliate Disclosure Essentials: Stay Compliant as a Travel Creator
Essential Affiliate Tools: From Tracking to Full Optimization
Booking.com Affiliate Program Review: Pros, Cons, and Earnings Potential
Decoding Affiliate Commission Rates: Benchmarks for Travel Creators
Amazon Associates for Travel: Strategies to Maximize Commissions
The Ultimate Travel First Aid Kit Checklist (2026)
TrekGuider @trekguider
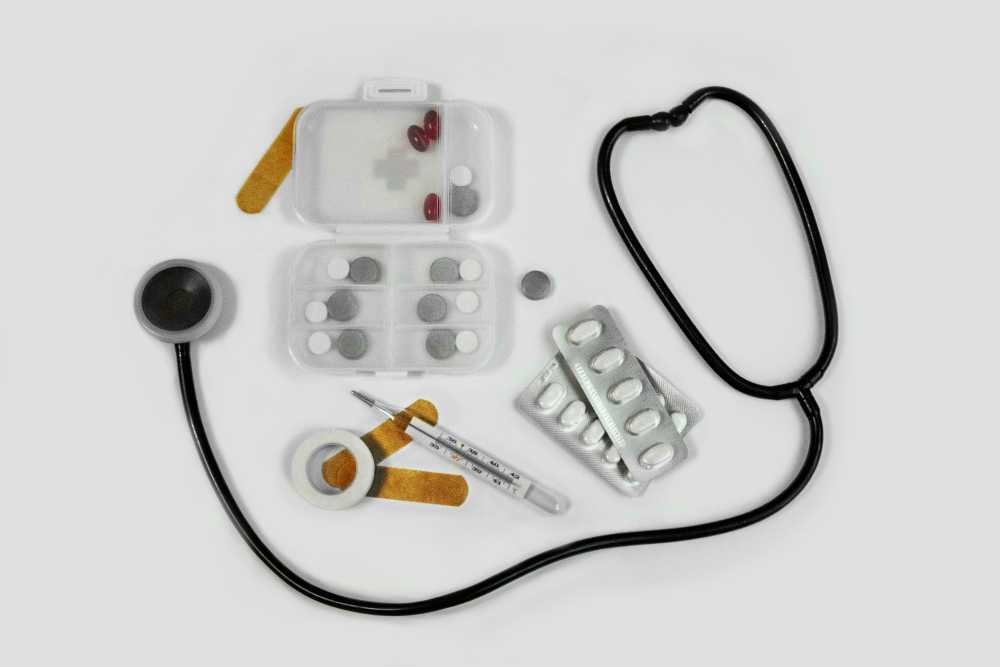
But it doesn’t have to be that way. The single most powerful tool for ensuring a healthy, stress-free journey is one you create before you even leave home: a comprehensive travel first aid kit. This isn’t just a box of bandages; it’s a personalized arsenal of preparedness that empowers you to handle common health issues with confidence and ease. Building your own kit is at the heart of the proactive mindset we cover in our comprehensive [The Ultimate Guide to Travel Safety: A 2026 Playbook]. Think of this guide less as a simple shopping list and more as a masterclass in preparedness, backed by pharmacist-approved advice to help you build the ultimate defense against travel’s minor medical curveballs.
DIY vs. Pre-Made: Which Travel First Aid Kit is Right for You?
Before we dive into the specific items, it’s worth considering whether to build your kit from scratch or buy a pre-made one.
Pre-Made Kits: These offer undeniable convenience. They come in a compact case and provide a decent baseline of supplies. However, they are often filled with low-quantity, generic items and may lack the specific medications you need for your trip.
DIY Kits: Building your own kit requires a bit more effort upfront but is superior in every other way. It allows you to choose high-quality brands, pack sufficient quantities, and tailor the contents specifically to your destination, your planned activities, and your personal health needs.
Our recommendation? Start with a high-quality pre-made kit as your base and then use this checklist to supercharge it, swapping out generic items and adding the crucial medications and tools it’s missing. This hybrid approach gives you the best of both worlds.
The Core Components of Your Ultimate Travel First Aid Kit
A truly effective travel first aid kit is organized like a mobile clinic, with specific supplies to treat the most common categories of travel-related ailments. Here is the definitive breakdown of what you need.
Wound & Burn Care: For Life's Little Scrapes
From a papercut to a scraped knee on a cobblestone street, any break in the skin is an open invitation for infection, especially in new environments. Here’s how you shut that door, fast.
Antiseptic Wipes (BZK or alcohol-based): For cleaning wounds, scrapes, and your hands before providing treatment. Individual packets are perfect for travel.
Antibiotic Ointment (e.g., bacitracin): A crucial step to prevent infection in minor cuts, scrapes, and burns after cleaning.
Assorted Adhesive Bandages: Pack a variety of sizes. Fabric bandages are generally more durable and flexible than plastic ones.
Butterfly Bandages / Wound-Closure Strips: Essential for taping the edges of a minor cut together to help it heal cleanly.
Sterile Gauze Pads and a Roll of Gauze: For dressing larger wounds or as a compress to control bleeding. Pack a few different sizes.
Medical Adhesive Tape: To secure gauze and bandages in place.
Moleskin or Blister Treatment Pads: An absolute lifesaver for any trip involving significant walking or hiking. Apply it as soon as you feel a "hot spot" to prevent a blister from forming.
Aloe Vera Gel: Provides soothing relief for minor sunburns.
Pain, Fever & Sprains: Managing Aches and Injuries
Long days of sightseeing, sleeping in unfamiliar beds, and carrying luggage can lead to aches and pains. Be prepared to manage them effectively so they don't slow you down.
Pain Relievers/Fever Reducers: Pack both an ibuprofen-based and an acetaminophen-based option. Pharmacists consistently recommend trusted brands like Advil/Motrin (Ibuprofen) for inflammation and pain, and Tylenol (Acetaminophen) for general pain and fever.
Aspirin: While not for general pain relief for everyone, a dose of aspirin can be life-saving for an adult experiencing symptoms of a heart attack.
Elastic Wrap Bandage: Invaluable for providing support and compression to a sprained ankle, wrist, or knee.
Instant Cold Packs: These single-use packs are activated by squeezing them and are excellent for reducing swelling from sprains, strains, and other minor injuries in the first 24-48 hours.
Pro-Tip: Decant pills into small, clearly labeled travel containers to save space, but take a photo of the original packaging first. This helps you remember dosages and provides information for pharmacists or doctors abroad if needed.

Digestive Issues: Your Defense Against Traveler's Diarrhea
Let’s be direct: traveler’s diarrhea is the single most common illness to strike travelers, affecting up to 80% of visitors in some destinations. Having a dedicated section in your kit to manage digestive distress is absolutely critical.
Anti-diarrhea Medication: To manage symptoms when you need to travel or get through a planned activity. The top pharmacist-recommended brand is Imodium (Loperamide).
Antacids: For relief from indigestion, heartburn, and general upset stomach. Pepto-Bismol is another pharmacist-favorite that can also help with mild diarrhea.
Oral Rehydration Salts: This is arguably the most important item in this section. Dehydration is the primary risk of diarrhea and vomiting. These pre-measured packets mix with safe, bottled water to replenish the essential fluids and electrolytes your body has lost.
Anti-nausea or Motion Sickness Medication: Essential if you’re prone to motion sickness on planes, boats, or winding bus rides.
Allergies, Bites & Skin: Soothing Irritations
New environments mean new pollens, unfamiliar insects, and different plants. Be ready to tackle itches, rashes, and allergic reactions before they become a major annoyance.
Antihistamine (e.g., diphenhydramine): For treating allergic reactions, hives, and severe itching. Note that some antihistamines can cause drowsiness.
Hydrocortisone Cream (1%): A topical steroid cream that provides fast relief from the irritation and itching of rashes and insect bites.
Insect Repellent: In any region with mosquito-borne illnesses like Dengue or Malaria, this is as important as your passport. Choose a repellent with an effective active ingredient like DEET or Picaridin.
Epinephrine Auto-Injector (e.g., EpiPen): This requires a prescription and is absolutely essential for travelers with a history of severe allergic reactions (anaphylaxis).
Ready to Pack Like a Pro?
Your travel first aid kit is a critical piece of your travel puzzle, but it's not the only one. To ensure you don't overlook a single essential item—from documents and finances to clothing and gear—you need a master list. Our comprehensive, free checklist has you covered.
Download Your Free [International Travel Checklist] Now!
Essential Tools & Personal Medications
The final layer of your kit includes the tools to use your supplies effectively and your own personal health necessities.
Fine-Point Tweezers: For removing splinters, ticks, or other foreign objects from the skin.
Small, Rounded-Tip Scissors: For cutting medical tape, gauze, or moleskin. (Ensure they meet TSA guidelines if packing in a carry-on).
Disposable Non-Latex Gloves: To protect your hands and prevent infection when treating a wound on yourself or someone else.
Digital Thermometer: For accurately checking for fever.
Personal Medications: This is the most critical category. Pack a sufficient supply for your entire trip, plus at least a few extra days' worth in case of delays. Always keep your personal medications in your carry-on luggage in their original, labeled containers.
Pro-Tip: Before you leave, ask your doctor for a letter describing your condition and the medications you take, including their generic names. Keep a digital copy of this and your prescriptions on your phone. This can be invaluable if your medication is lost or you need to see a doctor abroad.

Beyond the Basics: Customizing Your Kit
The ultimate travel first aid kit is not one-size-fits-all. Once you have the core components, elevate your preparedness by customizing it for your specific journey.
By Destination:
Tropical/Developing Countries: Add anti-fungal cream, more insect repellent, and potentially a prescription for a standby antibiotic for severe traveler's diarrhea (consult your doctor).
High-Altitude Destinations: Speak with your doctor about medication to prevent altitude sickness.
By Activity:
Hiking/Trekking: Double down on blister care (moleskin, gel pads), pack an elastic wrap for sprains, and add pain-relieving gel.
Beach Vacation: Add extra aloe vera gel, sting-relief spray, and waterproof bandages.
By Traveler:
With Children: Include children’s formulations and dosages of pain/fever reducers, kid-friendly bandages, and any specific allergy medications they need.
Travel First Aid Kit FAQs
A great kit anticipates problems. Here are answers to common questions that take your preparedness to the next level.
1. What’s the first thing I should do if I get traveler’s diarrhea?
According to the CDC and travel medicine doctors, the first and most important step is oral rehydration. Dehydration is the biggest risk. Start sipping an Oral Rehydration Solution (ORS), sports drinks, or clear broths immediately. For mild to moderate cases that don't have a high fever or blood, an antimotility drug like Loperamide (Imodium) can help manage the symptoms. If symptoms are severe, incapacitating, or include a high fever or blood, it's time to consider a prescribed standby antibiotic and seek medical advice.
2. Should I pack a standby antibiotic in my kit?
This is a question for your doctor or a travel medicine clinic. For travelers heading to high-risk destinations where severe traveler's diarrhea is common, many doctors will provide a prescription for a standby antibiotic like Azithromycin. It’s not for mild cases but can significantly shorten the duration of a severe bout of illness. Discuss your itinerary with your doctor to see if this is right for you.
3. Is it okay to pack medications outside their original bottles to save space?
While it's tempting, it's safest to keep prescription medications in their original, clearly labeled containers. This avoids any confusion or legal issues with customs officials. For over-the-counter pills, you have more flexibility. If you use a travel pill organizer, consider taking a photo of the original packaging so you have the dosage information and ingredients handy.

Pack Confidence for Every Journey
A carefully assembled travel first aid kit does more than just prepare you for minor medical issues; it provides profound peace of mind. It transforms you from a worried passenger into a self-sufficient, empowered traveler, ready to handle the small bumps in the road so you can stay focused on the incredible experiences ahead. By following this checklist, you’re not just packing supplies—you’re packing the confidence to explore the world freely and fully.
Now that your health and safety are covered, you can focus on the other details that make a trip unforgettable. For a complete, deep-dive into every facet of trip planning, from health and safety to budgeting and logistics, our comprehensive [Travel Guide] is the only resource you'll ever need.
Meta Data Suggestions:
SEO Meta Title (55 characters): The Ultimate Travel First Aid Kit Checklist (2026)
URL Slug: travel-first-aid-kit-checklist
SEO Meta Description (154 characters): Build the perfect travel first aid kit. Our 2026 checklist, with pharmacist-approved tips, covers everything from wound care to stomach issues. Be prepared.
Don't Miss Out! Subscribe for Exclusive Content
SubscribeComments 0
No comments yet
Be the first to share your experience!
Dont Miss Out! Subscribe for Exclusive Content
Ultimate USA Holidays Guide: Top Picks
FTC Affiliate Disclosure Essentials: Stay Compliant as a Travel Creator
Essential Affiliate Tools: From Tracking to Full Optimization
Booking.com Affiliate Program Review: Pros, Cons, and Earnings Potential
Decoding Affiliate Commission Rates: Benchmarks for Travel Creators