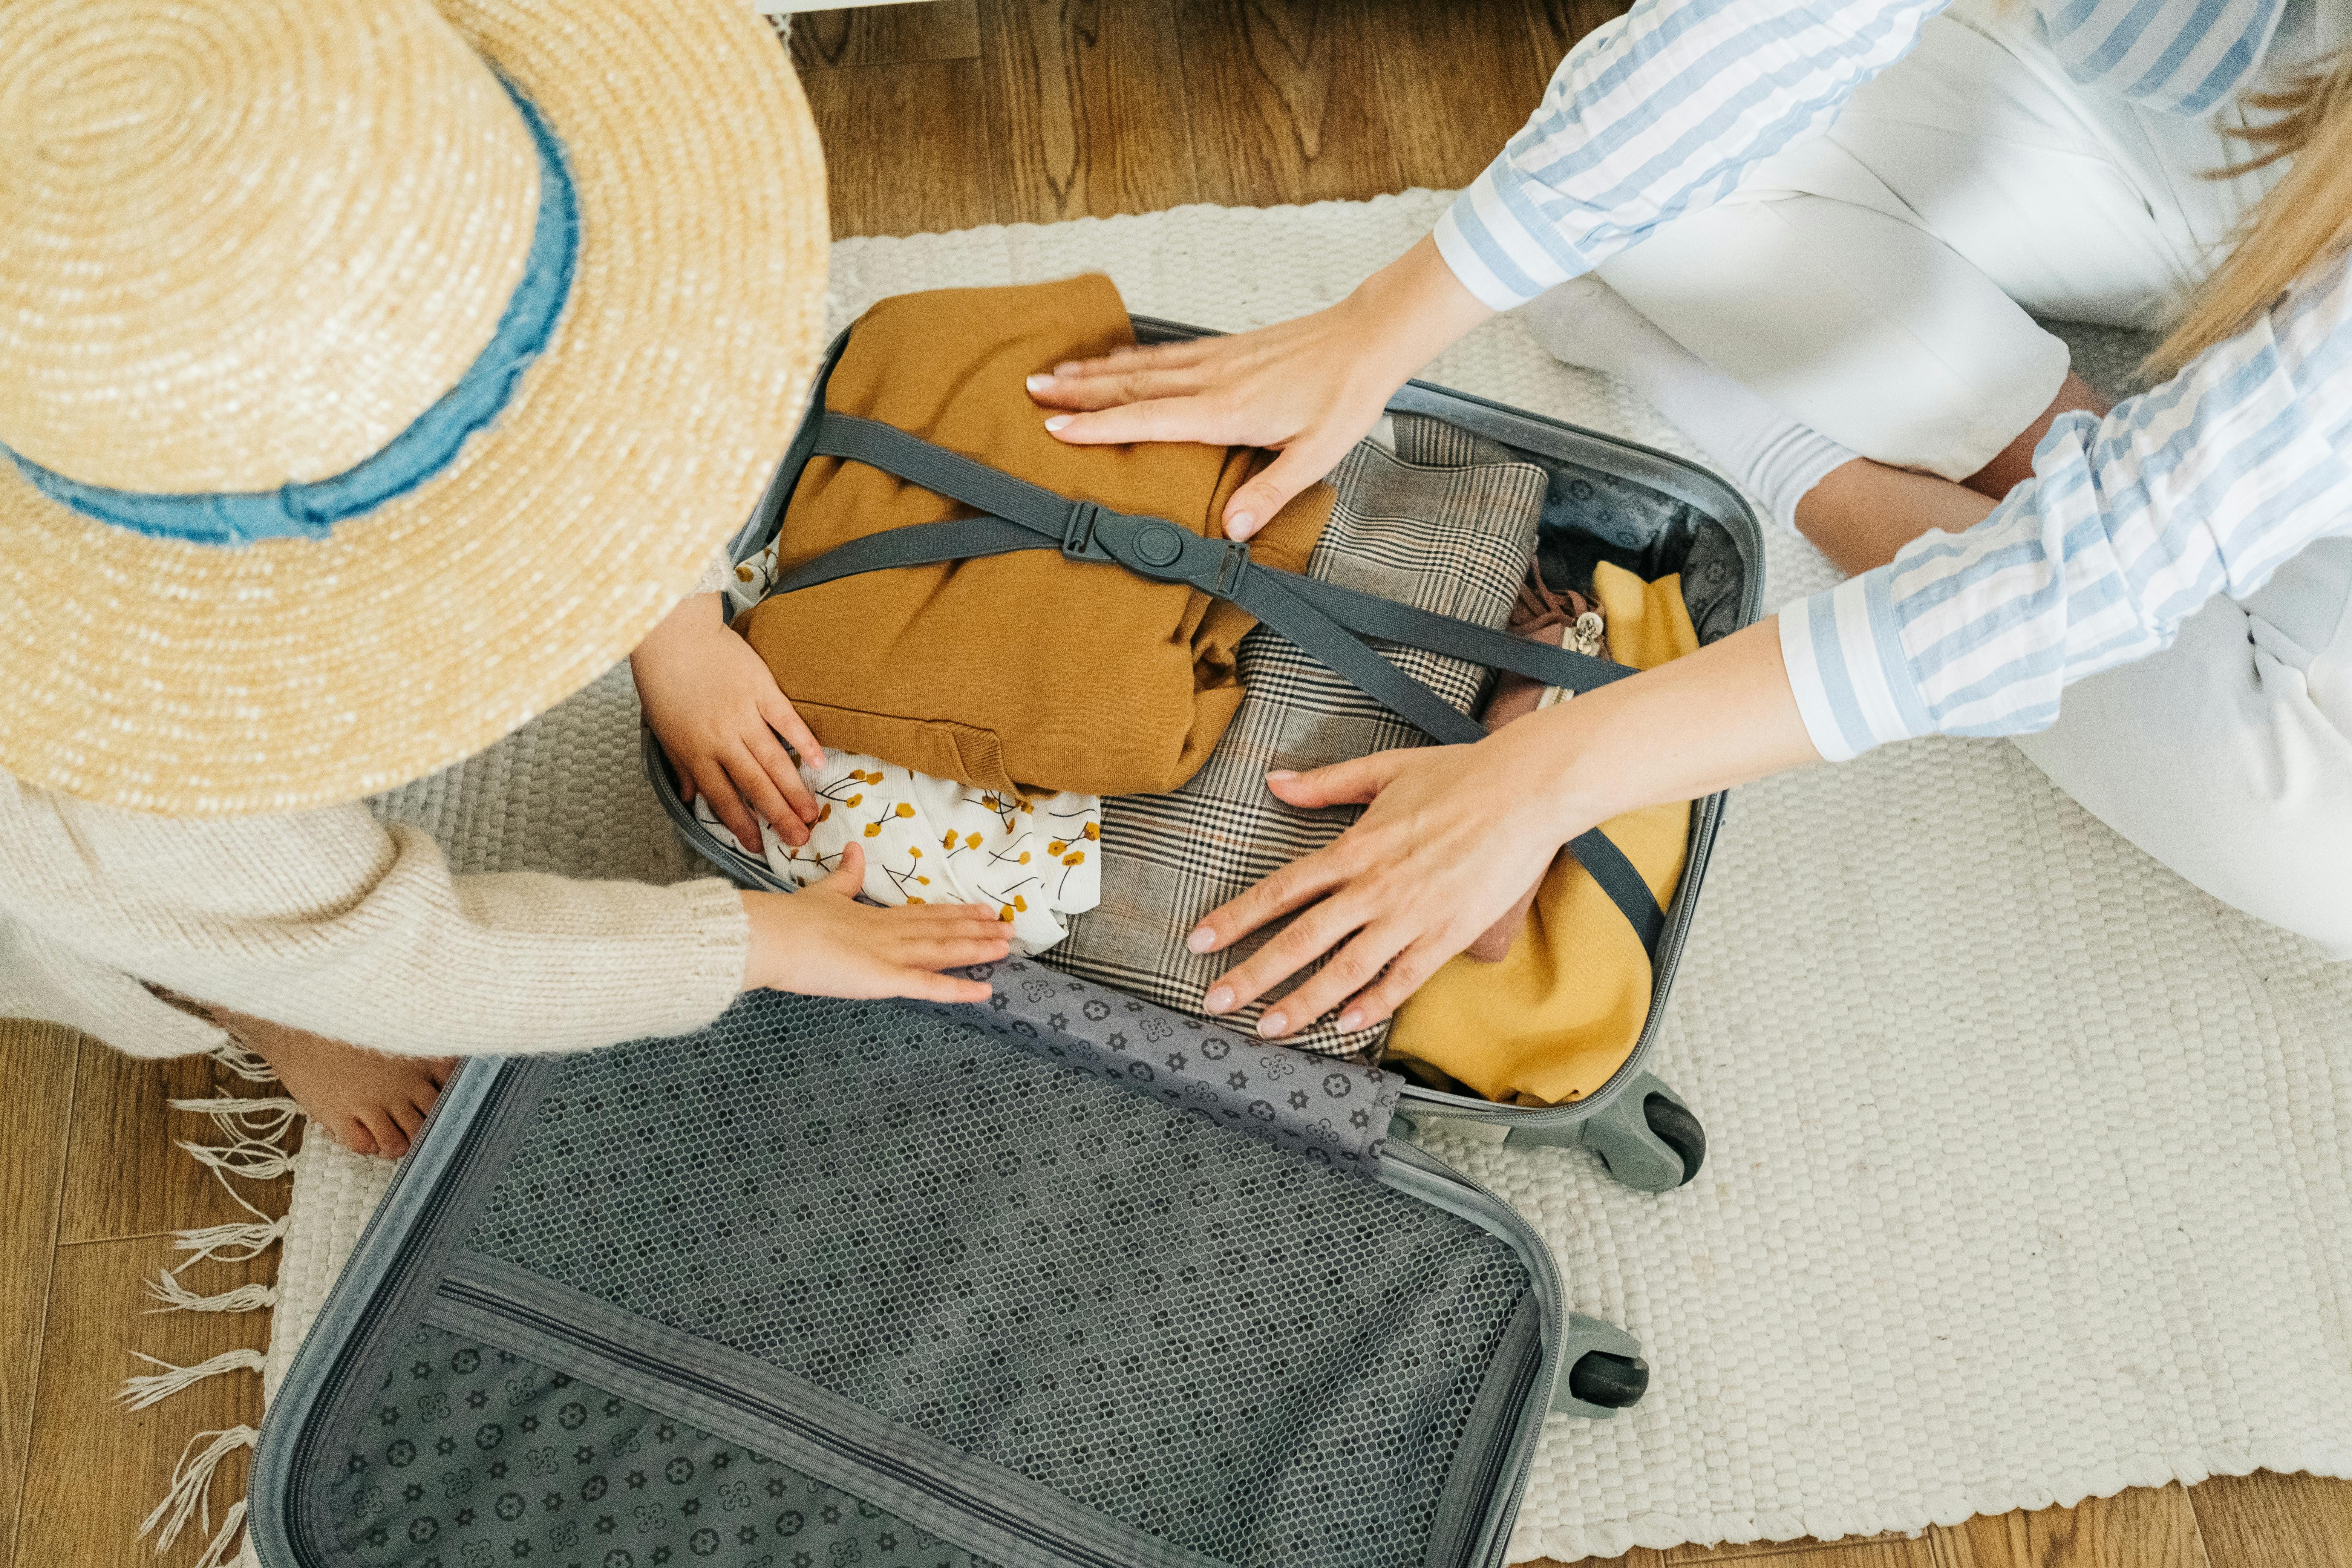
7 Hotel Safety & Security Tips for Peace of Mind
TrekGuider @trekguider
You’ve finally made it. After a long day of navigating airports, taxis, and unfamiliar streets, you slide the key card into your hotel room door and a wave of relief washes over you. This is your sanctuary, your home base for the adventures ahead. But as you drop your bags, another feeling can creep in, spoiling the moment. Let’s be honest: that sterile, anonymous hotel room doesn't feel as secure as your own home. It’s a vulnerability that can cast a shadow over an entire trip, a persistent whisper of "what if" that prevents you from ever truly relaxing.

The good news is that safety isn't a matter of luck; it's a repeatable skill. This guide is your new ritual, a systematic playbook for transforming any hotel room into a personal fortress. We’ve synthesized advice from former hotel security personnel and fire safety experts to bring you seven essential hotel safety tips. This isn’t about paranoia; it's about empowerment. By making these simple checks a habit, you can ensure your peace of mind is the most valuable thing you pack. These strategies are a critical part of the accommodation-specific awareness we cover in our comprehensive guide to The Ultimate Guide to Travel Safety: A 2026 Playbook.
The 60-Second Security Sweep: Your First Check-In Ritual
Your first minute inside a new hotel room is the most important. This is your window to verify, secure, and orient yourself before you get distracted by unpacking or collapsing on the bed. By turning the following steps into an unbreakable habit, you proactively eliminate the most common security and safety risks. Think of it as a professional-grade inspection that takes less time than it does to check your email.
Tip 1: Secure the Door and Verify the Room is Empty
Before you do anything else, take control of your entry point. A common mistake is to walk in, close the door, and immediately turn your back to it while dealing with luggage. This makes you vulnerable. Instead, follow this security-conscious procedure.
Prop the Door: As you enter, use your luggage to prop the door open so it can't be closed behind you.
Conduct a Visual Clear: From the doorway, quickly scan the room to ensure it is empty. This includes a glance behind the curtains, in the closet, under the bed, and inside the shower.
Close and Lock: Once you've confirmed the room is unoccupied, remove your luggage from the entryway, close the door, and immediately test every single locking mechanism. This includes the primary deadbolt and any secondary security devices like a security chain or a flip latch. Ensure they are all functional and engage smoothly. Don't assume they work; physically test them.
Tip 2: Check Your Communication and Safety Gear
Now that the room is secure, your next step is to verify your lifelines. You need to know that the room’s built-in safety equipment is present and functional.
Test the Phone: Pick up the in-room phone and confirm there’s a dial tone or call the front desk for a quick "hello." This ensures you have a reliable way to call for help if your cell phone has no service or the battery dies.
Locate Safety Devices: Visually identify the smoke detector and fire alarm sprinkler heads. It’s also wise to check for a carbon monoxide detector, especially in hotels with in-room fireplaces or those attached to large parking garages. If one isn't present and you have concerns, report it to the front desk.
Tip 3: Create a Mental Fire Escape Map
This is one of the most critical hotel safety tips, yet it's the one most often ignored. In the event of a fire, heavy smoke can reduce visibility to absolute zero. The evacuation map on the back of your door is not decoration; it's your key to survival.

According to fire safety experts, you must identify three key things:
Your Primary and Secondary Exits: The map will show the nearest emergency exit stairwell. Crucially, you must also identify an alternative, secondary exit in case your primary route is blocked by fire or smoke. Remember, elevators must never be used in a fire.
The Door Count: This is the most important part. Physically walk out into the hallway and count the number of doors between your room and the nearest emergency exit. Memorize this number. In a dark, smoke-filled hallway, this knowledge will allow you to feel your way along the wall to safety, counting the doors as you go.
Location of Safety Equipment: As you identify your route, note the location of fire alarm pull stations and fire extinguishers in the hallway.
Tip 4: Fortify Your Privacy
Your final step in the initial sweep is to ensure your room is a truly private space.
Check Windows and Connecting Doors: Go to every window and make sure it is locked securely. If your room has a connecting door to an adjacent room, verify that it is locked from your side. A good practice is to slide a chair or your luggage in front of a connecting door as an extra physical and audible barrier.
Close the Curtains: Fully close the curtains to ensure privacy from the outside, especially in ground-floor rooms or those that face other buildings.
Scan for Oddities: While rare, hidden cameras are a modern concern. Conduct a quick visual scan for any electronics or objects that seem out of place. Pay attention to smoke detectors, alarm clocks, and USB wall outlets, looking for unusual pinholes or lenses.
Beyond the Locks: Advanced Hotel Safety Tips
Okay, the room is secure. But a locked door is just the first line of defense. Now it’s time to think like a pro and protect your belongings with the kind of savvy that separates seasoned travelers from the rest.
Tip 5: Outsmart a Thief: How to Hide Your Valuables
The in-room safe should always be your first choice for storing passports, extra cash, and small electronics. However, if a safe is unavailable, broken, or you simply don't trust it, you need a smart hiding strategy. The key is to avoid the first places a thief would look: in drawers, under the mattress, and inside your suitcase.

Security consultants recommend using non-obvious, "high-friction" hiding spots that take time and effort to find.
Taped in an Inconspicuous Location: Use a small amount of duct tape to secure an envelope containing cash or cards to a surface that is out of sight. Think creatively: the underside of a heavy desk, the back panel of a chest of drawers, or high up on a closet shelf.
Inside a Common, Uninteresting Object: Hide valuables in plain sight by placing them inside items a thief would ignore. A popular tactic is to place cash inside a bag of dirty laundry, as it's highly unlikely to be searched. You can also slip flat items like cash or cards inside the hotel room's bible or another book on a shelf.
Within the Room's Fixtures: Some parts of a hotel room offer clever nooks. For a laptop, a surprisingly effective tactic is to hide it inside a pillowcase on the bed, then pile the other pillows on top to disguise its shape.
Pro-Tip: When hiding cash or cards in an envelope, tape it flat against a surface and choose a dark color for the envelope (e.g., black or brown) to prevent it from being seen through any gaps.
Tip 6: Bring Your Own Security: Portable Safety Devices
For the ultimate peace of mind, especially when staying in older hotels, budget accommodations, or short-term rentals, consider investing in a portable security device. These lightweight gadgets are designed to provide an extra layer of defense against unauthorized entry.
Portable Door Locks: These devices brace against the door frame from the inside, making it physically impossible for the door to be opened from the outside, even with a key.
Door Stop Alarms: These are simple, wedge-shaped door stops that you place under your door from the inside. If the door is pushed open, it triggers a piercingly loud alarm, startling the intruder and alerting you and others to the breach.
The Final Layer of Protection: Personal Habits
Your physical security measures are only half the battle. The other half is cultivating smart habits and maintaining a high level of situational awareness throughout your stay.
Tip 7: Practice Smart "Hotel Habits"
Small, consistent habits can significantly reduce your risk profile.
Sanitize High-Touch Surfaces: Upon arrival, use a disinfectant wipe to clean the objects that are most frequently handled but often overlooked by cleaning staff: the TV remote, light switches, doorknobs, and the phone.
Be Discreet with Your Room Number: When checking in, if the front desk clerk announces your room number out loud, politely ask for a different room and for them to write it down for you instead. Never leave your key card sleeve, which often has the room number written on it, lying around in public areas.
Use the "Do Not Disturb" Sign: When you are in your room, hang the "Do Not Disturb" sign on the outside of your door. This is a clear signal that the room is occupied and can deter someone from trying to enter, whether by mistake or with ill intent.
Verify All Visitors: Never blindly open your door. If someone knocks claiming to be hotel staff, call the front desk to verify that they sent someone to your room before opening the door.
Pro-Tip: If you order room service or have hotel staff coming to your room, call the front desk to verify the person's identity before opening the door. It's a simple step that confirms the visitor is legitimate.
A secure hotel stay is at the heart of a well-planned trip. To ensure every other aspect of your journey is just as prepared, from packing lists to financial planning, a comprehensive resource is essential. The right Travel Guide can be the difference between a good trip and a flawless one.
Your Pre-Trip Master Plan
A secure hotel room is just one piece of your travel safety puzzle. To ensure you don't overlook a single essential item—from documents and finances to clothing and gear—a master checklist is your most powerful tool. Our comprehensive, free checklist has you covered for every stage of your trip.

Download Your Free International Travel Checklist Now!
Hotel Safety FAQs
A prepared mind anticipates questions. Here are expert answers to common concerns.
1. Is an in-room safe really the most secure option?
For the vast majority of travelers, yes. Modern electronic safes are quite secure against opportunistic theft. However, hotel management does have a master key or code for emergencies. The greatest risk often comes from user error (choosing an obvious code like 1234) or a dishonest staff member (which is rare in reputable hotels). For irreplaceable items, using a smart hiding spot in addition to the safe, or keeping them on your person, can provide an extra layer of security.
2. Are short-term rentals (like an Airbnb) more or less secure than hotels?
It varies dramatically. A professionally managed rental in a secure building can be safer than a budget motel. However, rentals lack the 24/7 staff, multiple security cameras, and controlled access points of a hotel. When booking a rental, read reviews carefully for any mention of safety concerns, check the lock quality upon arrival, and consider bringing your own portable door lock.
3. What should I do if hotel staff need to enter my room while I'm out?
If you have requested maintenance or housekeeping, you have a reasonable expectation they will enter. Secure all valuables in the safe or hide them before you leave. If you are concerned, you can request that these services only be performed while you are present in the room. Always leave the "Do Not Disturb" sign on your door when you leave if you do not want anyone entering.
Travel with True Peace of Mind
Your hotel room should be a sanctuary—a place where you can recharge after a day of exploration and sleep soundly through the night. It shouldn't be a source of anxiety. By incorporating these seven hotel safety tips into your check-in routine, you are taking active control of your environment. You are replacing uncertainty with a plan and vulnerability with empowerment. This simple, 60-second ritual does more than just secure a room; it secures your peace of mind, freeing you to focus on the real purpose of your journey: the adventure that awaits outside your door.

Meta Data Suggestions:
SEO Meta Title (Under 60 characters):
7 Essential Hotel Safety Tips for Travelers
URL Slug:
hotel-safety-security-tips
SEO Meta Description (Under 155 characters):
Sleep soundly on your next trip. Our expert-backed hotel safety tips cover room security, hiding valuables, fire safety, and more for total peace of mind.
Don't Miss Out! Subscribe for Exclusive Content
Subscribe


Comments 0
No comments yet
Be the first to share your experience!
Dont Miss Out! Subscribe for Exclusive Content

Ultimate USA Holidays Guide: Top Picks

FTC Affiliate Disclosure Essentials: Stay Compliant as a Travel Creator

Essential Affiliate Tools: From Tracking to Full Optimization

Booking.com Affiliate Program Review: Pros, Cons, and Earnings Potential

Decoding Affiliate Commission Rates: Benchmarks for Travel Creators

Amazon Associates for Travel: Strategies to Maximize Commissions
Best Family Vacations: 4 Ideas That Are Fun With a Toddler
TrekGuider @trekguider
Feeling the pull for a family adventure but paralyzed by the thought of traveling with a toddler? You’re not alone. Many parents find themselves caught between the deep desire for new memories and the very real fear of meltdowns, jet lag, and logistical chaos. This guide is here to solve that conflict, proving that the best family vacations aren't just possible during the toddler years—they can be truly wonderful.
The internet is filled with horror stories that can make any parent second-guess their plans. The stress is immense, from packing to navigating public spaces with a tiny human whose whims are as unpredictable as the weather. But what if the problem isn’t the toddler, but our definition of a “vacation”? What if we shifted the goal from blissful relaxation to creating a pocket of truly joyful, shared memories within a framework of manageable stress?
This is your new playbook. We’ll move beyond generic lists to give you a system for choosing a trip that matches your family’s unique personality. Drawing inspiration from our comprehensive guide to Family Travel Ideas: The 2026 Guide to Unforgettable Trips, this article drills down into the specific, data-driven strategies that make traveling with toddlers a success.

The Unspoken Rules of Toddler Travel
The term "kid-friendly" is one of the most misleading labels in the travel industry. A destination that’s a thrill ride for a ten-year-old can be a sensory overload nightmare for a two-year-old. A truly "toddler-friendly" vacation must be measured by a more rigorous, operational standard.
After analyzing countless family travel experiences, we’ve identified four pillars that are the primary determinants of a trip’s success. The very best family vacations with toddlers master these principles.
Logistical Simplicity: This is about relentlessly reducing friction. It means favoring destinations with direct flights or manageable driving distances. Every layover, every transfer, is a potential failure point. The goal is to minimize the number of stressful transitions between your front door and your final destination.
Environmental Control: A successful toddler trip creates a safe, contained environment where your child can have a degree of freedom without causing constant parental anxiety. This is why car-free locations, walkable beach towns, and all-inclusive resorts are so popular. They create a "bubble" of safety that allows parents to relax their hyper-vigilance.
Flexible Pacing: The rigid, minute-by-minute itineraries of pre-child travel are a recipe for disaster. A successful toddler vacation is built around the non-negotiable anchors of their day: naps and meals. The best destinations offer low-pressure activities. A beach day can be cut short without a major loss, unlike a day at a theme park with expensive, time-stamped tickets.
Sensory Management: Toddlers are experiencing the world with wide-open senses. While new stimuli are great, overstimulation is the number one trigger for meltdowns. The ideal destination is engaging but not overwhelming. Nature-focused trips and smaller, more relaxed theme parks often hit this sweet spot perfectly.
Four Proven Archetypes for the Best Family Vacations With Toddlers
With this framework in mind, the theoretical becomes practical. Let's move from the "what" to the "where." To combat the classic parental decision fatigue, we’ve categorized the world of toddler-friendly travel into four distinct archetypes, allowing you to quickly identify a style that aligns with your family’s goals.
1. The All-Inclusive Sanctuary: For Parents Craving a True Break
Think of this as the 'total surrender' model—the ultimate choice for parents whose primary goal is to escape the relentless cognitive load of planning, cooking, and cleaning that defines daily life. This is the closest a toddler’s parent can get to a restorative break. For a deeper dive into this option, it's worth reading our guide on Choosing an All-Inclusive Family Resort? Read This First.
Beaches Resorts (Turks & Caicos, Jamaica): The gold standard. They offer childcare for infants and toddlers supervised by certified nannies, providing parents with actual, legitimate downtime. With Sesame Street characters, tot-specific waterparks, and endless food options, it’s an entire ecosystem designed to eliminate stress.
Club Med (Multiple Locations): Known for its family focus, Club Med excels at creating a predictable daily rhythm that toddlers thrive on—breakfast, beach, nap, lunch, pool, dinner. This routine, combined with available childcare, gives parents a perfect blend of family time and personal time.
Woodloch (Pocono Mountains, PA): A fantastic domestic option, this resort is built around "togethering." With all-inclusive meal plans and a staggering array of on-site activities, you never have to get in a car or wonder what to do next. It’s a self-contained world of low-stress fun.
2. The Classic Beach Getaway: For Low-Key, Flexible Fun

A beach vacation remains a top contender for a simple reason: sand and water are the ultimate open-ended toys. A beach day has no rules, no schedule, and no pressure, allowing for maximum flexibility and making it one of the very best family vacations you can take.
San Diego, California: Perhaps the most perfect U.S. city for toddlers. It offers gentle beaches like La Jolla Shores, the world-class San Diego Zoo, and the perfectly-scaled LEGOLAND California. The weather is famously mild year-round, removing another layer of planning stress.
The Florida Gulf Coast (e.g., Rosemary Beach, Siesta Key): This region is known for its calm, warm waters and powder-soft sand. Towns like Rosemary Beach are master-planned for walkability, with stroller-friendly paths connecting everything. You can park your car and live a simple, blissful rhythm of beach, naps, and evening strolls for ice cream.
Outer Banks, North Carolina: For families who prefer the space and control of a rental home, the Outer Banks are ideal. You can set up your own home base, cook familiar meals, and enjoy wide-open, uncrowded beaches where your toddler can run free.
Pro-Tip: When booking a beach rental, use satellite view on a map to check the actual distance from the property to the sand. A "beachfront" listing can sometimes mean a grueling trek over dunes or across a busy road—a deal-breaker with a toddler and gear in tow.
3. The National Park Expedition (Toddler Edition)

Introducing your toddler to the wonders of nature can be incredibly rewarding. The key is to radically adjust expectations. Forget long, strenuous hikes. The goal is to leverage scenic drives and short, paved, stroller-friendly trails to experience the majesty of the parks with minimal strain.
Zion National Park, Utah: Exceptionally well-suited for families. The Pa'rus Trail is a paved, 3.5-mile path that follows the Virgin River and is perfect for strollers. The park's shuttle system makes accessing key areas effortless.
Great Smoky Mountains National Park (TN/NC): A classic choice with strong infrastructure. The Cades Cove Loop Road is a scenic 11-mile drive with fantastic opportunities for spotting wildlife from your car. There are also numerous short, accessible nature trails perfect for little legs.
Acadia National Park, Maine: Offers stunning coastal scenery with manageable effort. The Ocean Path is a relatively flat trail that offers iconic views, and the Jordan Pond Loop is another fantastic, stroller-friendly option. The proximity to the charming town of Bar Harbor means you're never far from a good meal or a comfortable bed.
4. The Low-Key Theme Park Experience: For Managed Excitement

Many parents want to give their kids a theme park experience but are rightly terrified of the cost, crowds, and sensory assault of the mega-parks. These smaller, smarter alternatives deliver the magic without the madness.
LEGOLAND (California, Florida, New York): The undisputed champion for this age group. It is specifically designed for kids ages 2-12, with an entire DUPLO Village for toddlers. It’s consistently praised for being quieter, smaller, and more relaxed than its larger competitors, making it the ideal "starter" theme park.
Sesame Place (San Diego, CA & Langhorne, PA): Leveraging a cast of beloved characters, these parks are a massive hit. They blend gentle rides with fantastic, age-appropriate water park features, offering a full day of excitement in a more contained and focused environment.
Story Land (Glen, NH): A charming, classic theme park where beloved fairy tales come to life. The park is designed for young children, with rides and attractions that are whimsical rather than over-the-top, creating a magical but manageable experience.
Want to Make Flying With Your Toddler a Breeze?
The thought of a long flight can be the most stressful part of planning. Our free, printable guide is packed with expert tips, checklists, and sanity-saving strategies to make your travel day smooth and meltdown-free. Download the Stress-Free Flying with Kids Guide and fly with confidence.
The Savvy Parent's Logistics Toolkit
A smooth trip is built on a foundation of careful planning. Mastering the practical details is what separates a stressful ordeal from an enjoyable adventure.
The Ultimate Toddler Vacation Packing System

This isn't just a list; it's a strategic system. Pack by category to ensure nothing essential is forgotten. To keep your days organized, you can also download our free Travel Itinerary Template.
Sleep & Comfort
Portable Crib/Pack-n-Play (unless confirmed by accommodation)
Slumber Pod or similar blackout solution (a game-changer for room sharing)
White Noise Machine
Familiar sheets and a favorite "lovey" or stuffed animal
Baby Monitor
Feeding & Mealtime
An abundance of familiar, non-perishable snacks
Spill-proof sippy cups and a portable water bottle
Toddler utensils and a travel-friendly plate/bowl
Wipeable bibs
Travel high chair or booster seat
Health & Safety
Comprehensive First-Aid Kit (Children's Tylenol/Motrin, thermometer, bandages, etc.)
All prescription medications
Toddler-safe sunscreen and bug spray
Diapering supplies (pack more than you think you need)
Small bag of child-proofing supplies (outlet covers) and a small roll of painter's tape for on-the-fly fixes.
Gear & Entertainment
FAA-approved Car Seat and padded travel bag for gate-checking
Lightweight travel stroller
Baby carrier or hiking backpack carrier
Tablet pre-loaded with shows and games (and volume-limiting headphones)
A bag of new, inexpensive "surprise" toys and mess-free activities (Water Wow!, sticker books)
Pro-Tip: The gate-check tag for your stroller or car seat is your best friend. Get it as soon as you arrive at the gate. On a full flight, overhead bin space disappears fast; waiting until the last minute to get your gear tagged risks having to check it with regular luggage, where it's more likely to be damaged.
The Lodging Debate: Hotel Suite vs. Vacation Rental
This is one of the most critical decisions you'll make, reflecting your core vacation philosophy.
Team Hotel/Resort: Choose this if your primary goal is parental relaxation. The biggest advantages are daily housekeeping (no cleaning!), room service, and on-site amenities like pools and restaurants. The major downside is often being confined to a single dark room after your toddler goes to bed at 7:30 PM. The Fix: Book a suite with a separate living area or adjoining rooms if the budget allows.
Team Airbnb/Vacation Rental: Choose this if your primary goal is maintaining routine and control. The biggest advantages are a separate bedroom for the child (giving parents their evenings back), a full kitchen for preparing familiar meals, and a laundry machine. The downside is that you’re still responsible for cooking and cleaning. The Trade-off: Plan for simple meals and accept that the space will get a little messy. The freedom you gain is often worth it.
Frequently Asked Questions
What is the best age to travel with a toddler?
There's no single "best" age, as success depends more on strategy than the child's exact age. The key is choosing a destination that aligns with their developmental stage by focusing on logistical simplicity, flexible pacing, and avoiding overstimulation, which this guide helps you do.
How can I make flying with a toddler easier?
Preparation is everything. Pack a bag of new, engaging toys, bring more snacks than you think you'll need, and use a tablet with headphones for screen time. For a complete strategy, download our Stress-Free Flying with Kids Guide to cover all your bases from check-in to landing.
Are all-inclusive resorts a good option for toddlers?
Yes, they can be fantastic. All-inclusive resorts excel at creating a controlled, safe environment that minimizes planning and stress for parents. With kids' clubs, endless food options, and on-site activities, they allow parents a rare chance to relax while ensuring the toddler's needs are met.
Your Adventure Awaits
Finding the best family vacations with a toddler is entirely possible when you approach it with the right mindset and strategy. It begins by letting go of pre-child expectations and embracing a new goal: creating joyful, shared experiences within a framework of manageable logistics.
By thoughtfully choosing a destination archetype that aligns with your family’s unique needs—whether it's the effortless escape of an all-inclusive resort or the flexible fun of a classic beach getaway—you set the stage for success. Mastering the details of packing and lodging removes the friction that leads to stress, allowing you to focus on what truly matters.
This proactive approach transforms planning into an act of empowerment. You are not just booking a trip; you are architecting an experience for memories that will last a lifetime. The challenges of this age are temporary, but the joy of watching your child discover the world is permanent.
Read the full guide: Family Travel Ideas: The 2026 Guide to Unforgettable Trips
Don't Miss Out! Subscribe for Exclusive Content
SubscribeComments 0
No comments yet
Be the first to share your experience!
Dont Miss Out! Subscribe for Exclusive Content
Ultimate USA Holidays Guide: Top Picks
FTC Affiliate Disclosure Essentials: Stay Compliant as a Travel Creator
Essential Affiliate Tools: From Tracking to Full Optimization
Booking.com Affiliate Program Review: Pros, Cons, and Earnings Potential
Decoding Affiliate Commission Rates: Benchmarks for Travel Creators
Amazon Associates for Travel: Strategies to Maximize Commissions
How to Start Affiliate Marketing as a Travel Creator
TrekGuider @trekguider
You’ve built an audience that hangs on your every word. They trust your travel advice, save your destination guides, and flood your DMs asking for your gear recommendations. You have the passion and the platform, but there’s a frustrating disconnect: your content isn’t generating the income you need to make this a sustainable career. You see other creators seemingly living the dream, funding their travels through their content, and you’re left wondering, “What’s the missing piece?”

The missing piece isn’t a secret; it’s a business model. The global affiliate marketing industry is on a trajectory to surpass $93 billion, and the creator economy is right there with it. For travel creators, this intersection is the single greatest economic opportunity of our time. The average monthly income for affiliates in the travel niche is a reported $13,847—a figure that proves this isn't a side hustle; it's a serious enterprise. But from the outside, it can feel like a complex maze of networks, links, and legal jargon.
This is your way through the maze. This guide is your definitive, zero-to-launch roadmap to start affiliate marketing the right way. We’re cutting through the noise to give you a simple, actionable, step-by-step process for transforming your trusted recommendations into a powerful and predictable revenue stream. This is your blueprint for building a real business. For a complete command of the entire landscape, from program deep-dives to advanced conversion tactics, our comprehensive pillar guide to Travel Affiliate Programs: The 2026 Ultimate Guide is your essential next read.
Building Your Foundation (Before You Touch a Link)
Let’s address the single biggest mistake new creators make: they chase the links first. They see affiliate marketing as a task of finding products and sprinkling links across a page. This is backward. Elite affiliate marketing isn’t about selling; it’s the final, natural step in the process of serving an audience. Before you ever apply to a single program, you must build these three non-negotiable pillars.
Step 1: Define Your Niche (The Most Critical Decision You'll Make)
The travel market is a roaring ocean. Trying to be a general "travel creator" is like trying to boil that ocean. You’ll exhaust yourself and make no impact. Your first and most important task is to specialize. A well-defined niche allows you to become the undisputed expert for a specific group of people, building the kind of deep trust that makes monetization feel effortless.

A powerful niche exists at the intersection of three circles:
Your Authentic Passion: What part of travel makes you come alive? Is it the grit of adventure travel, the elegance of luxury hotels, the history of ancient sites, or the thrill of finding the best street food? Your genuine enthusiasm is an un-fakeable asset.
Proven Audience Demand: Are people actively searching for information on this topic? Use free tools like Google Trends or simply type phrases into the Pinterest and TikTok search bars to see what queries autocomplete. That’s your demand signal.
Clear Monetization Potential: Are there high-quality products, services, or experiences within this niche that you can confidently recommend?
Don't be a "travel blogger." Be the go-to resource for:
Budget Family Road Trips in the American Southwest
Luxury Eco-Tourism & Conservation in Costa Rica
Solo Female Backpacking in Southeast Asia
Digital Nomad Life & Co-working in Eastern Europe
A sharp niche makes every subsequent step—from content creation to product selection—infinitely easier and more effective.
Step 2: Build Your Owned Platform (Your Digital Command Center)
Instagram, TikTok, YouTube—these are phenomenal tools for reaching people and building community. But they are rented land. An algorithm change can vaporize your reach overnight. Your single most important business asset is a platform you own and control: your website.
An owned website is your digital home base. It’s where you:
Exercise Full Control: You dictate the content, the user experience, and the monetization strategy.
Build a Long-Term Asset: A well-optimized article can rank on Google for years, becoming an evergreen asset that drives traffic and affiliate sales while you sleep.
Establish Unshakable Credibility: A professional website signals to your audience, brands, and affiliate managers that you are a serious business owner.
This is where you need a digital command center. While a traditional blog is a fine starting point, modern creator platforms are built to accelerate this process. On the TrekGuider Seller Platform, for instance, your articles, bio, social links, and digital products all live in one central hub—instantly establishing you as a multi-faceted expert, not just a blogger.
Step 3: Create a Library of Foundational, High-Value Content
Before you ask for the sale, you must first provide immense value. Affiliate managers are looking to partner with creators who have a proven ability to engage an audience. Your job is to build a small library of 5-10 "pillar" content pieces that are purely focused on helping your audience solve a problem.
This content should not have a single affiliate link. Its sole purpose is to build trust and showcase your expertise. Examples include:
"The Perfect 7-Day Itinerary for First-Timers in Rome"
"The Ultimate Packing List for a Safari in Tanzania"
"10 Costly Mistakes to Avoid When Planning a Trip to Japan"
By creating this content first, you build a portfolio that makes your affiliate applications irresistible. You’re not just another hopeful creator; you’re a valuable partner with a demonstrated track record.

The Launch Sequence (From Application to First Commission)
With your foundation poured and cured, it’s time to start framing the house. This is the launch sequence—the phase where you strategically integrate monetization and work toward that first, exhilarating commission.
Step 4: How to Start Affiliate Marketing Program Selection
The goal here is precision, not volume. Joining dozens of programs leads to overwhelm and inaction. Start by identifying and joining 3-5 core programs that are a perfect fit for your niche. The most resilient strategy is a hybrid one:
Join a Major Network: An affiliate network acts as a marketplace, giving you access to hundreds of brands through a single dashboard. A travel-specific network like Travelpayouts or a broad one like CJ Affiliate is the perfect place to start.
Partner Directly with Core Brands: Identify the handful of brands your audience already knows, uses, and trusts. If you focus on outdoor adventure, a direct partnership with REI is non-negotiable.
Pro-Tip: When evaluating programs, look beyond the commission percentage. A 30-day "cookie duration" (the window in which you get credit for a sale after a click) is far more valuable than a high commission with a 24-hour window, especially for considered purchases like travel.
Step 5: Get Your Unique Links and Weave Them In
Once approved, you’ll gain access to your affiliate dashboard. This is where you’ll find your unique tracking links. Now, revisit your foundational content and look for natural, organic opportunities to place them. The key is to be a helpful guide, not a pushy salesperson.
Contextual In-Text Links: "For our day trips, we booked everything through Viator, which had the best cancellation policies."
Visually Distinct Buttons & Boxes: Use eye-catching design elements for your most important recommendations to make them stand out.
Specific Calls-to-Action (CTAs): Ditch "Click Here." Use compelling, specific language like, "Check Prices & Availability on Booking.com" or "See the Latest Reviews on Tripadvisor."
Pro-Tip: Transparency is the foundation of trust. The U.S. Federal Trade Commission (FTC) legally requires you to disclose your affiliate relationships. Place a clear, simple disclosure at the very top of any post containing affiliate links. A simple, "This post contains affiliate links, which means I may earn a commission if you make a purchase at no extra cost to you," is perfect.

Scaling Your Success (The Path to a Full-Time Income)
Earning your first commission is a monumental milestone. It’s proof of concept. Now, it’s time to build a system for sustainable growth that can transform this into a reliable, full-time income stream.
Step 6: How to Start Affiliate Marketing Traffic Generation
Great content with affiliate links is useless without eyeballs. Your affiliate business lives and dies by its ability to attract the right audience. Focus your energy on two primary channels:
Search Engine Optimization (SEO): This is your long-term wealth-building strategy. Focus your SEO efforts on keywords with commercial investigation intent. These are the phrases people use when they are actively researching a purchase. Think "best carry-on luggage for Europe," "Viator vs. GetYourGuide," or "SafetyWing insurance review." Ranking for these terms attracts an audience that is already primed to buy.
Social Media & Email Promotion: This is your short-term traffic-driving strategy. Every time you publish a new monetized article, promote it across your social channels and to your email list to get an immediate influx of engaged readers.
Step 7: Analyze, Optimize, and Scale
You cannot improve what you do not measure. Your affiliate dashboards are a goldmine of data. Every month, review your analytics and ask:
Which articles are driving the most clicks and commissions?
Which products are resonating most with my audience?
What questions are people asking that I can answer with a new piece of content?
Use this data to double down on what’s working. If your review of a specific hiking boot is generating consistent sales, create a comprehensive guide to "The Best Hiking Gear for the Pacific Crest Trail." This data-driven approach is what separates amateurs from professional affiliate marketers.

Frequently Asked Questions for New Creators
1. How much does it cost to start affiliate marketing? The startup costs are incredibly low. You can start a professional website with a domain name and hosting for less than $100 a year. The primary investment is your time in creating high-quality content.
2. How long does it take to start making money? This depends on your niche and your ability to create helpful content and drive traffic. It's realistic to expect to earn your first commission within 3-6 months if you are consistent. Think of the first six months as building the foundation of a business that will pay you for years to come.
3. Can I do affiliate marketing without a blog or website? While you can share links on social media or in a newsletter, it's highly discouraged as a primary strategy. A website is an asset you own. It builds credibility, allows for long-form content that ranks on Google, and insulates you from the risk of being de-platformed.
Ready to Build Your Travel Content Business?
Download our free resource bundle, The Travel Creator's Toolkit, is packed with the checklists, content templates, and guides you need to put these steps into action and start building your affiliate income today.
Your Business Blueprint is Set
To start affiliate marketing is to start a real business. By following this framework—building a solid foundation, launching with precision, and scaling with data—you have the exact blueprint for success. You are no longer just a creator sharing your passion; you are the CEO of a modern media company.
The path is clear. The opportunity is immense. Your journey from passionate traveler to profitable creator starts now.
Read the full guide: The Travel Blogger's Playbook to Affiliate Marketing Mastery
Don't Miss Out! Subscribe for Exclusive Content
SubscribeComments 0
No comments yet
Be the first to share your experience!
Dont Miss Out! Subscribe for Exclusive Content
FTC Affiliate Disclosure Essentials: Stay Compliant as a Travel Creator
Essential Affiliate Tools: From Tracking to Full Optimization

Avoid These 5 Affiliate Landing Page Mistakes for Better Conversions

Affiliate Keyword Research Mastery for Travel Blogs
Booking.com Affiliate Program Review: Pros, Cons, and Earnings Potential