Food & Water Safety Abroad: How to Avoid Getting Sick
TrekGuider @trekguider
There’s a moment on every trip where the true magic happens: the first bite of a dish you can’t pronounce from a street cart buzzing with locals, the refreshing sip of a regional drink, the discovery of a flavor that will forever define a place in your memory. Food is culture, connection, and the fastest way to the heart of a destination. And that’s the traveler’s paradox, isn’t it? The very experiences that promise the most profound connection also carry a potent, gut-wrenching risk.
One bad meal or a single sip of contaminated water can derail your entire adventure, swapping days of discovery for days spent locked in a hotel room. This fear is agitated by horror stories from fellow travelers and the sheer unpredictability of an unfamiliar environment. It's a valid concern—traveler's diarrhea is unequivocally the most common travel-related illness, affecting up to 80% of international travelers depending on the destination. The fear of getting sick can make you timid, causing you to stick to bland, "safe" foods and miss out on the rich mix of flavors your destination has to offer. It can rob you of the very experiences you traveled so far to find.

But it doesn't have to be this way. This guide is your solution, a definitive and practical playbook for mastering food and water safety abroad. We’ve synthesized actionable advice from the world’s leading health organizations, including the Centers for Disease Control and Prevention (CDC) and the World Health Organization (WHO), to empower you to eat boldly and drink safely. This isn’t a list of things to fear; it’s a set of simple, memorable rules for prevention, identification, and, if necessary, management. This is a critical deep-dive into a core pillar of preparedness we cover in The Ultimate Guide to Travel Safety: A 2026 Playbook, designed to give you the confidence to dive fork-first into the heart of a culture.
The Golden Rule of Food and Water Safety: "Boil It, Cook It, Peel It, or Forget It"
If you remember only one thing from this guide, make it this simple, five-word mantra. Promoted by the CDC and other global health bodies, this single rule is a powerful and easy-to-use filter for nearly every culinary decision you'll make on the road. It’s the foundation of your entire food and water safety strategy.
Boil It: Your Safest Bet for Liquids
Pathogens like bacteria, viruses, and parasites are killed by heat. This makes boiling the most effective method for purifying liquids.
Examples: Drinking water that has been brought to a vigorous, rolling boil for at least one full minute. Hot beverages like tea or coffee that are served steaming hot are also generally safe. Any milk products you consume should be confirmed to be pasteurized or have been boiled.
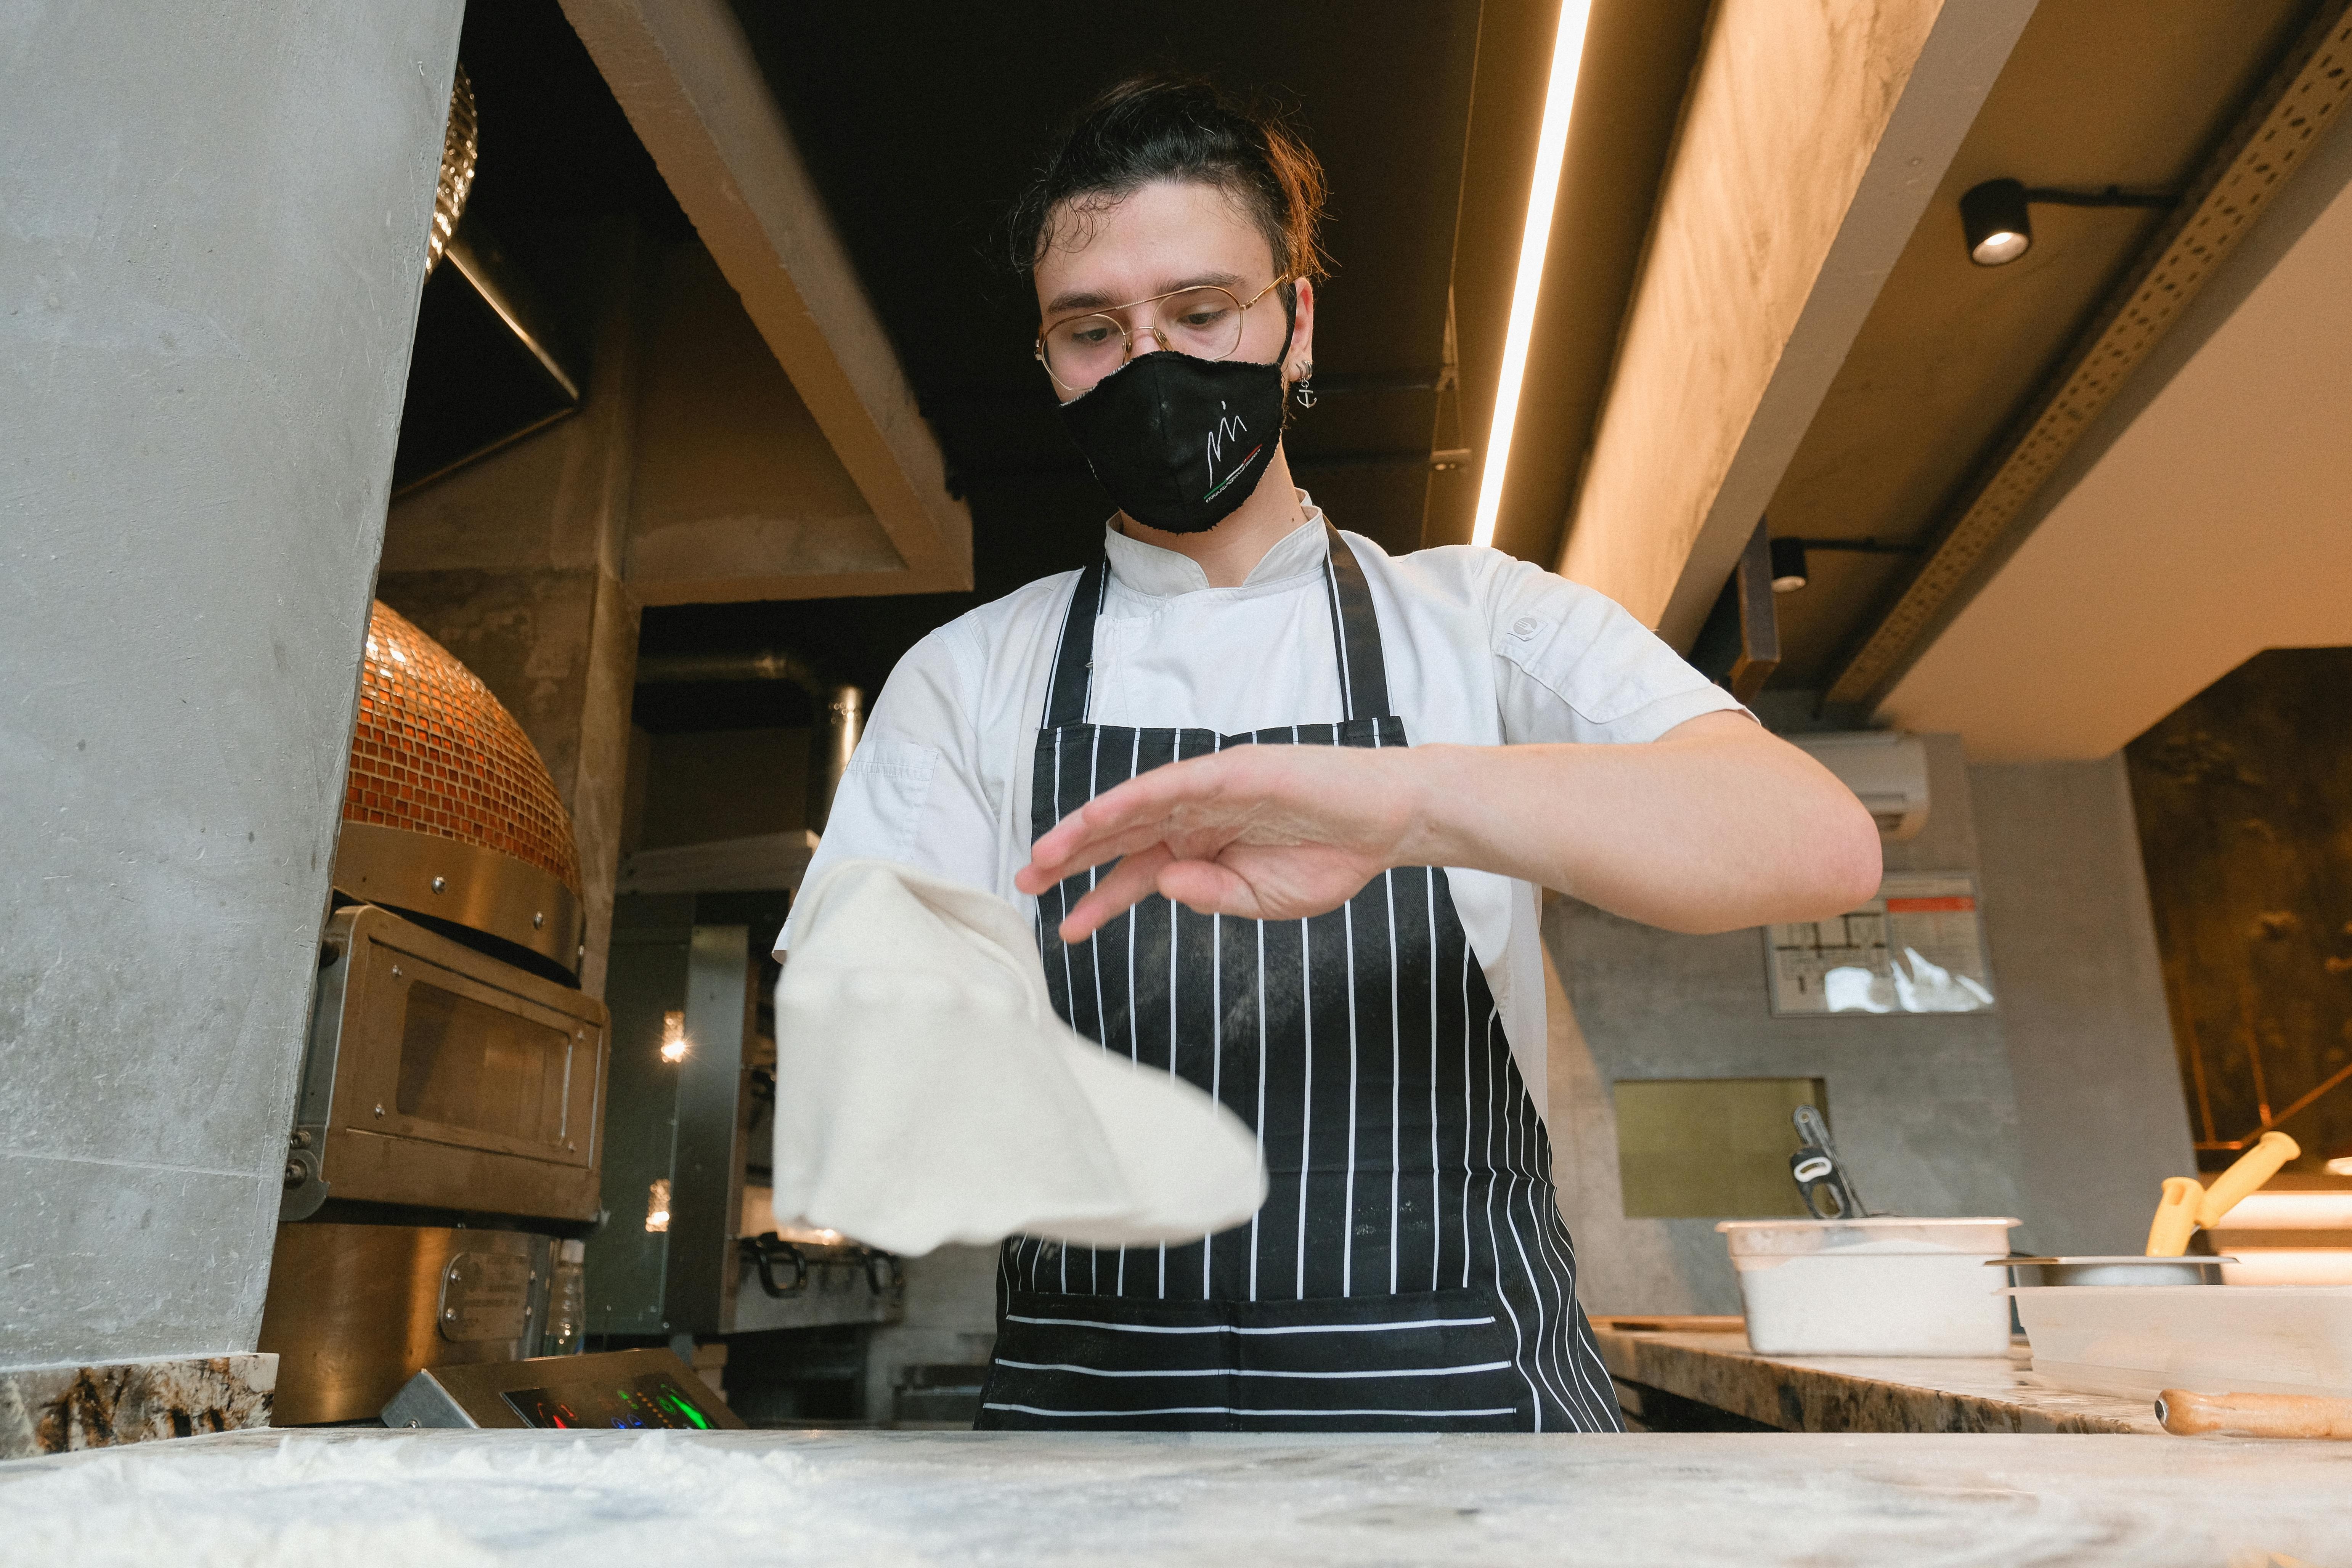
Cook It: The Power of Heat
Thoroughly cooking food kills the harmful microorganisms that cause illness. The key is to ensure it is cooked all the way through and served hot.
Examples: Meat, poultry, or seafood that is well-cooked (not rare or raw) and served steaming hot to the touch. This is especially crucial for street food; dishes that are cooked fresh to order in front of you are a much safer bet than those that have been sitting out.
Peel It: Nature’s Own Packaging
For raw fruits and vegetables, the contamination is almost always on the outside surface. By peeling it yourself with clean hands, you remove the risk.
Examples: Fruits with a thick, peelable skin like bananas, oranges, mangoes, and avocados are your safest and best friends for a healthy snack. Similarly, vegetables you can peel, such as cucumbers, are also a great option.
Forget It: When in Doubt, Go Without
This is the most critical and sometimes most difficult part of the rule to follow. It requires discipline, but it’s your ultimate defense. If an item of food or drink doesn't meet one of the three criteria above, you must skip it.
Examples: Tap water and ice cubes made from tap water are the biggest culprits. Salads and raw leafy greens like lettuce are high-risk because they are difficult to clean thoroughly and may have been washed in contaminated water. You should also avoid fruits that cannot be peeled, such as grapes and berries, and any unpasteurized dairy products like milk or cheese. Finally, be very wary of any food served at room temperature, such as from a buffet.
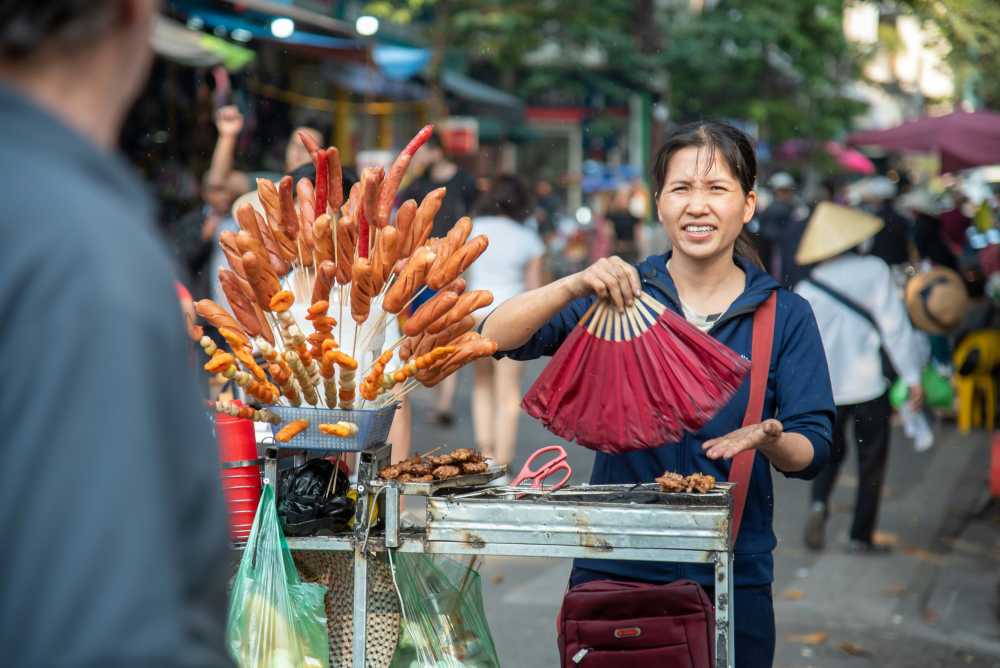
Navigating the Streets: A Visual Guide to Spotting Unsafe Food
Street food is often the soul of a city's cuisine, but not all vendors are created equal. Your eyes are your best tool for vetting a stall. Before you order, take thirty seconds to perform a quick visual inspection. Look for these five clear signs of a safe or unsafe operation.
Poor General Cleanliness: This is the most obvious indicator. Red flags include dirty workstations with unwiped spills, visible food waste, rubbish on the ground, and the presence of pests like flies or wasps. The vendor themselves should also appear clean, with tidy clothes and hands.
Improper Food Temperatures: Food left in the "danger zone" (room temperature) is a breeding ground for bacteria. Avoid stalls where cooked food, especially meat, is sitting out in large trays. The safest option is always food that is cooked fresh to order, right in front of you. Hot food should be visibly steaming.
Obvious Cross-Contamination: Watch how the vendor handles ingredients. A major red flag is using the same cutting board, knife, or unwashed hands to handle raw meat and then touch ready-to-eat items like bread, salad, or cooked food.
Use of Contaminated Water: Look at the vendor’s water source. Rinsing dishes, utensils, or vegetables in a single bucket of murky, stagnant water is a sign of a high-risk operation. Likewise, avoid ice in your drinks unless you can confirm it was made from purified water (commercially bagged ice is usually a safe sign).
Lack of a Crowd (Especially Locals): A busy stall with a long line, particularly of local residents, is one of the best indicators of a trusted and safe food source. High customer turnover means the food is fresh and hasn't been sitting out for long. An empty stall is often empty for a reason.
Pro-Tip: Make "follow the locals" your street food mantra. A long line of residents is a walking, talking five-star review of a vendor's quality and safety. It's the most reliable seal of approval you can find.
Securing Your Water Supply: A Deep Dive into Hydration and Purification
Staying hydrated is non-negotiable for your health and energy while traveling, but assuming tap water is safe is one of the most common and dangerous mistakes a traveler can make. Here’s how to ensure every sip you take is safe.
Identifying Safe and Unsafe Drinking Water Sources
The CDC and WHO have clear guidelines. Unless you are in a country with a known, highly-developed sanitation system, you should assume all tap water is unsafe.
Safest Sources: Commercially bottled water in a factory-sealed, tamper-proof container is your most reliable option. Carbonated water is even safer, as a broken seal is immediately obvious. The second safest source is water that you have personally brought to a rolling boil for at least one minute.
Unsafe Sources to Avoid: Tap water, well water, ice made from tap water, fountain drinks mixed with tap water, and even water from clear mountain streams (which can contain germs) should all be avoided unless they have been purified.
Your Purification Playbook: The Top 3 Methods
When bottled or boiled water isn't available, you need a backup plan. Here are the top three recommended purification methods.
Boiling (The Gold Standard): This is consistently ranked by the CDC and WHO as the single most effective method. It kills all known disease-causing microorganisms, including viruses, bacteria, and parasites. Simply bring clear water to a rolling boil for 1 minute (or 3 minutes at elevations above 6,500 feet / 2,000 meters).
Filtration: A high-quality portable water filter is highly effective at removing bacteria and protozoan parasites like Giardia and Cryptosporidium. Look for a filter with an absolute pore size of 1 micron or smaller. The main limitation is that most portable filters do not remove viruses, so in high-risk areas, the CDC recommends following filtration with chemical disinfection.
Chemical Disinfection: Chlorine, iodine, or chlorine dioxide tablets/drops are a lightweight and easy way to kill viruses and bacteria. However, they are not consistently effective against the parasite Cryptosporidium and require a contact time of at least 30 minutes.
For in-depth planning on what gear to pack for every type of trip, from water filters to first-aid supplies, our all-encompassing Travel Guide is the only resource you'll ever need.
Damage Control: How to Manage Traveler's Diarrhea
But let’s be realistic: even the most diligent traveler can have a bad day. When that happens, knowing exactly what to do—and what not to do—can be the difference between a 24-hour nuisance and a trip-ruining ordeal. This is the damage control phase of your food and water safety plan.
The First and Most Critical Step: Oral Rehydration
According to travel medicine doctors, dehydration is the single most likely and dangerous complication of traveler's diarrhea. Replacing lost fluids and electrolytes is your absolute first priority.
Method: The best way to rehydrate is with a dedicated Oral Rehydration Solution (ORS), which comes in packets of salts and sugars that you mix with boiled or bottled water. In a pinch, sports drinks or clear soups can also be used.
Symptomatic Treatment for Mild to Moderate Cases
If the diarrhea is tolerable and not accompanied by a high fever or blood, over-the-counter medications can provide relief and help you get through a travel day.
Medications: An antimotility agent like Loperamide (the active ingredient in Imodium, a top pharmacist-recommended brand) can reduce the frequency of bowel movements. Bismuth Subsalicylate (found in Pepto-Bismol, another pharmacist favorite) can also help decrease the frequency and shorten the duration of the illness.
When to Use Standby Antibiotics (For Severe Cases)
If diarrhea is distressing, incapacitating, or contains blood or mucus, a prescribed antibiotic may be necessary.
Method: Before you travel, speak with your doctor or a travel medicine clinic. For travelers heading to high-risk destinations, they may provide a prescription for a standby antibiotic, such as Azithromycin, to carry with you. A single dose is often highly effective at treating severe cases.
Pro-Tip: Within your main travel first-aid kit, create a dedicated "Digestive Distress" module. Keep it in a separate, clearly-labeled zip-top bag containing a few packets of Oral Rehydration Salts, a strip of Loperamide, and a few antacids. This way, when you need it, you won't have to rummage through your entire kit.
Ready to Pack Like a Pro?
A smart food and water safety strategy is just one piece of your pre-trip preparation. To ensure you don't overlook a single essential item—from documents and finances to clothing and medical supplies—a master checklist is your most powerful tool. Our comprehensive, free checklist has you covered for every stage of your journey.
Download Your Free International Travel Checklist Now!
Food and Water Safety FAQs
A prepared mind is a safe mind. Here are expert answers to common questions that take your preparedness to the next level.
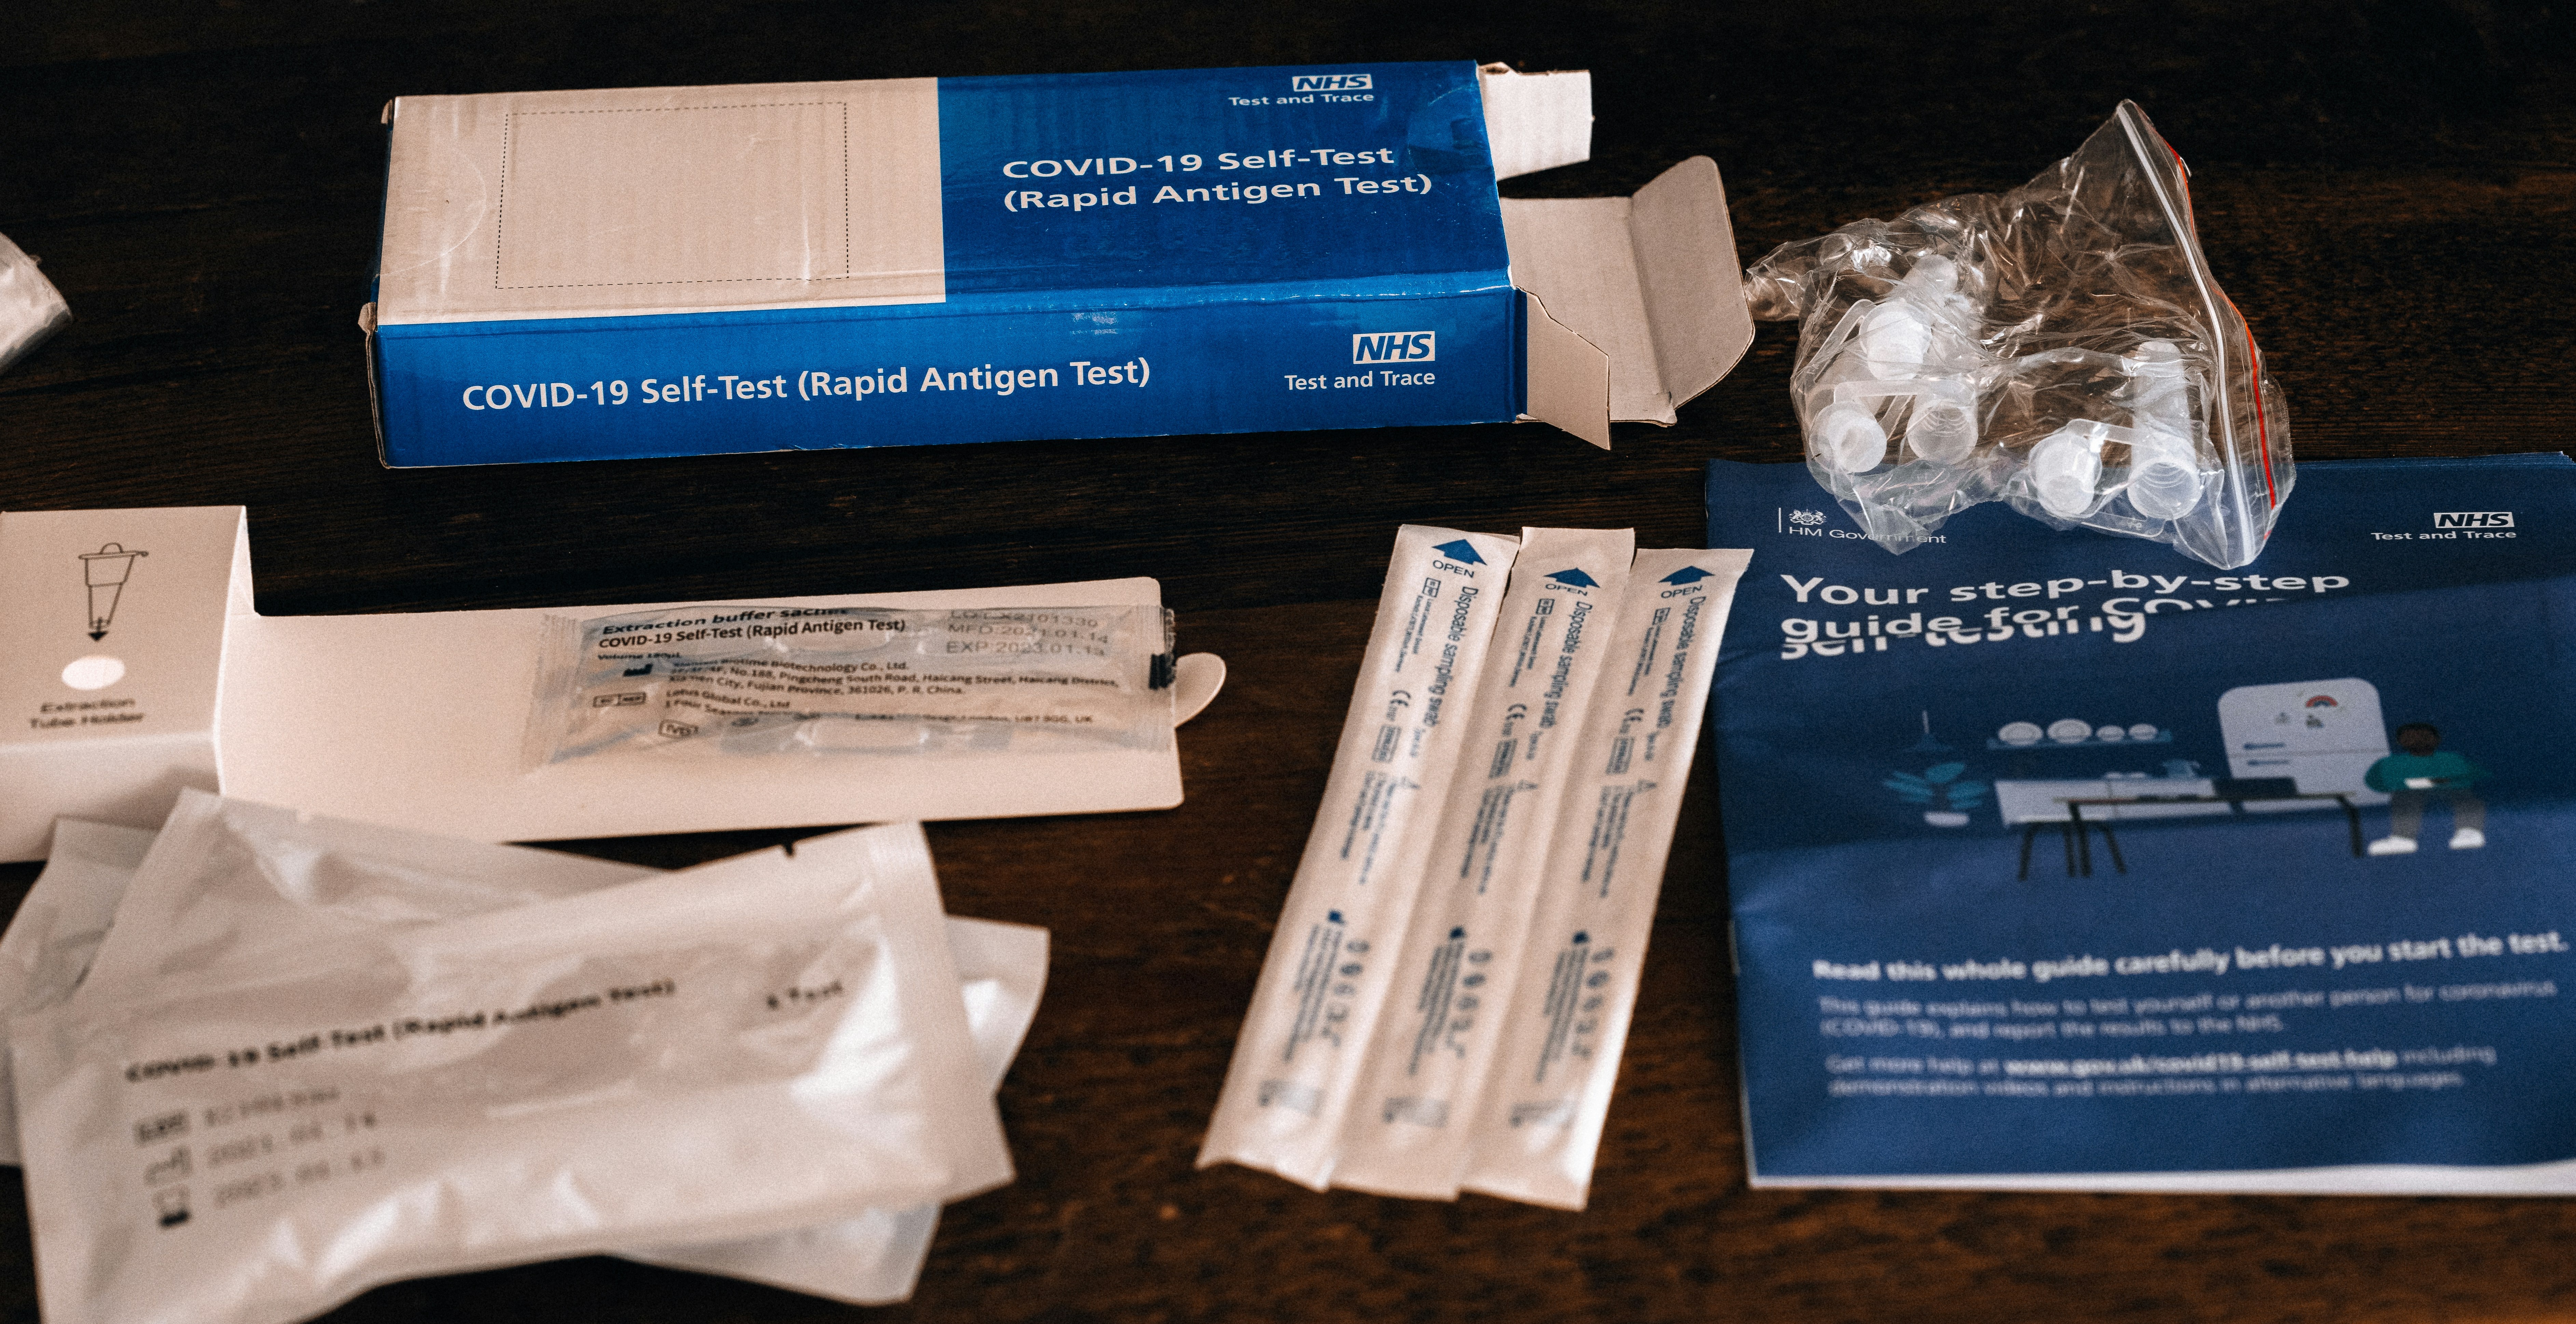
1. Besides traveler's diarrhea, what are the most common travel illnesses?
While traveler's diarrhea is number one, the CDC reports that other common issues include acute respiratory infections (like influenza or COVID-19, often acquired in transit), vector-borne fevers like Dengue and Malaria in tropical regions, and other food-borne illnesses like Hepatitis A and Typhoid Fever. Skin conditions from insect bites are also extremely common.
2. Is it safe to eat at a restaurant if I'm worried about street food?
Generally, restaurants can be safer, but the same principles apply. A busy restaurant full of locals is a great sign. Be cautious with the same high-risk items: salads, unpeeled fruits, and tap water or ice. If you want to find trusted, local-approved gems, explore the TrekGuider platform, where travel creators often share their own curated guides to safe and authentic eats.
3. Should I carry a standby antibiotic in my first-aid kit?
This is a question for your doctor or a travel medicine clinic. For travelers heading to high-risk destinations where severe traveler's diarrhea is common, many doctors will provide a prescription for a standby antibiotic like Azithromycin. It’s not for mild cases but can significantly shorten the duration of a severe bout of illness. Discuss your itinerary with your doctor to see if this is right for you.
Eat Boldly, Travel Well
The world of food is a world of incredible diversity and connection, and it deserves to be explored with an open mind and a curious palate. The goal of mastering food and water safety is not to build a wall of fear that separates you from authentic experiences. It is about building a foundation of knowledge that gives you the freedom to be adventurous. By internalizing the golden rule of "Boil it, cook it, peel it, or forget it," learning to trust your own visual assessment of a food stall, and knowing exactly what to do if you get sick, you replace anxiety with empowerment. You are now equipped with the skills to navigate the world's most exciting cuisines with confidence, ensuring your focus remains on the flavor, connection, and joy that every journey promises. Go explore, eat boldly, and travel well.

Meta Data Suggestions:
SEO Meta Title (Under 60 characters): Food & Water Safety Abroad: How to Avoid Getting Sick
URL Slug: food-water-safety-abroad
SEO Meta Description (Under 155 characters): Avoid traveler's diarrhea with our expert guide to food and water safety abroad. Learn the golden rules for eating street food, purifying water, and staying healthy.
Don't Miss Out! Subscribe for Exclusive Content
Subscribe


Comments 0
No comments yet
Be the first to share your experience!
Dont Miss Out! Subscribe for Exclusive Content

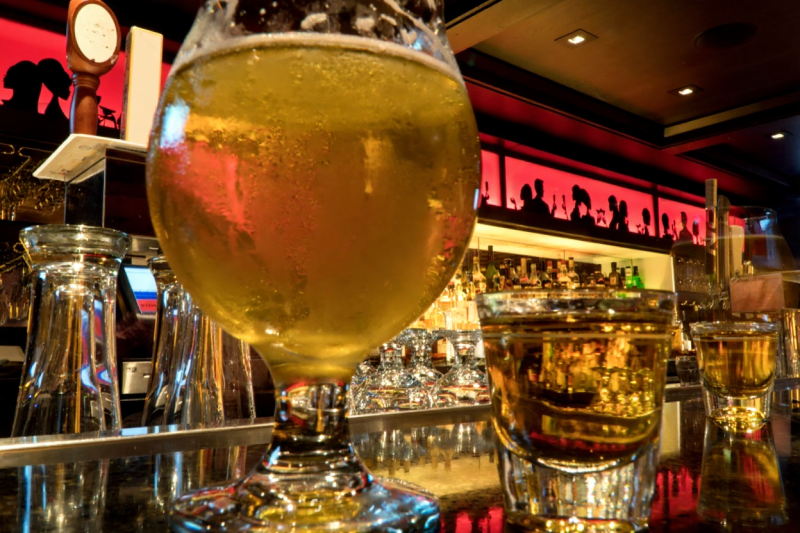
Chicago Beer Fests: Top 6 Tastings

Ultimate USA Holidays Guide: Top Picks

FTC Affiliate Disclosure Essentials: Stay Compliant as a Travel Creator

Essential Affiliate Tools: From Tracking to Full Optimization

Booking.com Affiliate Program Review: Pros, Cons, and Earnings Potential

Decoding Affiliate Commission Rates: Benchmarks for Travel Creators
Chicago Beer Fests: Top 6 Tastings
TrekGuider @trekguider
Chicago. The Windy City. A metropolis of staggering architecture, legendary deep-dish pizza, and a cultural pulse that's impossible to ignore. But for the discerning traveler, another current runs deep through its streets: a world-class, boundary-pushing craft beer scene. The problem? If you're searching for the best beer festivals Chicago has to offer, you're likely drowning in a generic sea of event listings and outdated guides. It’s a frustrating quest that can leave you wondering where the truly exceptional tasting experiences are hiding.
The agitation is real. You don't want to waste your precious travel time or money on a crowded, soulless festival with endless lines and a tap list dominated by macro-brews. You're hunting for something more—an authentic experience that pairs the city's vibrant energy with the innovative spirit of its local brewers. You risk missing out on that perfect pint, that unique seasonal ale enjoyed in a memorable setting, the very reason you sought out Chicago's beer culture. You want a curated path to the city's best pours, not just another tent in a park.
So, let's cut through the noise. I've personally vetted the city's event calendar to bring you a curated guide to the six most exceptional beer tasting experiences—moments that are woven directly into the fabric of Chicago's most iconic celebrations. This isn't just a list; it's your strategic plan for exploring the sudsy side of the city. We'll show you how to find craft beer havens at massive music festivals, what to sip while a river runs green, and where to find festive German lagers in the heart of downtown. These are the can't-miss moments that elevate a simple drink into a core Chicago memory, and they represent just one facet of the year-round excitement we detail in our complete guide to Chicago Holidays: Windy City Thrills.

1. Lollapalooza: An Unlikely Star Among Beer Festivals in Chicago
When you picture Lollapalooza, you see massive stages, roaring crowds, and a lineup of global music superstars. But tucked within this four-day musical marathon is one of the most unique settings for a craft beer experience in the city. Lollapalooza, taking over Grant Park from July 31 - the final day of the festival, is a city within a city, and its beverage program has evolved to satisfy the sophisticated palates of modern festival-goers.
Forget the days of limited options. The festival now boasts a dedicated "Craft Beer Oasis," a shaded haven where you can escape the pulsating crowds and explore a curated selection of Chicago's finest local breweries. Here, you can find everything from crisp, refreshing pilsners perfect for a sunny afternoon watching artists like Olivia Rodrigo or Sabrina Carpenter, to bold, hoppy IPAs that provide the perfect fuel for a night with headliners like Tyler the Creator, A$AP Rocky, and Korn.
Your Tasting Strategy:
Plan Your Pours: With gates open from 11 AM to 10 PM daily, pacing is key. Start your day with a lighter option, like a session ale or a kolsch, to stay hydrated. As the sun sets and the energy builds, transition to something with more character—perhaps a hazy IPA from a local favorite or a rich porter to savor during the final set.
Navigate Like a Pro: Before you even arrive, download the official Lollapalooza app. It’s your key to locating the craft beer tents, viewing digital menus, and identifying which vendors have the shortest lines. This simple step can save you precious time that is better spent enjoying the music.
Pairing is Everything: Think of your beer choice as part of the sensory experience. The bright, citrusy notes of a pale ale can perfectly complement the upbeat energy of a pop performance by an artist like TWICE, while the complex, dark notes of a stout might be the ideal companion for an intense rock set.
Pro-Tip: Lollapalooza is a "rain or shine" event. Pack a poncho. A sudden downpour can send crowds running for cover, creating the perfect five-minute window for you to walk right up to a beer tent with no line and discover your new favorite Chicago brew.

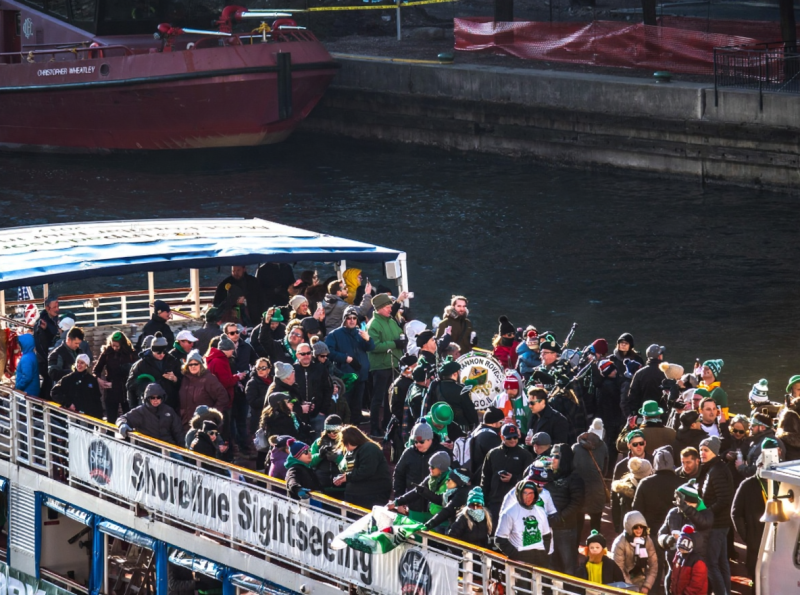
2. The St. Patrick's Day Green River Pour: A Uniquely Chicago Tradition
On Saturday, the Saturday before St. Patrick's Day, Chicago performs a miracle of civic engineering and festive spirit: it dyes its river a brilliant, shimmering emerald green. This spectacle, a tradition dating back to 1962, is the centerpiece of the city's St. Patrick's Day celebration and creates an unparalleled backdrop for a truly unique beer experience. While not a formal festival, the entire riverfront transforms into a massive, open-air party where the beer flows as freely as the green water.
The day kicks off as crews release 40 to 60 pounds of a secret, vegetable-based powder into the water, turning it a vibrant green for about five to six hours. This is followed by the grand parade—a tradition since 1843—which starts at 12:15 PM and marches down Columbus Drive. For a beer lover, the mission is clear: secure a spot with a view and a pint in hand.
Your Tasting Strategy:
Embrace the Theme: This is the one day of the year when ordering a green-dyed light lager is not just acceptable, but practically mandatory. It’s a novelty, a photo op, and a rite of passage for anyone celebrating in the city.
Seek Out Authenticity: Beyond the green beer, riverfront pubs and pop-up vendors will be pouring classic Irish styles. Look for a rich, creamy nitrogen-poured stout or a malty Irish red ale. These traditional brews offer a delicious, authentic contrast to the playful absurdity of the green river.
Location, Location, Location: The best views are from the bridges crossing the river or along the Riverwalk. Arrive early (by 9 AM) to claim your territory. Many local bars and restaurants with river views offer ticketed events that include drinks, providing a more comfortable (and less crowded) way to enjoy the spectacle.
This celebration is a photographer's dream. To make your photos of the emerald river and city skyline truly pop, consider using our collection of Free Travel Lightroom Presets, designed to enhance travel shots and make your memories look as vivid as the day itself.
3. The Christkindlmarket Chalice: German Biers and Festive Cheer
As winter descends upon Chicago, Daley Plaza transforms into a magical, twinkling European village. This is the Christkindlmarket, a traditional German-style Christmas market that is at the heart of the city's holiday season. While families flock here for handcrafted ornaments and festive snacks, beer aficionados know it as the premier destination for authentic German winter brews.
The experience is famously centered around "Glühwein" (hot spiced wine), but the beer selection is equally impressive and essential to the market's charm. You won't find a sprawling list of experimental IPAs here. Instead, the focus is on classic, impeccably crafted German styles that are perfect for sipping in the chilly air.
Your Tasting Strategy:
Drink from the Boot: The most iconic part of the experience is drinking from the commemorative ceramic boot-shaped mug, or "Stiefel." Each year features a new design, making it a collectible souvenir. It’s the perfect vessel for a crisp German pilsner, a malty Märzen, or a dark, roasty Dunkel.
Explore Winter Styles: Look for seasonal specialties like a Doppelbock or a Winter Warmer. These beers are typically higher in alcohol and feature rich, malty flavors of caramel, toffee, and dark fruit, making them the perfect antidote to a cold Chicago evening.
Pair with German Fare: The beer is only half the story. Enhance your tasting by pairing your brew with traditional market food. A crisp pilsner cuts through the richness of a bratwurst, while the sweet maltiness of a bock beer beautifully complements a warm, soft pretzel or a bag of candied nuts.
Pro-Tip: The Christkindlmarket can get extremely crowded, especially on weekends. For a more relaxed tasting experience, visit on a weekday afternoon. You'll have more space to wander, shorter lines for beer and food, and a better chance to chat with the vendors about their offerings.

4. The July 4th Fireworks Flight: Patriotic Pints at Navy Pier
Independence Day in Chicago is a spectacular affair, culminating in a massive fireworks display over Lake Michigan, launched from the iconic Navy Pier. While thousands crowd the pier itself, the savvy beer lover knows the best experience is found away from the main throng, combining the stunning visuals with a curated taste of American craft brewing. This is your chance to create your own micro beer tasting against a patriotic backdrop.
The strategy is to find a rooftop bar or a comfortable perch with a clear view of the fireworks. Many establishments in the Streeterville and River North neighborhoods offer exactly this. The goal is to arrive by 7 PM, settle in, and order a "flight" of local craft beers to enjoy as the sky lights up.
Your Tasting Strategy:
Curate an All-American Flight: Work with your server to build a tasting flight that celebrates American brewing history and innovation. A perfect flight might include:
A Classic American Lager: A clean, crisp, and refreshing starting point.
An American Pale Ale (APA): The style that arguably launched the craft beer revolution, known for its balance of malt and citrusy hops.
A West Coast IPA: A bold, hop-forward brew that showcases the piney, bitter notes characteristic of the style.
A Midwest Stout: A rich, dark beer from a local Chicago or regional brewery, perhaps with notes of coffee or chocolate.
The Rooftop Advantage: Choosing a rooftop bar not only gives you a superior, less crowded view of the fireworks but also provides access to a full menu, comfortable seating, and proper glassware—all elements that elevate the beer tasting experience.
Timing is Key: Order your flight about 30-45 minutes before the fireworks are scheduled to begin. This gives you ample time to savor and compare each beer as the anticipation builds, culminating in the grand finale both in the sky and in your glass.
5. Neighborhood Street Fairs: The True Heart of Beer Festivals in Chicago
While the major events offer fantastic beer experiences, the heart and soul of the city's craft scene is found at its countless neighborhood street festivals. These weekend events, which pop up across Chicago's diverse communities from late spring to early fall, are the authentic gatherings that locals cherish. This is where you move beyond the big names and discover the hyper-local, experimental breweries that are pushing the boundaries of craft beer.
Exploring these festivals requires a spirit of adventure. One weekend you might be at a food-focused fest in the West Loop, the next at an art fair in Lincoln Park. The key is that nearly every one of them features a strong showing from local breweries, often pouring special, festival-only releases.
Your Tasting Strategy:
Follow the Breweries: Instead of searching for festivals, follow your favorite Chicago breweries on social media. They will always announce which neighborhood events they'll be pouring at, leading you directly to the best and most interesting beer selections.
Talk to the Brewers: At these smaller events, you often have the chance to speak directly with the brewers or brewery staff. Ask them what's new, what they're excited about, and what you should try. This insider access is invaluable for any true beer fan.
Go Beyond the Loop: Don't be afraid to hop on the 'L' train and explore festivals in neighborhoods like Logan Square, Pilsen, or Andersonville. This is where you'll find the city's most exciting and innovative breweries, far from the downtown crowds.
Discovering these hidden gems is the ultimate reward for any traveler. To plan your journey through the city's neighborhoods and uncover these and other off-the-beaten-path experiences, our comprehensive Travel Guide is the essential resource, packed with local insights and detailed maps.

6. The Cinco de Mayo Cerveza Celebration: Pints and Parades
On May 5th, Chicago's vibrant Mexican-American communities, particularly in the Little Village neighborhood, burst into celebration for Cinco de Mayo. The holiday, which commemorates the Mexican Army's 1862 victory at the Battle of Puebla, is marked by lively parades, incredible food, and, of course, fantastic beer. This is a cultural immersion that offers a unique and flavorful tasting experience far removed from a standard beer fest.
The centerpiece is the parade, a colorful procession of floats, dancers, and musicians. The surrounding streets become a festival in their own right, with vendors selling authentic Mexican cuisine and local bars and restaurants pouring a variety of Mexican and Mexican-inspired beers.
Your Tasting Strategy:
Start with the Classics: Begin with a classic Mexican-style lager. It’s light, crisp, and incredibly refreshing—the perfect beer for sipping in the sun while you watch the parade. Ask for it with a lime wedge for the full, traditional experience.
Explore Craft Interpretations: Many Chicago craft breweries create special releases for Cinco de Mayo. Look for creative interpretations like a lime-infused gose, a spicy habanero-laced stout, or a refreshing pale ale brewed with agave nectar.
The Ultimate Food Pairing: The real magic happens when you pair your beer with the food. The crispness of a lager perfectly cuts through the richness of tacos al pastor, while the subtle sweetness of an amber ale beautifully complements the smoky flavor of elotes (grilled street corn).
Your Ultimate Chicago Beer Adventure Awaits
Chicago's beer scene is as dynamic and diverse as the city itself. It isn't confined to traditional taprooms or designated festival grounds; it's woven into the very fabric of the city's greatest celebrations. By looking beyond the obvious, you can craft a tasting journey that is unique, memorable, and deeply connected to the local culture. From sipping German lagers at a Christmas market to enjoying an All-American flight during the July 4th fireworks, you now have the ultimate insider's guide to the best beer festivals Chicago has to offer—even the ones you didn't know existed. So go forth, raise a glass, and toast to the incredible spirit of the Windy City.
Don't Miss Out! Subscribe for Exclusive Content
SubscribeComments 0
No comments yet
Be the first to share your experience!
Dont Miss Out! Subscribe for Exclusive Content

San Francisco Cherry Blossoms: A Local's Guide to the Blooms

Halloween SF: Haunts Without Horrors

SF Festivals: 7 Must-See Lineups

Christmas SF: Lights & Wharf Wonders

SF Pride: 6 Route & Party Hacks

Chinese New Year SF: Parade Essentials
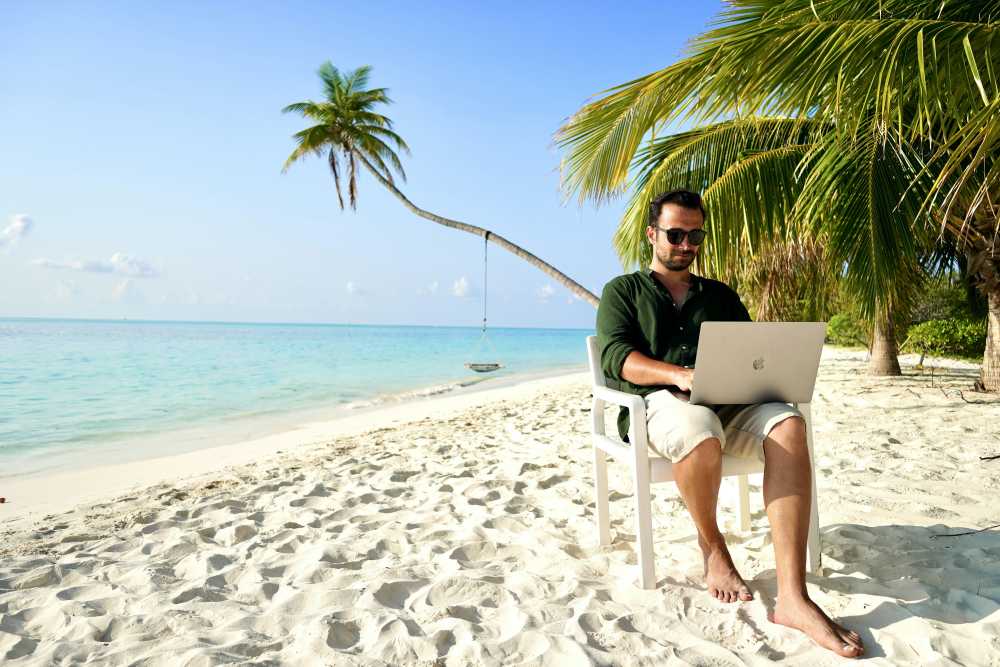
The Travel Blog Business Plan: How to Make Real Money in 2026
TrekGuider @trekguider
Stop collecting tactics. Start building a business. The internet is flooded with articles listing a dozen ways of how to make money travel blogging—affiliate links, display ads, sponsored posts—but they all miss the most critical question: in what order? Without a strategic plan, those tactics are just lottery tickets, a recipe for confusion and burnout.

This isn't another list. This is your comprehensive, step-by-step business plan, designed to take you from zero traffic and zero income to a profitable, scalable travel content business. We’re going to show you exactly what to focus on in your first 12 months (hint: it has nothing to do with making money) and provide the exact framework the top 1% of bloggers use to build seven-figure brands.
Forget the random tips and the vague "follow your passion" advice. It’s time to get serious. It's time to build a real asset.
Phase 1: Building Your Unfair Advantage (Months 1-12)
Welcome to the trenches. This is the most important—and by far the least glamorous—phase of your travel blogging career. The first 6 to 12 months are not about earning an income, chasing sponsored trips, or designing a beautiful logo. Let me be crystal clear: your goal in year one is not to make money.
Your goal is to build an asset.
Think of yourself as a real estate developer in a prime location. You wouldn't try to rent out a skyscraper while you're still pouring the concrete foundation. In the world of digital content, your asset is a high-quality website that attracts a dedicated audience through search engines. Your currency isn't dollars; it's traffic. Your foundation isn't concrete; it's trust.

During this foundational phase, every ounce of your energy—every late night and every weekend—will be dedicated to constructing a blog that is so genuinely helpful and authoritative that monetization becomes the natural, inevitable next step, not a desperate scramble. This is where you do the unsexy work that separates you from the 99% of travel blogs that are abandoned by month six. This is where you build your unfair advantage.
Step 1: Choose a Profitable Niche (Go Deep, Not Wide)
The single most fatal mistake a new travel blogger can make is trying to be everything to everyone. A blog about "my travels around the world" is a personal journal destined for an audience of three: you, your mom, and your most supportive friend.
A blog about "solo female travel in Southeast Asia on a budget" is a business. For those interested in this path, starting with can provide immense value to your future audience.
The fear of market saturation is valid, but the solution isn't to give up. The solution is to get laser-focused. Choosing a profitable niche is the most critical strategic decision you will make. It's not about limiting yourself; it's about making yourself the only logical choice for a specific person. A narrow focus is your primary weapon against a crowded market.

Here’s why this works:
It Builds Crushing Topical Authority for SEO: Google's algorithm is a machine built to find experts. When you write 30 in-depth articles exclusively about hiking in the Pacific Northwest, you are screaming to Google that you are the authority on that topic. This makes it exponentially easier to rank for valuable keywords than it is for a generalist who writes about Oregon one week and Paris the next. You're not just a voice in the crowd; you're the leading expert in a specific field.
It Attracts a High-Value Audience: A focused niche attracts a specific, passionate audience with a predictable set of problems, desires, and budgets. This clarity makes it far easier to create content that feels like it’s reading their mind, which in turn makes it easier to eventually sell products they are desperate to buy.
It Skyrockets Conversion Rates: Whether it's an affiliate link for a specific child-friendly hiking carrier or a brand deal with an Oregon-based tour company, a targeted audience converts at an astronomically higher rate. A general audience is just window shopping; a niche audience has their wallet out, ready to act on your expert recommendations.
Don't be afraid to get granular. Use this simple formula: [Who] does [What] in [Where].
From: "European travel" -> To: "Train travel for seniors in Western Europe."
From: "Family travel" -> To: "Accessible travel in Tuscany for multi-generational families."
From: "Adventure travel" -> To: "Scuba diving certification trips in the Caribbean for beginners."
A niche isn't a prison; it's your real advantage. It allows you to become a big fish in a small, profitable pond. For more ideas, explore our in-depth guide to 15 Profitable Travel Blog Niche Ideas for 2026.
Step 2: The Minimum Viable Setup (Spend Less Than $100)
Your perfectionism is your enemy here. The "Aspiring Travelpreneur" often falls into the trap of "pre-crastination"—spending months and thousands of dollars on custom design, expensive plugins, and countless online courses before they've even published a single, helpful article.
Resist this urge with every fiber of your being. In the beginning, your money is infinitely better spent on the experiences you can write about than on a fancy website.
Forget the custom logo and bespoke WordPress theme for now. In the beginning, your website needs to be a Toyota Corolla, not a Ferrari: utterly reliable, brutally efficient, and cheap to run. The goal isn't to win design awards; it's to build a platform that won't buckle when the traffic finally arrives.
Here are the absolute essentials:
A Domain Name: Choose a .com that is brandable, memorable, and hints at your niche. Don't overthink it. (Approx. $15/year)
Reliable Hosting: This is your one non-negotiable technical investment. Do not use free platforms like Wix or Blogger—you don't own your content, and your monetization options will be crippled. Shared hosting from a reputable provider like SiteGround, Bluehost, or Lyrical Host is the industry standard for your first year. (Approx. $5-$10/month)
A Clean WordPress Theme: Install the free, self-hosted version from WordPress.org (never .com). Then, choose a lightweight, fast-loading theme. A premium theme like Kadence or GeneratePress offers a free version that is more than powerful enough to get you started. In 2026, website speed is a critical ranking factor for SEO and essential for user experience. A slow site is a dead site.
Alternatively, for creators who want to bypass the technical setup of hosting and WordPress entirely, a marketplace platform like TrekGuider offers a powerful head start. By registering as a creator on TrekGuider, you can not only sell digital products but also publish your own blog directly on the platform. This approach allows you to focus 100% on creating great content while leveraging built-in tools to view statistics on your posts, directly track your audience engagement, and grow your business within an established travel ecosystem.
That's it. Your total initial investment can and should be under $100. Every dollar you save here is a dollar you can put toward the travel that will fuel your content—and your business—for the next year.
Step 3: Master "Helpful Content" SEO to Reach 50,000 Sessions
Traffic is the lifeblood of a profitable blog. It is the raw material from which all revenue is refined. Without a steady, predictable stream of readers, you have no one to show ads to, no one to click your affiliate links, and zero influence to leverage with brands. In this foundational phase, your single most important Key Performance Indicator (KPI) is monthly sessions.
And your singular, obsessive goal is to reach 50,000 monthly sessions.
Why that exact number? Because it's the golden ticket. It is the minimum traffic requirement to get accepted into premium advertising networks like Mediavine and Raptive (formerly AdThrive). The income difference isn't just big; it's staggering.
Google AdSense might earn you a paltry $1-$3 per 1,000 visitors (a metric called "RPM," or Revenue Per Mille).
A premium network like Mediavine can earn you $20, $30, or even $40+ RPM for the exact same traffic.
Hitting this threshold is the inflection point where your blog transforms from an expensive hobby into a legitimate source of income. It's the first taste of real profit.
The only sustainable, long-term way to get there is through Search Engine Optimization (SEO). This means creating content that methodically answers the specific questions your niche audience is typing into Google. Forget writing diary entries about your feelings. Your job now is to become a problem-solver. Your mantra is "helpful content."
This "nuts and bolts" content is the bedrock of every successful travel blog. Think about the practical, unglamorous questions a traveler actually needs answered:
"How much does a 3-day trip to Lisbon cost for a couple?" (Our is built on answering questions just like this.)
"Is it safe to drink tap water in Costa Rica in 2026?"
"What is the best travel insurance that covers trekking in Nepal?"
"A detailed, day-by-day itinerary for one week in Japan without a car." (This is the exact kind of detail you'll find in our .)
By focusing relentlessly on answering these practical questions with first-hand experience and exhaustive detail, you build immense trust with your audience and demonstrate your expertise to Google. This is a slow, methodical process of laying brick after brick. To learn the fundamentals, your first read should be our A Beginner's Guide to SEO for Travel Blogs.
Phase 2: The Monetization Ladder (Months 12-24)
You survived the gauntlet of year one. You've published 50+ articles of deeply helpful, SEO-optimized content. Your traffic is climbing steadily, and you're approaching or have just surpassed the magical 50,000 session mark. Now, and only now, is it time to flip the monetization switch. It's time to talk about how to make money travel blogging.

We call this phase the "Monetization Ladder" because it’s a sequential process. Trying to do everything at once—ads, affiliates, brand deals, products—is the fastest way to get overwhelmed and do everything poorly. Instead, you'll climb the ladder one rung at a time, introducing income streams in a logical order that aligns with your blog's growth and authority.
Rung 1: Affiliate Marketing
Affiliate marketing is the perfect first rung on the ladder for two simple, powerful reasons: it has zero traffic requirements, and it integrates perfectly with the helpful content you are already creating. Our guide on .
The concept is beautifully simple: you recommend products or services you genuinely use and love (hotels, tours, gear, travel insurance), and when a reader makes a purchase through your unique tracking link, you earn a commission at no extra cost to them.
This is the most reader-centric form of monetization possible. You're not just slapping a jarring banner ad on your site; you're providing a curated, value-added recommendation that solves a specific problem for your reader. For example, in an article about "The Best Carry-On Backpacks for a Two-Week Trip to Europe," you link to the specific Osprey backpack you've personally torture-tested for the past three years. It's a natural, helpful, and profitable service.

Your Action Plan:
Begin with Aggregators: In your early days, it's most efficient to join large affiliate networks that give you access to thousands of brands under one roof. For travel, your first stops should be platforms like TravelPayouts (for flights, hotels, tours), Stay22 (for embedding beautiful, interactive accommodation maps), and of course, Amazon Associates for all travel gear.
Perform a Content Audit: Go back through your top 10-15 highest-traffic articles. Where have you mentioned a hotel, a piece of gear, a tour, or a booking site? Add your affiliate links to these existing, proven posts first. This is the lowest-hanging fruit.
Prioritize Unshakeable Trust: This is the cardinal rule. Only recommend things you have used personally or would confidently recommend to your best friend. Your long-term credibility is worth infinitely more than a few quick commissions. The moment your readers suspect you're recommending something just for the money, you've lost.
Rung 2: Premium Display Advertising
This is your reward for a year of relentless, thankless work. The moment your Google Analytics shows you've crossed the 50,000-session threshold in the last 30 days, you should stop everything you're doing and apply to Mediavine.
Getting accepted is a rite of passage. It's the moment your traffic asset begins producing significant, life-changing passive income.
As we covered, the income potential is transformative. A blog earning a disappointing $50/month from AdSense could suddenly be earning $1,000-$2,000/month from Mediavine with the exact same audience. This provides a stable, predictable income floor. It's the money that pays your rent, allows you to reinvest in your business, and finally eases the financial pressure of this entrepreneurial journey.
The beauty of premium ads is their passive nature. Once you're approved, Mediavine's expert team works with you to install the ad code. They handle all the optimization, management, and advertiser relationships. Your only job is to keep doing what got you here: creating excellent content that attracts readers. This predictable income stream frees up your mental energy to focus on the more lucrative, and more complex, rungs of the ladder.
Rung 3: Sponsored Content & Brand Partnerships
Once you have established traffic, a clear niche, and a professional-looking website, brands will start to notice. You'll begin to get emails in your inbox with subject lines like "Collaboration Opportunity." This can be a very lucrative income stream, but it is a minefield if not approached with extreme strategic caution, as we outline in our guide to .
Many bloggers, desperate for validation and cash, fall into the trap of accepting any and every offer that comes their way. They turn their carefully crafted blog into a chaotic billboard of random, low-value sponsored posts for mattress companies and mobile games. This erodes reader trust and can be, in the words of veteran blogger Nomadic Matt, utterly "soul-sucking."
Position sponsored content as an opportunistic, supplementary income stream, not your primary goal.
You Are the Prize: Remember this always. You have done the hard work of building the asset—the targeted audience. Brands need access to your audience far more than you need their one-off payment. Do not accept free products in exchange for "exposure." Your rates should be based on the value you provide, and you should be comfortable starting at $500-$1,000 for a single sponsored post and rising quickly from there.
Create a Professional Media Kit: When you're ready to proactively pitch brands or respond to inquiries, you need a professional media kit. This is a 2-3 page PDF that acts as your blog's resume. Our free resource, , includes essential apps and resources that can help you showcase your traffic statistics, audience demographics, and past work, making the difference between being ignored and landing a four-figure deal.
Chase Partnerships, Not Posts: The most successful bloggers don't do one-off posts. They build long-term, multi-faceted partnerships. Instead of just pitching a single article, pitch a package that includes a dedicated blog post, a series of Instagram stories, a YouTube video, and inclusion in your email newsletter. This provides immense value to the brand and commands a price tag 5-10x higher than a single post.
Phase 3: Scaling to a Six-Figure Business (Year 2+)
If you've diligently climbed the monetization ladder, you'll have a profitable travel blog. You'll be earning a consistent, respectable income from ads, affiliates, and a few select brand deals. Congratulations—you've built yourself a great job.
But Phase 3 is about transcending that. It's about making the leap from content creator to business owner.

The objective here is to decouple your income from your time. It's about building systems and assets that generate revenue while you sleep, travel, or work on your next big project. This is where becomes a reality. You achieve this by creating and owning your own proprietary products.
The Ultimate Goal: Creating and Selling Your Own Digital Products
This is the endgame. This is the key to true financial independence and uncapped scaling. When you sell your own products, you control everything: the price, the profit margin (which is often 95% or higher), and the customer relationship. This is how the most successful bloggers build seven-figure brands, and we've compiled some top .
The best digital products are not born from a flash of genius. They are born directly from the problems you have been methodically solving for your audience all along. What questions do they ask you over and over again in your comments and DMs? What is their single biggest pain point?
Package the solution.

Examples of highly profitable digital products for travel bloggers include:
Hyper-Detailed Itineraries or Guides: Not a blog post, but a beautifully designed, downloadable PDF itinerary for a specific trip, complete with daily schedules, Google Map integrations, booking links, and insider tips they can't find anywhere else.
Niche E-books: A comprehensive guide to a topic you are an undisputed expert in, like "The Digital Nomad's Handbook to Visas and Taxes" or "The Complete Guide to Planning a Honeymoon in Greece," which you could model after our professional .
High-Value Templates: Notion or Google Sheets templates that help your readers organize their trip research, manage their budget, or track their credit card points. People will gladly pay a premium to save time and get organized.
Specialized Online Courses: High-ticket items ($200-$2,000+) that teach a specific, valuable skill, such as "Travel Photography for Beginners," "How to Land Your First Tourism Board Partnership," or "SEO for Travel Bloggers."
Once you've created your product, the next question is where to sell it. While you can set up your own storefront on your blog, a dedicated marketplace is often the fastest path to your first sale. By listing your products on the TrekGuider marketplace, you tap into a pre-existing audience of passionate travelers actively looking for resources. Our platform provides you with the tools to not only sell your digital guides and itineraries but also to publish your own blog content, view detailed statistics on views and engagement, and directly influence your sales through an integrated ecosystem designed for travelpreneurs.
Creating high-value products like detailed travel itineraries is a proven, winning model. To streamline this process, you can start with , which allows you to create professional, shareable plans your audience will love.
The potential here is limitless, and it is where you will build real, lasting, life-changing wealth.
Building an Email List: Your Most Valuable Asset
If your blog is your public storefront, your email list is your private VIP lounge. It is the single most valuable, durable, and critical asset in your entire business, for one simple reason: you own it. For a deep dive, explore our guide on .
Your Google rankings can fluctuate overnight. Instagram could shut down tomorrow. Facebook's algorithm is a black box. But your email list is a direct, unfiltered line of communication to your most loyal fans, and it is immune to the whims of algorithms.
It is the primary sales channel for launching your digital products and the ultimate tool for building a durable, long-term business.

Start building your list from day one—long before you have something to sell. Don't just put a "subscribe here" box in your footer. Offer a simple, valuable, and irresistible "lead magnet"—a freebie in exchange for an email address. This could be a one-page packing checklist like our , a 5-page PDF guide to the "Top 10 Mistakes to Avoid," or a simple spreadsheet template.
Nurture that list by sending regular, value-packed newsletters. Then, when it comes time to launch your e-book or course, you will have a warm, engaged audience of true fans who are ready and eager to buy from you. If you need help getting started, read our guide on How to Choose the Best Email Marketing Platform.
This three-phase plan is the exact blueprint for building a real business. But what does that business actually look like on a bank statement? Let’s pull back the curtain and talk about the numbers.
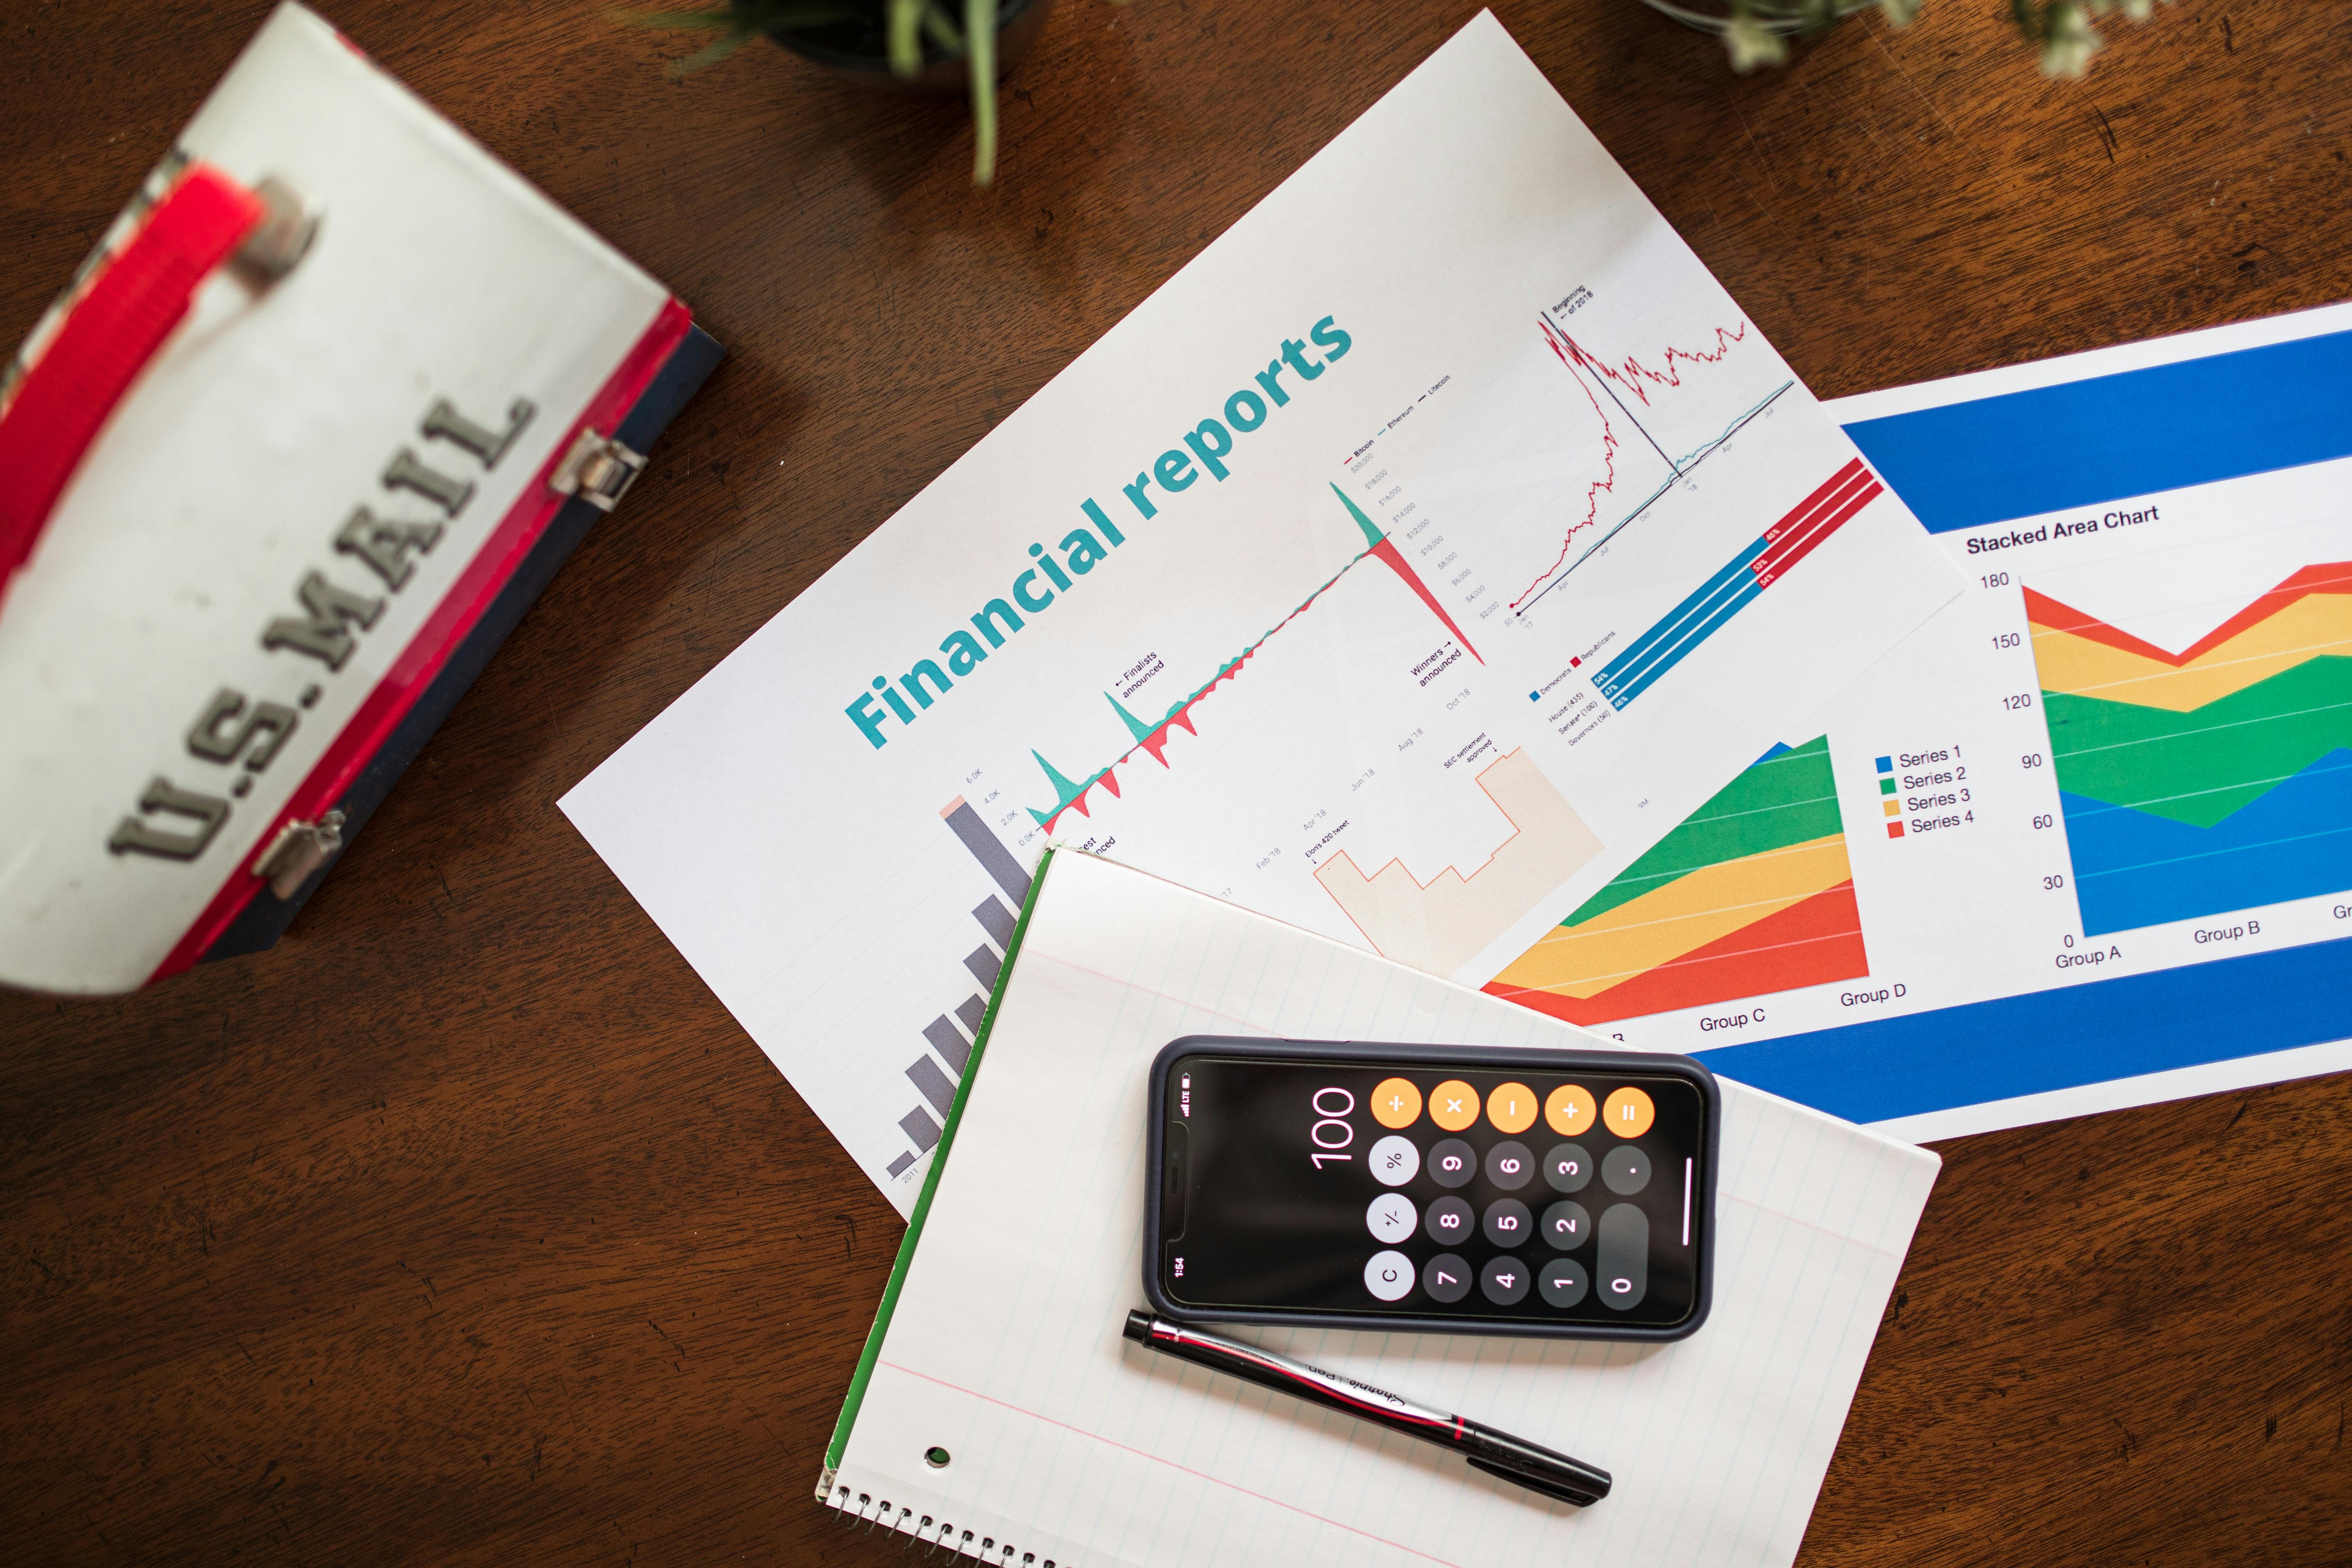
Financial Realities: A Data-Backed Look at Income & Timelines
It is absolutely crucial to have realistic expectations. Travel blogging is a marathon, not a sprint. The internet is littered with the ghosts of blogs started by people who expected to be earning thousands within a few months and quit when reality hit.
Profitability is a slow, steady climb built on relentless consistency. The numbers below are aggregated from dozens of public travel blog income reports to give you a realistic, no-fluff picture of what the journey often looks like when you follow this business plan.

These figures are not guarantees. They are a reflection of what is possible with a strategic, patient, and business-minded approach. Many bloggers never reach these numbers because they quit too soon, focus on the wrong things (like Instagram likes), or treat their blog like a diary instead of an asset. By following this plan, you put yourself on the path to joining the successful minority.
Frequently Asked Questions (FAQ Section)
How much do top travel bloggers make?
The most successful travel bloggers operate as full-blown media companies and can earn anywhere from $20,000 to over $100,000 per month. These figures are the result of 5-10+ years of work. Their income is highly diversified, coming from premium ads, a complex web of affiliate partnerships, a suite of their own digital products and courses, high-level brand ambassador deals, and sometimes even their own curated group tours. They have successfully transitioned from being "bloggers" to being brand CEOs.
Can you start a travel blog with no money?
While you can technically start on a free platform, it is a strategic dead end if your goal is to make serious money. As outlined in Phase 1, the minimum viable setup (domain and hosting) costs less than $100 for the entire first year. The question of how to become a travel blogger with no money is better framed as a lean startup. The most significant investment by far is your "sweat equity"—the hundreds of hours you will pour into creating exceptional content. If the initial $100 is a barrier, your first business goal should be to save that amount.
Is travel blogging dead or too saturated in 2026?
No, but the bar for entry is much higher. The era of the generalist "look at my cool life" travel diary is definitively over. The market is saturated with mediocrity, but there is more opportunity than ever for true experts who serve a specific niche. Readers and Google alike are rewarding authentic, deep, experience-based content over generic, AI-generated listicles. So, is travel blogging profitable in 2026? The answer is a resounding yes—for those who treat it like a business and commit to becoming the most helpful resource for a specific audience.
You have the business plan. Now it's time to get the tools to execute it.
The TrekGuider marketplace is built for this journey. Here, you can not only sell your digital products but also publish your own blog, track your stats, and grow your audience. To get started, download , a curated collection of 34 essential apps and resources designed to help you build your travel blog faster and smarter. For a complete A-to-Z resource on smarter travel, which will fuel your content for years, check out our .
Related Guides
- How to Make Money Blogging (From $0 to $10k/mo)
- How to Create a Digital Travel Guide People Will Buy
- 7 Digital Products That Sell Themselves for Travelers
- How to Make Money Online: A Creator's Guide for 2026
- Top 10 Travel Affiliate Programs for 2026
- 6 Proven Models to Make Money Online Blogging
- 5 Passive Income Ideas for Your Travel Blog
- Email Marketing for Bloggers: A Step-by-Step Playbook
- How to Start a Travel Blog (And Get Noticed)
- 15 Travel Blog Niche Ideas with Low Competition
Don't Miss Out! Subscribe for Exclusive Content
SubscribeComments 0
No comments yet
Be the first to share your experience!
Dont Miss Out! Subscribe for Exclusive Content
FTC Affiliate Disclosure Essentials: Stay Compliant as a Travel Creator
Essential Affiliate Tools: From Tracking to Full Optimization

Avoid These 5 Affiliate Landing Page Mistakes for Better Conversions

Affiliate Keyword Research Mastery for Travel Blogs
Booking.com Affiliate Program Review: Pros, Cons, and Earnings Potential