The Travel Blog Business Plan: How to Make Real Money in 2026
TrekGuider @trekguider
Stop collecting tactics. Start building a business. The internet is flooded with articles listing a dozen ways of how to make money travel blogging—affiliate links, display ads, sponsored posts—but they all miss the most critical question: in what order? Without a strategic plan, those tactics are just lottery tickets, a recipe for confusion and burnout.

This isn't another list. This is your comprehensive, step-by-step business plan, designed to take you from zero traffic and zero income to a profitable, scalable travel content business. We’re going to show you exactly what to focus on in your first 12 months (hint: it has nothing to do with making money) and provide the exact framework the top 1% of bloggers use to build seven-figure brands.
Forget the random tips and the vague "follow your passion" advice. It’s time to get serious. It's time to build a real asset.
Phase 1: Building Your Unfair Advantage (Months 1-12)
Welcome to the trenches. This is the most important—and by far the least glamorous—phase of your travel blogging career. The first 6 to 12 months are not about earning an income, chasing sponsored trips, or designing a beautiful logo. Let me be crystal clear: your goal in year one is not to make money.
Your goal is to build an asset.
Think of yourself as a real estate developer in a prime location. You wouldn't try to rent out a skyscraper while you're still pouring the concrete foundation. In the world of digital content, your asset is a high-quality website that attracts a dedicated audience through search engines. Your currency isn't dollars; it's traffic. Your foundation isn't concrete; it's trust.

During this foundational phase, every ounce of your energy—every late night and every weekend—will be dedicated to constructing a blog that is so genuinely helpful and authoritative that monetization becomes the natural, inevitable next step, not a desperate scramble. This is where you do the unsexy work that separates you from the 99% of travel blogs that are abandoned by month six. This is where you build your unfair advantage.
Step 1: Choose a Profitable Niche (Go Deep, Not Wide)
The single most fatal mistake a new travel blogger can make is trying to be everything to everyone. A blog about "my travels around the world" is a personal journal destined for an audience of three: you, your mom, and your most supportive friend.
A blog about "solo female travel in Southeast Asia on a budget" is a business. For those interested in this path, starting with can provide immense value to your future audience.
The fear of market saturation is valid, but the solution isn't to give up. The solution is to get laser-focused. Choosing a profitable niche is the most critical strategic decision you will make. It's not about limiting yourself; it's about making yourself the only logical choice for a specific person. A narrow focus is your primary weapon against a crowded market.

Here’s why this works:
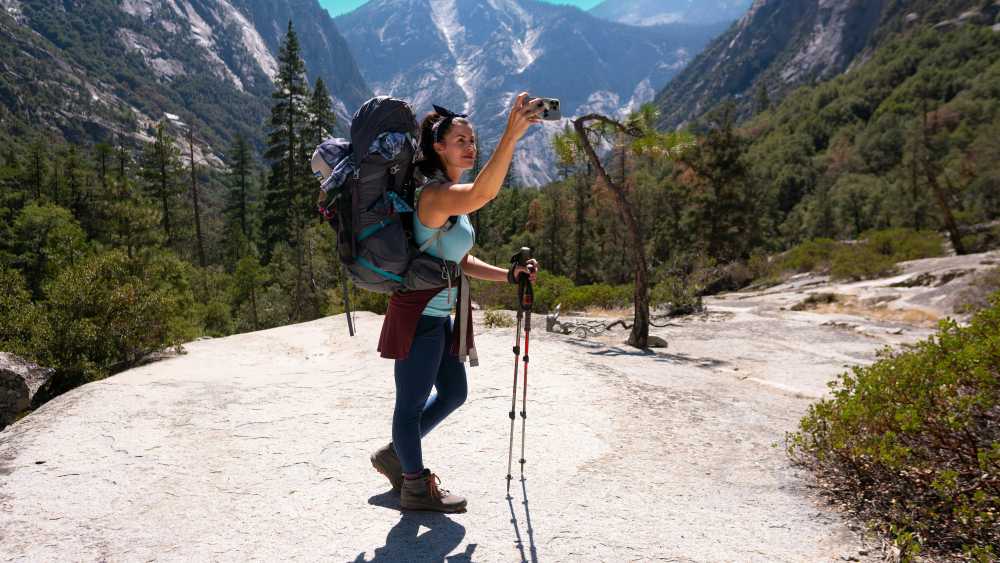
It Builds Crushing Topical Authority for SEO: Google's algorithm is a machine built to find experts. When you write 30 in-depth articles exclusively about hiking in the Pacific Northwest, you are screaming to Google that you are the authority on that topic. This makes it exponentially easier to rank for valuable keywords than it is for a generalist who writes about Oregon one week and Paris the next. You're not just a voice in the crowd; you're the leading expert in a specific field.
It Attracts a High-Value Audience: A focused niche attracts a specific, passionate audience with a predictable set of problems, desires, and budgets. This clarity makes it far easier to create content that feels like it’s reading their mind, which in turn makes it easier to eventually sell products they are desperate to buy.
It Skyrockets Conversion Rates: Whether it's an affiliate link for a specific child-friendly hiking carrier or a brand deal with an Oregon-based tour company, a targeted audience converts at an astronomically higher rate. A general audience is just window shopping; a niche audience has their wallet out, ready to act on your expert recommendations.
Don't be afraid to get granular. Use this simple formula: [Who] does [What] in [Where].
From: "European travel" -> To: "Train travel for seniors in Western Europe."
From: "Family travel" -> To: "Accessible travel in Tuscany for multi-generational families."
From: "Adventure travel" -> To: "Scuba diving certification trips in the Caribbean for beginners."
A niche isn't a prison; it's your real advantage. It allows you to become a big fish in a small, profitable pond. For more ideas, explore our in-depth guide to 15 Profitable Travel Blog Niche Ideas for 2026.
Step 2: The Minimum Viable Setup (Spend Less Than $100)
Your perfectionism is your enemy here. The "Aspiring Travelpreneur" often falls into the trap of "pre-crastination"—spending months and thousands of dollars on custom design, expensive plugins, and countless online courses before they've even published a single, helpful article.
Resist this urge with every fiber of your being. In the beginning, your money is infinitely better spent on the experiences you can write about than on a fancy website.
Forget the custom logo and bespoke WordPress theme for now. In the beginning, your website needs to be a Toyota Corolla, not a Ferrari: utterly reliable, brutally efficient, and cheap to run. The goal isn't to win design awards; it's to build a platform that won't buckle when the traffic finally arrives.

Here are the absolute essentials:
A Domain Name: Choose a .com that is brandable, memorable, and hints at your niche. Don't overthink it. (Approx. $15/year)
Reliable Hosting: This is your one non-negotiable technical investment. Do not use free platforms like Wix or Blogger—you don't own your content, and your monetization options will be crippled. Shared hosting from a reputable provider like SiteGround, Bluehost, or Lyrical Host is the industry standard for your first year. (Approx. $5-$10/month)
A Clean WordPress Theme: Install the free, self-hosted version from WordPress.org (never .com). Then, choose a lightweight, fast-loading theme. A premium theme like Kadence or GeneratePress offers a free version that is more than powerful enough to get you started. In 2026, website speed is a critical ranking factor for SEO and essential for user experience. A slow site is a dead site.
Alternatively, for creators who want to bypass the technical setup of hosting and WordPress entirely, a marketplace platform like TrekGuider offers a powerful head start. By registering as a creator on TrekGuider, you can not only sell digital products but also publish your own blog directly on the platform. This approach allows you to focus 100% on creating great content while leveraging built-in tools to view statistics on your posts, directly track your audience engagement, and grow your business within an established travel ecosystem.
That's it. Your total initial investment can and should be under $100. Every dollar you save here is a dollar you can put toward the travel that will fuel your content—and your business—for the next year.
Step 3: Master "Helpful Content" SEO to Reach 50,000 Sessions
Traffic is the lifeblood of a profitable blog. It is the raw material from which all revenue is refined. Without a steady, predictable stream of readers, you have no one to show ads to, no one to click your affiliate links, and zero influence to leverage with brands. In this foundational phase, your single most important Key Performance Indicator (KPI) is monthly sessions.
And your singular, obsessive goal is to reach 50,000 monthly sessions.

Why that exact number? Because it's the golden ticket. It is the minimum traffic requirement to get accepted into premium advertising networks like Mediavine and Raptive (formerly AdThrive). The income difference isn't just big; it's staggering.
Google AdSense might earn you a paltry $1-$3 per 1,000 visitors (a metric called "RPM," or Revenue Per Mille).
A premium network like Mediavine can earn you $20, $30, or even $40+ RPM for the exact same traffic.
Hitting this threshold is the inflection point where your blog transforms from an expensive hobby into a legitimate source of income. It's the first taste of real profit.
The only sustainable, long-term way to get there is through Search Engine Optimization (SEO). This means creating content that methodically answers the specific questions your niche audience is typing into Google. Forget writing diary entries about your feelings. Your job now is to become a problem-solver. Your mantra is "helpful content."
This "nuts and bolts" content is the bedrock of every successful travel blog. Think about the practical, unglamorous questions a traveler actually needs answered:
"How much does a 3-day trip to Lisbon cost for a couple?" (Our is built on answering questions just like this.)
"Is it safe to drink tap water in Costa Rica in 2026?"
"What is the best travel insurance that covers trekking in Nepal?"
"A detailed, day-by-day itinerary for one week in Japan without a car." (This is the exact kind of detail you'll find in our .)
By focusing relentlessly on answering these practical questions with first-hand experience and exhaustive detail, you build immense trust with your audience and demonstrate your expertise to Google. This is a slow, methodical process of laying brick after brick. To learn the fundamentals, your first read should be our A Beginner's Guide to SEO for Travel Blogs.
Phase 2: The Monetization Ladder (Months 12-24)
You survived the gauntlet of year one. You've published 50+ articles of deeply helpful, SEO-optimized content. Your traffic is climbing steadily, and you're approaching or have just surpassed the magical 50,000 session mark. Now, and only now, is it time to flip the monetization switch. It's time to talk about how to make money travel blogging.

We call this phase the "Monetization Ladder" because it’s a sequential process. Trying to do everything at once—ads, affiliates, brand deals, products—is the fastest way to get overwhelmed and do everything poorly. Instead, you'll climb the ladder one rung at a time, introducing income streams in a logical order that aligns with your blog's growth and authority.
Rung 1: Affiliate Marketing
Affiliate marketing is the perfect first rung on the ladder for two simple, powerful reasons: it has zero traffic requirements, and it integrates perfectly with the helpful content you are already creating. Our guide on .
The concept is beautifully simple: you recommend products or services you genuinely use and love (hotels, tours, gear, travel insurance), and when a reader makes a purchase through your unique tracking link, you earn a commission at no extra cost to them.
This is the most reader-centric form of monetization possible. You're not just slapping a jarring banner ad on your site; you're providing a curated, value-added recommendation that solves a specific problem for your reader. For example, in an article about "The Best Carry-On Backpacks for a Two-Week Trip to Europe," you link to the specific Osprey backpack you've personally torture-tested for the past three years. It's a natural, helpful, and profitable service.

Your Action Plan:
Begin with Aggregators: In your early days, it's most efficient to join large affiliate networks that give you access to thousands of brands under one roof. For travel, your first stops should be platforms like TravelPayouts (for flights, hotels, tours), Stay22 (for embedding beautiful, interactive accommodation maps), and of course, Amazon Associates for all travel gear.
Perform a Content Audit: Go back through your top 10-15 highest-traffic articles. Where have you mentioned a hotel, a piece of gear, a tour, or a booking site? Add your affiliate links to these existing, proven posts first. This is the lowest-hanging fruit.
Prioritize Unshakeable Trust: This is the cardinal rule. Only recommend things you have used personally or would confidently recommend to your best friend. Your long-term credibility is worth infinitely more than a few quick commissions. The moment your readers suspect you're recommending something just for the money, you've lost.
Rung 2: Premium Display Advertising
This is your reward for a year of relentless, thankless work. The moment your Google Analytics shows you've crossed the 50,000-session threshold in the last 30 days, you should stop everything you're doing and apply to Mediavine.
Getting accepted is a rite of passage. It's the moment your traffic asset begins producing significant, life-changing passive income.
As we covered, the income potential is transformative. A blog earning a disappointing $50/month from AdSense could suddenly be earning $1,000-$2,000/month from Mediavine with the exact same audience. This provides a stable, predictable income floor. It's the money that pays your rent, allows you to reinvest in your business, and finally eases the financial pressure of this entrepreneurial journey.
The beauty of premium ads is their passive nature. Once you're approved, Mediavine's expert team works with you to install the ad code. They handle all the optimization, management, and advertiser relationships. Your only job is to keep doing what got you here: creating excellent content that attracts readers. This predictable income stream frees up your mental energy to focus on the more lucrative, and more complex, rungs of the ladder.
Rung 3: Sponsored Content & Brand Partnerships
Once you have established traffic, a clear niche, and a professional-looking website, brands will start to notice. You'll begin to get emails in your inbox with subject lines like "Collaboration Opportunity." This can be a very lucrative income stream, but it is a minefield if not approached with extreme strategic caution, as we outline in our guide to .

Many bloggers, desperate for validation and cash, fall into the trap of accepting any and every offer that comes their way. They turn their carefully crafted blog into a chaotic billboard of random, low-value sponsored posts for mattress companies and mobile games. This erodes reader trust and can be, in the words of veteran blogger Nomadic Matt, utterly "soul-sucking."
Position sponsored content as an opportunistic, supplementary income stream, not your primary goal.
You Are the Prize: Remember this always. You have done the hard work of building the asset—the targeted audience. Brands need access to your audience far more than you need their one-off payment. Do not accept free products in exchange for "exposure." Your rates should be based on the value you provide, and you should be comfortable starting at $500-$1,000 for a single sponsored post and rising quickly from there.
Create a Professional Media Kit: When you're ready to proactively pitch brands or respond to inquiries, you need a professional media kit. This is a 2-3 page PDF that acts as your blog's resume. Our free resource, , includes essential apps and resources that can help you showcase your traffic statistics, audience demographics, and past work, making the difference between being ignored and landing a four-figure deal.
Chase Partnerships, Not Posts: The most successful bloggers don't do one-off posts. They build long-term, multi-faceted partnerships. Instead of just pitching a single article, pitch a package that includes a dedicated blog post, a series of Instagram stories, a YouTube video, and inclusion in your email newsletter. This provides immense value to the brand and commands a price tag 5-10x higher than a single post.
Phase 3: Scaling to a Six-Figure Business (Year 2+)
If you've diligently climbed the monetization ladder, you'll have a profitable travel blog. You'll be earning a consistent, respectable income from ads, affiliates, and a few select brand deals. Congratulations—you've built yourself a great job.
But Phase 3 is about transcending that. It's about making the leap from content creator to business owner.

The objective here is to decouple your income from your time. It's about building systems and assets that generate revenue while you sleep, travel, or work on your next big project. This is where becomes a reality. You achieve this by creating and owning your own proprietary products.
The Ultimate Goal: Creating and Selling Your Own Digital Products
This is the endgame. This is the key to true financial independence and uncapped scaling. When you sell your own products, you control everything: the price, the profit margin (which is often 95% or higher), and the customer relationship. This is how the most successful bloggers build seven-figure brands, and we've compiled some top .
The best digital products are not born from a flash of genius. They are born directly from the problems you have been methodically solving for your audience all along. What questions do they ask you over and over again in your comments and DMs? What is their single biggest pain point?
Package the solution.

Examples of highly profitable digital products for travel bloggers include:
Hyper-Detailed Itineraries or Guides: Not a blog post, but a beautifully designed, downloadable PDF itinerary for a specific trip, complete with daily schedules, Google Map integrations, booking links, and insider tips they can't find anywhere else.
Niche E-books: A comprehensive guide to a topic you are an undisputed expert in, like "The Digital Nomad's Handbook to Visas and Taxes" or "The Complete Guide to Planning a Honeymoon in Greece," which you could model after our professional .
High-Value Templates: Notion or Google Sheets templates that help your readers organize their trip research, manage their budget, or track their credit card points. People will gladly pay a premium to save time and get organized.
Specialized Online Courses: High-ticket items ($200-$2,000+) that teach a specific, valuable skill, such as "Travel Photography for Beginners," "How to Land Your First Tourism Board Partnership," or "SEO for Travel Bloggers."
Once you've created your product, the next question is where to sell it. While you can set up your own storefront on your blog, a dedicated marketplace is often the fastest path to your first sale. By listing your products on the TrekGuider marketplace, you tap into a pre-existing audience of passionate travelers actively looking for resources. Our platform provides you with the tools to not only sell your digital guides and itineraries but also to publish your own blog content, view detailed statistics on views and engagement, and directly influence your sales through an integrated ecosystem designed for travelpreneurs.
Creating high-value products like detailed travel itineraries is a proven, winning model. To streamline this process, you can start with , which allows you to create professional, shareable plans your audience will love.
The potential here is limitless, and it is where you will build real, lasting, life-changing wealth.
Building an Email List: Your Most Valuable Asset
If your blog is your public storefront, your email list is your private VIP lounge. It is the single most valuable, durable, and critical asset in your entire business, for one simple reason: you own it. For a deep dive, explore our guide on .
Your Google rankings can fluctuate overnight. Instagram could shut down tomorrow. Facebook's algorithm is a black box. But your email list is a direct, unfiltered line of communication to your most loyal fans, and it is immune to the whims of algorithms.
It is the primary sales channel for launching your digital products and the ultimate tool for building a durable, long-term business.

Start building your list from day one—long before you have something to sell. Don't just put a "subscribe here" box in your footer. Offer a simple, valuable, and irresistible "lead magnet"—a freebie in exchange for an email address. This could be a one-page packing checklist like our , a 5-page PDF guide to the "Top 10 Mistakes to Avoid," or a simple spreadsheet template.
Nurture that list by sending regular, value-packed newsletters. Then, when it comes time to launch your e-book or course, you will have a warm, engaged audience of true fans who are ready and eager to buy from you. If you need help getting started, read our guide on How to Choose the Best Email Marketing Platform.
This three-phase plan is the exact blueprint for building a real business. But what does that business actually look like on a bank statement? Let’s pull back the curtain and talk about the numbers.
Financial Realities: A Data-Backed Look at Income & Timelines
It is absolutely crucial to have realistic expectations. Travel blogging is a marathon, not a sprint. The internet is littered with the ghosts of blogs started by people who expected to be earning thousands within a few months and quit when reality hit.
Profitability is a slow, steady climb built on relentless consistency. The numbers below are aggregated from dozens of public travel blog income reports to give you a realistic, no-fluff picture of what the journey often looks like when you follow this business plan.

These figures are not guarantees. They are a reflection of what is possible with a strategic, patient, and business-minded approach. Many bloggers never reach these numbers because they quit too soon, focus on the wrong things (like Instagram likes), or treat their blog like a diary instead of an asset. By following this plan, you put yourself on the path to joining the successful minority.
Frequently Asked Questions (FAQ Section)

How much do top travel bloggers make?
The most successful travel bloggers operate as full-blown media companies and can earn anywhere from $20,000 to over $100,000 per month. These figures are the result of 5-10+ years of work. Their income is highly diversified, coming from premium ads, a complex web of affiliate partnerships, a suite of their own digital products and courses, high-level brand ambassador deals, and sometimes even their own curated group tours. They have successfully transitioned from being "bloggers" to being brand CEOs.
Can you start a travel blog with no money?
While you can technically start on a free platform, it is a strategic dead end if your goal is to make serious money. As outlined in Phase 1, the minimum viable setup (domain and hosting) costs less than $100 for the entire first year. The question of how to become a travel blogger with no money is better framed as a lean startup. The most significant investment by far is your "sweat equity"—the hundreds of hours you will pour into creating exceptional content. If the initial $100 is a barrier, your first business goal should be to save that amount.
Is travel blogging dead or too saturated in 2026?
No, but the bar for entry is much higher. The era of the generalist "look at my cool life" travel diary is definitively over. The market is saturated with mediocrity, but there is more opportunity than ever for true experts who serve a specific niche. Readers and Google alike are rewarding authentic, deep, experience-based content over generic, AI-generated listicles. So, is travel blogging profitable in 2026? The answer is a resounding yes—for those who treat it like a business and commit to becoming the most helpful resource for a specific audience.
You have the business plan. Now it's time to get the tools to execute it.
The TrekGuider marketplace is built for this journey. Here, you can not only sell your digital products but also publish your own blog, track your stats, and grow your audience. To get started, download , a curated collection of 34 essential apps and resources designed to help you build your travel blog faster and smarter. For a complete A-to-Z resource on smarter travel, which will fuel your content for years, check out our .
Related Guides
- How to Make Money Blogging (From $0 to $10k/mo)
- How to Create a Digital Travel Guide People Will Buy
- 7 Digital Products That Sell Themselves for Travelers
- How to Make Money Online: A Creator's Guide for 2026
- Top 10 Travel Affiliate Programs for 2026
- 6 Proven Models to Make Money Online Blogging
- 5 Passive Income Ideas for Your Travel Blog
- Email Marketing for Bloggers: A Step-by-Step Playbook
- How to Start a Travel Blog (And Get Noticed)
- 15 Travel Blog Niche Ideas with Low Competition
Don't Miss Out! Subscribe for Exclusive Content
Subscribe


Comments 0
No comments yet
Be the first to share your experience!
Dont Miss Out! Subscribe for Exclusive Content

FTC Affiliate Disclosure Essentials: Stay Compliant as a Travel Creator

Essential Affiliate Tools: From Tracking to Full Optimization

Avoid These 5 Affiliate Landing Page Mistakes for Better Conversions

Affiliate Keyword Research Mastery for Travel Blogs

Booking.com Affiliate Program Review: Pros, Cons, and Earnings Potential

Decoding Affiliate Commission Rates: Benchmarks for Travel Creators
Jazz Fest: Ultimate Lineup Planner
TrekGuider @trekguider
The New Orleans Jazz & Heritage Festival is a titan of American culture, a sprawling, soulful celebration that transforms the Fair Grounds Race Course into the center of the musical universe. But with that iconic status comes an overwhelming challenge: with a dozen stages, hundreds of artists, and a menu of Louisiana’s finest cuisine that could take a lifetime to explore, how do you possibly see and taste it all? You’ve spent months dreaming of this, only to be handed a schedule so dense it feels impossible to crack.
Imagine the sinking feeling of hearing the distant roar of the crowd for a legend’s set while you’re stuck on the opposite side of the infield. You spend your day battling a sea of people, crisscrossing the grounds under a hot sun, only to miss the first three songs of a band you were dying to see. The fear of missing out becomes a tangible stress, turning a dream trip into a frantic race against the clock. Without a rock-solid strategy, you risk experiencing only a fraction of what this incredible event offers, leaving with a nagging regret over the missed bands and uneaten crawfish bread.
Forget the festival FOMO. This is your playbook for conquering the controlled chaos of the Fair Grounds, turning a dizzying schedule into a masterclass of music, food, and soul. We will break down everything you need to build a flawless plan, navigate the grounds like a local, and balance the world-class music with the equally legendary food. This is the ultimate lineup planner for Jazz Fest New Orleans, designed to ensure your time is spent soaking in the magic, not getting stuck in the mud.

Before You Go: Pre-Festival Prep for the Savvy Planner
A masterful Jazz Fest experience begins long before you step through the gates. The sheer scale of the event, which roars to life from April 24 to early May, demands a thoughtful approach. Smart preparation is the secret that separates the overwhelmed amateur from the festival pro who glides effortlessly from stage to stage. This is your foundational work, where you turn the festival’s massive schedule from an intimidating document into a personalized roadmap. As one of the crown jewels we celebrate in our definitive guide to New Orleans Holidays: Cultural Feasts, Jazz Fest is a cultural pilgrimage that richly rewards those who arrive with a plan.
Decoding the "Cubes": Your First Step to Lineup Mastery
In the lexicon of Jazz Fest veterans, the daily performance schedules are simply "the cubes." This grid-style layout is your bible, detailing who is playing where and when. Your first mission is to become fluent in its language.
Download the Official App: Weeks before the festival, the official New Orleans Jazz & Heritage Festival app becomes the most important app on your phone. Download it the moment it’s released. This digital tool contains the full "cubes," an interactive map, vendor lists, and, most critically, the ability to build your own personalized schedule.
Study the Grounds: Before you start picking artists, spend time with the festival map. Get a feel for the locations of the major stages—like the Festival Stage and the Gentilly Stage where headliners hold court—and the more intimate tents, such as the legendary Gospel Tent, the Blues Tent, and the Jazz Tent. Understanding the physical distance between stages is the key to realistic planning.
Star Your Favorites: Go through the lineup day by day and start "starring" or "favoriting" every single act that piques your interest. Don't hold back; this is your master list of possibilities. This year’s lineup already boasts a staggering collection of headliners like Pearl Jam, Dave Matthews Band, Luke Combs, and Lil Wayne & The Roots, so your list of must-sees will fill up fast.
Assembling Your Tiers: From "Must-See" to "Happy Accident"
With your initial list of favorited artists, it's time to get strategic. Set times will inevitably clash. The key is to prioritize ruthlessly.
Tier 1: The Non-Negotiables: Identify the 3-4 artists each day that you absolutely, positively cannot miss. These are your anchors, the pillars around which the rest of your day will be built.
Tier 2: The High-Interest Acts: These are the performers you’d be thrilled to see. If their set times and locations work conveniently around your Tier 1 picks, you’ll make every effort to be there.
Tier 3: The Serendipity List: This is your list for discovery. It’s filled with intriguing local brass bands, up-and-coming songwriters, or genres you’re curious about. These are the acts you’ll check out when you have a gap in your schedule. The true magic of Jazz Fest often lies in stumbling upon an incredible performance you never planned to see.

Essential Gear for a Full Day at the Fair Grounds
The festival is a marathon, not a sprint. It runs from 11 AM to 7 PM daily and proceeds "rain or shine," so you need to be prepared for anything a Louisiana spring day can throw at you.
Sun Protection: A wide-brimmed hat, sweatproof sunscreen, and sunglasses are non-negotiable. Shade is a precious and rare commodity.
Footwear: You will walk miles on uneven terrain that can turn to mud in an instant. Comfortable, broken-in, waterproof boots are your best bet.
Rain Gear: A lightweight poncho is a must. A classic New Orleans downpour can appear out of nowhere, and a simple poncho can save your day.
Hydration: Bring an empty reusable water bottle. Free water stations are located throughout the grounds, and staying hydrated is critical.
A Small Blanket or Chair: A small, foldable festival chair or a compact blanket gives you a home base at a stage and a chance to get off your feet. Always check the official festival website for the latest rules on chair sizes.
Navigating the Stages: A Pro's Guide to the Jazz Fest New Orleans Landscape
Once you’re on the grounds, a new challenge emerges: moving efficiently through a temporary city of music lovers. The space is vast, the crowds are thick, and every minute spent fighting a human traffic jam is a minute of music lost. Mastering the art of movement is what separates the pros from the rookies.

The Art of Stage Hopping: The Perimeter Strategy
The single most effective technique for navigating between stages is to avoid the center. The natural instinct is to cut directly through the middle of the crowd, but this is almost always the slowest and most frustrating path.
Instead, adopt the perimeter strategy. When you need to move, walk to the outer edge of the crowd and use the less-congested pathways along the racetrack, food vendor areas, and craft marketplaces. It may look like a longer route on the map, but you will move significantly faster. This method is your secret weapon for making it from the Gospel Tent to the Gentilly Stage in record time.
Understanding the Vibe of Each Major Stage Area
While the lineup is diverse everywhere, different stages at Jazz Fest New Orleans cultivate their own unique atmospheres. Knowing these vibes helps you plan not just your schedule, but your energy.
The Main Stages (Festival Stage & Gentilly Stage): These are the epicenters for the big-name headliners. Expect massive crowds, high energy, and a classic large-scale concert feel. If you want to be close, you need to camp out hours in advance.
The Tents (Gospel, Blues, Jazz): The tents offer a more intimate and often more intense musical experience. The Gospel Tent is legendary for its powerful, soul-stirring performances. The Blues and Jazz tents are where you’ll find virtuoso musicians in a focused, respectful listening environment. They also provide crucial shade.
The Cultural Stages (Fais Do-Do, Jazz & Heritage): These stages are the heart of the festival's "heritage" mission, showcasing the rich sounds of Louisiana, from Cajun and Zydeco to Mardi Gras Indians. The vibe here is pure, joyful, and deeply authentic.
Pro-Tip: Use the official festival app to set alerts for your must-see artists 15 minutes before their set time. This gives you a travel-time buffer to move from one stage to another using the perimeter strategy without feeling rushed.
More Than Music: Planning Your Culinary and Cultural Itinerary
To treat Jazz Fest as only a music festival is to miss half the point. It is, without exaggeration, one of the greatest food festivals on the planet. Furthermore, the craft areas showcase the incredible artistry of the region. A truly ultimate lineup plan integrates these cultural pillars into your day.

The "Food Fest" Within the Jazz Fest: Don't Miss These Bites
The food booths at Jazz Fest are a headline attraction. Planning your meals is just as important as planning your music.
Eat at Off-Peak Times: The food lines are longest between noon and 2 PM. Plan to eat an early lunch right when the gates open or a later one after 3 PM to minimize your wait.
Divide and Conquer: If you’re with a group, send one person for drinks while others wait in different food lines for Crawfish Monica, Mango Freeze, or Alligator Sausage. Reconvene and share your haul to sample more of the legends.
The vibrant colors of the food, the elaborate costumes, and the soulful expressions of the musicians are all begging to be photographed. To make your festival shots pop, download our Free Travel Lightroom Presets. They are expertly designed to enhance the unique light and color palette of a New Orleans celebration.
Exploring the Heritage Crafts: A Mid-Day Music Break
Jazz Fest features three distinct craft marketplaces: Congo Square African Marketplace, Contemporary Crafts, and the Louisiana Marketplace. When the sun is at its peak or you have a gap between sets, take a leisurely stroll through these areas. It’s a perfect way to rest your ears, cool down, and find a unique, handmade souvenir that truly represents the soul of the festival.
Advanced Strategies for the Ultimate Jazz Fest New Orleans Experience
You’ve prepped, you’ve planned, and you know how to navigate. Now it’s time for the pro-level strategies that will elevate your experience from great to unforgettable.
The "Rain or Shine" Reality: How to Prepare for Louisiana Weather
The festival’s "rain or shine" policy is serious. While stages may temporarily close for lightning, the event continues.
Protect Your Gear: Bring a waterproof bag or Ziploc bags for your phone and wallet. A wet phone can quickly ruin a day.
Embrace the Mud: If it rains, the Fair Grounds will become muddy. This is where your choice of waterproof footwear pays off. Lean into it.
Post-Rain Strategy: After a storm, the covered tents will be packed. This is a great time to head to an outdoor stage, as many people will be slow to leave the shelter, giving you a chance to get a better spot.

The Zero-Waste Warrior: Participating in Festival Sustainability
Jazz Fest is a massive event, and you can play a role in reducing its environmental impact. Look for the festival’s oyster shell recycling program, a fantastic initiative that helps rebuild coastal reefs. Use the designated recycling and compost bins, and always opt for refilling your water bottle over buying single-use plastic.
Pro-Tip: The last set of the day creates a massive exit rush. Consider leaving 15-20 minutes before the final song of the headliner you're watching to beat the crowds heading for the shuttles. That small head start can save you an hour of waiting in line.
Planning a trip to Jazz Fest is often the centerpiece of a larger New Orleans adventure. To make the most of your entire visit, from the French Quarter to the Garden District, our comprehensive Travel Guide provides expert-led itineraries and local secrets to help you build the perfect trip.

Your Blueprint for Jazz Fest Success
You are now armed with a complete strategic blueprint to not just attend the New Orleans Jazz & Heritage Festival, but to truly conquer it. By decoding the cubes, prioritizing your artist list, and mastering the perimeter strategy, you’ve eliminated the guesswork. By integrating the world-class food and crafts into your plan, you’ve ensured a rich experience that captures the true spirit of this cultural institution. You are ready to move with purpose, eat with gusto, and immerse yourself in the unparalleled soundscape of the incredible Jazz Fest New Orleans.
Meta Data Suggestions:
SEO Meta Title: Jazz Fest New Orleans: The Ultimate Lineup & Stage Planner
URL Slug: /jazz-fest-new-orleans-lineup-planner
SEO Meta Description: Conquer Jazz Fest 2026 with our ultimate planner. Get pro tips on navigating stages, scheduling artists like Pearl Jam, and finding the best food.
Don't Miss Out! Subscribe for Exclusive Content
SubscribeComments 0
No comments yet
Be the first to share your experience!
Dont Miss Out! Subscribe for Exclusive Content

San Francisco Cherry Blossoms: A Local's Guide to the Blooms

Halloween SF: Haunts Without Horrors

SF Festivals: 7 Must-See Lineups

Christmas SF: Lights & Wharf Wonders

SF Pride: 6 Route & Party Hacks

Chinese New Year SF: Parade Essentials
The 7 Solo Female Travel Safety Rules You Can't Ignore
TrekGuider @trekguider
You feel the magnetic pull of the world, a deep-seated desire to explore ancient cities, wander through breathtaking landscapes, and discover it all on your own terms. The dream of solo travel is vibrant and powerful. But for so many women, that dream is shadowed by a persistent and paralyzing question: "But will I be safe?"
This isn't just a fleeting thought; it's a formidable barrier. It’s a shared, valid concern that echoes across the travel community. A staggering 66% of women who travel solo report worrying about their personal safety, and for the 59% of women who have yet to start their first independent journey, these concerns are the second-largest obstacle holding them back. The fear is real, and it is robbing you of what could be the most transformative experience of your life. But what if you could systematically dismantle that fear, replacing it with an unshakable foundation of competence?
This guide is your tactical blueprint to do exactly that. We are moving beyond vague reassurances and diving into the essential, non-negotiable rules of solo female travel safety. This isn't about seeing the world through a lens of paranoia; it's about equipping yourself with the knowledge to navigate it intelligently. For a complete overview of the journey, start with our comprehensive pillar guide, The Ultimate Guide to Solo Female Travel (15 Essential Tips). These seven rules, however, are the bedrock—the field-tested strategies that will transform you from a worrier into a prepared and confident global explorer.
Rule 1: Build a "Lifeline Home" Before You Leave
The single most important phase of your safety strategy happens before you ever pack a bag. Creating a strong communication and information bridge between you and a trusted emergency contact back home is non-negotiable. This "mission control" is your ultimate safety net, ensuring that if you are ever unreachable, someone you trust has every critical detail needed to help.
Your "lifeline" packet should be a comprehensive dossier containing both physical and digital copies of the following, based on recommendations from the U.S. Department of State:
A Complete Itinerary: Detail your trip on a day-by-day basis, including flight numbers, train schedules, and the names, addresses, and phone numbers of all booked accommodations.
Copies of All Important Documents: Include the photo page of your passport, any necessary visas, your driver's license, and a full copy of your travel insurance policy, complete with the policy number and the 24/7 emergency assistance phone number.
Financial Information: Provide photocopies of the front and back of every credit and debit card you are carrying. The international toll-free numbers on the back are essential for canceling them if they are lost or stolen.
A Pre-Arranged Communication Plan: Establish a clear plan for when you will check in (e.g., a quick text upon arrival in a new city). Crucially, agree on a protocol for what your contact should do if you miss a check-in (e.g., wait 12 hours, then contact your hotel, then contact the nearest embassy).

Pro-Tip: The single most effective safety action you can take in under five minutes is to enroll your trip with the U.S. Department of State’s free Smart Traveler Enrollment Program (STEP). This provides the nearest U.S. Embassy or Consulate with your itinerary, creating a three-way digital bridge connecting you, your emergency contact, and the State Department for a coordinated response in a worst-case scenario.
Rule 2: Master Your Sanctuary with an Unbreakable Arrival Protocol
Think of your accommodation as more than just a place to sleep. It’s your secure base of operations, your private sanctuary to rest and recharge. Ensuring its integrity from the moment you arrive is a critical habit that provides profound peace of mind. Adopt this methodical security check and perform it automatically every single time you enter a new room.
Prop the Door Open. Before you fully enter, use your main piece of luggage to prop the door open. This simple action prevents the door from closing and locking behind you, guaranteeing an immediate escape route should the room not be empty.
Conduct a Full Room Sweep. With the door still open, perform a quick but thorough physical search. Check under the bed, behind all curtains, inside closets, and in the bathroom, including behind the shower curtain.
Verify All Locks. Once the room is confirmed to be empty, close the door and immediately test all locking mechanisms. Engage the deadbolt, chain lock, or security latch. Go to every window and any balcony doors to ensure they lock securely.
Deploy Your Personal Security. Your own devices provide a layer of protection entirely within your control. Immediately place a rubber wedge doorstop alarm under the main door or install a portable door lock like an Addalock. These inexpensive, lightweight devices are highly effective at preventing unauthorized entry, even from someone with a key card.
Locate and Map Emergency Exits. Find the fire exit map on the back of the door. Identify the two nearest exits, then physically walk the route to each one, counting the doors you pass. This mental map is invaluable for navigating in darkness or smoke.
Perform a Hidden Camera Scan. In an age of miniaturized electronics, a quick scan for hidden cameras is a prudent measure. Use your phone's flashlight to look for the tell-tale glint of a tiny lens in unexpected places like smoke detectors, alarm clocks, and USB wall chargers. In the dark, use your phone's front-facing camera (which is more sensitive to infrared light) to scan the space. Look for the small, often blinking, IR lights used by night-vision cameras that are invisible to the naked eye.
Adopt a "Verify, Then Open" Door Policy. Make it your strict policy to never open your door to an unsolicited knock. If someone claims to be from housekeeping, call the front desk using the room phone to verify they sent a staff member to your room.

YOUR ULTIMATE SAFETY TOOLKIT
Mastering your environment is the first step to confident travel. True preparedness means having the right tools for every situation. Our free, downloadable Solo Female Travel Safety Guide is the perfect companion to these rules. It's a comprehensive checklist and resource guide covering everything from what to pack to what to do in an emergency.
Rule 3: Take Absolute Control of Your Ground Transportation
Moving through an unfamiliar city can be a point of high vulnerability. Whether you’re using a ride-sharing app or a local taxi, you must shift from being a passive passenger to an active participant in your own safety. Adhere to this strict set of protocols for every single ride.
The "Match, Name, Share" Protocol for Ride-Shares
Match: Before you get in, carefully match the vehicle's make, model, and license plate number with the information in the app. Check that the driver's appearance matches their profile photo. If anything is off, do not get in the car.
Name: This is a critical verification step. Do not approach a vehicle and ask, "Are you here for Jane?" This gives a potential imposter the information they need. Instead, from a safe position on the curb, ask the driver, "Who are you here for?" A legitimate driver will be able to state your name correctly.
Share: Before your ride begins, use the app's built-in "Share Trip Status" feature. This sends a live map of your journey to a trusted contact, allowing them to track your progress in real-time.
Universal Rules for Every Ride
The Backseat Protocol: As a solo traveler, always sit in the back seat on the side opposite the driver. This creates crucial physical distance and gives you access to two separate exits.
The Route Protocol: Keep your own mapping application, like Google Maps, open on your phone throughout the journey. If the driver takes a significant, unexplained detour, you are empowered to question it. If the response makes you uncomfortable, end the ride in a safe, well-lit public area.

Rule 4: Create Layers of Personal and Digital Security
Your solo female travel safety strategy should be built on layers and redundancy. This means pairing smart practices with an effective toolkit of personal security devices and ensuring your digital lifelines are always active.
Your Personal Security Toolkit
Personal Safety Alarm: This is arguably the most valuable device for a solo traveler. An alarm like the She's Birdie emits an extremely loud siren (130+ decibels) and a flashing strobe light to startle an attacker and attract immediate attention. They are small, legal everywhere, and attach to a keychain for instant access.
Anti-Theft Bag: Invest in a bag with features like RFID-blocking pockets (to protect from electronic skimming), slash-proof fabric, and lockable zippers. A crossbody style worn in front of your body offers the most security.
Portable Door Lock / Alarm: As mentioned in Rule 2, carrying your own lock gives you absolute control over the security of your room, ensuring your sanctuary remains impenetrable.

Your Digital Security Layer
Your phone is your map, translator, and lifeline. A solar-powered power bank adds a critical layer of resilience to a standard one, ensuring you can maintain a charge even during power outages or on multi-day treks.
Rule 5: Project Confidence and Practice Proactive Situational Awareness
How you carry yourself has a profound impact on how you are perceived. Projecting confidence—even when you're feeling uncertain—is a powerful deterrent. Walk with purpose, keep your head up, and make brief eye contact. This signals that you are aware of your surroundings, not an easy target.
This confidence is fueled by situational awareness. It's not about being paranoid; it's about being present.
Understand the Local Landscape: Before arriving, research common tourist scams. A 2024 report noted that 29% of solo female travelers had experienced a theft or attempted scam. Knowing the playbook for ploys like the "friendship bracelet" or "spilled drink" allows you to disengage before you become a victim.
Trust Your Intuition: Your intuition is your most finely tuned security equipment. If a person, place, or situation feels "off," it probably is. You do not need a logical reason. Honor it. Cross the street, leave the bar, get in a different train car. Acting on your intuition is not rude; it is intelligent.
Manage Your Inputs: Be mindful of your alcohol consumption. Your awareness is your primary defense, and anything that dulls it increases your vulnerability.

Rule 6: Embrace That Safety Anxiety Decreases with Experience
It's crucial to understand the psychology of solo travel fear. The data reveals a powerful truth: the act of traveling solo is the most effective antidote to the fear of it.
Among women who have taken fewer than six solo trips, 77% report worrying about safety. That number drops dramatically to just 55% for those who have traveled solo more than ten times. This establishes a direct, negative correlation between experience and anxiety.

Every time you successfully navigate a new city and overcome a challenge, you are collecting real-world evidence of your own competence. This direct experience systematically replaces abstract, media-fueled fear with managed, situational awareness. You learn that while vigilance is essential, you are far more capable than you imagined. The goal of your first trip is to break this cycle of fear and begin the empowering loop of experience.
Rule 7: Never Outsource Your Safety to Chance—The Travel Insurance Mandate
For a solo traveler, travel insurance isn't an optional add-on; it is a foundational pillar of your financial security. A cheap policy is not a good deal if it doesn't have the right coverage. When evaluating policies, ensure the plan includes strong coverage in these key areas:
Emergency Medical Coverage: A policy should offer a minimum of $250,000 in benefits.
Emergency Medical Evacuation: This covers the potentially astronomical cost of transporting you to a hospital with adequate facilities or back home.
Emergency Medical Reunion (Companion Coverage): This is vital for solo travelers. If you are hospitalized, this coverage pays for a family member's transportation and accommodation to be at your bedside, providing invaluable logistical and emotional support.
Trip Interruption and Cancellation: This reimburses your non-refundable trip costs if you have to cancel or cut your trip short for a covered reason.
Frequently Asked Questions About Solo Female Travel Safety
What's the single most important safety device I should buy?
A personal safety alarm. While a doorstop and anti-theft bag are excellent, a loud, attention-grabbing alarm is the most versatile tool for deterring a potential threat in any public situation, day or night.
I'm nervous about nightlife. Should I just avoid going out after dark?
Not at all! The key is to be strategic. Have your transportation planned in advance—know exactly how you're getting home. Nurse your drink and never leave it unattended. Stick to well-lit, reputable areas and consider starting with a structured activity, like a group tour or a show, rather than just wandering.
How do I handle street harassment without escalating the situation?
The most effective strategy is confident disengagement. Do not respond or make prolonged eye contact. Project purpose and keep walking. In many cases, a reaction is what the harasser is seeking. If you feel you are being followed, walk into a busy, open shop or restaurant immediately.
Are group tours a good option for a safety-conscious first-timer?
Absolutely. An estimated 75% of women who have never traveled alone would be more likely to do so on a group tour. They provide a "scaffolded" entry into the world of solo travel. You can find tours vetted and reviewed by other solo female travelers on platforms like TrekGuider, which is a great way to build foundational confidence.
Your Journey to Confident Exploration Starts Now
The narrative around solo female travel safety is too often dominated by fear. But the data tells a different, more empowering story of capability and resilience. These seven rules are your framework—a practical system for managing risk and moving through the world with intelligent confidence. By internalizing these strategies, you build a foundation of competence from which you can freely and bravely explore.
Now that you have the safety blueprint, the truly exciting part can begin. Explore our collection of expert-written Travel Guide resources to find your perfect destination, and remember to download the essential Solo Female Travel Safety Guide. The world is waiting for you to discover it—and yourself.
Meta Data Suggestions:
SEO Meta Title (59 characters): The 7 Essential Solo Female Travel Safety Rules for 2026
URL Slug: solo-female-travel-safety-rules
SEO Meta Description (154 characters): From accommodation security to transport protocols, these 7 non-negotiable solo female travel safety rules will empower you to explore the world with confidence.
Don't Miss Out! Subscribe for Exclusive Content
SubscribeComments 0
No comments yet
Be the first to share your experience!
Dont Miss Out! Subscribe for Exclusive Content

How to Avoid Travel Scams: A Global Guide

Is Public WiFi Safe? How to Protect Your Data Abroad

A Woman's Guide to Safe Travel: 10 Critical Tips

7 Hotel Safety & Security Tips for Peace of Mind

9 Beach Safety Tips That Could Save Your Life
