July 4th NYC: Best Fireworks Views
TrekGuider @trekguider
Trying to see the Macy's 4th of July fireworks in New York City can feel like plotting a military campaign. You know it’s one of the most spectacular patriotic displays on the planet, a dazzling barrage of color and sound against the world’s most famous skyline. But the thought of navigating the colossal crowds, deciphering the cryptic official viewing spots, and battling for a sliver of sidewalk with a view of a brick wall is enough to trigger a full-blown anxiety attack.
You’re haunted by visions of being pinned for hours in a human gridlock, craning your neck to see absolutely nothing, with no access to a restroom or a bottle of water. What if you spend all day planning, only to find your chosen spot has been unceremoniously cordoned off by the NYPD? The dream of a magical Independence Day quickly sours into a logistical nightmare, leaving you sweating on a crowded street corner wondering why you didn't just stay home and watch it on TV.
Forget the chaos. This is your definitive battle plan for conquering the crowds and securing a breathtaking view. We’ve distilled the official intel and insider secrets into a foolproof strategy. Whether you want a free patch of grass with a picnic or a more civilized vantage point, this guide will equip you for an unforgettable Fourth of July in New York.

Understanding the Main Event: The Macy's Fireworks Spectacular
Let’s be clear about the sheer scale of this operation. The Macy's 4th of July Fireworks isn't just a show; it's the nation's largest pyrotechnic spectacle, a city-shaking tradition that paints the skyline with thousands of carefully choreographed shells launched from barges on the water. For Friday, July 4, 2026, the show continues its reign on the East River, meaning the most coveted views will be found along the waterfronts of Brooklyn, Queens, and Manhattan.
This isn't a casual affair where you can wander up a few minutes before showtime. It's a massive, city-wide celebration that demands a solid game plan. While the fireworks are an undisputed summer highlight, they're just one piece of the city's vibrant celebratory calendar, which we cover in our definitive guide to New York Holidays: 10 Must-Do Events. Thinking about your trip through this lens—as one epic event among many—is the key to unlocking a truly memorable visit.
The Best Free Viewing Spots for the Fourth of July in New York
Securing a great free spot is the holy grail for most spectators. It requires a healthy dose of patience and impeccable timing, but the reward is a front-row seat to history without spending a dime. The secret is knowing precisely where to go and, just as critically, which tourist traps to avoid.
Brooklyn's Cinematic Waterfront Views
For years, the Brooklyn waterfront has offered the most cinematic views of the fireworks, framing the pyrotechnics against the iconic Manhattan skyline. This is where you go for the postcard shot.
Transmitter Park (Greenpoint): Consistently hailed as a top-tier viewing location, this park offers a direct, jaw-droppingly clear sightline across the East River. Its open, grassy layout is a godsend, providing more room to spread out a blanket than the narrow promenades elsewhere. But its reputation precedes it. To claim a decent piece of turf, you must arrive by 6 PM at the absolute latest.
Domino Park (Williamsburg): With its clever multi-level design, reclaimed factory artifacts, and ample seating, Domino Park is a phenomenal—and popular—option. The elevated walkway provides a unique perspective, and the park's modern amenities (hello, clean restrooms!) make the long wait far more civilized.
East River State Park (Williamsburg): Just a short walk from Domino Park, this location offers a more traditional park experience with a sprawling grassy lawn. It’s a magnet for families and larger groups looking to set up a proper picnic and make a full day of it.
Manhattan's Official Front Lines (and What to Expect)
Manhattan offers official, NYPD-managed viewing points that get you incredibly close to the action. However, this proximity comes at the cost of the highest crowd density and the tightest security.
Official Access Points: The city announces these designated entry points a few days before the event, typically along the FDR Drive in the East Village, Murray Hill, and Midtown East. Check the official Macy's or NYC websites on the day of the event for the exact cross-streets.
The No-Go Zones: Heed the official warnings. The city explicitly advises spectators to avoid FDR Drive in Midtown, Battery Park, and the Brooklyn Heights Promenade. These areas will either be completely closed to the public or offer severely obstructed views. Don't be the tourist who wastes hours trekking to a dead end.
Queens: The Savvy Spectator's Choice
Often overlooked by the masses flocking to Brooklyn, the Queens waterfront in Long Island City provides views that are every bit as stunning, but often with slightly more breathing room.
Gantry Plaza State Park: This park is a true gem, famous for its iconic Pepsi-Cola sign and beautifully restored waterfront gantries. It offers a sweeping panorama of the Midtown skyline, which serves as the ultimate canvas for the fireworks display.
Hunter's Point South Park: Located just south of Gantry Plaza, this park boasts a vast, open green space perfect for laying down a blanket. It’s an excellent alternative for those looking to escape the most intense choke points in Manhattan and Brooklyn.

Pro-Level Strategy: Navigating Security and Human Gridlock
Experiencing the Fourth of July in New York is as much about logistical prowess as it is about patriotic fervor. This is not a casual security checkpoint. The NYPD's presence is comprehensive, involving everything from drones providing aerial surveillance and metal detectors at entry points to NYPD scuba divers patrolling the river itself. This isn't to intimidate, but to ensure a safe event for millions.
Your Arrival and Entry Checklist
Embrace the Early Bird Ethos: We cannot overstate this. For prime real estate like Transmitter Park, a 6 PM arrival is the bare minimum. For the official Manhattan zones, dedicated viewers begin lining up in the early afternoon. The later you arrive, the more likely you are to be watching the back of someone's head.
Pack Like a Pro: You will be on your feet or sitting on the ground for hours. Comfort matters most, but you also need to breeze through security. Large backpacks, coolers, alcohol, and lawn chairs are almost always prohibited. Knowing what to bring—and what to leave behind—is crucial. Our How to Pack Light Guide offers brilliant strategies for carrying just the essentials, a skill that's just as valuable for a day in the city as it is for a week-long trip.
Trust but Verify (Your Sources): On July 4th, follow the NYPD and Macy's on social media or refresh their websites. Viewing points can and do change or close without notice based on crowd capacity. A quick check before you head out can save you from a massive, frustrating detour.
The Buddy System is Non-Negotiable: In crowds of this magnitude, getting separated is incredibly easy. Establish a clear, unambiguous meeting point in advance (e.g., "the corner of X and Y," not "by the hot dog stand"). Keep your phones fully charged, and consider sharing your location with your group via a mapping app.
Pro-Tip: Public transportation is your only sane option. Do not even entertain the idea of driving. Street closures begin in the early afternoon, and parking is a fantasy. The subway is the most efficient way to get close to the action, but expect platforms and train cars to be packed to capacity. Plan your route, buy your MetroCard in advance, and budget at least double the normal travel time.

Beyond the Fireworks: Mastering the All-American Picnic
The fireworks are the grand finale, but Independence Day is an all-day affair. A classic American picnic is the perfect way to spend the afternoon, soaking in the city's festive energy in a more relaxed setting before diving into the waterfront fray.
Prime Picnic Parks (Well Away from the Fireworks Chaos)
Central Park: It’s the quintessential NYC experience for a reason. Head to the vast Sheep Meadow or the Great Lawn, find a spot under a tree, and enjoy the people-watching. You won't see the main fireworks from here, but it’s the perfect stage for your pre-show festivities.
Prospect Park, Brooklyn: Often called Brooklyn's answer to Central Park, the Long Meadow in Prospect Park offers a similarly idyllic and expansive setting. It’s a favorite among locals and provides a more laid-back, community-focused vibe.
Governors Island: A quick and scenic ferry ride away, Governors Island is a true urban oasis. With its sprawling lawns, hammocks, and unparalleled views of the Statue of Liberty, it’s an ideal place to decompress for the day before heading back for the evening's main event.
Your Picnic Pack-Out List
The Spread: Stick to classics that travel well: gourmet sandwiches, cold fried chicken, pasta salads, and fresh fruit. Most importantly, bring more water than you think you'll need. Remember that alcohol is prohibited in public parks.
The Comfort Kit: A large, durable blanket is your foundation. Sunscreen, hats, and sunglasses are absolutely essential for a long day outdoors.
The Clean-Up Crew: Pack a dedicated trash bag and commit to the golden rule of picnicking: leave your spot cleaner than you found it.

Paid Options for a Crowd-Free Fourth of July in New York
If the idea of battling the masses for a patch of grass makes you want to run for the hills, several paid alternatives offer a more comfortable and exclusive experience. These options require booking far in advance and come at a premium, but for many, the guaranteed view and amenities are worth every penny.
Rooftop Bars and Viewing Parties
Many hotels and restaurants with prime real estate in Midtown East, Williamsburg, and Long Island City host ticketed fireworks viewing parties. These events typically include an open bar, food, and live music, all with an elevated, unobstructed view high above the street-level chaos. Expect tickets to start in the low hundreds and sell out weeks, if not months, ahead of time.
Fireworks Cruises on the East River
For a truly cinematic experience, watch the fireworks from the water itself. Numerous companies offer July 4th dinner cruises that place you directly on the East River, offering an unparalleled, up-close perspective of the show.
The Perks: You get a completely unobstructed view, dinner and drinks are often included, and you have access to clean, private restrooms—a luxury that cannot be overstated.
The Price: This is the most expensive option, with prices frequently ranging from $150 to over $500 per person. They are incredibly popular and must be booked months in advance.
Pro-Tip: When booking any ticketed event, do your due diligence. Scrutinize the venue's location on a map to confirm its viewing position relative to the fireworks barges. Search for reviews and photos from previous years' events to ensure the view is as spectacular as advertised. Not all "river views" are created equal.

Your Mission: An Unforgettable Independence Day
You are now armed with the strategy and insider intelligence to make your Fourth of July in New York a resounding success. The key is to decide on your desired experience—a free-for-all on the grass, a civilized seat at a rooftop bar, or a luxurious view from the water—and plan with precision. Arrive early, pack smart, and stay informed.
This is about more than just watching fireworks; it's about taking part in a quintessential American tradition in the most dynamic city on Earth. You're no longer a tourist hoping for a lucky break; you're an insider with a plan. Go forth, claim your spot, and create some dazzling memories. And when you're ready to plan your next great urban adventure, our comprehensive Travel Guide is packed with the expert resources you need to make every trip a masterpiece.
Don't Miss Out! Subscribe for Exclusive Content
Subscribe


Comments 0
No comments yet
Be the first to share your experience!
Dont Miss Out! Subscribe for Exclusive Content

San Francisco Cherry Blossoms: A Local's Guide to the Blooms

Halloween SF: Haunts Without Horrors

SF Festivals: 7 Must-See Lineups

Christmas SF: Lights & Wharf Wonders

SF Pride: 6 Route & Party Hacks

Chinese New Year SF: Parade Essentials
The Ultimate Solo Travel Packing List: A Modular Checklist
TrekGuider @trekguider
Staring at an empty suitcase can be overwhelming. This is not another generic article; this is your definitive, actionable solo travel packing list. It’s a methodical system designed to transform packing from a chore into an act of empowerment. We’ve built this checklist on a "Core + Modules" framework: a non-negotiable foundation of essentials, plus optional modules you can add for specific types of travel.
This tactical checklist is your "what." Before you dive into the specific items, we highly recommend reading our guide to to understand the minimalist systems and philosophy that make this list so powerful. Understanding the "why" will make packing the "what" intuitive and stress-free.
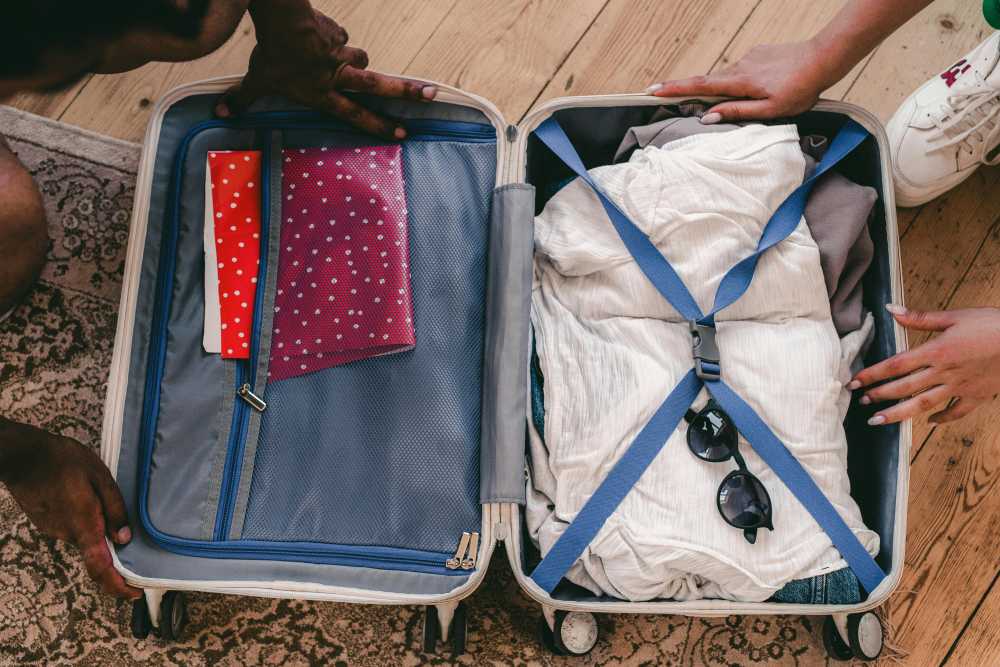
Your Core Essentials
Every trip, regardless of destination or duration, starts here. These are the non-negotiable items that form the base of any smart solo travel plan. Do not leave home without them.
Your Access to Everything
Your ability to move, transact, and prove your identity matters most. Build redundancy into your document strategy.
Passport/Visa: Check that your passport has at least six months of validity from your planned return date.
Digital & Physical Copies: Store a physical photocopy of your passport and driver's license in a separate bag from the originals. Keep high-quality photos of them in a secure cloud service (Google Drive, Dropbox) and in your email.
Travel Insurance Details: Carry a printed copy of your policy and save a PDF to your phone for offline access.
Multiple Bank Cards: Pack at least two different credit cards and one debit card. Store them in separate locations (e.g., one in your wallet, one in your daypack).
Emergency Cash: Hide $100-$200 USD deep within your main bag as a final safety net.
Bank Travel Notifications: Log into your banking apps and set a travel notice for your specific destinations and dates. This five-minute task prevents your accounts from being frozen for suspected fraud.
Your On-the-Go Wellness Kit
Stay healthy and comfortable on the road. The goal is a compact, leak-proof, and comprehensive kit.
Prescription Medications: Pack enough for your entire trip in their original, labeled containers. Bring a copy of the prescription itself.
Mini First-Aid Kit:
Pain relievers (Ibuprofen/Acetaminophen)
Assorted adhesive bandages
Antiseptic wipes
Blister treatment (e.g., Compeed)
Anti-diarrhea medication (e.g., Imodium)
Solid Toiletries: The ultimate packing hack. Eliminates liquid restrictions, prevents leaks, and lasts longer.
Solid shampoo bar
Solid conditioner bar
Solid soap bar
The Basics:
Toothbrush
Solid toothpaste tablets
Deodorant
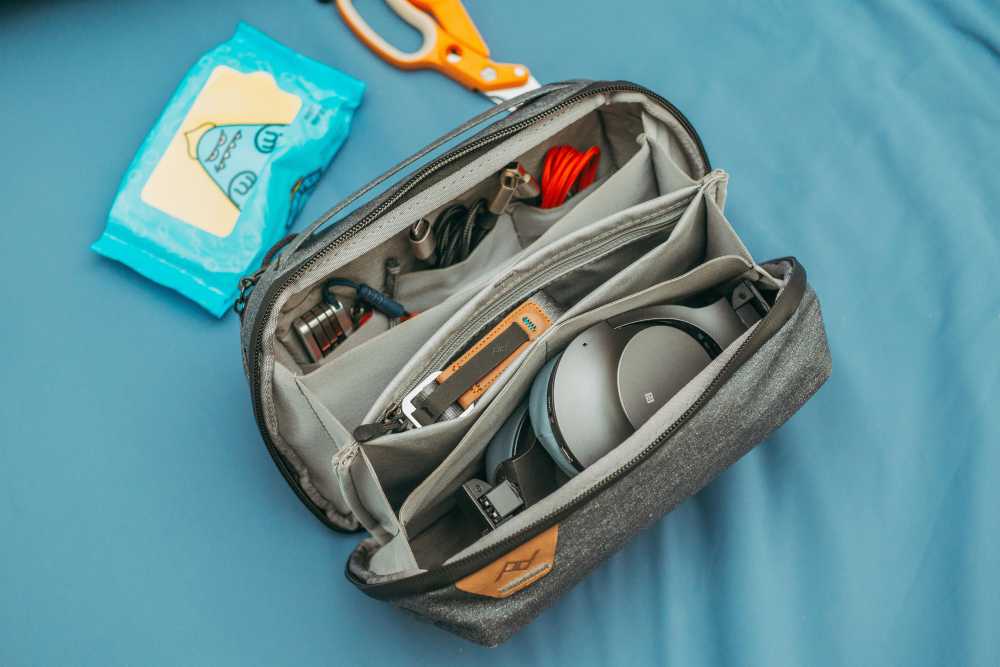
Your Digital Lifeline
Your smartphone is your navigator, translator, and connection to the world. Keeping it powered is mission-critical.
Smartphone: Your all-in-one command center. Download offline maps for your destination.
Portable Power Bank: A non-negotiable safety item. Choose a 10,000mAh+ model from a reliable brand like Anker to guarantee 2-3 full phone charges. Keep it charged.
Universal Power Adapter: Invest in one high-quality universal adapter with multiple USB ports. This allows you to charge all your devices from a single outlet.
Noise-Canceling Headphones: Essential for focus and peace on loud flights, trains, or in shared hostel rooms.

Essential Solo Travel Safety Gear
This module proactively addresses the "what-if" scenarios, allowing you to explore with confidence and sleep soundly. The gear here is your first line of defense, but true confidence comes from preparation. For a complete guide to situational awareness and navigating new environments securely, our comprehensive article, Anxious to Adventurous: Solo Travel Tips for Confidence, is required reading.

For Your Accommodation
Portable Door Lock (e.g., Addalock): A small, lightweight device that braces your door from the inside, making it impossible to open even with a key.
Door Stop Alarm: A wedge that slides under your door. If opened, it physically blocks the door while emitting a piercingly loud alarm.
For When You're Out & About
Anti-Theft Daypack (e.g., Pacsafe, Travelon): Choose a crossbody bag or backpack with slash-proof straps, lockable zippers, and RFID-blocking pockets.
Personal Safety Alarm: A keychain device that emits an ear-splitting siren and flashing strobe light to attract attention and disorient an attacker.
RFID-Blocking Wallet: Protects your passport and credit cards from electronic "skimming."
The 5-4-3-2-1 Formula
Pack less and wear more with a strategic, versatile wardrobe built on mix-and-match essentials. Choose a neutral color palette (black, gray, navy) for core items.
The 5-4-3-2-1 Formula (1-Week Framework)
5 Tops: Focus on wrinkle-resistant, odor-resistant fabrics. At least one should be merino wool—the ultimate travel fabric for temperature regulation and multi-day wear.
4 Bottoms: A typical mix includes one pair of comfortable travel pants, one pair of jeans or chinos, and one skirt or pair of shorts.
3 Accessories: A lightweight scarf or sarong is incredibly versatile (fashion, beach cover-up, towel, head covering).
2 Pairs of Shoes:
Pair 1: Supremely comfortable, broken-in walking shoes.
Pair 2: A versatile, slightly dressier option (flats, loafers, clean leather sneakers).
1 Jacket: A waterproof, windproof outer shell. Layer with a fleece or sweater for warmth as needed.
Climate Sub-Modules (Choose One)
Cold Climate Add-ons: One set of thermal base layers (top and bottom), a warm hat, gloves, and wool socks.
Tropical Climate Add-ons: A swimsuit, a quick-dry microfiber towel, a wide-brimmed sun hat, and sunglasses.
Digital Nomad's Checklist
This module is for anyone working on the road. It focuses on creating an efficient, ergonomic, and connected remote workstation.

Lightweight Laptop: An ultrabook (e.g., MacBook Air) offers the best balance of power and portability.
Portable Laptop Stand (e.g., Roost, Nexstand): The single best way to prevent neck and back pain.
Ergonomic Peripherals: A slim, portable keyboard (e.g., Logitech K380) and a portable mouse (e.g., Logitech MX Anywhere).
High-Quality Headphones with Mic: Essential for calls and focus in noisy environments.
eSIM: Use an app like Airalo to purchase and install a digital SIM card before you leave. Get connected the moment you land.
High-Capacity "PD" Power Bank: Ensure your power bank is "Power Delivery" rated and has enough capacity to charge your laptop, not just your phone.
What NOT to Pack
Knowing what to leave behind is as important as knowing what to bring.

Expensive or Sentimental Jewelry: Don't bring anything you would be devastated to lose.
Full-Sized Towel: Most accommodations provide them. If needed, a quick-dry travel towel is a superior option.
Multiple "Good" Outfits: Stick to versatile pieces that can be dressed up or down.
Physical Books: An e-reader provides an entire library at a fraction of the weight.
"Just in Case" Items: Unless you're traveling to a very remote location, you can buy most basic items at your destination.
Your Questions Answered
What should a solo female traveler add? Many add a versatile sarong (for modesty at religious sites), a silicone doorstop for extra security, and some opt for a fake wedding ring to deter unwanted attention.
How do I pack for a long-term trip in a carry-on? Commit to doing laundry. Pack one week's worth of clothing using the capsule method and plan to do laundry every 7-10 days.
What are the best shoes for solo travel? The ones you can walk in comfortably for 8+ hours. Never bring new, unbroken-in shoes on a trip.

By starting with the Core Essentials and adding modules tailored to your journey, you have now built the perfect solo travel packing list. This system eliminates guesswork, ensures you are prepared for your adventure, and empowers you to travel with the confidence of a pro.
Read the full guide: Anxious to Adventurous: The Ultimate Guide to Solo Travel Confidence
Don't Miss Out! Subscribe for Exclusive Content
SubscribeComments 0
No comments yet
Be the first to share your experience!
Dont Miss Out! Subscribe for Exclusive Content

Ultimate USA Holidays Guide: Top Picks

FTC Affiliate Disclosure Essentials: Stay Compliant as a Travel Creator

Essential Affiliate Tools: From Tracking to Full Optimization

Booking.com Affiliate Program Review: Pros, Cons, and Earnings Potential

Decoding Affiliate Commission Rates: Benchmarks for Travel Creators

Amazon Associates for Travel: Strategies to Maximize Commissions
How to Make Family Travel Planning Actually Easy
TrekGuider @trekguider
Staring down the logistics of a family vacation can feel less like an adventure and more like a high-stakes, unpaid second job. The dream of relaxing on a sun-drenched beach is often buried under an avalanche of budgets, schedules, and the wildly different demands of a toddler and a teen. If you’re feeling the pressure to create a perfect, frictionless experience, you’re not alone—the mental load is immense.

This constant juggling act leaves you feeling stressed before you’ve even packed a bag. But what if the planning process itself could be a seamless and satisfying part of the journey? You don't need a business degree to succeed—you just need the right playbook. This is that playbook. We’ve created a comprehensive guide that transforms a daunting task into a manageable process, clearing the path to the best Family Travel Ideas: The 2026 Guide to Unforgettable Trips.
The Strategic Blueprint (6+ Months Before Your Trip)
A truly relaxing vacation is built long before you ever pack a bag. The decisions you make in this early stage form a rock-solid foundation that prevents costly mistakes and eliminates last-minute panic. This is where you align expectations, define your financial reality, and get the core logistics in order.
Define Your Family's Travel Style
The most common mistake is choosing a trip that’s fundamentally mismatched with your family’s personality. A rustic camping trip will be a disaster for a family that craves resort amenities. Before you do anything else, take a moment for an honest assessment.
Ask yourselves:
Are we Relaxation-Oriented or Adventure-Seekers? Do we want to spend our days lounging by a pool, or are we happiest when hiking, biking, or exploring?
Do we prefer Structure or Spontaneity? Does a detailed itinerary make us feel secure, or does it feel restrictive?
Are we City Explorers or Nature Lovers? Do we draw energy from bustling streets and museums, or from quiet trails and scenic vistas?
What is our "Pace-Maturity"? Can our kids handle long days of sightseeing, or do we need to build in significant downtime and nap schedules?
Answering these questions creates a filter that immediately narrows down your options. It stops you from planning a trip you think you should want, and helps you focus on the one your family will actually enjoy. For more help with this crucial first step, see our guide on Best Family Vacations: How to Finally Pick the Right One.
Host a "Family Dream Session" to Get Everyone on Board
Getting buy-in from the entire crew early on is the secret to a harmonious trip. This turns "your" trip into "our" trip and builds collective excitement.
For younger kids: Frame choices in simple terms. "Would you rather build sandcastles at the beach or see really big animals at a national park?"
For older kids and teens: Give them genuine responsibility. Task them with researching and pitching two or three activity options for the trip.
Make it fun: Host a "dream session" over pizza with a map spread out on the table. Create a shared vision board on Pinterest where everyone can add images of what they'd like to see, do, and eat.
Craft a Realistic Vacation Budget That Works
Nothing kills the vacation buzz faster than money stress. A clear budget isn’t a restriction; it’s a powerful tool that makes decisions easier and eliminates worry.
Determine a Total Trip Number: Decide on a realistic, all-in amount you are comfortable spending. Work backward from this number.
Use the 50/30/20 Rule: Allocate your funds to provide structure.
50% for Core Costs: This covers the non-negotiables: flights/fuel and accommodations.
30% for Experiences: This is your budget for activities, tours, park tickets, and dining out.
20% for Contingency & Extras: This covers souvenirs and, crucially, a 10-15% buffer for the unexpected. This emergency fund is your key to a stress-free mindset.
Account for Hidden Costs: Don't forget easily overlooked expenses like airport parking, baggage fees, hotel resort fees, and travel insurance.
Automate Your Savings: Create a dedicated high-yield savings account for your trip (e.g., "Hawaii 2026") and set up automatic transfers. This makes the goal feel tangible and motivating.
Track Everything: Use a simple spreadsheet or a budgeting app to monitor your spending and ensure you stay on track.

Conduct a Critical Document Audit
This is the most time-sensitive task in this entire phase. Do not procrastinate.
Passports: Physically locate every passport and check the expiration date. Many countries require your passport to be valid for at least six months after your planned return date. If anyone’s is expiring within a year, start the renewal process now.
Visas: Do a quick search for visa requirements for your top destination choices.
Digital Backups: Take a photo of each passport's information page and save it to a secure cloud service like Google Drive or Dropbox. This can be a lifesaver.
For a comprehensive list of everything you might need for a trip abroad, our International Travel Checklist is an essential resource.
Locking in the Logistics (3-5 Months Before Your Trip)
With your destination direction clear and documents verified, it’s time to commit. This phase is about securing the key elements of your trip at the best possible prices. This is a key part of successful family travel planning.
Choose the Perfect Destination & Accommodations
Where you stay is more than just a place to sleep; it’s your command center.
Hotels vs. Vacation Rentals: Hotels offer amenities like pools and housekeeping. Vacation rentals (like Airbnb or Vrbo) provide invaluable assets like a full kitchen (critical for picky eaters), separate bedrooms (a lifesaver for different bedtimes), and a washing machine.
The Amenity Checklist: When booking, look for game-changing features like a kitchen, on-site laundry, and a pool or nearby playground for easy entertainment.
Pro-Tip: When traveling with infants, call the hotel directly to confirm the availability and condition of amenities like cribs. Don't rely solely on an online icon.
Secure Your Flights, Lodging, and Rental Car
The best family-friendly options get snatched up quickly, especially during school breaks.
Become a Flight Hawk: Use tools like Google Flights to set price alerts for your route. For international travel, the 2-3 month window is often the sweet spot.
Book Your Home Base: Lock in your preferred hotel or vacation rental now for the best selection.
Reserve Your Wheels: If you need a rental car—especially a larger SUV or van—book it early. Waiting is a recipe for sky-high prices or no availability at all.
Invest in Peace of Mind with Travel Insurance
Think of travel insurance not as an expense, but as an essential piece of safety equipment. It’s the safety net that protects your financial investment and ensures your family’s health is covered. A good policy must include strong coverage for trip cancellation, emergency medical expenses, and emergency medical evacuation. Use a comparison site like Squaremouth or InsureMyTrip to easily compare policies.
Fleshing Out the Details (1-2 Months Before Your Trip)
The skeleton of your trip is built. Now it’s time to add the muscle and personality by planning your daily adventures and handling key logistics back home.

Build a Flexible Itinerary (and Avoid the Over-scheduling Trap)
A great itinerary is a guide, not a straitjacket. The goal is to minimize on-the-ground stress, not to schedule every second.
The "One Big Thing" Rule: Anchor each day with only one primary activity (e.g., a museum visit, a specific hike). Everything else is a bonus.
Schedule Downtime: This is the golden rule of family travel. Intentionally block out "do nothing" time. Alternate busy days with relaxed ones to prevent meltdowns.
Delegate and Empower: Assign each child or teen a "planning day." Let them choose the main activity or where the family eats dinner from a pre-approved list.
Transform Your Itinerary from a To-Do List to a Done Deal
A well-structured plan is the secret to a low-stress vacation. Stop trying to organize everything in a messy document or a string of emails. Download our free Travel Itinerary Template to build a clear, flexible, and easy-to-follow plan that the whole family can use.
Pre-Book "Must-Do" Tickets and Reservations
For bucket-list attractions that are known to sell out or have long lines (like the Colosseum or a popular luau), booking your tickets online a month in advance is a game-changer. This simple step can save you hours of waiting.
Arrange Home, Pet, and Plant Care
Pet Sitter/Kennel: Confirm dates and details with your pet care provider.
House Sitter: Finalize plans and do a walkthrough of your home’s quirks.
Inform a Neighbor: Give a trusted neighbor your itinerary and contact info, and ask them to keep an eye on your place.
The Final Countdown (The Week Before Departure)
The excitement is building! This week is all about tying up loose ends, starting the physical packing process, and prepping your home for departure.
Pack Smart, Not Heavy: A Strategy for Families
Overpacking is a travel sin. It creates heavy luggage and decision fatigue. For a deeper dive into minimalism, grab our popular How to Pack Light Guide.

Create a "Staging Area": Designate a guest bed or a corner as your packing zone. As you think of items throughout the week, put them there to prevent last-minute scrambling.
Use Packing Cubes: These are non-negotiable. Assign each family member a color to keep clothes organized and make finding items a 10-second job.
Pack by Outfit: Lay out complete outfits for each day, including socks and accessories. This prevents overpacking "just in case" items.
Pro-Tip: Snap a picture of each child's daily outfit on your phone. This visual checklist makes it easy for them to get dressed and ensures you don't forget anything.
The 1-Week Rule: For trips longer than seven days, pack for one week and plan to do laundry.
Prepare Your Carry-On Command Center: Your carry-on is your lifeline. It must contain a complete change of clothes for everyone, all essential medications, a "boredom-busting" kit, and portable power banks with charging cables.
Handle Last-Minute Finances and Confirmations
Triple-Check Reservations: Quickly reconfirm flight times, hotel bookings, and car rental details.
Notify Your Banks: Call your credit card companies to set a travel notice to prevent your cards from being frozen for suspected fraud.
Get Local Currency: If traveling internationally, get a small amount of local currency to cover immediate expenses like a taxi or snacks upon arrival.
Prep Your Tech for Travel
The Great Charge-Up: Charge every single electronic device to 100%—phones, tablets, and power banks.
The Great Download: Download everything you might need: movies, playlists, podcasts, and offline Google Maps for your destination. Never rely on spotty airport Wi-Fi.
An Age-by-Age Guide to a Smoother Journey
Tailoring your strategy to your kids' developmental stages is the secret to travel harmony. Generic advice falls flat. Here’s how to adapt your approach.

Traveling with Infants & Toddlers (Ages 0-4)
Packing: Create a "Blowout Bag" for your carry-on with two full changes of clothes, extra diapers, and wipes. Consider using a gear rental service like BabyQuip at your destination for bulky items.
Transit: Gate-check your stroller to have it immediately upon deplaning. Pack a small bag of new, quiet toys (stickers, gel window clings) to reveal during the flight. For more pro tips, check out our Stress-Free Flying with Kids Guide.
On-the-Ground: Try to maintain your child's nap and sleep schedule as much as possible. A well-rested child is a happy traveler.
Traveling with Young Children (Ages 5-10)
On-the-Ground: Balance "adult" activities with kid-focused fun. For every museum, plan a trip to a playground. Give them a simple camera and assign them the role of "Official Trip Documentarian."
Pro-Tip: Before visiting a historical site, find a short, engaging, kid-friendly YouTube video about it. Five minutes of prep provides context and can prevent an hour of whining.
Souvenir Hack: Give them their own vacation spending money. This empowers them, teaches budgeting, and instantly ends the "Can I have this?" negotiations.
Traveling with Tweens & Teens (Ages 11-17)
Transit: Respect their need for space. A long travel day is a great time for them to listen to music or watch their own movies. Don't force family games.
On-the-Ground: The key is autonomy.
Grant them planning power: Make them responsible for planning one full day of the trip.
Schedule solo time: Allow for supervised periods of independence, like exploring a shopping district while you visit a nearby coffee shop.
Wi-Fi is a utility: Acknowledge that connecting with friends is important to them. Ensure your accommodation has reliable Wi-Fi and treat it like you would hot water.
The Ultimate Departure Day Checklist
The day is here! The goal is a calm, orderly exit. Run through this final checklist before you head out the door.
Last-Minute Grab List
Toiletries used this morning (toothbrushes, hairbrush)
Phone chargers that were used overnight
Daily medications
Each child's essential comfort item ("lovey")
Final Home Security Check
Adjust thermostat (up in summer, down in winter)
Empty all trash cans and run the dishwasher
Unplug non-essential small appliances
Check that all windows and doors are locked
The Final Sweep
Do one last walkthrough, grab your cooler of snacks, take a deep breath, and lock the door. You did it. Let the adventure begin.
Frequently Asked Questions
What is the biggest mistake in family travel planning?
The most common mistake is choosing a vacation that doesn't match your family's true travel style. Planning an intense, adventure-packed trip for a family that prefers to relax by the pool is a recipe for stress. An honest assessment of your family's preferences is the most important first step.
How much should I budget for a family vacation?
A great starting point is the 50/30/20 rule. Allocate 50% of your total budget to core costs like flights and lodging, 30% to experiences like activities and dining, and reserve 20% for extras and a crucial contingency fund for unexpected costs.
What is the "One Big Thing" rule for family itineraries?
The "One Big Thing" rule is a simple way to avoid over-scheduling. Instead of packing your day with activities, anchor each day with just one primary event, like a museum visit or a specific hike. This creates a flexible structure and leaves room for spontaneous fun and much-needed downtime.
Your Plan is Your Passport to Presence
The goal of careful family travel planning is not to eliminate every possible hiccup, but to build a resilient, flexible framework that allows your family to navigate challenges together. By following this guide, you’ve transformed a daunting task into a manageable process. You are the architect of your family's most precious memories.
The shared discovery and laughter are the ultimate return on your investment. Now, go and enjoy the incredible experience you've worked so hard to create by exploring all the Family Travel Ideas: The 2026 Guide to Unforgettable Trips that await.

Read the full guide: Family Travel Ideas: The 2026 Guide to Unforgettable Trips
Don't Miss Out! Subscribe for Exclusive Content
SubscribeComments 0
No comments yet
Be the first to share your experience!
Dont Miss Out! Subscribe for Exclusive Content
Ultimate USA Holidays Guide: Top Picks
FTC Affiliate Disclosure Essentials: Stay Compliant as a Travel Creator
Essential Affiliate Tools: From Tracking to Full Optimization
Booking.com Affiliate Program Review: Pros, Cons, and Earnings Potential
Decoding Affiliate Commission Rates: Benchmarks for Travel Creators
