How to Start a Travel Blog in 2026 (For Profit)
TrekGuider @trekguider
Do you find yourself endlessly scrolling through travel photos, dreaming of turning your own adventures into something more? The idea of starting a travel blog is captivating—a path to sharing your stories, connecting with a global community, and building a life of freedom. But that initial spark is often extinguished by a wave of overwhelm. The market seems impossibly crowded, the technical steps feel like learning a new language, and the road from passion project to profitable business is shrouded in mystery.
You see other creators living the dream, and you know you have the stories and the drive. But the fear of pouring your heart, time, and savings into a simple online diary that never earns a dime is paralyzing. You're not looking to build a hobby; you're looking to build a real asset, a brand, a business. You need more than just another checklist—you need a battle-tested business plan.
This is that plan. Forget the outdated advice. This is your comprehensive, step-by-step playbook on how to start a travel blog that is engineered for profit from day one. We’ll move beyond the basics of setting up a website and dive deep into the strategy of building a modern media brand. The goal isn't just to get you a byline; it's to get you paid. Before you can join the ranks of The Best Travel Blogs to Follow in 2026, you need a rock-solid foundation, and that’s exactly what we’re going to build—right now.
Why Start a Travel Blog in 2026? The Shift to Media Entrepreneur
Let's address the elephant in the room: is travel blogging still a viable business? The answer is an emphatic yes, but the game has fundamentally changed. The global travel blogging market, valued at an impressive $4.5 billion in 2026, is projected to double to $9 billion by 2032. That growth isn't for hobbyists; it's for savvy creators who understand the key market shift.

Success is no longer about simply documenting your trips. The most successful bloggers are evolving from content creators into media entrepreneurs. They are building focused, niche brands that serve a specific audience with unparalleled expertise. They understand that their blog is not the final product; it is the marketing engine for their actual products. This guide is built on that modern, profitable philosophy.
Phase 1: Building Your Brand Foundation (Before You Touch a Computer)
The single biggest mistake new bloggers make is rushing the technical setup. In 2026, the strategic barriers to success are significantly higher than the technical ones. Dedicate 80% of your initial effort to this phase, and you’ll be miles ahead of the competition.

Step 1: Niche Down to Stand Out
The era of the generalist travel blog is over. To succeed, you cannot be everything to everyone. You must become the undisputed, go-to expert for a specific audience. This is called "niching down," and frankly, it’s the most critical strategic decision you'll make. A narrow focus allows you to build deep expertise, attract a loyal and targeted audience, and charge premium prices for your knowledge.
Based on current market trends, here are five sub-niches with significant growth and commercial potential for 2026:
Accessible Travel: This historically underserved market caters to travelers with disabilities, offering content on wheelchair-friendly destinations and sensory-friendly experiences.
National Parks for Families: This niche combines the booming interest in outdoor, domestic travel with the evergreen family market, providing guides on kid-friendly hikes and lodging.
Vegan Food Travel: A highly specific subset of the food travel niche, this area serves a passionate and growing demographic with guides to plant-based restaurants and cooking classes worldwide.
Digital Nomad & Remote Work Lifestyle: With the explosion of remote work, this niche focuses on the logistics of the lifestyle—managing visas, finding reliable WiFi, and balancing work with travel.
Sustainable & Eco-Tourism: Driven by a powerful wave of consumer consciousness, this niche highlights eco-friendly accommodations, low-impact tours, and tips for responsible travel.
Step 2: Define Your Ideal Reader
Once you have your niche, get granular. Create a detailed profile of your ideal reader. Don't just think about demographics; think about psychographics.
What are their biggest travel-related frustrations?
What does their dream trip look like, and what's stopping them from taking it?
What kind of budget are they working with?
What questions do they type into Google at 11 PM while trip planning?
Understanding their pain points is the key to creating content and products they will feel were made just for them.
Step 3: Choose a Brandable Blog Name
Your blog name is a critical piece of your brand identity. It should be memorable, easy to spell, and hint at what your blog is about. Follow this practical framework to find the perfect name:
Keyword Brainstorming: List words associated with your niche, tone, and audience. For a "Sustainable & Eco-Tourism" blog, you might list: Green, Conscious, Atlas, Compass, Earth, Kind, Trek, Journey, Collective.
Apply Naming Formulas: Experiment with common conventions using your keywords.
Niche-Specific: The Vegan Voyager, The Frugal Flier
Alliteration: Roaming Roads, Compass Chronicles
Evocative & Abstract: The Saffron Trail, Velvet Atlas
Modern & Simple: The Travel Edit, Trip Theory
Verify Availability: This is non-negotiable. Your chosen name must be available as a .com domain. A ".com" is the universal standard and signals professionalism. Simultaneously, check if the name is available as a consistent handle on your primary social media platforms (Instagram, TikTok, Pinterest, etc.).
Conduct Conflict Avoidance: Do a quick Google search to ensure the name isn't already heavily associated with another major brand.
Pro-Tip: Your blog name is your brand's first impression. A short, memorable, and easily pronounceable name with an available .com domain is the gold standard for building a serious online business.
Step 4: Secure Your Digital Real Estate
Found a name that's available? Don't wait. Immediately purchase the .com domain and create the social media accounts. This secures your brand identity across the web, even if you don't plan to use all the platforms right away.
Phase 2: The Smart Launchpad — Build Your Business, Not Just a Website
With your brand strategy set, it's time to build your blog's home. For years, this meant wrestling with web hosting, WordPress installations, themes, and a dozen plugins before you could even write a word. This was the slow, expensive, and technically frustrating path.
In 2026, the smartest creators are skipping that entire phase. Instead of building a house from scratch on an empty plot of land, they're launching their business from a penthouse suite in a bustling city. They are plugging directly into a marketplace ecosystem like TrekGuider, which is designed specifically for travel entrepreneurs. This approach lets you bypass the technical headaches and focus on what actually drives your business forward: creating high-value content and selling digital products.

Step 5: Launch Your Professional Creator Page in Minutes
Instead of buying a domain and hosting, your first step is to set up your professional creator page on the TrekGuider marketplace. This is your new home base, a beautiful, pre-built landing page that establishes your brand's credibility from day one—no coding or design skills required. Within minutes, you can have:
A professional bio and profile photo that tells your story.
A showcase for your digital products, front and center.
A feed of your latest articles published on the platform.
Direct links to all your social media channels.
A built-in donation feature for your audience to support you directly.
Step 6: Upload Your Digital Products and Start Selling
The old way involved researching and configuring complex e-commerce plugins. The TrekGuider way is to simply upload your digital products. Whether you've created a custom map, an in-depth city guide, a PDF itinerary, or an e-book, our platform is built to handle the sale and delivery. You can start monetizing your expertise immediately by listing your products in our catalog, where they're discoverable by a global audience of travelers ready to buy.
Step 7: Publish Your First Articles and Tap into a New Audience
Forget worrying about SEO plugins and site speed. Your blog now lives within our Articles and News section. You can publish your high-quality, long-form content directly onto the platform. Every article you publish is automatically featured on your creator page and becomes discoverable to the entire TrekGuider community. You're not just writing for your existing audience; you're tapping into a built-in stream of traffic from day one, dramatically accelerating your growth.
Step 8: Focus on Creation, Not Maintenance
By building your presence on our marketplace, you eliminate the hidden work that plagues self-hosted bloggers: website security, plugin updates, theme compatibility issues, and performance optimization. We handle the entire technical infrastructure. Your time is freed up to focus on the only two things that will grow your income: creating exceptional content that helps travelers and developing valuable digital products they want to buy. This is the ultimate accelerator for building a travel blog for profit.
Phase 3: Content Strategy & Launching for Profit
With your brand strategy in place and your website built, you're ready to focus on the two things that will actually grow your business: creating world-class content and intelligent monetization.
Step 9: Develop Your Foundational Content Strategy
Before you write a single word, plan your first 10-20 "pillar" articles. These are in-depth, foundational posts that cover the core topics of your niche. A solid content strategy ensures you are purposefully creating assets that will attract your ideal reader and rank in search engines. This is the real secret behind how to start a travel blog that gets traffic. For example, if your niche is "National Parks for Families," your pillar posts might be "The Ultimate Guide to Visiting Yellowstone with Kids" and "10 Best Toddler-Friendly Hikes in Zion National Park."
Step 10: Writing and Publishing Your First Posts
With your content plan in place, it's time to create. Focus on producing the highest quality content possible. Your goal is to be so incredibly helpful that your readers feel like they've struck gold. Write in-depth, solve their problems, and let your unique personality shine through. Publish at least 5-10 of your pillar articles before you officially "launch" your blog to the world.
Step 11: Monetization: Planning for Profit from Day One
A profitable blog diversifies its income. While there are five primary monetization models, one stands far above the rest for long-term, scalable profit.
The future is selling your own digital products.
While display ads seem like the easiest path, they are the least profitable. To make a significant income, you need massive traffic. Digital products, on the other hand, allow you to generate substantial revenue with a much smaller, more engaged audience. The data is clear: recent blogger surveys show the average revenue per 1,000 visitors (RPM) for digital products can be as high as $283.64, compared to just $33.80 for ads.

A simple calculation shows that if just 0.2% of 50,000 monthly visitors (100 people) buy your $30 digital product, you earn $3,000. That same traffic might only generate $1,000-$2,000 from ads. This is the core of the modern travel creator's business model. Instead of earning pennies from ads, you build valuable assets that solve your audience's problems directly.
A few examples of high-value digital products include:
A hyper-detailed "7-Day Off-the-Beaten-Path Itinerary for Kyoto."
A Lightroom "Tropical Blues & Greens" preset pack.
A comprehensive travel planning template for Notion or Google Sheets.
An e-book like "The Ultimate Guide to Travel Hacking."
And when you're ready to sell your own itineraries, templates, or photo presets, a platform like the TrekGuider Platform gives you the tools to build your own digital storefront, connect directly with your customers, and build a sustainable business you control.
Frequently Asked Questions
How much does it really cost to start a travel blog?
While you can start for a very low cost, plan for a realistic initial investment of $150-$200 for your first year. This covers three years of quality hosting (like Hostinger, to lock in low rates), your domain name, and a premium theme. Think of it as the startup cost for your business.
How long does it take to make money travel blogging?
Treat it like a business, not a get-rich-quick scheme. It typically takes 6-12 months of consistent, high-quality content creation and promotion before you start seeing meaningful traffic from search engines. Most bloggers start earning their first significant income in the 12-24 month range.
Do I need to be traveling full-time to have a travel blog?
Absolutely not. Some of the most successful blogs are run by people with full-time jobs who are experts on a specific destination or travel style (e.g., weekend trips, maximizing vacation days). Your expertise and the value you provide are far more important than being a full-time nomad.
Your Journey as a Creator Starts Now
Starting a travel blog in 2026 is less about being a writer and more about being an entrepreneur. It's about building a focused brand, serving a specific audience with undeniable value, and creating assets that generate income long after you've hit "publish." You are no longer just a traveler; you are the CEO of your own media company.
The path from dreamer to doer is paved with strategic action. You now have the complete playbook for how to start a travel blog for profit in 2026. The overwhelm is gone, replaced by a clear, step-by-step plan.
Your journey starts now. Take the first step, choose your niche, and start building the travel media brand of your dreams.
Meta Data Suggestions:
SEO Meta Title (59 characters): How to Start a Travel Blog in 2026 (For Profit)
URL Slug: how-to-start-a-travel-blog
SEO Meta Description (154 characters): A step-by-step business playbook for aspiring creators. Learn how to start a travel blog for profit, from niche selection and tech setup to monetization.
Don't Miss Out! Subscribe for Exclusive Content
Subscribe


Comments 0
No comments yet
Be the first to share your experience!
Dont Miss Out! Subscribe for Exclusive Content

FTC Affiliate Disclosure Essentials: Stay Compliant as a Travel Creator

Essential Affiliate Tools: From Tracking to Full Optimization

Avoid These 5 Affiliate Landing Page Mistakes for Better Conversions

Affiliate Keyword Research Mastery for Travel Blogs

Booking.com Affiliate Program Review: Pros, Cons, and Earnings Potential

Decoding Affiliate Commission Rates: Benchmarks for Travel Creators
Ultra Festival: Beat the Heat Guide
TrekGuider @trekguider
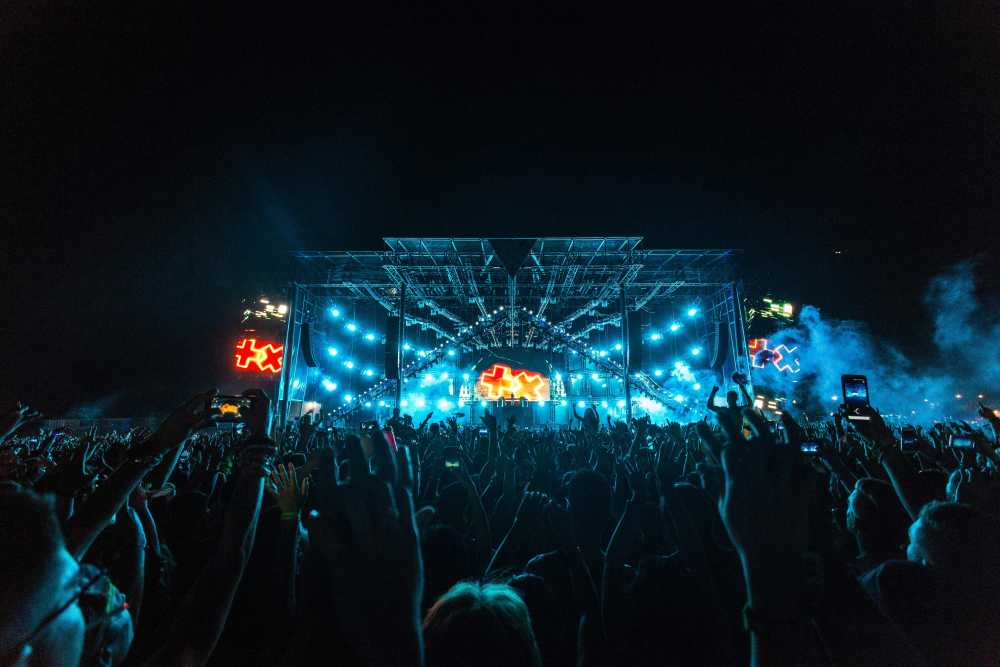
You’ve done it. You scored the golden ticket to Ultra Music Festival, a three-day sonic pilgrimage in the heart of Miami where the world’s greatest DJs command colossal stages and the energy is nothing short of electric. But as the bass drops, so does the relentless Florida sun. The real problem isn't just the heat; it's the brutal combination of scorching temperatures, suffocating humidity, and tens of thousands of dancing bodies that can quickly turn your dream festival into a dehydrated, sun-stroked nightmare.
Imagine the agony of missing Skrillex’s closing set because you’re dizzy and nauseous, huddled in a medical tent. Picture the sheer frustration of tapping out before sunset on day one, your energy completely drained, while your friends rave on into the night. This isn't a scare tactic; it's a common reality for unprepared attendees who fatally underestimate the physical toll of partying under the Miami sun for three straight days. The line between an unforgettable weekend and a miserable, potentially dangerous one is drawn by a single thing: a bulletproof strategy.
This is that strategy. Forget the generic "drink water" advice you’ve heard a thousand times. This is your new bible for not just surviving, but truly conquering the heat at Ultra. We’re providing a pro-level, comprehensive blueprint covering everything from tactical gear selection and advanced hydration science to strategic stage navigation and leveraging festival tech for your safety. Follow these steps, and you won't just beat the heat—you'll own the entire experience, from the opening beat on Friday to the final fireworks on Sunday.

Understanding the Ultra Music Festival Environment: Sun, Crowds, and Sound
Before you can build a plan, you must understand the battlefield. Ultra Music Festival unfolds in late March at Bayfront Park, a beautiful but notoriously exposed venue. For 2026, the festival runs from March 28-30 (and for you long-term planners, March 27-29 in 2026), a time when Miami’s weather is deceptively intense. While the festival is at the heart of the city's vibrant event calendar—a scene we detail in our complete guide to Miami Holidays: 8 Beach Fest Vibes—its unique environment presents a specific set of challenges you must be prepared for.
The festival operates on a strict "rain or shine" policy, meaning you need to be ready for anything. The schedule itself is a marathon, not a sprint:
Friday, March 28: 4:00 PM – 12:00 AM
Saturday, March 29: 12:00 PM – 12:00 AM
Sunday, March 30: 12:00 PM – 10:00 PM
Notice that Saturday and Sunday demand ten to twelve hours of exposure. The primary obstacles you will face are:
Intense Solar Radiation: The Florida sun is powerful. Without adequate shade, direct exposure can lead to severe sunburn and rapidly increase your core body temperature.
Oppressive Humidity: Miami's humidity cripples your body's natural cooling system. It prevents sweat from evaporating effectively, making 85°F feel like a suffocating 95°F.
Massive Crowds: Dense crowds trap body heat, creating microclimates that are significantly hotter than the ambient air. Navigating these human seas requires immense physical energy.
Constant Movement: You’ll be walking, standing, and dancing for hours on end, burning calories and losing fluids at a dangerously accelerated rate.
The first and most critical mindset shift is to treat Ultra like an athletic event. Your preparation starts long before you ever step foot in Bayfront Park.

Pre-Festival Prep: Your Foundation for Success
Victory is won in the preparation. What you do in the days leading up to the festival and what you pack in your bag will absolutely dictate your endurance and enjoyment.
The Ultimate Packing List: Beyond the Basics
Your packing list is your first line of defense. Every single item should serve a purpose, primarily focused on cooling, hydration, and comfort.
Clothing (The Three B’s: Breathable, Bright, and Barely-There):
Fabrics: Choose lightweight, moisture-wicking materials like polyester, nylon, or bamboo blends. These technical fabrics pull sweat away from your skin, allowing it to evaporate and cool you down. Avoid cotton at all costs; it absorbs moisture, becoming a heavy, suffocating trap for heat.
Colors: Opt for light-colored clothing. White, beige, and pastels reflect sunlight rather than absorbing it like dark colors do.
Fit: Loose-fitting garments are your best friend. They allow for crucial airflow against your skin, preventing heat from getting trapped.
Footwear (Your Most Important Gear): You will be on your feet for 30+ hours over the weekend. Comfortable, well-worn sneakers are non-negotiable. Do not, under any circumstances, wear brand-new shoes, flimsy sandals, or heavy boots. Running or athletic shoes with proven arch support are ideal.
Hydration Hardware:
Hydration Pack: This is the single most important piece of gear you can bring. A CamelBak or a similar backpack with a water bladder allows you to carry 2-3 liters of water and sip continuously without fumbling with a bottle. Ensure it complies with the latest festival size and pocket regulations before you go.
Electrolyte Packets: Pack single-serving powders or tablets (like Liquid I.V., Nuun, or Pedialyte packets). They are small, light, and absolutely essential for true hydration.
Sun & Heat Protection Arsenal:
Sweatproof Sunscreen: A broad-spectrum, water-resistant sunscreen with an SPF of 50 or higher is mandatory. Apply it generously 30 minutes before you enter and reapply every two hours, no exceptions.
Wide-Brimmed Hat: A bucket hat or other wide-brimmed hat provides a portable oasis of shade for your face, neck, and ears, significantly reducing your perceived temperature.
UV-Protective Sunglasses: Protect your eyes from the relentless glare and long-term sun damage.
Cooling Towel: These hyper-evaporative towels, when soaked in water, provide incredible cooling relief when worn around your neck.
Handheld Fan/Mister: A small, battery-operated fan can be a godsend in a stagnant, dense crowd, creating a personal breeze when you need it most.
Physical Conditioning: Don't Underestimate the Marathon
You wouldn't run a 10k without training, and you shouldn't tackle Ultra without some physical prep.
Pre-Hydrate Aggressively: Begin increasing your water intake 2-3 days before the festival. Your goal is to start Day 1 with your body in a state of optimal hydration, not playing a desperate game of catch-up.
Build Endurance: In the weeks leading up, incorporate some light cardio into your routine. Even 30 minutes of brisk walking or jogging a few times a week will dramatically improve your stamina.
Prioritize Sleep: Get a full 8 hours of sleep each night in the week before the festival. A sleep deficit severely impairs your body's ability to regulate temperature and recover.
Just as detailed planning is key for a scenic road trip, like the one we map out in our Big Sur Map & Itinerary, careful preparation is essential for a massive festival. Don't leave your experience to chance.
Mastering Hydration: The Core of Your Ultra Music Festival Strategy
This is the most critical section of this guide. Proper hydration at Ultra is a science. Simply drinking water when you feel thirsty is a recipe for disaster; by the time you feel thirst, you are already significantly dehydrated.

Water Isn't Enough: The Critical Role of Electrolytes
When you sweat, you don't just lose water; you lose vital minerals called electrolytes—primarily sodium, potassium, and magnesium. These minerals are the spark plugs of your body, responsible for regulating nerve and muscle function, hydrating your cells, and balancing blood pressure. Replenishing them is just as important as replenishing water.
Why It Matters: Drinking excessive amounts of plain water without replacing electrolytes can lead to a dangerous condition called hyponatremia, where the sodium levels in your blood become dangerously diluted. Symptoms can mimic dehydration (nausea, headache, confusion) but can be far more severe.
Your Game Plan: For every two refills of your hydration pack with plain water, make the third refill an electrolyte mix. This simple rule ensures you are constantly replenishing what you're sweating out. Avoid relying on sugary energy drinks or sodas for hydration; they can often make dehydration worse.
Your Hydration Schedule: A Sip-by-Sip Plan
Discipline is everything. You need a proactive hydration schedule, not a reactive one.
The Morning Load-Up: Drink at least 16-20 ounces (about half a liter) of water with an electrolyte packet before you even leave for the festival.
The Immediate Refill: The very first thing you do upon entering Bayfront Park is locate a water station and fill your hydration pack to its maximum capacity.
The 15-Minute Rule: Take a few big sips of water from your pack every 15 minutes. Set a recurring alarm on your phone or watch if you have to. Do not wait until you feel thirsty.
The Proactive Refill: Never wait until your pack is empty to refill it. When it's about one-third full, make your way to a water station. The lines are shortest during non-peak times (e.g., during a headliner's set when everyone is at one stage, or early in the day).
The End-of-Night Recovery: Drink another 16-20 ounces of electrolyte-infused water before you go to sleep. This will supercharge your body's recovery overnight and prepare you for the next day.
Pro-Tip: As soon as you get inside, open the festival map on the official app and screenshot the locations of all free water refill stations. The stations located near smaller stages or along the perimeter of the park often have significantly shorter lines than the ones near the main stage.
Strategic Navigation and Lineup Planning
How you move through the festival and plan your day is just as important as what you pack. Wasting energy is a luxury you simply cannot afford.

Decoding the Festival Map for Heat Evasion
The festival grounds are a maze of stages, vendors, and people. Use the map to your real advantage.
Identify Cool Zones: Before you even start thinking about artists, scan the map for any designated shade structures, indoor stages (like the iconic Megastructure), or air-conditioned brand activations. These are your recovery oases.
Plan Efficient Routes: When moving from the Main Stage to the Resistance stage, don't just try to cut through the thickest part of the crowd. Use the perimeter walkways. It might be a slightly longer distance, but it will be faster and require far less energy than pushing through a human traffic jam.
Building a Smart Schedule: Pacing is Everything
With a 2026 lineup featuring titans like John Summit & Dom Dolla, Armin van Buuren, Tiësto, Chase & Status, and Deadmau5, the temptation is to sprint from stage to stage. This is a rookie mistake that will burn you out by 9 PM on Friday.
Prioritize Ruthlessly: Accept that you cannot see every artist. Pick your top 3-4 "can't-miss" sets for each day and build your schedule around them as anchors.
Schedule Deliberate Downtime: The hottest part of the day is typically between 2 PM and 5 PM. This is the perfect time to schedule a tactical break. Find a shady spot, sit down, focus on hydrating, and eat a proper meal. This planned rest will give you the energy you need for the headlining acts at night.
Embrace Discovery: Use the time between your must-see sets to explore smaller stages. They are often less crowded, providing more space to dance, breathe, and discover your new favorite artist.
Pro-Tip: When moving through a dense crowd to get closer to a stage, conserve energy by following directly behind a larger, determined person or group. Let them carve a path for you. It's a simple "drafting" trick that saves a surprising amount of physical effort.
Leveraging Technology and Safety Resources at Ultra Music Festival
In the modern festival era, your phone is an essential survival tool. Ultra has integrated technology to enhance attendee safety, and you should take full advantage of every resource.
Your Phone is Your Lifeline
The Official Ultra App: Download it well in advance. It contains the most up-to-date festival map, set times, and, most importantly, will send push notifications for any emergency alerts or important announcements.
The SaferWatch App: Ultra has partnered with the SaferWatch app, which allows you to report any safety or security concerns (medical emergencies, suspicious activity) directly and anonymously to festival staff in real-time. Have it downloaded and set up before you arrive.
Portable Charger: Your phone is useless with a dead battery. A fully charged portable power bank is not optional; it's mandatory.
Knowing Where to Go for Help
Even with perfect preparation, things can go wrong. Knowing how to recognize a problem and where to get help is crucial.
Locate Medical Tents: Just like the water stations, the first thing you should do is identify the location of all medical tents on your map. They are staffed with professionals who are there to help you, no questions asked. There is no shame in seeking help.
Recognize the Signs of Heat Exhaustion: Be aware of these symptoms in yourself and your friends:
Heavy sweating
Dizziness or lightheadedness
Nausea or vomiting
A throbbing headache
Cool, pale, clammy skin
If you or a friend experience these, get to a medical tent immediately. Do not try to "tough it out."
Be a Good Raver: The Ultra community is known for looking out for one another. If you see someone who looks unwell or is in distress, ask if they need help and guide them toward a medical tent or alert festival staff.

You're Ready to Conquer Ultra
The roar of the crowd, the earth-shaking bass, the Miami skyline lit up against the night sky—these are the moments that define the Ultra Music Festival experience. By approaching the weekend with the mindset of an endurance athlete, you are no longer at the mercy of the elements. You are in control. Preparation is your armor, hydration is your fuel, and a smart strategy is your map to victory. You now have the expert knowledge to stay cool, energized, and safe from the first set to the final encore.
You are now equipped to handle the heat, navigate the crowds, and fully immerse yourself in the magic of one of the world's greatest music festivals. This level of detailed planning is what transforms a good trip into an unforgettable one. For comprehensive strategies on navigating destinations and events worldwide, our master Travel Guide is the ultimate resource for the serious traveler. Now go, stay hydrated, and have the time of your life.
Don't Miss Out! Subscribe for Exclusive Content
SubscribeComments 0
No comments yet
Be the first to share your experience!
Dont Miss Out! Subscribe for Exclusive Content

San Francisco Cherry Blossoms: A Local's Guide to the Blooms

Halloween SF: Haunts Without Horrors

SF Festivals: 7 Must-See Lineups

Christmas SF: Lights & Wharf Wonders

SF Pride: 6 Route & Party Hacks

Chinese New Year SF: Parade Essentials
NYE Miami: 5 Epic Party Spots
TrekGuider @trekguider
The final seconds of the year are ticking away. You’re in Miami, a city that practically vibrates with anticipation, but a single, paralyzing question hangs in the warm night air: where will you be when the clock strikes twelve? The pressure is immense. This isn't just any night out; it's the moment that sets the tone for the entire year ahead.
Choose wrong, and your legendary New Year's Eve Miami fantasy dissolves into a frustrating reality. You could be trapped in gridlock on the MacArthur Causeway, listening to the fireworks you can't see. You might end up at an overpriced, underwhelming party, wondering where the real energy is. Or worse, you could miss the magic moment entirely, stuck behind a crowd with a view of nothing but the back of someone's head. The fear of an anticlimactic night is real, a specter of regret that haunts every planner.
Banish the uncertainty. We’ve navigated the velvet ropes, scouted the best waterfront views, and decoded the city’s vibrant party ecosystem to forge your definitive guide. This is your blueprint to the five most epic ways to ring in the new year in Magic City. Whether you crave a massive, free-for-all street party, an ultra-exclusive night with world-class DJs, or a breathtaking view from the water, your perfect celebration is detailed below. Consider this your insider pass to a flawless Miami NYE.

Why Miami is the Ultimate New Year's Eve Destination
While many cities offer a brief fireworks display before the cold sends everyone scurrying home, Miami transforms the entire night into a sprawling, complex festival. The city’s unique alchemy of tropical warmth, intoxicating Latin energy, and world-class entertainment creates an atmosphere that’s simply unrivaled. While Miami is a year-round hotspot for celebrations—a fact we explore in our comprehensive guide to Miami Holidays: 8 Beach Fest Vibes—New Year’s Eve dials the city’s signature energy up to an entirely new frequency. Here, the celebration isn’t just about a ten-second countdown; it’s about all-night dance parties on the sand, glamorous rooftop soirees under the stars, and spectacular fireworks reflecting across the moonlit waters of Biscayne Bay. It’s a place where you can rock your most stylish outfit in late December without a second thought, making it the ultimate destination to welcome the year in style.
Spot #1: Bayfront Park - The Classic Miami Countdown
For those who want to be at the absolute epicenter of Miami’s public celebration, Bayfront Park is the undisputed champion. This is the city’s official, free New Year’s Eve bash, drawing hundreds of thousands of people to the downtown waterfront for a massive, high-voltage spectacle that defines the night for the entire region.
What to Expect: The Vibe and the Crowd
Forget a simple party; Bayfront Park on NYE is a massive, communal heartbeat. The air thrums with a mix of languages and laughter—a true cross-section of Miami, from families with kids on their shoulders to seasoned party-goers, all united by the building excitement. The centerpiece of the event is the iconic "Big Orange," a 35-foot neon icon that slowly ascends the side of the InterContinental Hotel throughout the night. At the stroke of midnight, it reaches the top, triggering a city-wide roar—Miami’s quirky, tropical answer to the Times Square Ball Drop. Expect live music from chart-topping artists, dozens of food trucks, and a palpable sense of unity that builds with every passing hour.

The Main Event: Fireworks Over Biscayne Bay
The true climax of the night is the jaw-dropping fireworks display. Launched from barges anchored in Biscayne Bay, the show is a stunning, 360-degree spectacle of light and sound. The vibrant colors explode over the downtown skyline, reflecting brilliantly on the water and illuminating the entire area. The sheer scale of the display is designed to be seen from miles around, but being in Bayfront Park places you directly under the dazzling canopy of light for an immersive and unforgettable experience.
Logistics and Pro-Tips for Bayfront Park
Navigating the biggest party in town requires a bit of strategy. Here’s how to do it like a local:
Arrive Early: To secure a decent spot with a good view of both the stage and the fireworks, plan to arrive by late afternoon. The park fills up fast, and by evening, it’s a sea of people.
Use Public Transit: Driving is a non-starter. Street closures create a labyrinth of traffic, and parking is virtually nonexistent and exorbitantly priced. The Metromover is your secret weapon; this free elevated train has a Bayfront Park station, dropping you right at the entrance and providing the easiest way to get in and out.
Pack Light but Smart: While you can’t bring coolers or large bags, a small backpack with essentials like a water bottle (to refill), snacks, and a portable phone charger is a lifesaver.
Plan for Families: Bayfront Park is family-friendly, but the immense crowd can be overwhelming for children. If you're bringing the kids, the logistics can be a challenge. Our Stress-Free Flying with Kids Guide is packed with universal tips on managing travel and big events with children that apply just as well on the ground. Find a spot near the park's edges for a little more breathing room and an easier exit strategy.
Pro-Tip: The Metromover is not just a suggestion; it's a mandate for a stress-free night. It's free, efficient, and drops you right at the heart of the action, allowing you to bypass the traffic nightmare completely.
Spot #2: South Beach Superclubs - The VIP Experience for New Year's Eve Miami
If your vision of a perfect New Year's Eve involves world-famous DJs, flowing champagne, and a glamorous, high-fashion crowd, then the legendary superclubs of South Beach are your destination. This is where the global elite come to play, and NYE is the most coveted, high-stakes night of the year.

The Legendary Venues: LIV and Fontainebleau
At the zenith of Miami’s nightlife are institutions like LIV at the Fontainebleau. These are not just nightclubs; they are multi-level entertainment palaces known for their stunning design, bone-rattling sound systems, and a history of hosting the biggest names in music. On New Year’s Eve, they pull out all the stops, booking A-list performers and creating an immersive, high-production experience. Based on our research, tickets for these exclusive parties start at over $200 and can soar into the thousands for VIP table service. The vibe is pure, unapologetic opulence.
Securing Your Spot: Tickets and Reservations
Do not, under any circumstances, expect to walk up and buy a ticket at the door. NYE events at these top-tier clubs sell out weeks, if not months, in advance.
Book Immediately: Start looking for tickets in the fall. The longer you wait, the higher the price climbs, and the faster they disappear.
Understand the Tiers: General admission will get you in the door and often includes a premium open bar for several hours. VIP tickets or table reservations offer a dedicated space, bottle service, and the best sightlines of the DJ booth.
Use Official Channels: Purchase tickets directly from the venue’s website or a reputable ticketing partner like Tixr or Tablelist to avoid counterfeit tickets and scams.
Dress Code and Etiquette
This is your moment to shine. The dress code is strictly enforced and trends toward cocktail attire and high fashion. For men, think designer trousers with a stylish button-down shirt or blazer. For women, cocktail dresses and heels are the standard. Think chic, glamorous, and ready for your close-up.
Spot #3: Biscayne Bay Boat Cruises - A Unique Perspective
For a truly unforgettable and quintessentially Miami experience, escape the terrestrial crowds and celebrate New Year's Eve on the water. A boat cruise on Biscayne Bay offers an exclusive, front-row seat to the fireworks, combined with dinner, drinks, and dancing under the stars.

The All-Inclusive Experience on the Water
Picture this: you’re clinking champagne glasses on the deck of a yacht, a gentle sea breeze in the air, as the entire Miami skyline glitters before you. This is the unparalleled allure of an NYE boat party. Most cruises are all-inclusive packages, with prices typically starting around $150. This fee generally covers:
An Open Bar: Enjoy unlimited cocktails, wine, and beer as you cruise the bay.
A Gourmet Buffet: Feast on a spread of delicious food, from elegant hors d'oeuvres to full dinner buffets.
Live Entertainment: A DJ spins party anthems all night long, turning the deck into a vibrant dance floor on the water.
Unparalleled Views: The main draw is the unobstructed, panoramic view of the Bayfront Park fireworks. You are literally in the middle of the action, without being stuck in the middle of the crowd.
Choosing the Right Cruise for You
With New Year's Eve 2026 falling on a Wednesday, this is the perfect year to plan a long weekend. A boat cruise offers a brilliant escape from the midweek madness, letting you bypass the traffic jams that will inevitably clog the causeways.
Party Yachts: These are geared toward a younger, high-energy crowd, with loud music and a focus on dancing.
Dinner Cruises: These offer a more refined and relaxed experience, often featuring live bands, seated dining, and a sophisticated ambiance.
Private Charters: For the ultimate luxury experience, charter a private yacht for your group and customize the entire evening to your tastes.
Pro-Tip: Book your cruise as early as possible, as they sell out quickly. Remember to bring a light jacket or sweater; even on a warm Miami night, the breeze on the bay can be cool once the sun goes down.
Spot #4: Coconut Grove - The Laid-Back Local Vibe for New Year's Eve Miami
If the high-octane intensity of South Beach and the colossal crowds of downtown aren't your scene, make your way to Coconut Grove for a more relaxed, bohemian, and refreshingly affordable celebration. The Grove offers a charming, village-like atmosphere with a vibrant street party feel that’s pure local flavor.
A More Affordable, Bohemian Celebration
Coconut Grove provides a welcome alternative to the high-priced chaos found elsewhere. Here, you’ll find a collection of eclectic bars, cozy pubs, and waterfront restaurants all celebrating the new year with a distinctly laid-back vibe. Our research shows that entry fees for parties in the Grove are often hovering around the $50 mark, making it an excellent option for a fun night out that won't drain your bank account. The crowd is a mix of local residents, university students, and savvy visitors who prefer a genuine atmosphere over a velvet-rope scene.
Where to Go in the Grove
The heart of the celebration is centered around CocoWalk and the neighborhood's main drags, McFarlane Road and Grand Avenue. Many bars and restaurants host their own ticketed events with live music and drink specials. The real magic, however, is the communal street-party feel that emerges as people spill out from the venues, creating a festive and friendly block party. The area's waterfront parks, like Regatta Park, also offer fantastic, less-crowded spots to watch the local fireworks displays over the bay.
Spot #5: Rooftop Bars - Celebrate Above It All
For a celebration that blends chic sophistication with spectacular views, nothing beats a rooftop bar. Perched high above the city streets in neighborhoods like Brickell and South Beach, these venues offer a glamorous escape from the crowds below, providing the perfect perch for the midnight fireworks.

The Best Views in the City
The undeniable appeal of a rooftop NYE party is the view. You get a breathtaking, panoramic perspective of the city’s fireworks displays without having to battle for a spot on the ground. Watching the explosions of color erupt over the glittering skyline from a comfortable lounge chair, cocktail in hand, is an experience of pure elegance. These venues are designed for Instagram-worthy moments, with the city lights providing a stunning, dynamic backdrop. The skill of finding these exclusive spots is at the heart of savvy travel; our comprehensive Travel Guide is packed with insider strategies for discovering hidden gems and booking the best experiences in any city you visit.
What to Expect: Tickets and Ambiance
Rooftop parties are exclusive, ticketed events. Prices vary but almost always include a premium open bar and passed gourmet appetizers. The ambiance is upscale and trendy, attracting a stylish crowd looking for a sophisticated party atmosphere that’s more about conversation and cocktails than a packed dance floor.
Making the Most of Your Rooftop NYE
Book a Table: While general admission tickets are available, booking a table for your group guarantees a dedicated space and often comes with bottle service.
Confirm the Dress Code: Like the superclubs, rooftop bars enforce a strict dress code. Think cocktail chic and dress to impress.
Check the View: Not all rooftops are created equal. When booking, confirm that the venue has a clear and direct view of the fireworks display you want to see, whether it's the main show at Bayfront Park or the display over South Beach.
Your Perfect Miami NYE Awaits
Miami on New Year's Eve is a city of infinite possibilities, offering a celebration perfectly suited to every style and budget. You can join the massive, joyful crowd for a free countdown at Bayfront Park, dance until dawn with the world’s best DJs in a South Beach superclub, or toast to the new year from the deck of a yacht on Biscayne Bay. You can opt for the laid-back, local charm of Coconut Grove or rise above it all at a glamorous rooftop soiree. No matter how you choose to celebrate New Year's Eve Miami, the city guarantees an electric atmosphere and an unforgettable start to the year. The only question left is, which will you choose?
SEO Meta Title: NYE Miami: 5 Epic Party Spots for an Unforgettable Night
URL Slug: nye-miami-party-spots
SEO Meta Description: Planning New Year's Eve in Miami? Discover the 5 best party spots, from free fireworks at Bayfront Park to VIP clubs in South Beach. Your ultimate guide.
Don't Miss Out! Subscribe for Exclusive Content
SubscribeComments 0
No comments yet
Be the first to share your experience!
Dont Miss Out! Subscribe for Exclusive Content
San Francisco Cherry Blossoms: A Local's Guide to the Blooms
Halloween SF: Haunts Without Horrors
SF Festivals: 7 Must-See Lineups
Christmas SF: Lights & Wharf Wonders
SF Pride: 6 Route & Party Hacks