7-Day Solo Travel Itinerary: A Perfect First-Trip Template
TrekGuider @trekguider
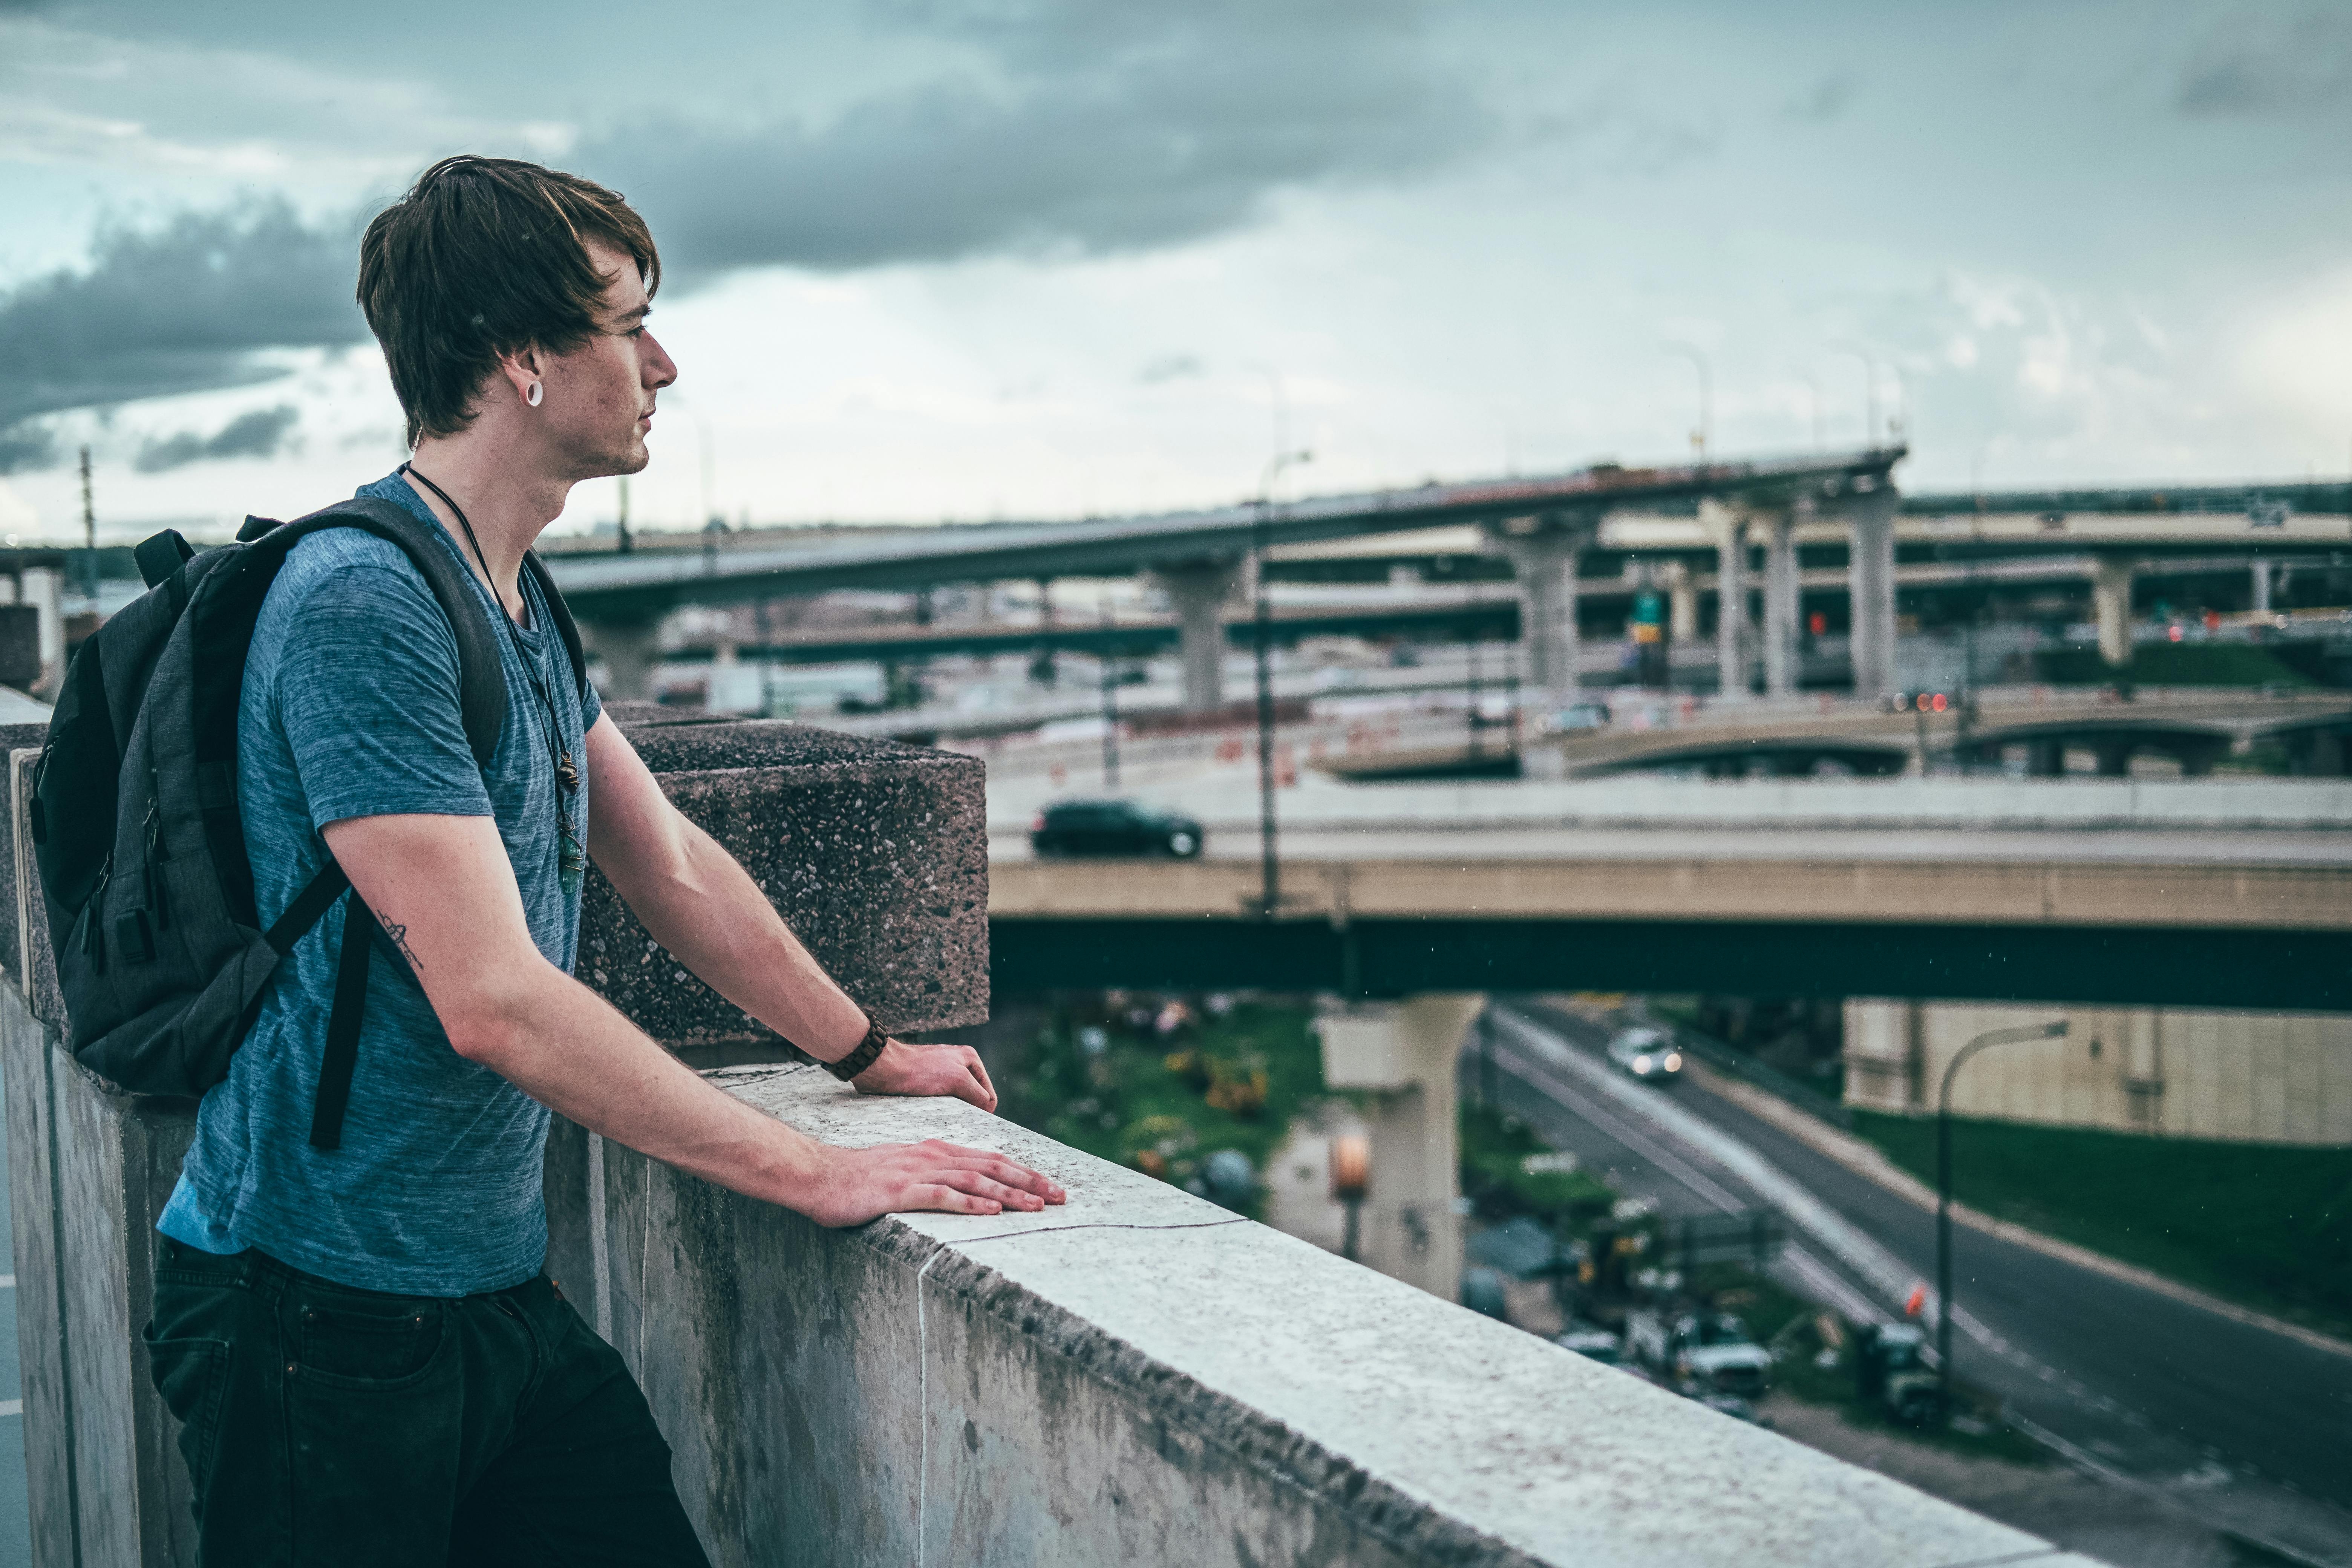
You're ready for an adventure that's entirely your own. No more compromising on destinations, no more syncing schedules. Just you, the open road, and the profound freedom of solo travel.

But a blank page can be intimidating. The excitement of the idea is quickly replaced by the paralysis of planning. Where do I start? How do I build a solo travel itinerary that's exciting but not overwhelming? How do I stay safe?
The good news is that you don't need to reinvent the wheel. You need a proven framework, a reliable playbook to guide you. This article provides the ultimate solution: a flexible 7-day solo travel itinerary that acts as the perfect template for your first independent adventure. It’s designed to eliminate guesswork, build confidence, and ensure an unforgettable experience.
While planning a trip for one has a very different set of challenges than coordinating group travel, as detailed in our guide to Family Travel Ideas: The 2026 Guide to Unforgettable Trips, the need for a solid plan remains universal. This guide is your key to unlocking that journey, transforming apprehension into pure excitement.
Your Pre-Flight Checklist: Engineering a Stress-Free Start
A smooth trip begins long before you pack your bags. Solid preparation is the antidote to travel anxiety, transforming "what ifs" into "I've got this."

1. Choose a Beginner-Friendly Destination
For your first solo trip, set yourself up for success by picking a location known for its strong tourist infrastructure and safety. You're looking for a "soft landing."
Top Contenders: Think cities like Lisbon (Portugal Travel Guide), Dublin, Kyoto (Japan Travel Guide), or Vancouver. These spots are celebrated for being affordable, walkable, friendly, and supremely safe.
The Litmus Test: Can you get around easily on public transport? Is it known for being safe, particularly for solo travelers? Is Wi-Fi widely available?
2. Select Your Home Base Wisely
Your accommodation is more than a place to sleep; it's your sanctuary and command center.
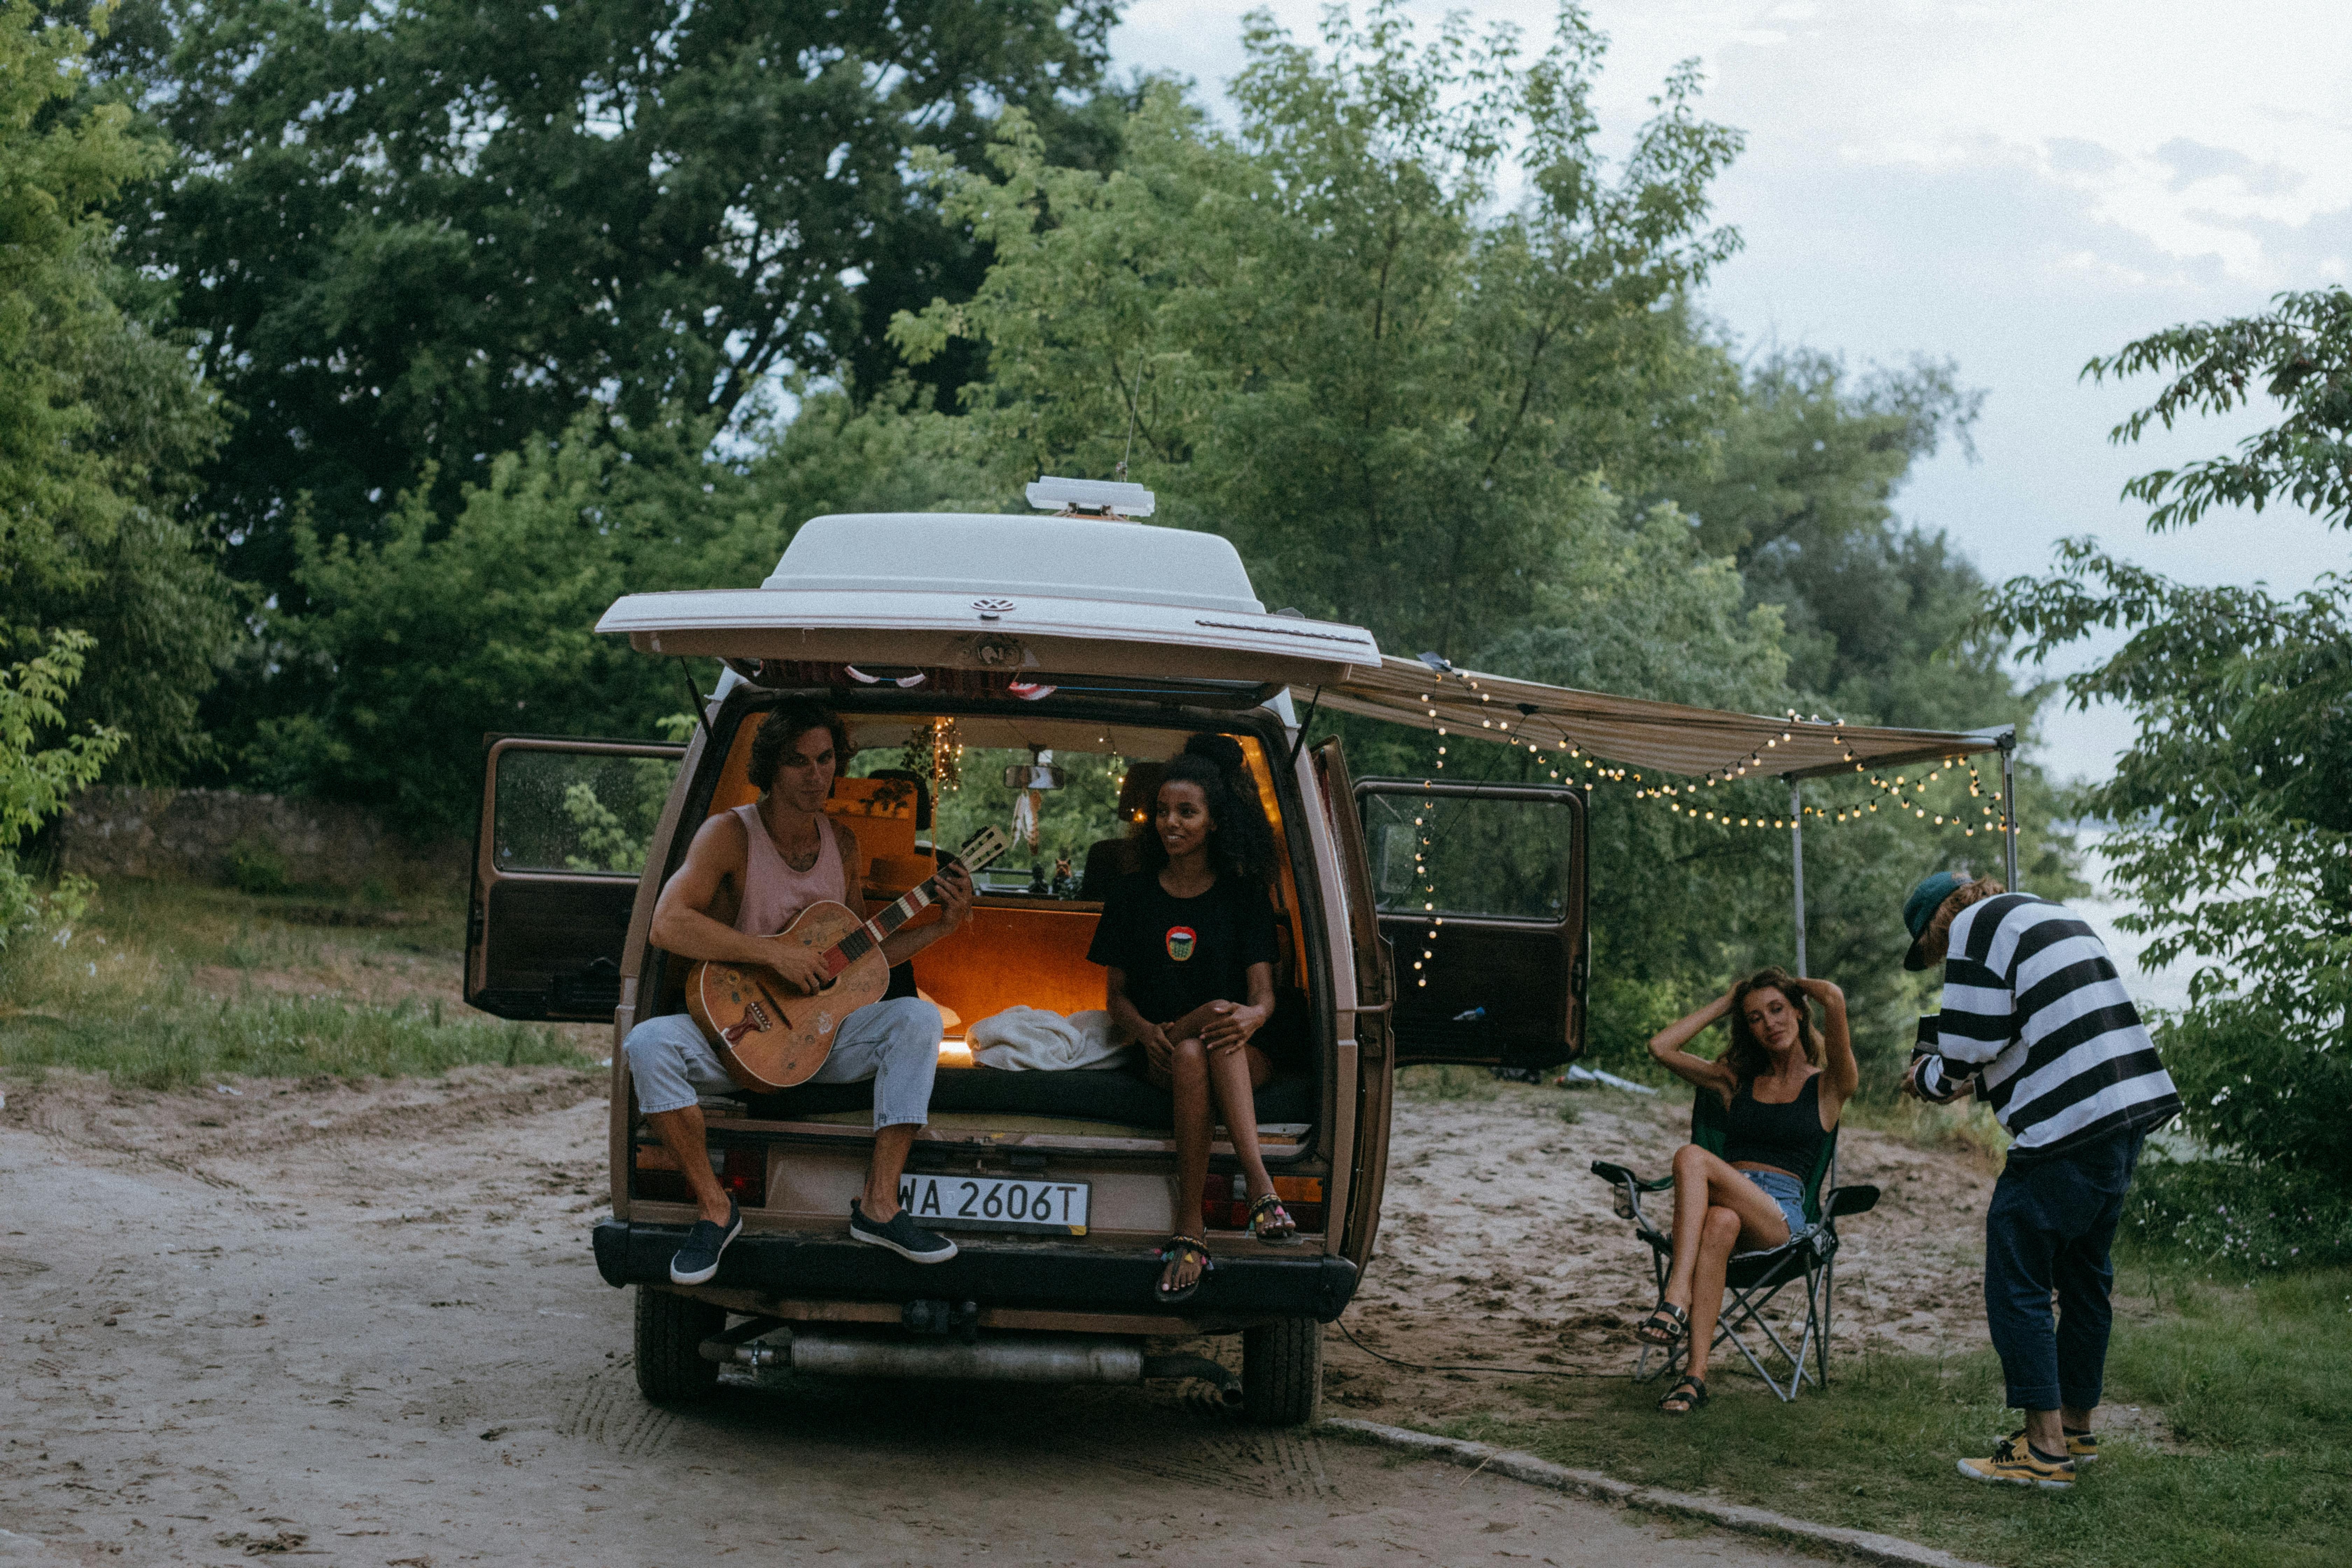
Boutique Hostels (with Private Rooms): The gold standard for many first-timers. You get the social energy of a common room and organized tours, plus the quiet retreat of your own space. It's the perfect balance of community and privacy.
Boutique Hotels or Guesthouses: A step up in privacy and comfort. Small, locally-owned spots often provide a warmer, more personal touch than soulless chains, and the staff can be a goldmine of local tips.
Centrally Located Airbnbs: Ideal if you crave a "live like a local" vibe and a kitchen. Stick exclusively to hosts with a "Superhost" designation and dozens of positive reviews that specifically mention safety, cleanliness, and an excellent location.
3. A Quick Word on Budgeting for Your First Solo Trip
A clear budget isn't a restriction; it's freedom. It frees you from money-related stress on the road. For a 7-day city trip, a simple framework is:
Fixed Costs: Pre-booked flights and accommodation.
Daily Average: Set a realistic daily budget for food, activities, and transport. Research costs in your chosen city (e.g., a meal in Lisbon is far cheaper than in Zurich). A good starting point for many European or North American cities is $75-$125 per day.
Contingency Fund: Always have an extra 20% of your total budget tucked away in a separate account for unexpected opportunities or emergencies.
4. A Pro's Approach to Solo Safety
Your confidence is directly linked to how safe you feel. Build a fortress of preparation. For a deeper dive, especially for female travelers, our Solo Female Travel Safety Guide is an essential resource.
Digital Security: Download offline maps of your city on Google Maps. Use a VPN on public Wi-Fi. Scan your passport and important documents and save them to a secure cloud service like Dropbox.
Situational Awareness: The "Morning Photo" protocol is a great habit for solo travelers. Snap a quick selfie each morning. In an emergency, it provides an exact, current visual reference.
Contingency Plan: Before you leave, share your detailed itinerary with someone at home. Establish a simple check-in cadence (e.g., a quick "all good" text each night).
Financial Safety: Carry a "decoy" wallet with a small amount of cash and an expired credit card. Keep your primary cards and the bulk of your cash in a secure money belt or a hidden internal pocket. Never keep all your money in one place.
Pro-Tip: Download the Noonlight app. It's a discreet safety button on your phone. If you're feeling uneasy, you can hold your thumb on the button. Release it and don't enter your PIN, and it will automatically alert local authorities with your exact location.
Your Ultimate Pre-Trip Tool
Feeling organized is feeling confident. Before you book a single flight, download our free International Travel Checklist. It’s a comprehensive resource that covers everything from passports and visas to packing and travel insurance, ensuring you don't miss a single crucial step.
The Perfect 7-Day Solo Travel Itinerary Blueprint
This is your playbook. The specific sights will change, but the strategic rhythm of this week is designed to maximize discovery while preventing burnout.

Day 1: Land Softly, Start Slow
Your only goal on day one is to land softly. Forget the pressure to do anything "touristy." The mission is simple: arrive, check-in, and breathe.
Afternoon (Arrival & Settle): Navigate from the airport to your lodging using a pre-vetted option—an official taxi stand, Uber/Lyft, or the city's express train. Avoid unsolicited ride offers. Once you drop your bags, take 30 minutes to actually unpack. This small act of nesting transforms a sterile room into your personal space.
Late Afternoon (The Reconnaissance Walk): Take a short, aimless walk with a purpose: to locate your vitals. Find the nearest ATM, pharmacy, small grocery store, and metro/bus stop. This simple recon mission builds a mental map and makes you feel instantly more capable.
Evening (The Easiest Dinner Ever): Your first meal should be low-stress. Find a casual, well-lit café or bistro within a few blocks of your accommodation. Ask for a table with a view of the street. This isn't just dinner; it's your first immersion.
Day 2: Find Your Anchor, Catch the Vibe
Today is about orientation. You'll anchor yourself with a major landmark and then plug into the city's authentic energy.
Morning (The Iconic Anchor): Head to the city's most famous landmark—the one on all the postcards. Book your ticket online, weeks in advance, to bypass the soul-crushing queues. Seeing this "anchor point" early gives your mental map a center of gravity.
Lunch (A Feast for the Senses): Skip the tourist-trap restaurants and head for a bustling local food market. It's a vibrant, low-pressure way to sample authentic cuisine. Graze from different stalls, trying whatever looks and smells incredible.
Afternoon (The Ultimate Solo Travel Hack): Join a "free" walking tour (they run on tips, so bring cash). A passionate local guide will give you a brilliant crash course in the city's history, secrets, and layout. It's also an effortless way to be around fellow travelers.
Evening (Culture or Comfort): If you're energized, catch a local performance—traditional music, a play, anything that gives you a taste of the culture. If you're tired, there is zero shame in a simple dinner and an early night. Listen to your body.
Day 3: Pursue Your Passion
This is your trip. Today is dedicated entirely to whatever makes you tick.
Morning (The Deep Dive):
Art Lover? Lose yourself in a world-class museum or hunt for street art in a bohemian neighborhood.
History Buff? Explore that niche museum or archaeological site that fascinates you.
Foodie? Take a local cooking class. It's one of the best ways to meet people, learn a skill, and eat an amazing meal.
Nature Enthusiast? Escape to the city's largest park or botanical garden for a few hours of green therapy.
Afternoon (The Art of Getting Lost): Pick a neighborhood that intrigued you and put your phone on airplane mode. Allow yourself to wander without a destination. Follow a charming alleyway, pop into a random shop, sit on a bench. This is where the magic happens.
Evening (A Table for One, with a View): Treat yourself. Find a restaurant or rooftop bar with a spectacular view. Order a great meal, and toast to your adventure. Worried about dining alone? Bring a journal and write about your day—it makes you look like a mysterious travel writer, not a lonely tourist.
Day 4: Gain Perspective with a Day Trip
Escaping the city for a day provides a vital change of scenery and proves your growing travel competence.
Full Day: Choose a destination one or two hours away by train or bus. Think a coastal village, a historic castle, or a national park. The journey itself is part of the adventure.
The Mission: This trip breaks the routine and shows you a completely different facet of the country. It also flexes your navigation skills and builds immense confidence. Successfully planning and executing a day trip on your own is a huge milestone.
Logistics: Research train/bus schedules the night before. Pack a small daypack with a water bottle, snacks, a portable charger, and a light jacket.
Day 5: Live Like You Belong Here
Today, your goal is to blend in. Shed the tourist skin and adopt the rhythms of a local.

Morning (The Café Ritual): Find a small, neighborhood café far from the tourist trail. Order a coffee, grab a pastry, and settle in with a book or journal for an hour. Watch the morning commute, listen to the chatter—just be.
Mid-Day (A Mundane Mission): Do a normal-person errand. Browse a local bookstore, buy fruit at a grocer, or find a post office to mail cards home. These simple tasks ground you in the reality of the place.
Afternoon (Scheduled Downtime): Hit the pause button. You are not a travel machine. Go back to your room for a nap. Read a book on a park bench. Do absolutely nothing. This is a vital part of sustainable travel.
Evening (The Local's Recommendation): Ask a local you've had a pleasant interaction with—your barista, a friendly shopkeeper—"Where's your favorite place to eat around here?" Their recommendation will almost always be more authentic and delicious than anything on a top-ten list.
Day 6: The Open Road and a Fond Farewell
Leave this day largely unplanned. It's a blank page for you to fill with whatever your heart desires.
Morning (Encore or Exploration): Is there a neighborhood you fell in love with? Go back. Did a fellow traveler tell you about a hidden gem you can't stop thinking about? Go find it. This is your flex day to chase your curiosity.
Afternoon (Meaningful Mementos): If you're buying souvenirs, seek out items that tell a story. Skip the generic trinkets and look for local crafts, specialty foods, a vintage poster, or a book from a local author.
Evening (The Last Supper): Make your final dinner a celebration of your journey. Return to a favorite spot or try that one special place you've been saving. As you eat, reflect on the week. Think about what you've learned, the challenges you've overcome, and the person you've become.
Day 7: Depart with Your Head Held High
The last day is for a smooth, grateful exit. No frantic rushing.
Morning: Enjoy one last coffee and pastry at your favorite café. Take a final, mindful walk down a beloved street, soaking in the sights and sounds.
Pack & Go: Head back to your room for a final pack-up. Leave ample time for your journey to the airport. Strolling calmly to your gate is a far better feeling than sprinting.
At the Airport: Once you're through security, pause. Take a deep breath. You did it. You took the dream of solo travel and forged it into reality. Acknowledge the magnitude of that achievement.
Frequently Asked Questions
What is the best way to handle feeling lonely on a solo trip?
It's completely normal to feel a pang of loneliness. The best strategy is to be proactive. Stay in social accommodations like a boutique hostel, join a walking tour or a cooking class on days you crave interaction, and find a cozy café to simply be around the comforting buzz of other people.
Is it awkward to eat at restaurants alone?
Not at all! It's a skill that gets easier with practice. Start with casual cafes, bring a book or journal to feel more comfortable, and try sitting at the bar where you can often chat with the bartender. Soon you'll find it's a peaceful and empowering experience.
How can I stay safe when going out at night by myself?
A: Prioritize well-lit, busy areas and research neighborhoods beforehand. Tell someone where you're going, use ride-sharing apps like Uber instead of walking in unfamiliar areas late at night, and always be mindful of your drink. Trust your intuition—if a place feels off, leave immediately.
What's the most common mistake first-time solo travelers make?
The most common mistake is over-scheduling. New solo travelers often try to fill every single minute to avoid being alone with their thoughts. The real magic happens in the unplanned moments, so be sure to build plenty of downtime and flexibility into your itinerary.
Welcome Home, Traveler: This Is Just the Beginning
Walk through that arrival gate on your way home, and you won't be the same person who left. A solo trip is a declaration—proof that you are more capable, resilient, and fiercely independent than you might have ever allowed yourself to believe.

This solo travel itinerary was never just about seeing a new place; it was about discovering a new version of yourself. Use this template, adapt it, and carry the confidence you've earned into planning your next adventure. When you're ready to go from template to a fully-realized plan, our comprehensive Travel Guide is the perfect next step to turning your dream trip into a reality. Because this isn't the end of one journey; it's the beginning of a lifetime of them.
Read the full guide: Family Travel Ideas: The 2026 Guide to Unforgettable Trips
Don't Miss Out! Subscribe for Exclusive Content
Subscribe


Comments 0
No comments yet
Be the first to share your experience!
Dont Miss Out! Subscribe for Exclusive Content

Ultimate USA Holidays Guide: Top Picks

FTC Affiliate Disclosure Essentials: Stay Compliant as a Travel Creator

Essential Affiliate Tools: From Tracking to Full Optimization

Booking.com Affiliate Program Review: Pros, Cons, and Earnings Potential

Decoding Affiliate Commission Rates: Benchmarks for Travel Creators

Amazon Associates for Travel: Strategies to Maximize Commissions
Ultra Festival: Beat the Heat Guide
TrekGuider @trekguider
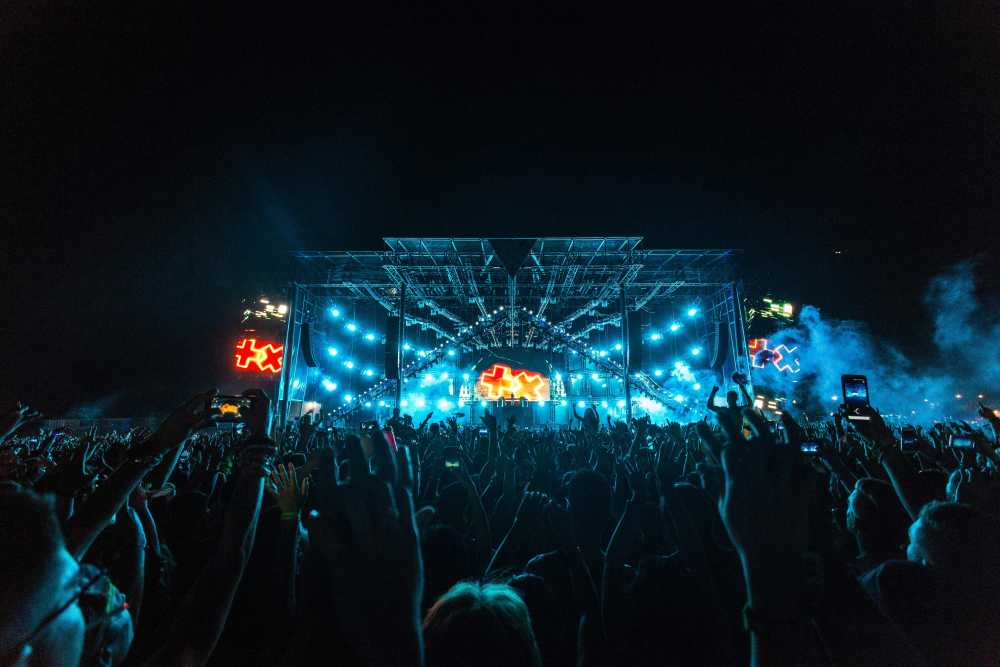
You’ve done it. You scored the golden ticket to Ultra Music Festival, a three-day sonic pilgrimage in the heart of Miami where the world’s greatest DJs command colossal stages and the energy is nothing short of electric. But as the bass drops, so does the relentless Florida sun. The real problem isn't just the heat; it's the brutal combination of scorching temperatures, suffocating humidity, and tens of thousands of dancing bodies that can quickly turn your dream festival into a dehydrated, sun-stroked nightmare.
Imagine the agony of missing Skrillex’s closing set because you’re dizzy and nauseous, huddled in a medical tent. Picture the sheer frustration of tapping out before sunset on day one, your energy completely drained, while your friends rave on into the night. This isn't a scare tactic; it's a common reality for unprepared attendees who fatally underestimate the physical toll of partying under the Miami sun for three straight days. The line between an unforgettable weekend and a miserable, potentially dangerous one is drawn by a single thing: a bulletproof strategy.
This is that strategy. Forget the generic "drink water" advice you’ve heard a thousand times. This is your new bible for not just surviving, but truly conquering the heat at Ultra. We’re providing a pro-level, comprehensive blueprint covering everything from tactical gear selection and advanced hydration science to strategic stage navigation and leveraging festival tech for your safety. Follow these steps, and you won't just beat the heat—you'll own the entire experience, from the opening beat on Friday to the final fireworks on Sunday.
Understanding the Ultra Music Festival Environment: Sun, Crowds, and Sound
Before you can build a plan, you must understand the battlefield. Ultra Music Festival unfolds in late March at Bayfront Park, a beautiful but notoriously exposed venue. For 2026, the festival runs from March 28-30 (and for you long-term planners, March 27-29 in 2026), a time when Miami’s weather is deceptively intense. While the festival is at the heart of the city's vibrant event calendar—a scene we detail in our complete guide to Miami Holidays: 8 Beach Fest Vibes—its unique environment presents a specific set of challenges you must be prepared for.
The festival operates on a strict "rain or shine" policy, meaning you need to be ready for anything. The schedule itself is a marathon, not a sprint:
Friday, March 28: 4:00 PM – 12:00 AM
Saturday, March 29: 12:00 PM – 12:00 AM
Sunday, March 30: 12:00 PM – 10:00 PM
Notice that Saturday and Sunday demand ten to twelve hours of exposure. The primary obstacles you will face are:
Intense Solar Radiation: The Florida sun is powerful. Without adequate shade, direct exposure can lead to severe sunburn and rapidly increase your core body temperature.
Oppressive Humidity: Miami's humidity cripples your body's natural cooling system. It prevents sweat from evaporating effectively, making 85°F feel like a suffocating 95°F.
Massive Crowds: Dense crowds trap body heat, creating microclimates that are significantly hotter than the ambient air. Navigating these human seas requires immense physical energy.
Constant Movement: You’ll be walking, standing, and dancing for hours on end, burning calories and losing fluids at a dangerously accelerated rate.
The first and most critical mindset shift is to treat Ultra like an athletic event. Your preparation starts long before you ever step foot in Bayfront Park.

Pre-Festival Prep: Your Foundation for Success
Victory is won in the preparation. What you do in the days leading up to the festival and what you pack in your bag will absolutely dictate your endurance and enjoyment.
The Ultimate Packing List: Beyond the Basics
Your packing list is your first line of defense. Every single item should serve a purpose, primarily focused on cooling, hydration, and comfort.
Clothing (The Three B’s: Breathable, Bright, and Barely-There):
Fabrics: Choose lightweight, moisture-wicking materials like polyester, nylon, or bamboo blends. These technical fabrics pull sweat away from your skin, allowing it to evaporate and cool you down. Avoid cotton at all costs; it absorbs moisture, becoming a heavy, suffocating trap for heat.
Colors: Opt for light-colored clothing. White, beige, and pastels reflect sunlight rather than absorbing it like dark colors do.
Fit: Loose-fitting garments are your best friend. They allow for crucial airflow against your skin, preventing heat from getting trapped.
Footwear (Your Most Important Gear): You will be on your feet for 30+ hours over the weekend. Comfortable, well-worn sneakers are non-negotiable. Do not, under any circumstances, wear brand-new shoes, flimsy sandals, or heavy boots. Running or athletic shoes with proven arch support are ideal.
Hydration Hardware:
Hydration Pack: This is the single most important piece of gear you can bring. A CamelBak or a similar backpack with a water bladder allows you to carry 2-3 liters of water and sip continuously without fumbling with a bottle. Ensure it complies with the latest festival size and pocket regulations before you go.
Electrolyte Packets: Pack single-serving powders or tablets (like Liquid I.V., Nuun, or Pedialyte packets). They are small, light, and absolutely essential for true hydration.
Sun & Heat Protection Arsenal:
Sweatproof Sunscreen: A broad-spectrum, water-resistant sunscreen with an SPF of 50 or higher is mandatory. Apply it generously 30 minutes before you enter and reapply every two hours, no exceptions.
Wide-Brimmed Hat: A bucket hat or other wide-brimmed hat provides a portable oasis of shade for your face, neck, and ears, significantly reducing your perceived temperature.
UV-Protective Sunglasses: Protect your eyes from the relentless glare and long-term sun damage.
Cooling Towel: These hyper-evaporative towels, when soaked in water, provide incredible cooling relief when worn around your neck.
Handheld Fan/Mister: A small, battery-operated fan can be a godsend in a stagnant, dense crowd, creating a personal breeze when you need it most.
Physical Conditioning: Don't Underestimate the Marathon
You wouldn't run a 10k without training, and you shouldn't tackle Ultra without some physical prep.
Pre-Hydrate Aggressively: Begin increasing your water intake 2-3 days before the festival. Your goal is to start Day 1 with your body in a state of optimal hydration, not playing a desperate game of catch-up.
Build Endurance: In the weeks leading up, incorporate some light cardio into your routine. Even 30 minutes of brisk walking or jogging a few times a week will dramatically improve your stamina.
Prioritize Sleep: Get a full 8 hours of sleep each night in the week before the festival. A sleep deficit severely impairs your body's ability to regulate temperature and recover.
Just as detailed planning is key for a scenic road trip, like the one we map out in our Big Sur Map & Itinerary, careful preparation is essential for a massive festival. Don't leave your experience to chance.
Mastering Hydration: The Core of Your Ultra Music Festival Strategy
This is the most critical section of this guide. Proper hydration at Ultra is a science. Simply drinking water when you feel thirsty is a recipe for disaster; by the time you feel thirst, you are already significantly dehydrated.

Water Isn't Enough: The Critical Role of Electrolytes
When you sweat, you don't just lose water; you lose vital minerals called electrolytes—primarily sodium, potassium, and magnesium. These minerals are the spark plugs of your body, responsible for regulating nerve and muscle function, hydrating your cells, and balancing blood pressure. Replenishing them is just as important as replenishing water.
Why It Matters: Drinking excessive amounts of plain water without replacing electrolytes can lead to a dangerous condition called hyponatremia, where the sodium levels in your blood become dangerously diluted. Symptoms can mimic dehydration (nausea, headache, confusion) but can be far more severe.
Your Game Plan: For every two refills of your hydration pack with plain water, make the third refill an electrolyte mix. This simple rule ensures you are constantly replenishing what you're sweating out. Avoid relying on sugary energy drinks or sodas for hydration; they can often make dehydration worse.
Your Hydration Schedule: A Sip-by-Sip Plan
Discipline is everything. You need a proactive hydration schedule, not a reactive one.
The Morning Load-Up: Drink at least 16-20 ounces (about half a liter) of water with an electrolyte packet before you even leave for the festival.
The Immediate Refill: The very first thing you do upon entering Bayfront Park is locate a water station and fill your hydration pack to its maximum capacity.
The 15-Minute Rule: Take a few big sips of water from your pack every 15 minutes. Set a recurring alarm on your phone or watch if you have to. Do not wait until you feel thirsty.
The Proactive Refill: Never wait until your pack is empty to refill it. When it's about one-third full, make your way to a water station. The lines are shortest during non-peak times (e.g., during a headliner's set when everyone is at one stage, or early in the day).
The End-of-Night Recovery: Drink another 16-20 ounces of electrolyte-infused water before you go to sleep. This will supercharge your body's recovery overnight and prepare you for the next day.
Pro-Tip: As soon as you get inside, open the festival map on the official app and screenshot the locations of all free water refill stations. The stations located near smaller stages or along the perimeter of the park often have significantly shorter lines than the ones near the main stage.
Strategic Navigation and Lineup Planning
How you move through the festival and plan your day is just as important as what you pack. Wasting energy is a luxury you simply cannot afford.

Decoding the Festival Map for Heat Evasion
The festival grounds are a maze of stages, vendors, and people. Use the map to your real advantage.
Identify Cool Zones: Before you even start thinking about artists, scan the map for any designated shade structures, indoor stages (like the iconic Megastructure), or air-conditioned brand activations. These are your recovery oases.
Plan Efficient Routes: When moving from the Main Stage to the Resistance stage, don't just try to cut through the thickest part of the crowd. Use the perimeter walkways. It might be a slightly longer distance, but it will be faster and require far less energy than pushing through a human traffic jam.
Building a Smart Schedule: Pacing is Everything
With a 2026 lineup featuring titans like John Summit & Dom Dolla, Armin van Buuren, Tiësto, Chase & Status, and Deadmau5, the temptation is to sprint from stage to stage. This is a rookie mistake that will burn you out by 9 PM on Friday.
Prioritize Ruthlessly: Accept that you cannot see every artist. Pick your top 3-4 "can't-miss" sets for each day and build your schedule around them as anchors.
Schedule Deliberate Downtime: The hottest part of the day is typically between 2 PM and 5 PM. This is the perfect time to schedule a tactical break. Find a shady spot, sit down, focus on hydrating, and eat a proper meal. This planned rest will give you the energy you need for the headlining acts at night.
Embrace Discovery: Use the time between your must-see sets to explore smaller stages. They are often less crowded, providing more space to dance, breathe, and discover your new favorite artist.
Pro-Tip: When moving through a dense crowd to get closer to a stage, conserve energy by following directly behind a larger, determined person or group. Let them carve a path for you. It's a simple "drafting" trick that saves a surprising amount of physical effort.
Leveraging Technology and Safety Resources at Ultra Music Festival
In the modern festival era, your phone is an essential survival tool. Ultra has integrated technology to enhance attendee safety, and you should take full advantage of every resource.
Your Phone is Your Lifeline
The Official Ultra App: Download it well in advance. It contains the most up-to-date festival map, set times, and, most importantly, will send push notifications for any emergency alerts or important announcements.
The SaferWatch App: Ultra has partnered with the SaferWatch app, which allows you to report any safety or security concerns (medical emergencies, suspicious activity) directly and anonymously to festival staff in real-time. Have it downloaded and set up before you arrive.
Portable Charger: Your phone is useless with a dead battery. A fully charged portable power bank is not optional; it's mandatory.
Knowing Where to Go for Help
Even with perfect preparation, things can go wrong. Knowing how to recognize a problem and where to get help is crucial.
Locate Medical Tents: Just like the water stations, the first thing you should do is identify the location of all medical tents on your map. They are staffed with professionals who are there to help you, no questions asked. There is no shame in seeking help.
Recognize the Signs of Heat Exhaustion: Be aware of these symptoms in yourself and your friends:
Heavy sweating
Dizziness or lightheadedness
Nausea or vomiting
A throbbing headache
Cool, pale, clammy skin
If you or a friend experience these, get to a medical tent immediately. Do not try to "tough it out."
Be a Good Raver: The Ultra community is known for looking out for one another. If you see someone who looks unwell or is in distress, ask if they need help and guide them toward a medical tent or alert festival staff.

You're Ready to Conquer Ultra
The roar of the crowd, the earth-shaking bass, the Miami skyline lit up against the night sky—these are the moments that define the Ultra Music Festival experience. By approaching the weekend with the mindset of an endurance athlete, you are no longer at the mercy of the elements. You are in control. Preparation is your armor, hydration is your fuel, and a smart strategy is your map to victory. You now have the expert knowledge to stay cool, energized, and safe from the first set to the final encore.
You are now equipped to handle the heat, navigate the crowds, and fully immerse yourself in the magic of one of the world's greatest music festivals. This level of detailed planning is what transforms a good trip into an unforgettable one. For comprehensive strategies on navigating destinations and events worldwide, our master Travel Guide is the ultimate resource for the serious traveler. Now go, stay hydrated, and have the time of your life.
Don't Miss Out! Subscribe for Exclusive Content
SubscribeComments 0
No comments yet
Be the first to share your experience!
Dont Miss Out! Subscribe for Exclusive Content

San Francisco Cherry Blossoms: A Local's Guide to the Blooms

Halloween SF: Haunts Without Horrors

SF Festivals: 7 Must-See Lineups

Christmas SF: Lights & Wharf Wonders

SF Pride: 6 Route & Party Hacks

Chinese New Year SF: Parade Essentials
A Woman's Guide to Safe Travel: 10 Critical Tips
TrekGuider @trekguider
The desire to see the world is a powerful, universal calling. It’s a yearning for new horizons, different cultures, and the thrill of discovery. But for women, this excitement is often tangled with a unique and persistent thread of concern. The questions are constant and valid: Will I be safe? How will I be treated? How do I handle unwanted attention? This undercurrent of anxiety is the problem—it threatens to shrink your map, limit your experiences, and steal the spontaneous joy that travel is supposed to ignite.
This fear is agitated by vague warnings from well-meaning friends and family. You’re told to "be careful" but rarely taught how to be confident. You’re handed a list of places to avoid instead of a set of skills to navigate any place on Earth. This narrative can make you feel like a potential victim rather than the powerful, capable explorer you are. It’s time to change that story. This guide is your solution, a definitive playbook for empowerment. It’s not a list of restrictions; it’s a masterclass in preparation, cultural fluency, and unshakeable self-assurance. We’ve synthesized insights from security experts, cultural specialists, and veteran female travelers to bring you 10 critical tips for women's travel safety. These strategies are a vital part of the complete approach to preparedness we champion in our The Ultimate Guide to Travel Safety: A 2026 Playbook. Let’s begin.

The Foundation: Mindset, Research, and Preparation
True safety isn't a reaction; it's a foundation you build long before you leave home. It’s about cultivating a mindset of proactive awareness and arming yourself with knowledge. These foundational principles transform you from a tourist into a savvy, self-assured traveler.
Tip 1: Master the Art of Proactive Research
Going beyond booking flights and hotels is the first step in empowered travel. Your research needs to include a deep dive into the cultural norms and expectations for women in your destination. This isn't about judging a culture; it's about understanding it so you can navigate it respectfully and safely.
Middle East & North Africa: In many conservative countries, modesty matters most. Research the local expectation for dress, which often means covering your shoulders, cleavage, and knees with loose-fitting clothing. Carrying a lightweight scarf is always a smart move, as it's required for entering mosques and can be used to show respect in more traditional areas.
India: While dress codes are relaxing in major cities, modesty is still advisable, especially in rural areas and at religious sites. Public displays of affection are generally frowned upon and can draw unwanted attention.
Japan & parts of Southeast Asia: In cultures that value public harmony, like Japan's, loud conversations on trains or buses are considered rude. In Thailand, the head is sacred; never touch someone's head. Conversely, feet are considered lowly, so avoid pointing them at people or religious icons.
Latin America: Personal space is generally much smaller than in other cultures. People stand closer when talking, and greetings often involve a kiss on the cheek. Knowing this can prevent you from misinterpreting a normal social custom as an invasion of your space.
This research isn't about limiting your freedom. It's about gaining cultural fluency, which allows you to move with more confidence and less friction.
Tip 2: Project Unshakeable Confidence (Even When Faking It)
Your body language is your first and most powerful line of defense. Potential harassers and scammers are opportunistic; they look for people who seem lost, timid, or distracted. Your goal is to project an aura of confidence and awareness that makes you a "hard target."
Walk with Purpose: Move with a steady, determined pace, as if you know exactly where you're going—even if you're just exploring.
Keep Your Head Up: Avoid looking down at your phone or the ground. Keep your head on a swivel, actively scanning your environment and making brief, deliberate eye contact with those around you.
Maintain Assertive Posture: Stand tall with your shoulders back. This non-verbally communicates that you are aware, present, and not an easy target.
Even if you're feeling nervous or lost on the inside, projecting confidence on the outside is a powerful deterrent. If you need to check a map, step into a café or shop to do so discreetly.
Tip 3: Trust Your Intuition—It’s Your Superpower
Psychologists and security experts agree: that "gut feeling" is a legitimate and powerful threat-detection tool. It's your subconscious mind processing thousands of subtle environmental and behavioral cues that something is "off" long before your conscious mind can articulate why.
If a person, a street, or a situation feels wrong, it is wrong for you.
Do not dismiss that feeling. Do not worry about being "rude" or overreacting. Your safety is more important than anyone else's opinion. Treat your intuition as an infallible guide. If a conversation makes you uncomfortable, end it and walk away. If a street looks sketchy, turn around and take a different route. If the friendly stranger inviting you for tea seems too good to be true, he is. Leave immediately, without hesitation or apology.

Your Digital and Social Safety Net for Women's Travel Safety
In today's world, you are never truly alone unless you choose to be. Technology and global communities have created a powerful safety net that you can, and should, leverage on every trip. Setting this up before you go is one of the most important aspects of modern women's travel safety.
Tip 4: Join a Sisterhood: Leverage Female Travel Networks
The beautiful truth of modern travel is that the shared experience of women has forged an incredible global sisterhood. Tapping into this collective wisdom before and during your trip is like having thousands of savvy, experienced friends on speed dial.
The Solo Female Traveler Network (SoFe): One of the largest and most active communities, SoFe's Facebook groups are a treasure trove of real-time advice, support, and meetup opportunities. Its mission is to empower women to travel solo with confidence.
Wanderful: This global "travel sisterhood" connects women through online networks, local chapters with in-person events, and group trips. Their focus is on building an inclusive and supportive ecosystem for all female travelers.
Host A Sister: This highly-engaged Facebook group operates on a principle of cultural exchange, allowing women to find or offer safe accommodation with other women around the world. It's a powerful tool for finding trusted lodging and making authentic connections.
On the TrekGuider platform, you can explore our Catalog of Authors to discover and follow trusted female travel creators, accessing their expert guides and articles all in one place.
Tip 5: Share Your Itinerary and Use Safety Apps
Always leave a copy of your detailed itinerary with a trusted friend or family member back home. This should include flight numbers, accommodation addresses and phone numbers, and a general outline of your plans. Establish a check-in schedule—a quick text or email each morning—so they know when to worry and when not to.
Amplify this with technology. Use a personal safety app like bSafe, which can share your GPS location with "Guardians" in real-time, activate a voice-command SOS alarm, and even live-stream and record video during an emergency. Other highly-rated options include Noonlight, which connects you to professional emergency dispatchers, and Life360, which is excellent for private location sharing with a trusted circle.
Pro-Tip: Before you leave, create a "digital decoy." On a secure cloud drive, keep encrypted copies of your passport, visa, and credit cards. On your phone's notes app, create a fake list of passwords (e.g., "Email: 12345678," "Bank: password123"). In the unlikely event you are ever forced to hand over your phone and passwords, you can provide the useless decoy list while your real information remains secure.
Your Ultimate Solo Travel Playbook
Ready to take your preparedness to the next level? For a deep dive into cultural etiquette, responding to harassment, and strategies for building unshakeable confidence, you need our comprehensive playbook. It's the ultimate resource for any woman dreaming of exploring the world on her own terms.
Download your free Solo Female Travel Safety Guide now!
In the Field: Street Smarts and Cultural Fluency
Once you're on the ground, your preparation meets reality. This is where your research, mindset, and social savviness come together to create a seamless and safe experience.
Tip 6: Dress to Blend, Not to Brand
Your clothing is your most immediate form of non-verbal communication. While you should always express yourself, making strategic wardrobe choices is a key tool for blending in and deterring unwanted attention. Observe what local women are wearing—not just other tourists—and aim for a similar level of modesty and formality. In many cultures, this simple act of respect can dramatically reduce the amount of attention you receive.

Tip 7: Master Your "De-escalation Script" for Harassment
Street harassment is an unfortunate reality in many parts of the world. The key to handling it is to have a pre-planned response so you don't freeze in the moment. Experts recommend a tiered approach:
Ignore First: Often, a harasser's goal is to get a reaction. The safest and most effective initial response is to not engage. Avoid eye contact, do not respond verbally, and continue walking with purpose as if you heard nothing.
Get Loud and Firm: If ignoring doesn't work and the person becomes persistent, use a strong, firm voice and assertive body language. Say a clear, simple command like "Stop," "Go away," or "Leave me alone." Learning this phrase in the local language is incredibly effective.
Move to a Safe Place: Your priority is to remove yourself from the situation. Walk directly into a public, populated place like a shop, a café, or a hotel lobby. If you feel you are being followed, do not lead them back to your own hotel.
Tip 8: Understand Local Interaction Norms
Knowing the local customs for social interaction is critical for avoiding misunderstandings that could compromise your safety. As mentioned in Tip 1, different cultures have vastly different norms. In the Middle East, a woman should typically wait for a man to extend his hand before offering a handshake; a hand over the heart is a respectful alternative. In Latin America, standing very close while talking is normal. Understanding these nuances prevents you from misinterpreting friendliness as aggression or vice-versa.
Smart Choices for Accommodation and Transport
Where you sleep and how you get there are two of the most important safety decisions you'll make every day.
Tip 9: Choose Your Accommodation Wisely
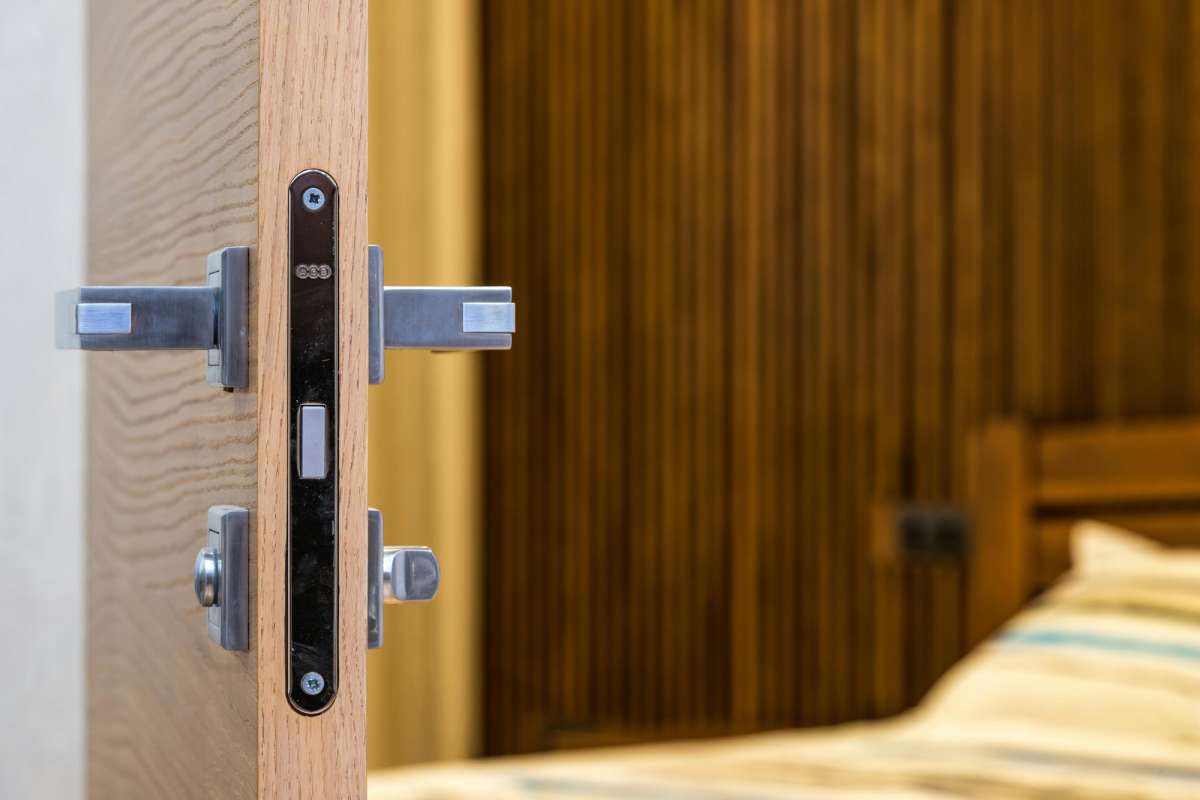
Your hotel or rental is your sanctuary. Protect it. When booking, read reviews specifically from other solo female travelers—they will often highlight safety aspects others might overlook. Consider accommodations with 24-hour reception, interior corridors (rather than motel-style doors that open to the outside), and positive reviews about staff helpfulness. Female-only hostel dorms are also an excellent and secure option.

Tip 10: Be Strategic About Transportation
Arriving in a new city late at night can be disorienting and put you in a vulnerable position. Try to schedule flights that land during the day. Before you arrive, research the safest way to get from the airport to your accommodation and pre-book with a reputable company if possible. When using taxis or ride-shares, always perform a safety check. Match the license plate and driver with the app, and never get in if they don't match.
Pro-Tip: When you get in a taxi or ride-share, start a real or fake phone call. Say loudly and clearly, "Hi, I'm in the car now. The license plate is read the plate number. I'll be there in about 20 minutes, you can track my ride on the app. See you soon!" This immediately informs the driver that you are being monitored, which can be a powerful deterrent to any wrongdoing.
Women's Travel Safety FAQ
A prepared mind is a safe mind. Here are expert answers to common questions.
1. What's the best response if I'm approached by "fake police"?
This is a common scam where criminals impersonate officers to demand an on-the-spot "fine." Real police will not demand cash. Remain calm and never hand over your wallet or passport. State firmly and politely, "I understand. I am happy to go with you to the official police station to handle this." This will almost always cause the scammers to back down.
2. Is it safe to wear jewelry when traveling?
It's generally wise to leave expensive or sentimental jewelry at home. Flashy items can attract unwanted attention and make you a target for theft. A simple wedding band is usually fine, but consider leaving valuable engagement rings or designer watches in a safe place. The goal is to blend in, not to stand out.
3. I'm worried about being scammed. What's a good general rule?
Trust your skepticism. Many scams work by exploiting your politeness or greed. The "found ring" scam, for example, preys on your desire for a deal. A universal rule is to be wary of any unsolicited help or offers from strangers, no matter how friendly they seem. A firm, polite "No, thank you" while walking away is your best defense against most ploys.
Travel with Empowered Confidence
The goal of women's travel safety is not to build a fortress of fear that separates you from the world. It is to build a foundation of knowledge that gives you the freedom to engage with the world fully and fearlessly. By mastering research, cultivating confidence, leveraging your community, and practicing situational awareness, you are not just keeping yourself safe—you are taking control of your journey. You are proving that a woman's place is wherever she wants it to be. The world is waiting. You are capable, you are strong, and now, you are prepared.
For a complete master plan covering every aspect of your journey—from health and financial safety to packing and logistics—our all-encompassing Travel Guide is the only resource you'll ever need.

Meta Data Suggestions:
SEO Meta Title (58 characters): A Woman's Guide to Safe Travel: 10 Critical Tips (2026)
URL Slug: womens-travel-safety-tips
SEO Meta Description (154 characters): Empower your journey with 10 critical women's travel safety tips. Learn how to navigate cultures, respond to harassment, and travel solo with confidence.
Don't Miss Out! Subscribe for Exclusive Content
SubscribeComments 0
No comments yet
Be the first to share your experience!
Dont Miss Out! Subscribe for Exclusive Content

How to Avoid Travel Scams: A Global Guide

Is Public WiFi Safe? How to Protect Your Data Abroad

7 Hotel Safety & Security Tips for Peace of Mind

9 Beach Safety Tips That Could Save Your Life

How to Stay Safe While Hiking: A Hiker's Safety Guide
