Solo Travel in Asia: Afford Your Dream Trip (No More Guessing)
TrekGuider @trekguider
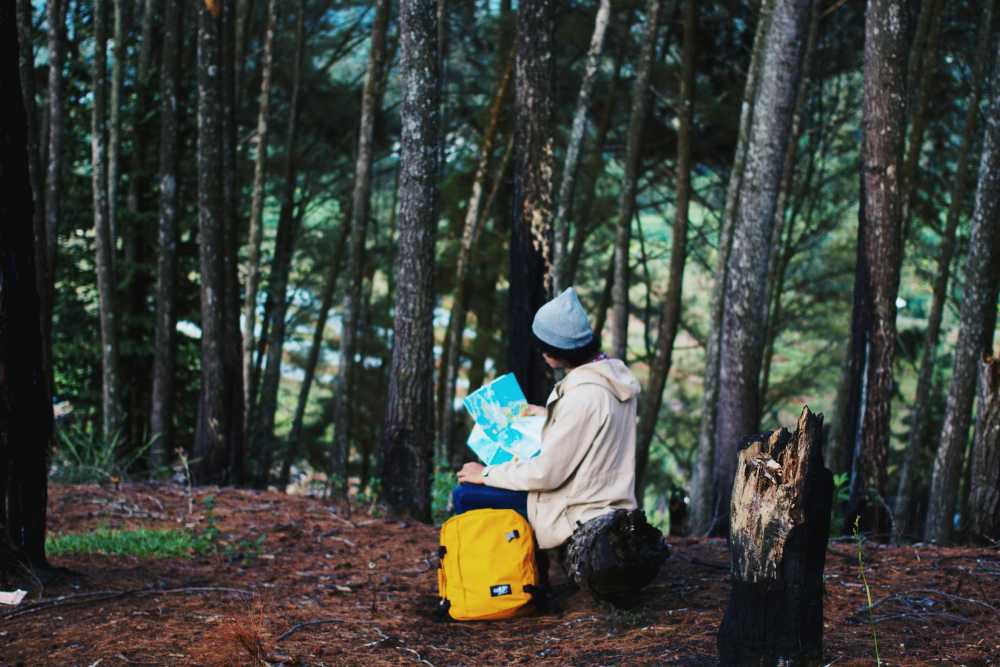
You see the photos in your feed: the vibrant street food stalls of Hanoi, the serene, golden temples of Chiang Mai, the almost impossibly turquoise waters of the Philippines. You want that. But a cloud of anxiety hangs over the dream: the budget. You’ve seen the blogs promising epic adventures for "$30 a day," but a nagging voice in your head questions the reality. How can that possibly be the whole story? It feels like you're missing a huge piece of the financial puzzle, making it impossible to know if your hard-earned savings are really enough.
Let's be clear: you're right to be skeptical. The internet is a minefield of incomplete advice that conveniently ignores the thousands of dollars you'll spend on flights, comprehensive travel insurance, visas, and pre-trip vaccinations before your boots even touch the ground. This "per-day" myth is a dangerous fantasy that leads to stress and budget blowouts. You don't need a fantasy; you need a plan based on reality.

This is that guide. We're cutting through the noise to give you a reality-based playbook for budget solo travel in Asia, built on hard data and real-world experience. We will tackle the Total Trip Cost head-on, giving you a complete financial blueprint that empowers you to plan with unshakable confidence. While this guide is your financial strategy, mastering the art of traveling alone is equally crucial. For a complete playbook on mindset, safety, and logistics, be sure to read our comprehensive guide on .
Asia: The Undisputed Epicenter for Budget Solo Travel
For decades, Asia has been the champion for independent travelers seeking the ultimate trifecta: unparalleled diversity, profound cultural experiences, and an astonishingly low cost of living. The continent offers a sensory feast, from the futuristic skyline of Tokyo to the ancient, jungle-claimed ruins of Angkor Wat and the snow-capped Himalayan peaks of Nepal.
What makes it uniquely perfect for budget solo travel is the well-trodden "Banana Pancake Trail"—the unofficial network of routes across Southeast Asia that has created a strong and welcoming infrastructure for backpackers. This translates to an abundance of affordable hostels, cheap and mind-blowingly delicious street food on every corner, accessible transportation, and a built-in community of fellow travelers. It’s an environment practically engineered for exploration, where your dollar stretches further than almost anywhere else on Earth, allowing for longer, more immersive journeys without bankrupting you.

The World's Best Bargains: A Data-Driven Ranking of Asia's Top 10 Budget Nations
The sheer number of options in Asia can be overwhelming. To cut through the noise, we've created a composite ranking based on average daily cost, safety (using data from the Global Peace Index), ease of solo travel, and overall experience value. This is your starting point for planning an incredible budget solo travel in Asia itinerary.
The "Big 4" for Ultimate Value: Vietnam, Cambodia, Nepal, Thailand
These four nations are the undisputed kings of the classic backpacker circuit, and for good reason. This is where your travel fund has superpowers. Here, a daily budget of $25-35 isn't about survival; it's about thriving. We're talking $8 for a clean hostel dorm bed, $2 for a world-class bowl of Phở or Pad Thai from a street vendor, and less than $1 for a local beer. The value proposition is simply unbeatable for anyone planning budget solo travel in Asia.
The Best of the Rest: Indonesia, The Philippines, Laos, Malaysia
This next tier offers world-class experiences with a slight step up in daily cost. The Philippines is an archipelago of some of the planet's most beautiful beaches, a paradise for island hopping and diving. Laos offers a more tranquil, less-trodden path with breathtaking mountain scenery and a deeply relaxed atmosphere. And Malaysia, particularly the island of Penang, is a food lover's dream, blending Malay, Chinese, and Indian culinary traditions into a spectacular and affordable street food scene.
The Rising Star: Uzbekistan
Largely absent from mainstream guides, Uzbekistan is a hidden gem for the budget-conscious history buff. As a central hub of the ancient Silk Road, its cities—Samarkand, Bukhara, and Khiva—are architectural masterpieces of complex tilework and soaring minarets. With a high degree of safety, incredibly friendly locals, and rock-bottom prices, it offers a unique cultural experience far from the tourist crowds.
The Great Debate: How to Conquer Japan on a Backpacker's Budget
Japan has a reputation for being prohibitively expensive, but here's the inside scoop: thanks to a favorable currency exchange rate and a unique social infrastructure, it has become surprisingly accessible. The key is to travel like a local, not a tourist.
Sleep in capsule hotels: These futuristic pods offer a clean, private, and safe place to sleep for a fraction of the price of a standard hotel.
Embrace the conbini: Japanese convenience stores (7-Eleven, FamilyMart) are a culinary marvel. You can get delicious and healthy meals like onigiri (rice balls), sandwiches, and bento boxes for just a few dollars.
Focus on free attractions: Many of Japan's most beautiful sights, from serene Shinto shrines and sprawling city parks to vibrant neighborhoods like Harajuku, are completely free to explore.
By adopting these strategies, you can experience one of the world's most fascinating cultures on a budget of around $50-70 a day.
Your No-Nonsense Guide to a Realistic Budget for Solo Travel in Asia
Let's build your real-world budget. While daily spending is the fun part, a successful trip requires a holistic financial plan that starts long before you book your flight.
The Daily Budget Benchmark: What $30, $50, and $75 a Day Really Buys You

$30/Day (The Shoestring Backpacker): This is tight but achievable in the "Big 4." It covers a bed in a dorm hostel, exclusively eating street food, walking as your primary transport, and sticking to mostly free activities.
$50/Day (The Flashpacker): This is the sweet spot for a comfortable budget solo travel in Asia experience. It allows for a private room in a hostel or a budget guesthouse, a mix of street food and restaurant meals, the occasional Grab ride, and entry fees for major attractions.
$75/Day (The Comfort Seeker): At this level, you can afford budget hotels, enjoy meals in nice restaurants, take domestic flights to save time, and participate in more expensive activities like scuba diving courses without constantly checking your bank account.
Deconstructing Your On-the-Ground Costs: A Percentage-Based Breakdown
Once you land, a good rule of thumb for allocating your daily funds is:
Accommodation: 35%
Food & Drink: 25%
Activities & Attractions: 15%
In-Country Transport: 15%
Miscellaneous (laundry, SIM card, etc.): 10%
The Hidden Costs: Budgeting for the "Big 4"
This is the most important part of your budget—the major expenses you'll pay before you leave. Ignoring these is the #1 mistake aspiring travelers make.
International Flights: This will likely be your single largest expense, ranging from $700 to $1,500+ for a round-trip ticket from the U.S. Use tools like Google Flights and Skyscanner, be flexible with your dates, and consider flying during the shoulder seasons (e.g., April-May, September-October) for huge savings.
Travel Insurance: A serious medical emergency or trip cancellation can be financially catastrophic without it. A comprehensive policy from a reputable provider like SafetyWing or World Nomads for a multi-month trip can cost between $300 and $700. It is the single most important investment you will make in your safety.
Visas: Costs and requirements vary wildly. Some countries offer free entry for U.S. citizens, while others require visas costing $30 to $100+. Research the official embassy websites for every country on your itinerary and budget accordingly.
Vaccinations & Meds: A pre-trip consultation with a travel doctor is essential. The cost of recommended vaccinations (like Typhoid, Hepatitis A, and Japanese Encephalitis) can easily add up to several hundred dollars.
Pro-Tip: Use Google Flights' 'Explore' map feature with flexible dates to visually find the cheapest entry point into Asia. Often, flying into a major hub like Bangkok (BKK) or Kuala Lumpur (KUL) and then taking a budget flight with AirAsia is significantly cheaper than a direct flight to your final destination.
Field Notes on Safety for Budget Solo Travel in Asia
Your safety matters most. Being prepared and aware isn't about being paranoid; it's about traveling with the quiet confidence of a pro.

Pre-Trip Protocol: Before you leave, make two photocopies of your passport, visa, and credit cards. Leave one set at home and keep the other in a separate bag from the originals. Save encrypted digital copies in a secure cloud service.
On-the-Ground Awareness: Petty theft is the most common crime. Be vigilant in crowded markets and on public transport. Never flash expensive electronics. Be politely skeptical of overly friendly strangers offering unsolicited help—these are often the lead-in to common tourist scams.
Accommodation Strategy: Read recent reviews from other solo travelers, especially solo women. Choose hostels or hotels in central, well-lit areas. Your accommodation is your safe haven; it's worth paying a few extra dollars for a better location and peace of mind.
A Note for Solo Female Travelers: While most of Asia is very safe, it’s smart to be mindful of cultural norms. In more conservative regions or when visiting temples, carry a scarf or sarong to cover your shoulders and knees. Trust your gut instinct—it is your most reliable safety tool. If a situation feels wrong, it is. Leave immediately.
Hacks to Stretch Your Travel Fund Further
Mastering a few key strategies can save you thousands over the course of a long trip.
Accommodation Hacks
Go analog for long stays. If you plan to stay a week or more, email or call the hostel directly to ask for a weekly rate. You can often get a 15-20% discount.
Master the art of the overnight journey. An overnight bus or train isn't just transport; it's a mobile hotel room that saves you one night's accommodation cost. In countries like Vietnam and Thailand, look for 'VIP' or 'sleeper' options, which often cost only a few dollars more for a fully reclining seat or bunk—an unbeatable value.
Food & Drink Hacks
Eat where the locals eat. Street food stalls and hole-in-the-wall restaurants with plastic stools and long lines of locals are where you'll find the most authentic and delicious food for the lowest prices.
Carry a reusable water bottle with a built-in filter (like a Lifestraw or Grayl). This saves you money on bottled water and dramatically reduces your plastic waste.
Transportation Hacks
Download Grab or Go-Jek. These ride-sharing apps are ubiquitous in Southeast Asia and offer fair, fixed pricing, eliminating the need to haggle with tuk-tuk or taxi drivers.
For long-haul bus and train travel, use a portal like 12Go Asia to compare prices and book tickets in advance, especially on popular routes.
Financial & Tech Hacks
Get a Wise (formerly TransferWise) card. This multi-currency account allows you to hold different currencies and withdraw money from ATMs with minimal fees, saving you a fortune on bank charges compared to your home debit card.
Buy an eSIM from a provider like Airalo before you leave home. This gives you affordable data the second you land, a massive convenience and safety advantage for navigating to your hostel.
Extending Your Trip: The Work-Exchange Secret
Platforms like Workaway and Worldpackers are game-changers for long-term budget solo travel in Asia. They connect you with hosts (often hostels, farms, or families) who offer free accommodation and sometimes food in exchange for a few hours of work per day. This is a phenomenal way to stretch your budget for months.
Pro-Tip: When withdrawing cash, always decline the ATM's "dynamic currency conversion." This is a fancy term for a terrible exchange rate. By choosing to be charged in the local currency (e.g., Thai Baht), you let your own bank handle the conversion at a much fairer rate, saving you 5-10% on every withdrawal.
Your Essential Asia Solo Travel Toolkit
Leverage technology to make your trip smoother, safer, and cheaper.
Financial: Wise, Revolut
Connectivity: Airalo, Holafly
Navigation: Google Maps (with offline maps downloaded!), Maps.me
Transportation: Grab, Go-Jek, 12Go Asia, Skyscanner
Accommodation: Booking.com, Hostelworld, Agoda
The Only Thing Left is to Go
The dream of an extended trip through Asia is not a fantasy reserved for the wealthy; it is an achievable goal for anyone armed with a solid, reality-based plan. By moving past the incomplete "per-day" myth and embracing a Total Trip Cost approach, you give yourself the financial clarity needed to travel with confidence, not anxiety. The strategies and tips in this guide are your blueprint. The path to a successful budget solo travel in Asia adventure is clear. The world is waiting for you.
Read the full guide: Anxious to Adventurous: The Ultimate Guide to Solo Travel Confidence
Don't Miss Out! Subscribe for Exclusive Content
Subscribe


Comments 0
No comments yet
Be the first to share your experience!
Dont Miss Out! Subscribe for Exclusive Content

Top 11 High-Paying Affiliate Programs for Travel Bloggers

High-Paying Affiliate Opportunities for Individual Travel Affiliates

Amazon Associates for Travel: Strategies to Maximize Commissions

How to Avoid Travel Scams: A Global Guide

A Woman's Guide to Safe Travel: 10 Critical Tips

7 Hotel Safety & Security Tips for Peace of Mind
How to Make Family Travel Planning Actually Easy
TrekGuider @trekguider
Staring down the logistics of a family vacation can feel less like an adventure and more like a high-stakes, unpaid second job. The dream of relaxing on a sun-drenched beach is often buried under an avalanche of budgets, schedules, and the wildly different demands of a toddler and a teen. If you’re feeling the pressure to create a perfect, frictionless experience, you’re not alone—the mental load is immense.

This constant juggling act leaves you feeling stressed before you’ve even packed a bag. But what if the planning process itself could be a seamless and satisfying part of the journey? You don't need a business degree to succeed—you just need the right playbook. This is that playbook. We’ve created a comprehensive guide that transforms a daunting task into a manageable process, clearing the path to the best Family Travel Ideas: The 2026 Guide to Unforgettable Trips.
The Strategic Blueprint (6+ Months Before Your Trip)
A truly relaxing vacation is built long before you ever pack a bag. The decisions you make in this early stage form a rock-solid foundation that prevents costly mistakes and eliminates last-minute panic. This is where you align expectations, define your financial reality, and get the core logistics in order.
Define Your Family's Travel Style
The most common mistake is choosing a trip that’s fundamentally mismatched with your family’s personality. A rustic camping trip will be a disaster for a family that craves resort amenities. Before you do anything else, take a moment for an honest assessment.
Ask yourselves:
Are we Relaxation-Oriented or Adventure-Seekers? Do we want to spend our days lounging by a pool, or are we happiest when hiking, biking, or exploring?
Do we prefer Structure or Spontaneity? Does a detailed itinerary make us feel secure, or does it feel restrictive?
Are we City Explorers or Nature Lovers? Do we draw energy from bustling streets and museums, or from quiet trails and scenic vistas?
What is our "Pace-Maturity"? Can our kids handle long days of sightseeing, or do we need to build in significant downtime and nap schedules?
Answering these questions creates a filter that immediately narrows down your options. It stops you from planning a trip you think you should want, and helps you focus on the one your family will actually enjoy. For more help with this crucial first step, see our guide on Best Family Vacations: How to Finally Pick the Right One.
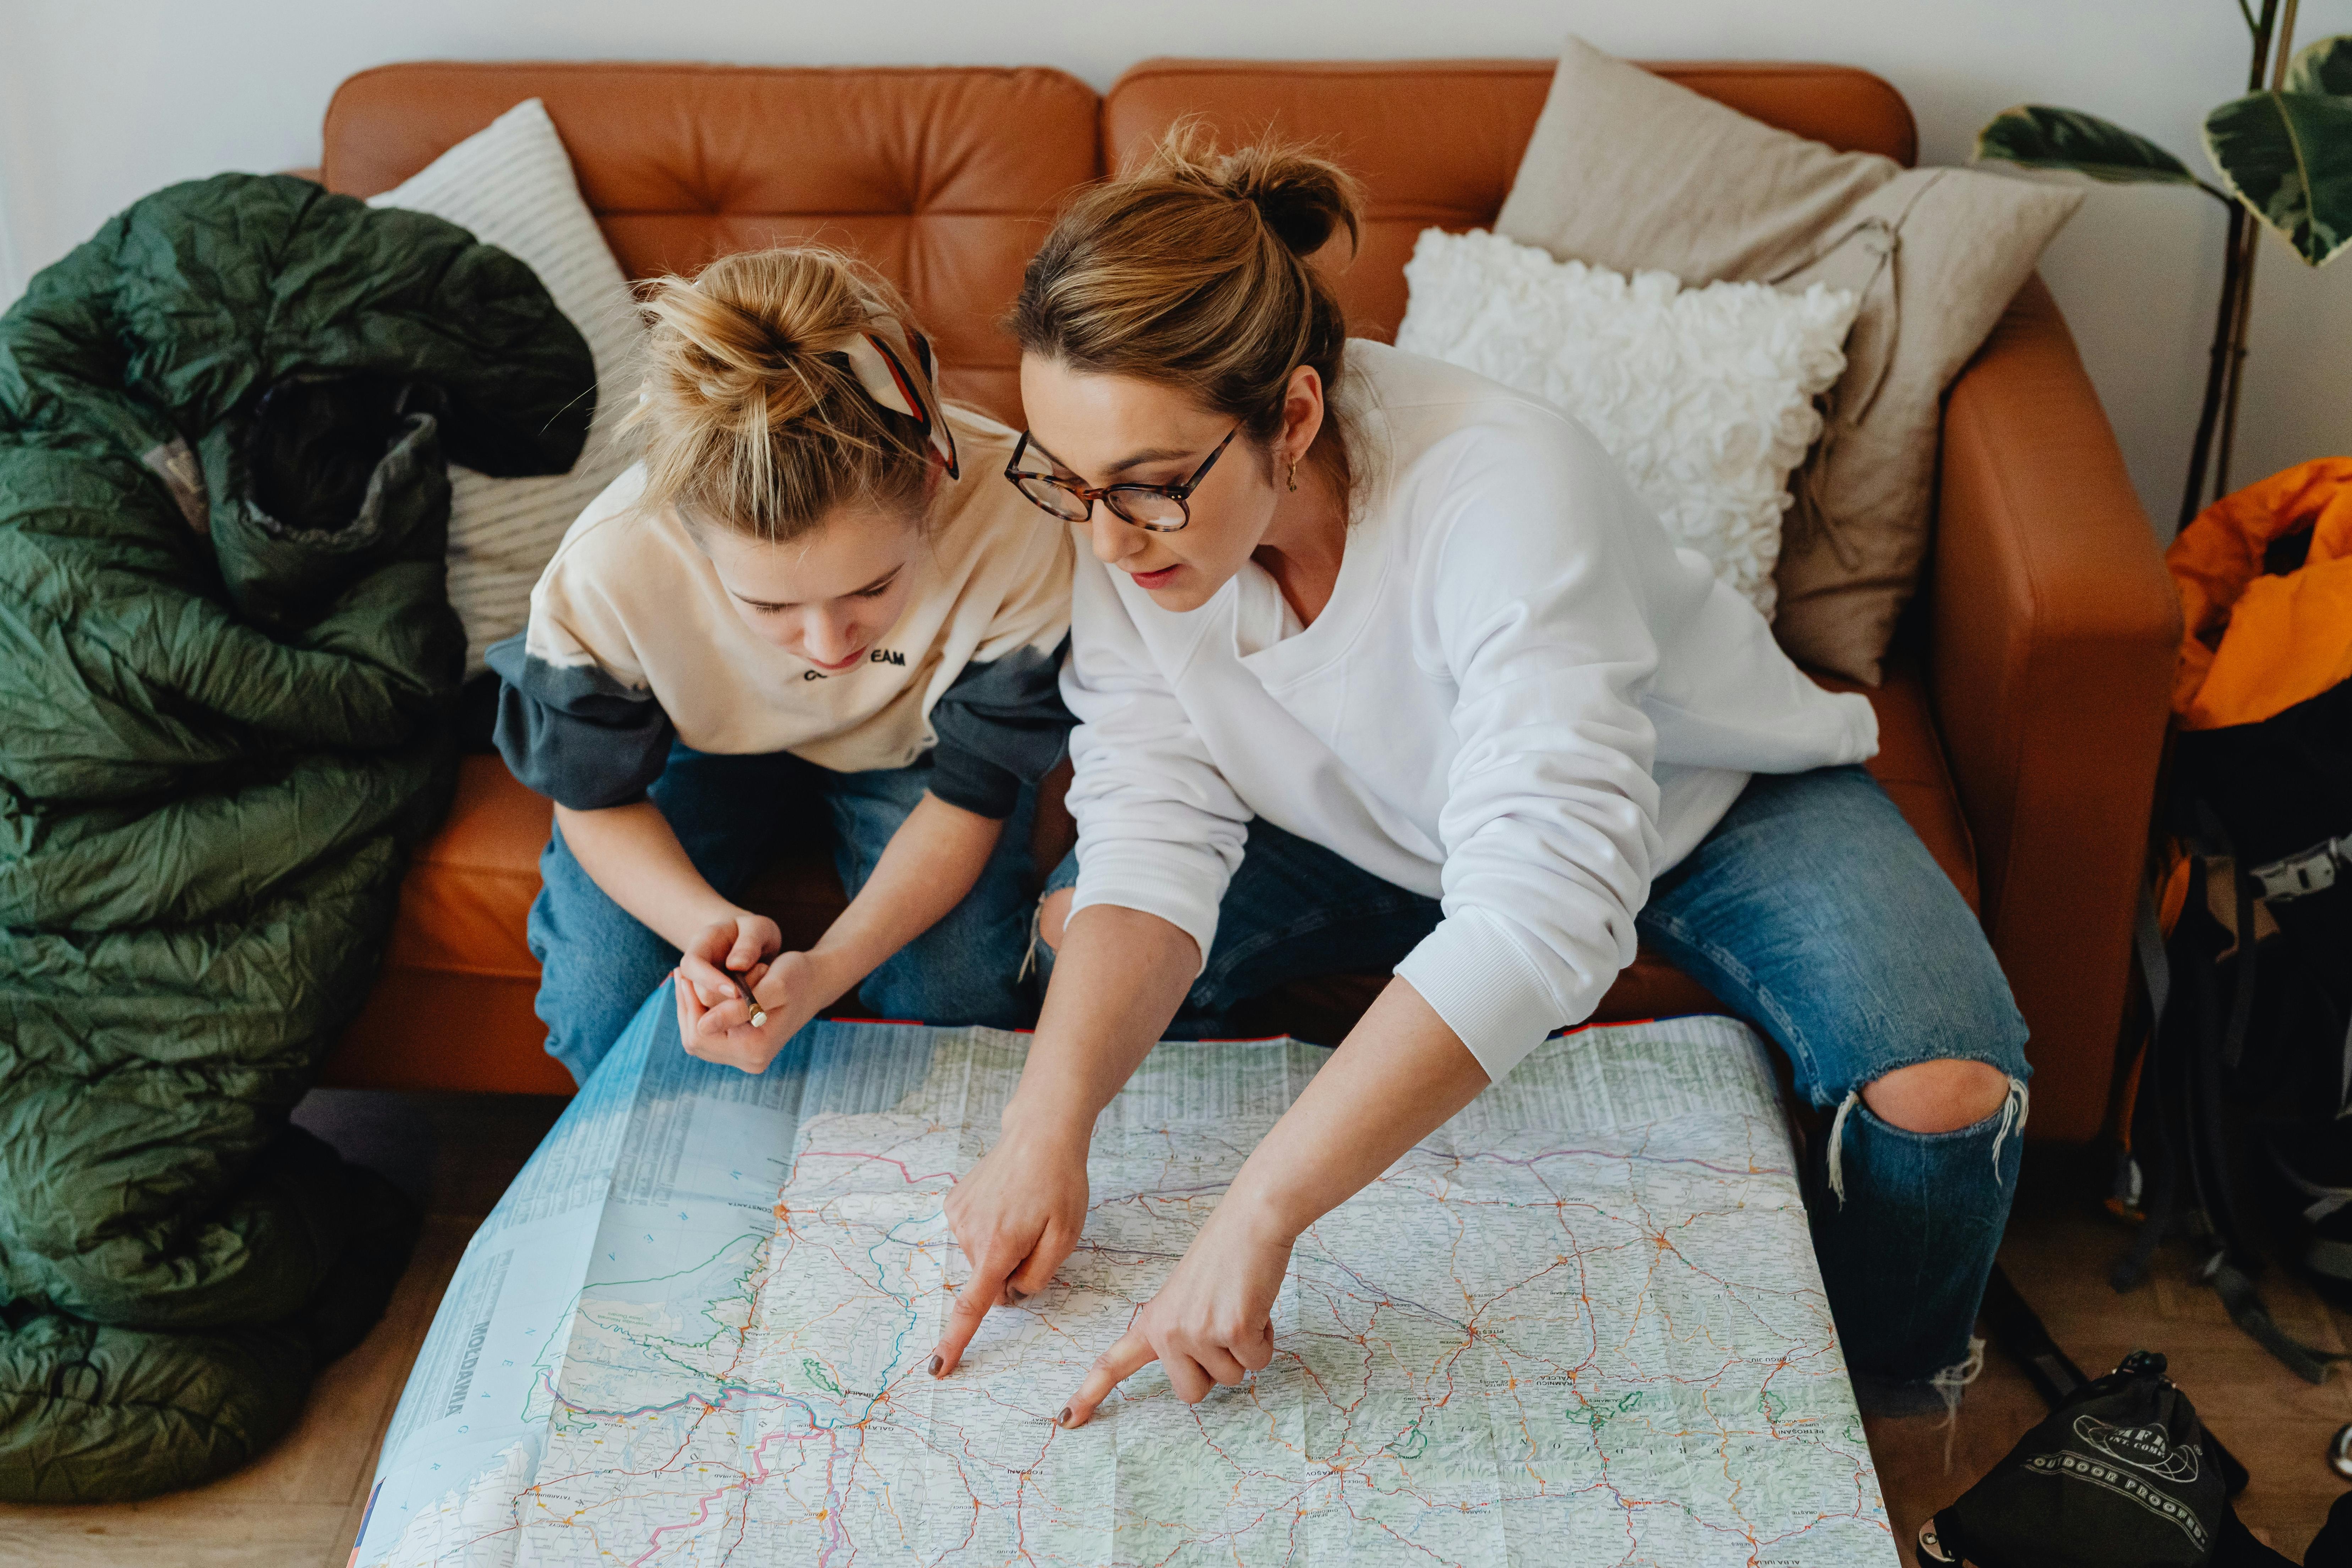
Host a "Family Dream Session" to Get Everyone on Board
Getting buy-in from the entire crew early on is the secret to a harmonious trip. This turns "your" trip into "our" trip and builds collective excitement.
For younger kids: Frame choices in simple terms. "Would you rather build sandcastles at the beach or see really big animals at a national park?"
For older kids and teens: Give them genuine responsibility. Task them with researching and pitching two or three activity options for the trip.
Make it fun: Host a "dream session" over pizza with a map spread out on the table. Create a shared vision board on Pinterest where everyone can add images of what they'd like to see, do, and eat.
Craft a Realistic Vacation Budget That Works
Nothing kills the vacation buzz faster than money stress. A clear budget isn’t a restriction; it’s a powerful tool that makes decisions easier and eliminates worry.
Determine a Total Trip Number: Decide on a realistic, all-in amount you are comfortable spending. Work backward from this number.
Use the 50/30/20 Rule: Allocate your funds to provide structure.
50% for Core Costs: This covers the non-negotiables: flights/fuel and accommodations.
30% for Experiences: This is your budget for activities, tours, park tickets, and dining out.
20% for Contingency & Extras: This covers souvenirs and, crucially, a 10-15% buffer for the unexpected. This emergency fund is your key to a stress-free mindset.
Account for Hidden Costs: Don't forget easily overlooked expenses like airport parking, baggage fees, hotel resort fees, and travel insurance.
Automate Your Savings: Create a dedicated high-yield savings account for your trip (e.g., "Hawaii 2026") and set up automatic transfers. This makes the goal feel tangible and motivating.
Track Everything: Use a simple spreadsheet or a budgeting app to monitor your spending and ensure you stay on track.

Conduct a Critical Document Audit
This is the most time-sensitive task in this entire phase. Do not procrastinate.
Passports: Physically locate every passport and check the expiration date. Many countries require your passport to be valid for at least six months after your planned return date. If anyone’s is expiring within a year, start the renewal process now.
Visas: Do a quick search for visa requirements for your top destination choices.
Digital Backups: Take a photo of each passport's information page and save it to a secure cloud service like Google Drive or Dropbox. This can be a lifesaver.
For a comprehensive list of everything you might need for a trip abroad, our International Travel Checklist is an essential resource.
Locking in the Logistics (3-5 Months Before Your Trip)
With your destination direction clear and documents verified, it’s time to commit. This phase is about securing the key elements of your trip at the best possible prices. This is a key part of successful family travel planning.
Choose the Perfect Destination & Accommodations
Where you stay is more than just a place to sleep; it’s your command center.
Hotels vs. Vacation Rentals: Hotels offer amenities like pools and housekeeping. Vacation rentals (like Airbnb or Vrbo) provide invaluable assets like a full kitchen (critical for picky eaters), separate bedrooms (a lifesaver for different bedtimes), and a washing machine.
The Amenity Checklist: When booking, look for game-changing features like a kitchen, on-site laundry, and a pool or nearby playground for easy entertainment.
Pro-Tip: When traveling with infants, call the hotel directly to confirm the availability and condition of amenities like cribs. Don't rely solely on an online icon.
Secure Your Flights, Lodging, and Rental Car
The best family-friendly options get snatched up quickly, especially during school breaks.
Become a Flight Hawk: Use tools like Google Flights to set price alerts for your route. For international travel, the 2-3 month window is often the sweet spot.
Book Your Home Base: Lock in your preferred hotel or vacation rental now for the best selection.
Reserve Your Wheels: If you need a rental car—especially a larger SUV or van—book it early. Waiting is a recipe for sky-high prices or no availability at all.
Invest in Peace of Mind with Travel Insurance
Think of travel insurance not as an expense, but as an essential piece of safety equipment. It’s the safety net that protects your financial investment and ensures your family’s health is covered. A good policy must include strong coverage for trip cancellation, emergency medical expenses, and emergency medical evacuation. Use a comparison site like Squaremouth or InsureMyTrip to easily compare policies.
Fleshing Out the Details (1-2 Months Before Your Trip)
The skeleton of your trip is built. Now it’s time to add the muscle and personality by planning your daily adventures and handling key logistics back home.

Build a Flexible Itinerary (and Avoid the Over-scheduling Trap)
A great itinerary is a guide, not a straitjacket. The goal is to minimize on-the-ground stress, not to schedule every second.
The "One Big Thing" Rule: Anchor each day with only one primary activity (e.g., a museum visit, a specific hike). Everything else is a bonus.
Schedule Downtime: This is the golden rule of family travel. Intentionally block out "do nothing" time. Alternate busy days with relaxed ones to prevent meltdowns.
Delegate and Empower: Assign each child or teen a "planning day." Let them choose the main activity or where the family eats dinner from a pre-approved list.
Transform Your Itinerary from a To-Do List to a Done Deal
A well-structured plan is the secret to a low-stress vacation. Stop trying to organize everything in a messy document or a string of emails. Download our free Travel Itinerary Template to build a clear, flexible, and easy-to-follow plan that the whole family can use.
Pre-Book "Must-Do" Tickets and Reservations
For bucket-list attractions that are known to sell out or have long lines (like the Colosseum or a popular luau), booking your tickets online a month in advance is a game-changer. This simple step can save you hours of waiting.
Arrange Home, Pet, and Plant Care
Pet Sitter/Kennel: Confirm dates and details with your pet care provider.
House Sitter: Finalize plans and do a walkthrough of your home’s quirks.
Inform a Neighbor: Give a trusted neighbor your itinerary and contact info, and ask them to keep an eye on your place.
The Final Countdown (The Week Before Departure)
The excitement is building! This week is all about tying up loose ends, starting the physical packing process, and prepping your home for departure.
Pack Smart, Not Heavy: A Strategy for Families
Overpacking is a travel sin. It creates heavy luggage and decision fatigue. For a deeper dive into minimalism, grab our popular How to Pack Light Guide.

Create a "Staging Area": Designate a guest bed or a corner as your packing zone. As you think of items throughout the week, put them there to prevent last-minute scrambling.
Use Packing Cubes: These are non-negotiable. Assign each family member a color to keep clothes organized and make finding items a 10-second job.
Pack by Outfit: Lay out complete outfits for each day, including socks and accessories. This prevents overpacking "just in case" items.
Pro-Tip: Snap a picture of each child's daily outfit on your phone. This visual checklist makes it easy for them to get dressed and ensures you don't forget anything.
The 1-Week Rule: For trips longer than seven days, pack for one week and plan to do laundry.
Prepare Your Carry-On Command Center: Your carry-on is your lifeline. It must contain a complete change of clothes for everyone, all essential medications, a "boredom-busting" kit, and portable power banks with charging cables.
Handle Last-Minute Finances and Confirmations
Triple-Check Reservations: Quickly reconfirm flight times, hotel bookings, and car rental details.
Notify Your Banks: Call your credit card companies to set a travel notice to prevent your cards from being frozen for suspected fraud.
Get Local Currency: If traveling internationally, get a small amount of local currency to cover immediate expenses like a taxi or snacks upon arrival.
Prep Your Tech for Travel
The Great Charge-Up: Charge every single electronic device to 100%—phones, tablets, and power banks.
The Great Download: Download everything you might need: movies, playlists, podcasts, and offline Google Maps for your destination. Never rely on spotty airport Wi-Fi.
An Age-by-Age Guide to a Smoother Journey
Tailoring your strategy to your kids' developmental stages is the secret to travel harmony. Generic advice falls flat. Here’s how to adapt your approach.

Traveling with Infants & Toddlers (Ages 0-4)
Packing: Create a "Blowout Bag" for your carry-on with two full changes of clothes, extra diapers, and wipes. Consider using a gear rental service like BabyQuip at your destination for bulky items.
Transit: Gate-check your stroller to have it immediately upon deplaning. Pack a small bag of new, quiet toys (stickers, gel window clings) to reveal during the flight. For more pro tips, check out our Stress-Free Flying with Kids Guide.
On-the-Ground: Try to maintain your child's nap and sleep schedule as much as possible. A well-rested child is a happy traveler.
Traveling with Young Children (Ages 5-10)
On-the-Ground: Balance "adult" activities with kid-focused fun. For every museum, plan a trip to a playground. Give them a simple camera and assign them the role of "Official Trip Documentarian."
Pro-Tip: Before visiting a historical site, find a short, engaging, kid-friendly YouTube video about it. Five minutes of prep provides context and can prevent an hour of whining.
Souvenir Hack: Give them their own vacation spending money. This empowers them, teaches budgeting, and instantly ends the "Can I have this?" negotiations.
Traveling with Tweens & Teens (Ages 11-17)
Transit: Respect their need for space. A long travel day is a great time for them to listen to music or watch their own movies. Don't force family games.
On-the-Ground: The key is autonomy.
Grant them planning power: Make them responsible for planning one full day of the trip.
Schedule solo time: Allow for supervised periods of independence, like exploring a shopping district while you visit a nearby coffee shop.
Wi-Fi is a utility: Acknowledge that connecting with friends is important to them. Ensure your accommodation has reliable Wi-Fi and treat it like you would hot water.
The Ultimate Departure Day Checklist
The day is here! The goal is a calm, orderly exit. Run through this final checklist before you head out the door.
Last-Minute Grab List
Toiletries used this morning (toothbrushes, hairbrush)
Phone chargers that were used overnight
Daily medications
Each child's essential comfort item ("lovey")
Final Home Security Check
Adjust thermostat (up in summer, down in winter)
Empty all trash cans and run the dishwasher
Unplug non-essential small appliances
Check that all windows and doors are locked
The Final Sweep
Do one last walkthrough, grab your cooler of snacks, take a deep breath, and lock the door. You did it. Let the adventure begin.
Frequently Asked Questions
What is the biggest mistake in family travel planning?
The most common mistake is choosing a vacation that doesn't match your family's true travel style. Planning an intense, adventure-packed trip for a family that prefers to relax by the pool is a recipe for stress. An honest assessment of your family's preferences is the most important first step.
How much should I budget for a family vacation?
A great starting point is the 50/30/20 rule. Allocate 50% of your total budget to core costs like flights and lodging, 30% to experiences like activities and dining, and reserve 20% for extras and a crucial contingency fund for unexpected costs.
What is the "One Big Thing" rule for family itineraries?
The "One Big Thing" rule is a simple way to avoid over-scheduling. Instead of packing your day with activities, anchor each day with just one primary event, like a museum visit or a specific hike. This creates a flexible structure and leaves room for spontaneous fun and much-needed downtime.
Your Plan is Your Passport to Presence
The goal of careful family travel planning is not to eliminate every possible hiccup, but to build a resilient, flexible framework that allows your family to navigate challenges together. By following this guide, you’ve transformed a daunting task into a manageable process. You are the architect of your family's most precious memories.
The shared discovery and laughter are the ultimate return on your investment. Now, go and enjoy the incredible experience you've worked so hard to create by exploring all the Family Travel Ideas: The 2026 Guide to Unforgettable Trips that await.
Read the full guide: Family Travel Ideas: The 2026 Guide to Unforgettable Trips
Don't Miss Out! Subscribe for Exclusive Content
SubscribeComments 0
No comments yet
Be the first to share your experience!
Dont Miss Out! Subscribe for Exclusive Content

Ultimate USA Holidays Guide: Top Picks

FTC Affiliate Disclosure Essentials: Stay Compliant as a Travel Creator

Essential Affiliate Tools: From Tracking to Full Optimization

Booking.com Affiliate Program Review: Pros, Cons, and Earnings Potential

Decoding Affiliate Commission Rates: Benchmarks for Travel Creators
Top 11 High-Paying Affiliate Programs for Travel Bloggers
Thanksgiving Parade: 6 Prime Spots
TrekGuider @trekguider
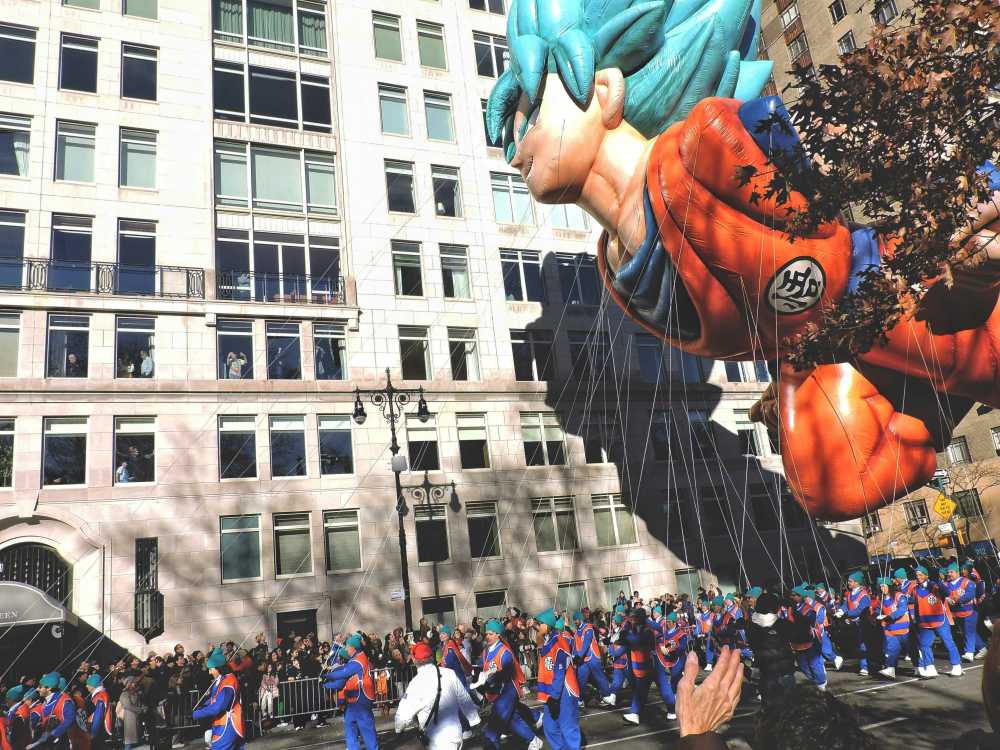
You’ve seen it on television your whole life: colossal cartoon characters floating between skyscrapers, world-class marching bands sending echoes through the avenues, and the final, festive arrival of Santa Claus himself. The Macy's Thanksgiving Day Parade is an American institution, the magical kick-off to the holiday season. But the dream of seeing it in person is often haunted by a logistical nightmare. You’re worried about battling millions for a tiny patch of sidewalk, only to have your view blocked, your kids get restless, and the entire enchanting experience devolve into a cold, stressful ordeal.
That anxiety is completely valid. Every year, over 3.5 million people descend on the route, and without a rock-solid plan, you’ll see more of the back of someone’s head than you will of the giant Snoopy balloon. You risk waking up before dawn only to find every good spot claimed, leaving your family disappointed and shivering. The magic you traveled for feels impossibly out of reach, lost in a sea of chaos. You deserve to experience the wonder, not the worry.
Forget the frustration. This is your strategic blueprint for success. We’re going to bypass the chaos and transform you into a parade-viewing expert. We’ll unveil the six prime spots to watch the spectacle, complete with insider strategies on timing, what to pack, and how to navigate the city like a local. This is your definitive plan for conquering the Thanksgiving parade in New York and creating memories that will last a lifetime. It’s one of the most iconic events in the city, a true highlight that we cover in our broader guide to New York Holidays: 10 Must-Do Events.
Understanding the Parade Route: Your Strategic Map
Before you can pick your spot, you need to understand the battlefield. The Macy's Thanksgiving Day Parade is a massive operation, and its route is the key to everything. Knowing the path, the timing, and—most importantly—the restricted zones will give you a powerful advantage.
The parade officially kicks off at 8:30 AM sharp on Thanksgiving morning, Thursday, the fourth Thursday of November. It begins on the Upper West Side and marches for 2.5 miles, concluding around noon.
Here’s the official step-by-step route:
Starts: 77th Street & Central Park West at 8:30 AM.
Travels South: Proceeds down Central Park West to Columbus Circle.
Turns: At Columbus Circle, it turns onto Broadway.
Continues South: It follows Broadway through the heart of Midtown.
Ends: The parade concludes around noon at the iconic Macy's Herald Square on 34th Street.
Our internal research confirms two critical areas to avoid at all costs: the start zone around 77th Street and the finish zone near Herald Square (from 34th to 38th Street). These areas have heavily restricted public viewing and are reserved for television broadcasting. Trying to watch from here is a rookie mistake that guarantees disappointment. Your strategy must focus on the long stretches in between.
The 6 Prime Viewing Spots for the Thanksgiving Parade in New York
Now for the main event. Choosing your location is the single most important decision you’ll make. Each of these six spots offers a unique advantage, whether it’s fewer crowds, better photo opportunities, or more family-friendly conditions.
1. The Upper West Side: The Classic Family Choice
Location: Along Central Park West, from 77th Street down to Columbus Circle (specifically the west side of the street).
Why It’s Prime: As the parade’s very first leg, this 16-block stretch is where the magic is freshest. The performers are electric with energy, the marching bands are at their most thunderous, and the balloon handlers are still wrangling their colossal characters into perfect formation. Because it's more residential, the crowds feel slightly more manageable and family-oriented than in the commercial chaos of Midtown. The backdrop of Central Park on one side and historic apartment buildings on the other makes for stunning photos.
Your Strategy:
Timing is Everything: You must arrive by 6:00 AM. The front-row spots are often claimed by locals before the sun is up. By 6:30 AM, the area will be packed several rows deep.
Positioning: Plant yourself on the west side of Central Park West. This gives you a direct, unobstructed view as the parade marches south.
What to Expect: It will be cold and dark when you arrive. This spot requires a commitment to waiting, but the payoff is a fantastic, high-energy viewing experience.
2. The Shops at Columbus Circle: The VIP Indoor View
Location: The second and third floors of The Shops at Columbus Circle, overlooking the parade’s turn from Central Park West onto Broadway.
Why It’s Prime: This is the ultimate parade hack for those who want to avoid the cold and the crowds. You get a warm, elevated, bird’s-eye view of the entire spectacle. Plus, you have immediate access to restrooms, coffee, and food—luxuries that are unthinkable for those on the street.
Your Strategy:
This Isn't Free: This is not a public viewing area. Access is typically granted to customers of the shops and restaurants within the mall.
Plan Months Ahead: Check with stores like Williams-Sonoma or restaurants with windows facing the circle. Many host private, ticketed viewing events that sell out far in advance.
Be Prepared to Spend: You will need to make a purchase or pay for a breakfast event to gain entry. Consider it the price of unparalleled comfort and convenience.

3. The Sixth Avenue Stretch: The Urban Canyon Experience
Location: Along Sixth Avenue (Avenue of the Americas) from 59th Street down to 38th Street.
Why It’s Prime: This is the longest and straightest portion of the route, offering dozens of blocks for potential viewing. Watching the giant balloons squeeze between the towering skyscrapers of Midtown is a uniquely New York experience. The sheer scale of the buildings creates a dramatic "urban canyon" effect that makes the parade feel even more grand.
Your Strategy:
Arrive Early: The secret is out on this spot. To get a decent view, be in position by 6:30 AM at the latest. The blocks closest to Central Park (59th to 50th) fill up the fastest.
Avoid Corners: Set up in the middle of a block. Corners are notoriously crowded and chaotic, with people constantly moving and blocking views.
Look for Scaffolding: Sometimes, construction scaffolding can be a blessing in disguise, creating a covered area that offers some protection from the elements and can deter massive crowds from forming in that exact spot.
Pro-Tip: The area between 70th and 75th streets on Central Park West offers a slightly wider sidewalk, giving you a little more breathing room. Pack a thermos of hot chocolate to stay warm while you wait—it’s a game-changer.
4. The "Quiet Zone" Near Radio City Music Hall
Location: The stretch of Sixth Avenue between 49th and 51st Streets.
Why It’s Prime: While no part of the route is truly "quiet," this section is designated as a no-marching-band-performance zone to accommodate the national television broadcast headquartered at Radio City. This means you get a brief respite from the loudest musical numbers—a great option for families with young children or those with sensory sensitivities.
Your Strategy:
Know the Trade-Off: You will see all the floats and balloons perfectly, but you will miss the live performances from the marching bands as they pass this specific area.
Use the Location: This spot is fantastic for its iconic backdrop. You can capture incredible photos of the balloons with the famous Radio City Music Hall marquee in the background.
Post-Parade Plans: You are perfectly positioned to see the Rockettes' Christmas Spectacular later in the day or head over to Rockefeller Center.

5. The South Side of 38th Street: The Late-Arrival Lifeline
Location: The blocks along Sixth Avenue from 40th Street down to 38th Street.
Why It’s Prime: Let's be realistic: not everyone can wake up at 4 AM. If you’re running late, this is your last best chance. As the parade nears its end at 34th Street, the area becomes a restricted broadcast zone. Therefore, the blocks just before this cutoff are the final public viewing areas.
Your Strategy:
Manage Expectations: You will not get a front-row view here. This is a spot for seeing the tops of the balloons and catching the general energy of the event.
Look Up: Your view will be mostly vertical. It’s less about seeing the performers on the street and more about witnessing the spectacle of the giant balloons against the sky.
Quick Exit: The advantage of being near the end of the route is that you can make a quick exit once the final float passes, beating some of the mass exodus heading for the subway.
6. The Virtual View: Your Hotel Room Perch
Location: Any hotel with rooms directly overlooking the parade route on Central Park West or Sixth Avenue.
Why It’s Prime: This is the most comfortable, stress-free, and luxurious way to experience the Thanksgiving parade in New York. You can watch the entire event from the warmth of your room, in your pajamas, with a cup of coffee in hand. You have your own bathroom, your own food, and an unbeatable, unobstructed view.
Your Strategy:
Book a Year in Advance: Rooms with parade views are often booked a year or more ahead and come at a significant premium.
Confirm the View: When booking, you must call the hotel directly to confirm that your specific room has a "parade view." An "avenue view" is not always sufficient.
Notable Hotels: Some hotels famous for their parade views include the JW Marriott Essex House, the Mandarin Oriental, New York, the Warwick New York, and the New York Hilton Midtown.
Pro-Level Survival Guide for Parade Day
Securing a great spot is only half the battle. You need a solid plan for the hours you’ll spend waiting. Follow these tips to ensure your experience is comfortable and memorable for all the right reasons.
The Ultimate Timing Strategy
The golden rule, confirmed by years of experience, is to arrive by 6:00 AM. This is non-negotiable for a front-row or second-row spot along Central Park West or the prime stretches of Sixth Avenue. By 6:30 AM, these areas are typically full. By 7:00 AM, you’ll be lucky to find a spot where you can see anything at all. Set your alarm, bundle up, and get there early. The early bird gets the best view of the parade.
What to Wear and Pack: The Family Checklist
New York in late November is cold. Standing still for hours makes it feel even colder.
Dress in Layers: Start with a thermal base layer, add a fleece or sweater, and top it off with a warm, wind-resistant winter coat. Don't forget a hat, gloves, and a scarf.
Comfortable Footwear: Wear warm, waterproof boots. Your feet will thank you.
The Essentials Bag: Pack a backpack with:
Snacks and Drinks: A thermos of hot chocolate or coffee is a must. Bring water and easy-to-eat snacks like granola bars and fruit.
Entertainment: A book, a deck of cards, or a fully charged phone with headphones can help pass the time.
Portable Phone Charger: Your battery will drain faster in the cold.
Small Folding Stools: If you have space, these can be a lifesaver for your back and legs.
For a comprehensive list of what to bring on any family adventure, our National Park Road Trip Checklist has you covered, with tips that apply just as well to an urban expedition.

Navigating the Crowds with Kids
The parade is a magical experience for children, but the crowds and waiting can be tough.
Avoid Strollers: In the most crowded areas, strollers are more of a liability than a help. They are difficult to maneuver and take up valuable space. A carrier is a much better option for very young children.
Establish a Meeting Point: As soon as you claim your spot, pick a clear, fixed landmark (e.g., a specific lamppost, a store entrance) as your family's meeting point in case you get separated.
Use a Buddy System: Ensure everyone has a partner.
Ladders: You will see people with small ladders for their kids to see over the crowd. If you bring one, be sure to place it a safe distance from the street and be courteous to those around you.
Pro-Tip: Skip the car. Public transportation is your best friend. The subway will be running on a holiday schedule, but expect crowded stations near the route. Plan your subway route in advance and buy your MetroCard the day before to avoid long lines at the machines on Thanksgiving morning.
Beyond the Parade: Making it a Full Thanksgiving Experience
Remember, the parade ends around noon, leaving you with a full day to enjoy the city. Many people head straight to a Thanksgiving dinner. If you plan to eat out, you must make reservations weeks, if not months, in advance. New York City is one of the world's culinary capitals, and a festive meal is the perfect way to cap off a magical morning.
Planning the perfect holiday trip, from the parade to the feast, requires expert knowledge. Our comprehensive Travel Guide provides detailed itineraries and booking advice for major US cities, ensuring your entire vacation is seamless and spectacular.

Your Mission, Should You Choose to Accept It
Watching the Macy's Thanksgiving Day Parade in person is a bucket-list dream, and with this guide, it’s a dream you can turn into a flawless reality. You now have the route, the prime locations, and the pro-level strategies to outsmart the crowds and secure a fantastic viewing experience. You’re no longer a tourist hoping for a glimpse; you’re a prepared strategist ready to claim your prime spot and soak in every moment of the magic. The Thanksgiving parade in New York is waiting for you.
Now go make those once-in-a-lifetime memories!
Meta Data Suggestions:
SEO Meta Title: 6 Prime Spots for the NYC Thanksgiving Day Parade (2026)
URL Slug: thanksgiving-parade-new-york-viewing-spots
SEO Meta Description: Don't just watch the Thanksgiving parade in New York, conquer it. Our guide reveals 6 prime viewing spots and insider tips for a stress-free family experience.
Don't Miss Out! Subscribe for Exclusive Content
SubscribeComments 0
No comments yet
Be the first to share your experience!
Dont Miss Out! Subscribe for Exclusive Content

San Francisco Cherry Blossoms: A Local's Guide to the Blooms

Halloween SF: Haunts Without Horrors

SF Festivals: 7 Must-See Lineups

Christmas SF: Lights & Wharf Wonders

SF Pride: 6 Route & Party Hacks
